![]() It’s finally time to share one of the big “secret sewing” projects I’ve been working on behind the scenes for the past few months! Those of you who are also on social media have most likely seen the announcement that I have teamed up with six (6) other pattern designers to launch a new company called Quilt Theory. Today is my day to introduce you to my pattern called Ocean Path, its inspiration and creation, and tell you a bit more about Quilt Theory. You also will have a chance to win a copy of my pattern, Quilt Theory coloring pages, and all of my Art Gallery Pure Elements scraps (enough to get you amply started on your very own Ocean Path Quilt) and Aurifil thread.
It’s finally time to share one of the big “secret sewing” projects I’ve been working on behind the scenes for the past few months! Those of you who are also on social media have most likely seen the announcement that I have teamed up with six (6) other pattern designers to launch a new company called Quilt Theory. Today is my day to introduce you to my pattern called Ocean Path, its inspiration and creation, and tell you a bit more about Quilt Theory. You also will have a chance to win a copy of my pattern, Quilt Theory coloring pages, and all of my Art Gallery Pure Elements scraps (enough to get you amply started on your very own Ocean Path Quilt) and Aurifil thread.
Ocean Path
 First, I’d like to introduce you to Ocean Path, my contribution to the debut Quilt Theory pattern line. Our underlying theme for this first collection of patterns was “Where can your quilt take you?” since the designers that comprise Quilt Theory live all across the country.
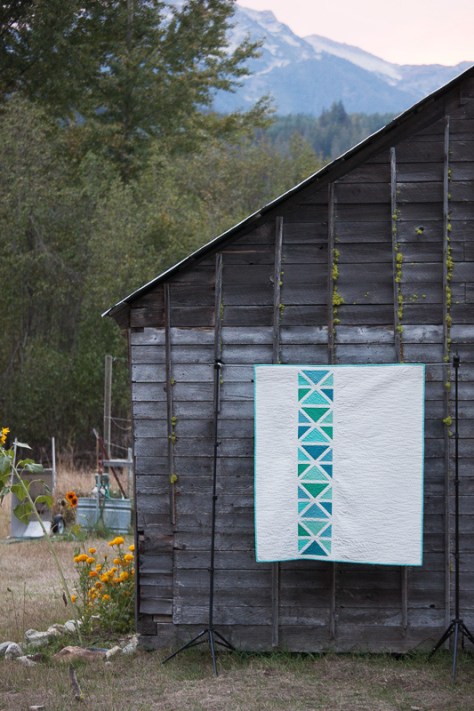
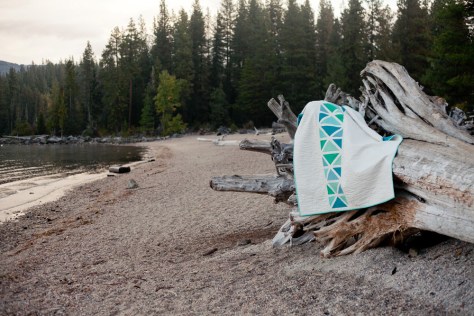 Living in midcoast Maine, an ocean path felt like the perfect inspiration for my quilt. I wanted to embrace the simple beauty of nature while providing a pattern that could be adapted to fit any color scheme, style, or decor.
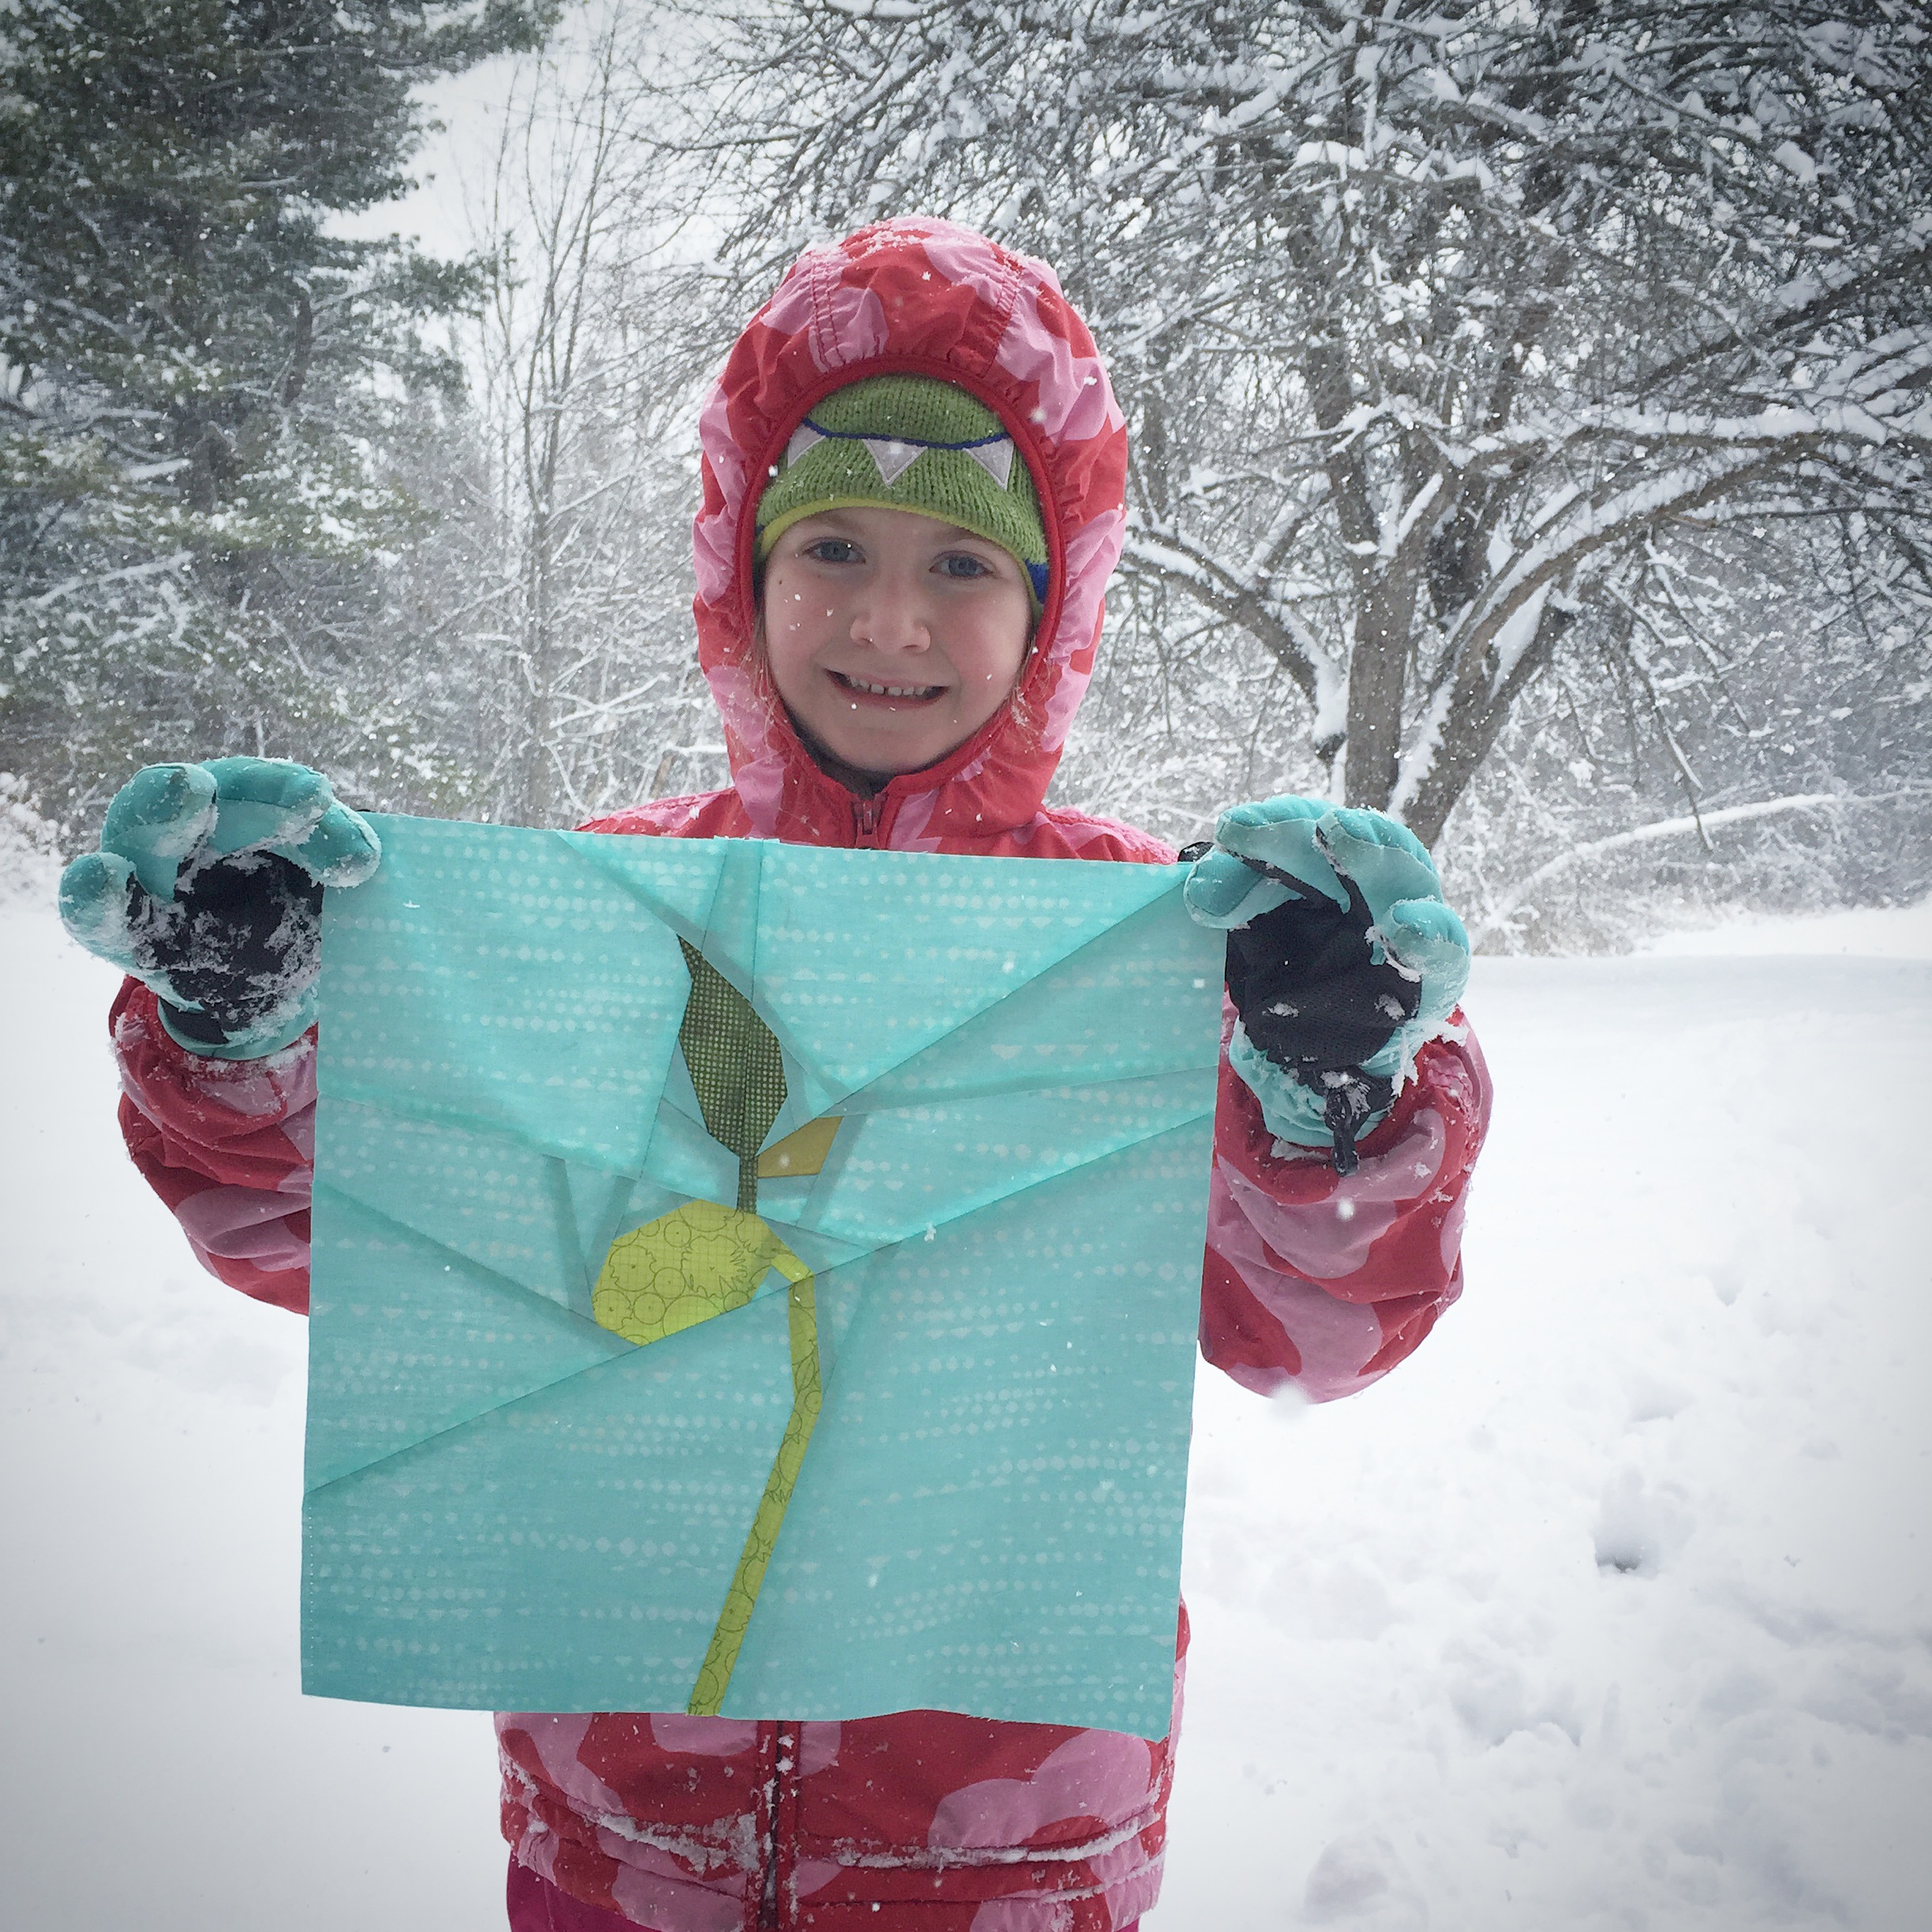
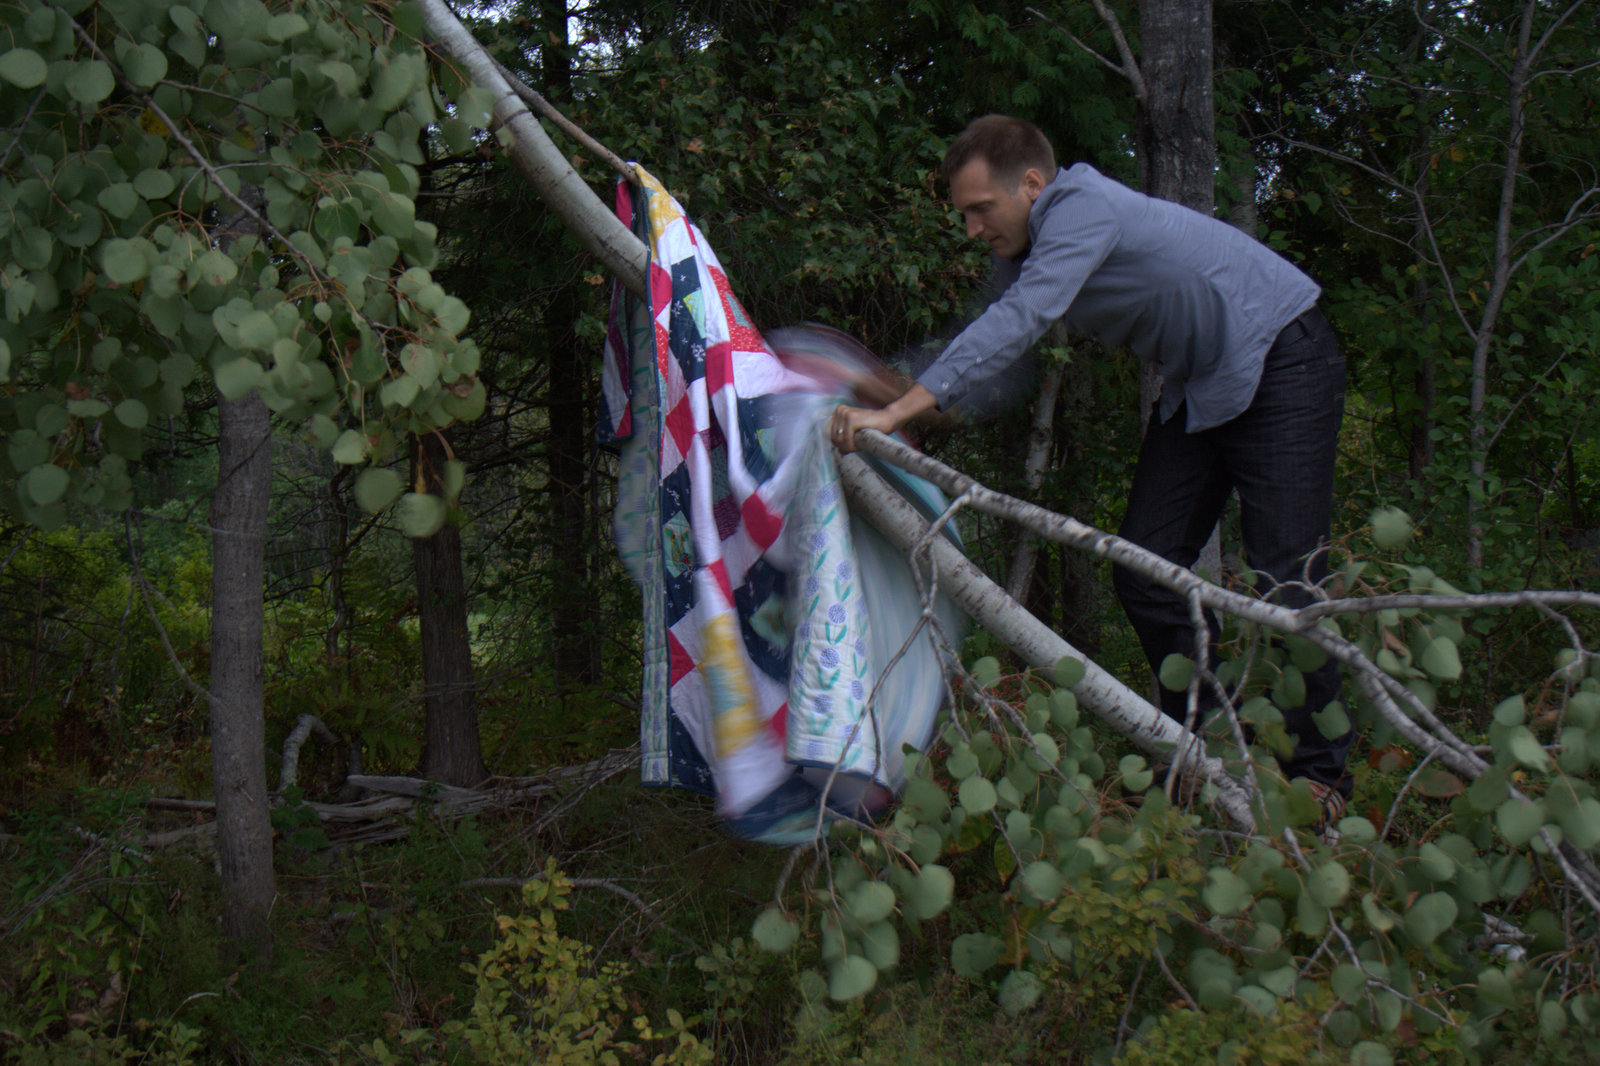
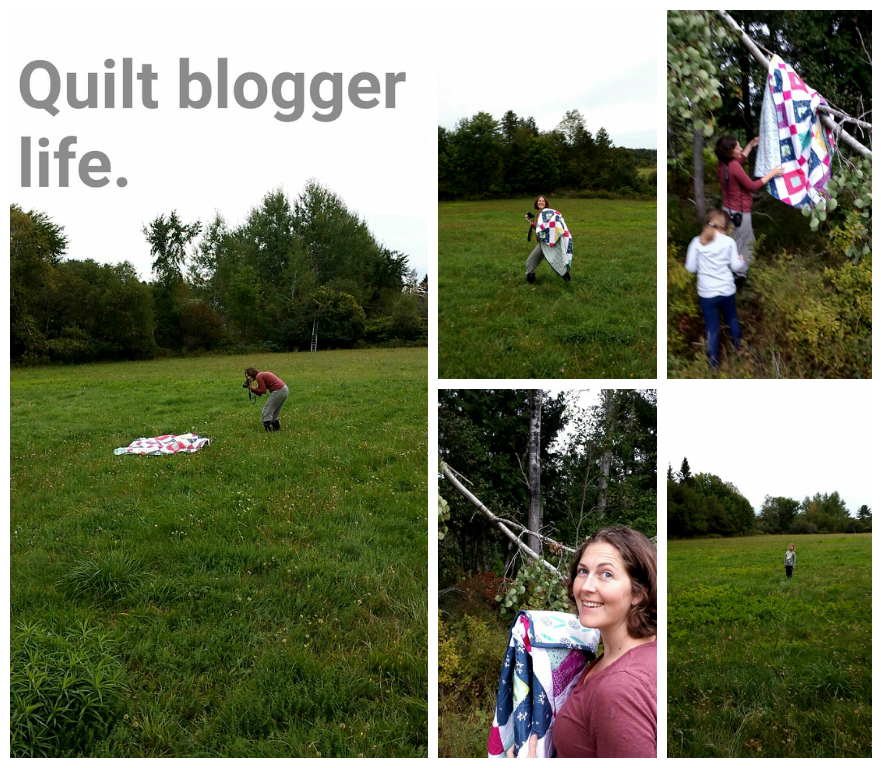
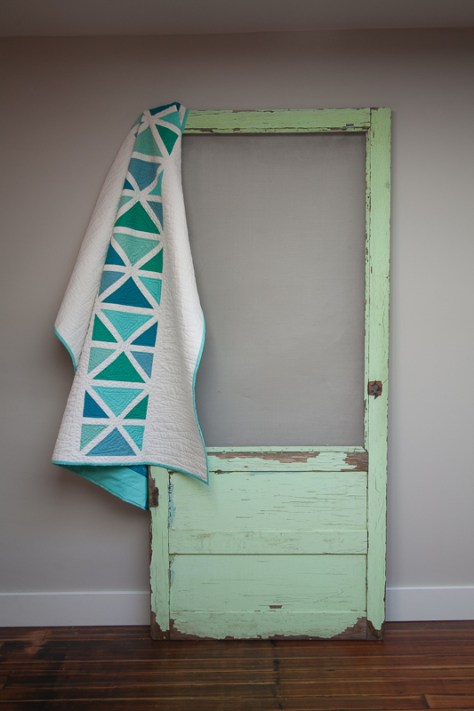 I should note here that the stunning photos included in this post were taken by Michelle Bartholomew all the way across the country in Washington state. Michelle is the mastermind behind Quilt Theory, a talented quilter and photographer, and I’m so grateful to be working with her!

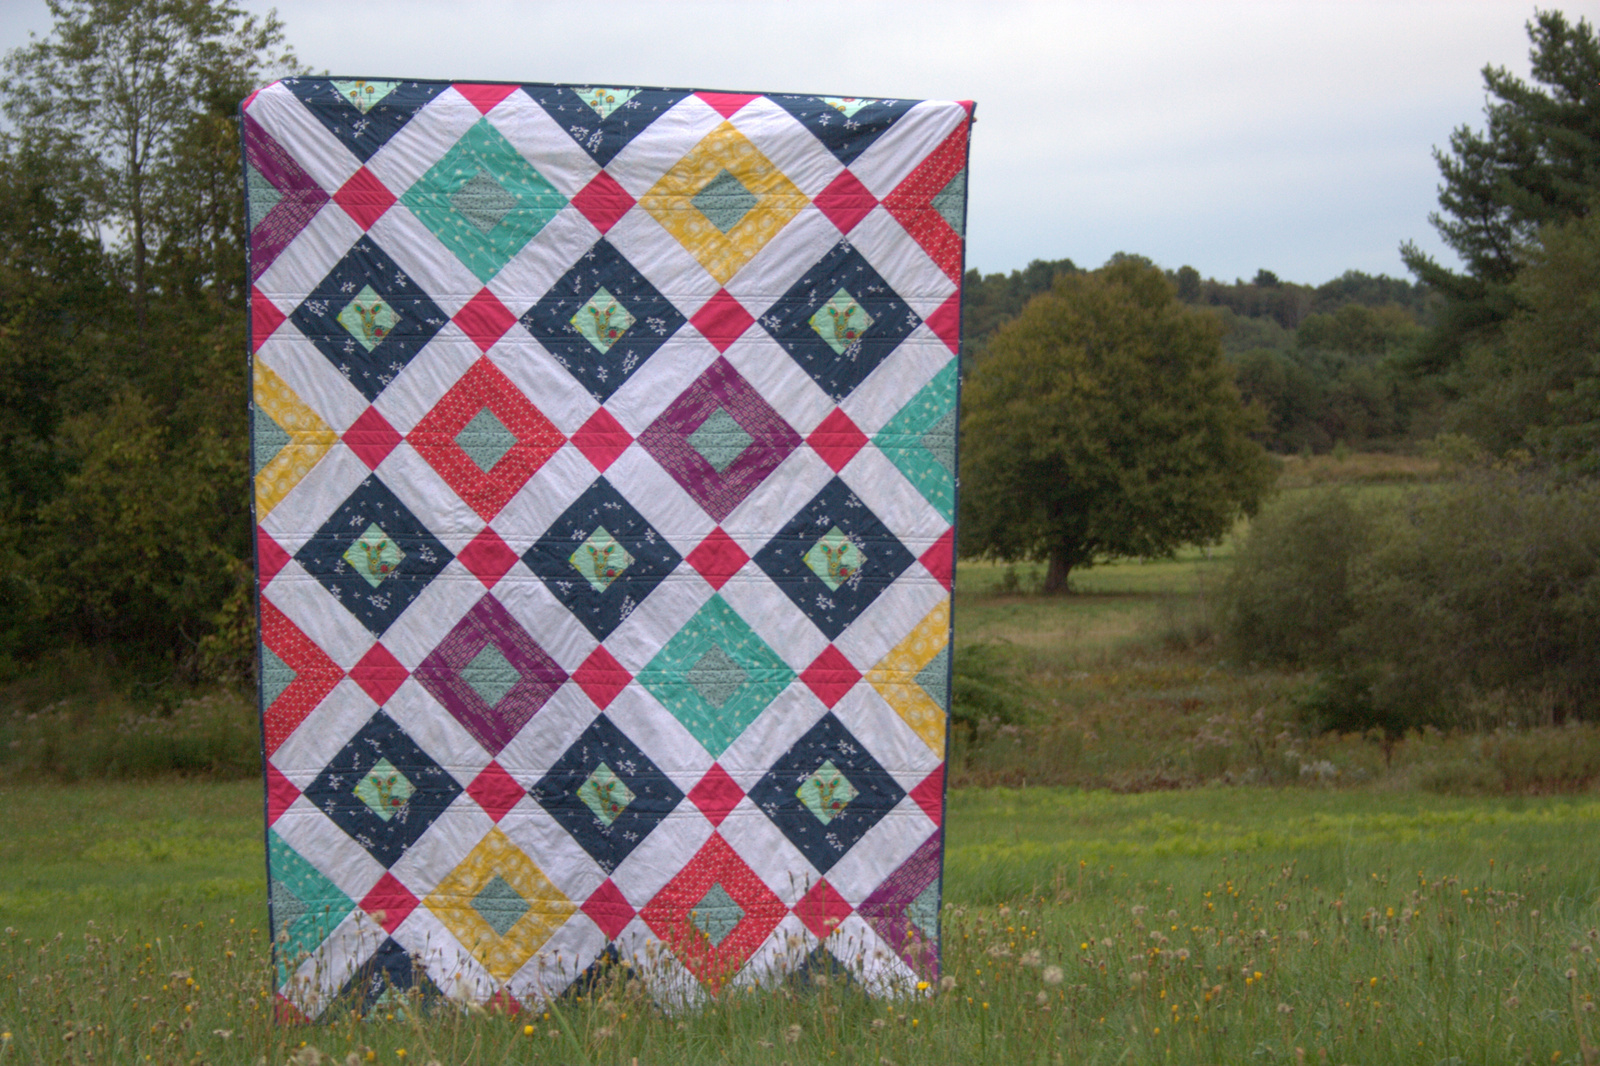
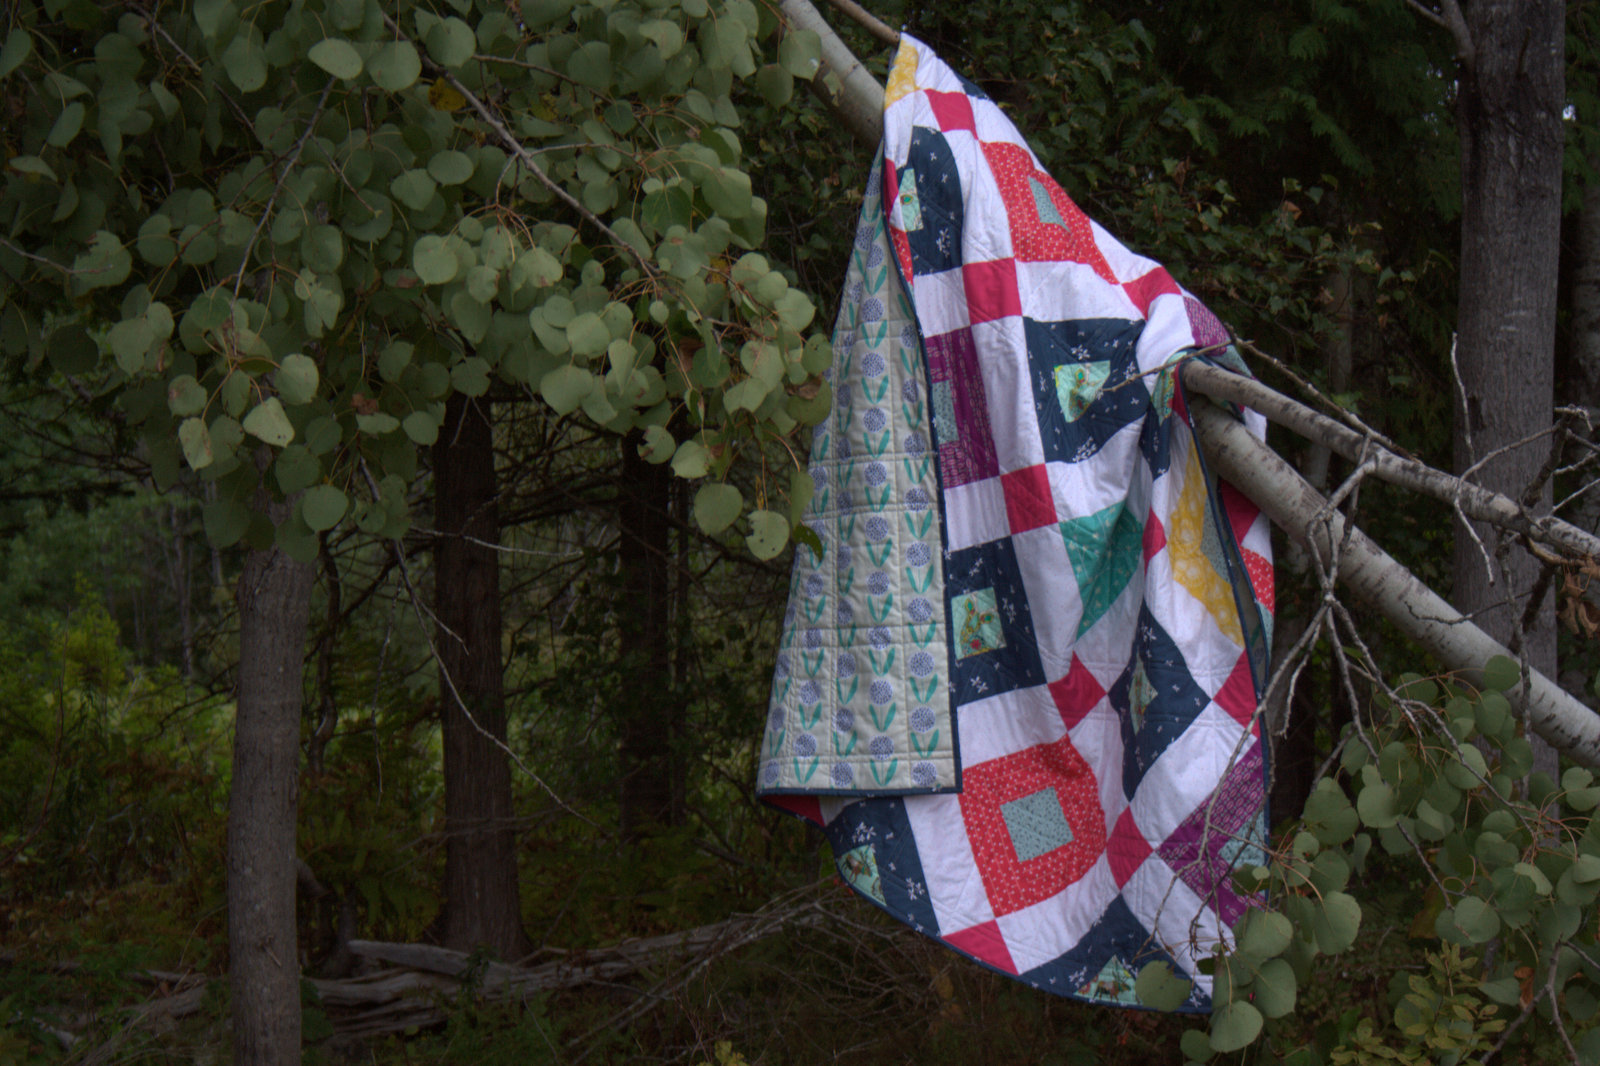
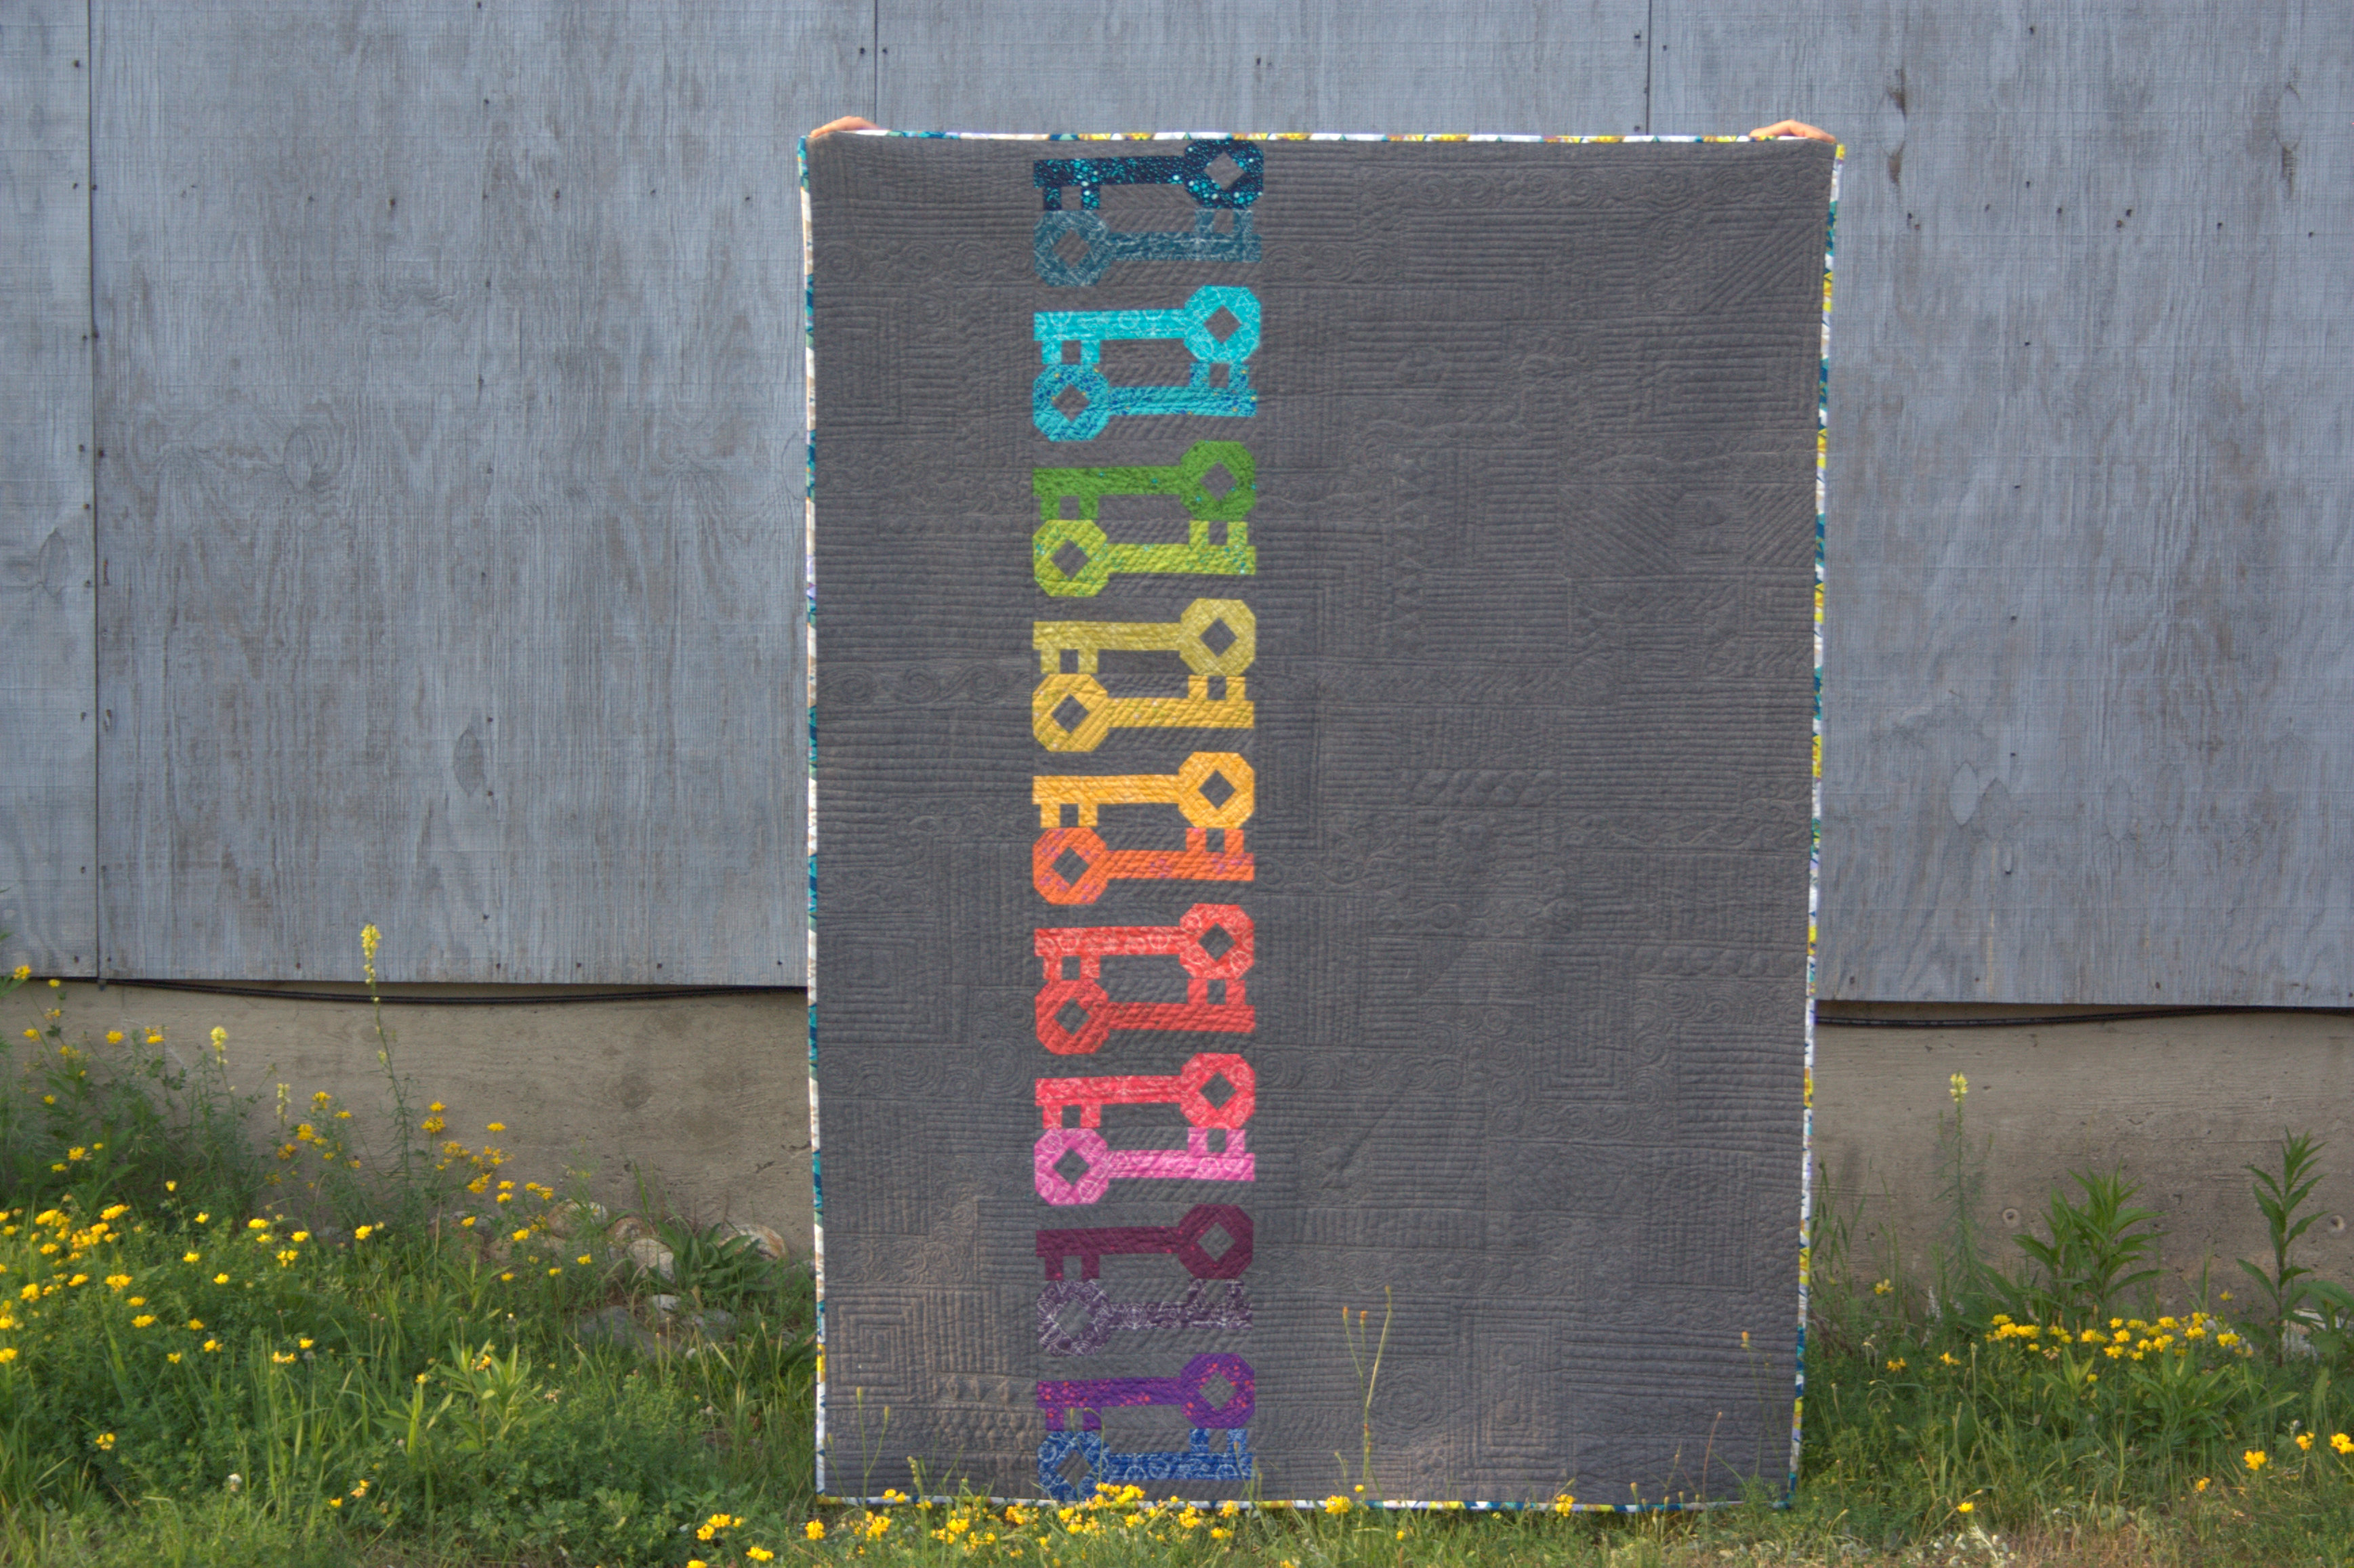
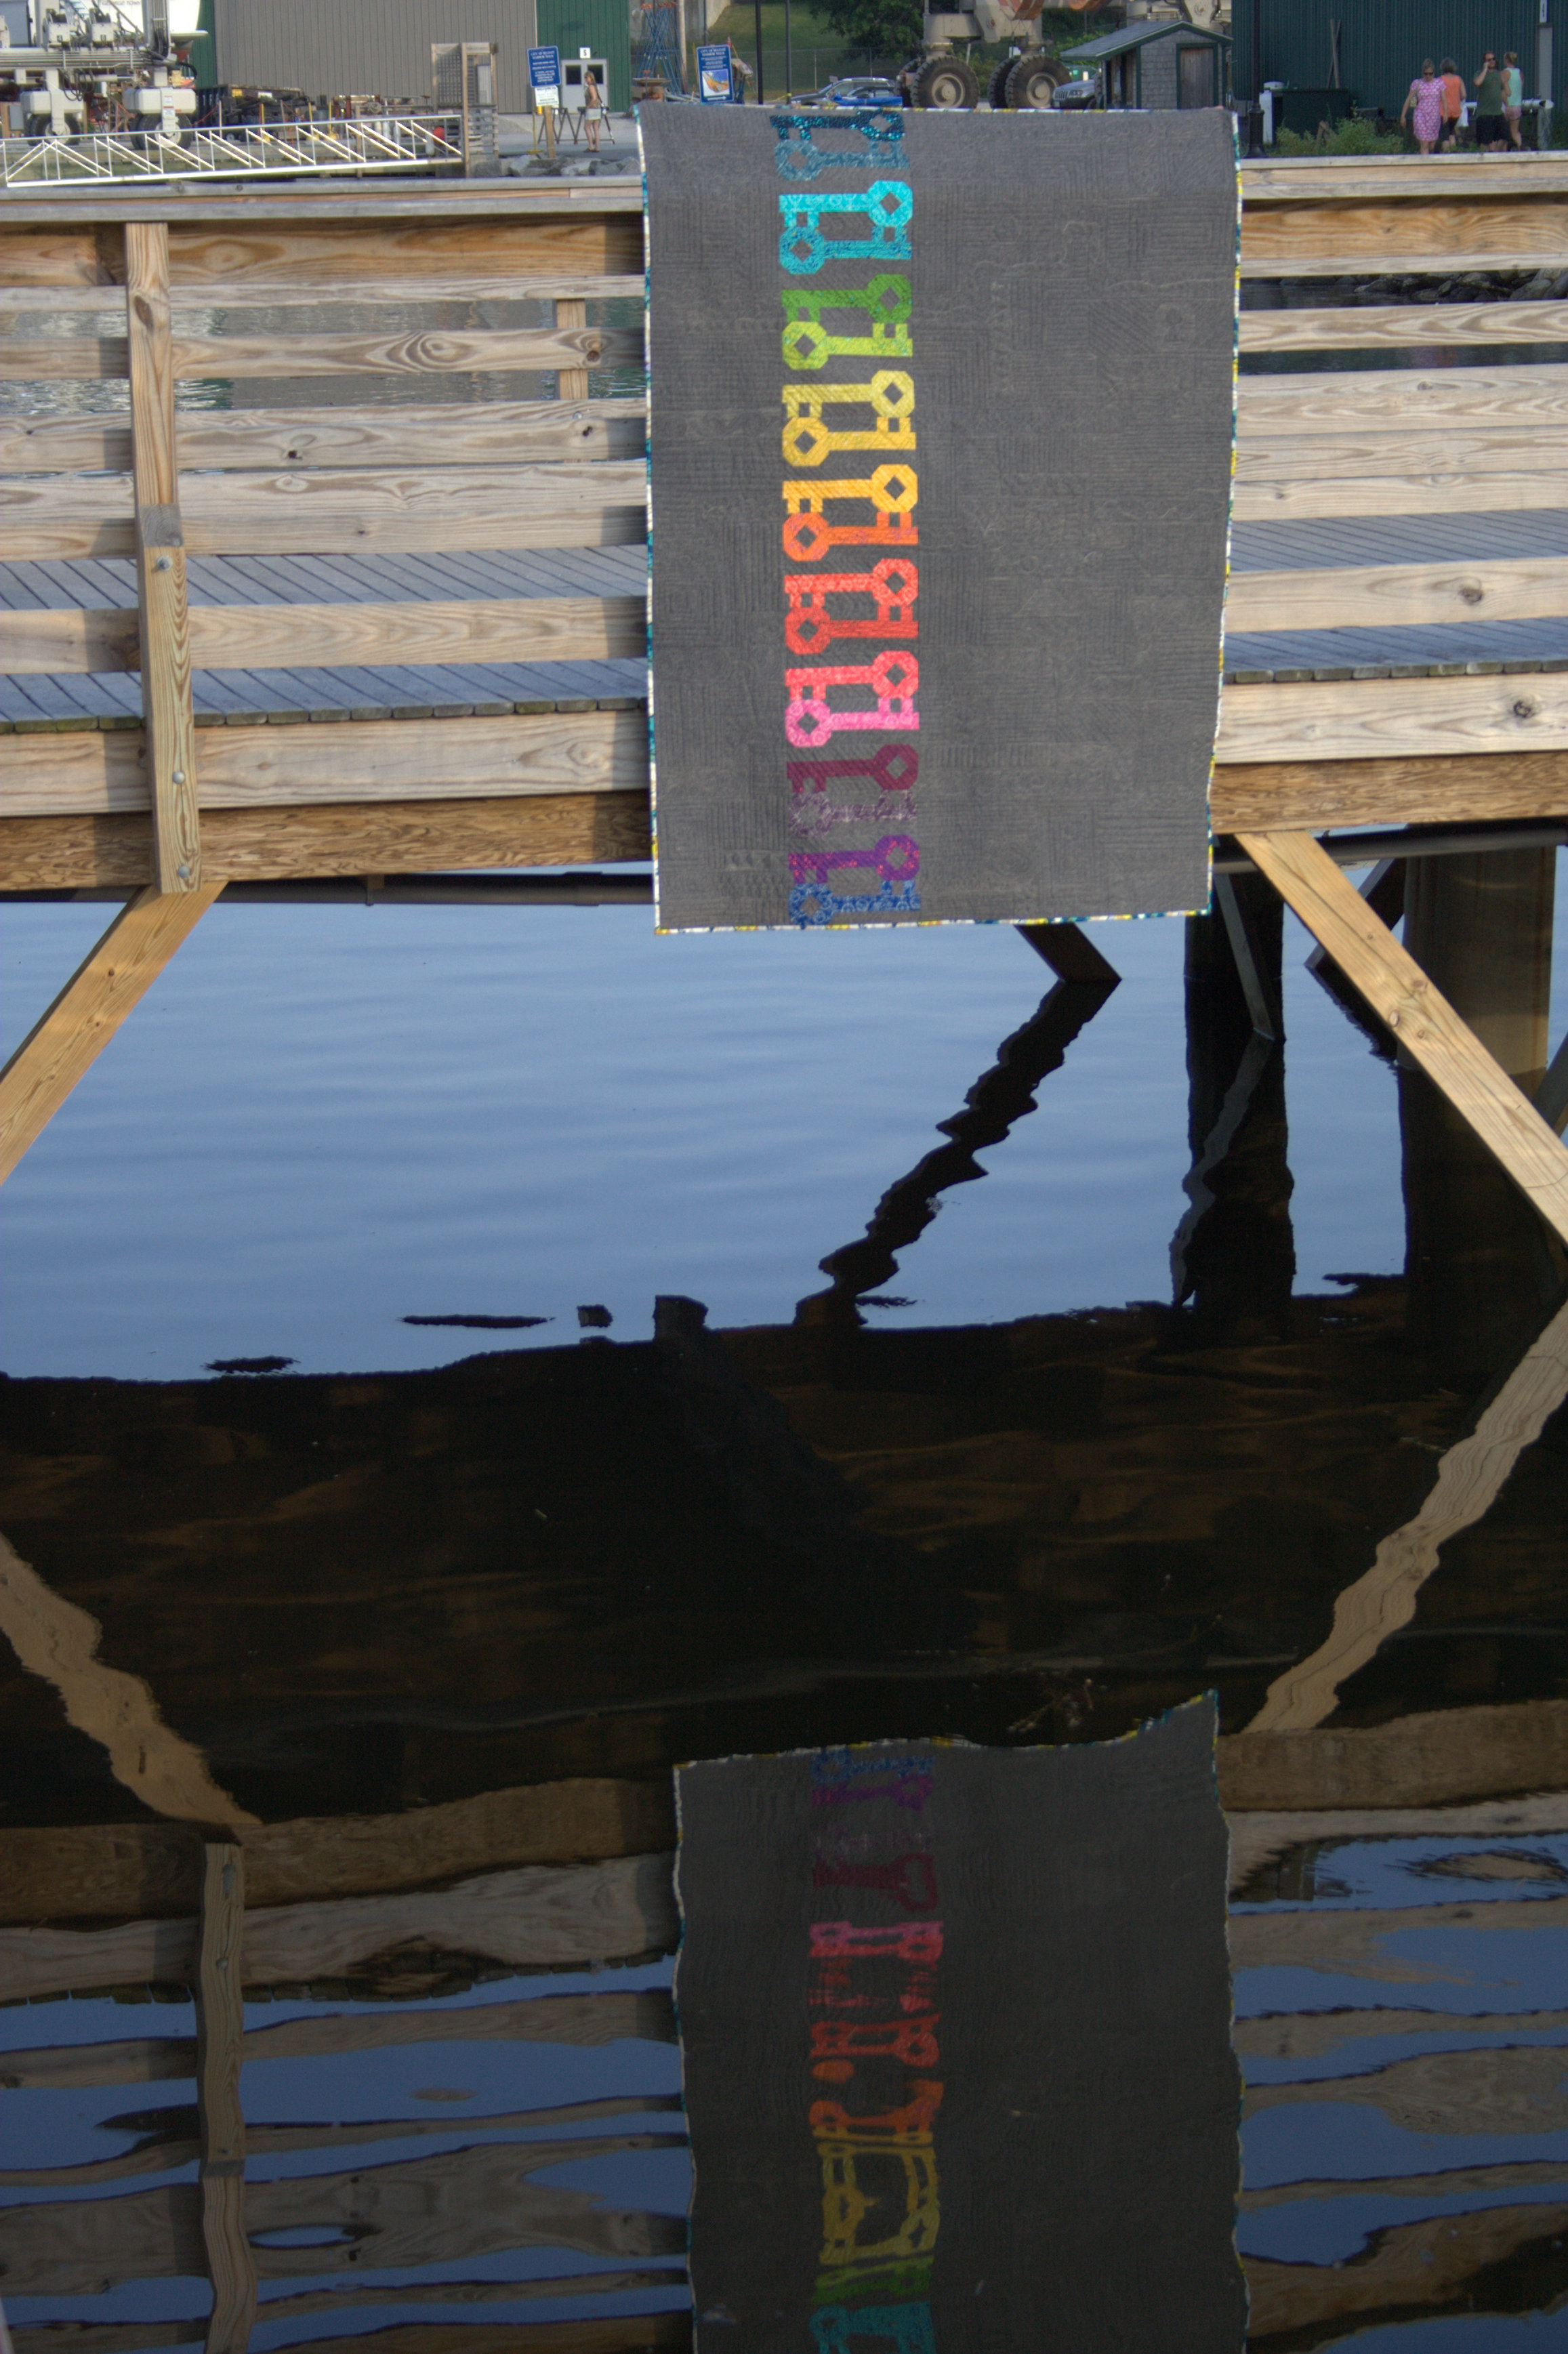
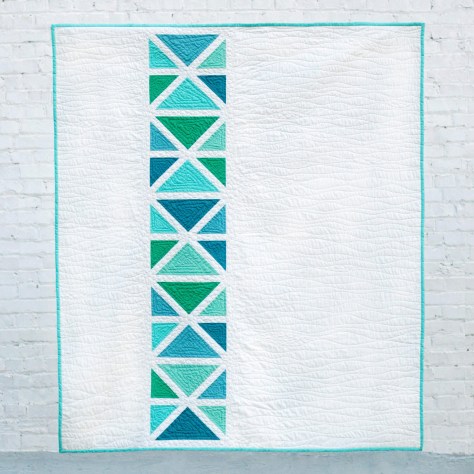
There’s something about the simple beauty of the ocean–the clean lines, soothingly subtle color play, and oh so much space to breathe that makes my heart happy–-and I aimed to captured it all in this simple yet striking pattern. I would like to think that you can take a stroll along the coast through the making of the Ocean Path quilt.
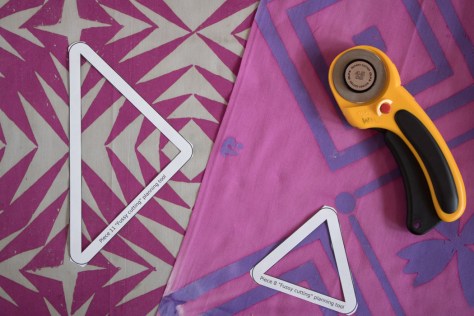
 Using simple construction from easily cut triangles and sashing, this quilt comes together in a breeze. Generous negative space provides room for intricate free motion quilting, or you could finish it with simple modern straight line quilting.
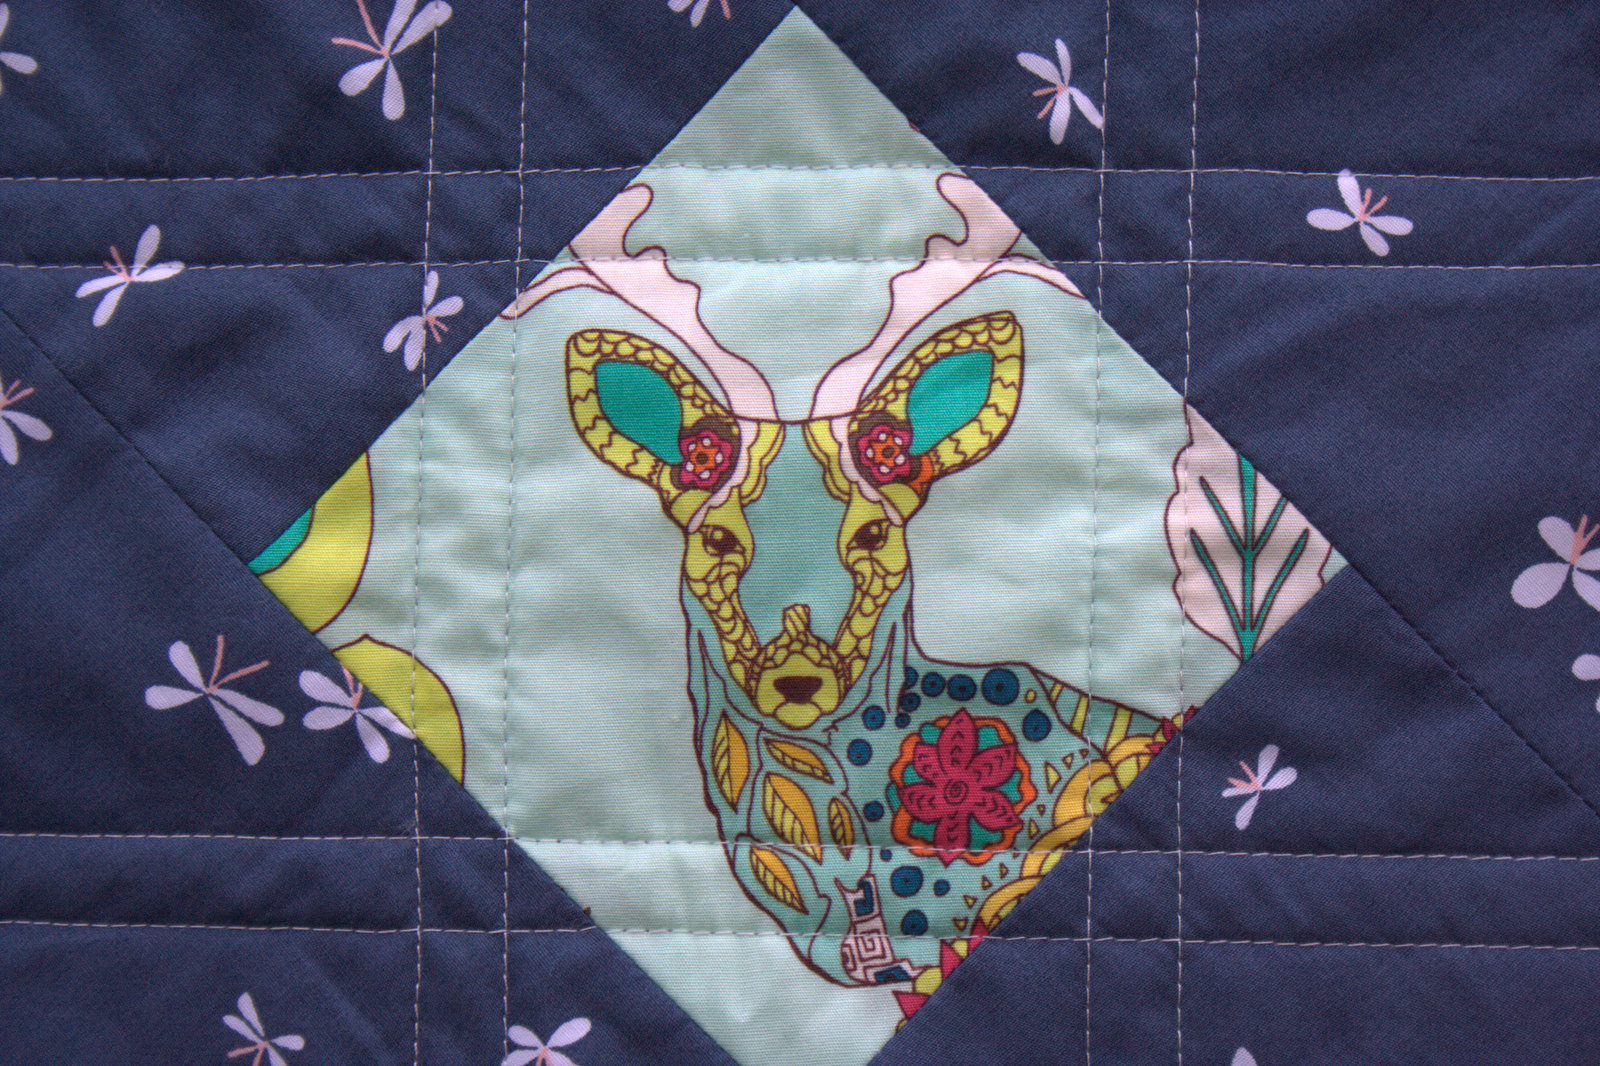
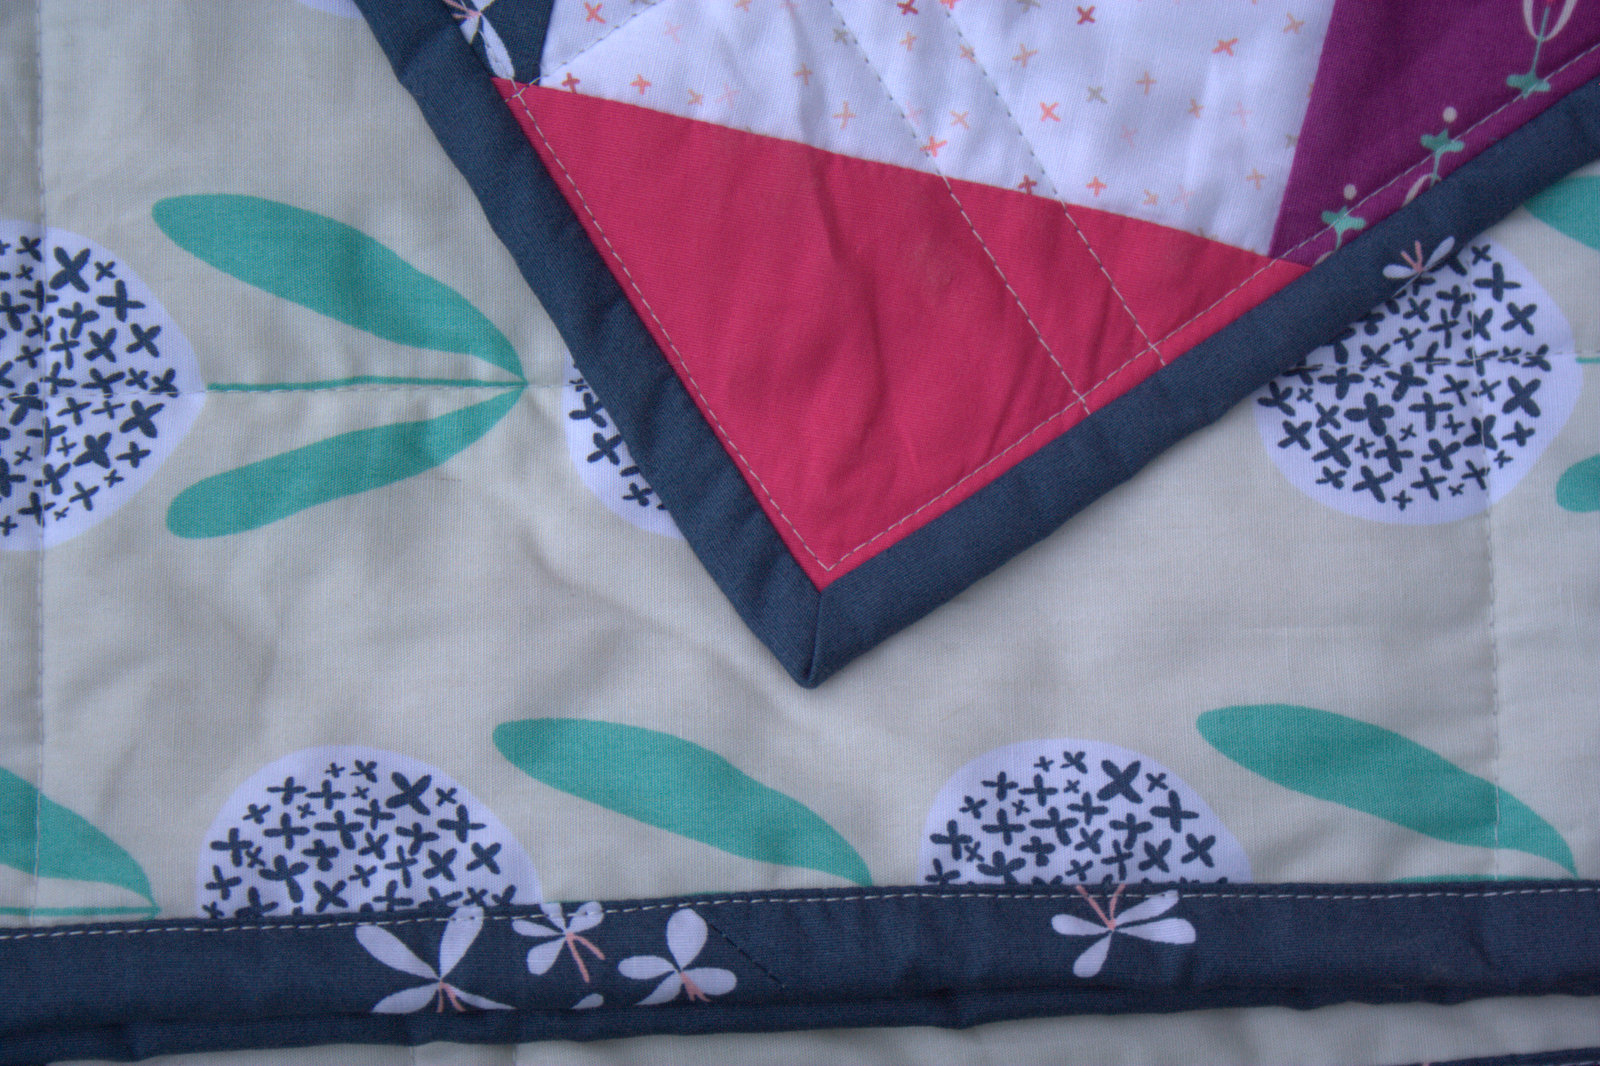
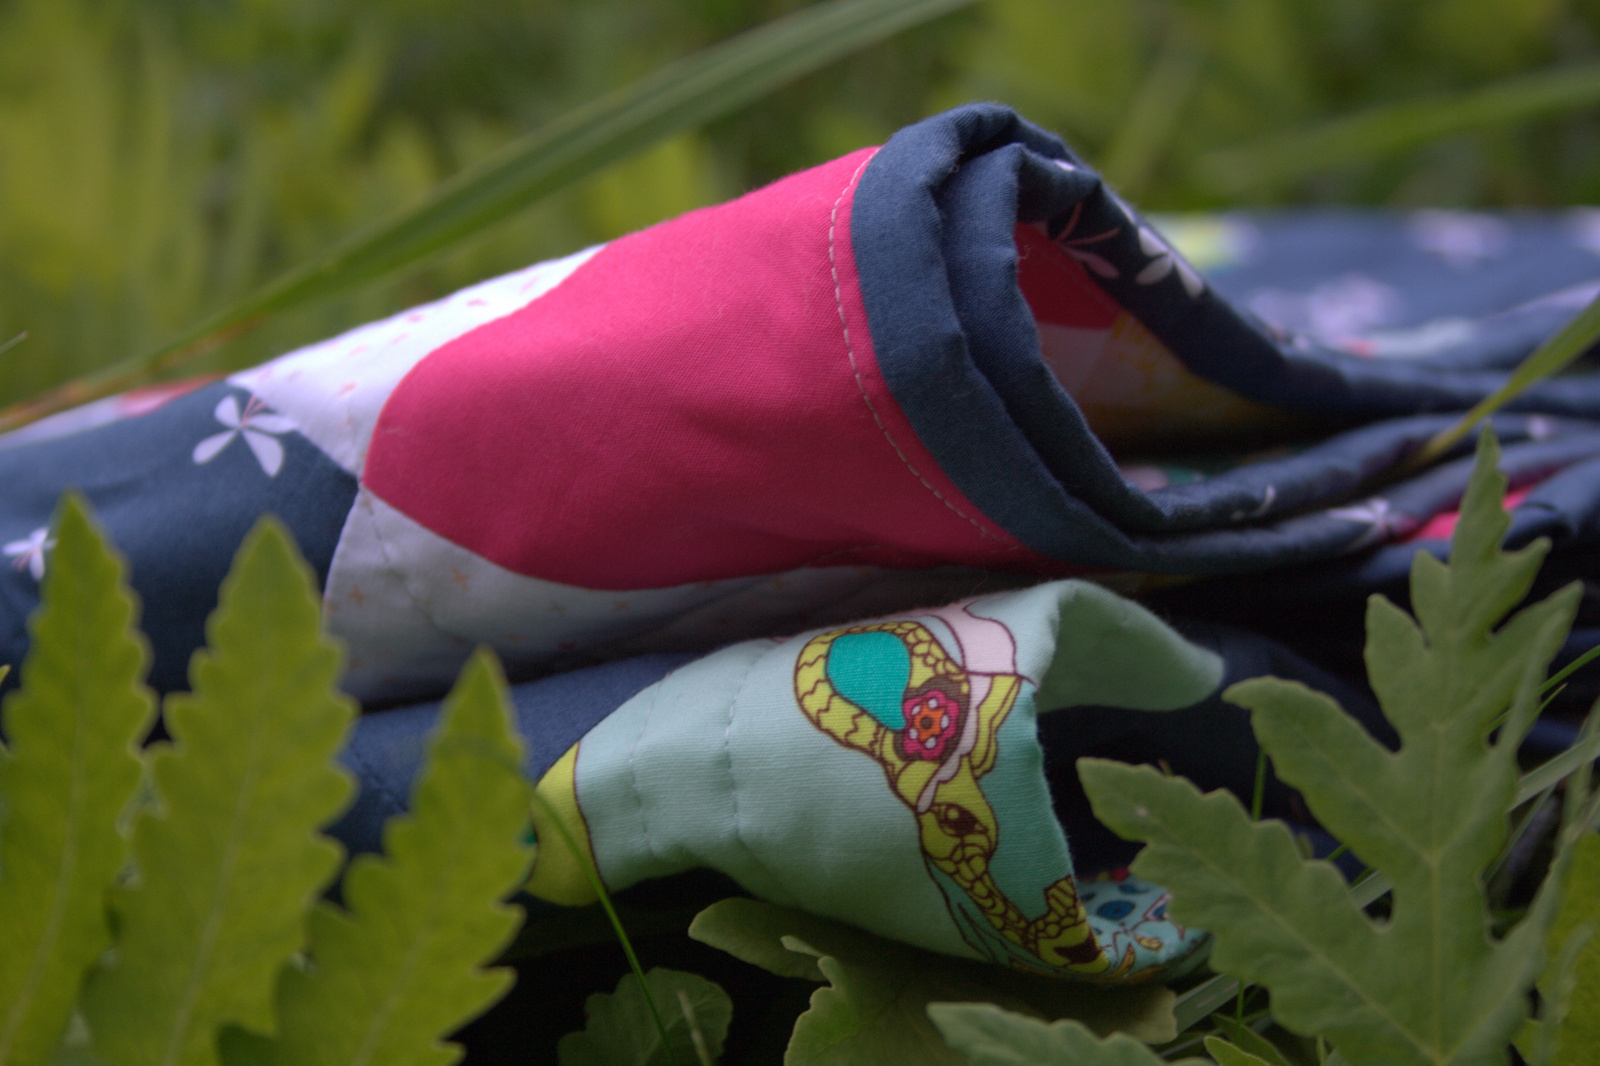
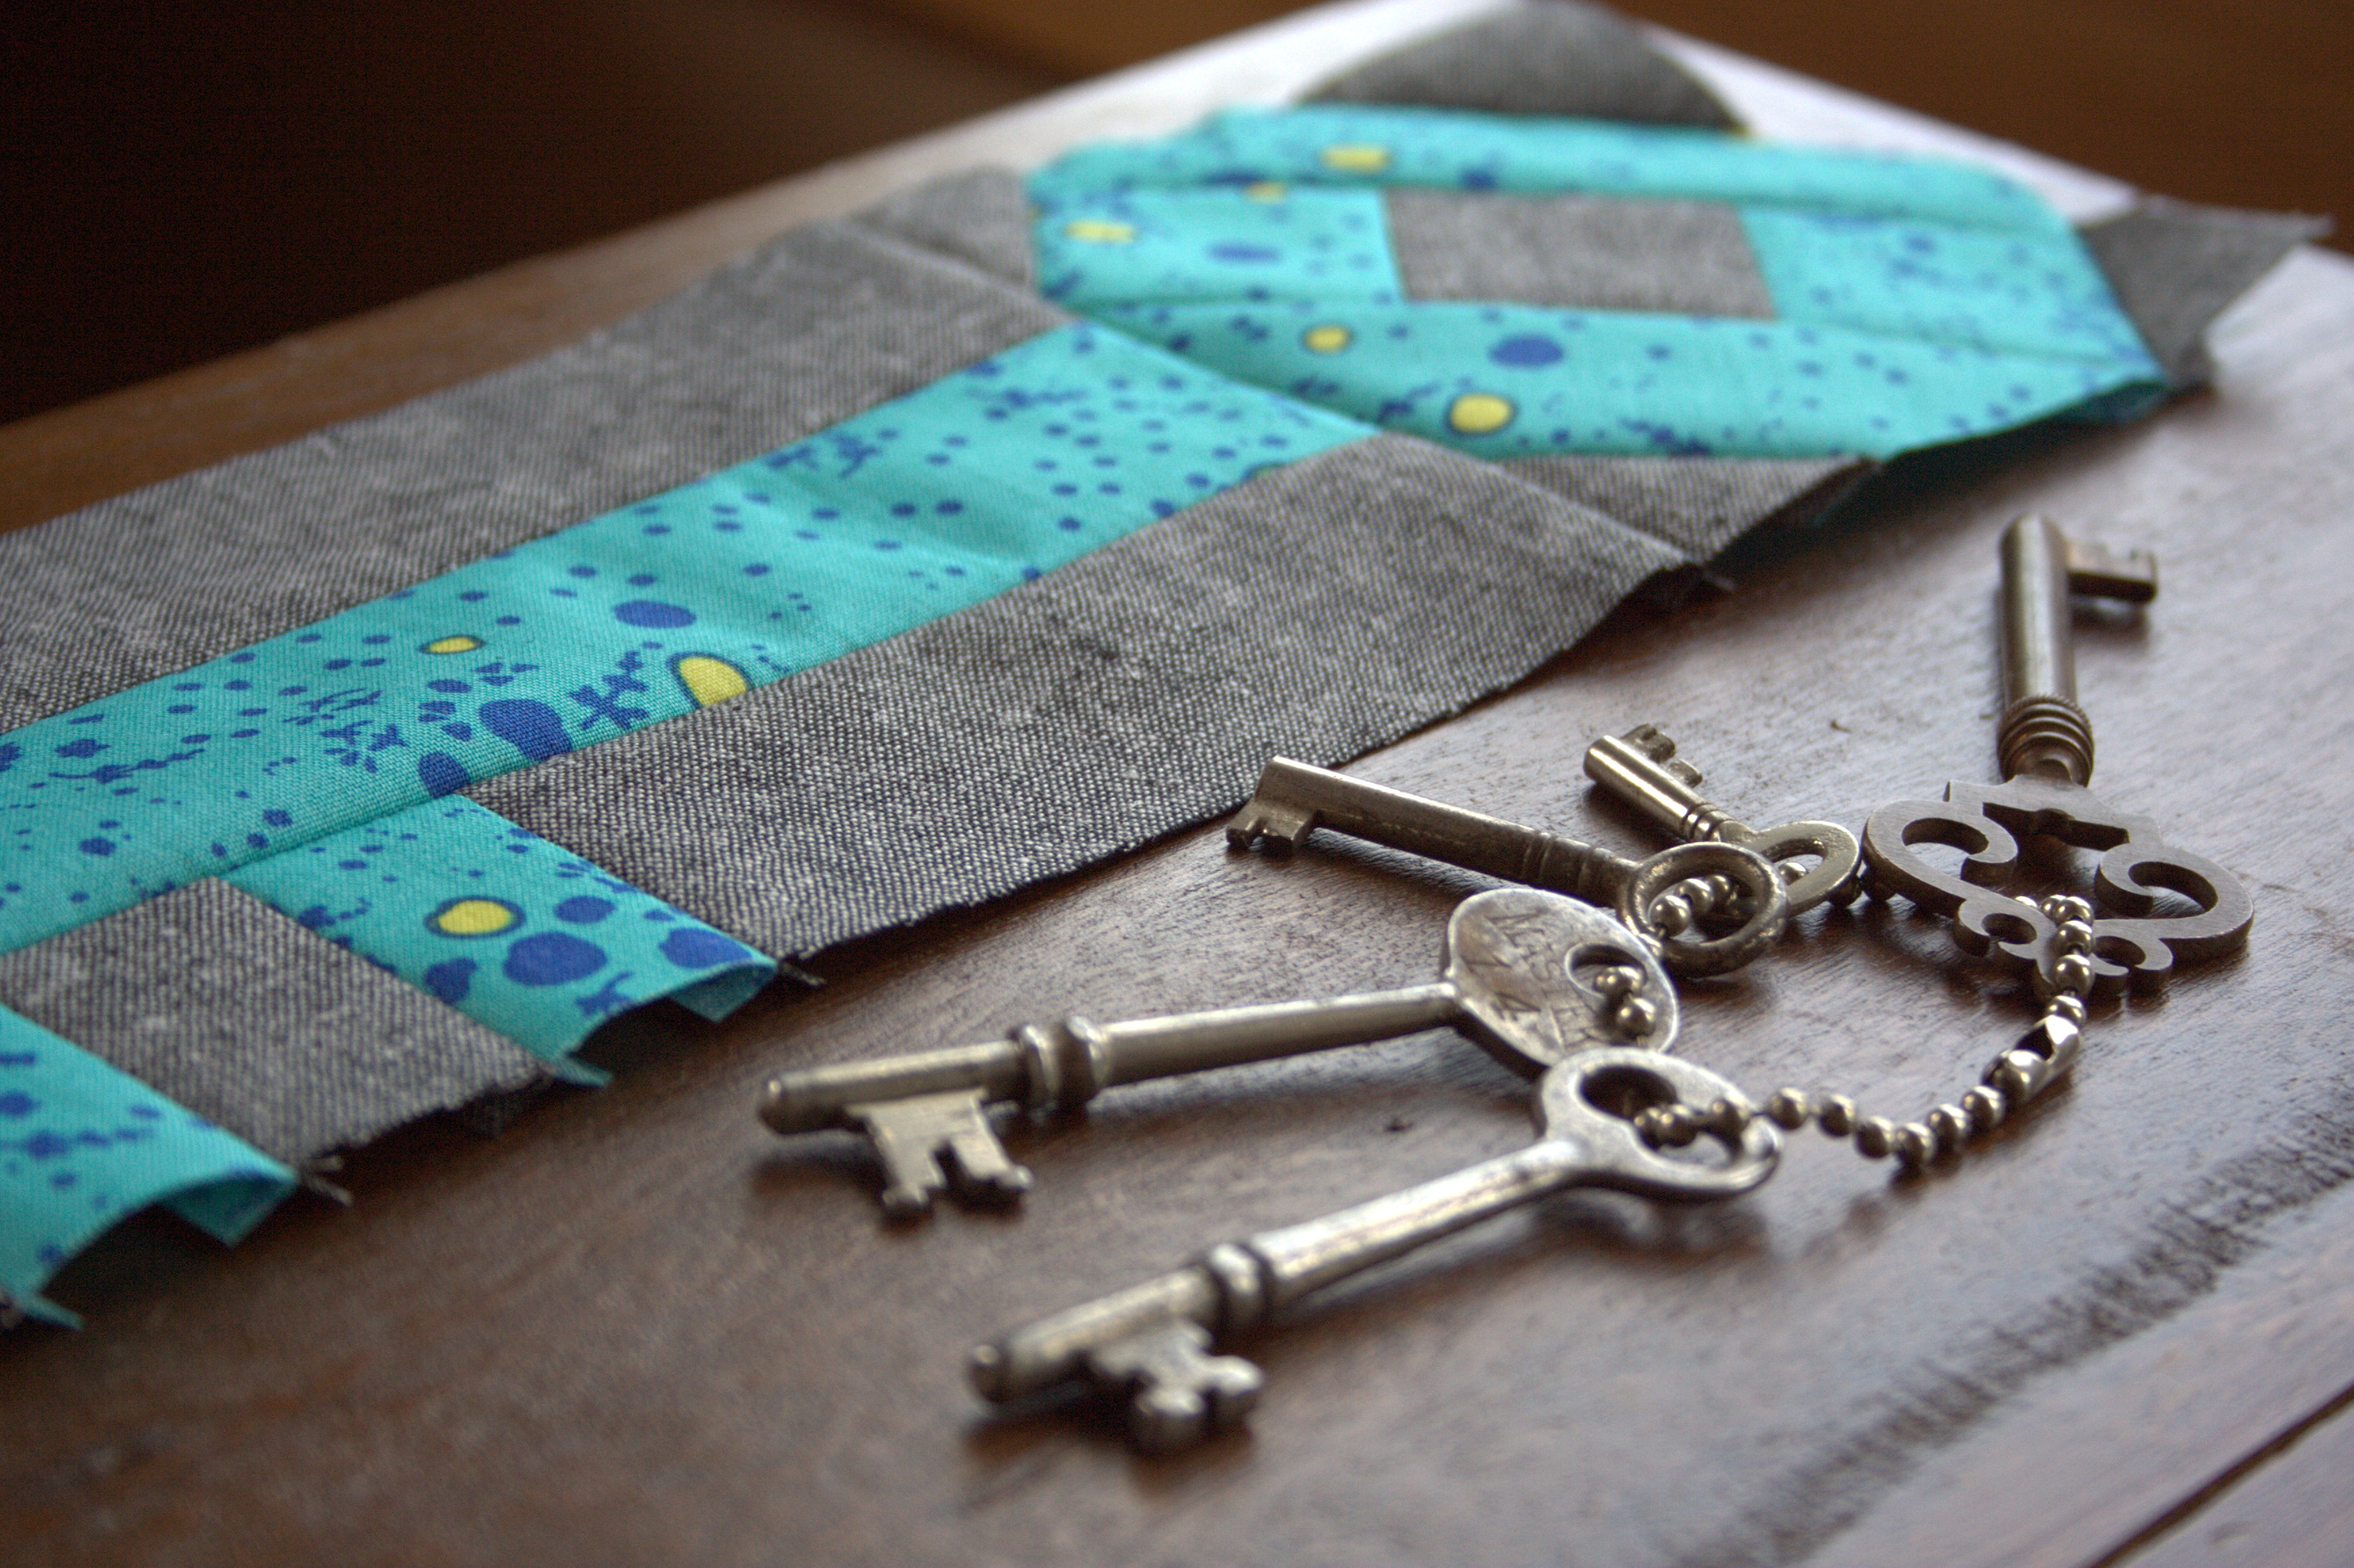
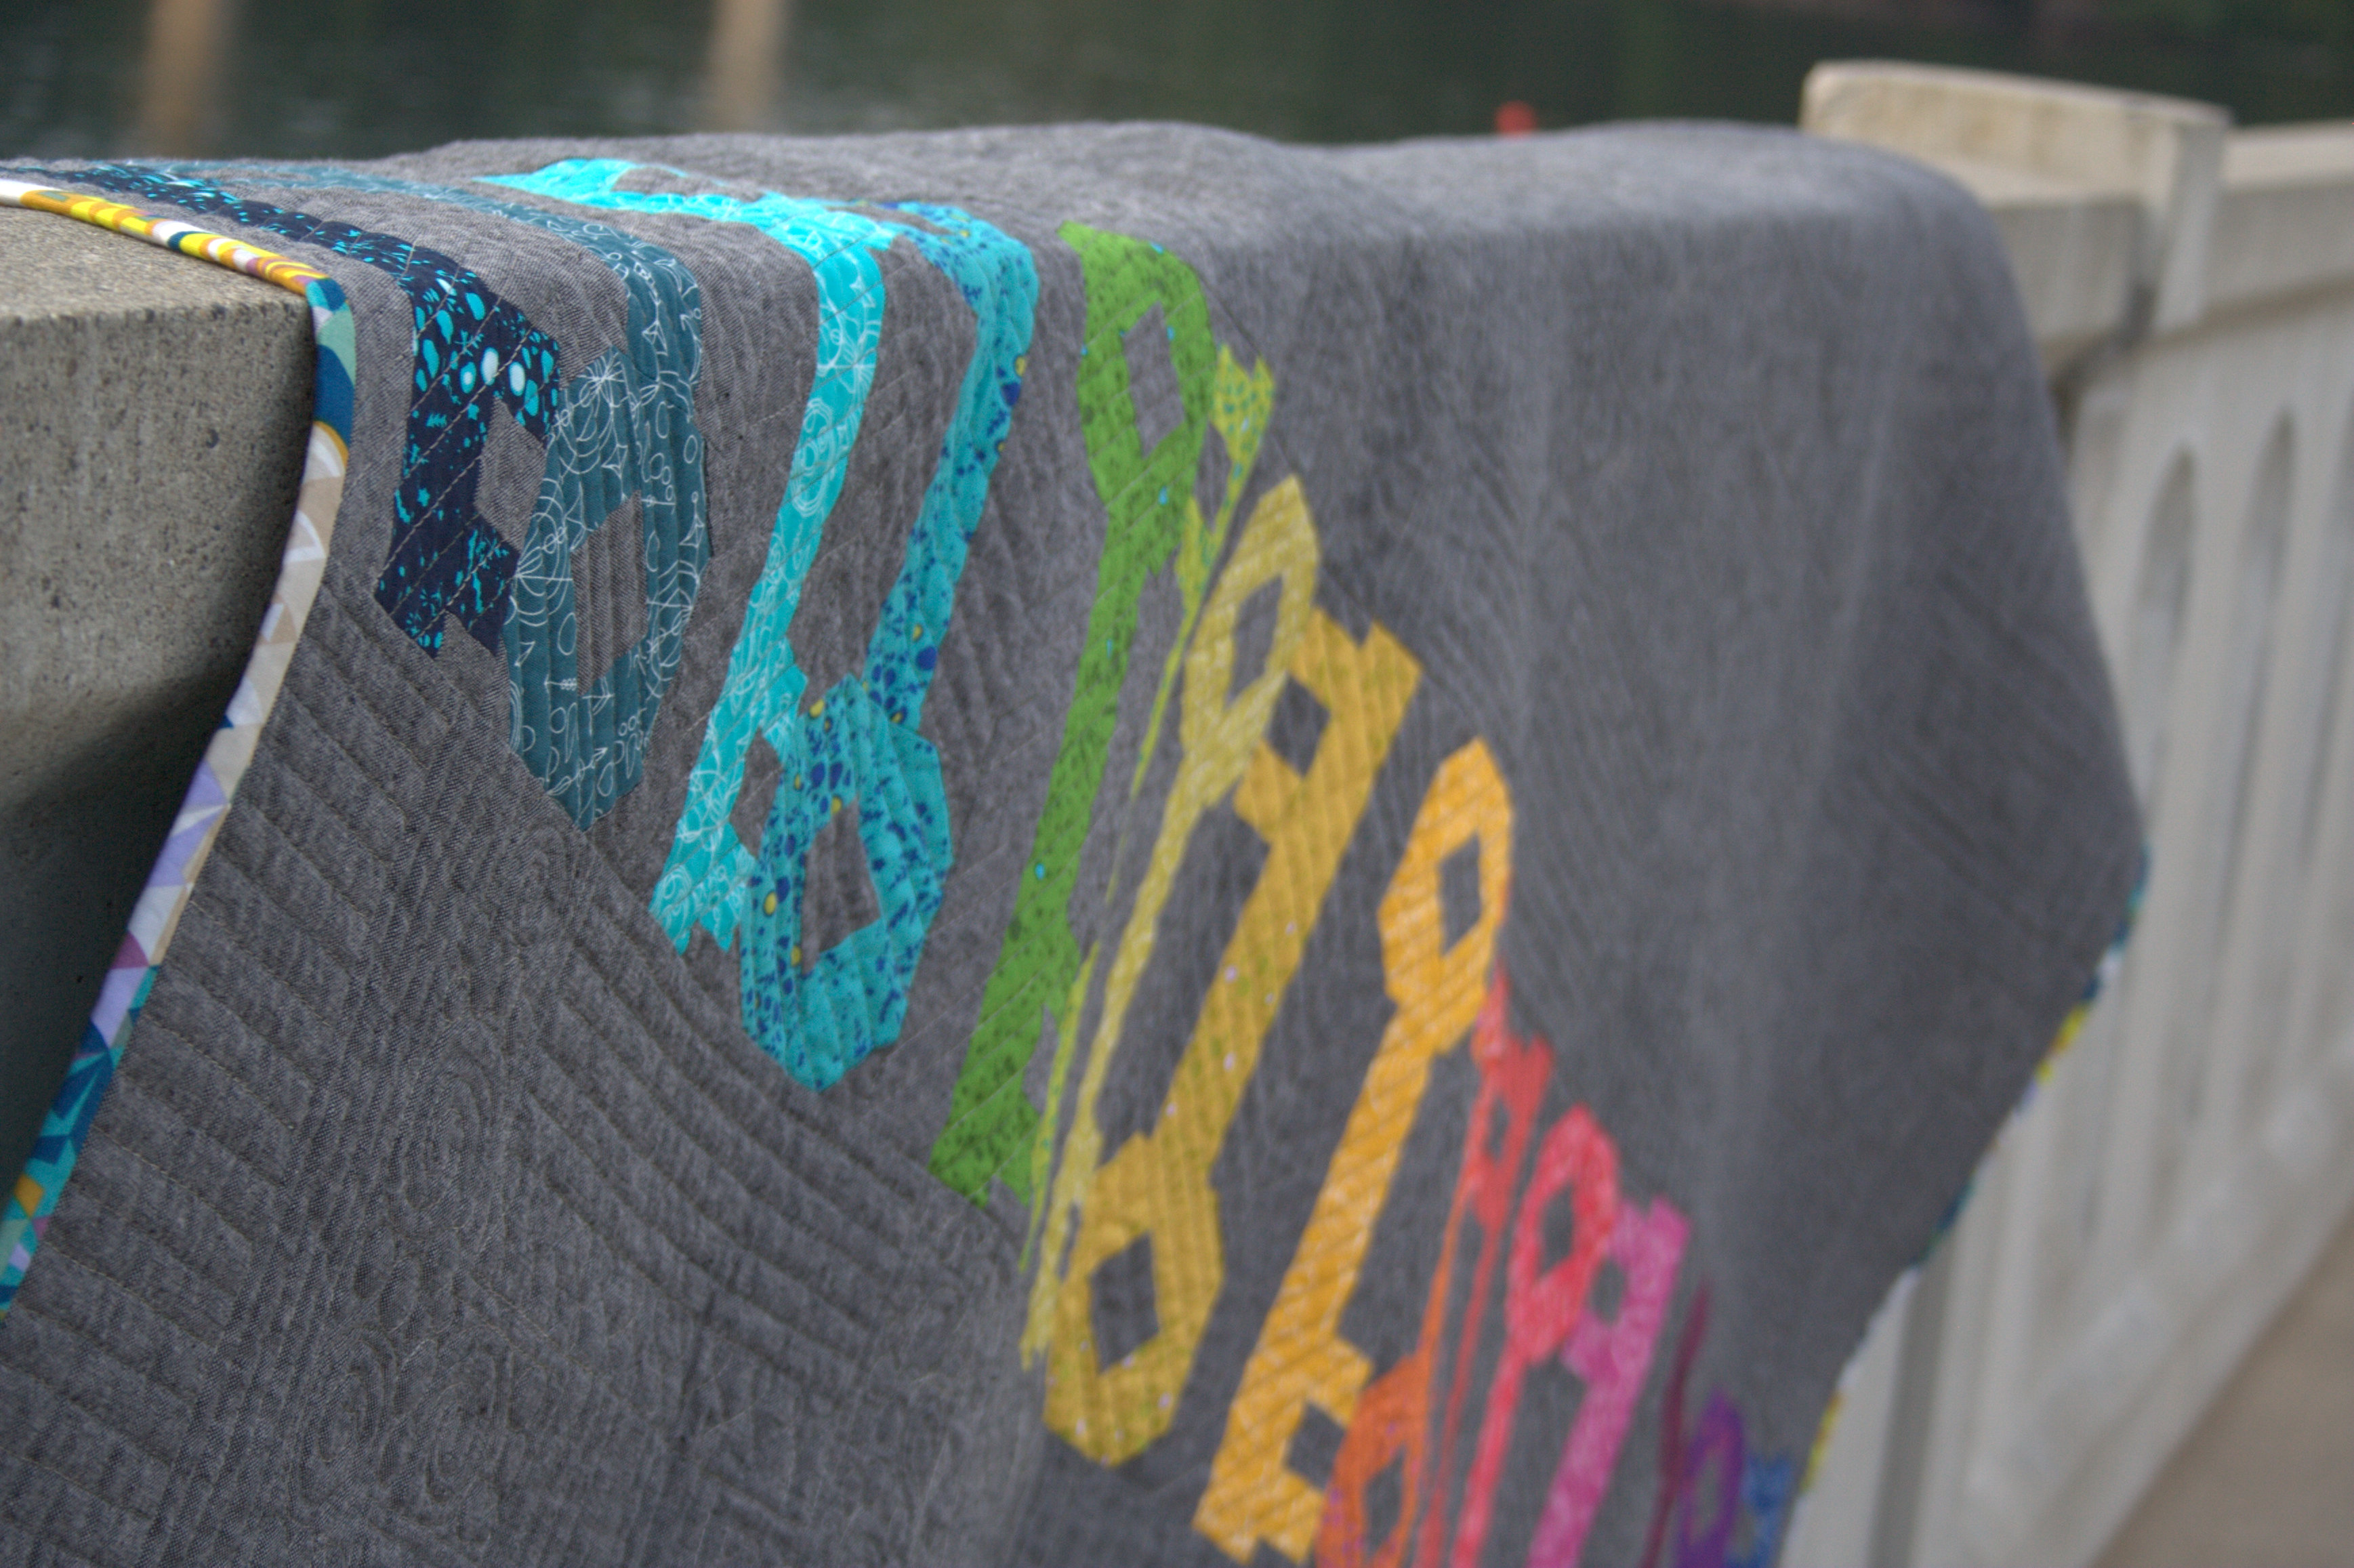
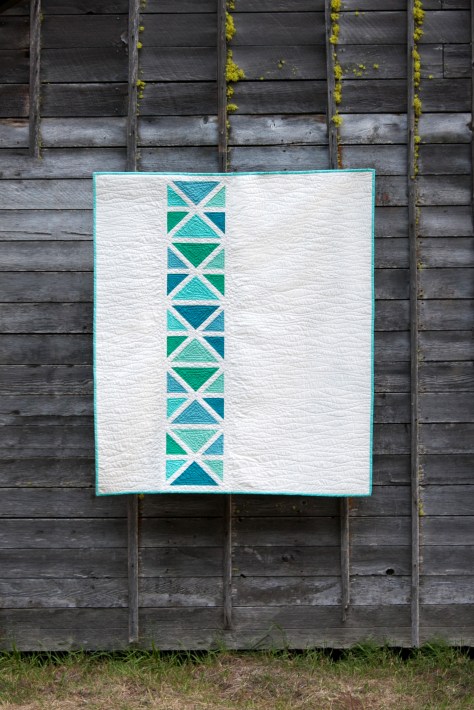
 Many thanks to Art Gallery Fabrics for providing the beautifully soft Pure Elements fabric for this quilt. I used Tile Blue PE-418, Emerald PE-417, Ocean Waves PE-442, Warm Wave PE-464, and Mirage Blue PE-424 for the feature triangles. The background and sashing are Snow PE-433. The backing is Seawater NE-123 from Skopelos by Katarina Roccella, which is the absolute perfect fabric to back this design!
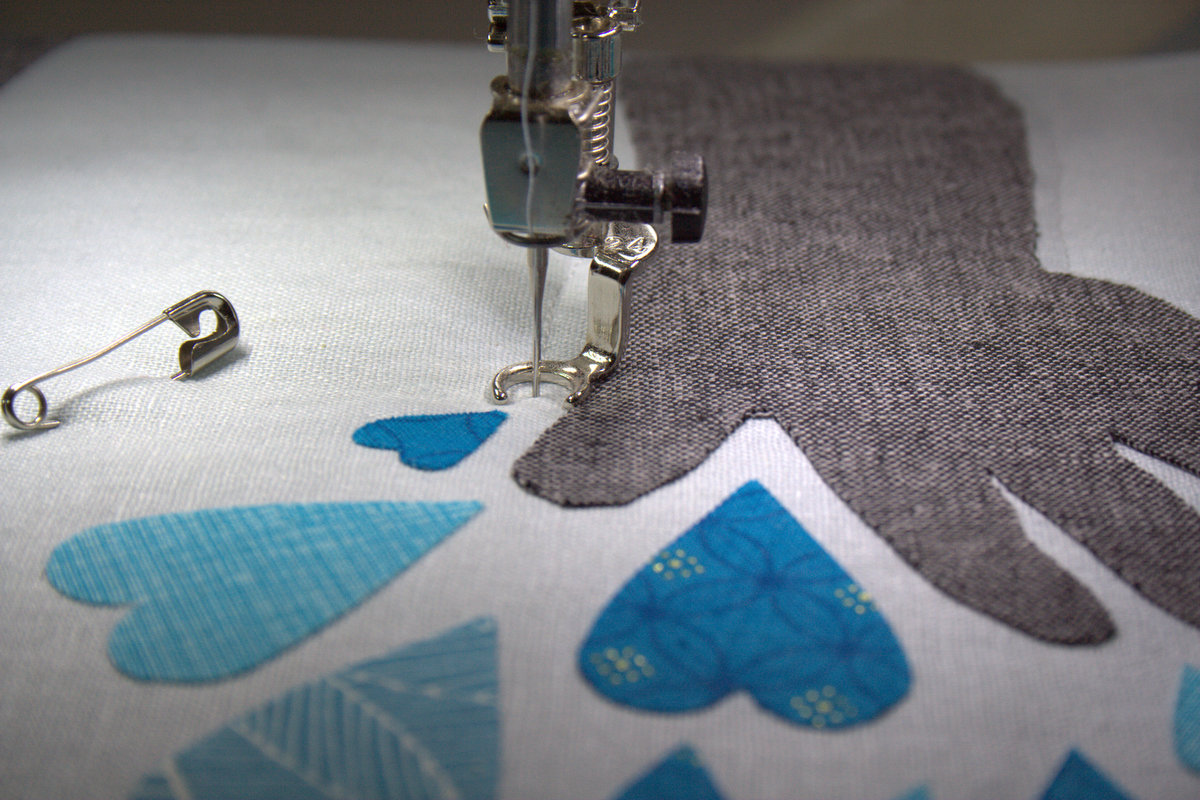
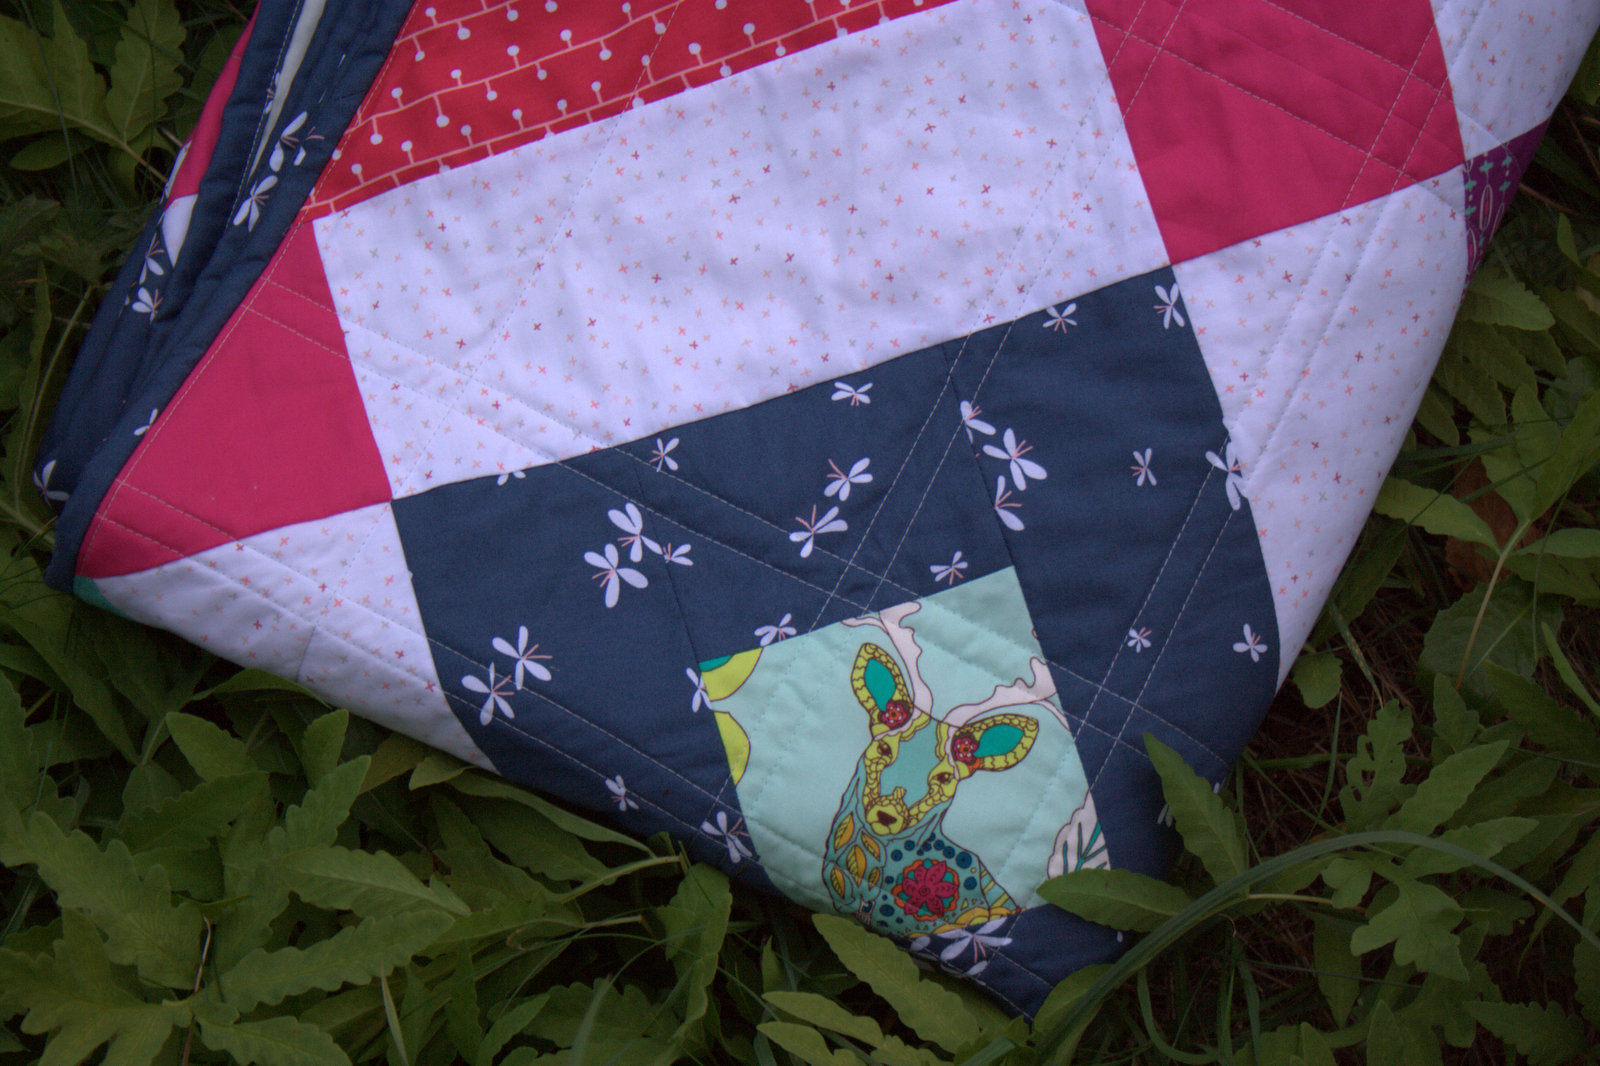
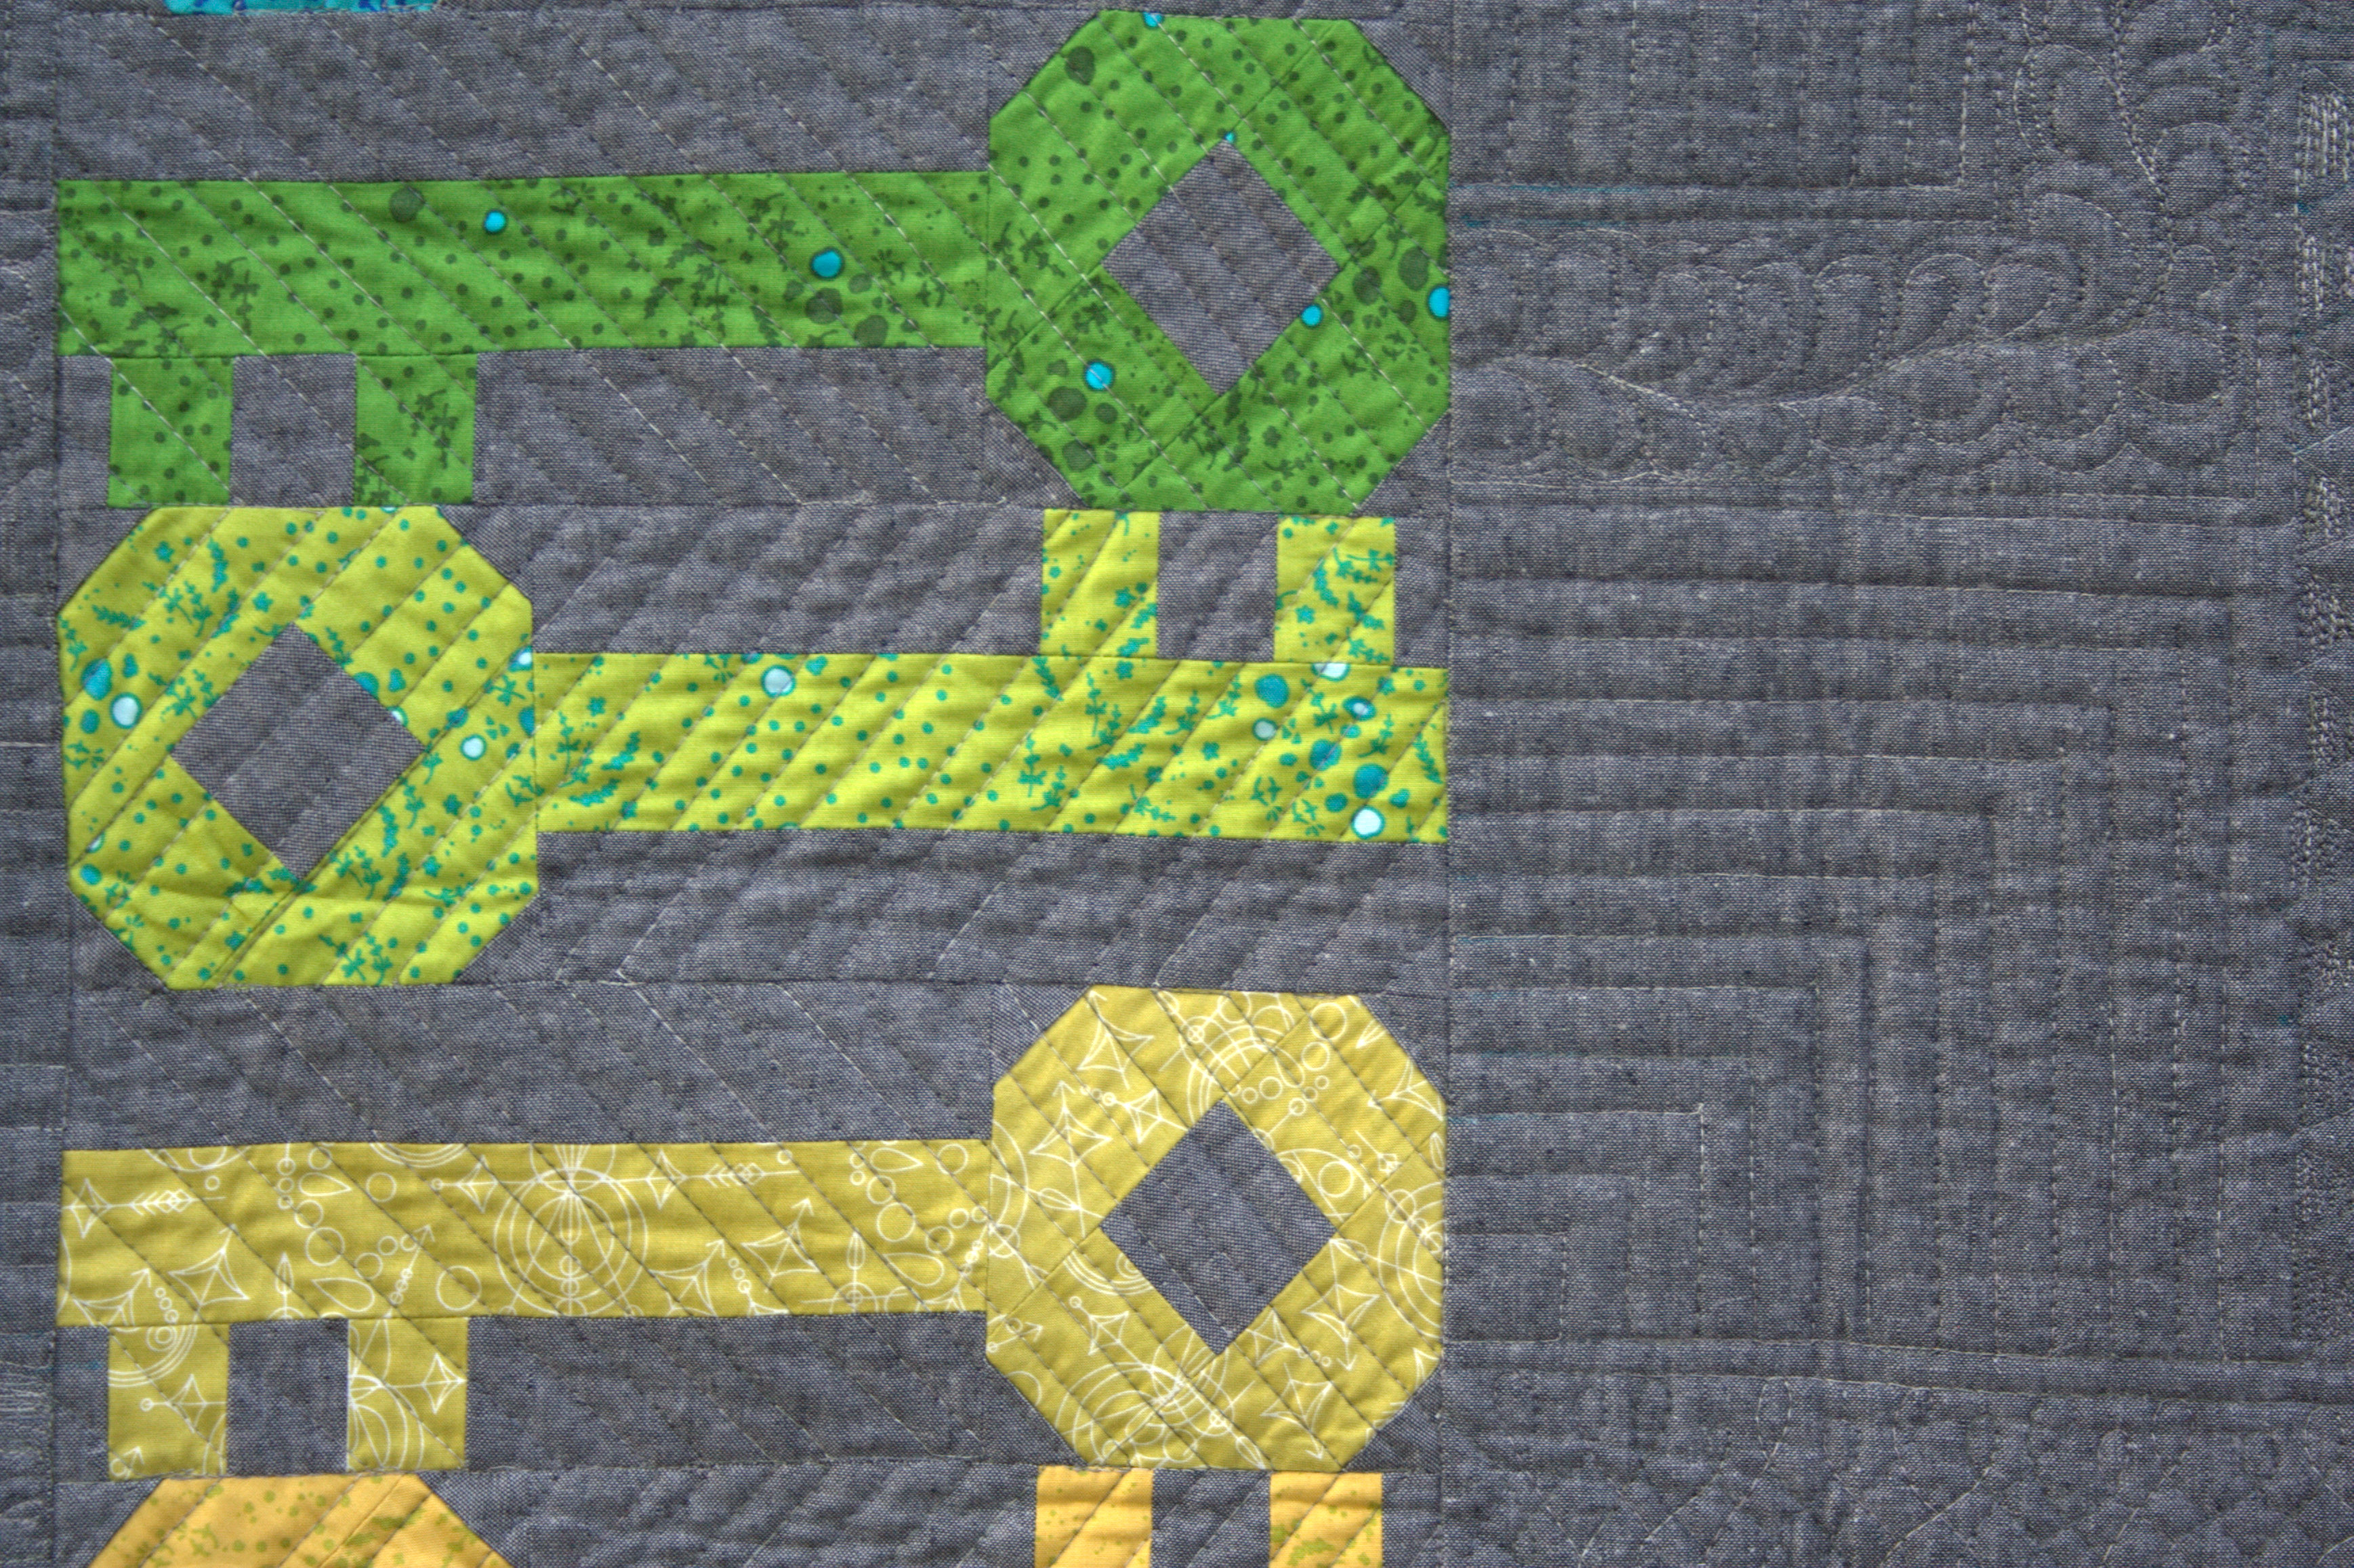
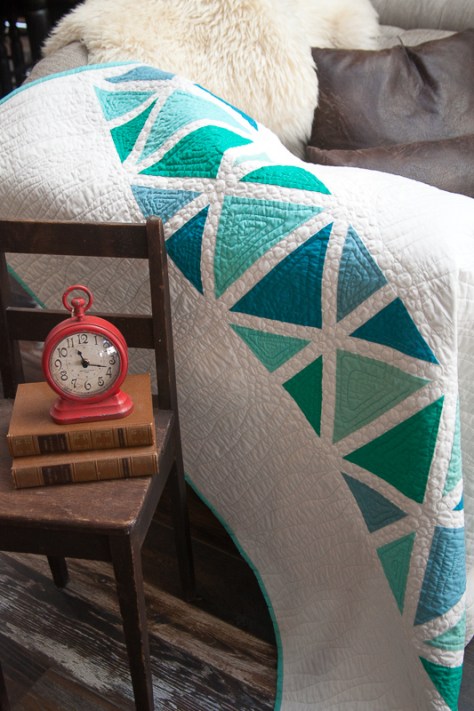 I quilted Ocean Path with echoing, organic triangles within each colored portion using 50wt Aurifil variegated 4654-Seamist. I quilted the bulk of the background with organic horizontal wavy lines with 50wt 2021-Natural White using the walking foot on my Bernina 560, and went a little wild and free motion quilted pebbles into all of the sashings between the triangles and drifting out into the wavy lines. It was one of those times that once I had the vision in my head, there was no turning back. I’m excited to report that it turned out pretty much the way I hoped! I did all of my piecing with 50wt Aurifil 2021-Natural White and 2600-Dove. Many thanks to Aurifil for providing the thread!
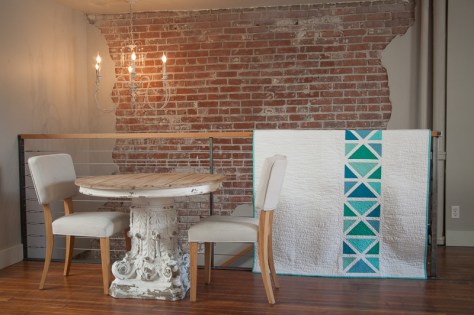
I think Ocean Path would look equally striking in many other color combinations–from fiery reds and oranges on a dark background, to the soothing calm of cool colors on a light background. I can’t wait to see your version!
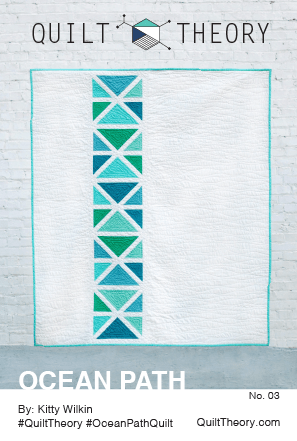
 All of the Quilt Theory patterns are simple enough to be printed on 4″x6″ cards or a single page downloadable pdf. At only $3 each, they are perfect for gift giving or collecting, too!
About Quilt Theory
Let me tell you a bit more about the designers behind Quilt Theory.

In February 2016, a group of quilters connected to cultivate relationships with others running businesses in the quilting industry. A tight-knit group was quickly woven together as we shared successes, answered questions, and supported one another. What started as a way to collect real-time insight and expertise quickly evolved into an opportunity to collaborate.
Our goal at Quilt Theory is to create simple and modern quilt patterns, and we challenged ourselves to design a line of patterns printed on small cards. As a group, we have become a strong team as we worked through pattern writing, testing, editing, and quilting.

Quilt Theory designers have been featured in 20+ major quilting publications and international quilt exhibits. Combined, we have 47 years of quilting experience, and we are excited to share our debut collection for Fall 2016.
How to buy or stock Quilt Theory patterns
You can buy either individual or a pattern collector’s package of PDF patterns through our Quilt Theory website right now!
Pattern cards will be coming soon to a local quilt shop near you! If you are a quilt shop and want to carry our patterns, set up a wholesale account here, or order through Checker Distributors.
Want to buy the cards, but don’t own a quilt shop? Let your local quilt shop know you want them to carry Quilt Theory patterns (click for a handy note to send to your favorite local quilt shop!)
Now, for the Giveaway!
 To celebrate the launch of Quilt Theory, I am giving away a copy of my pattern, Ocean Path (printed or PDF, your choice!) along with a PDF of all of the Quilt Theory Coloring Pages. I’m also including all of the fabric leftover from the making of my quilt, which contains enough fabric to get you amply started on your Ocean Path quilt, plus the rest of my large spool of color coordinating 50wt variegated Aurifil thread in 4654-Seamist.
To enter the giveaway today, tell me what color way you would use to create Ocean Path. Leave a comment and make sure I’m able to get ahold of you if you win. For an additional entry, leave another comment telling me how you follow Night Quilter (email list, instagram, facebook, twitter, blog follower, etc.) Follow Quilt Theory (facebook, twitter, Instagram, etc.) and tell me how in a third comment for a third entry.
This giveaway is open to US and international participants. The giveaway will be open until Sunday, October 16th, at midnight eastern time when I’ll select the winner randomly with random.org. Giveaway is open to participants 18 years or older. *If you buy my pattern and then you win it, I’ll refund you or let you pick out another free Quilt Theory pattern! This giveaway is now closed! A winner will be announced shortly!
Be sure to visit the rest of the Quilt Theory designers this week during our blog hop.
Quilt Theory Release Blog Hop Schedule
Friday 10/7 – Quilt Theory
Saturday 10/8 – Yvonne @Quilting Jetgirl
Monday 10/10 – Daisy @Ants to Sugar
Tuesday 10/11 – Cheryl @Meadow Mist Designs
Wednesday 10/12- Kitty @Night Quilter <—-You are here!
Thursday 10/13 – Michelle @Michelle Bartholomew
Friday 10/14 – Stephanie @Late Night Quilter
Saturday 10/15 – Lorinda @Laurel Poppy and Pine
Monday 10/17 – Quilt Theory
I’m linking up with Crazy Mom Quilts’ Finish it up Friday!

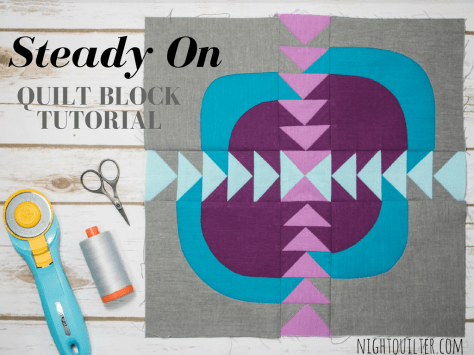 I’m calling my block Steady On, which just seemed fitting for such a classic made-by-me block. Those of you who know me know that I cannot keep anything simple, and this is a perfect case in point. This block has double improv curves, twenty (20) tiny flying geese, an hourglass block, and quite a few points that should match *just* so, all in the 12 1/2″ unfinished square block. But fear not, this tutorial has detailed photos and instructions on how to make each component of the block, and breaking it down into manageable chunks makes this block come together quite smoothly (Spoiler: we can make some of the flying geese 4 at a time!). There’s something about the determined light colored geese headed bravely into the dark and improvy unknown that urges me to encourage them… Steady on, now! That same encouragement goes for you, since I would LOVE to see you tackle this block and come out victorious (tag
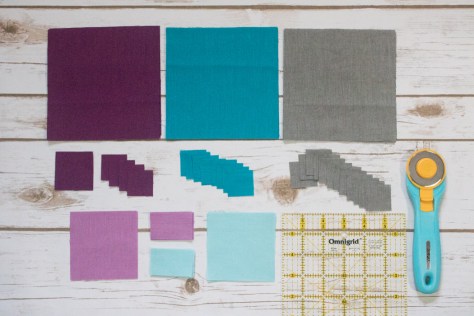
 For this step, you will need your 5 1/2″ squares of Iris, Amazon, and Sky, washable school glue and tip, a marking pen or pencil, scissors, and an iron and pressing surface. To make the double-curved quadrants for this block, follow my tutorial on easy curved piecing using a visual layering approach and glue basting
  Since this method begins from the bottom up, start with Iris and Amazon. Mark the Amazon square 2 1/4″ up along both sides from the bottom right corner. Make sure your mark extends 1/4″ in from the edges before beginning the curve. This will be your sew line, not your cut line, so by measuring the 2 1/4″ we are ensuring our seams will match up, even though the flying geese are exact and the curves can be improv. (Note here that if you are using fabric with a right and wrong side, you want to be marking the wrong side of the fabric. With the Cloud9 Cirrus Solids that’s not important).
 Draw an improv curve from marked point to point, or trace a perfect curve using the edge of a small plate or glass. Make sure your curve begins and ends at your marked points 2 1/4″ up from the corner.
 Next, grab your Shadow 5 1/2″ square and mark 3 1/4″ up both sides from the bottom right corner. Again, draw your curve as desired, connecting from marked point to marked point, and using that line as the sew line.
 Make four quadrants, measuring 2 1/4″ up on the Amazon square and 3 1/4″ up on the Shadow square for two of them, and measuring 3 1/4″ up on the Amazon and 4 1/4″ up on the Shadow square for the other two. Admire your smooth curves, and set those blocks aside for later!
 Place two 1 7/8″ Iris squares in the top right and bottom left corners of a 3 1/4″ Sky square as shown. Using your fabric marking tool of choice, draw a diagonal line from the top right corner to the bottom left corner. I love my Hera marker since it doesn’t actually mark the fabric, but makes a clear guide line.
 Sew 1/4″ from either side of the drawn line. Press with a hot iron to set the seam (notice that I didn’t do this step? tsk tsk).
 Cut along the drawn line.
 Press the small Iris triangles outward, with seams pressed toward the dark fabric. Then place another 1 7/8″ Iris square in the corner of each unit, and mark a diagonal line as shown above.
 Again, carefully sew 1/4″ from either side of the drawn line. Cut along drawn line.
 Press open, with seams toward darker fabric.
 Trim to 1 1/2″ x 2 1/2″ and set aside.
 Grab your 1 1/2″ squares and 1 1/2″ x 2 1/2″ rectangles and lay them out to help plan which corners should be positioned on each rectangle. Use the finished flying geese above to help plan before you start sewing.
 To make a flying geese block (or would it be flying goose?), position a 1 1/2″ square right sides facing the right top corner of a 1 1/2″ x 2 1/2″ rectangle. Draw a diagonal line as shown above.
 Sew along the line and then trim a 1/4″ seam allowance.
 I like to get mine all paired and drawn so that I can chain piece each side.
 Repeat with the other 1 1/2″ square on the top left side of the block. Press seams open or up toward the corner.
 Time saving tip: I cut my 1/4″ seam allowances with scissors while pressing. As long as you are accurate with a pair of scissors, it takes much less time than rotary cutting, at least for me.
 Finally, let’s make that center hourglass block. Grab your 3 1/4″ Lilac and Sky squares.
 Place right sides together and mark a diagonal line. I like to pin my pieces together since we are working with such a small scale. If you’d prefer some wiggle room, you can begin with 3 1/2″ squares and trim to size when you’re finished!
 Sew 1/4″ from either side of the drawn line. Cut along the drawn line.
 Press toward darker fabric. You will have two half square triangles (HST).
 Place HSTs right sides together, with the Lilac half of one facing the Sky half of the other, and nesting the seams.
 Draw a diagonal line perpendicular to the existing seam line, again pinning to keep the pieces in place while you sew.
 Sew 1/4″ on either side of the drawn line. Then, cut along drawn line.
 Press seams open. You will have two hourglass blocks, but will only need one for this block. Save the other one for your next Steady On block!
 Trim to 2 1/2″ square. Set aside.
 Now that you’ve made all of the components, it’s time to sew the block together! Arrange all of your pieces as shown above, paying careful attention the positioning of the flying geese in relation to the large and small curves on your curved quadrants. There should be two Iris flying geese corners next to small curves and three Iris flying geese corners next to large curves.
 Sew the top five and bottom five groupings of geese together, and sew the center horizontal strip of geese and center hourglass block together.
 Perfect points tip: When sewing the flying geese together, keep the piece with the goose point on top. As you’re sewing, make sure your sewing machine needle sews exactly through the “x” that marks the point of the goose, or if anything, slightly to the right (above) the point. This way you won’t lose any points!
 Next, sew the top left and top right curved quadrants to the top grouping of geese, pinning just after each seam that needs to match.
 When aligned properly, the geese corners should flow into the curved piece perfectly–that’s why we so carefully marked our curve starting distances with our improv curves!
 Finally, sew the top and bottom panels to the center horizontal strip, again pinning just after each important seam match. Press toward the less bulky sides (the curved quadrants), and viola! Steady on…
 All of my quilt patterns are 20% off for one week only! Now is your chance to restock your pattern library so you’re sure not to run out of projects once the kids are in school. Sale prices are already reflected in my
  On top of that,
  To enter the giveaway today, tell me which bundle would be your first choice: Moonrise (Giveaway #2) or Moonset (Giveaway #1). I will select two winners, and will be sure to give the first choice to the first winner! Leave a comment and make sure I’m able to get ahold of you if you win. For an additional entry, leave another comment telling me how you follow Night Quilter (
 I created my version of Constant Flux inspired by
 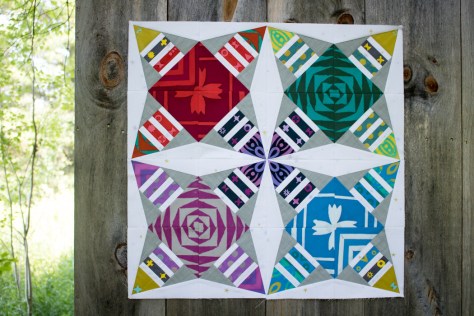 Constant Flux is available in my
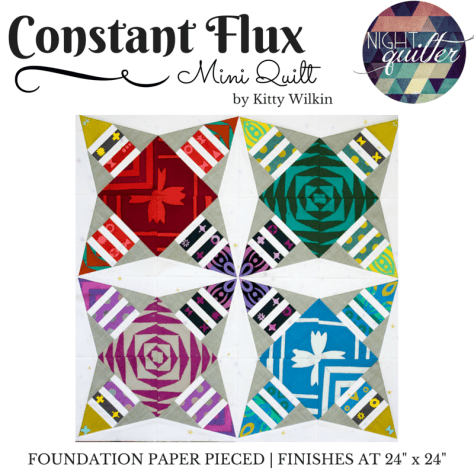
 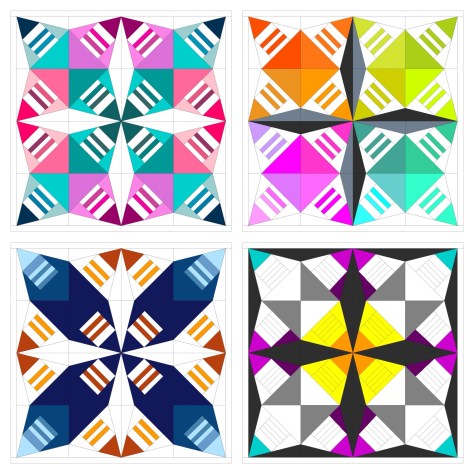 For now, I haven’t quilted my first one and I already want to make Constant Flux in a different colorway. Look at all of the options I came up with in just a short moment of color arrangement play! The pattern comes with a full page coloring sheet so that you can explore your options before diving in. That bottom right version is calling to me–which one would you make first?!

 The pattern includes clear piecing diagrams, sewing tips, and templates for the 8″x12″ finished block, with various shading to help with accurate fabric placement. Quarter inch seam allowances are included on all pattern pieces to help ensure easy piecing, and a 1″ reference square is on every printable page so that scale can be confirmed. Full foundation paper piecing instructions are not included in the pattern, but I have a thorough paper piecing tutorial