Category Archives: Quilting

A Quick Gift: EPP Rose Star Coasters {Sizzix Tutorial}

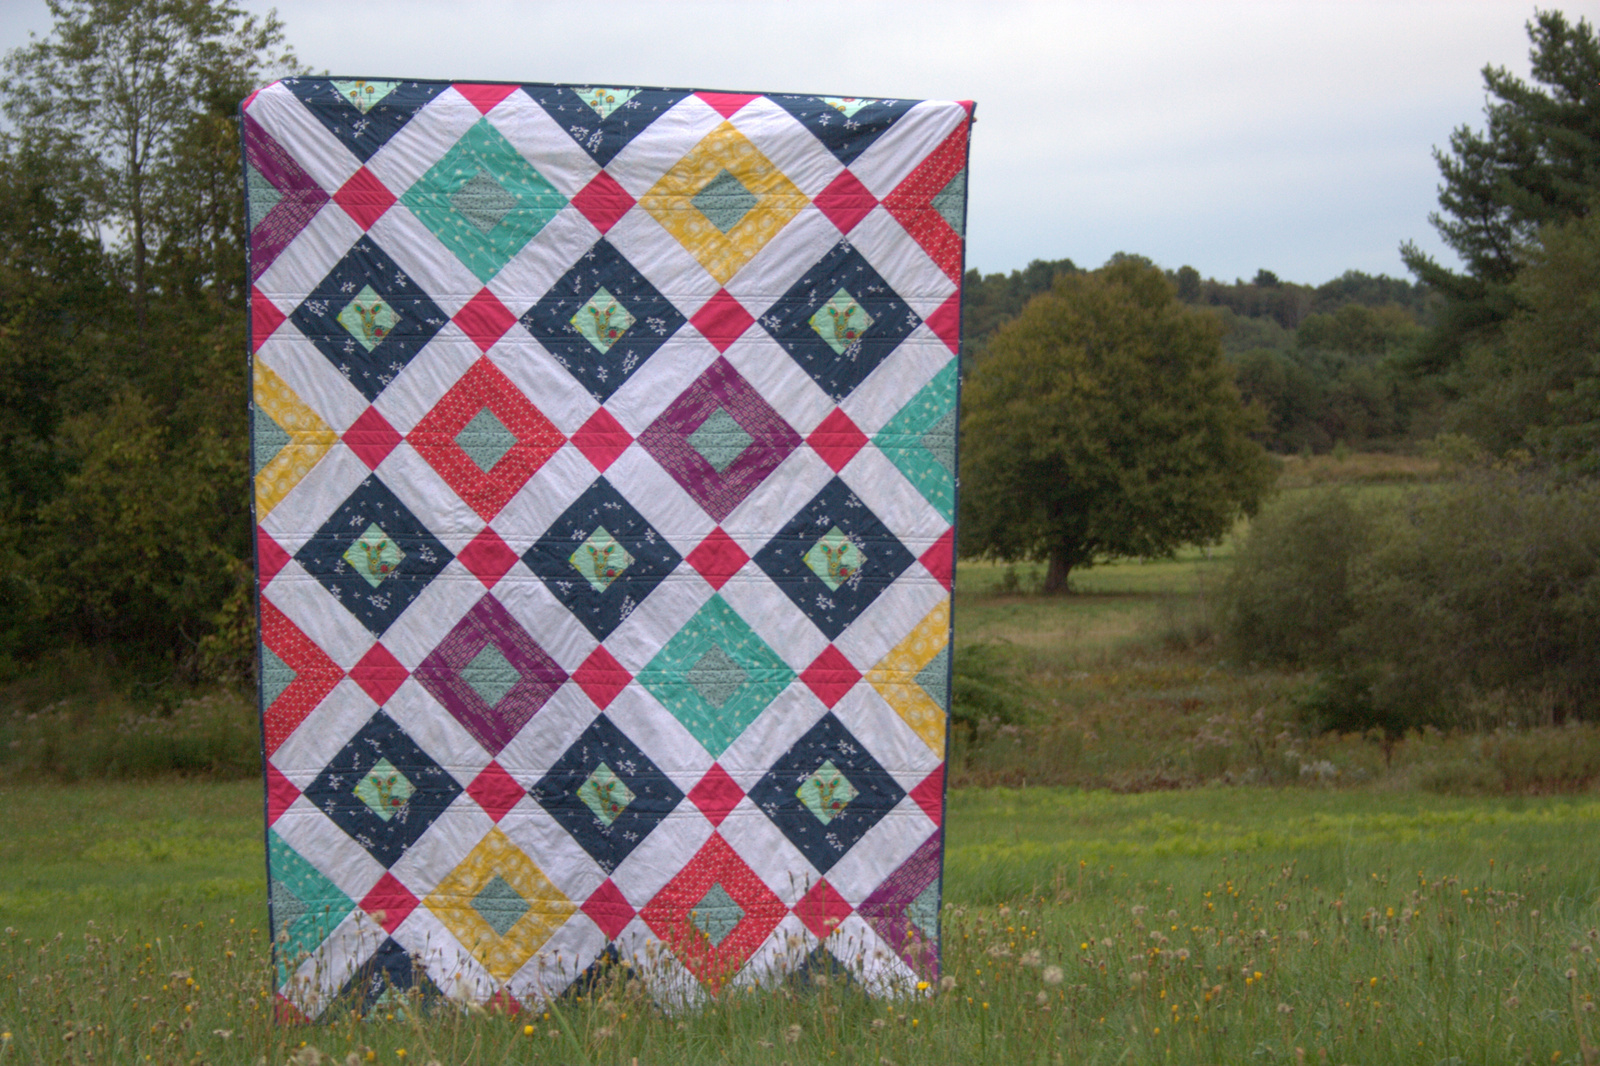
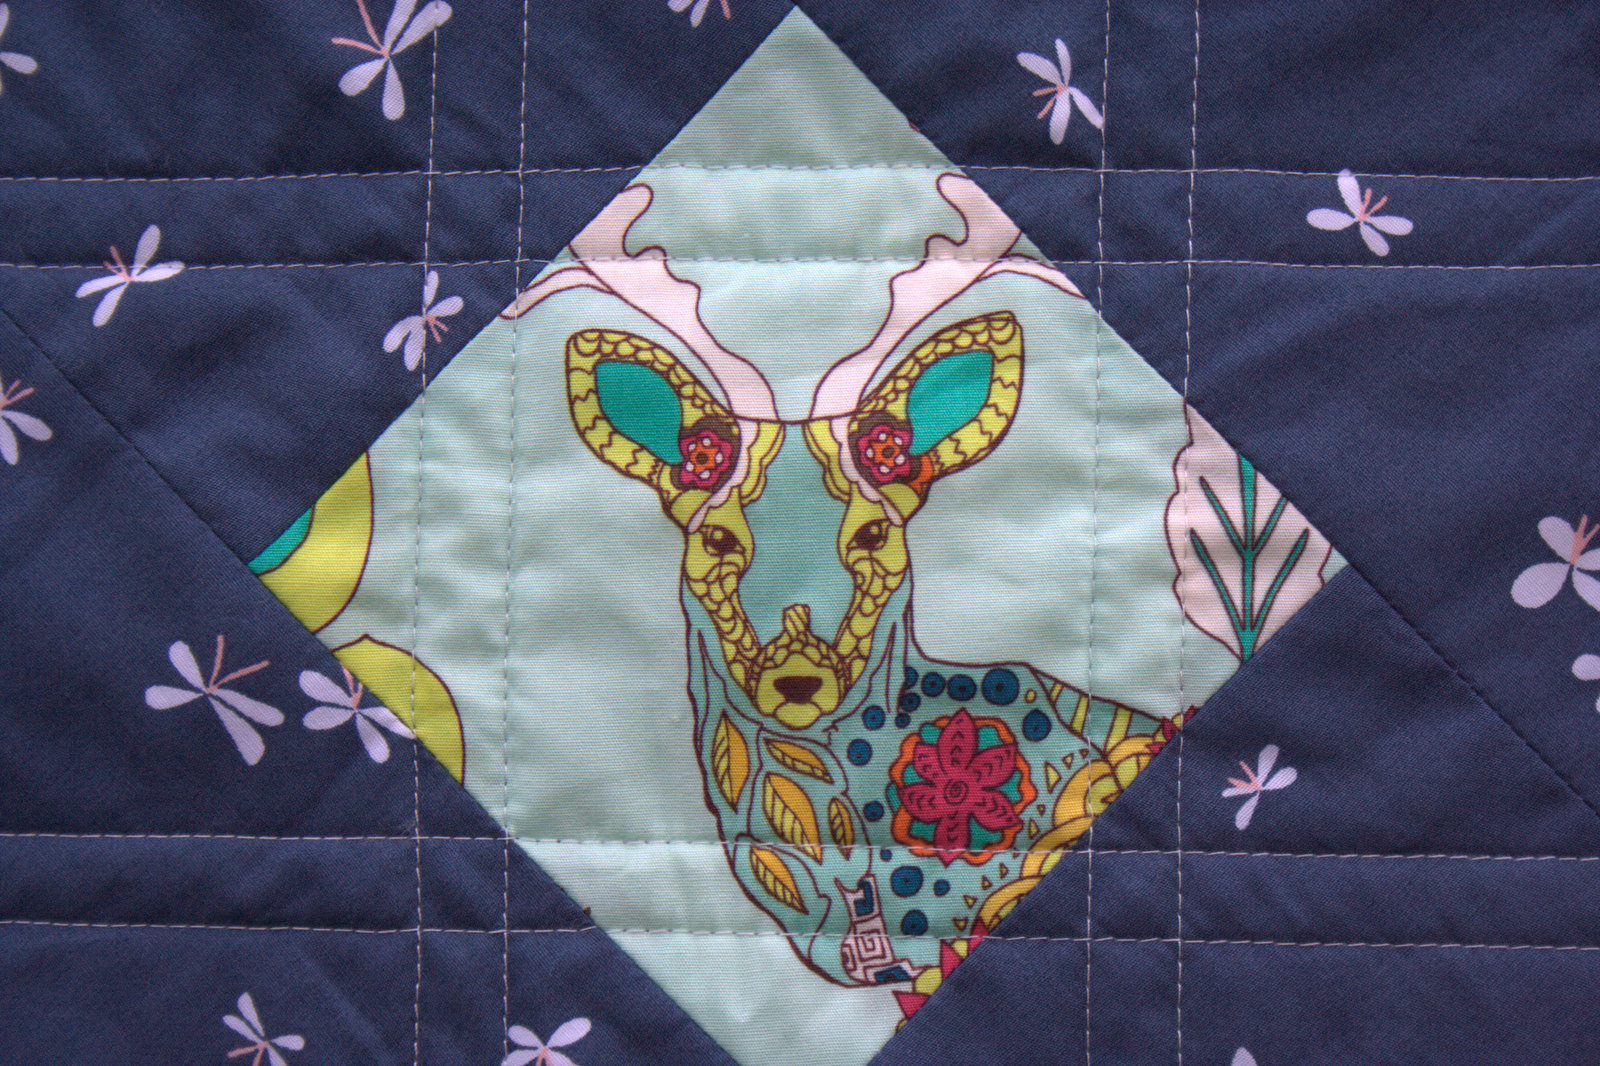
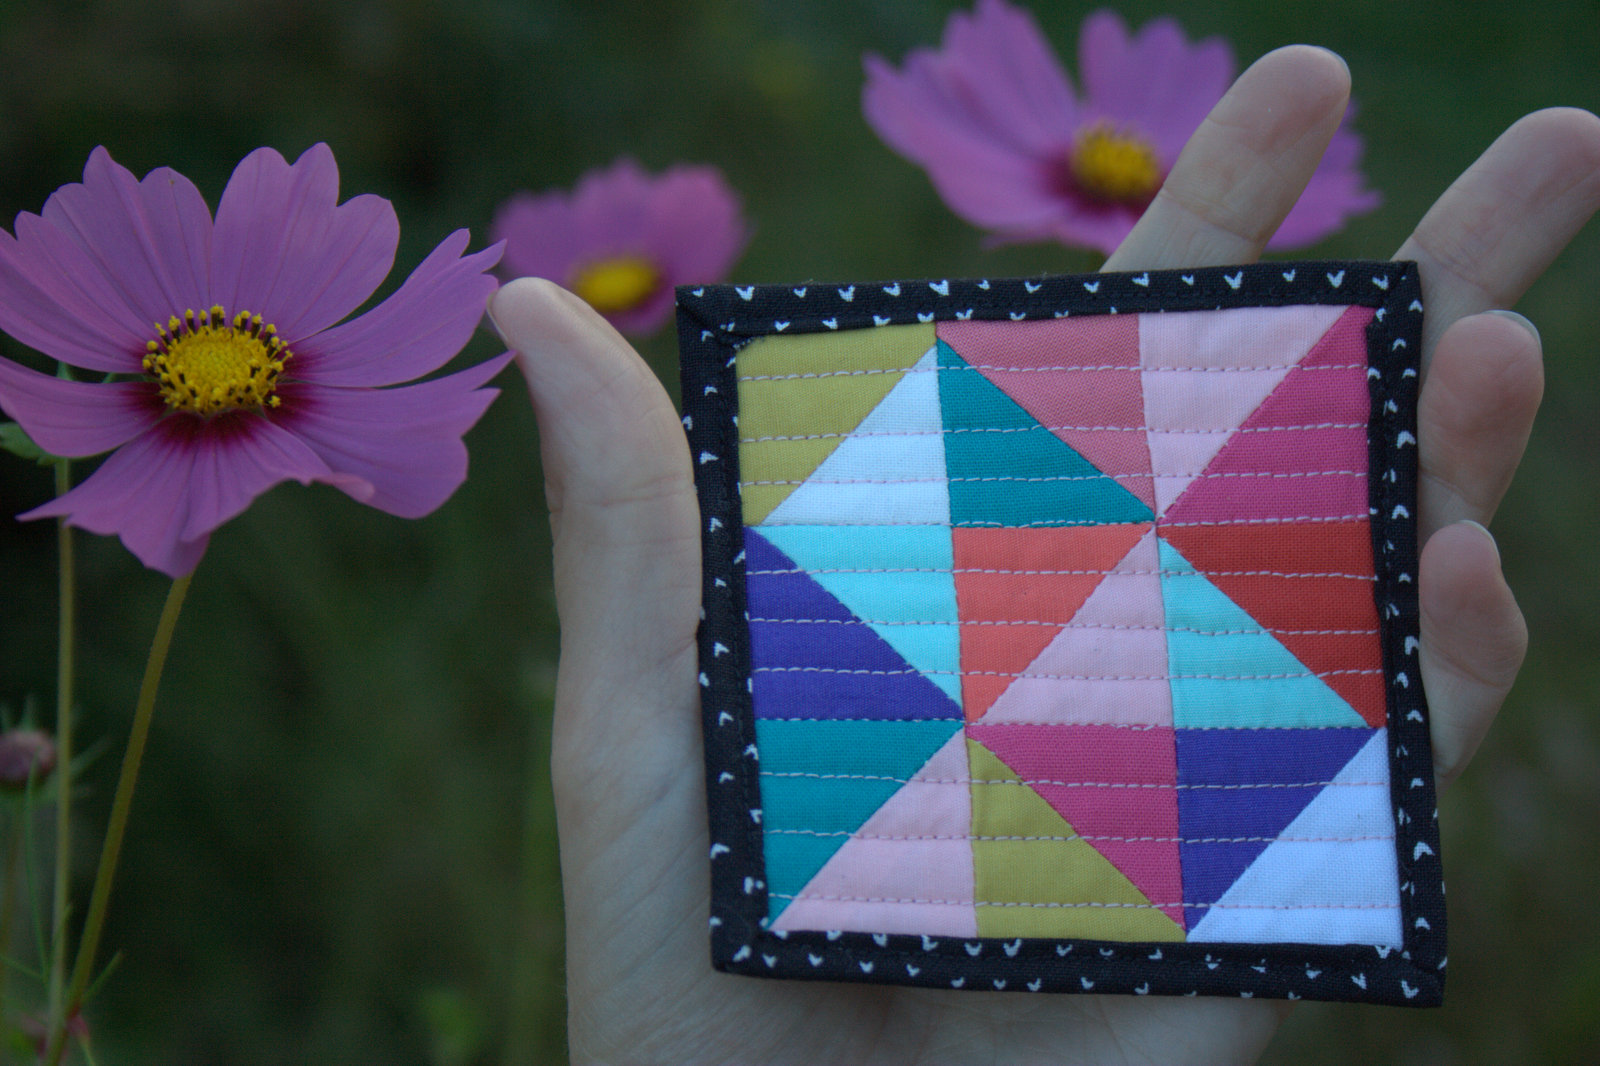
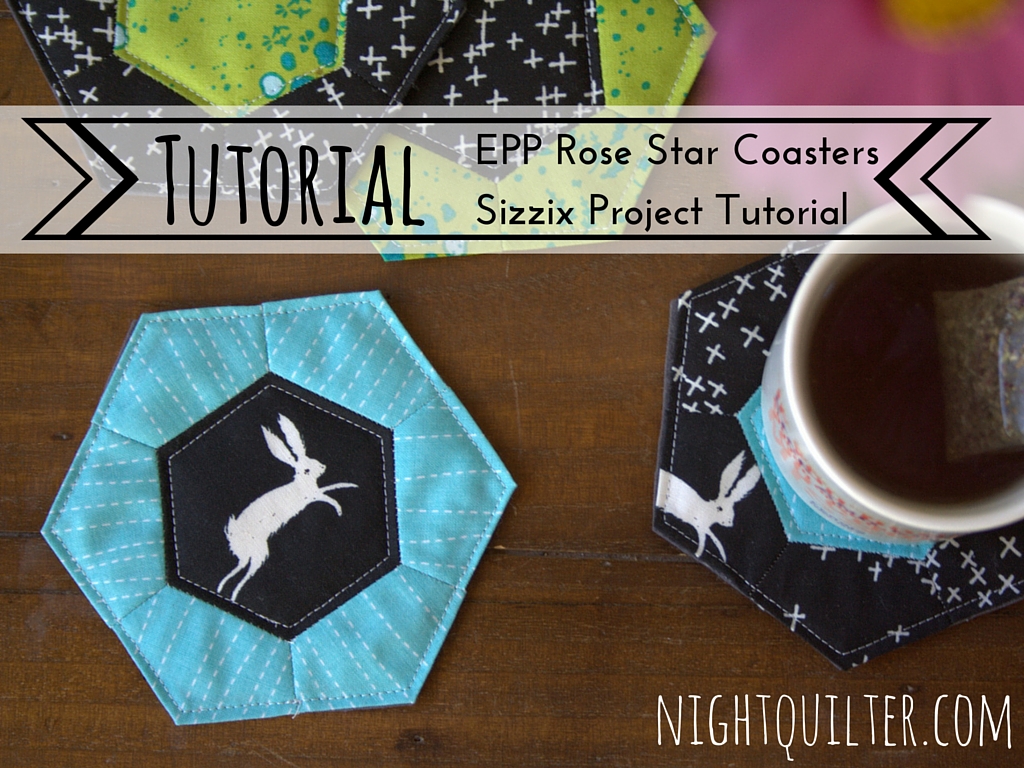
Today I’m sharing a tutorial for some quick and easy English Paper Pieced (EPP) coasters, made particularly quick and easy by use of a Sizzix fabi die cutting machine to cut all of the fabric and templates, glue basting the EPP pieces, and backing the coasters with felt (photos and instructions for all steps are included in this tutorial!). They are also a great way to showcase your hand-stitched EPP and meticulous (fussy) cutting if you so desire.

epp sizzix rose star hexi coasters
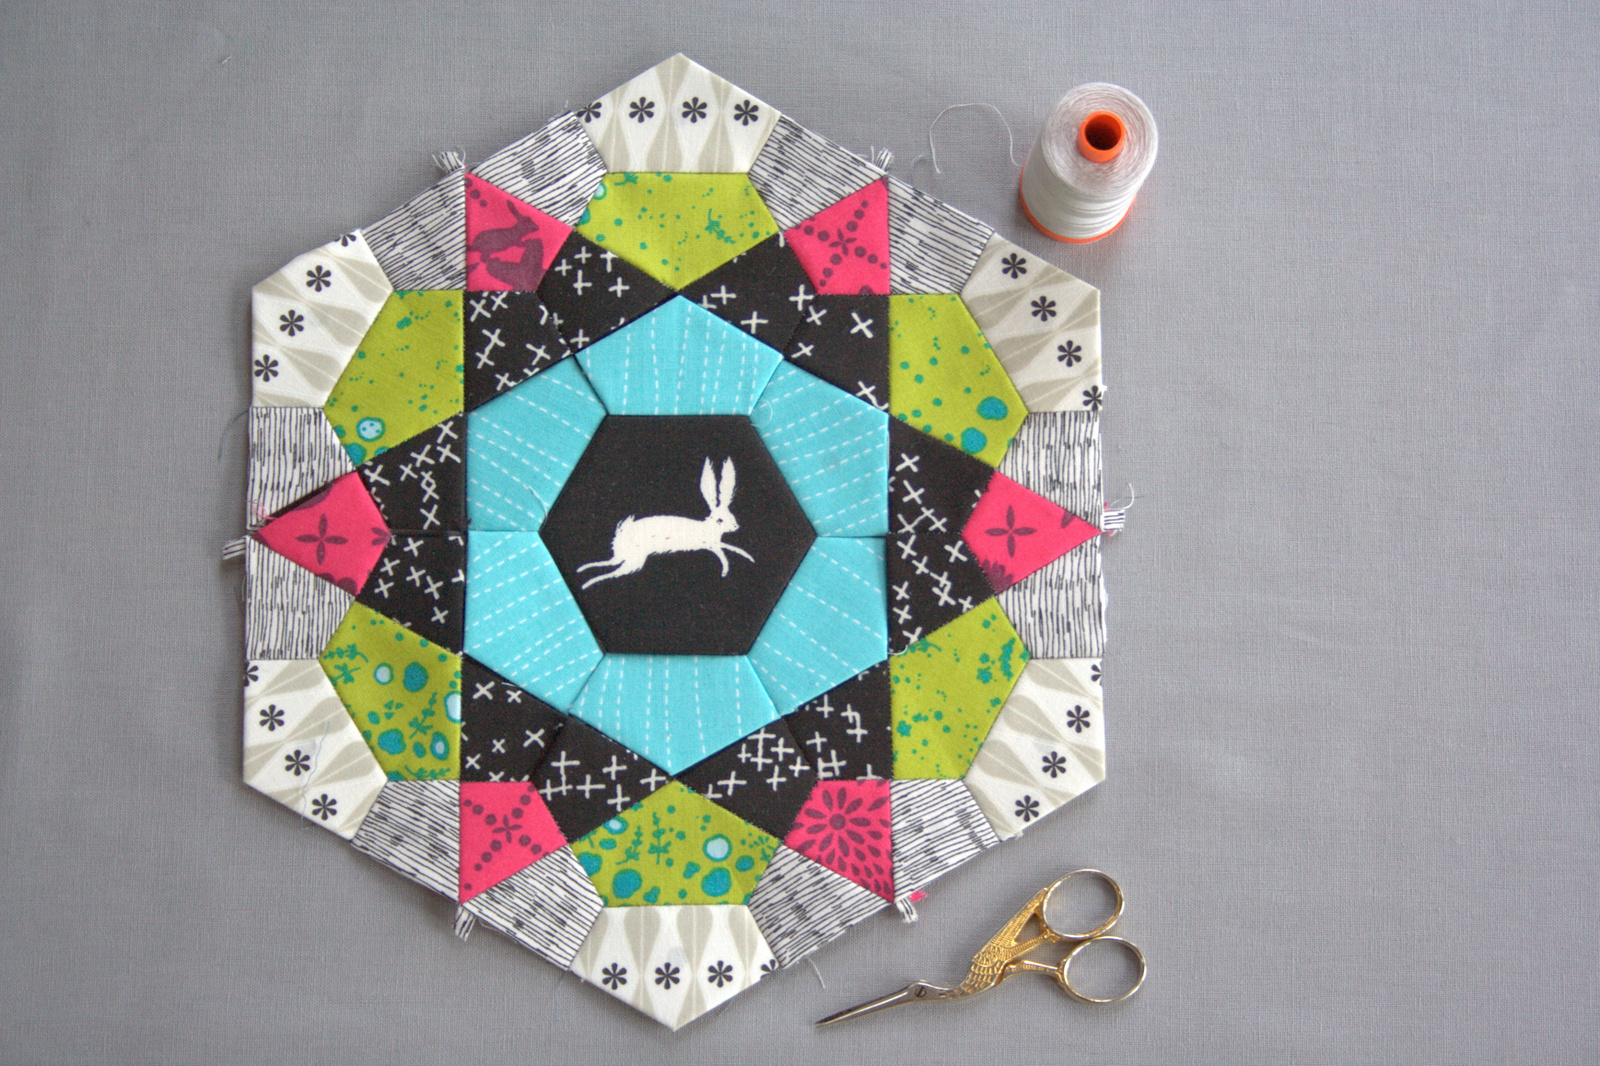
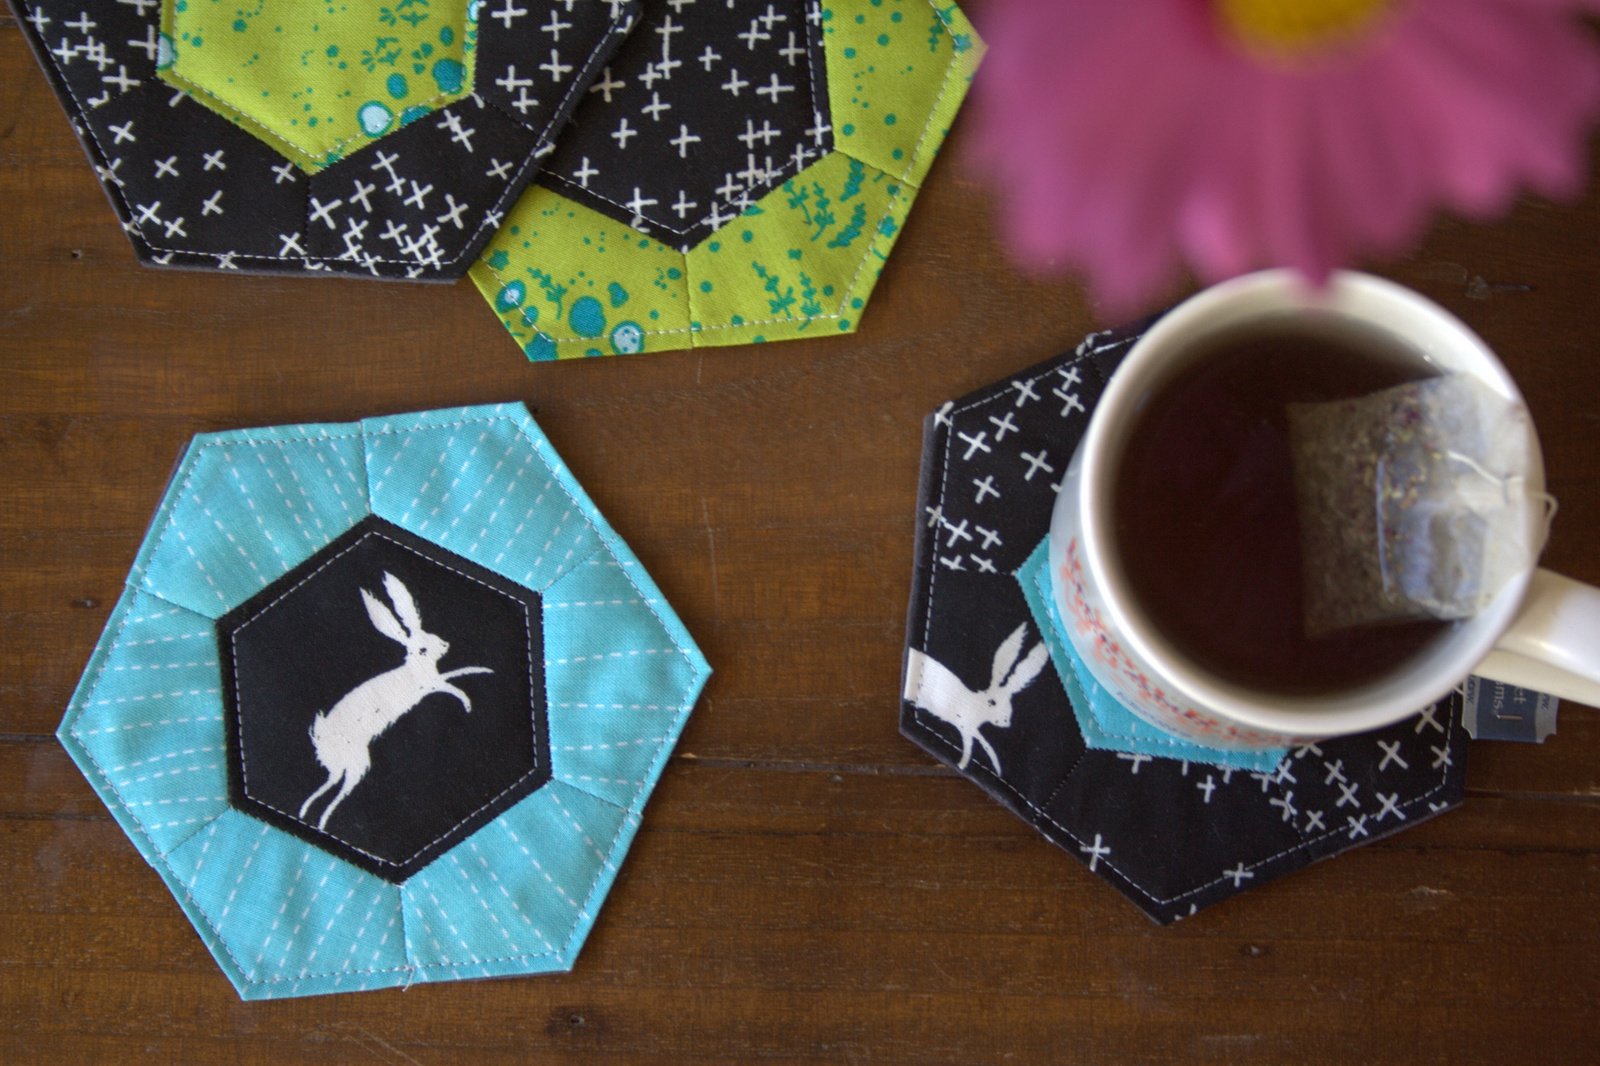
While I was planning out and putting together the mug rug I’m making for my sister using the Sizzix Rose Star die (you can see my tutorial for getting started on the mug rug on the Sizzix blog HERE), I realized that the center of the Rose Star would make a perfect hexi coaster. Of course that idea stuck and I decided to play around with fabric arrangements and make a set of coordinating coasters to go along with my sister’s mug rug. Thus, this tutorial was born.

I’ve included affiliate links throughout this post so that if you decide that you want to give the Sizzix and Rose Star die a go and click through my link, I will receive a small compensation at no cost to you. Share the love, right?

Without further ado, here we go!

EPP Rose Star Coasters Tutorial

For this tutorial, I used the Sizzix fabi die cutting machine and the BigZ L Rose Star die, but many of the techniques can be applied to any EPP project.

sizzix fabi die cutting machine
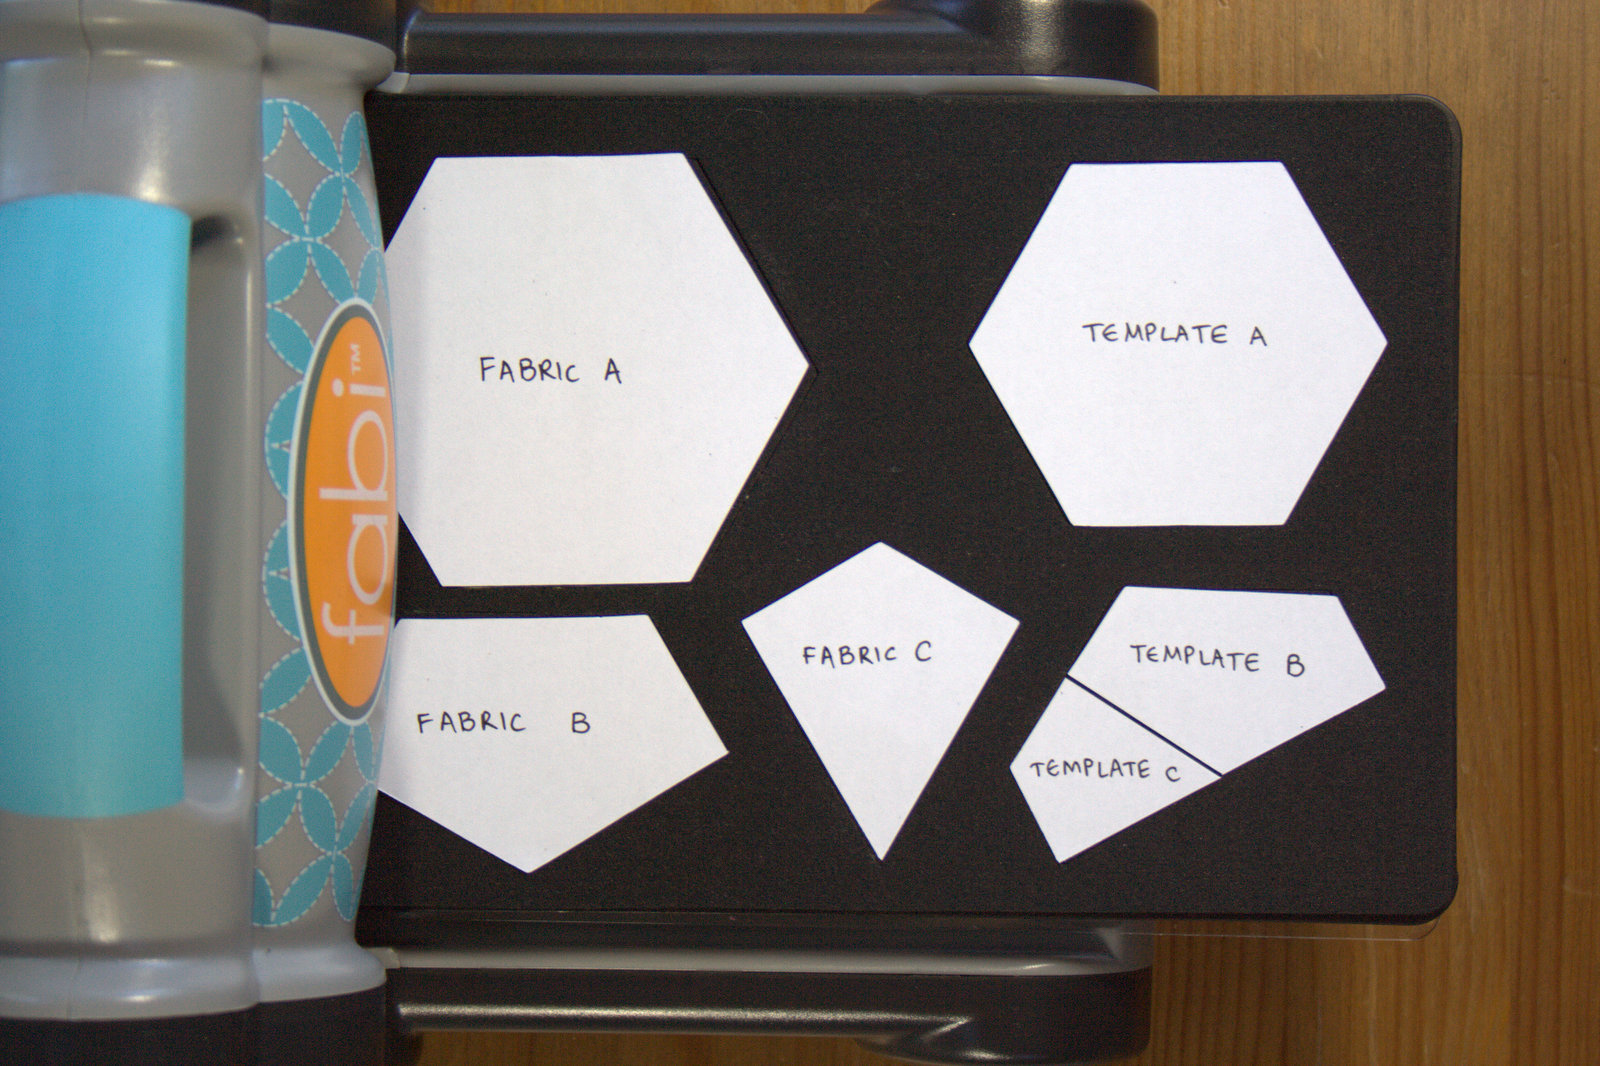
First, gather your fabric and get your die cutting machine ready. As I shared in my Sizzix mug rug tutorial, I like to pass a piece of regular printer paper through the machine, and label the pieces to help with planning. The Rose Star die is designed for EPP, so the single die can cut all of the templates and fabric needed (pretty awesome, huh?).

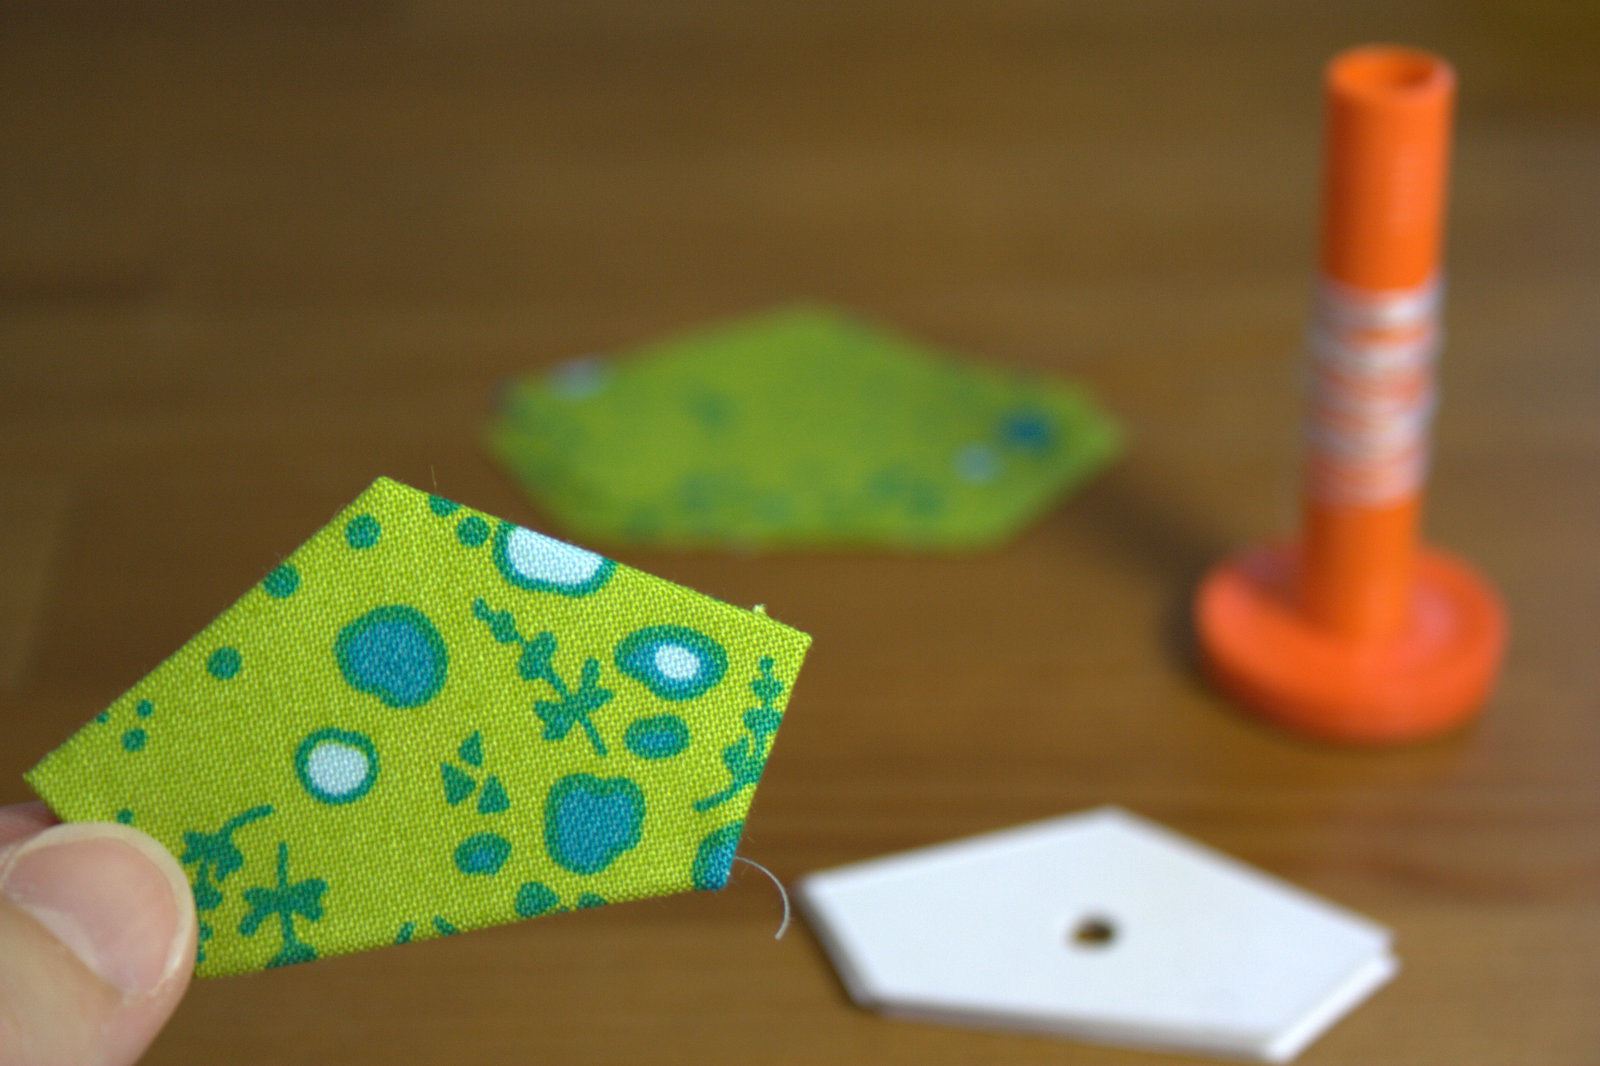
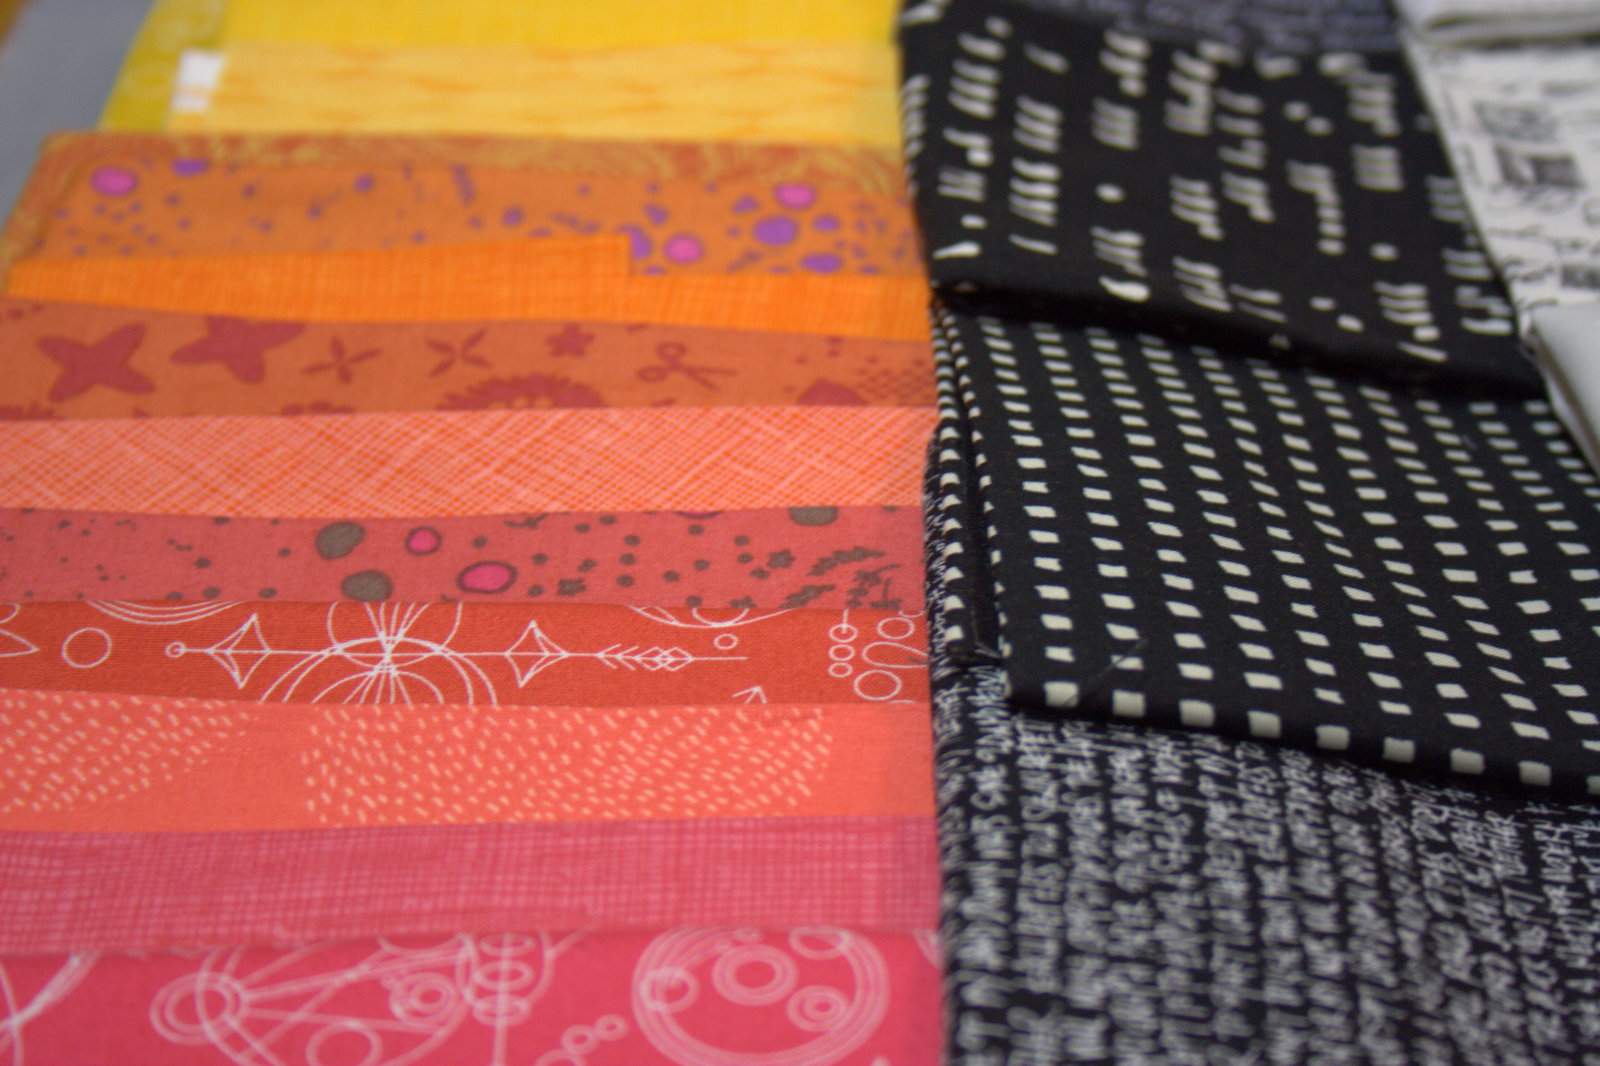
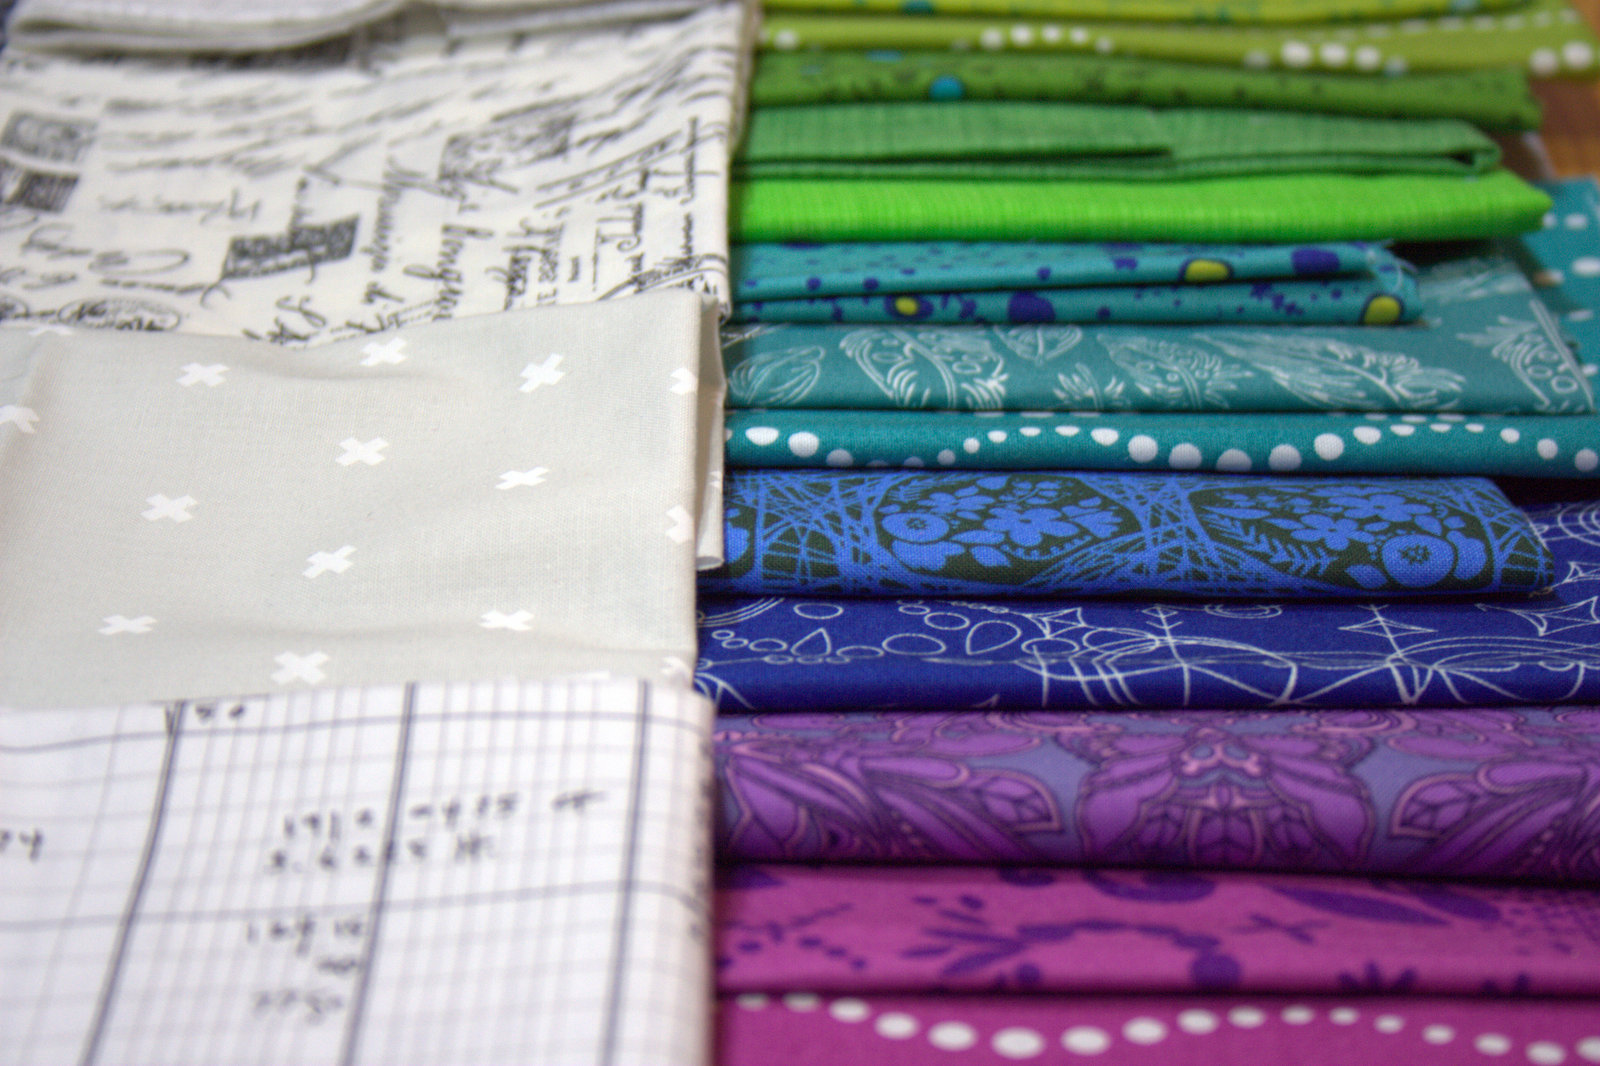
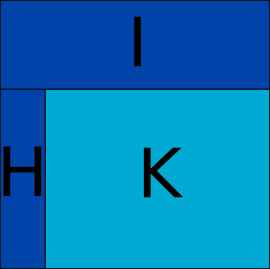
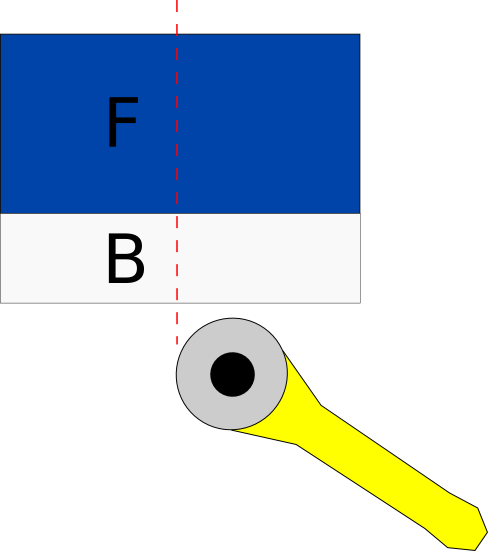
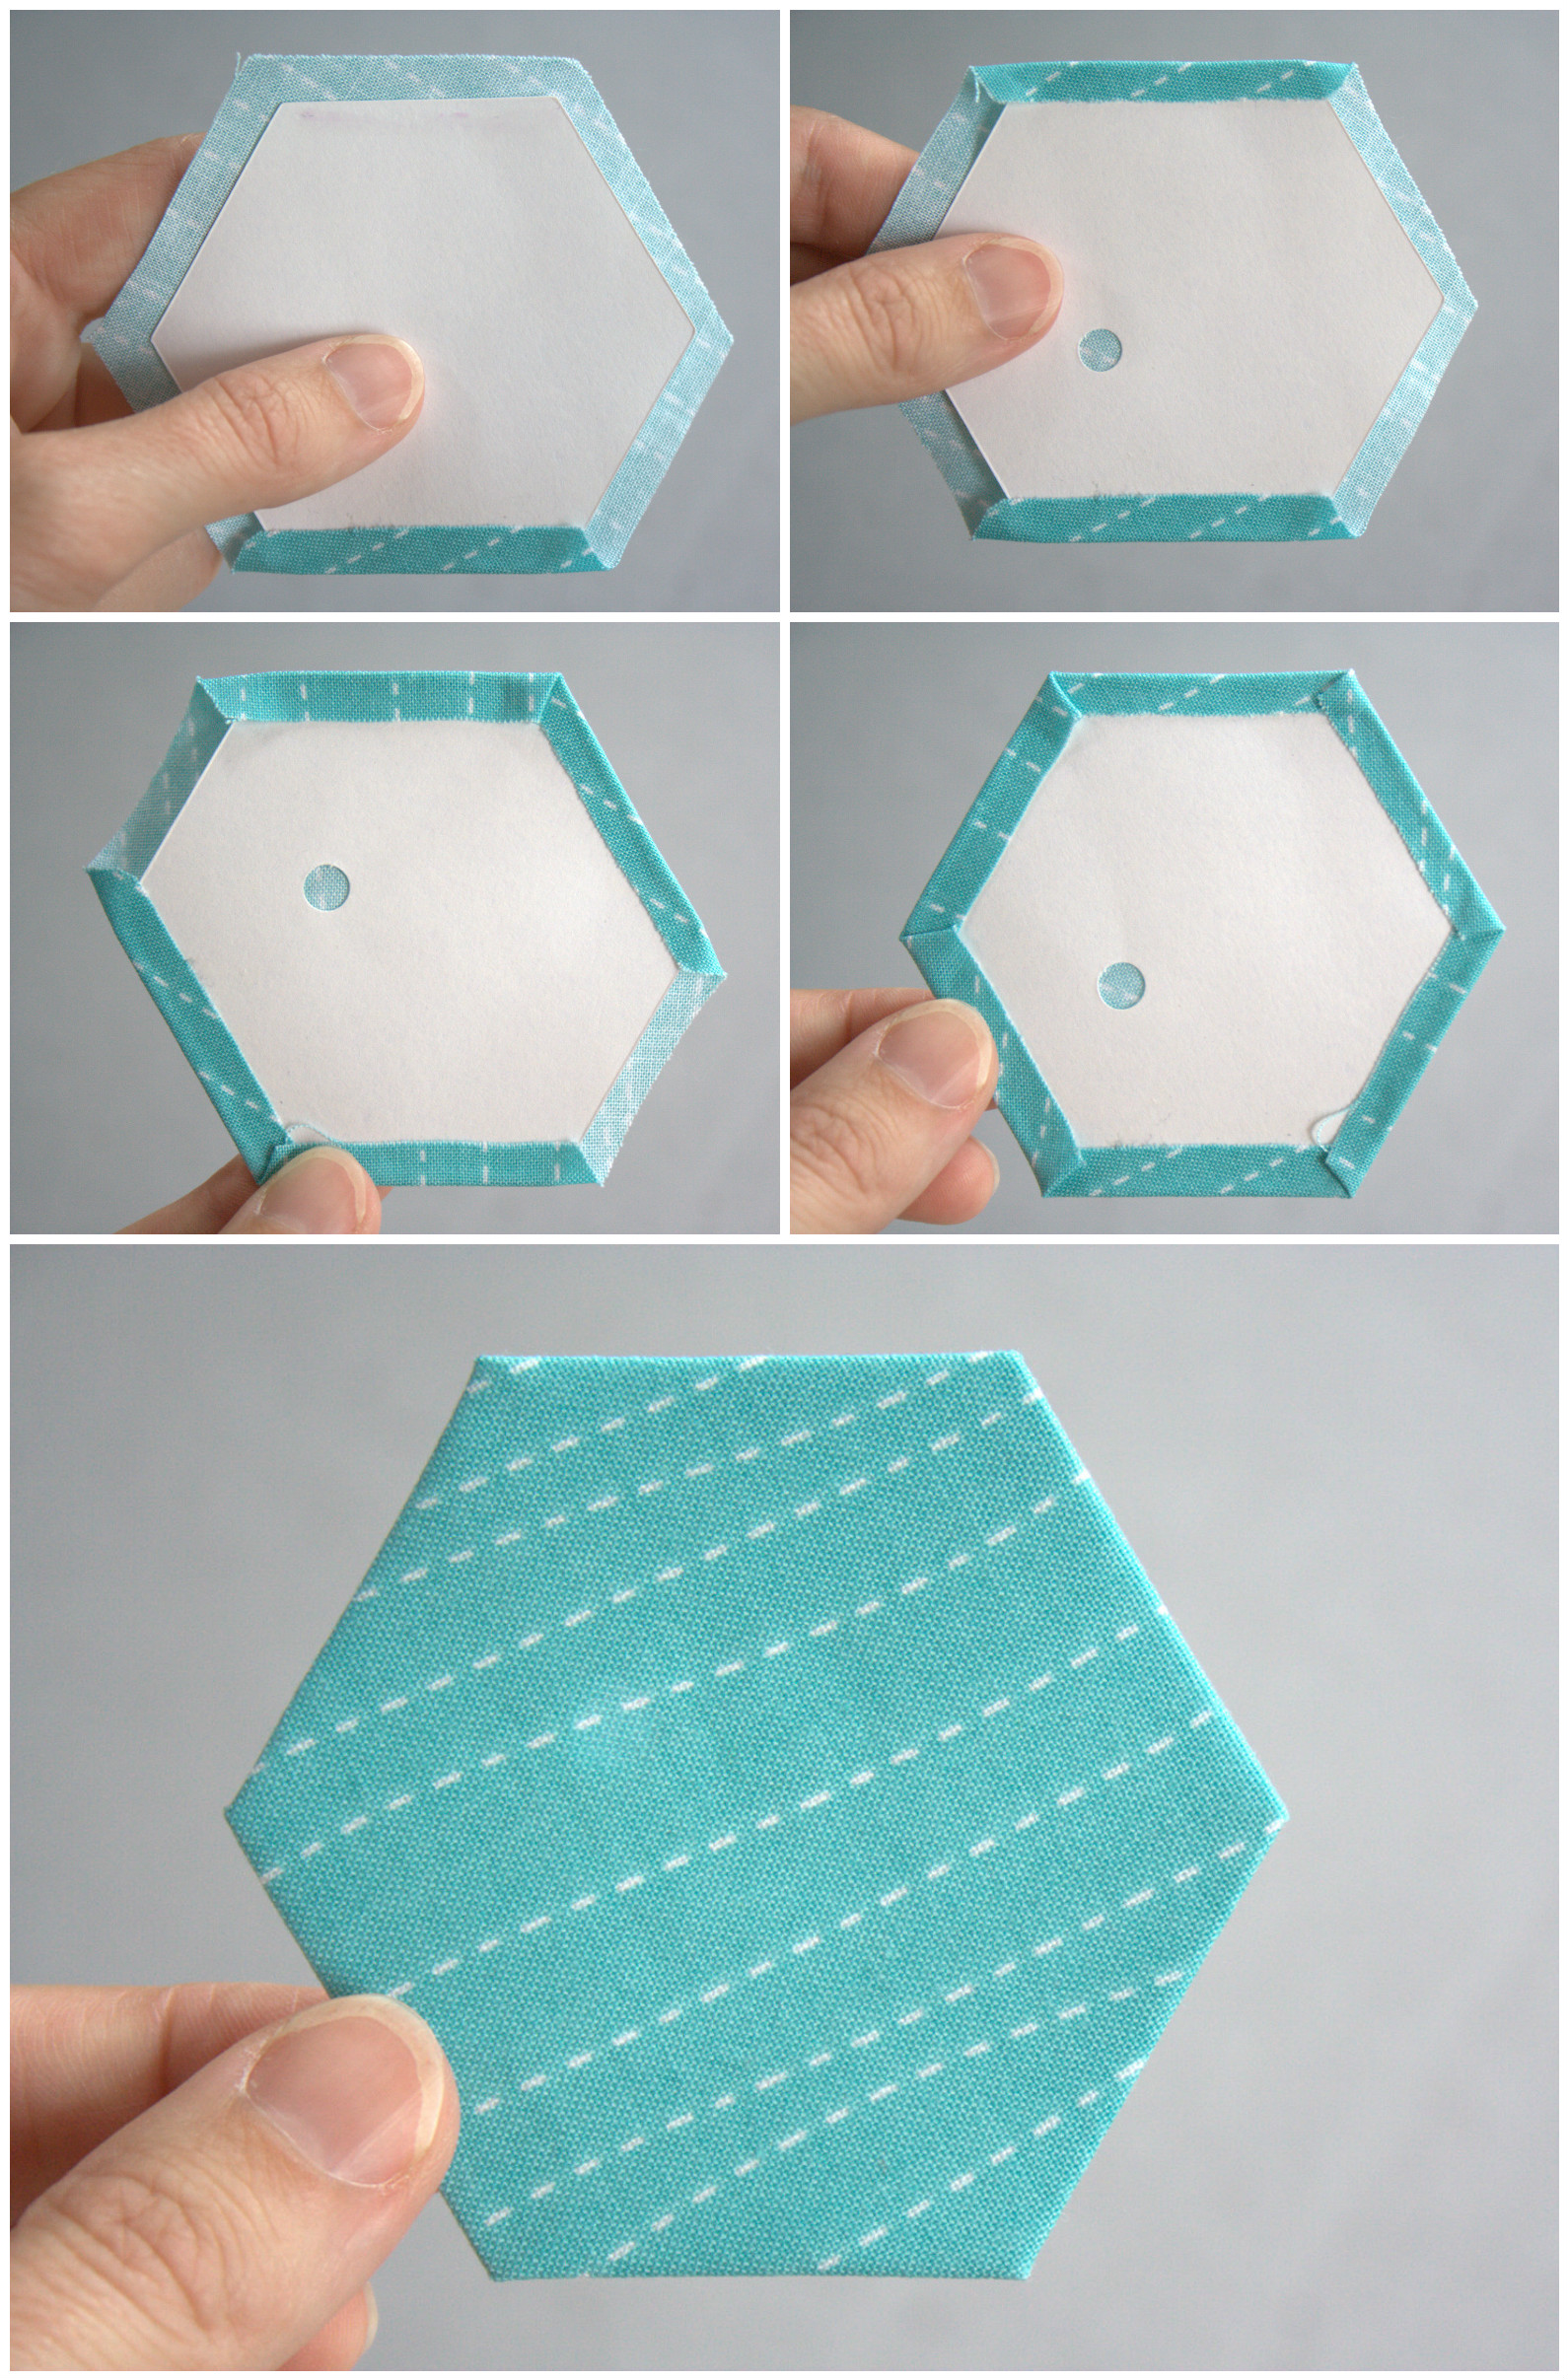
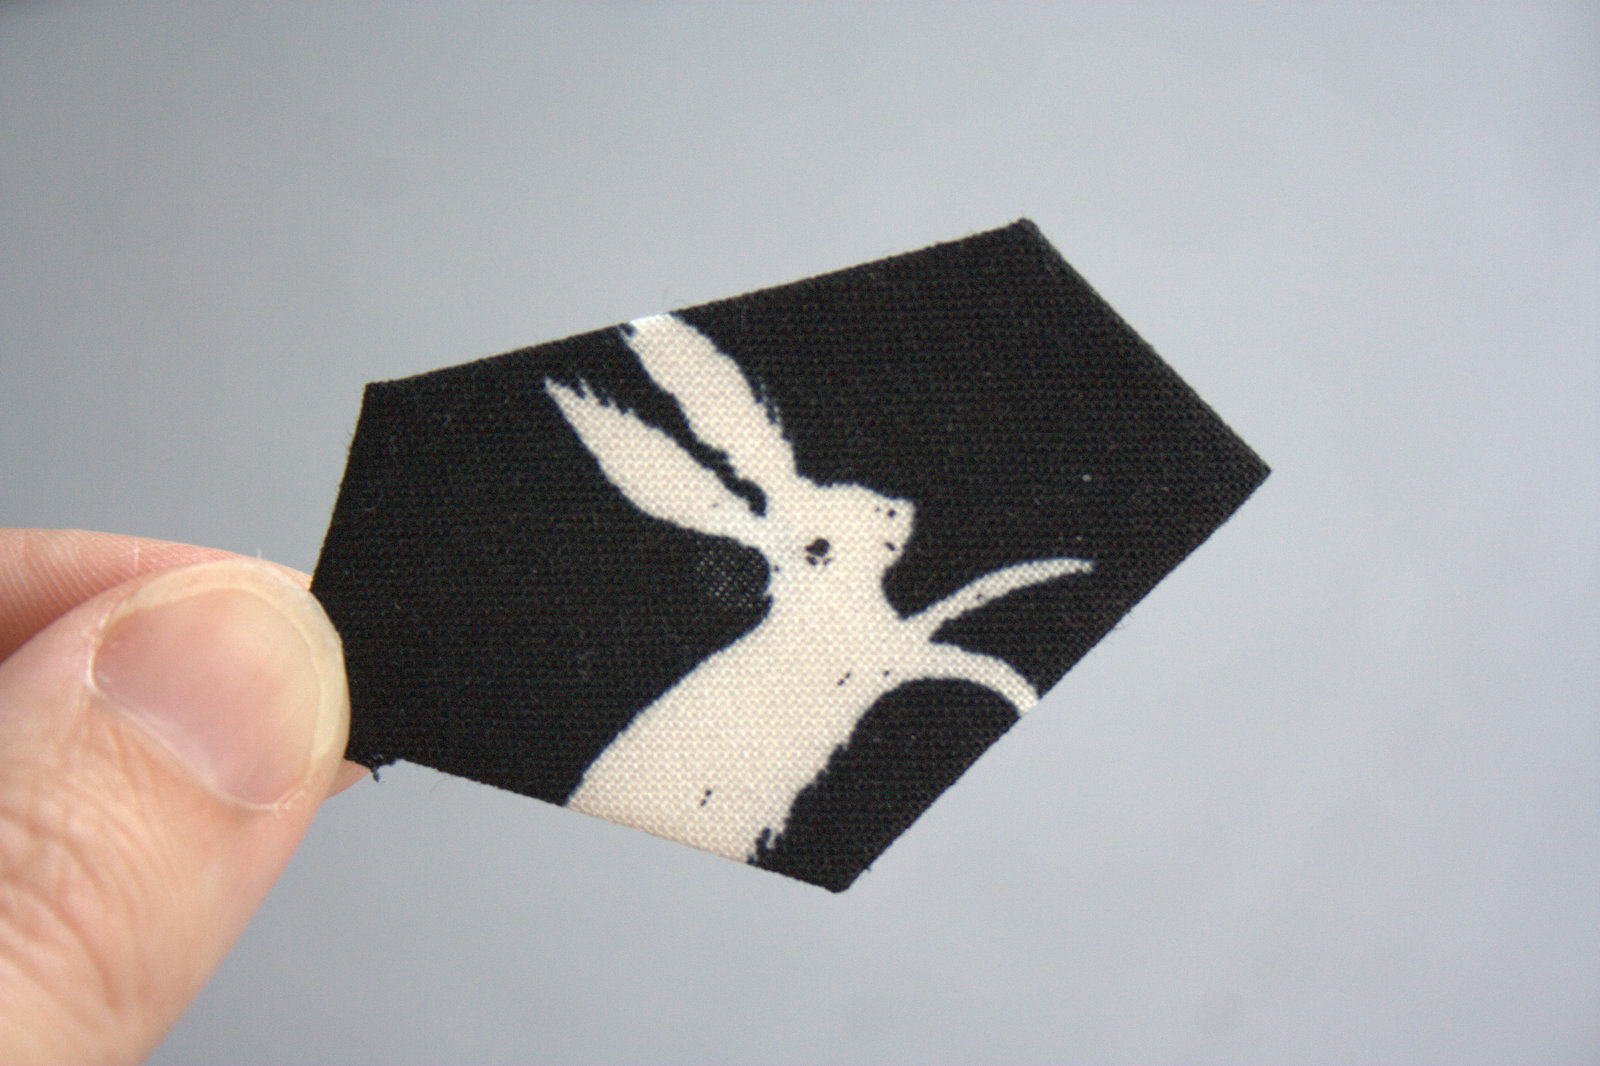
For this project, we will be using the A and B pieces. Begin by cutting the templates needed: 1 A and 6 B for each coaster. Since I made four (4) coasters, I cut 4 As and 24 Bs. I use cardstock for my templates, and hole punch the centers to facilitate easy removal after the stitching is complete. Use what works for you.

cutting
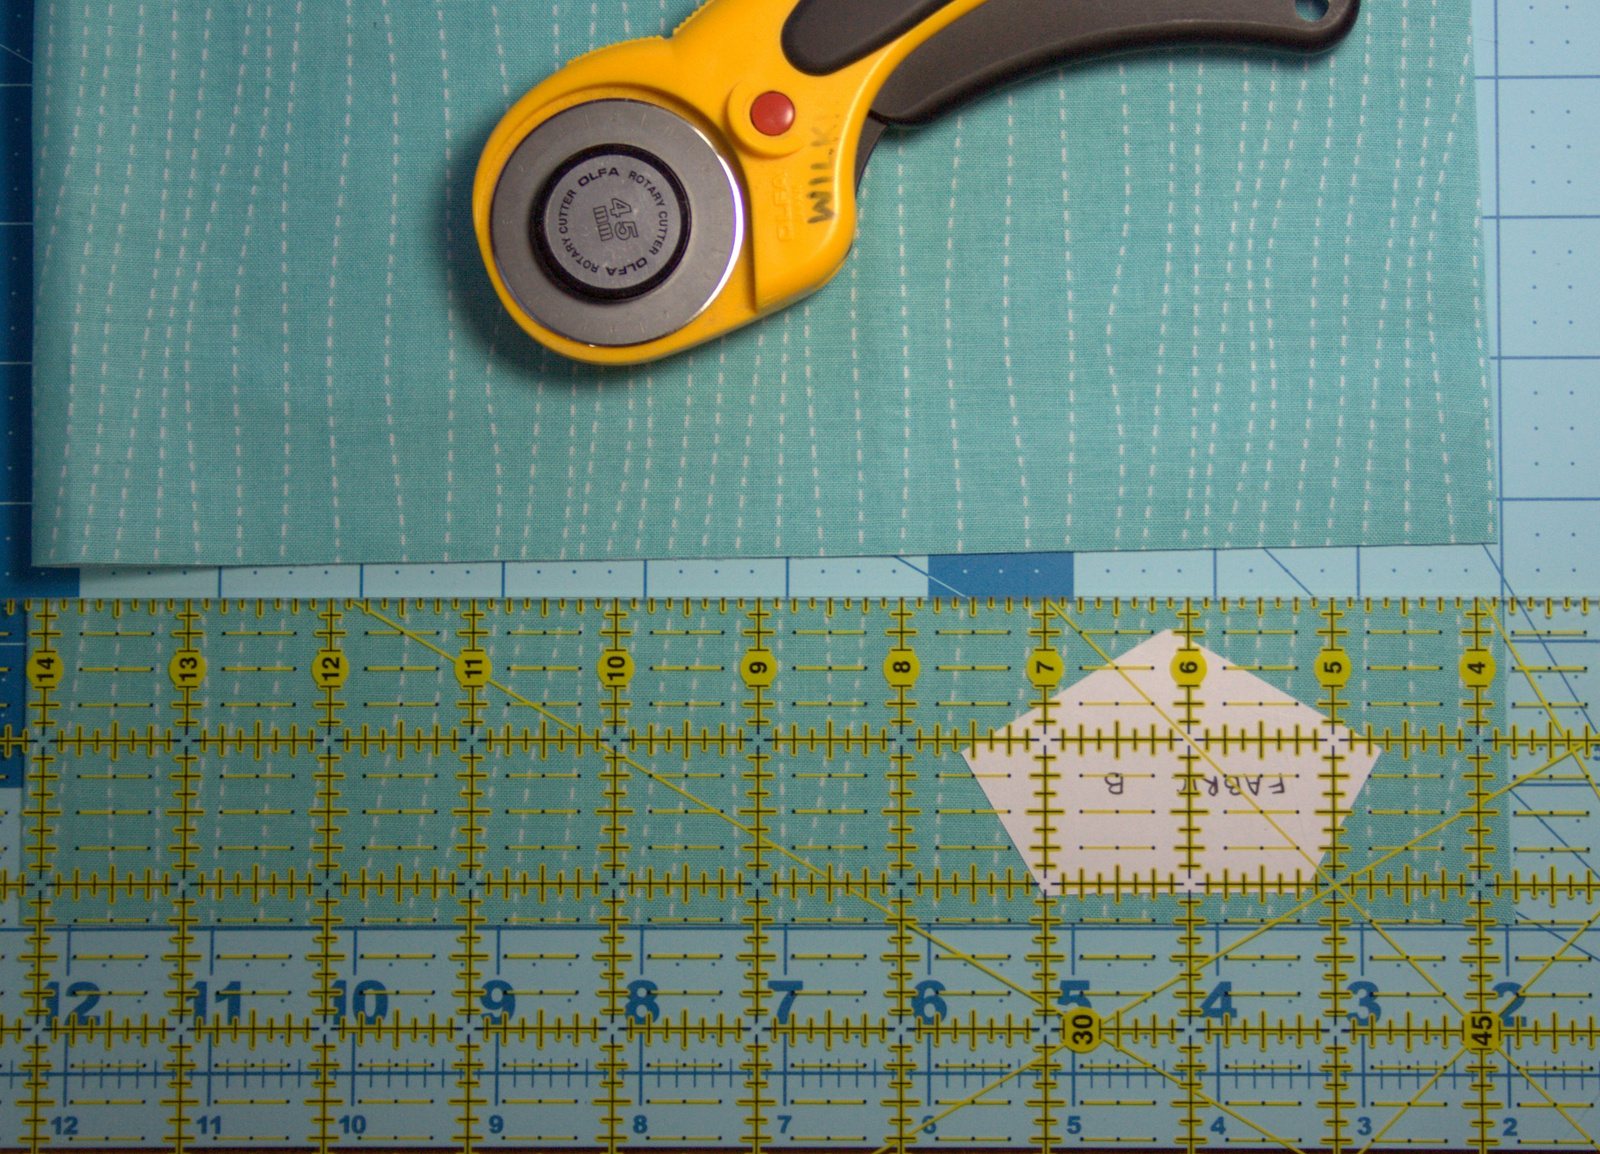
The paper practice pieces can help you save time in cutting, too. For fabric shapes needed in duplicate, use the fabric piece to determine how wide of a fabric strip you will need, then use your rotary cutter and mat to cut a strip. As you can see, I gave myself some wiggle room, but if you’re a die cutting pro, you can really save fabric by lining up the shape flush with the edges of the cut strip.

fabi die cutting machine
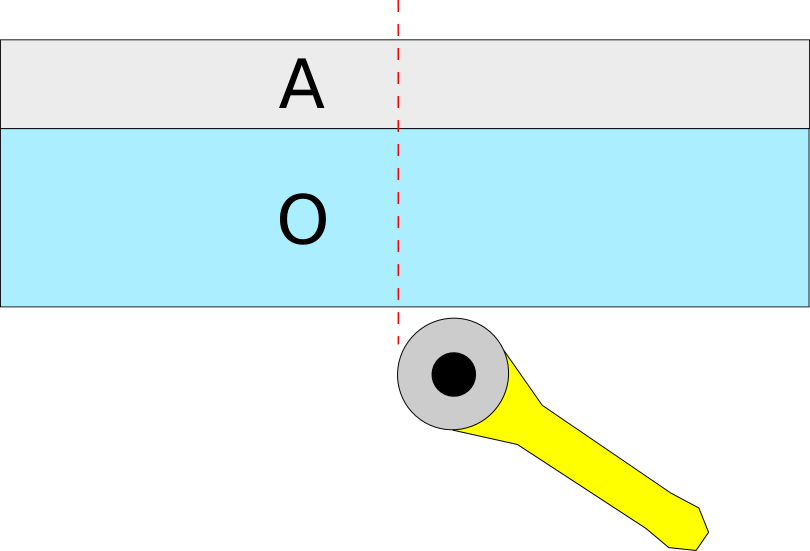
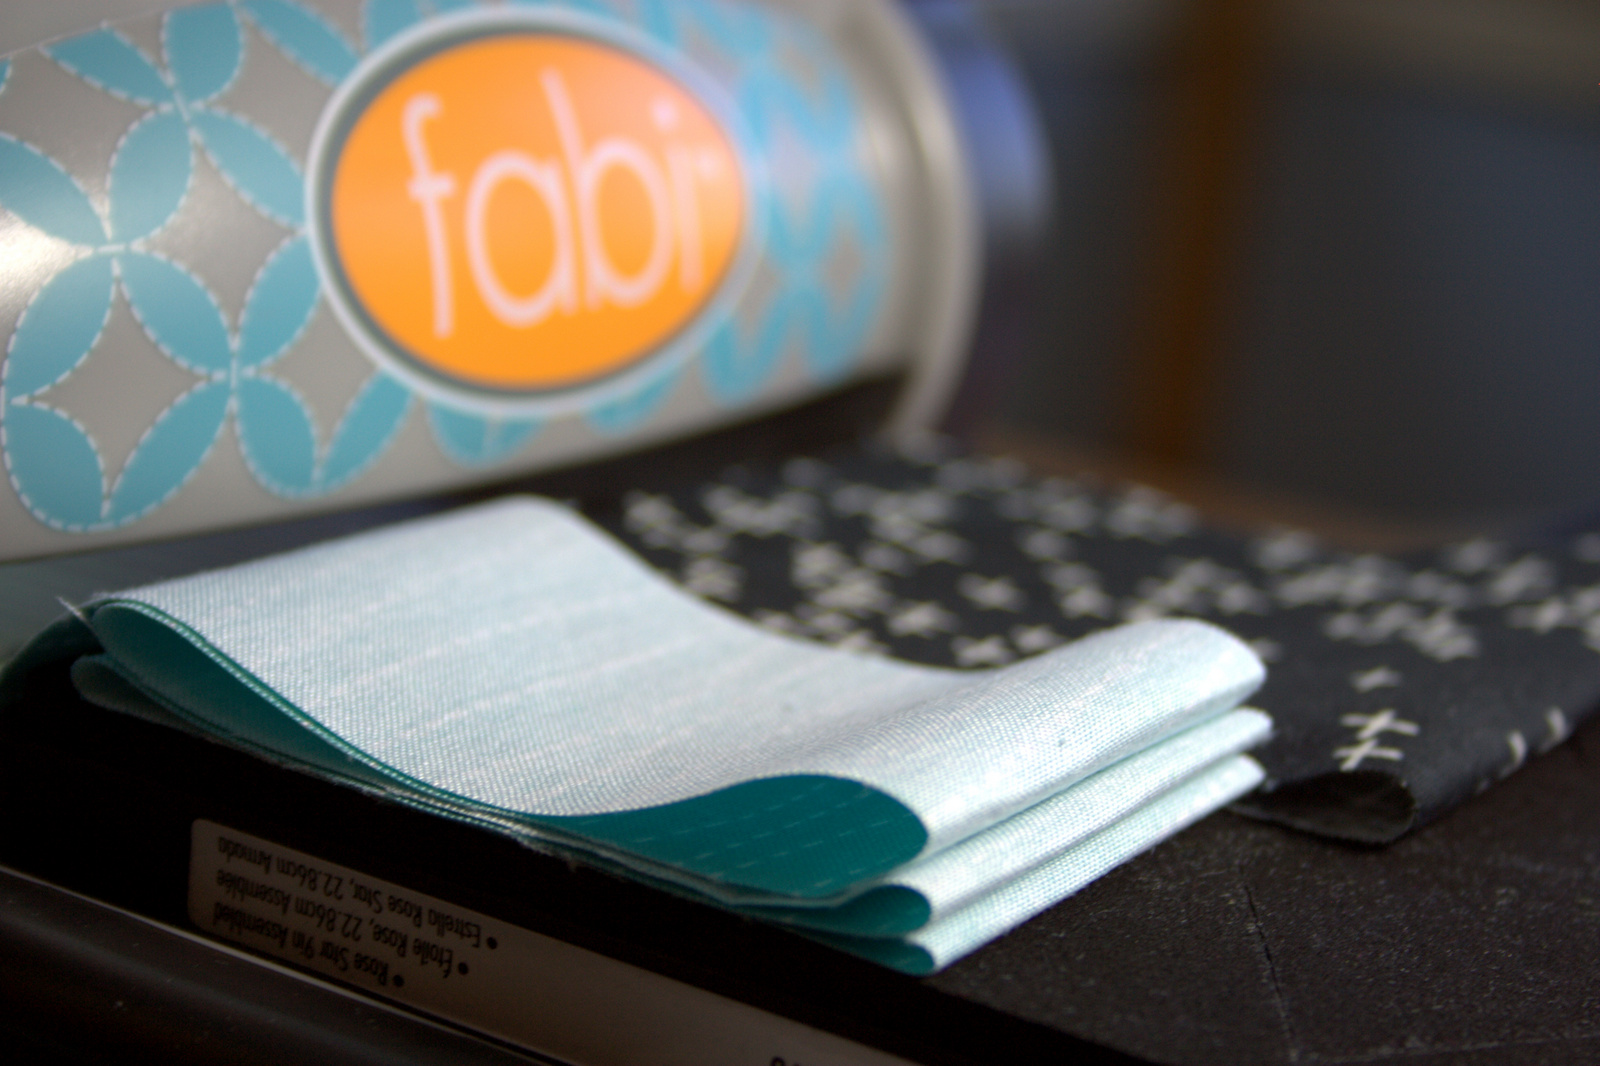
Once you have your fabric strip, fold it accordion style and position it in your Sizzix sandwich: bottom cutting pad, die with the blades facing up, fabric over the fabric blades, and top cutting pad (not shown in this photo). Pass it right through the die cutting machine (or have your three year old crank it through for you), and you’ll have all of the pieces needed for a coaster. You can cut all the fabric needed for a coaster in one pass.

Now it’s time to baste our pieces.

glue basting epp with sewline fabric pen
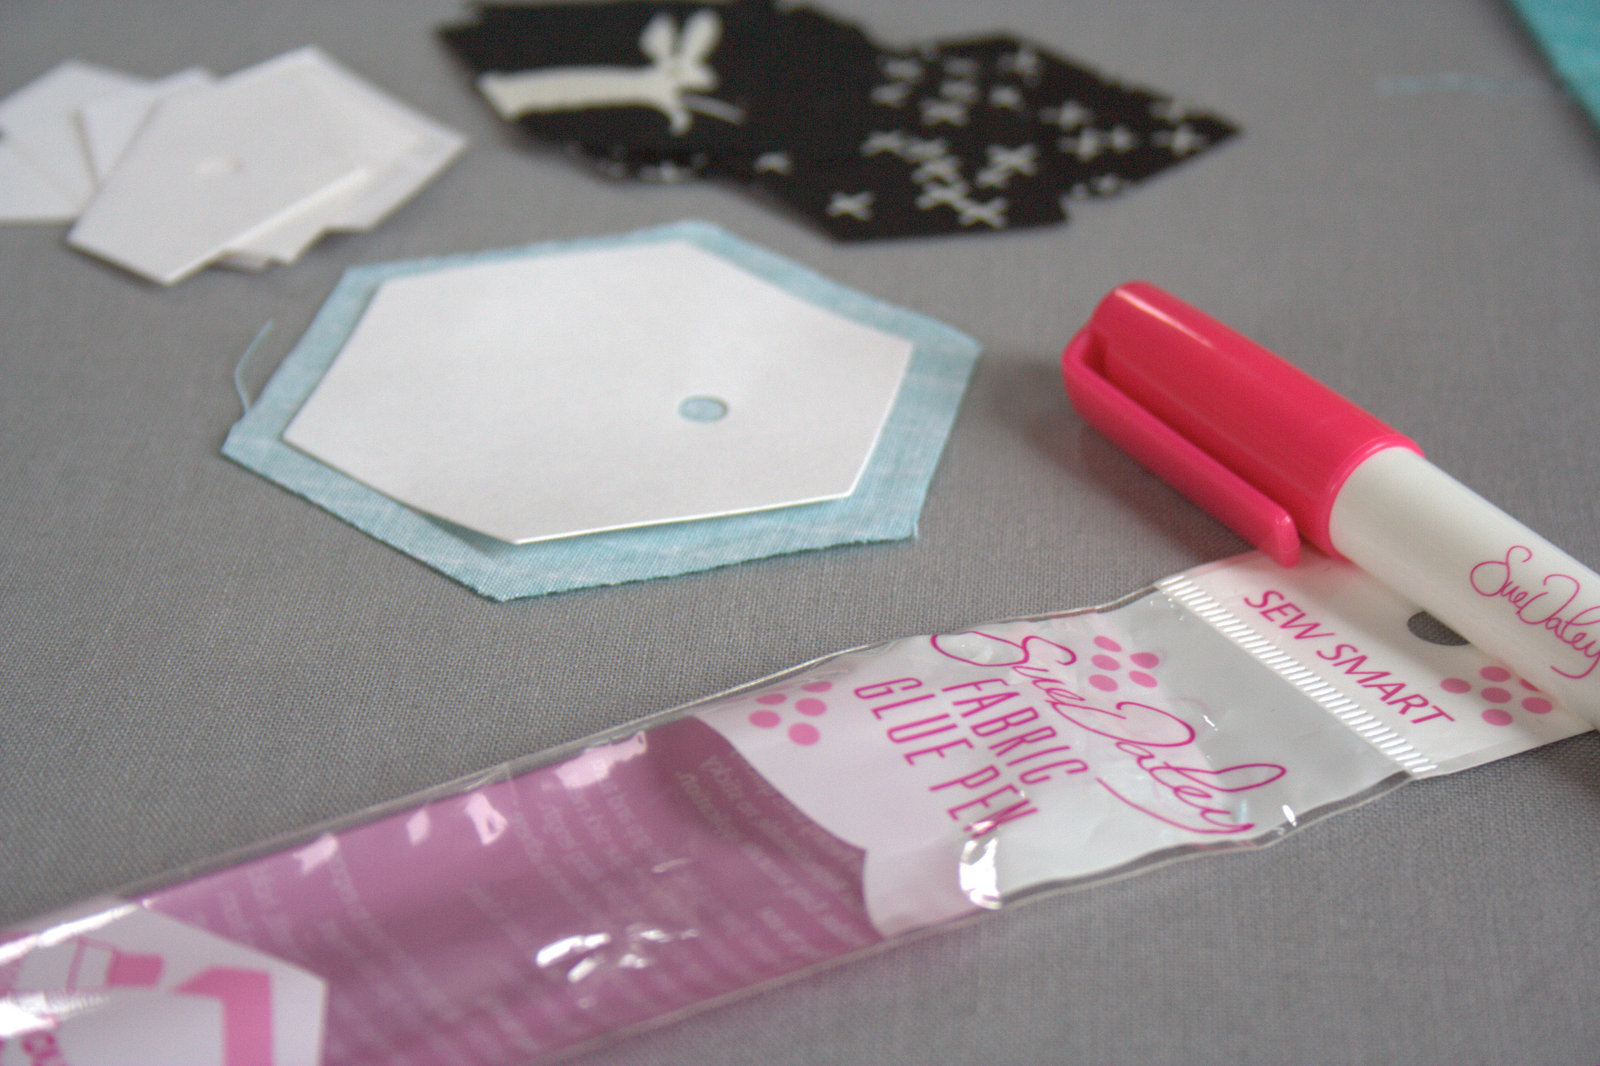
For this project, I decided to finally try glue basting instead of thread basting. I got a Sue Daley fabric glue pen, but any washable glue stick or pen will also work (Elmer’s, Sewline, etc.). I’ve heard so much about how glue basting saves a ton of time with EPP, so I figured if I paired it with the time saving cutting from the Sizzix fabi, I’d be golden with a fun, fast, fabulous gift idea. (Pst… I was right!)

sue daley glue basting epp
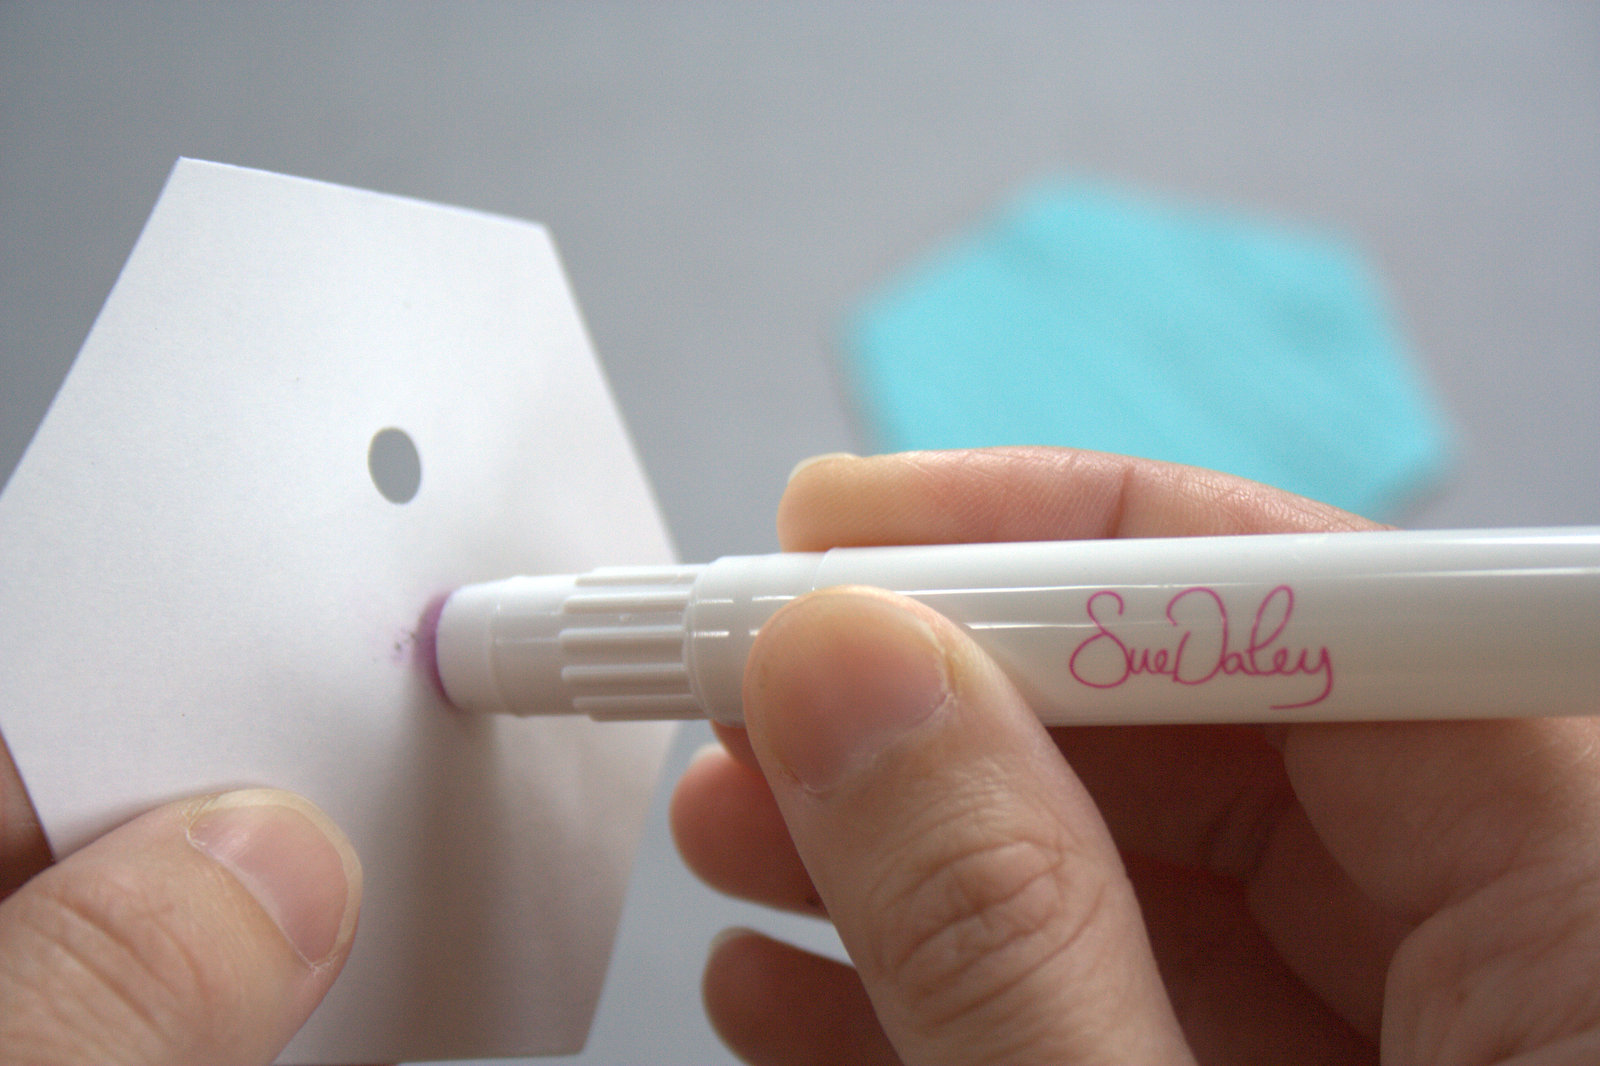
Glue basting is similar to thread basting in that you are securing the fabric around the cardstock template. With glue basting, first put a dab of glue on the center of your template and stick it to the center of the wrong side of your fabric.

sew daley glue basting eppNow is the time to double check any fussy cutting you did to make sure it all lines up how you want it.

sew daley glue basting epp
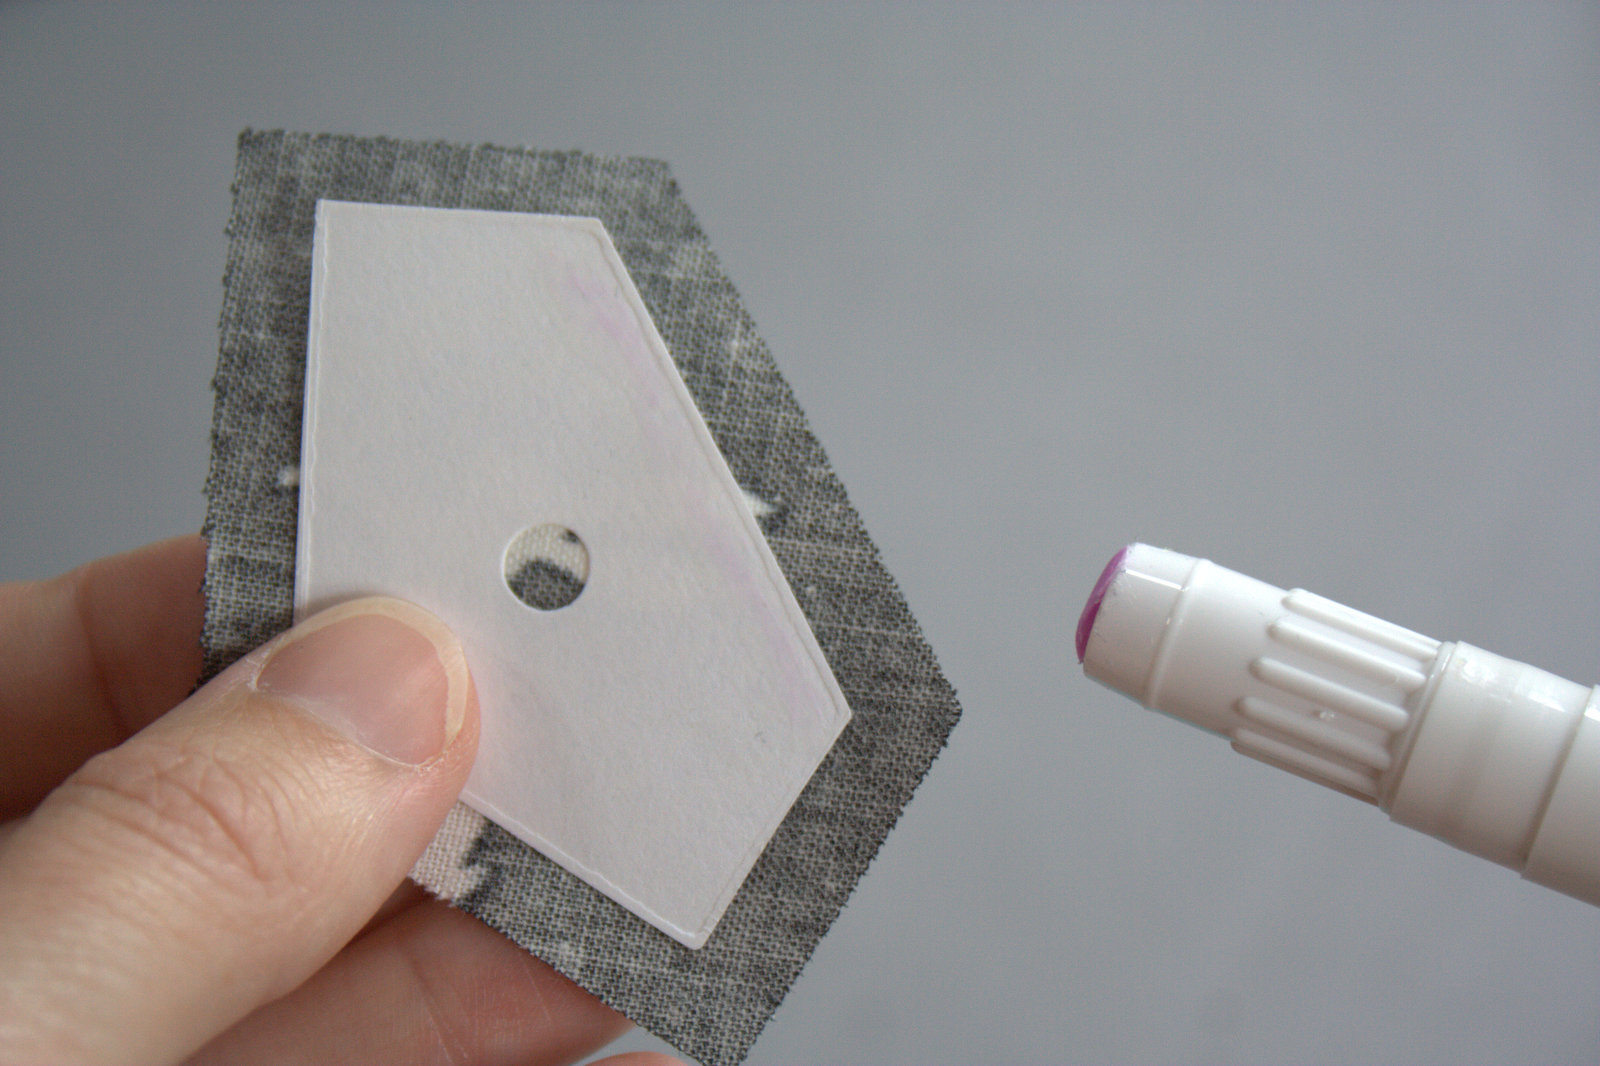
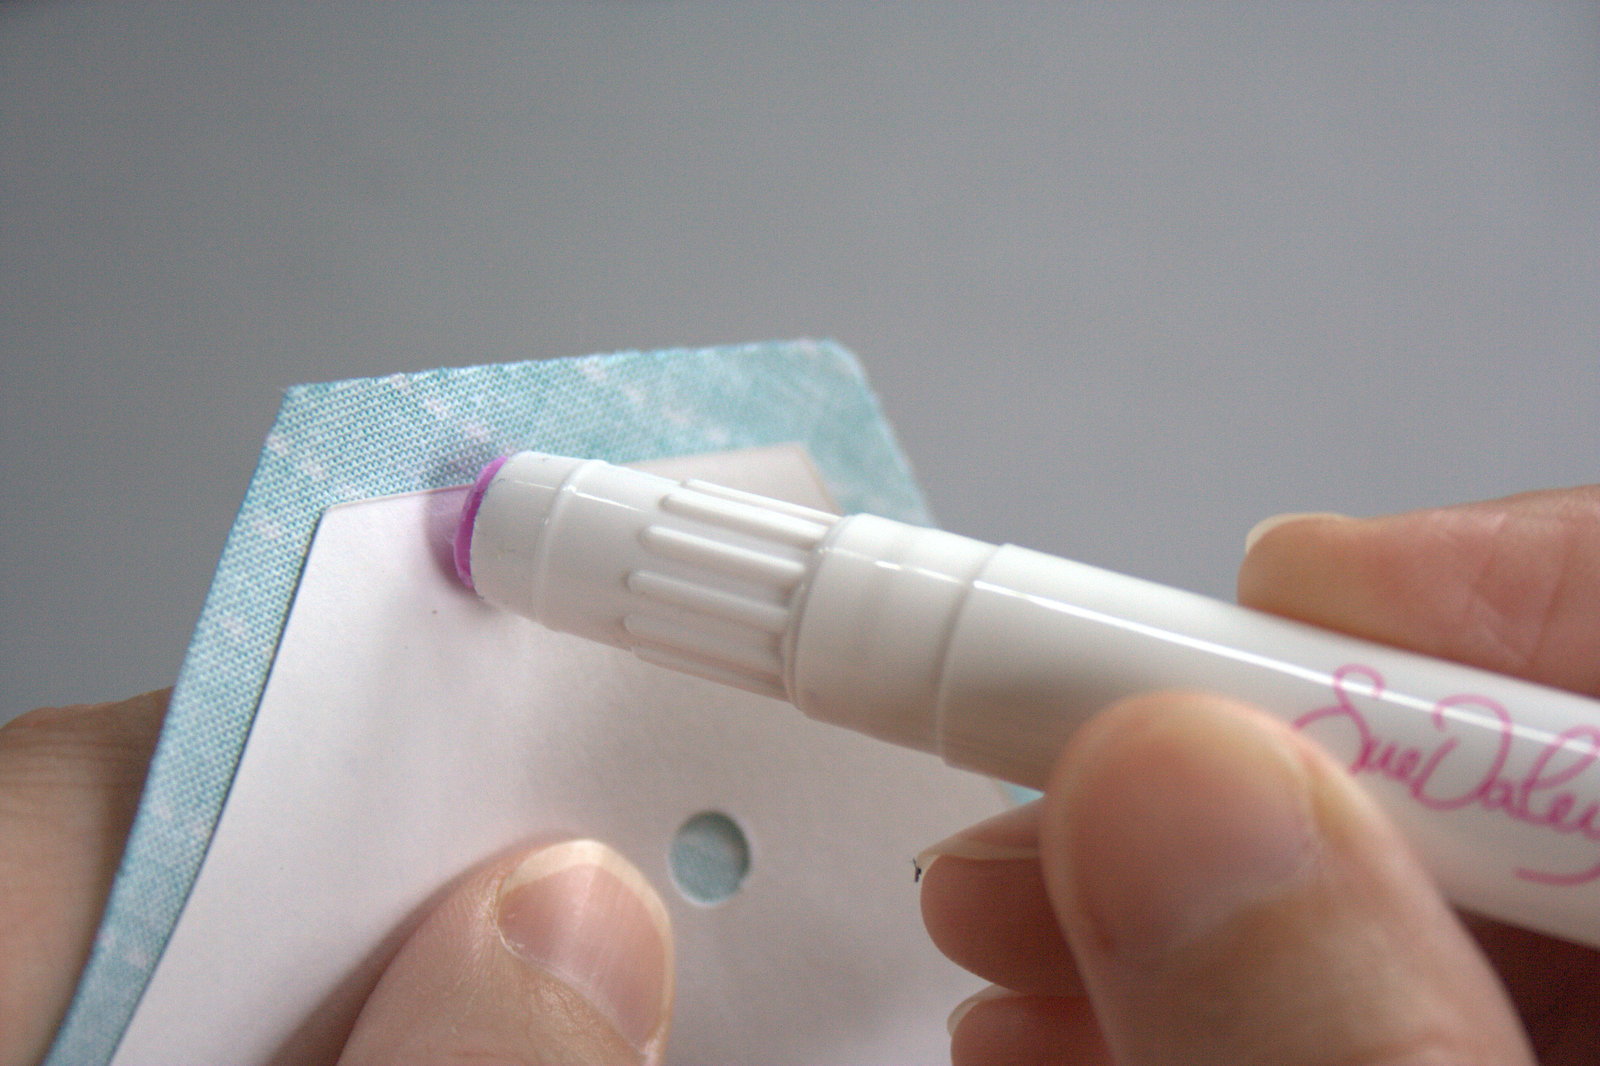
Next, apply a thin line of glue along one edge of your template. Be careful to keep the glue from getting all the way to the edge of the cardstock, since it will make it much more difficult to remove the templates once you are finished (ask me how I know).

sew daley glue basting eppHere’s one way glue basting differs from thread basting. Instead of working your way around the template, apply glue to opposite sides of the shape to help even out the pull of the fabric.

glue basting steps
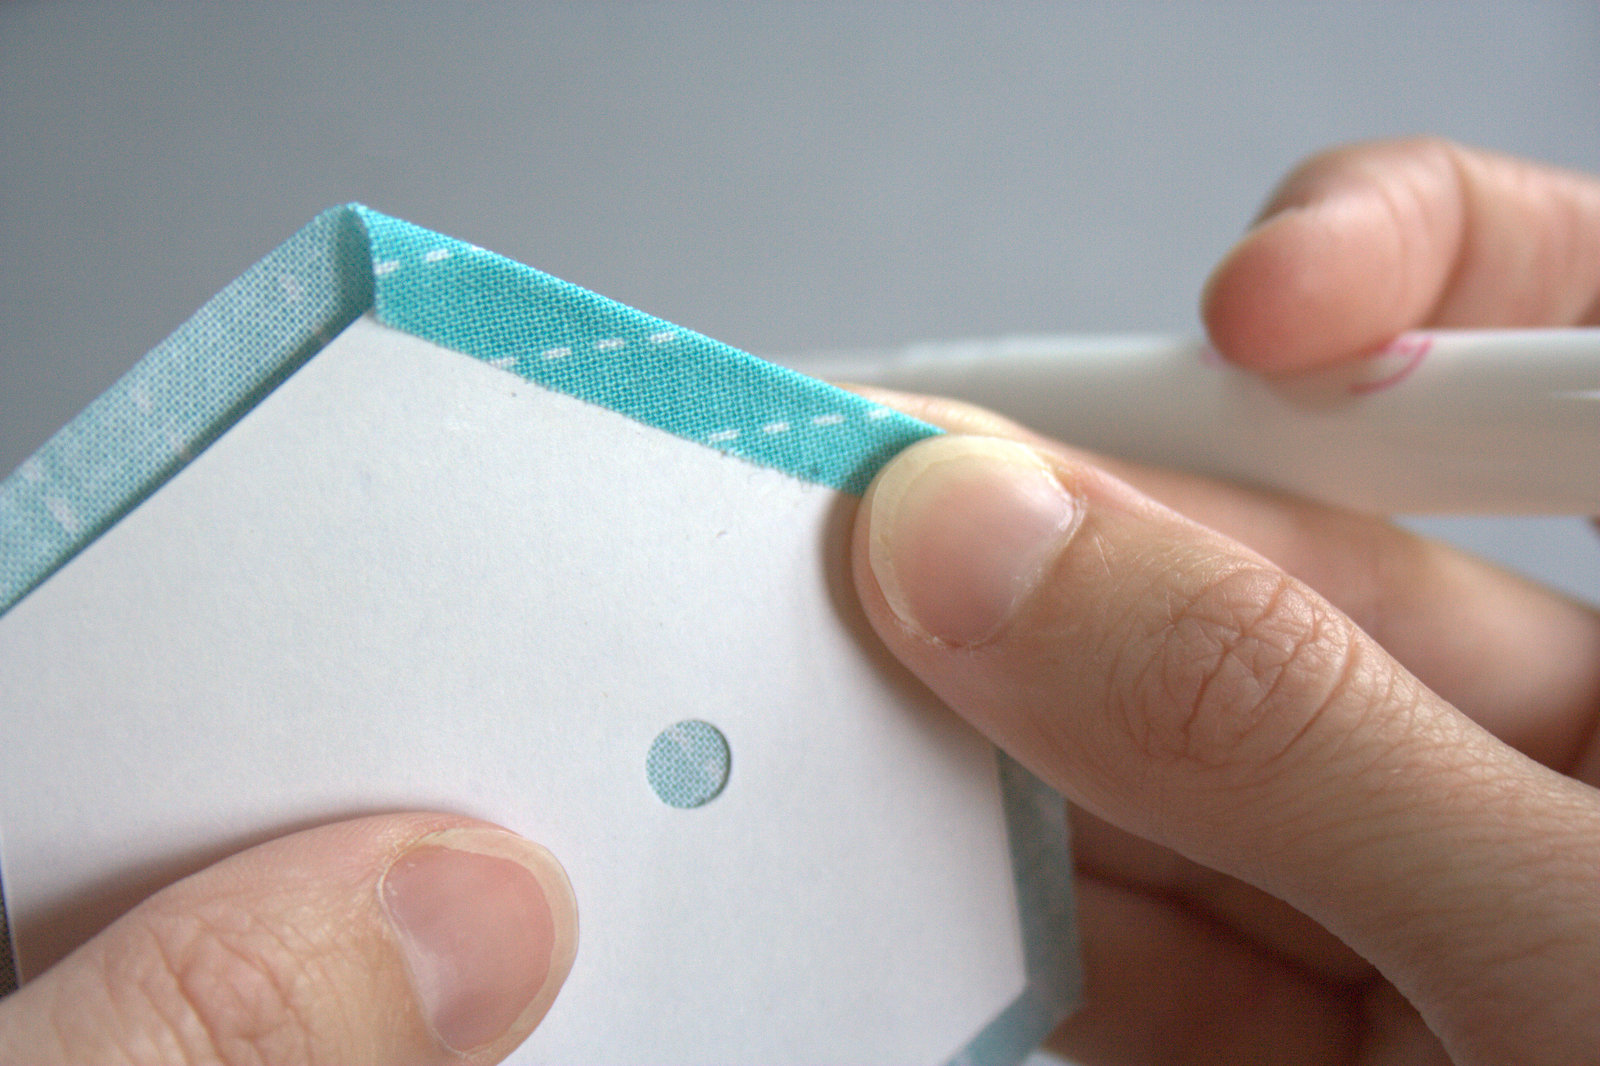
Before you know it, you’ll have your first piece.

glue basting stepsContinue glue basting all of the pieces needed for your coaster. With irregular shapes, start by gluing the longest side to help make the process smoother.

epp fussy cutting bunny rabbit
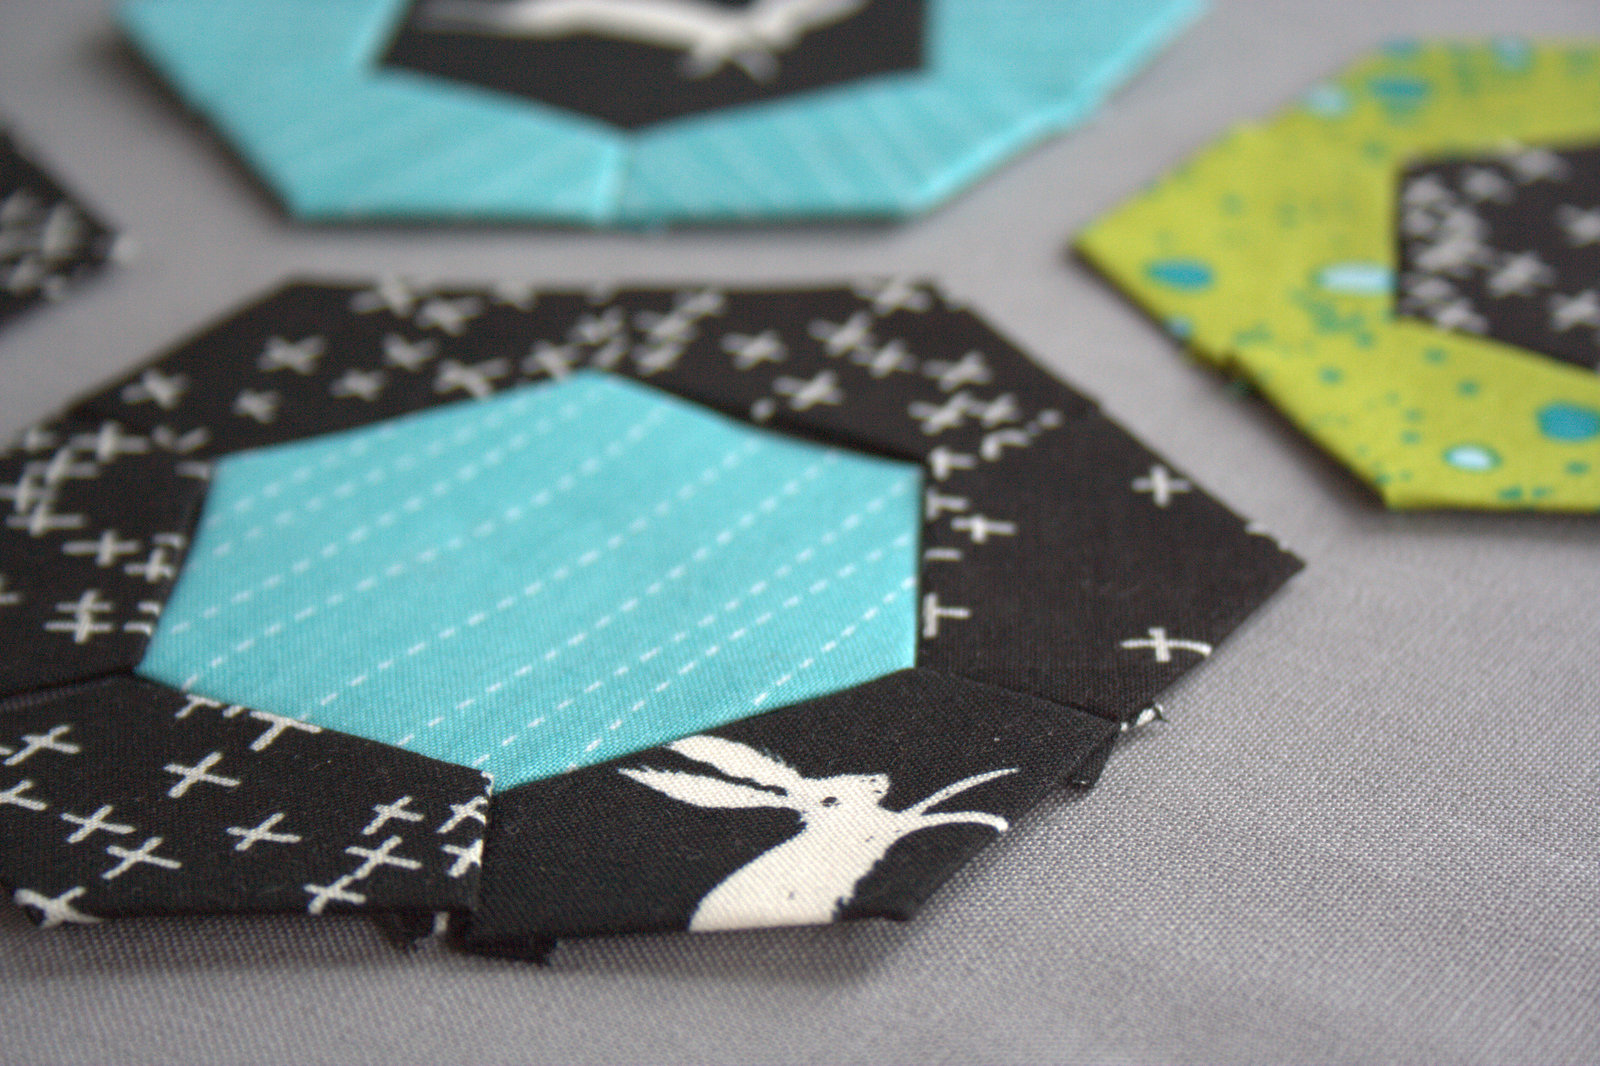
Have fun with your meticulous cutting. This is a great project for using those adorable little bits of fabric you’ve been saving.

epp coasters tutorial
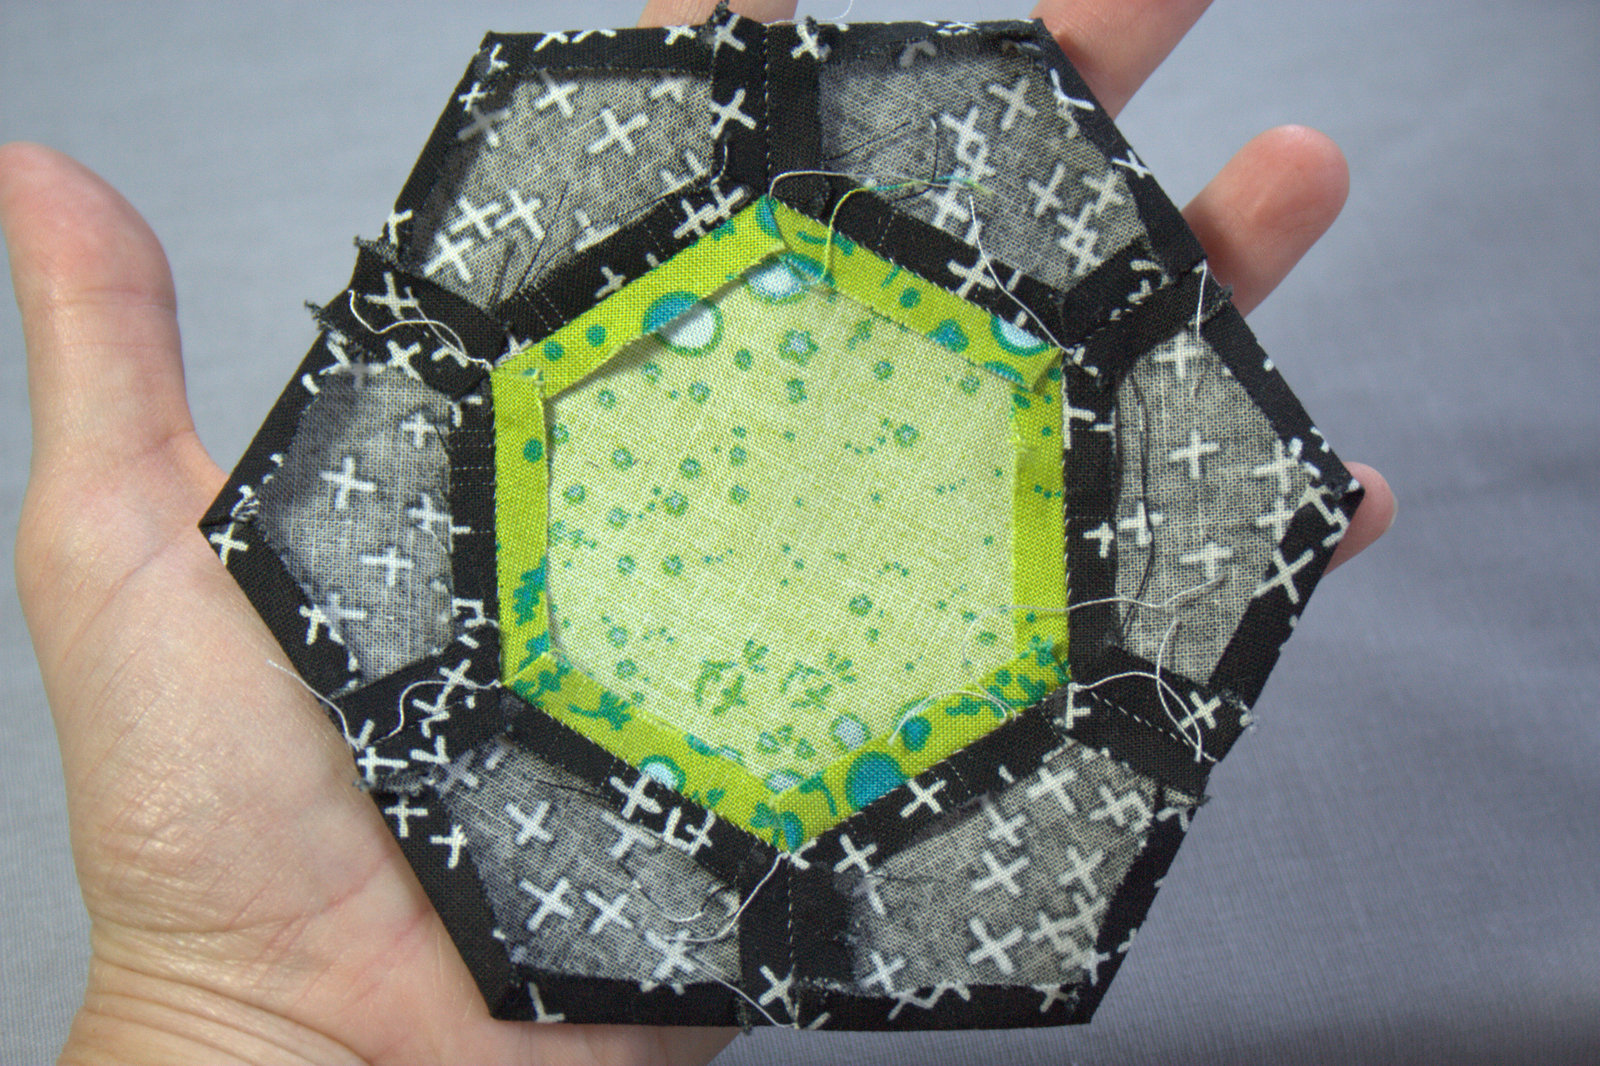
Once all of your pieces are basted, it’s time to start stitching them together! I made a set of four (4) coasters, but you can make as few or as many as you want.assembling epp coasters
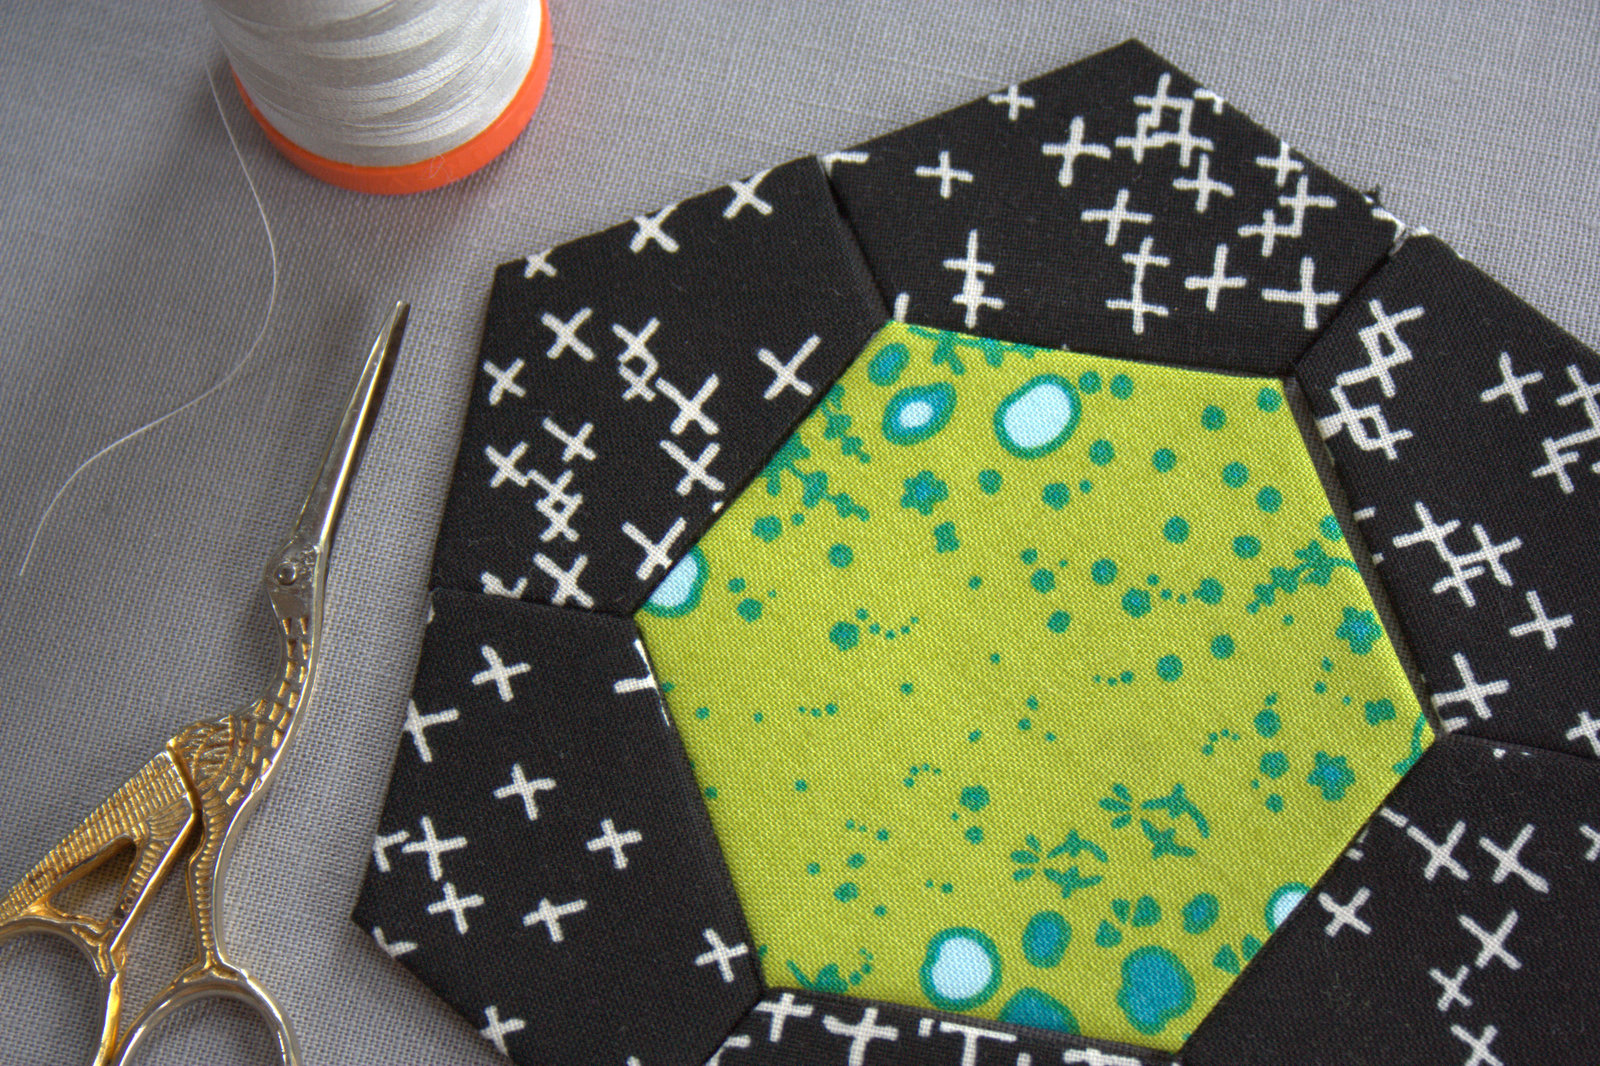
All you need for this step is your basted pieces, sharp scissors, a sewing needle, and some thread in a coordinating color (I love using 50wt Aurifil thread). Sometimes, when the two pieces you’re sewing together are very different colors, there is no color that coordinates with both (like in my case). You can choose one of the colors to match, or just use a neutral color thread. I didn’t have black thread (Aurifil #2692, how have you evaded me!?), so I went with a contrasting light grey (Dove #2600) since I had already decided to quilt these with the contrasting colored thread. Once you have your supplies, this is a great project to take on the go, to stitch here and there.

assembling epp coastersTo get started sewing the pieces together, arrange your basted pieces the way you want the finished coaster to look. Flip the first piece over one edge of the center hexagon, right sides together.

assembling epp coasters
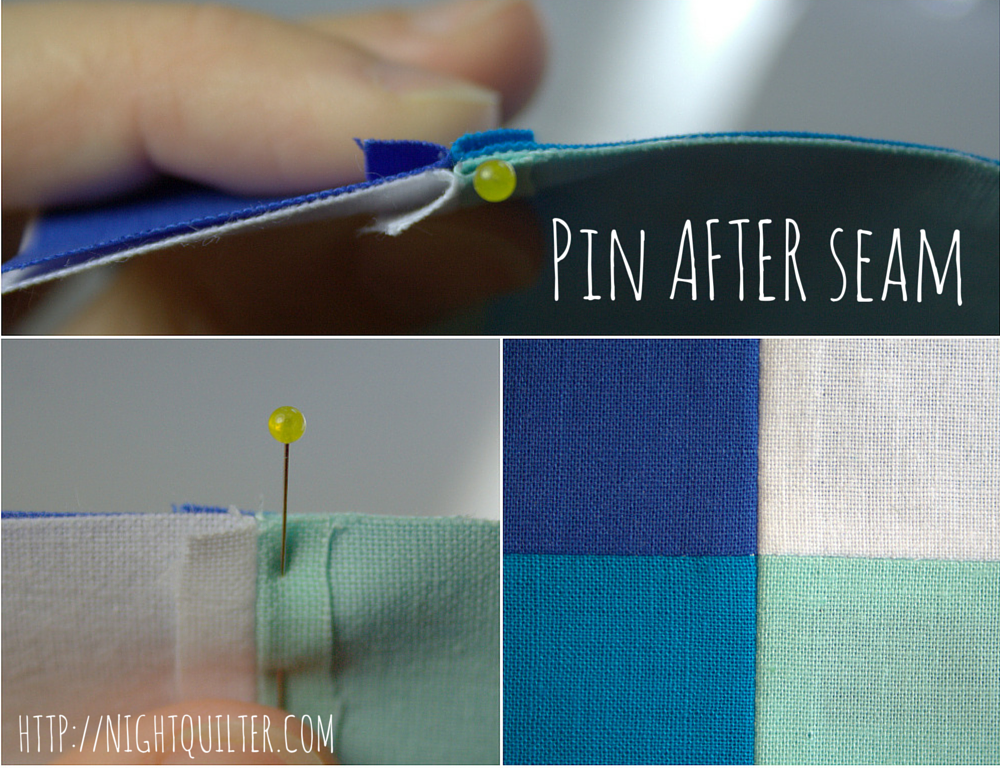
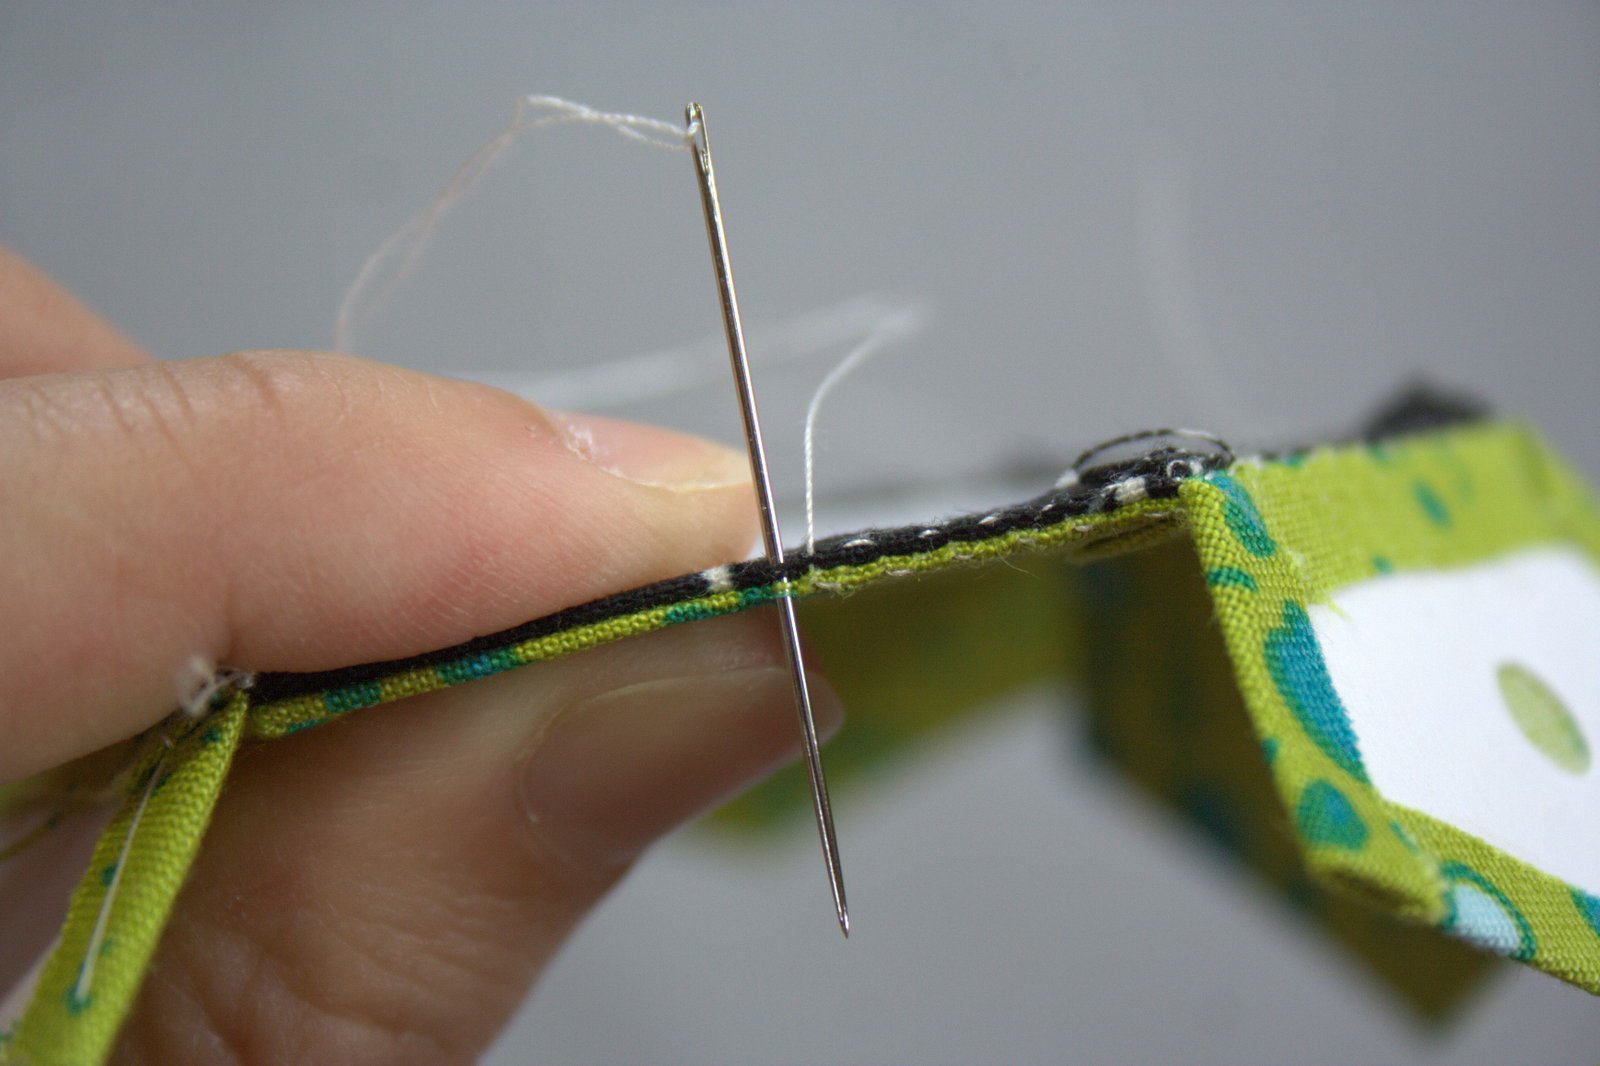
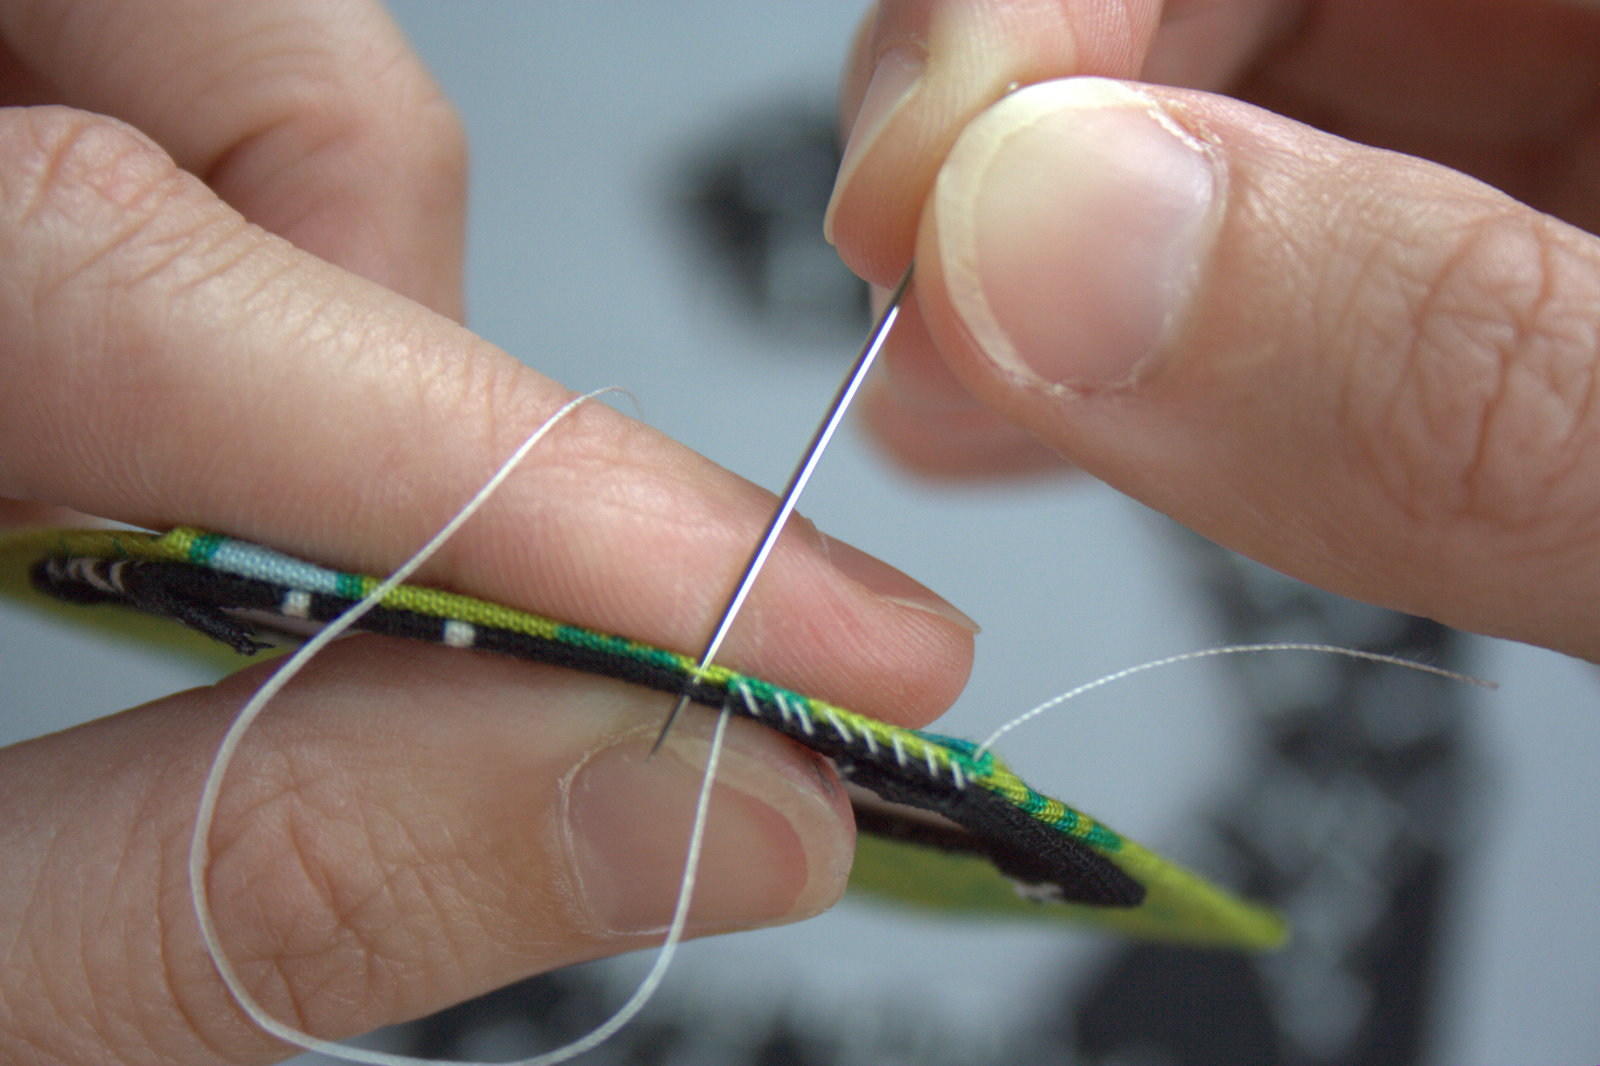
With a knotted thread, beginning at one corner, carefully stitch the two pieces together. The needle should only pass through the edges of the fabric, not the cardstock template, and only needs to catch a few threads of each fabric to hold. Many people use whip stitch to hold the pieces together (shown above). Sew the edge completely, then pick up the next basted piece, hold it right sides facing the next edge of the center hexagon, and continue sewing along that joining edge. There’s no need to knot your thread after each side; continue stitching the pieces together until you either run out of thread or you get to a point where no other piece can be directly joined.

ladder stitch to join eppladder stitch to join epp
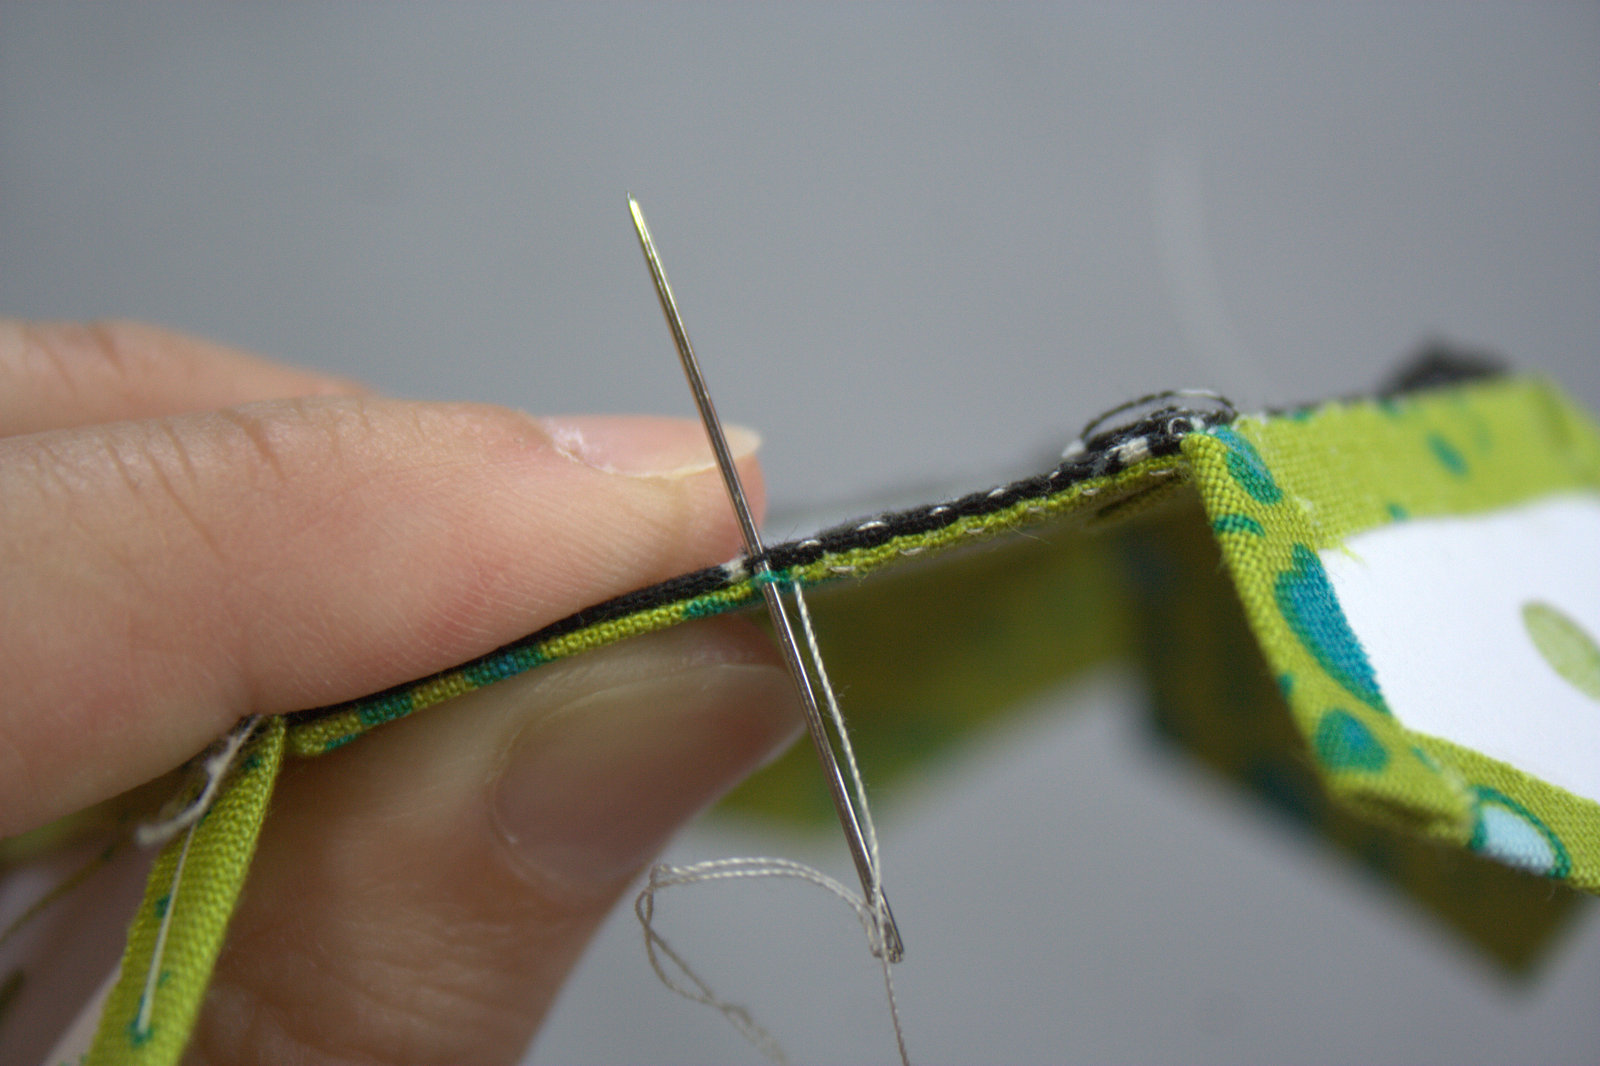
I recently saw the idea of using ladder stitch to join EPP pieces, so had to try it. I LOVED it! With ladder stitch, instead of entering the edge of the fabric from the same side every time as with whip stitch, you pass the needle from the side you’re on to the opposite side with each stitch. It may take a bit more time because of the back and forth of the needle, but I prefer it since it results in a nearly invisible join and I’m a slow and steady stitcher to begin with. Use whichever stitch works best for you and sew all seams. Don’t be afraid to fold your center template in order to get the outer seams lined up and sewn together.

Once your coaster EPP tops are all stitched together, it’s time to assemble the coasters.

tracing and cutting EPP coaster backing
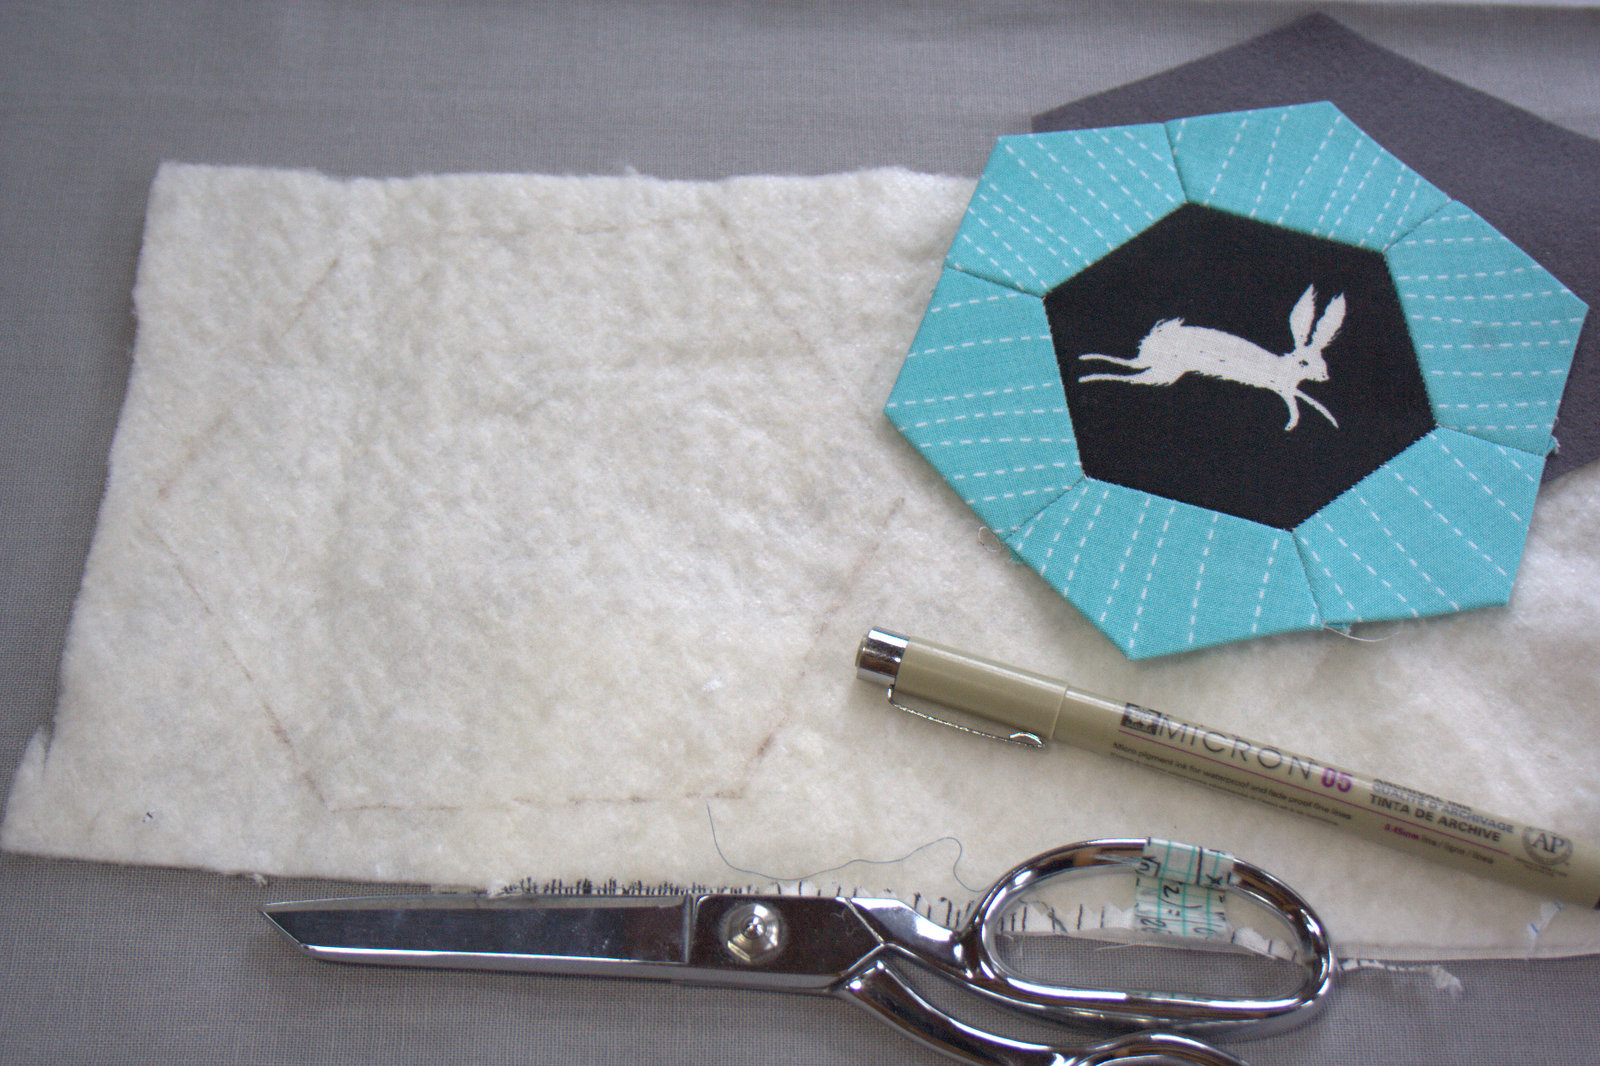
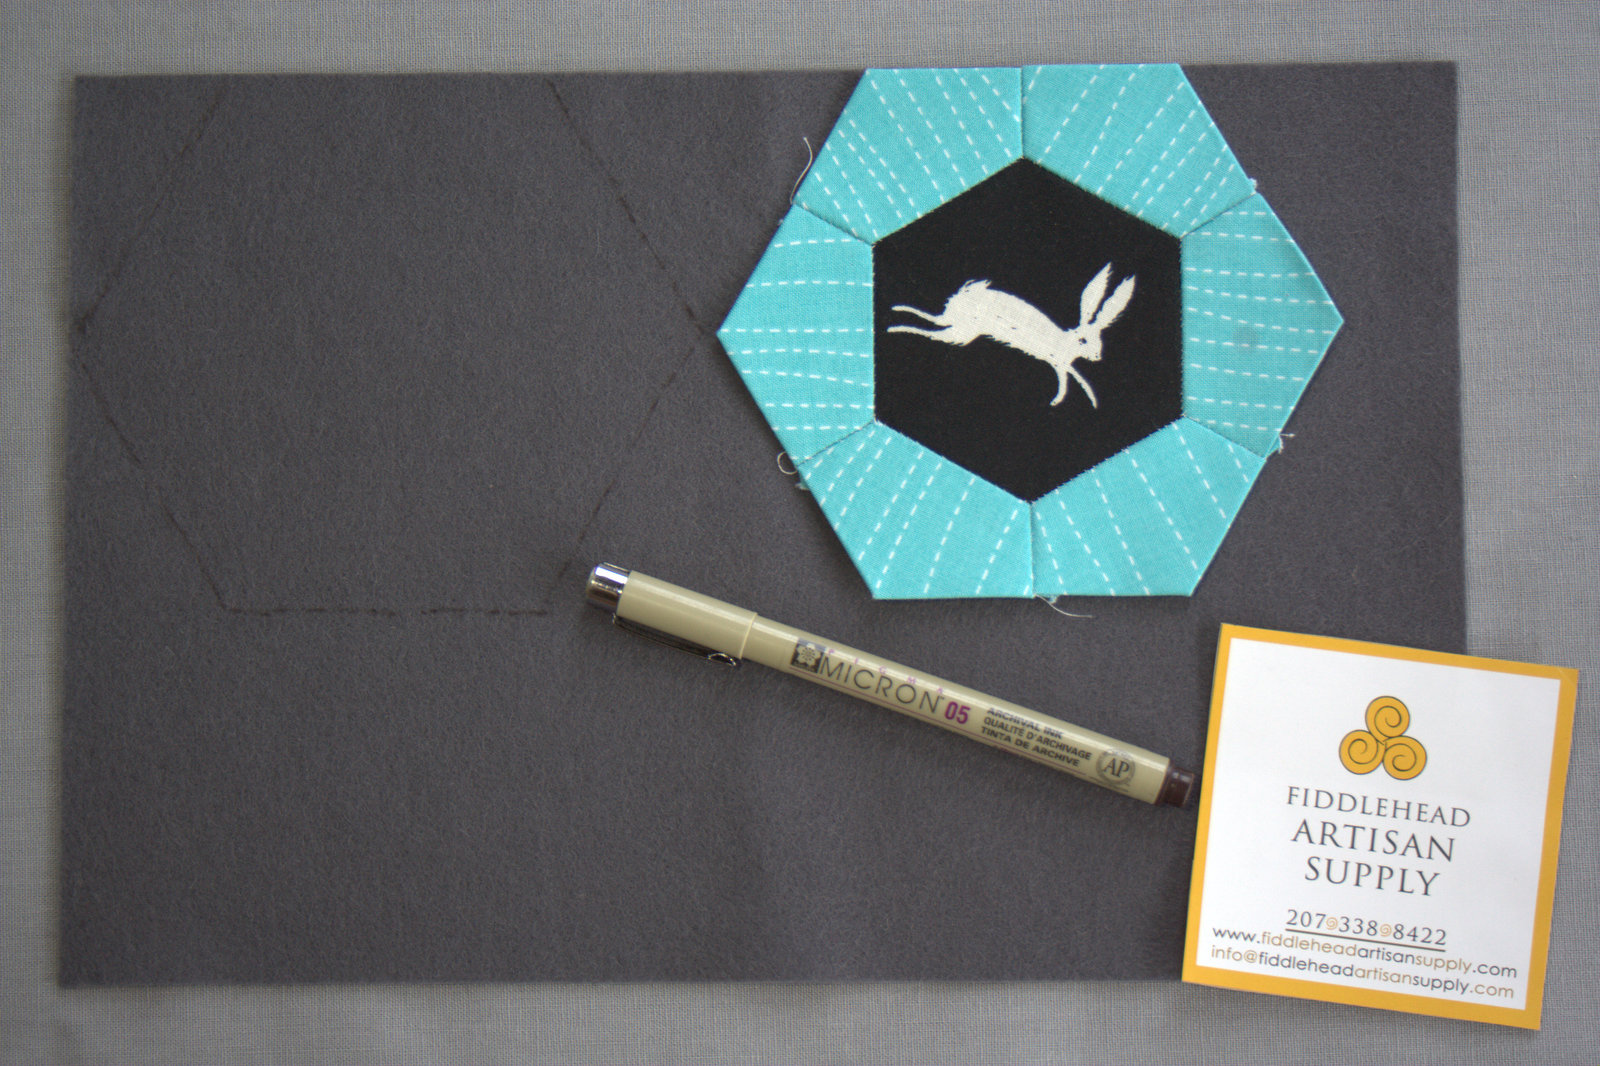
First, trace your EPP top onto a piece of 100% wool felt. I bought mine at my local quilt shop, Fiddlehead Artisan Supply, where there’s a huge wall of gorgeous wool felt from which to choose. Trace one hexagon backing for each of the coaster tops. I used a Sakura Micron pen since we are going to cut just inside the line and therefore it won’t be visible. Plus, Micron pens are the best.

EPP coaster assembly
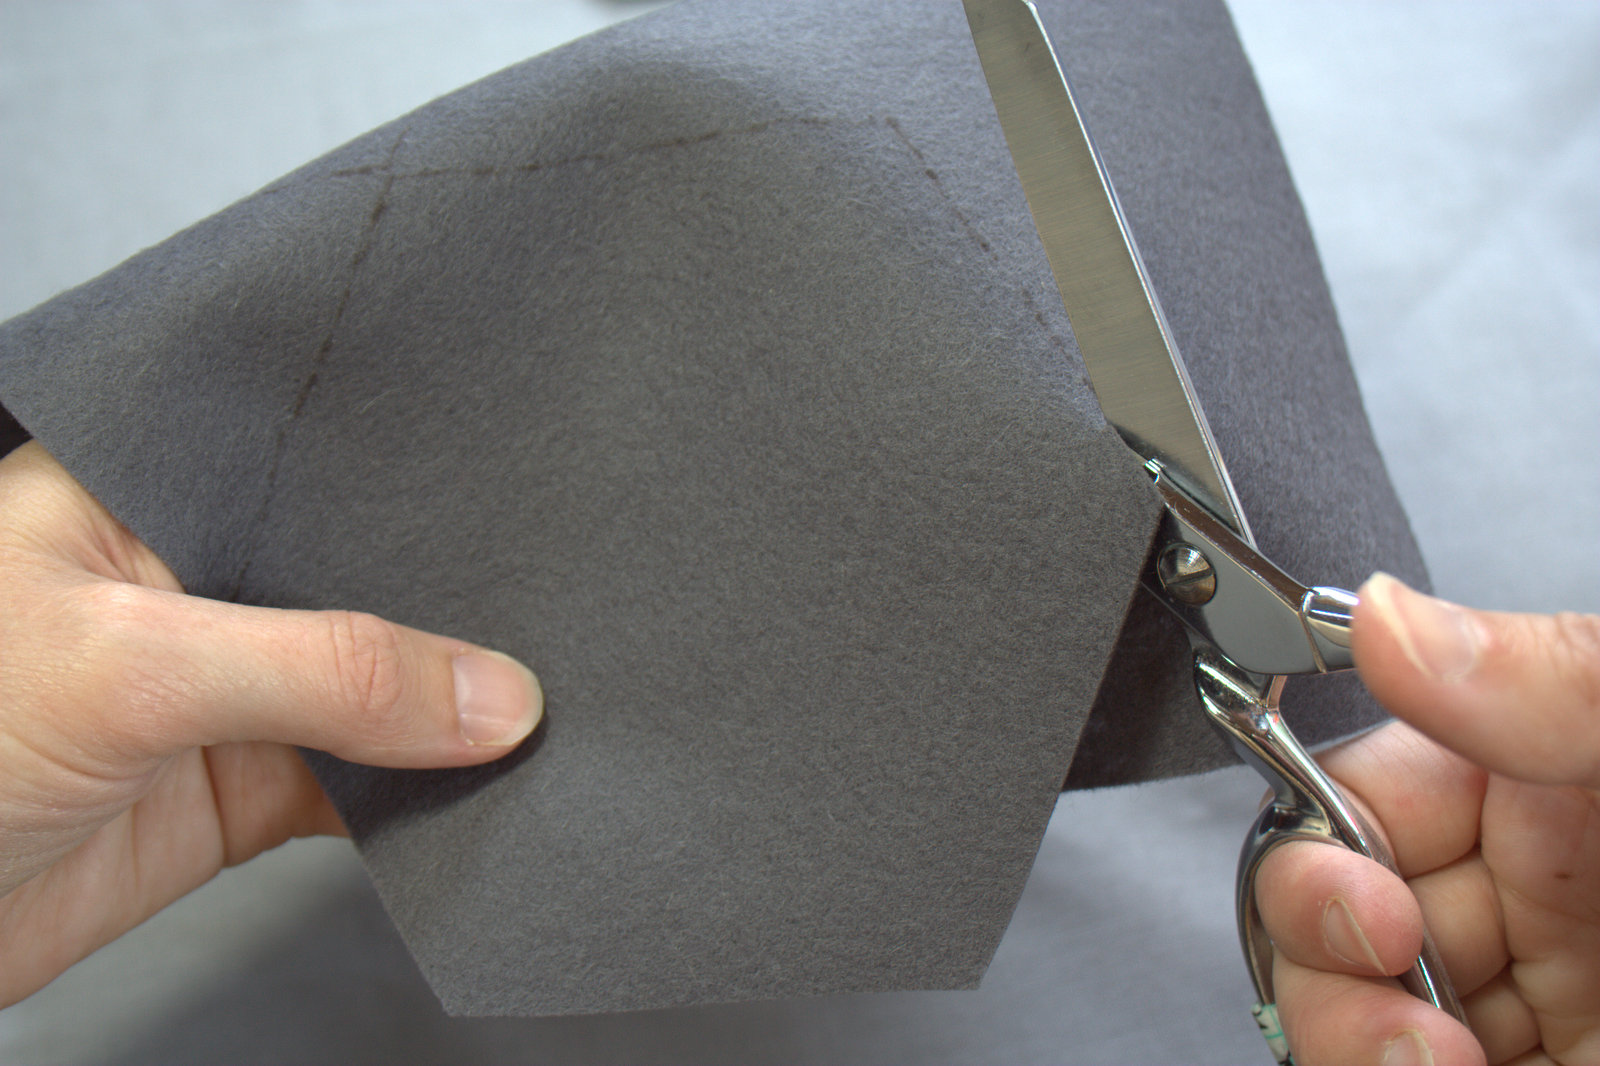
Carefully cut *just* inside the line you traced.

EPP coaster assembly
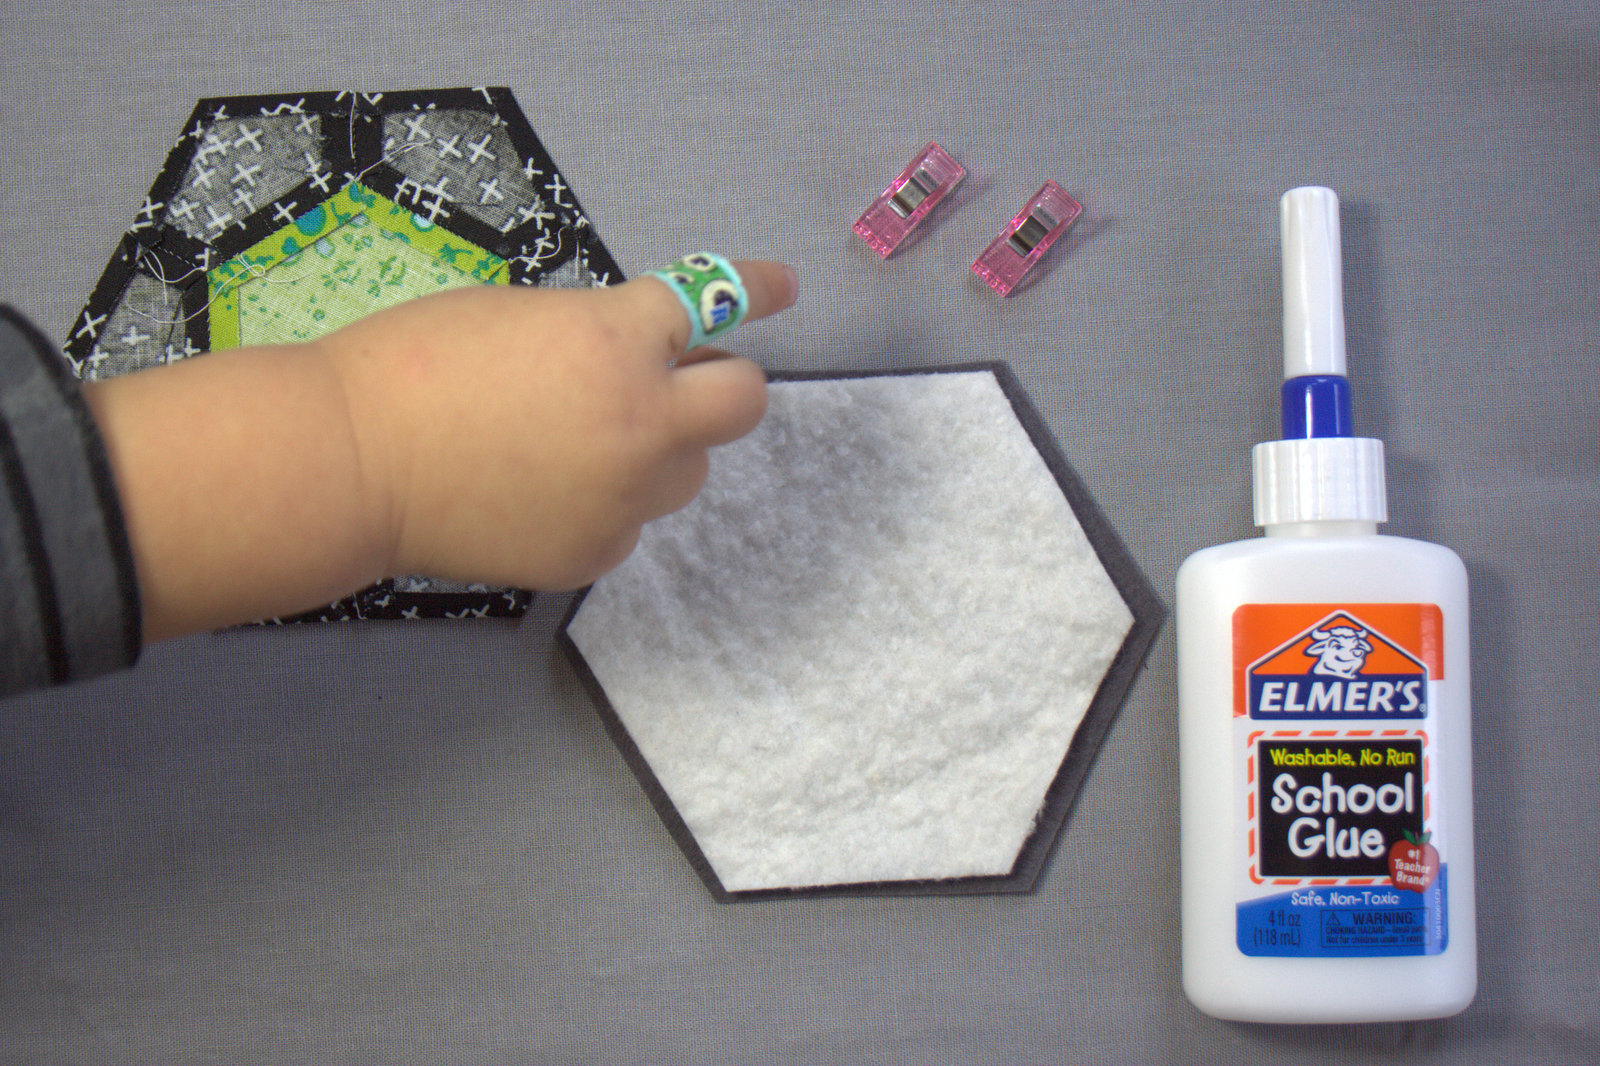
This next step is optional, but if you plan to use the coasters for hot beverages I would recommend it. Gather some batting scraps. This is a great way to use those batting trimmings you’ve cut off the edge of finished quilts. Again, trace your hexagon coaster top and cut out along the line.

EPP coaster assembly
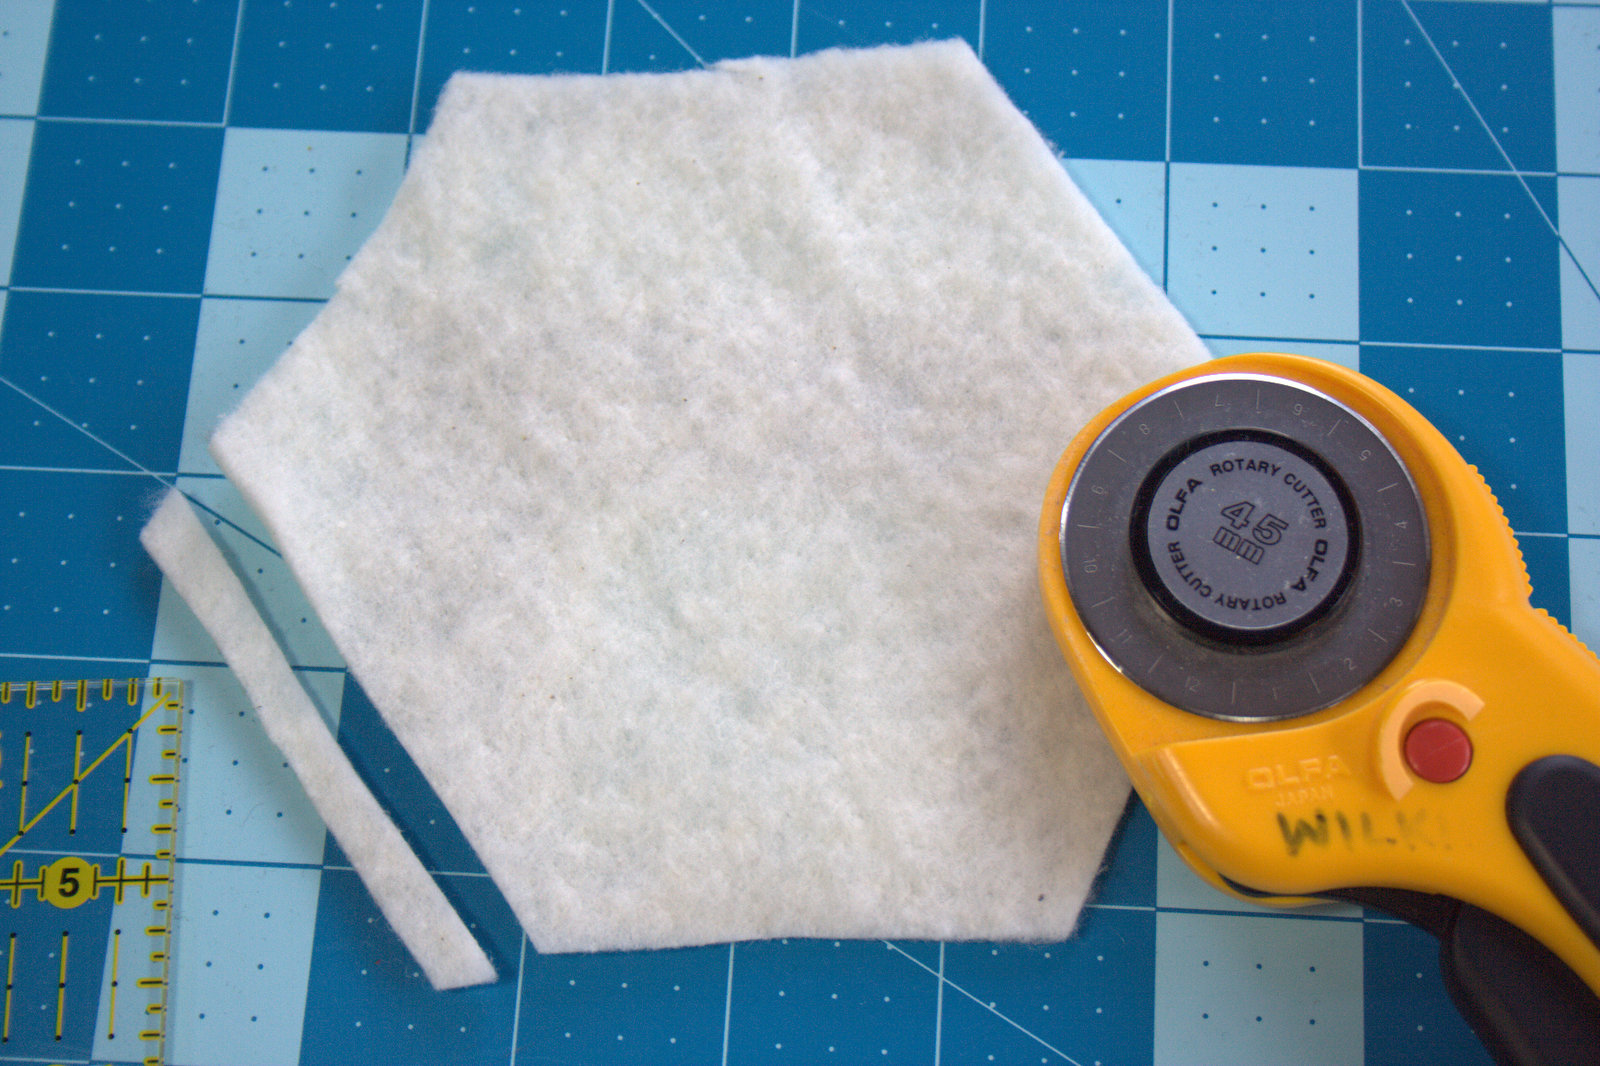
Trim 1/4″ off each edge of the batting hexagon. This way, the batting won’t stick out from the edges of the assembled coaster. I used my rotary cutter and ruler, but be sure to count how many edges you trim since it’s easy to lose track. You should have six (6) trimmings after trimming each hexagon. Set your felt and batting hexagons aside.

EPP coaster assembly
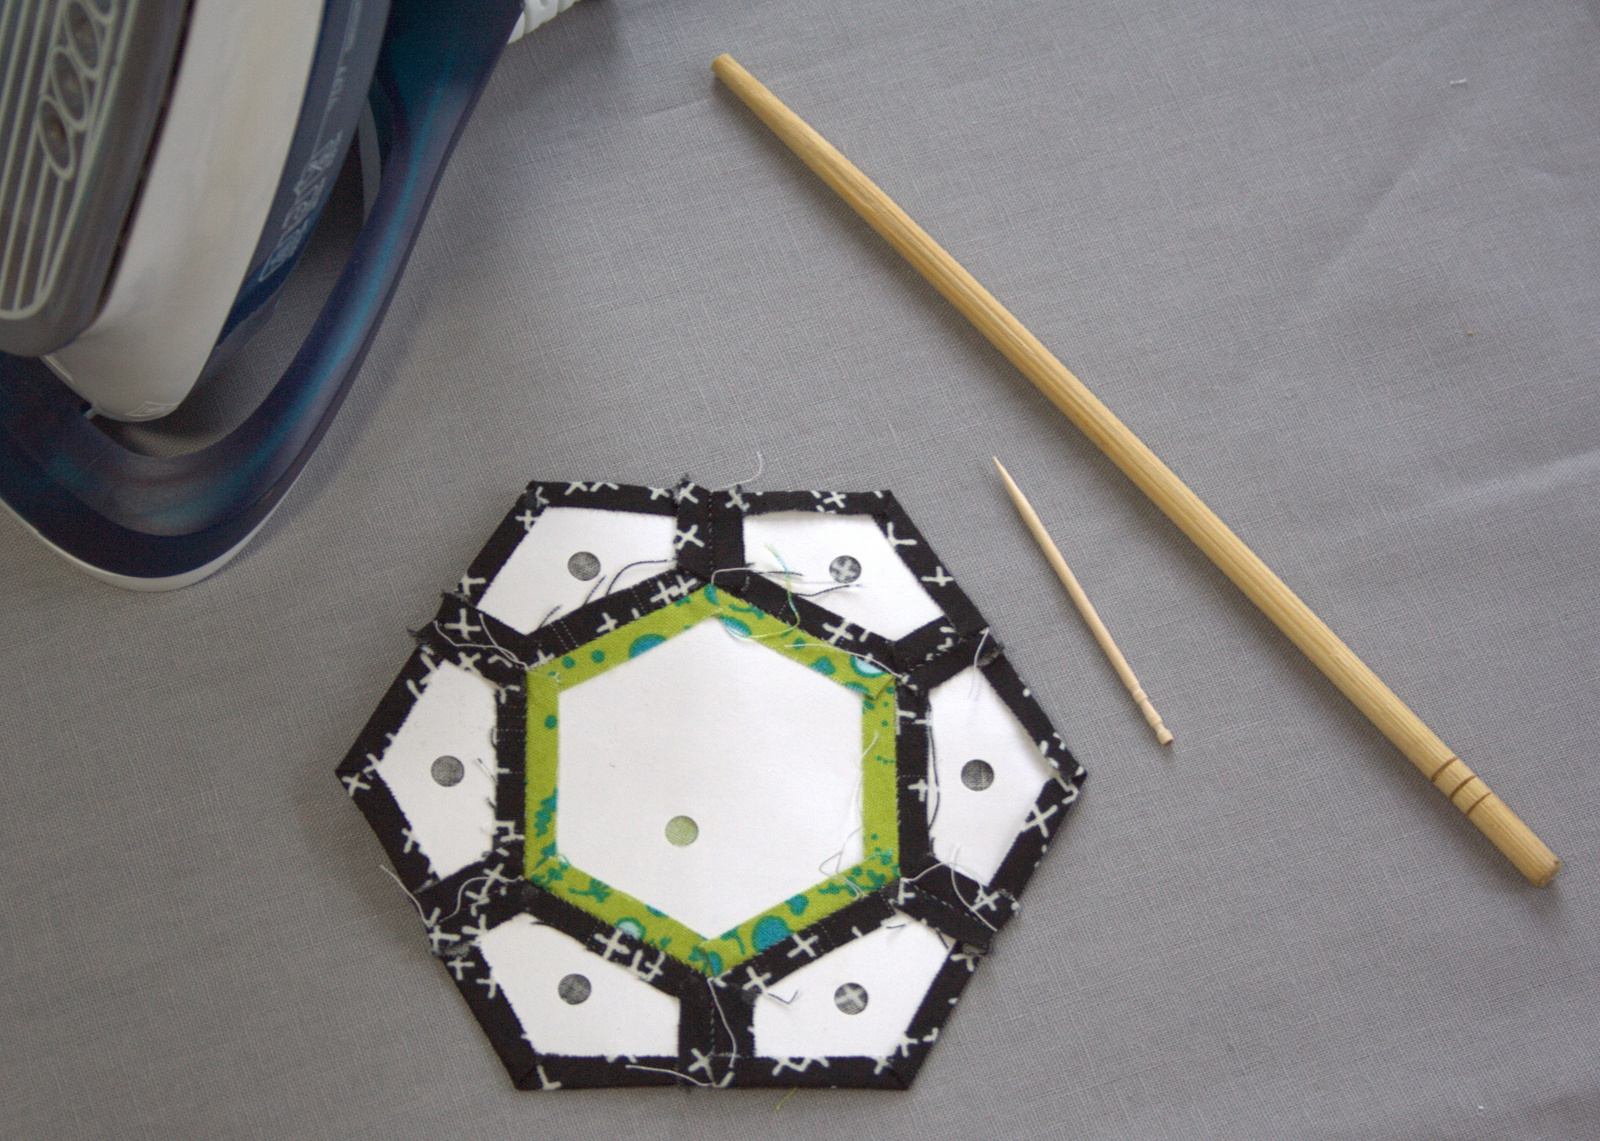
Now, back to your coaster tops. It’s time to take out those template papers! You will need your EPP coaster tops, a toothpick, a chop stick (or crochet hook), and an iron. Trust me, and no, we’re not making dinner!

use toothpick to release glue basting
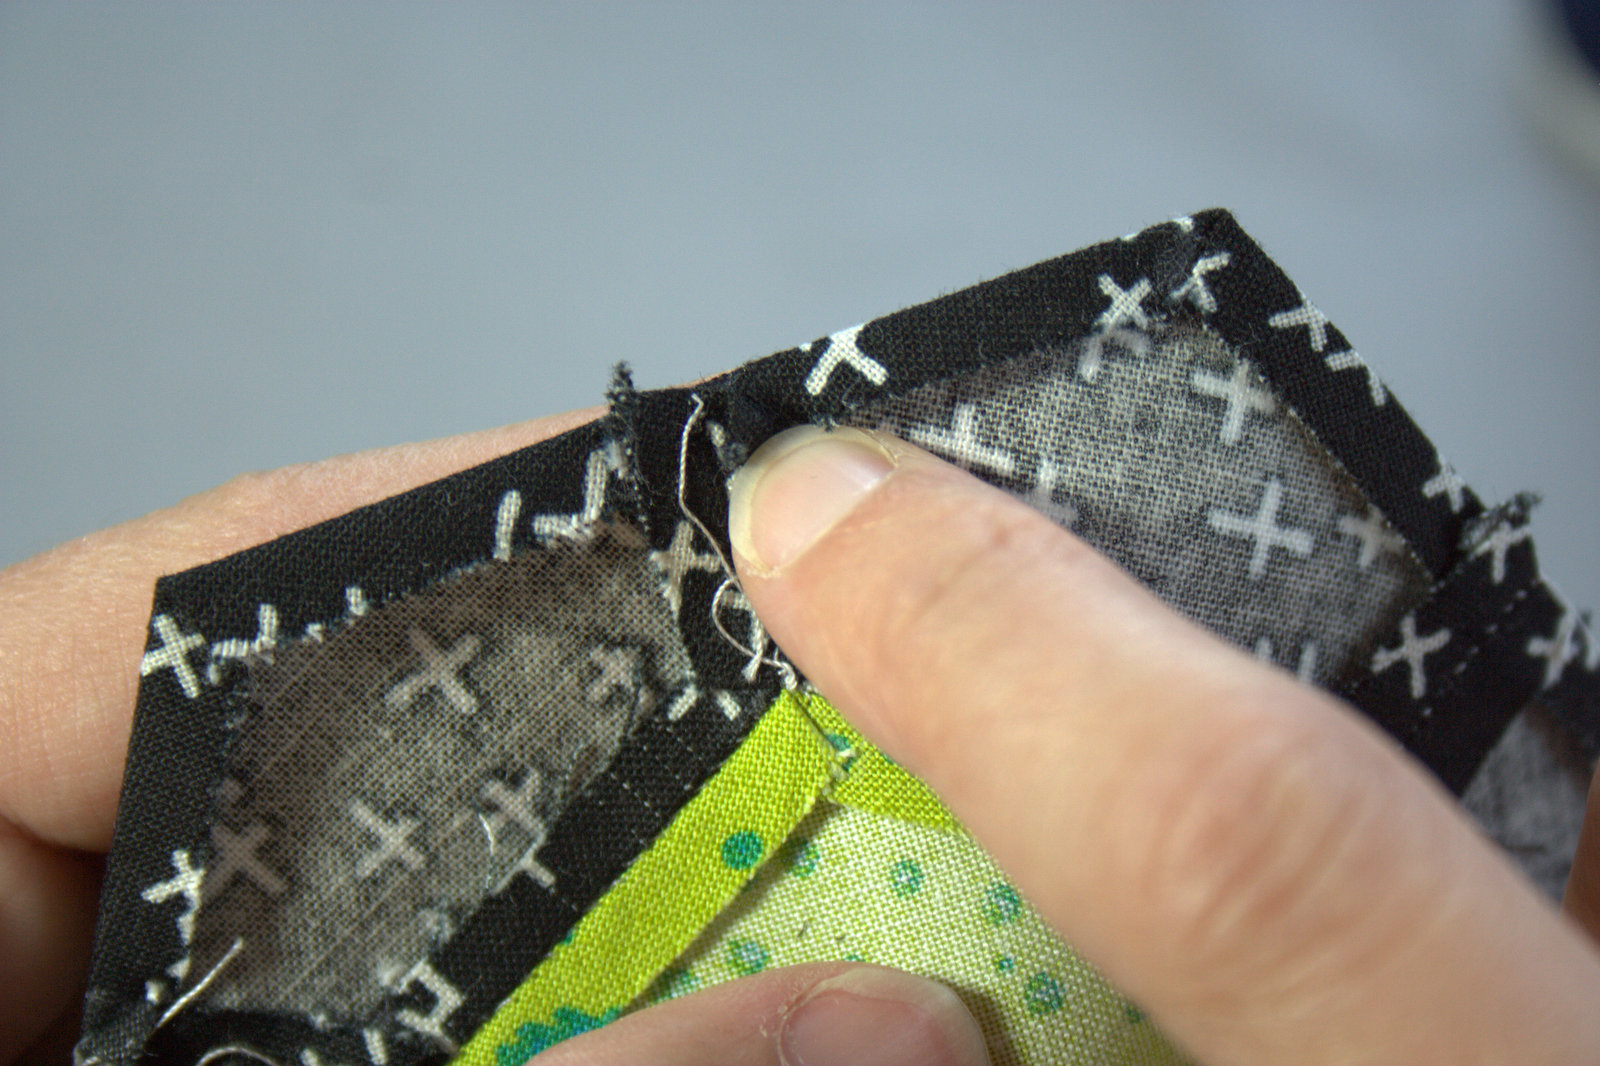
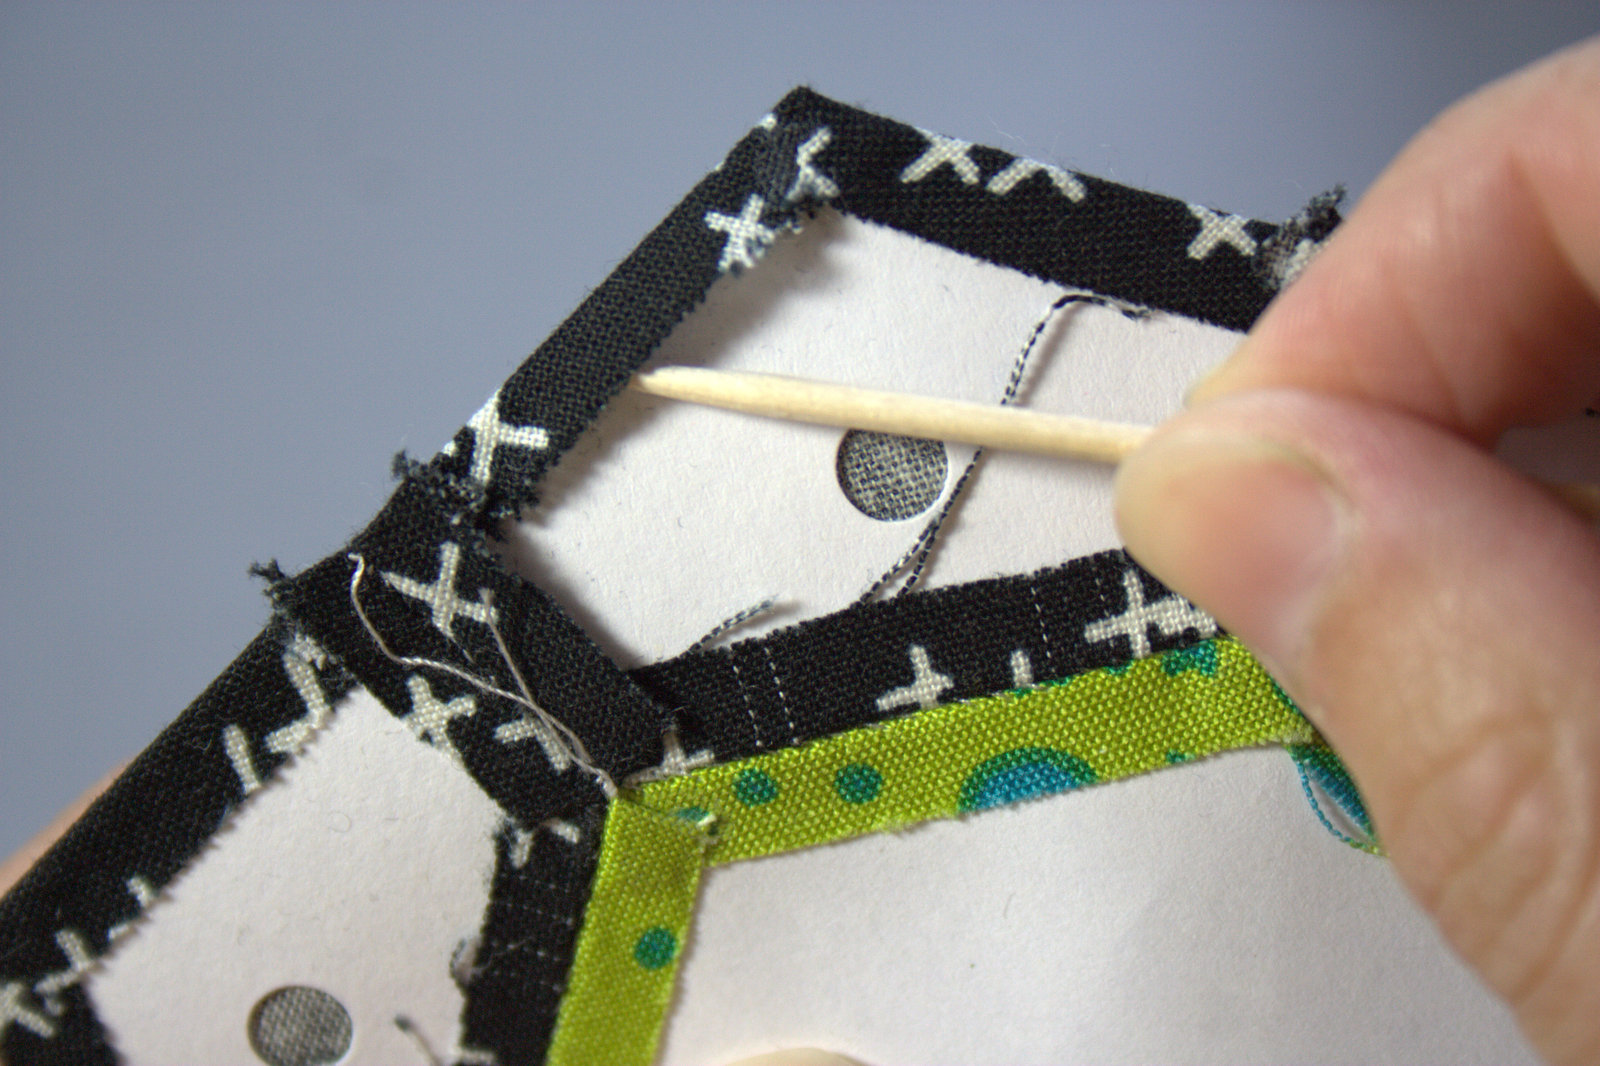
Gently slide the toothpick under the glued edges of the fabric, separating the fabric from the cardstock template. Be particularly careful around the outer edges to separate the fabric from the cardstock without pulling it out of shape too much.

chopstick removal of epp templates
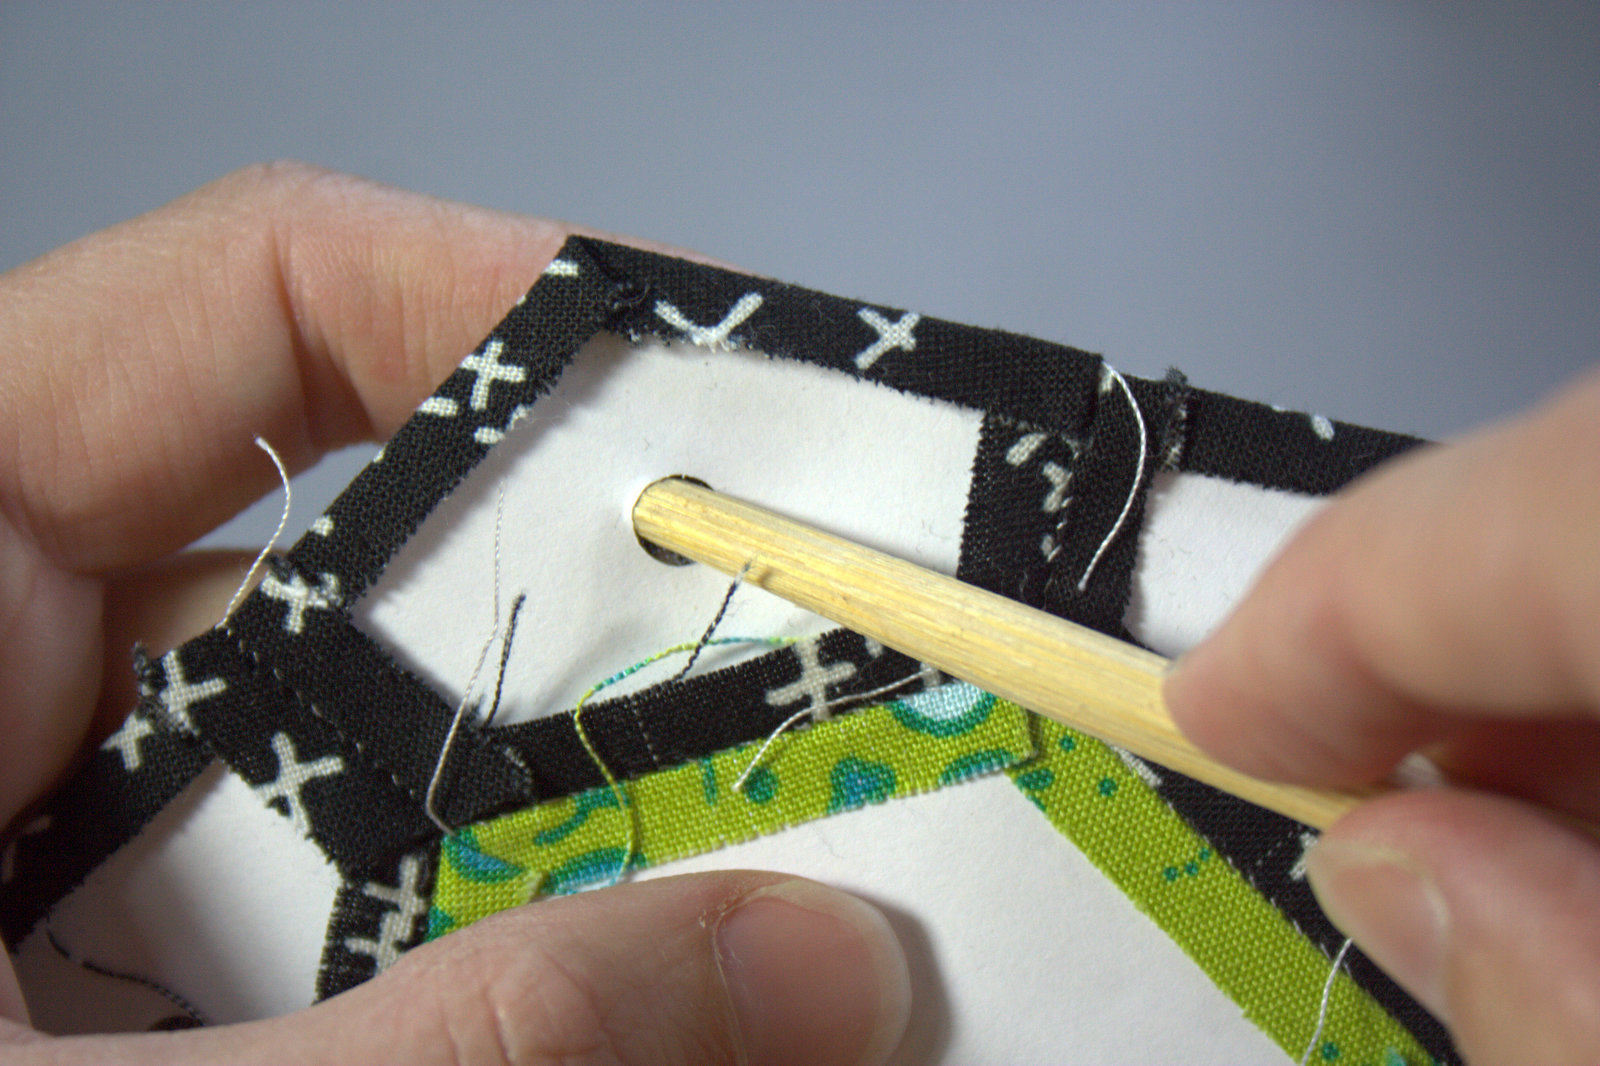
Once the fabric edges are separated from the cardstock template, grab your chopstick and stick the end of it in the hole punched hole of the template.

chopstick removal of epp templates
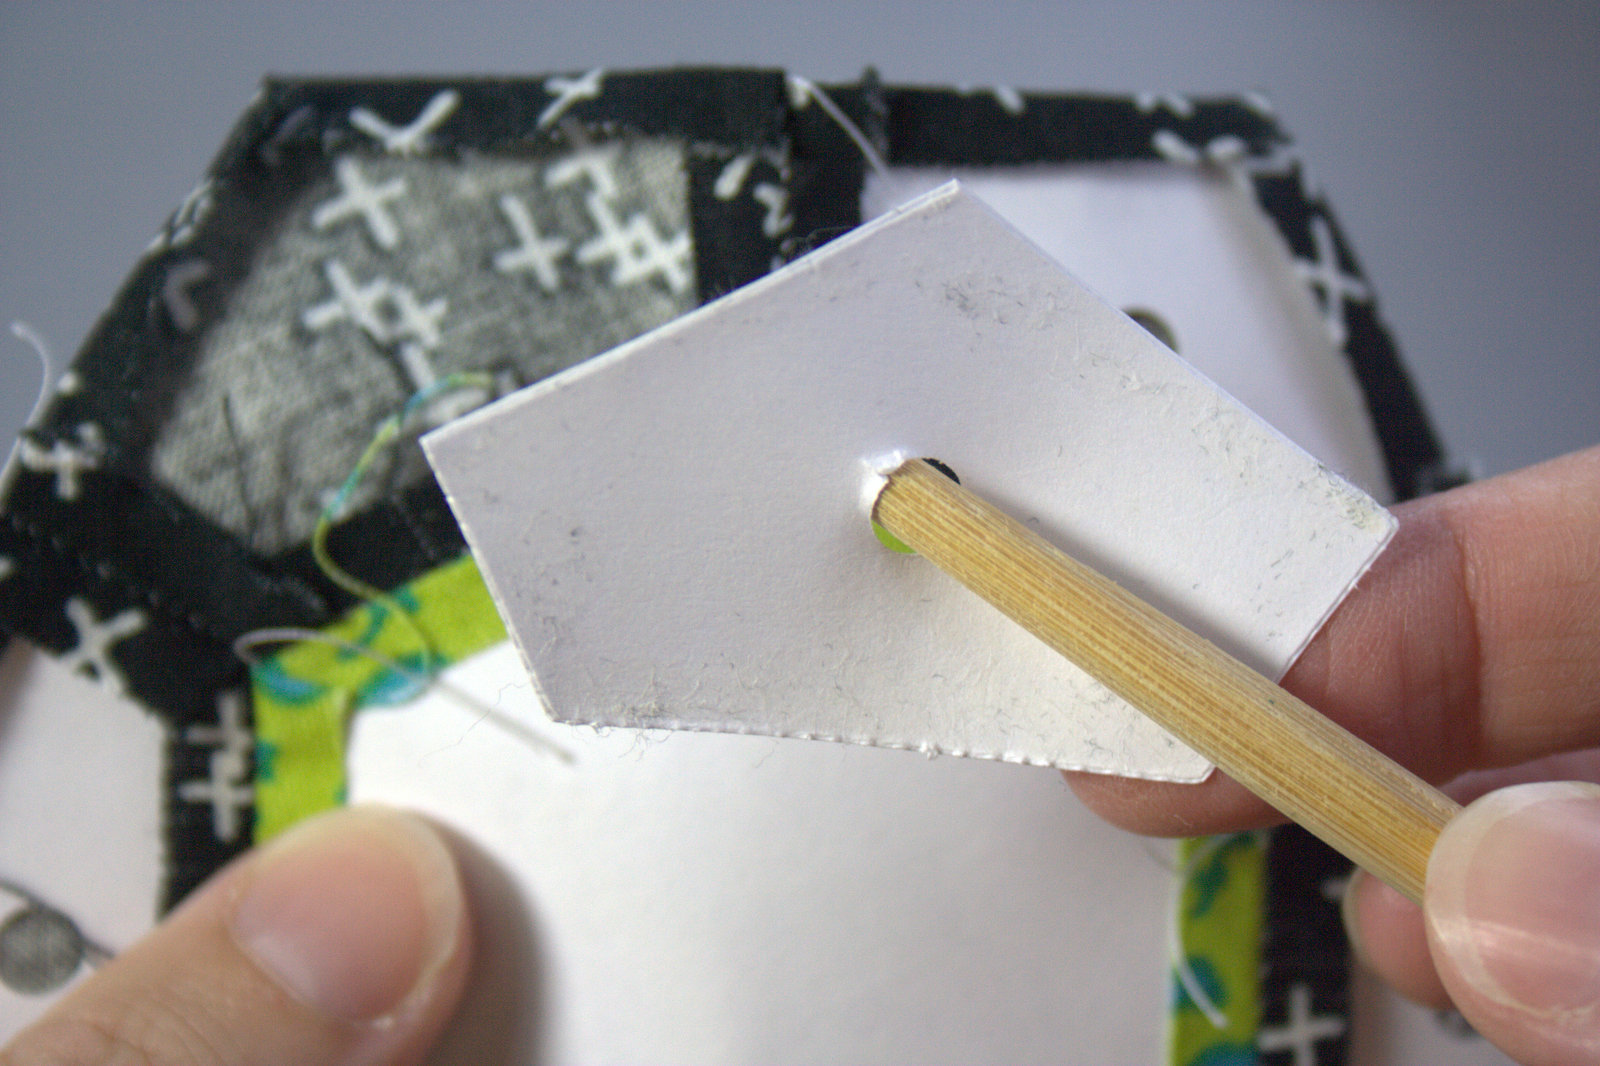
Gently pull the edge of the chopstick up and the cardstock template will pop right out. This chopstick removal method works much more smoothly with thread-basted EPP pieces, but as long as all of the glue spots have been unstuck, it should still smoothly remove the template. You can save the template and use it again!

EPP coaster tutorial
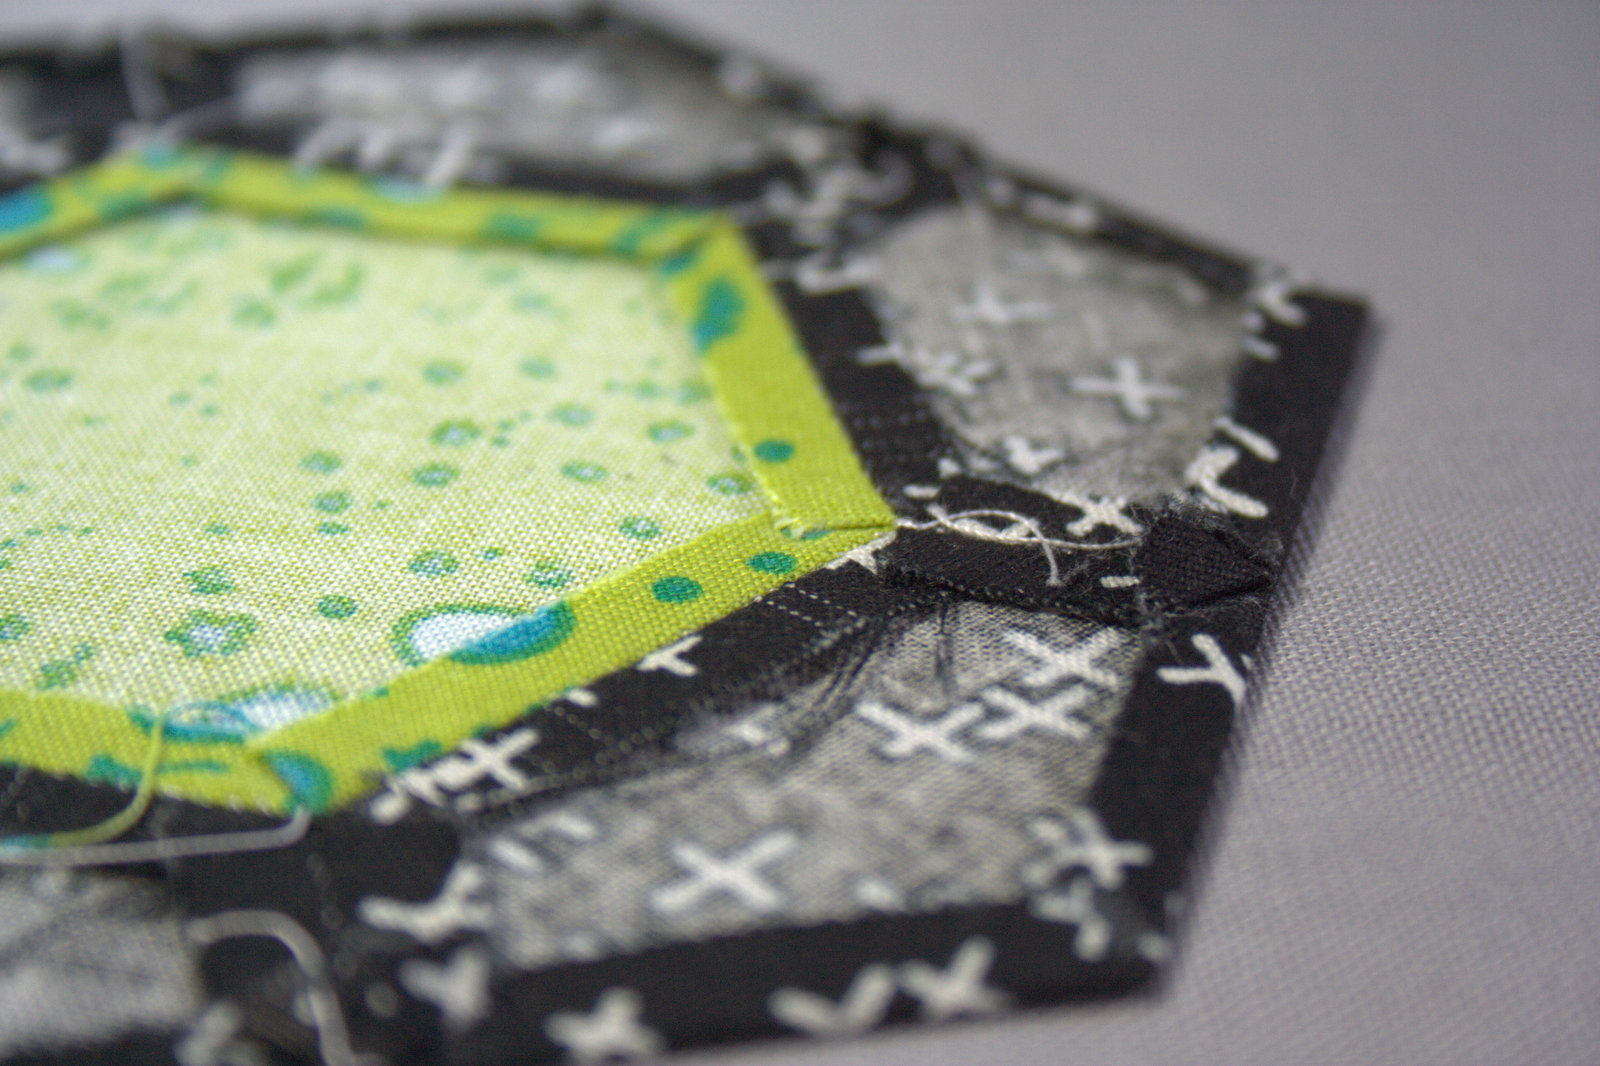
Once all of your templates have been removed, give your coaster top a good press with a hot, dry iron, ensuring that all of the outer corners are still folded in the way they should be.

EPP coaster tutorialWhile you’re pressing your coaster top, fold in the edges of your outer seams like you’re making a paper airplane and press well. This will keep them away from the edges when you sew your layers together, keeping the edges of your coaster neat and clean and free from peeking-out seams.

EPP coaster tutorialIt should leave a nice neat edge.

epp coaster assembly tutorial
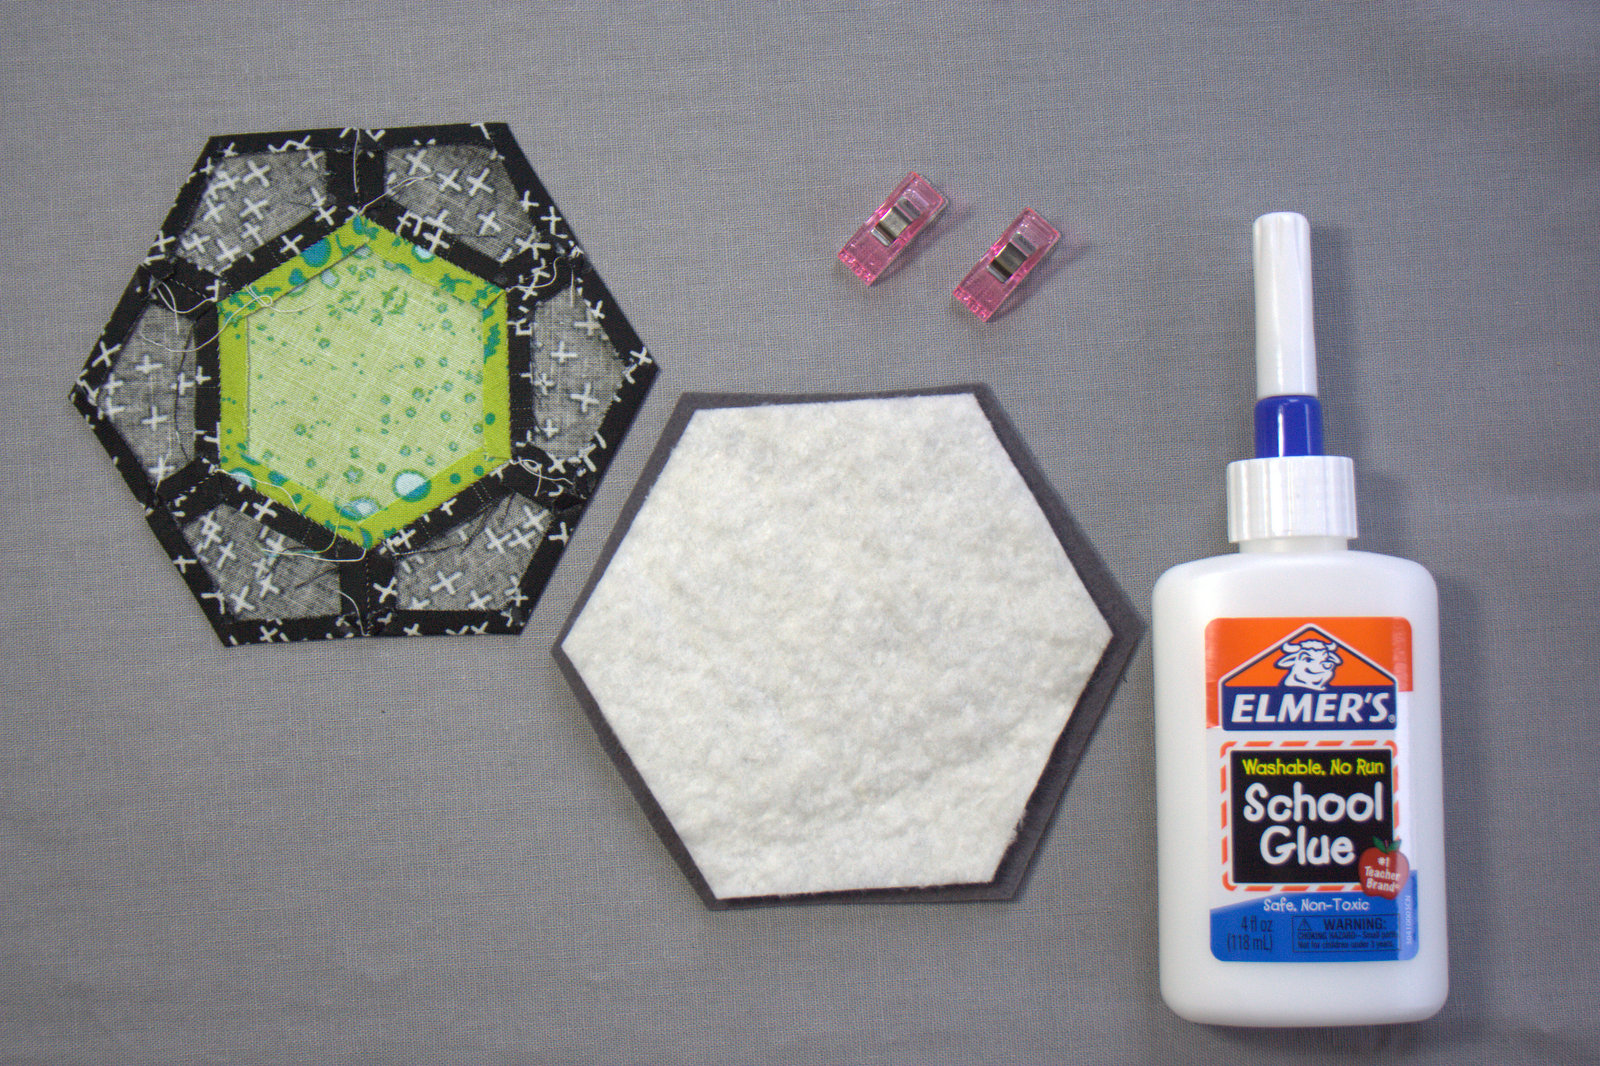
Now it’s time to assemble our coasters! You can probably just pin the layers together: felt on the bottom, then batting, then EPP coaster top, but I like to glue baste and use Clover Clips* to hold the layers together before sewing since it results in a nearly perfect alignment.

glue basting epp coaster tutorialUsing Elmer’s washable glue, make a tiny path of glue around the outside edge of the entire coaster. I use Fine Line Glue applicator tips provided by Pile O’ Fabric and they are fantastic. They are superfine applicators that screw onto a regular bottle of school glue, but they control the flow so that you don’t end up with gloppy globs of glue all over your project.

glue basting epp coaster tutorialAssemble your layers: wool felt on the bottom, then batting centered within that, then EPP coaster top carefully positioned on top. Give it a gentle press with a warm iron (note that wool is now involved) to set the glue. Clover clip the edges for extra stability and head over to your sewing machine!

glue basting epp coaster tutorial
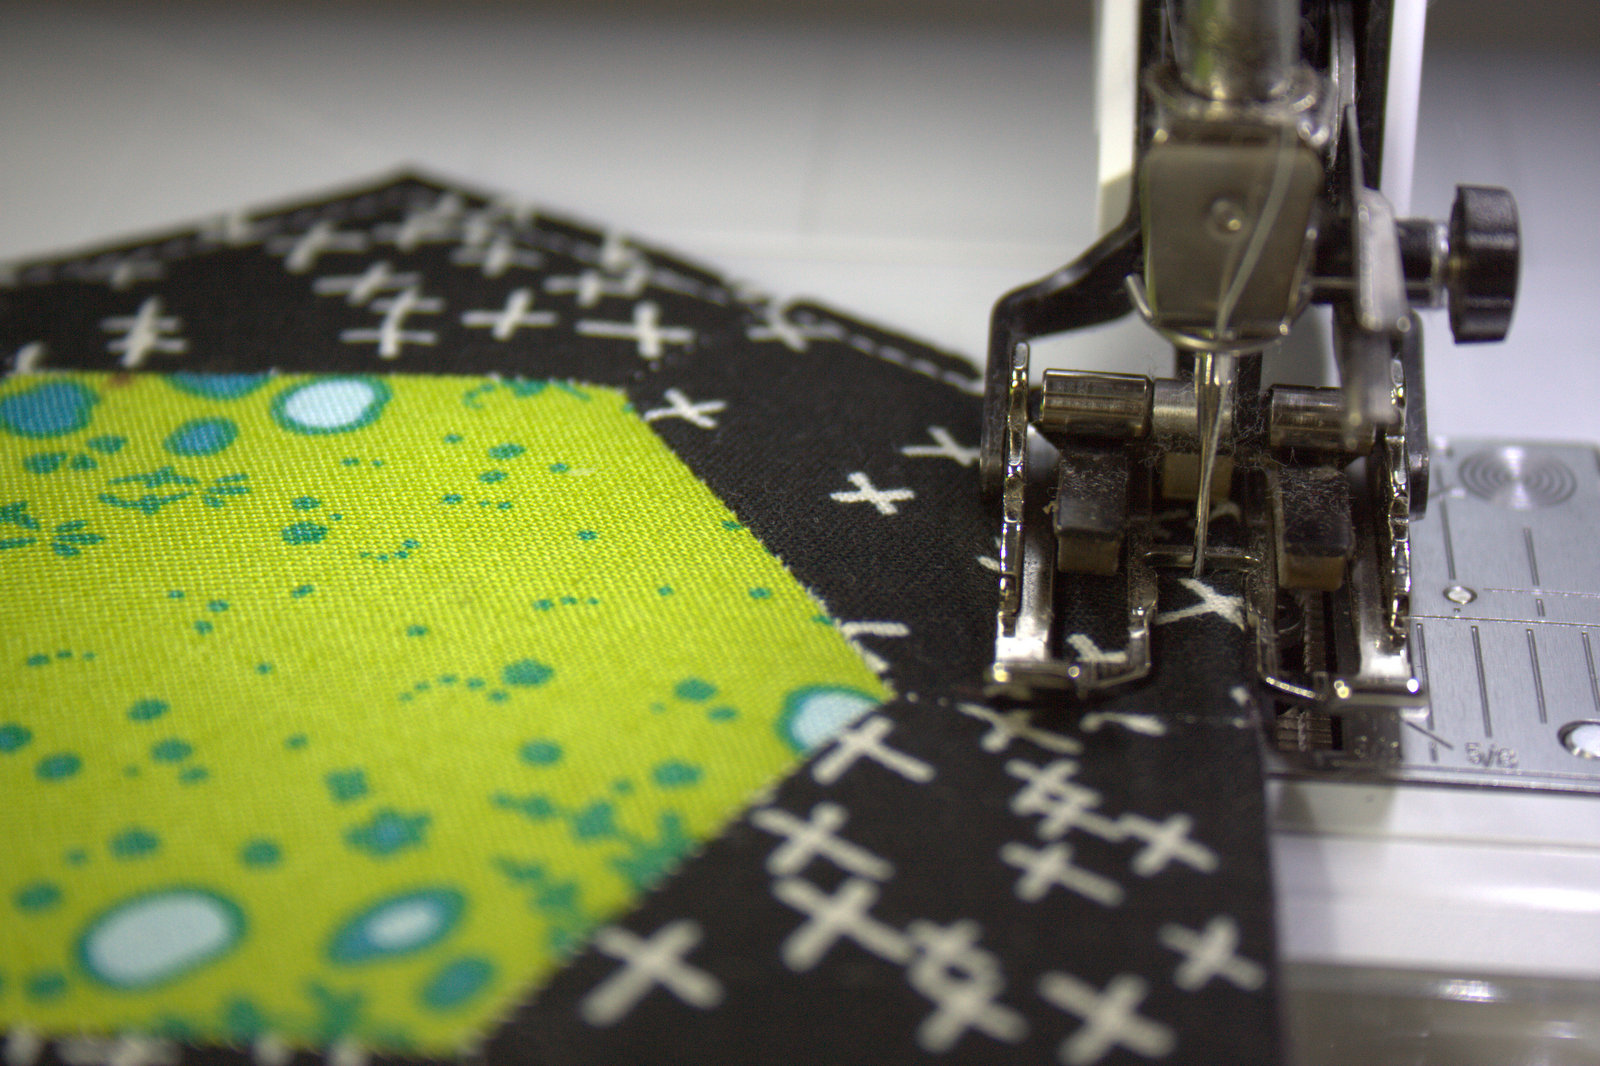
Top stitch about 1/8th inch from the edge of the entire periphery of the coaster.

glue basting epp coaster tutorial
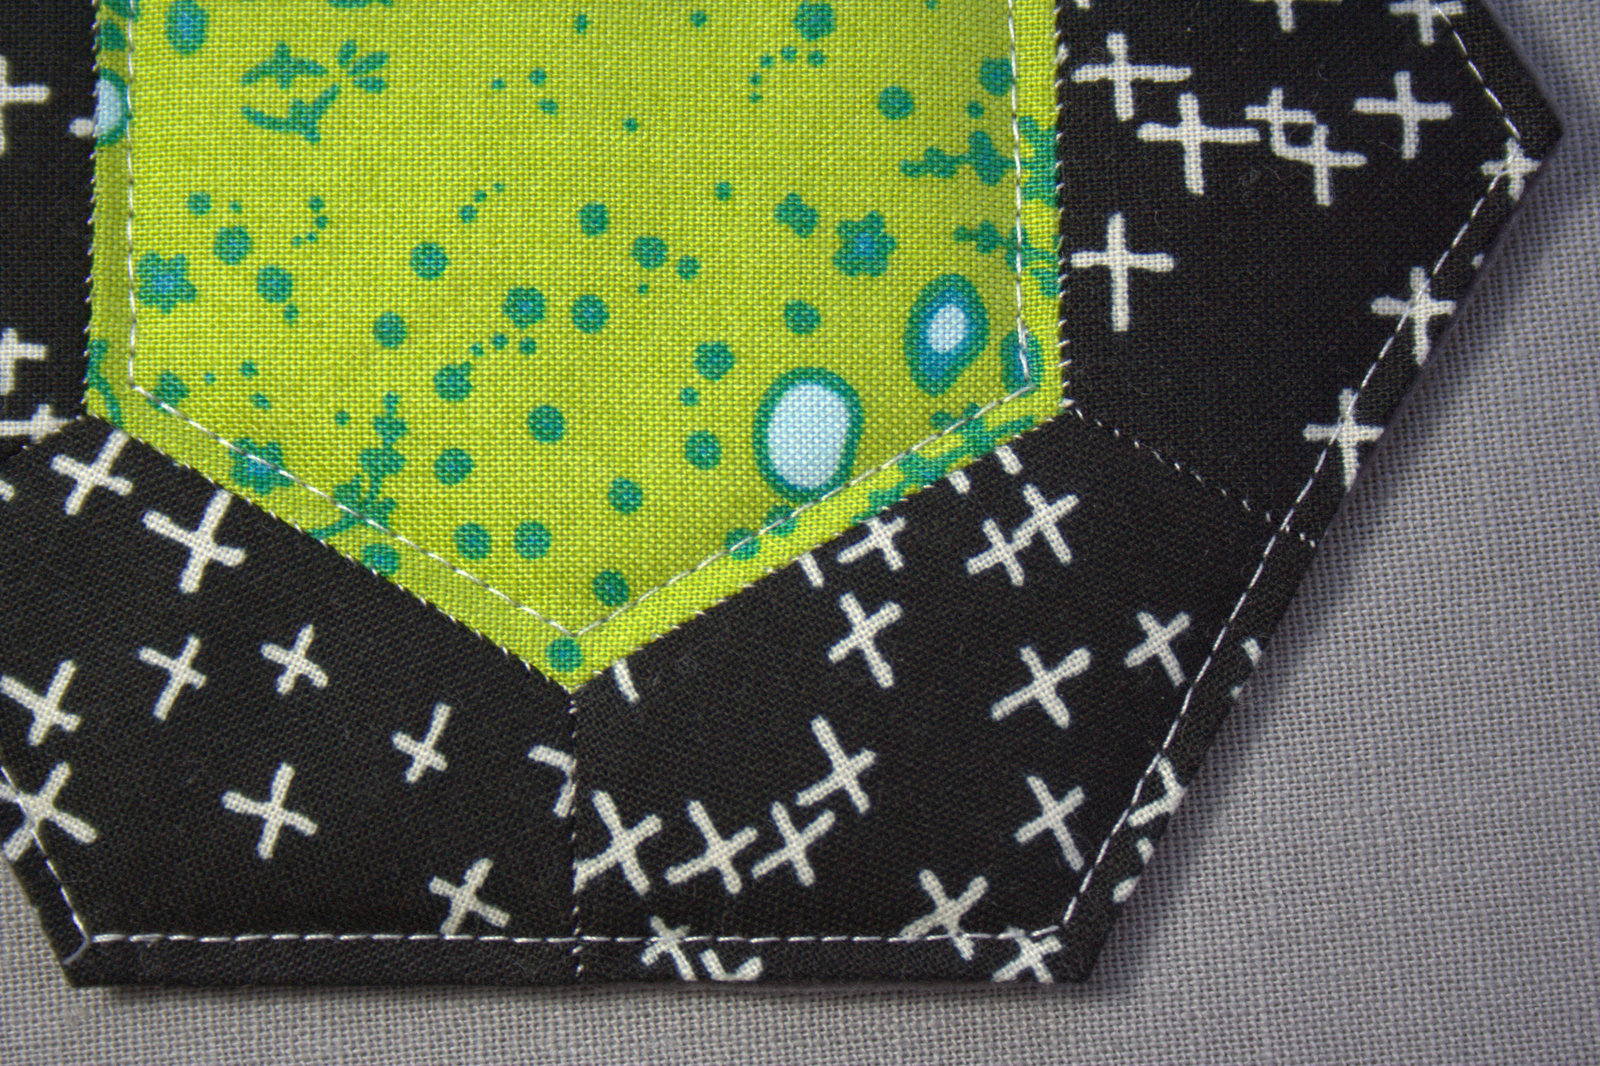
You can also add additional quilting if desired and for added durability. I added a top stitched hexagon about 1/8th inch from the edge of the inner hexagon mirroring the outer edge stitches.

EPP coasters in use
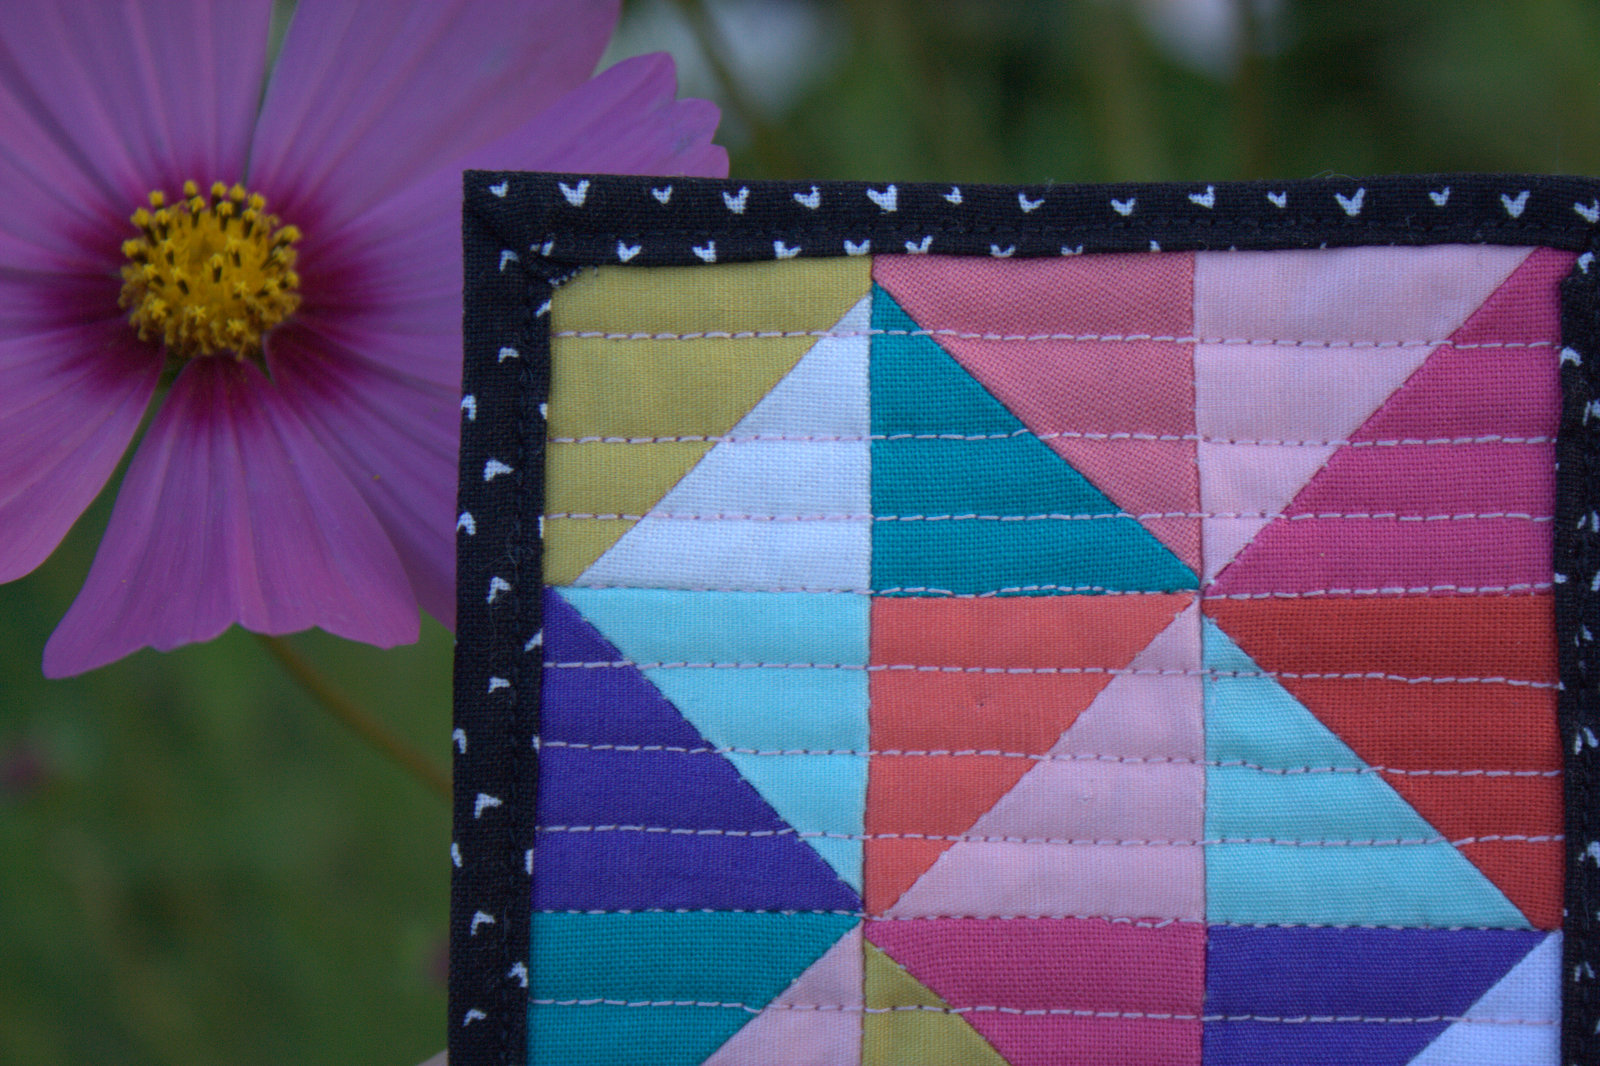
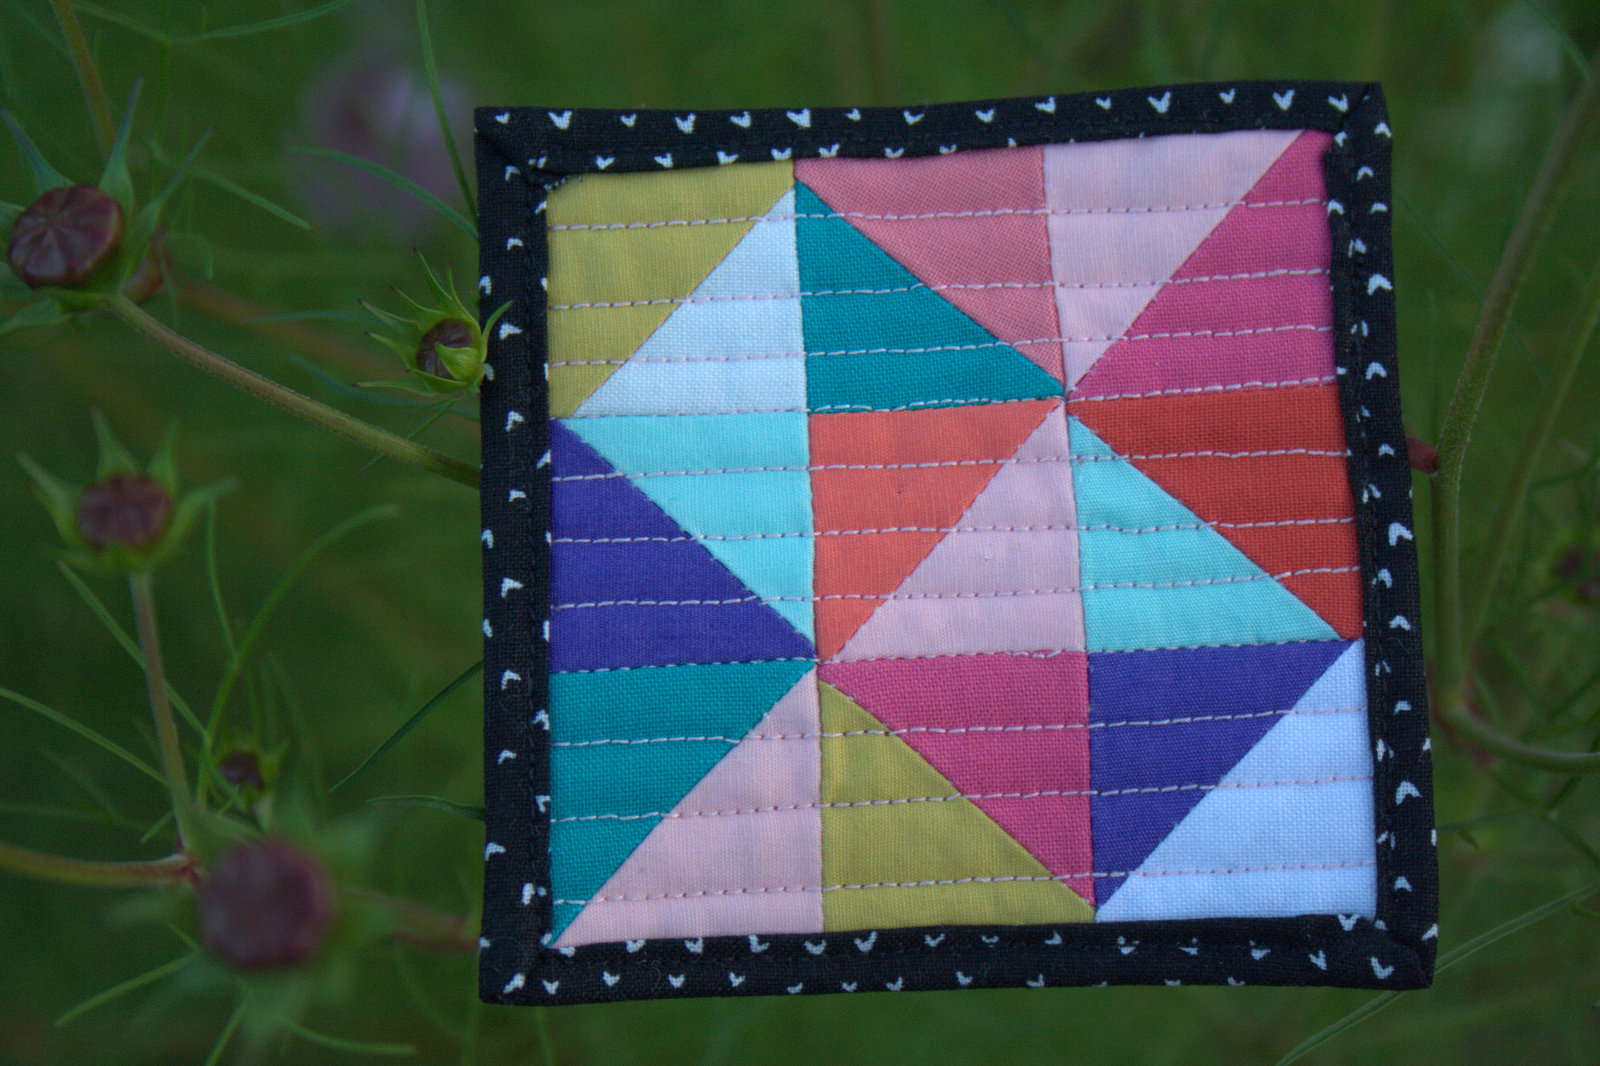
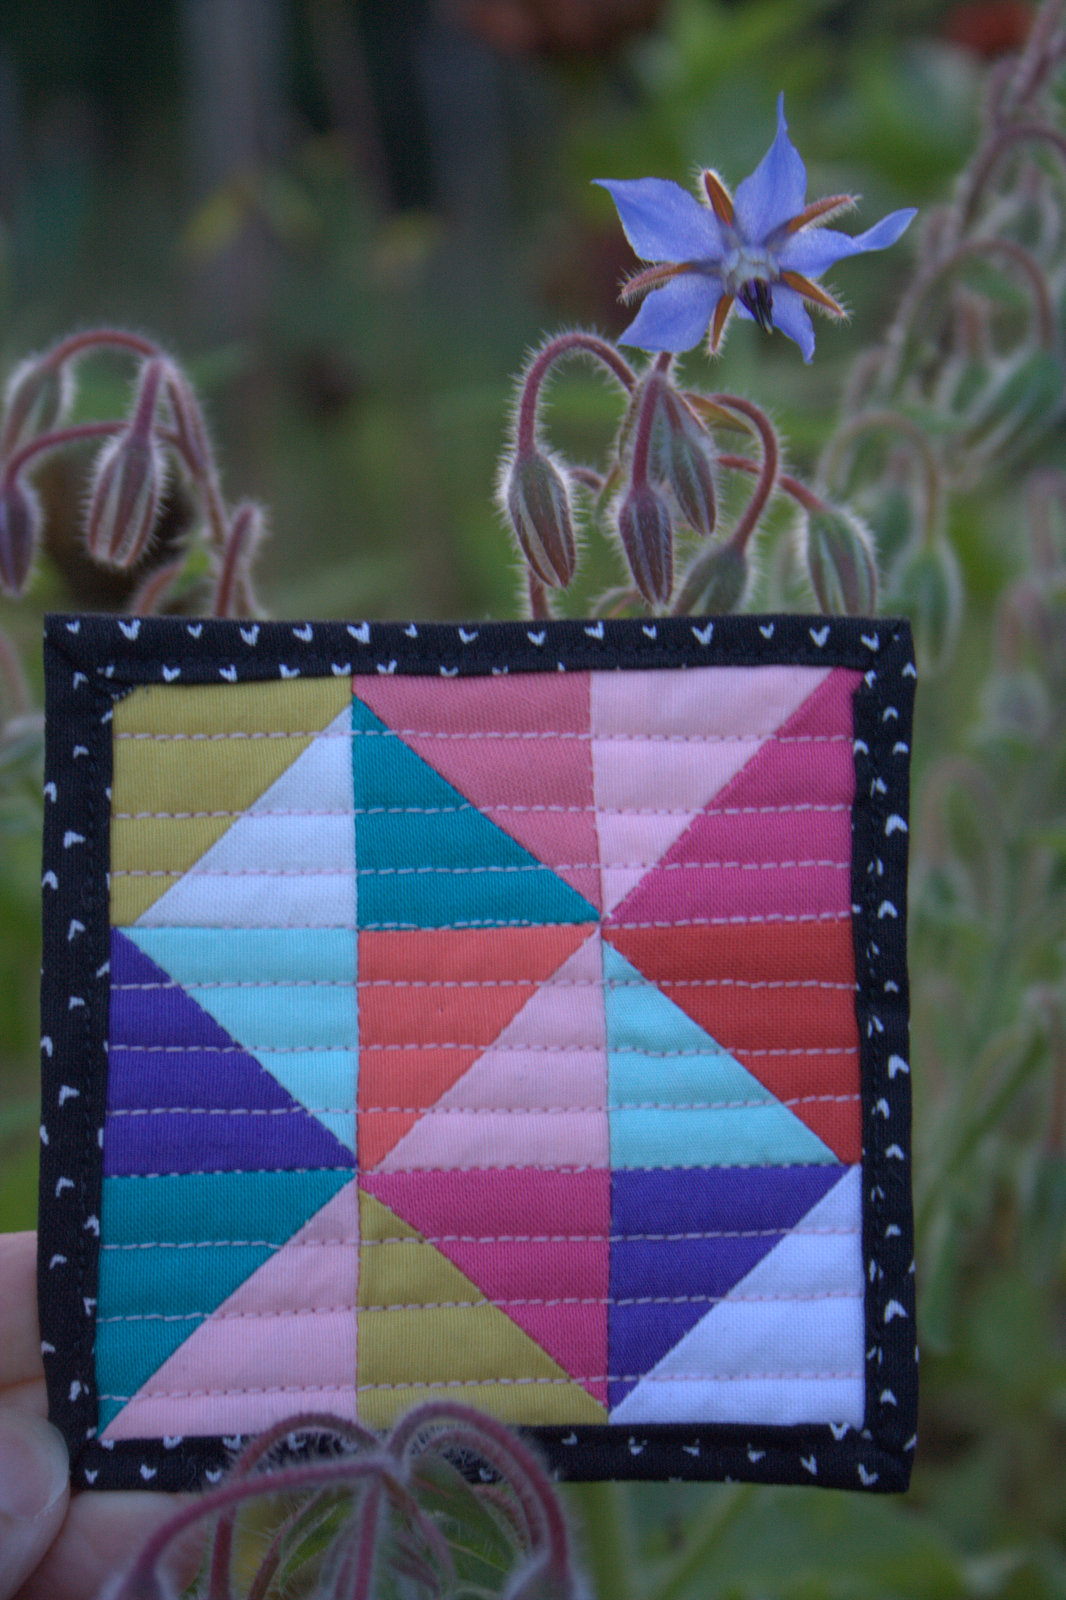
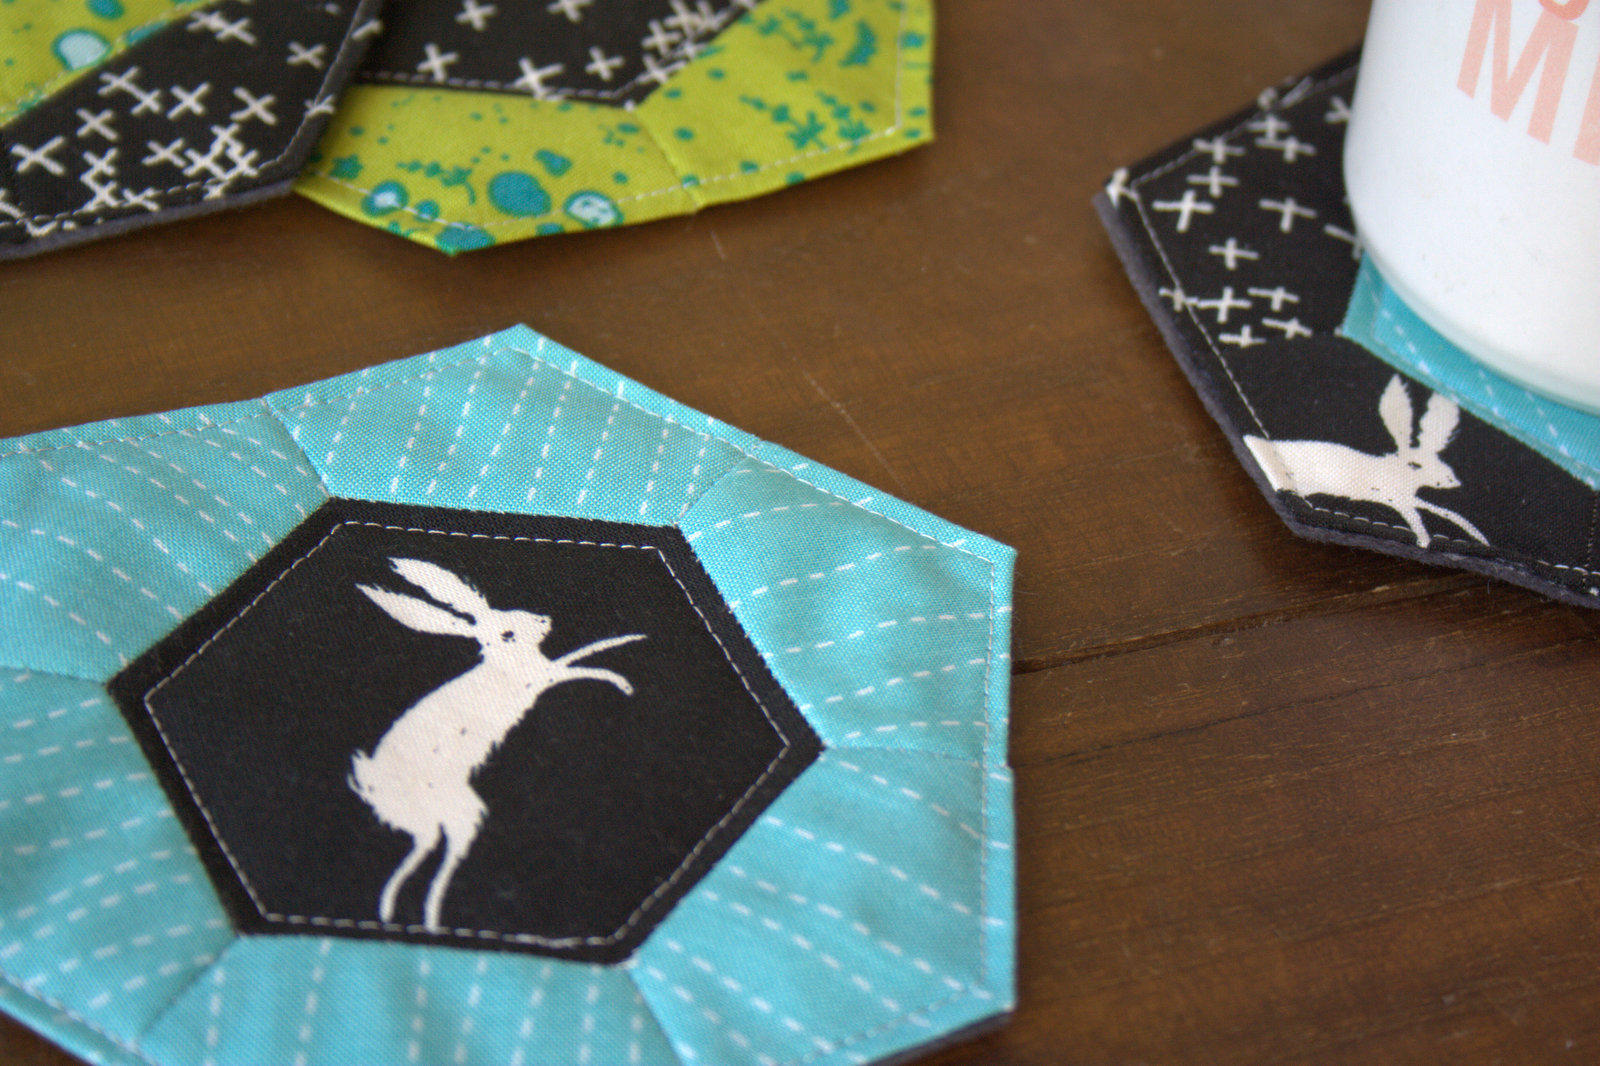
Carefully trim any wool felt that extends beyond the coaster top, and admire your EPP Rose Star coasters. Weren’t those quick and easy gifts? (You can give yourself gifts, too, you know!)

Sizzix Tutorial- EPP Rose Star CoastersBetween cutting the fabric and templates with the Sizzix die cutting machine, glue basting the EPP shapes, and backing the coasters with felt, these whip up as quickly as you can stitch the top together. It’s a great introductory project to EPP since it’s a quick finish, yet is still a handmade, hand stitched gift. I’m definitely planning on making more of these, and playing around with my fussy cutting, too.

*Disclaimer: Clover Clips are a favorite treasure for most toddlers. Use with discretion and awareness that there may be a pudgy hand lurking around any corner waiting to snatch your Clover Clips away.

clover clip toddler treasure

I’m linking up with Late Night Quilter’s Tips and Tutorials Tuesday. Enjoy your coaster-making foray! (You know you want to make some!)

EPP Rose Star Mug Rug: Getting Started {Sizzix Tutorial}

I’m excited to share that today is my Sizzix Design Team debut! Over on the Sizzix blog, I share a tutorial on how to get started on making an awesome English Paper Pieced (EPP) mug rug using the Rose Star die.

sizzix EPP mug rug start tutorialDid you know that there are Sizzix dies created specifically for paper piecing!? I cut all of the templates and fabric needed to piece this EPP star all from a single die! Pretty awesome.

english paper piecing tutorialIn the tutorial, I take you step by step through the process of making and basting EPP pieces, including some helpful tips, so if you’ve been wanting to learn or brush up on your piecing, go check it out!

Welded Quilt: AGF Stitched {& Giveaway}

I’m excited to share one of the big behind-the-scenes projects I’ve been furiously sewing over the past few weeks: my version of the Welded Quilt, the newest free quilt pattern released as part of a collaboration between Art Gallery Fabrics and Fat Quarter Shop called AGF Stitched with Kimberly (or #agfstitched).

agf-stitched-LOGOwelded quilt agf stitchedThis quilt is the third pattern released by Fat Quarter Shop and Art Gallery fabrics (you may have seen the Birchen and Fractal quilt patterns already released). The original version of the Welded quilt features Artisan by Pat Bravo. There’s an awesome instructional video HERE that helps make the organization and piecing of this on-point quilt very straight forward, without having to worry about bias edges. Fat Quarter Shop also has quilt kits and backing sets available.

When I was invited to be a part of the team to make this quilt, I accepted excitedly. I loved the idea of making an on-point quilt, and I knew that I wanted to use the focal diamonds to feature some meticulous cutting (fussy cutting to the rest of the quilting world). I also know how easy Kimberly makes quilt-making with her simple instructions.

utopia fabric fussy cut welded quiltI was invited to use the Art Gallery fabrics of my choice to make this quilt, and the fabric was generously provided by AGF. I quickly selected fabrics from Utopia by Frances Newcombe, including this Dreamlandia Irradiated (featuring the awesome deer), and some coordinating Curiosities by Jeni Baker. I added Art Gallery Pure Elements in Raspberry Rose, Teensy Weensy Lotus from Littlest for the light sashing, and Optical Origami Mod from Urban Mod by the AGF Studio to round out the palette.

utopia welded quilt agfstitchedI did have a few extra dates with my BFF the seam ripper due to directionality miscalculations, so pay extra attention to directionality of your edge pieces if you choose fabric with a distinct top and bottom. Those seam ripping dates were well worth it, though. I’m thrilled with the resulting quilt.

welded quilt in a treeI quilted it with straight lines in a grid work pattern framing the center diamonds, using my domestic Bernina 560 and a walking foot. I kept the quilting fairly minimal to preserve the super softness of the Art Gallery fabrics. I used my go-to thread, Aurifil 50wt in 2600-Dove for both piecing and quilting. I LOVE how this thread complements just about every fabric color combination and pattern.

machine binding welded quiltI machine bound the quilt for durability using the fabulous machine binding tutorial by Allison at Cluck Cluck Sew, and it turned out so well. Practice certainly helps, but I’m finding myself favoring the sharp look of the machine binding more and more (although I will always love hand stitching binding!).

welded quilt deer peeking through fernsI just can’t get over how cute those Utopia deer are peeking out from this quilt. As you can probably tell, I had a blast prancing through our front field with the rest of my family for this quilt photo shoot.

Quilt Stats

Pattern: Welded, part of the AGF Stitched with Kimberly collaboration (instructional video here)

Size: 61” x 79.5″

Fabric (all by Art Gallery Fabrics):
Front: Dreamlandia Irradiated, Specks of Carambola, and Atomic Influx Perse from Utopia by Frances Newcombe;  String Lights Carmin, Book Pressed Memories, and Firefly Jar Dark from Curiosities by Jeni Baker; Art Gallery Pure Elements in Raspberry Rose, Teensy Weensy Lotus from Littlest, and Optical Origami Mod from Urban Mod by the AGF Studio.
Back: Candied Lollies Mint from Curiosities by Jeni Baker.
Binding: Firefly Jar Dark from Curiosities by Jeni Baker.

Batting: 100% cotton Soft n’ Crafty batting

Thread: Aurifil 50wt in 2600 – Dove for both piecing and quilting

Quilting: Straight line quilting in a grid work pattern using my Bernina 560 and a walking foot

Time:
Piecing the top: 14 hours 20 min (includes fussy cutting and seam ripping to fix directionality)
Piecing the back: 45 minutes
Squaring, layering, and basting: 1 hour
Quilting: 5 hrs 10 min
Finishing (squaring): 25 minutes
Binding: 2 hr 30 min
Total: Approx. 24 hours 10 min

Why did it take me so long to bind!? Meticulous machine binding, I suppose! It was worth every minute!
++++++++++++++++++

Now, for a giveaway!

Fat Quarter Shop has generously offered a giveaway to one of my readers. Comment below to be entered to win a bundle of your favorite Art Gallery Fabrics collection!  You can enter by leaving two comments:

  1. What Art Gallery Fabric collection would you choose?
  2. If you follow me, Night Quilter, let me know how–or visit my right sidebar to follow me if you don’t already, then tell me how! (e-mail, WordPress, Bloglovin’, Instagram, Twitter, Craftsy)

The giveaway will be open until Wednesday, September 30th 12noon EST. I will select one winner randomly from the comments below. Good luck!  Note: This giveaway is now closed! Congratulations, Nicole!

Once you enter, be sure to check out the versions of Welded created by the other talented quilt bloggers participating in this event (links will be added as soon as available):

Cara of That Crafty Cara
John of Quilt Dad
Dana of Old Red Barn and Co.
Michele-Renee of Quilt Matters
Corey of Little Miss Shabby
Christina of Sometimes Crafter
Erica of Kitchen Table Quilting
Sinta of Pink Pin Cushion
Jess of The Elven Garden
Svetlana of Sotak Handmade
Jemima of Tied with a Ribbon
Katarina Roccella
Caroline of Sew Caroline
Riane of Vessel Quilts
Megan of Quilt Story
Kaye of Miss Print
Natalia of Piece N Quilt

Just for fun, here are some behind the scenes shots from our frolicking fun family photo shoot:

behind the quilt
My awesome husband not only is a champion quilt holder, but he also climbs downed branches to help adjust the quilt *just so*.
behind the quilt
Finn cheered us on from the stroller while Maddie and Max ran wild.
behind the quilt
Max needed a piggy back all the way home after playing in the field and climbing the apple tree to pick apples.

SnapChat Welded Quilt Photo ShootEveryone’s husband makes a SnapChat story about his family’s quilt photoshoot adventures, right? Yes, my husband is a tech geek extraordinaire! We had fun. Thanks again to Fat Quarter Shop and Art Gallery Fabrics!

I’m linking up with Crazy Mom Quilts Finish it up Friday and TGIFF, because seriously…. I’m so glad it’s Friday and I finished this in time!

P.S. I always try to respond to comments, but may not be able to on the giveaway posts due to the high number of comments.  Please know I appreciate your visit and hope you follow or come back again!

Mega Projects and Mini Minis

Things have been busy behind the scenes here at Night Quilter, and life has been cruising along the way life does. With many big projects about to begin (Farmer’s Wife Sew Along, Sizzix Design Team tutorial posts, a quilt project reveal, etc.), when I saw Michelle Bartholomew post about a mini mini quilt swap on Instagram, the “I love cute little finishes” within me jumped and clicked its heels. I immediately offered to swap mini minis with Michelle. (Look up #miniminiquiltswap on IG to see the current swap stream and jump right in).

mini mini quilt by michelle bartholomewMichelle is deep in the mini mini quilt swap game, so hers was already complete and she must have popped it right in the mail because it has arrived already! I absolutely love how tiny and adorable this mini quilt is.

mini mini quilt by michelle bartholomewThe hearts on the binding are the final touch, in my opinion. So tiny. So perfectly wonderful.

The mini mini quilt idea really resonates with me right now, too. Making a teeny tiny mini mini quilt to swap with a quilty friend gives you an opportunity to try new techniques, new color combinations, quilting styles, etc. without investing too much time or fabric. You also get to make a connection with a quilty friend, sharing a piece of yourself and decorating your walls with pieces of your quilty friends while you are at it. Surround yourself with inspiration! I have really enjoyed the mini quilt swaps in which I’ve participated, but the time investment is more than I have to give right now so I have been firmly resisting the urge to join in on additional mini swaps. The mini mini, though, is TOTALLY doable. Remember #sewtake20? #sewtake20 and make a mini mini! I hope to cover my wonky-sized craft loft walls with them, eventually.

mini mini quilt by michelle bartholomew on cosmosmini mini quilt by michelle bartholomew snuggles borageThis mini mini is so tiny it fit right at home with all of the little flowers in my garden. It lightly sat upon the cosmos leaves and snuggled with the borage.

So what mini mini am I making to mail back to Michelle?

my mini mini quilt in progressI showed her some of the little mini quilt bits I had started to see if any appealed to her and she chose one of my Chawne Kimber-inspired sew small Roberta quilt starts.

So what mini mini am I making to mail back to Michelle?It is far from perfect, but with those little 1/8th inch wide sections, it’s a mini mini work of love, and I think really fun aesthetically. I plan to free motion quilt it in a spiral, bind it somehow, and mail it off!

I’m linking up with Lee’s Work in Progress Wednesday at Freshly Pieced. It’s been a while since a link up for me, but this blog is about to get hopping! I’m excited to show you the projects on which I’ve been so secretly working. Soon…

The Farmer’s Wife 1930s Sew Along

I’m excited to share another behind-the-scenes project for which I’ve been preparing: The Farmer’s Wife 1930s Sew Along hosted by Angie at Gnome Angel and sponsored by Fat Quarter Shop and Marti Michell, which kicks off on September 28th, only 2 weeks away!

The Farmer's Wife 1930's Sew-along: Learn to sew the 99 Blocks from Laurie Aaron Hird's book The Farmer's Wife 1930's Sampler Quilt" with Angie Wilson of GnomeAngel.com, Fat Quarter Shop and From Marti Michell Perfect Patchwork Templates. Find out more here: http://gnomeangel.com/farmers-wife-1930s-sampler-quilt-sew-along/
The Farmer’s Wife 1930’s Sew-along: Learn to sew the 99 Blocks from Laurie Aaron Hird’s book The Farmer’s Wife 1930’s Sampler Quilt” with Angie Wilson of GnomeAngel.com, Fat Quarter Shop and From Marti Michell Perfect Patchwork Templates. Find out more here: http://gnomeangel.com/farmers-wife-1930s-sampler-quilt-sew-along/

The Farmer’s Wife quilt is one that while straight-up traditional, I’ve been itching to make for a while now. I’m not technically a farmer’s wife, but I certainly live in farm country and some of my closest friends are farmers (I’ll call mine the Programmer’s Wife in Farm Country quilt). There was just something about the idea of reading “inspiring letters from farm women of the Great Depression” and then making the respective quilt blocks that really appealed to me. Inspiration plus quilting: what’s not to like? When Angie asked if I would join the official bloggers team for the sew along, I knew that this was my chance–how could I say no?

farmer's wife 1930s sampler quilt
The Farmer’s Wife 1930s Sampler Quilt: Inspiring Letters from Farm Women of the Great Depression and 99 Quilt Blocks That Honor Them by Laurie Aaron Hird for Fons & Porter/F+W; RRP $28.99 – Click here to purchase.

This sew along is going to be super cool. All you need to participate is a copy of Laurie Aaron Hird’s book The Farmer’s Wife 1930s Sampler Quilt and your fabric of choice. I’m going to try to make mine almost entirely from stash, since frugality is part of the farmer’s wife experience.

Over the course of the year, Angie and the blogger team (including me!) will share tips and tricks to help you create all 99 blocks from the book, 2 per week in a non-chronological, easy to more difficult, order. Blocks finish at only 6″ square, and can be paper pieced, hand pieced, you can use templates, do English paper piecing, use a rotary cutter and sewing machine, or try all methods. I will most likely use a variety of methods, heavily favoring the rotary cutter-machine piecing and foundation paper piecing options.

fermers wife meets my chickensI have my book, took it for a little photography tour of our homestead, introduced it to our chickens, and have been thinking about how I want to make my quilt. I really lean heavily toward the modern aesthetic, so I want to try to make this uber traditional quilt “night quilter style”. We’ll see if I can pull it off.

warm vs cool color palette fabric pullThe fabric pull is pretty predictable, but this time instead of a simple rainbow gradient, I want to play with warm vs. cool colors. I’m planning on making the warm colored blocks with a black background and the cool colored blocks with a low volume/white background.

warm colors with blackI really like how fiery the warm colors look paired with black.

cool color with white fabricConversely, the cool colors look almost icy paired with the low volume/whites. I’m really hoping I can find a layout that emphasizes these visual characteristics!

Now that I have EQ7, it makes playing with layout options *really* quick and easy. Knowing that I am a busy, busy mama of three and that there is a decent chance I won’t be able to make ALL 99 blocks, I’ve opted for a layout that includes whole cloth background squares between the blocks, as well as sashing. I plan to use Essex yarn dyed linen in charcoal for the whole cloth background squares, or *maybe* (with the last layout) a gradient from even lighter to darker. Here are some of the layouts I’ve played with. I haven’t landed on one I LOVE yet. What do you think?

Note that rather than buy the entire Farmer’s Wife block file for EQ7, I just used some of the free quilt blocks included in the program. I made them the colors I wanted and then used them in duplicate to get the general aesthetic of the quilt.

Farmer's Wife Layout 1: Warm Cool Converge
Farmer’s Wife Layout 1: Warm Cool Converge

Layout 1. This one feels too stark to me.

Farmer's Wife Layout 2: ROYGBIV blend
Farmer’s Wife Layout 2: ROYGBIV blend

Layout 2. Note that I’ve pretty much decided I’m not going to use this layout. It’s easy, sure, and looks great, but I want to try to stretch my color play muscles a little bit.

Farmer's Wife Layout 3: cool warm
Farmer’s Wife Layout 3: cool warm

Layout 3. I like this one, with consistently colored sashing and background/filler squares. But I’m still not sure it’s exactly what I want. I want to create the effect of the fiery warms rising to meet the cool colors, which are dripping to meet and mingle with the warm.

Layout 4: Cool Warm Converge Blended Background

Layout 4. I like this one more than Layout 1, but I’m still not sold completely.

For now I will plan to start making my cool/warm blocks when the Sew Along begins in two weeks, and will continue to play with layout until I find one I love. Will you be joining in on the Farmer’s Wife Sew Along? If you do, be sure to join the super active Facebook group, too. It will be a fun journey!

September Goal {ALYoF}

I completely missed August for A Lovely Year of Finishes (ALYoF), so I’ll just call it summer break. The ALYoF link up is one of the most successful ones at getting me to finally finish projects, though, so I want to be sure to sneak in September’s goal setting post before it’s too late (in other words, before midnight tonight). I’m choosing a quick and easy goal for this month, since there are a lot of behind-the-scenes projects going on, too.

summer epp table runnerMy goal is to finish my Summer EPP Table Runner. I have a small bit of hand quilting remaining, and then I need to bind it. Easy peasey.

EPP table runner viewWe spent a lovely relaxing family day at the beach today, so I decided to have an impromptu photo shoot. I always carry a couple of hand-sewing projects with me, either a small hand quilting project like this one, some English Paper Piecing, or both! The strong cool breeze of the ocean made the 90 degree day feel absolutely perfect, but it made it a bit tricky to photograph this light weight runner. I took a few photos in full sun, which is typically a photography no-no, but with the gorgeous view and glittering water, how could I resist?

Then I decided that the trek over to the shady half of the beach was worth it. This is just a tiny little lesson in quilt photography. Photographs in full sun result in washed out colors and highly emphasized wrinkles due to resulting shadows (above). Shady photos, however, provide much richer, truer, and almost more gentle colors and a more forgiving look at the quilt despite the lack of an iron’s smoothing touch (below).

summer epp table runner on the beach

summer epp table runner be sweet backingI decided to back this table runner in Bee Sweet in the Morning colorway from Bonnie Christine’s Sweet as Honey fabric line. The bees in the table runner top are from the Bee Sweet in the Sunset colorway, so it coordinates fabulously.

summer epp table runner hand quiltingI have only a bit more hand quilting to do, and then I MIGHT do a little bit of machine quilting to make sure all stays nice and securely despite the many inescapable washes that surely await anything that will live on our table.

aurifil 12 wt threadI’m using 12 wt Aurifil thread #4140 Wedgewood, which is a perfect match. I love the subtle effect of the large quilting stitches in a coordinating color, and I’m very much looking forward to having this table runner finished and on our table. It can be a lingering reminder of our fun and beautiful summer. And it WILL be finished by the end of September!

I’m linking up with the September Goal Setting Party for ALYoF at Fiber of All Sorts and Sew Bittersweet Designs, then going to bed (with a couple hours to spare).

First Quarter: 3 Months

Time flies. Really, it does. It’s so cliche, but when it hits me how quickly hours become days, days become weeks, weeks become months, and then, surely, the months become years, it makes me slow down and remember how important it is to make the most of each moment. Three months have already passed since little Finn joined us on the outside. The first quarter of his first year is complete. I actually planned ahead this month, too, so that means a quarter of his monthly milestones baby quilt is complete.

monthly milestone quilt 3 months
“Wow, that’s growing!”

As promised, I finally settled on an overall layout and design for this quilt, and now I’m even more excited for the outcome.

Finn's Monthly baby quilt layout mock upI settled on a color scheme of dark and light teal and blacks/greys, both because they are fabulous colors, but also because I have plenty of teal and black/grey fabric in my scraps pile and stash. I also added a slightly skewed log cabin block to help provide the appearance of some curves and to add some interest to the overall quilt.

Finn's Monthly quilt block 2
Monthly Milestones quilt Block 2

This month I made a Block 2, with wide light teal and narrow black/grey pieces. Creating the illusion of a curve is really quite simple with log cabin blocks. I drafted this block from the outside in, with 1″ strips on two edges and 2″ strips on the opposite two edges, ending with a 2″ square in the off-set center.

The finished quilt will require five (5) block 1s and seven (7) block 2s. Block 1 is a more improv, scrappy log cabin with strips varying in widths, but generally around 2″ or 2.5″ in width. Both blocks are quick and easy to make.

monthly milestone quilt 3 monthsEnough about the quilt, though; I know you really want to hear about Finn! He is truly a blessing. He still loves to “talk” back and lights up whenever anyone looks him in the eye. His favorite thing as far as I can tell is having conversations with anyone who will sit and look at him, replying to his baby babble and grunts. He is generous and unbiased with his smiles, but the looks of true adoration are directed toward his siblings.

finn 3 months

finn talking at age 3 monthsFinn just recently started finding his hands, which is really fun to watch. I love seeing him deep in thought, examining his hands and clearly working hard at figuring out how to get them to do his bidding. He grabs my arm or hand when it’s within his reach, but he’s not quite reaching out to grab things yet.

Finn 3 MonthsNow that I have a clear plan for the quilt, I’m even more excited to see it come together as Finn grows. While I’m tempted to up the ante to two blocks per month (one every 2 weeks feels doable), I am going to be easy on myself and stick with the one block per month plan. A finished 36″x48″ will be a great drag-around size as he grows into toddlerhood.

I’m linking up with Show off Saturday with Sew Can She.

**Sponsor News**

Fiddlehead Artisan Supply is having an Online Labor Day Weekend Sale!

Use the code LaborDay2015 at checkout to get 15% off anything on their website all weekend (today, Saturday, September 4th through Monday, September 6th).  Fiddlehead now has international shipping available, too! Check out the details on their Shipping Page.

Flashback Friday: My First Quilt

My friend Jenn at A Quarter Inch from the Edge recently began a Throwback Thursday link-up where she encourages quilt-bloggers to share oldies but goodies–quilts from before their blogging days. Since I usually post my Color Inspiration posts on Thursdays, I have yet to participate. Plus, I think I only made two quilts, one wall hanging, and one table runner before beginning to blog, so you haven’t missed all that much! Since I’ve been sick (unfortunately Lyme tests came back positive, so I’m now on antibiotic treatment for that, hoping that my joint swelling and pain and extreme energy-level fluctuations will taper off and that we caught it early enough to avoid any long term Lyme crazies), I’ve been laying low without much sewing or inspiration to share. Since I missed Thursday anyway, I figure today is as good a day as any to dig through my photo archives for some pictures of the first quilt I ever made: my Rainy Days Picnic Quilt.

Rainy Days Picnic quilt first quilt

At the end of July, 2010, I purchased my first fabric bundle, Rainy Days and Mondays by Melimba and Beccabury for Riley Blake Designs, from FabricFly Shop on Etsy. With 15 fat quarters, and zero knowledge about quilting, I planned on making a quilt the only way I knew how: cut squares and sew them together. In my mind, this fabric was perfectly ironic for a picnic quilt: if there were rain and umbrellas all over our picnic quilt, then it would never rain on our picnics. Perfectly logical, right?

rainy days picnic quiltA picnic quilt was the perfect starting point, since it helped the stress level go WAY down. It was my first time ever making a quilt, but because it was slated to be a picnic quilt, with the knowledge that we would flop it down on the ground and spill food all over it, surely change diapers on it, drip lake water and watermelon juice all over it, smear avocado into it, and all of the other love-filled-things that happen on picnics, I was much less worried about imperfections. And boy, has it seen its share of babies and picnics!

Picnic quilt in use
Clockwise from top left: Picnic quilt in use at a playground, the beach, our front porch, and our back yard.
canoe island picnic
Lunch on an island in the Great Pond Mountain Conservation Trust. We had a family canoeing day trip here in 2014, and of course the picnic quilt came, too!

At around 60″x60″, I remember thinking how HUGE it would be–perfect for picnics! Now that I really quilt, and now that I see the quilt laid out and finished, I realize that a picnic quilt for a family of 5 really should be at least 84″x84″ or even larger. For now, it is wonderful.

I don’t remember exactly when I finished this quilt, but it was definitely well into 2011 or even 2012. I remember quilting it on our kitchen table while my husband took Maddie out for a daddy day. Boy, I thought it was huge!

Overlap binding: double fold bias tape novice methodThis quilt makes me laugh now because of how little quilting knowledge I had at the time. I actually bought double-fold bias tape, folded it over the edge and top-stitched it on. What method did I use to join the ends? Overlap and top stitch! I laugh because if I had even googled “how to bind a quilt” I could have learned how to actually bind a quilt. But honestly, I probably didn’t even know that the edging could be made with actual fabric and that it was called binding. Oh how far I’ve come in the past 3-4 years!

Despite all of these novice bits (or maybe because of them) it’s hands down our most used and loved quilt. (Although Maddie’s Rainbow Jellyroll quilt and my Doe Layers of Charm quilt are quickly becoming contenders with their permanent snuggle status on the couch).

picnic quilt
It should be noted that I broke many of my quilt photography rules in photographing this quilt today. But when I realized I didn’t have any photos that actually showed the entire quilt, I brought my little helpers outside to remedy that. Knowing the shortness of their arms and attention spans, I opted to use the most sturdy and level structure around: their new skyfort playground, in full sun. C’est la vie.

This Rainy Days Picnic quilt is special because it embodies my motto: just try it. I didn’t know how to quilt, so I did what I knew: I bought fabric, cut it into squares, moved it around until I thought it looked good, sewed it together, layered it with batting and backing, sewed straight lines corner to corner to hold the layers together (I used whatever thread was laying around and the same regular sewing machine foot I used to piece it), sewed a “binding” edge on and started using it. Everyone has to begin somewhere!

Do you remember the first quilt you ever made? I’d love to hear about it!

I’m linking up with Throwback Thursday with Jenn at A Quarter Inch from the Edge.

Fabri-Quilt New Block Blog Hop: Transparent Play {Tutorial}

fabri-quilt-new-block-blog-hopWhen I was invited to join the Fabri-Quilt New Block Blog Hop with the challenge of creating a new 12″ finished quilt block and sharing a tutorial, I immediately thought of transparency. I’ve been seeing fellow quilters play with transparency a lot lately (Yvonne’s Triangle Transparency quilt and the Transparency Bee Blocks by Hilary of Entropy Always Wins Blog and Leanne at She Can Quilt stand out in my mind most), and have yet to give it a go.

Watermelon Summer Color Palette
Colors chosen: Chartreuse, Turquoise, Coral, Aqua, Lapis Blue, White

As soon as I saw the color palette chosen, I knew that transparency it was (I’ll save the chartreuse and coral for an actual watermelon project)! I had fun creating a block that both looks cool on its own, but also can result in many fun layouts when replicated for a quilt. I call it Transparent Play (original, huh?!)

Today I’m going to share a tutorial for how to make the new block Transparent Play that I created using fat eighths provided by Fabri-Quilt. While I’m not typically a prewasher, I would definitely recommend prewashing the Fabri-Quilt solids with a color catcher or two.

TUTORIAL- Transparent Play BlockNote that part of the challenge for creating this block was to make it out of only fat eighths of fabric, so cutting instructions assume a fat eighth is being used. Fat eighths typically measure 9″x21″.

General Notes

All seams are sewn with 1/4″ seam allowance unless otherwise noted. I like to press seams open since it helps the block lay flat and helps me better match seams. Do what works best for you.

Fabric Requirements & Selection

For this block, you will need a fat eighth of each of the following fabrics:

  • a neutral background (I used white)
  • a dark (I used lapis blue)
  • a light (I used aqua)
  • a blend or medium (I used turquoise)

Since the block is designed for playing with transparency, try to choose fabrics that give the impression of transparency. The blend fabric should be a color that could result from the dark and the light fabrics being overlapped. Note that while I made my block mostly monochromatic (one color), this block could be made with color blends, too. For example red as your dark, yellow as your light, and orange as your blend.

Cutting Instructions

Again, this tutorial is assuming a fat eighth of fabric is being used for each color. Strips should be cut along the long edge of the fat eighth (usually 20-21″ long and called length of fabric (LOF) in this tutorial). Note that many sections of the block will be strip pieced, so the initial cutting keeps this in mind.

label cut piecesBe sure to label your pieces with the coordinating letters so that piecing is a breeze!

From white:

Cut 1 strip 1 1/2″ x LOF and subcut (1) 1 1/2″x10″ strip (A); and (2) 1 1/2″x5″ rectangles (B).

Cut 1 strip 3″ x LOF and subcut (2) 3″x3 1/2″ rectangles (C); (2) 3″x4 1/2″ rectangles (D); and (1) 1″x5″ strip (E).

From lapis blue (dark):

Cut 1 strip 2 1/2″ x LOF and subcut (1) 2 1/2″x5″ rectangle (F); (1) 1 1/2″x5″ rectangle (G); (1) 1″x5″ rectangle (H–note, this fits next to G in the strip); and (2) 1 1/2″x3 1/2″ rectangles (I).

Cut (1) 2 1/2″x7 1/2″ rectangle (J).

From aqua (light):

Cut (1) 1 1/2″x11″ strip (M).

Cut (1) 2 1/2″xLOF and subcut (1) 2 1/2″x5″ (N); and (1) 2 1/2″x10″ (O).

From turquoise (medium):

Cut (1) 3 1/2″xLOF and subcut (1) 3″x5″ rectangle (K); and (1) 1 1/2″x11″ strip (L).

Piecing Instructions

Making the Top and Bottom Panels

KHSew H to K along the 5″ side. Cut into two equal 3 1/2″x2 1/2″ rectangles as shown above. These are the HK units.

IKHSew I to the top of each HK unit, ensuring that the dark lapis blue  H strip is on the left. You will have (2) 3 1/2″ squares (above). These are the IHK units. Set aside.

AOSew A to O along the 10″ side. Cut into two equal 5″x3 1/2″ rectangles as shown above. Set aside.

FBSew F to one of the B pieces along the 5″ side. Cut into two equal 2 1/2″x3 1/2″ rectangles as shown above. These are the FB units.

CFBWith F on top, sew C pieces to the left side of the FB units along the 3 1/2″ edge. These are the 3 1/2″x5″  CFB units.

top bottom panelAssemble the top and bottom panels as shown above. Note that they can be assembled identically, but we will rotate one of them 180 degrees as the bottom panel before final assembly of the block.

*Accuracy Tip*

Pin AFTER seamWhen matching seams, line up the full length of the seams to be matched (not just at the raw edge) and then pin directly after the seam (about 1/16th “). This will ensure your seams stay in position without the pin skewing the fabric alignment when sewing. It will often result in perfectly matched seams.

Making the Center Panel

MLSew M to L along 11″ side. Cut into two equal 2 1/2″x5 1/2″ rectangles as shown above. These are the ML units. Set aside.

BGSew B to G along 5″ side. Cut into two equal 2 1/2″x2 1/2″ rectangles as shown above. These are the BG units. Set aside.

MLBGSew ML units to BG units as shown above. These are the MLBG units.

MLBGJSew MLBG units to long sides of J as shown. Note that the bottom MLBG unit has been rotated 180 degrees. Pay close attention to the position of the colors to ensure the MLBG units are mirroring each other. Set aside.

ENSew E to N along 5″ side. Cut into two equal 3″x 2 1/2″ rectangles as shown above. These are your EN units.

ENDSew D to the bottom of each EN unit, ensuring that the background white E strip is on the left. You will have (2) 3″x6 1/2″ rectangles (above). These are the END units.

center panelAssemble the center panel as shown above. Note that the right END unit has been rotated 180 degrees. Pay close attention to the position of the colors before sewing. The center panel should measure 12 1/2″ x 6 1/2″ at this point.

transparency play block assemblySew top and bottom panels to center panel to complete the quilt block as shown above. Note that the bottom panel has been rotated 180 degrees.

transparent play block tutorial

Congratulations! You just made your first Transparent Play block. It wasn’t nearly as tricky as it first looked, was it? Strip piecing is awesome.

This block is fun to play with when it comes to layout, since by simply rotating the blocks, you can create a number of different visual layout effects. Here are just a few:

Layout 1: All blocks in line

Transparency Block 4x4 Quilt Layout 1

Layout 2: Bull’s Eye

Transparency Block 4x4 Layout2

Layout 3: Braid

Transparency Block 4x4 Layout3
I also couldn’t let a post go without including a peek at a rainbow, so here’s a sample block using color gradient transparency instead of monochromatic transparency.
Transparency Play Block rainbow colorand a resulting layout:
Transparency Play with color rainbow layout3

I hope you’ve had fun making your Transparent Play block, and please tag me @nightquilter on social media if you make it–I would love to see!

There are many other wonderful free block tutorials (60+!) posted in this Fabri-Quilt New Block Blog Hop. Here are the others posted today:

Host – Stephanie @Late Night Quilter
Hannah @Modern Magnolia Studio
Cindy @Stitchin At Home
Abby @Hashtag Quilt
Lisa @Sunlight in Winter Quilts
Carrie @Chopping Block Quilts
Brianna @The Iron and Needle
Tish @Tish’s Adventures in Wonderland
Jan @The Colorful Fabriholic
Sarah @Smiles Too Loudly
Beth @Cooking Up Quilts
Leanne @Devoted Quilter
Liz @LizzyClips Design
Kim @Leland Ave Studios

Also be sure to visit the others hosts’ pages (Yvonne @Quilting Jetgirl, Cheryl @Meadow Mist Designs, and Terri Ann @Childlike Fascination) for links to all of the blocks posted Monday through Thursday of this week. All of these blocks are being mailed to a host, who is assembling them into charity quilts.

inchworm friend

I made an inchworm friend while photographing this block. He was testing out my seams for good measure! (get it!? LOL) Have fun inching your way through the rest of the blog hop!

I’m linking up with Tips & Tutorials Tuesday at Late Night Quilter.

Unlocked in Make Modern Magazine

Today I’m so excited to share that my magazine debut (as the covergirl, no less!) is here. My pattern Unlocked appears in this month’s edition of Make Modern magazine, and even graces the cover (can you say excited!?!).

make modern cover issue 7

Make Modern is a digital modern quilting magazine, full of great patterns for quilts and smaller sewn items, articles, tips, and features. This issue (Issue 7) has a lovely meet and greet with none other than the most glittery quilter around: Molli Sparkles. Based in Australia, Make Modern was the brainchild of three quilting friends: Jane, Lara, and Kristy. You can read about their philosophy HERE, which I definitely recommend. From the sustainability and accessibility of a digital magazine, to being a positive driving force in the modern quilting world, they’ve got it going on.

You can purchase single issues of the magazine or can choose 3 issue (6 month) or 6 issue (yearly) digital subscriptions. I’m honored to be a part of this publication.

Unlocked single block artisticI’ve shown you tiny peeks at my quilt Unlocked, but really nothing that gave away more than the obvious: it features the full Mercury and Grove lines from Alison Glass’s 2015 Sun Prints, on a gorgeous Robert Kaufman Essex Yarn Dyed Linen in Charcoal background. I used my go-to thread panacea Aurifil Dove #2600 for piecing. It’s very scrap-friendly, since each key only needs a fat eighth of fabric. Unlocked is also super versatile since a simple adjustment of the number of keys made and surrounding background results in any sized quilt you want.

unlocked center

unlocked reflectionWhile I really wanted a castle door or giant gate in which to photograph this quilt, a trip to Ireland was not in the budget, so Belfast, Maine had to suffice. I have the world’s best quilt holding husband, who schlepped our kids and a quilt all over town at the whim of me, his crazy quilt-making photo-crazed wife. We got some great shots, though, so I’d say it was well worth it! He really should start a blog “Behind the Quilts”.

unlocked block detail

unlocked detailUnlocked was longarm quilted by my ever-talented friend Stephanie at Late Night Quilter and it looks amazing. She used the Cityscape Path straight line quilting style designed by Krista Withers and photos don’t even come close to doing it justice. I’m so grateful to Stephanie for quilting this, since I was able to finish the quilt top and mail it off to Stephanie right before giving birth to Finn. Then, she was able to quilt it and get it back to me a couple weeks postpartum so that I could bind it and photograph it in time for the publication deadline. Teamwork at its best!

Head on over to Make Modern and grab your copy of this fabulous modern quilting publication.