I completely missed August for A Lovely Year of Finishes (ALYoF), so I’ll just call it summer break. The ALYoF link up is one of the most successful ones at getting me to finally finish projects, though, so I want to be sure to sneak in September’s goal setting post before it’s too late (in other words, before midnight tonight). I’m choosing a quick and easy goal for this month, since there are a lot of behind-the-scenes projects going on, too.
My goal is to finish my Summer EPP Table Runner. I have a small bit of hand quilting remaining, and then I need to bind it. Easy peasey.
We spent a lovely relaxing family day at the beach today, so I decided to have an impromptu photo shoot. I always carry a couple of hand-sewing projects with me, either a small hand quilting project like this one, some English Paper Piecing, or both! The strong cool breeze of the ocean made the 90 degree day feel absolutely perfect, but it made it a bit tricky to photograph this light weight runner. I took a few photos in full sun, which is typically a photography no-no, but with the gorgeous view and glittering water, how could I resist?
Then I decided that the trek over to the shady half of the beach was worth it. This is just a tiny little lesson in quilt photography. Photographs in full sun result in washed out colors and highly emphasized wrinkles due to resulting shadows (above). Shady photos, however, provide much richer, truer, and almost more gentle colors and a more forgiving look at the quilt despite the lack of an iron’s smoothing touch (below).
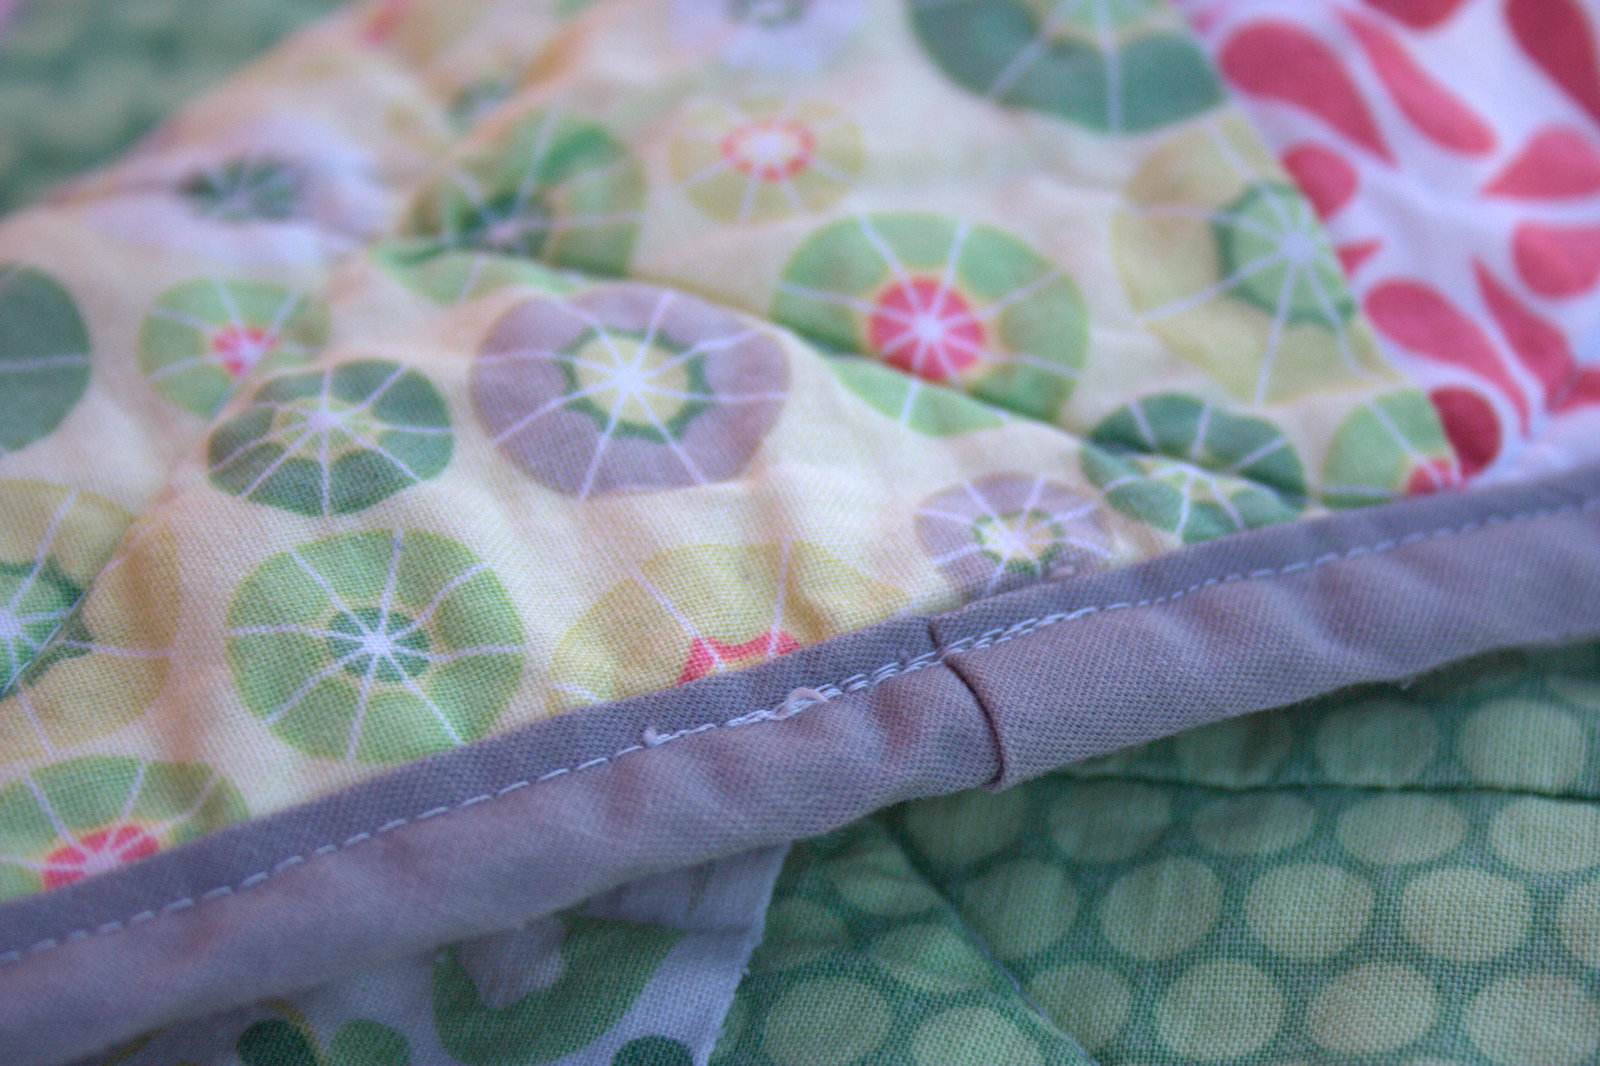
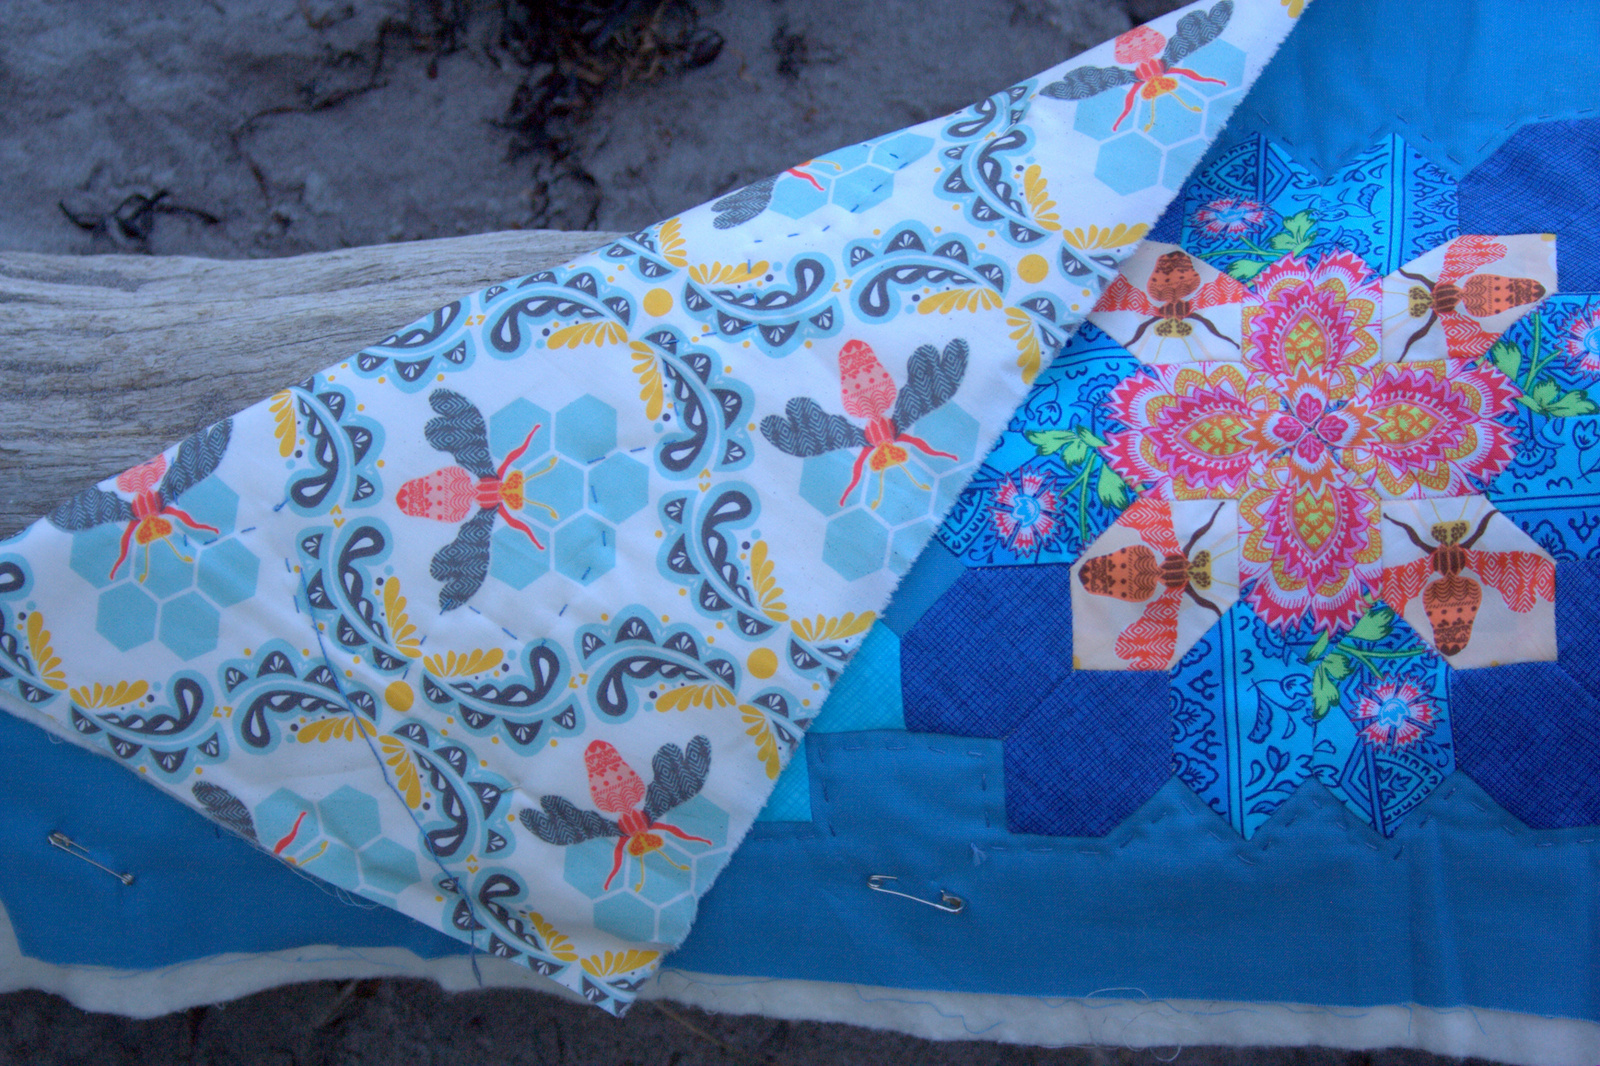
I decided to back this table runner in Bee Sweet in the Morning colorway from Bonnie Christine’s Sweet as Honey fabric line. The bees in the table runner top are from the Bee Sweet in the Sunset colorway, so it coordinates fabulously.
I have only a bit more hand quilting to do, and then I MIGHT do a little bit of machine quilting to make sure all stays nice and securely despite the many inescapable washes that surely await anything that will live on our table.
I’m using 12 wt Aurifil thread #4140 Wedgewood, which is a perfect match. I love the subtle effect of the large quilting stitches in a coordinating color, and I’m very much looking forward to having this table runner finished and on our table. It can be a lingering reminder of our fun and beautiful summer. And it WILL be finished by the end of September!
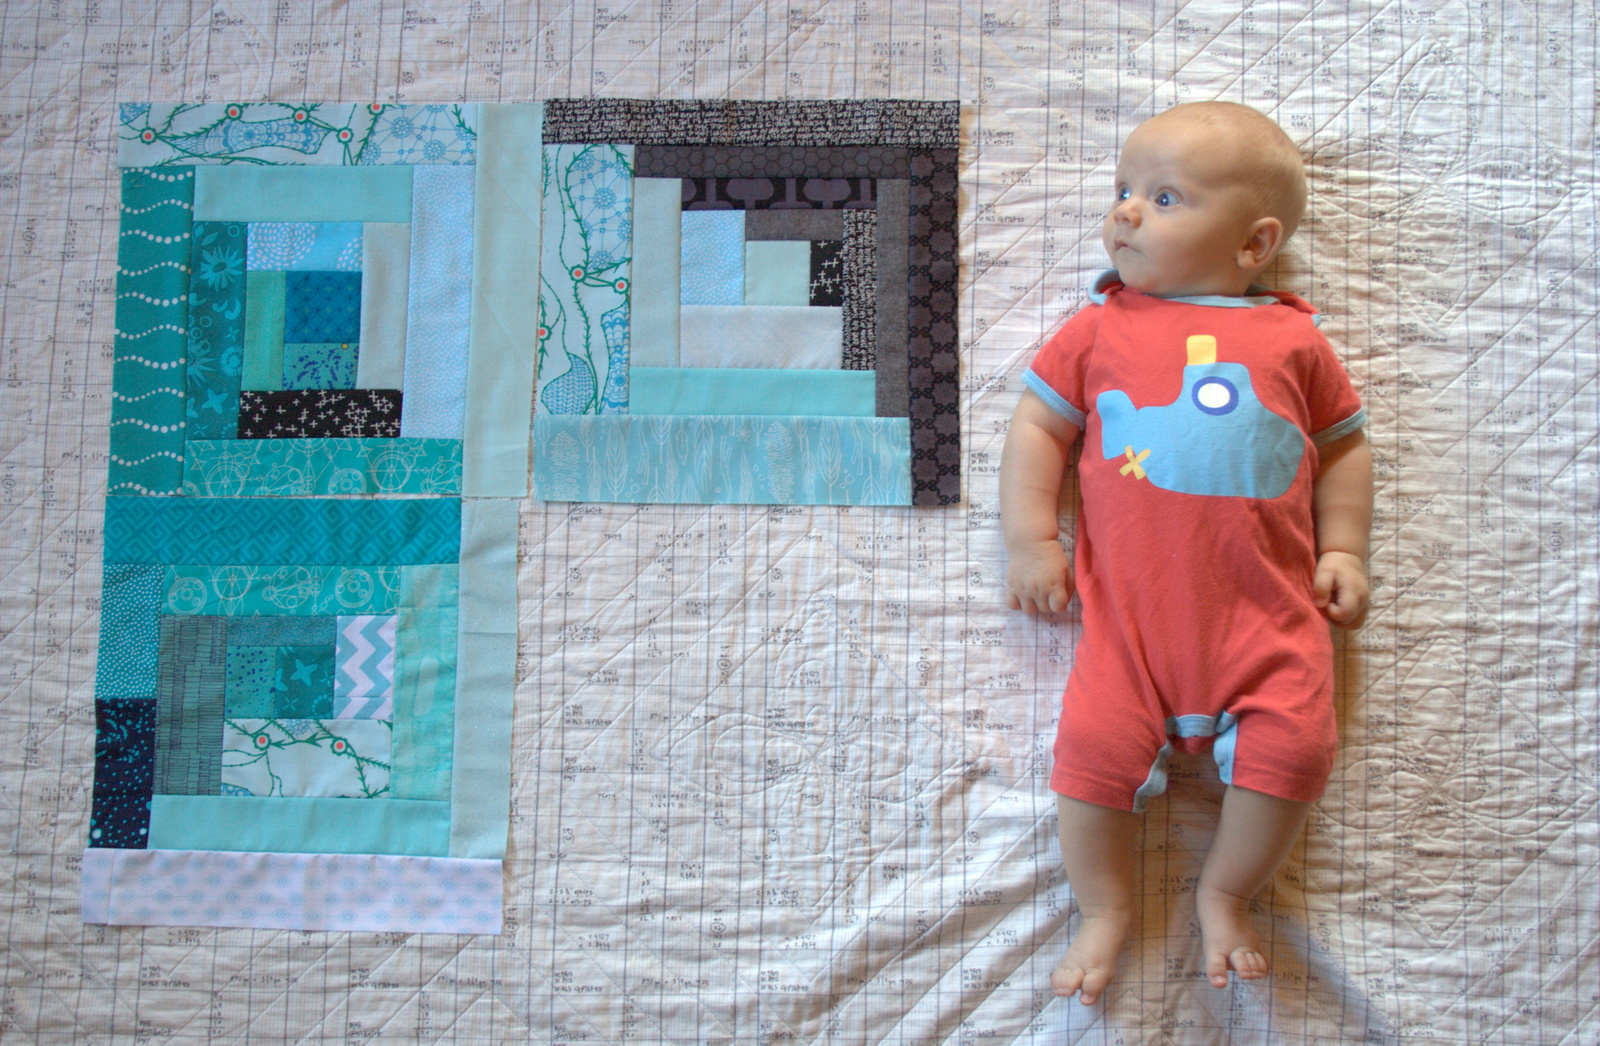
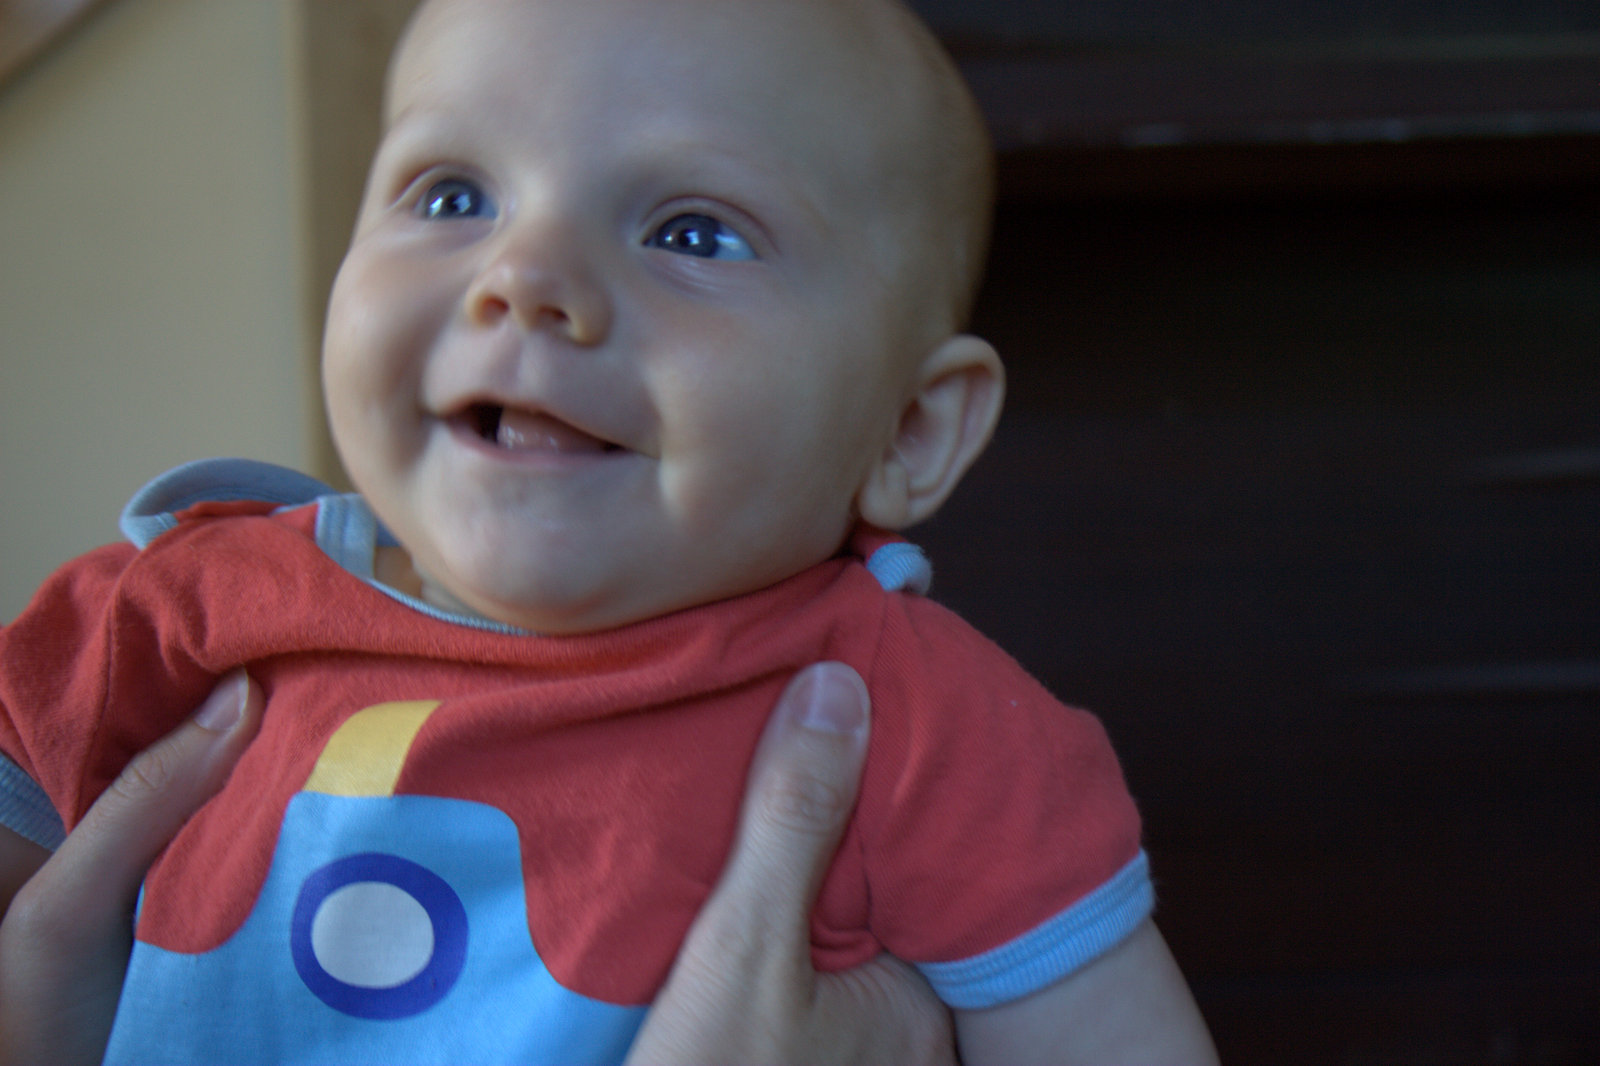
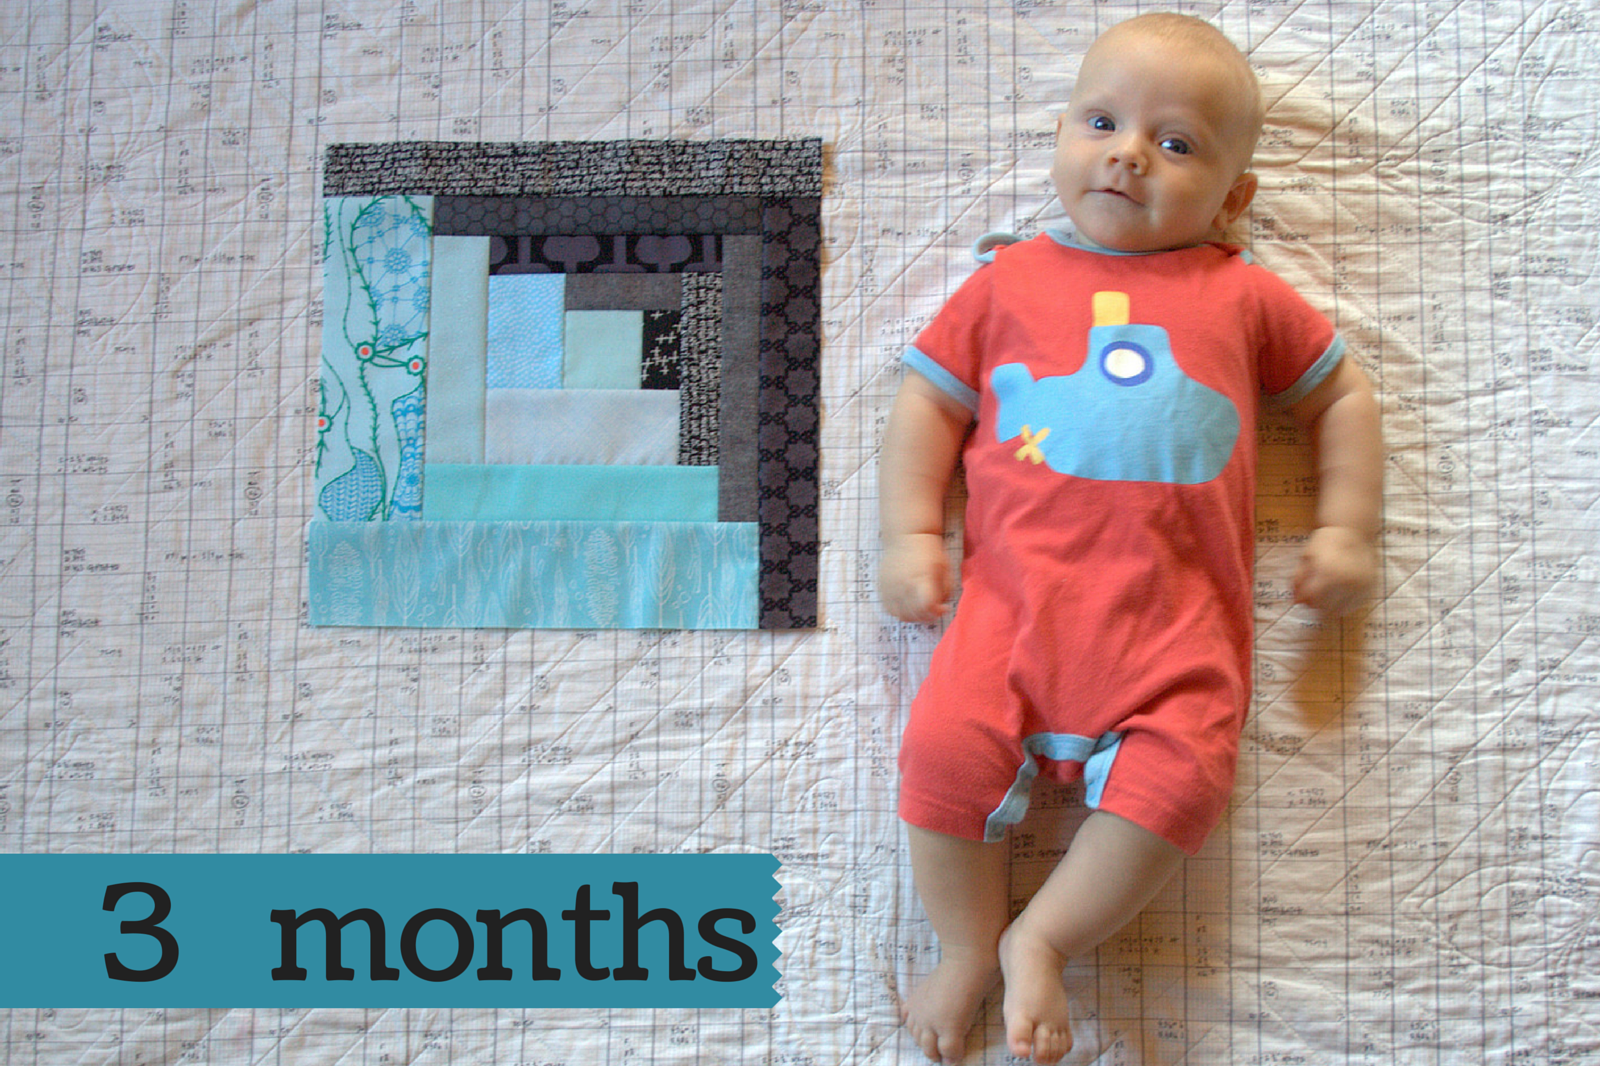
Time flies. Really, it does. It’s so cliche, but when it hits me how quickly hours become days, days become weeks, weeks become months, and then, surely, the months become years, it makes me slow down and remember how important it is to make the most of each moment. Three months have already passed since little Finn joined us on the outside. The first quarter of his first year is complete. I actually planned ahead this month, too, so that means a quarter of his monthly milestones baby quilt is complete.
“Wow, that’s growing!”
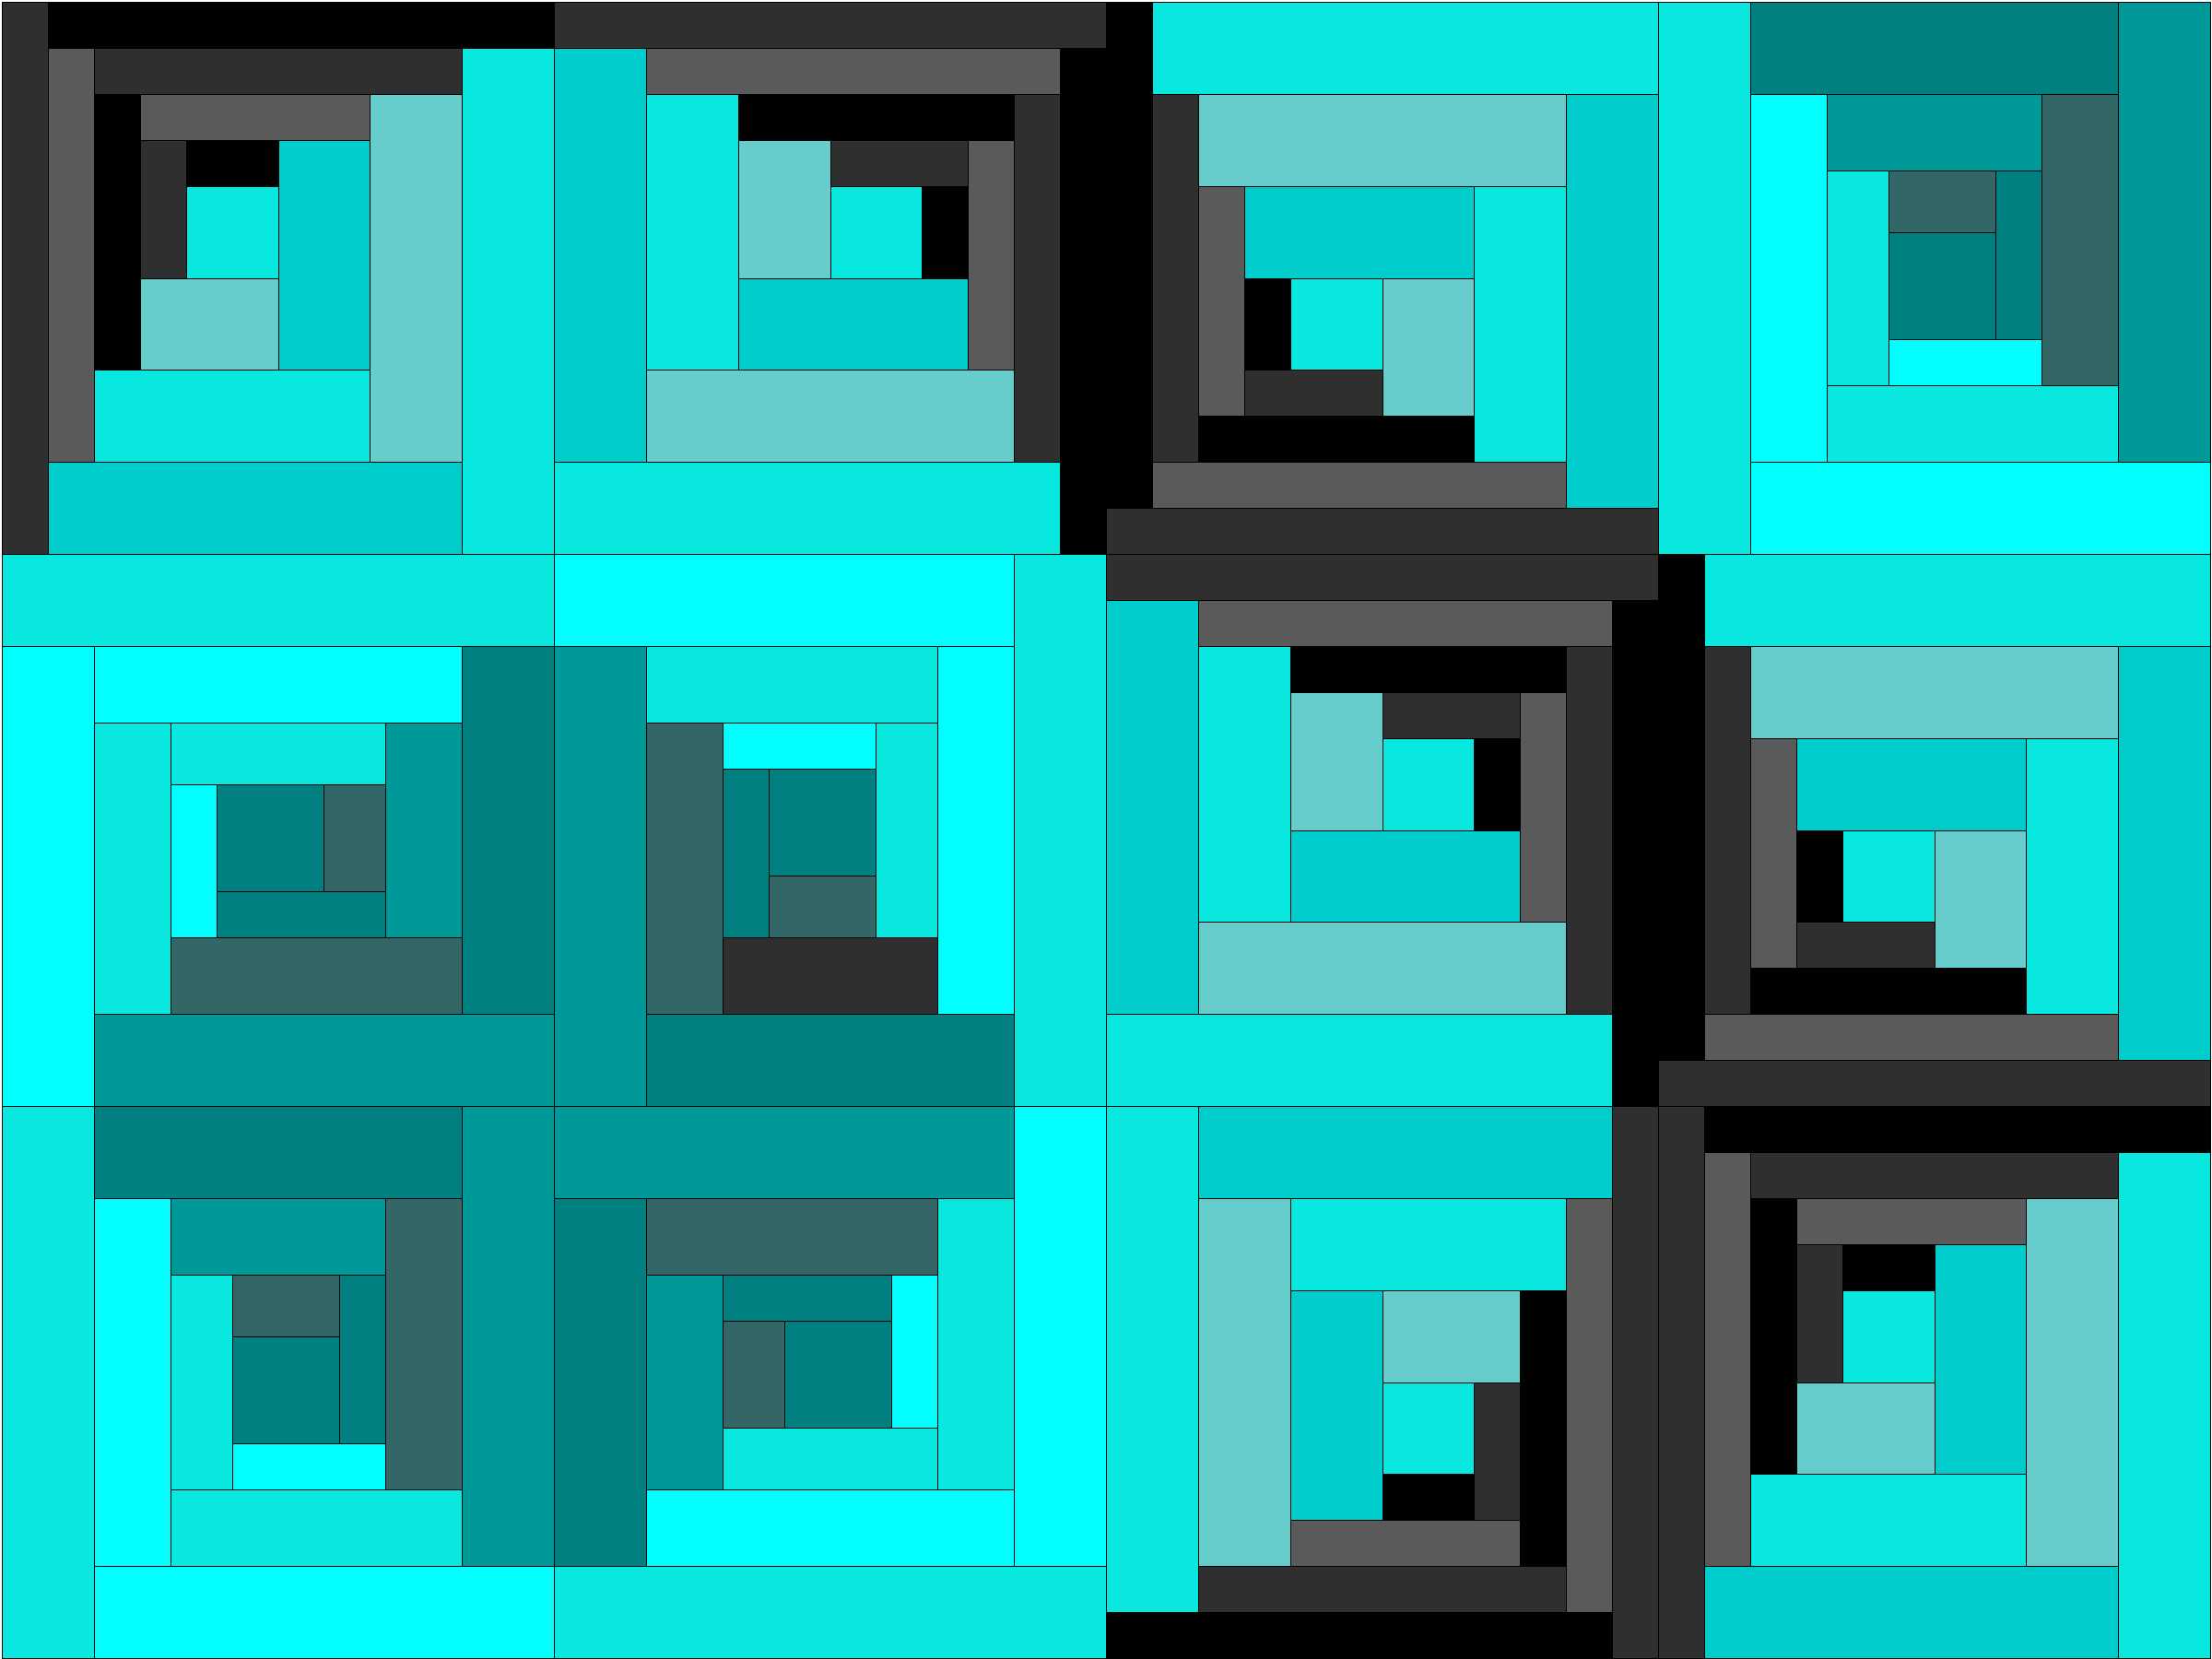
As promised, I finally settled on an overall layout and design for this quilt, and now I’m even more excited for the outcome.
I settled on a color scheme of dark and light teal and blacks/greys, both because they are fabulous colors, but also because I have plenty of teal and black/grey fabric in my scraps pile and stash. I also added a slightly skewed log cabin block to help provide the appearance of some curves and to add some interest to the overall quilt.
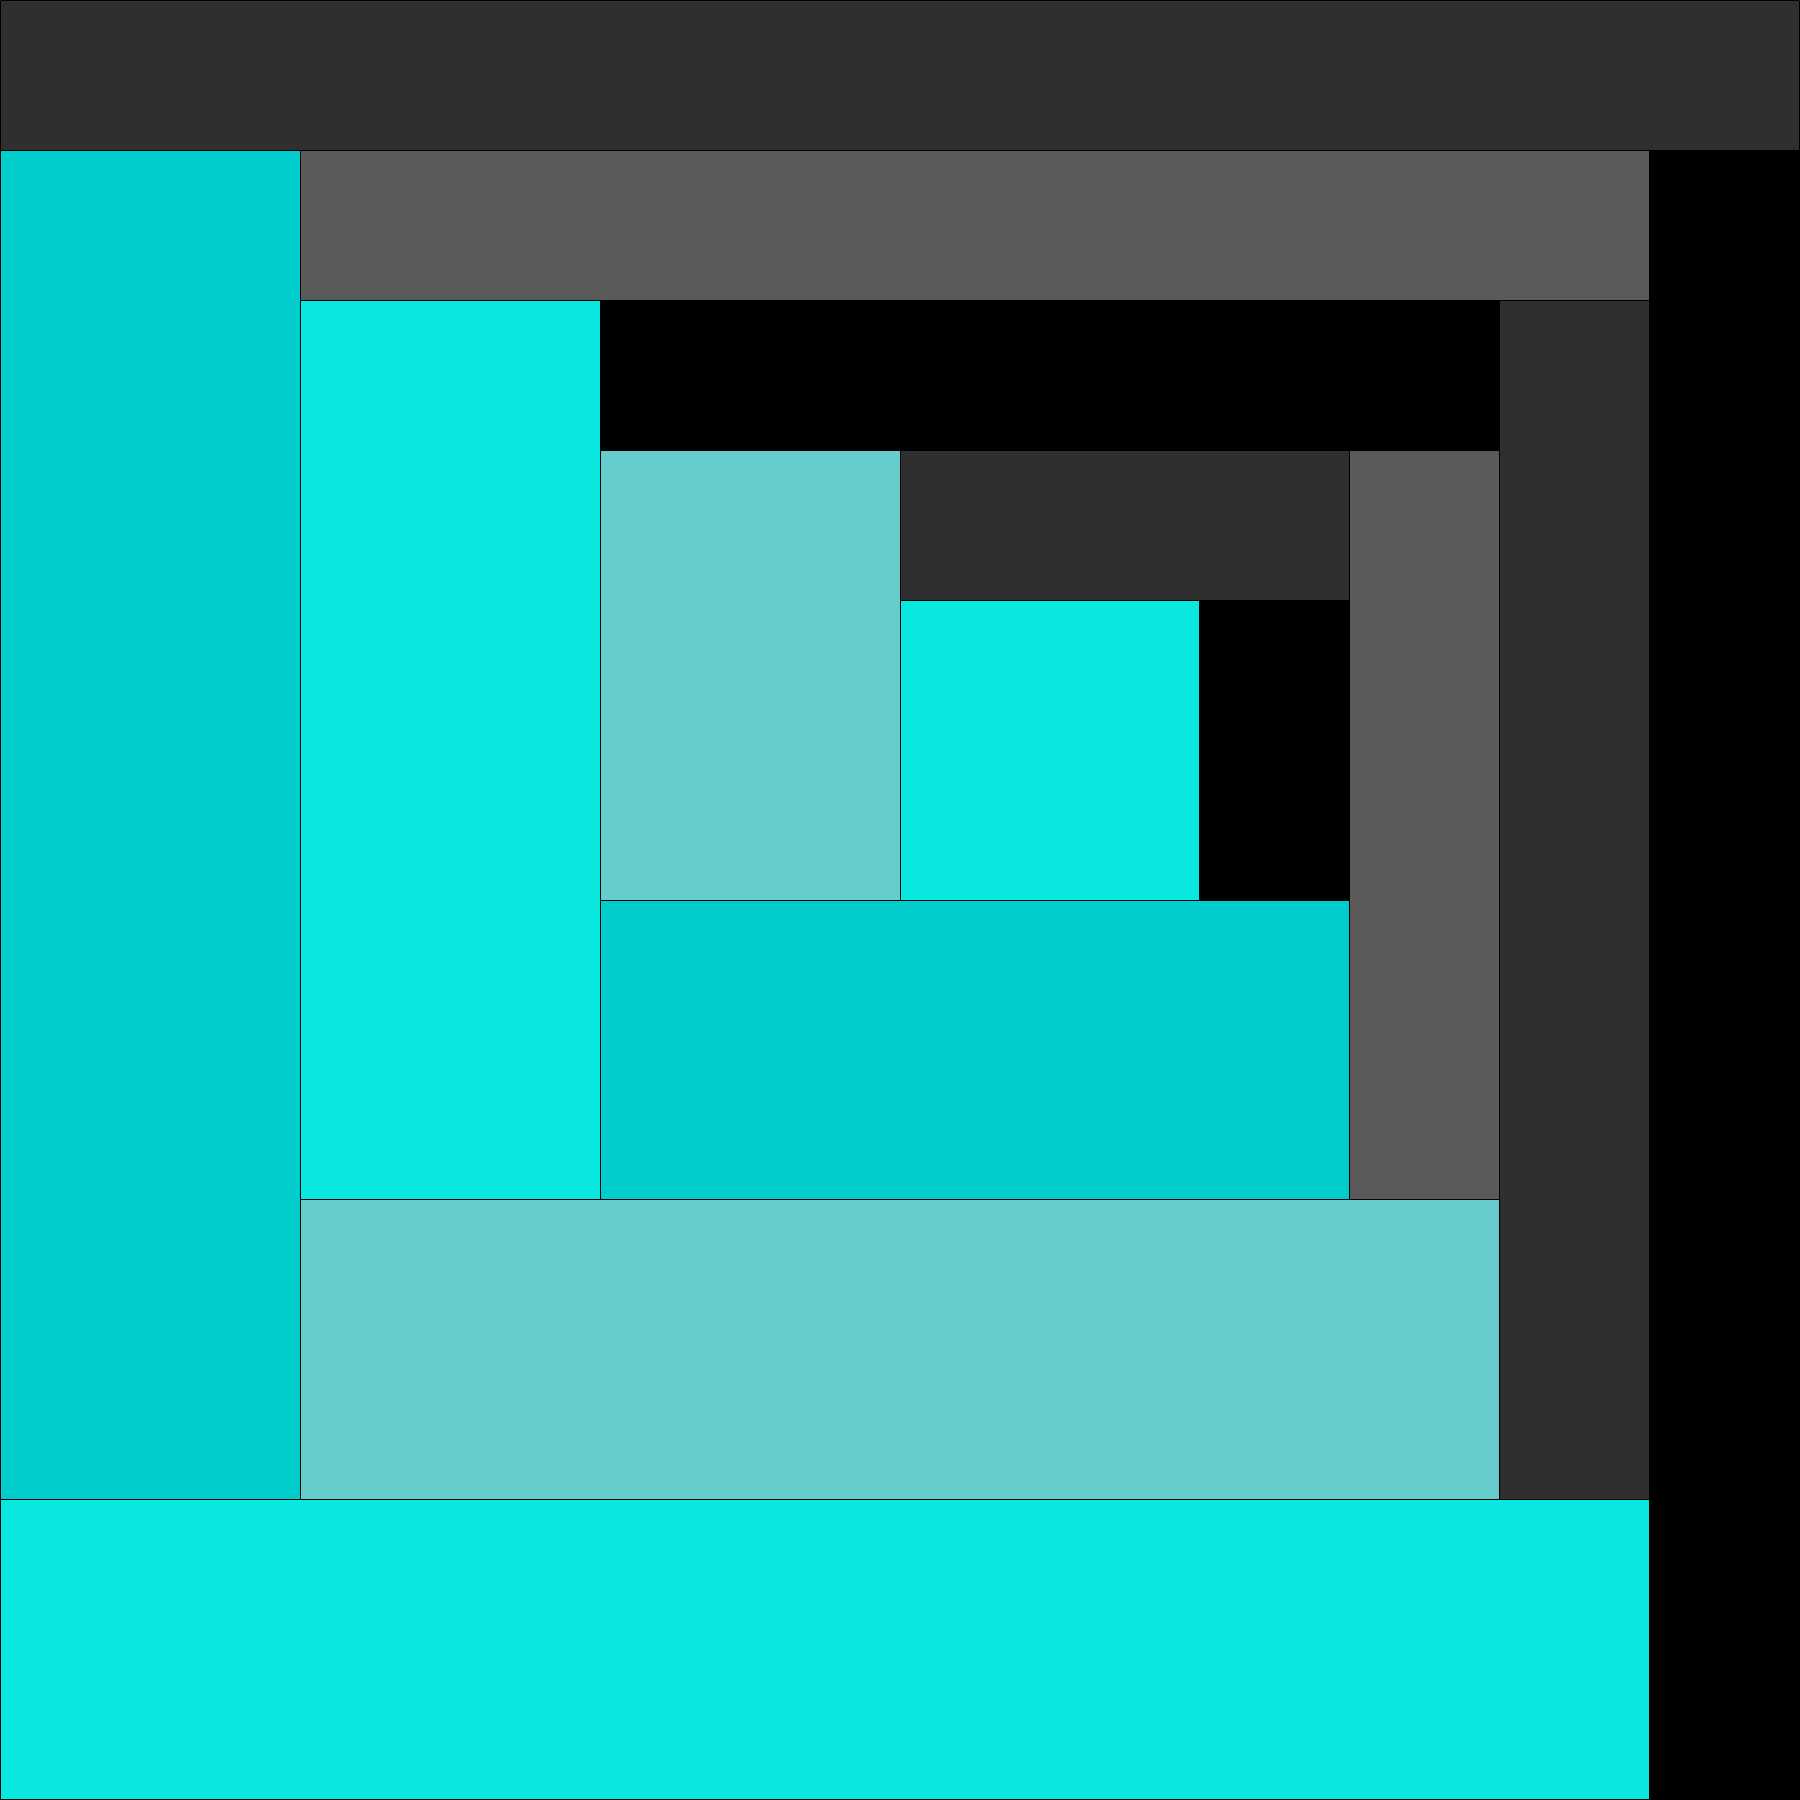
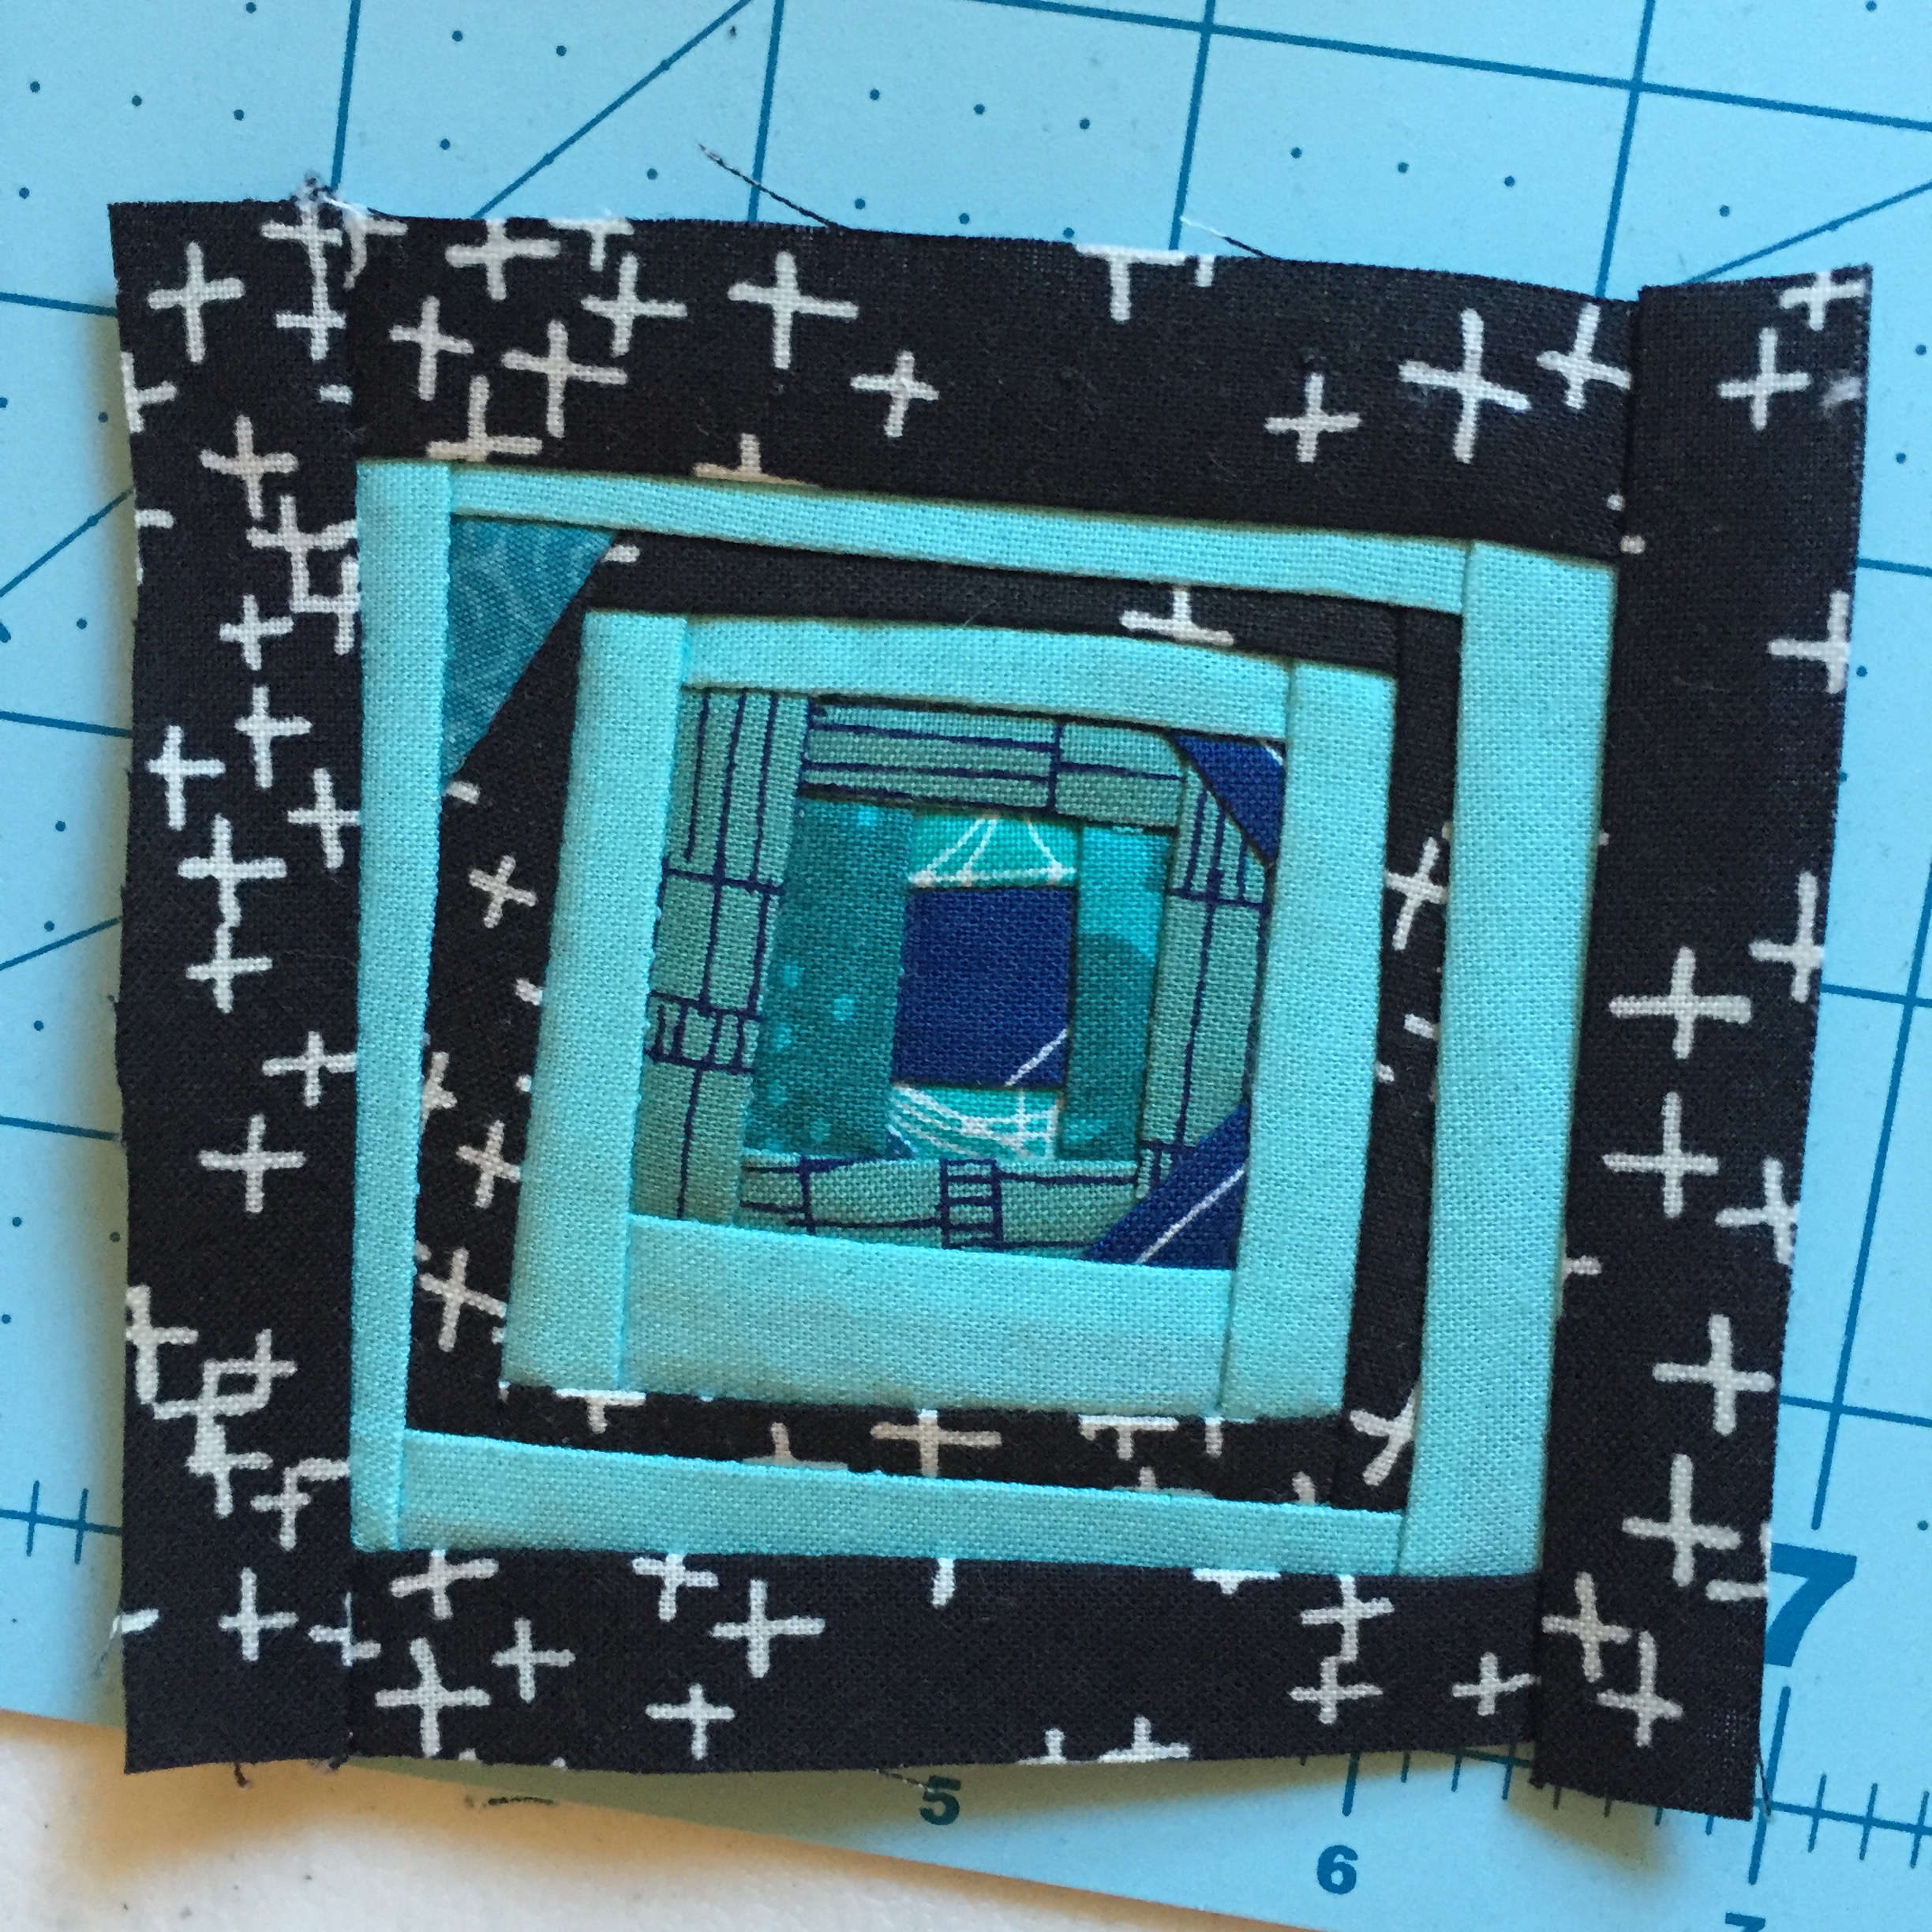
Monthly Milestones quilt Block 2
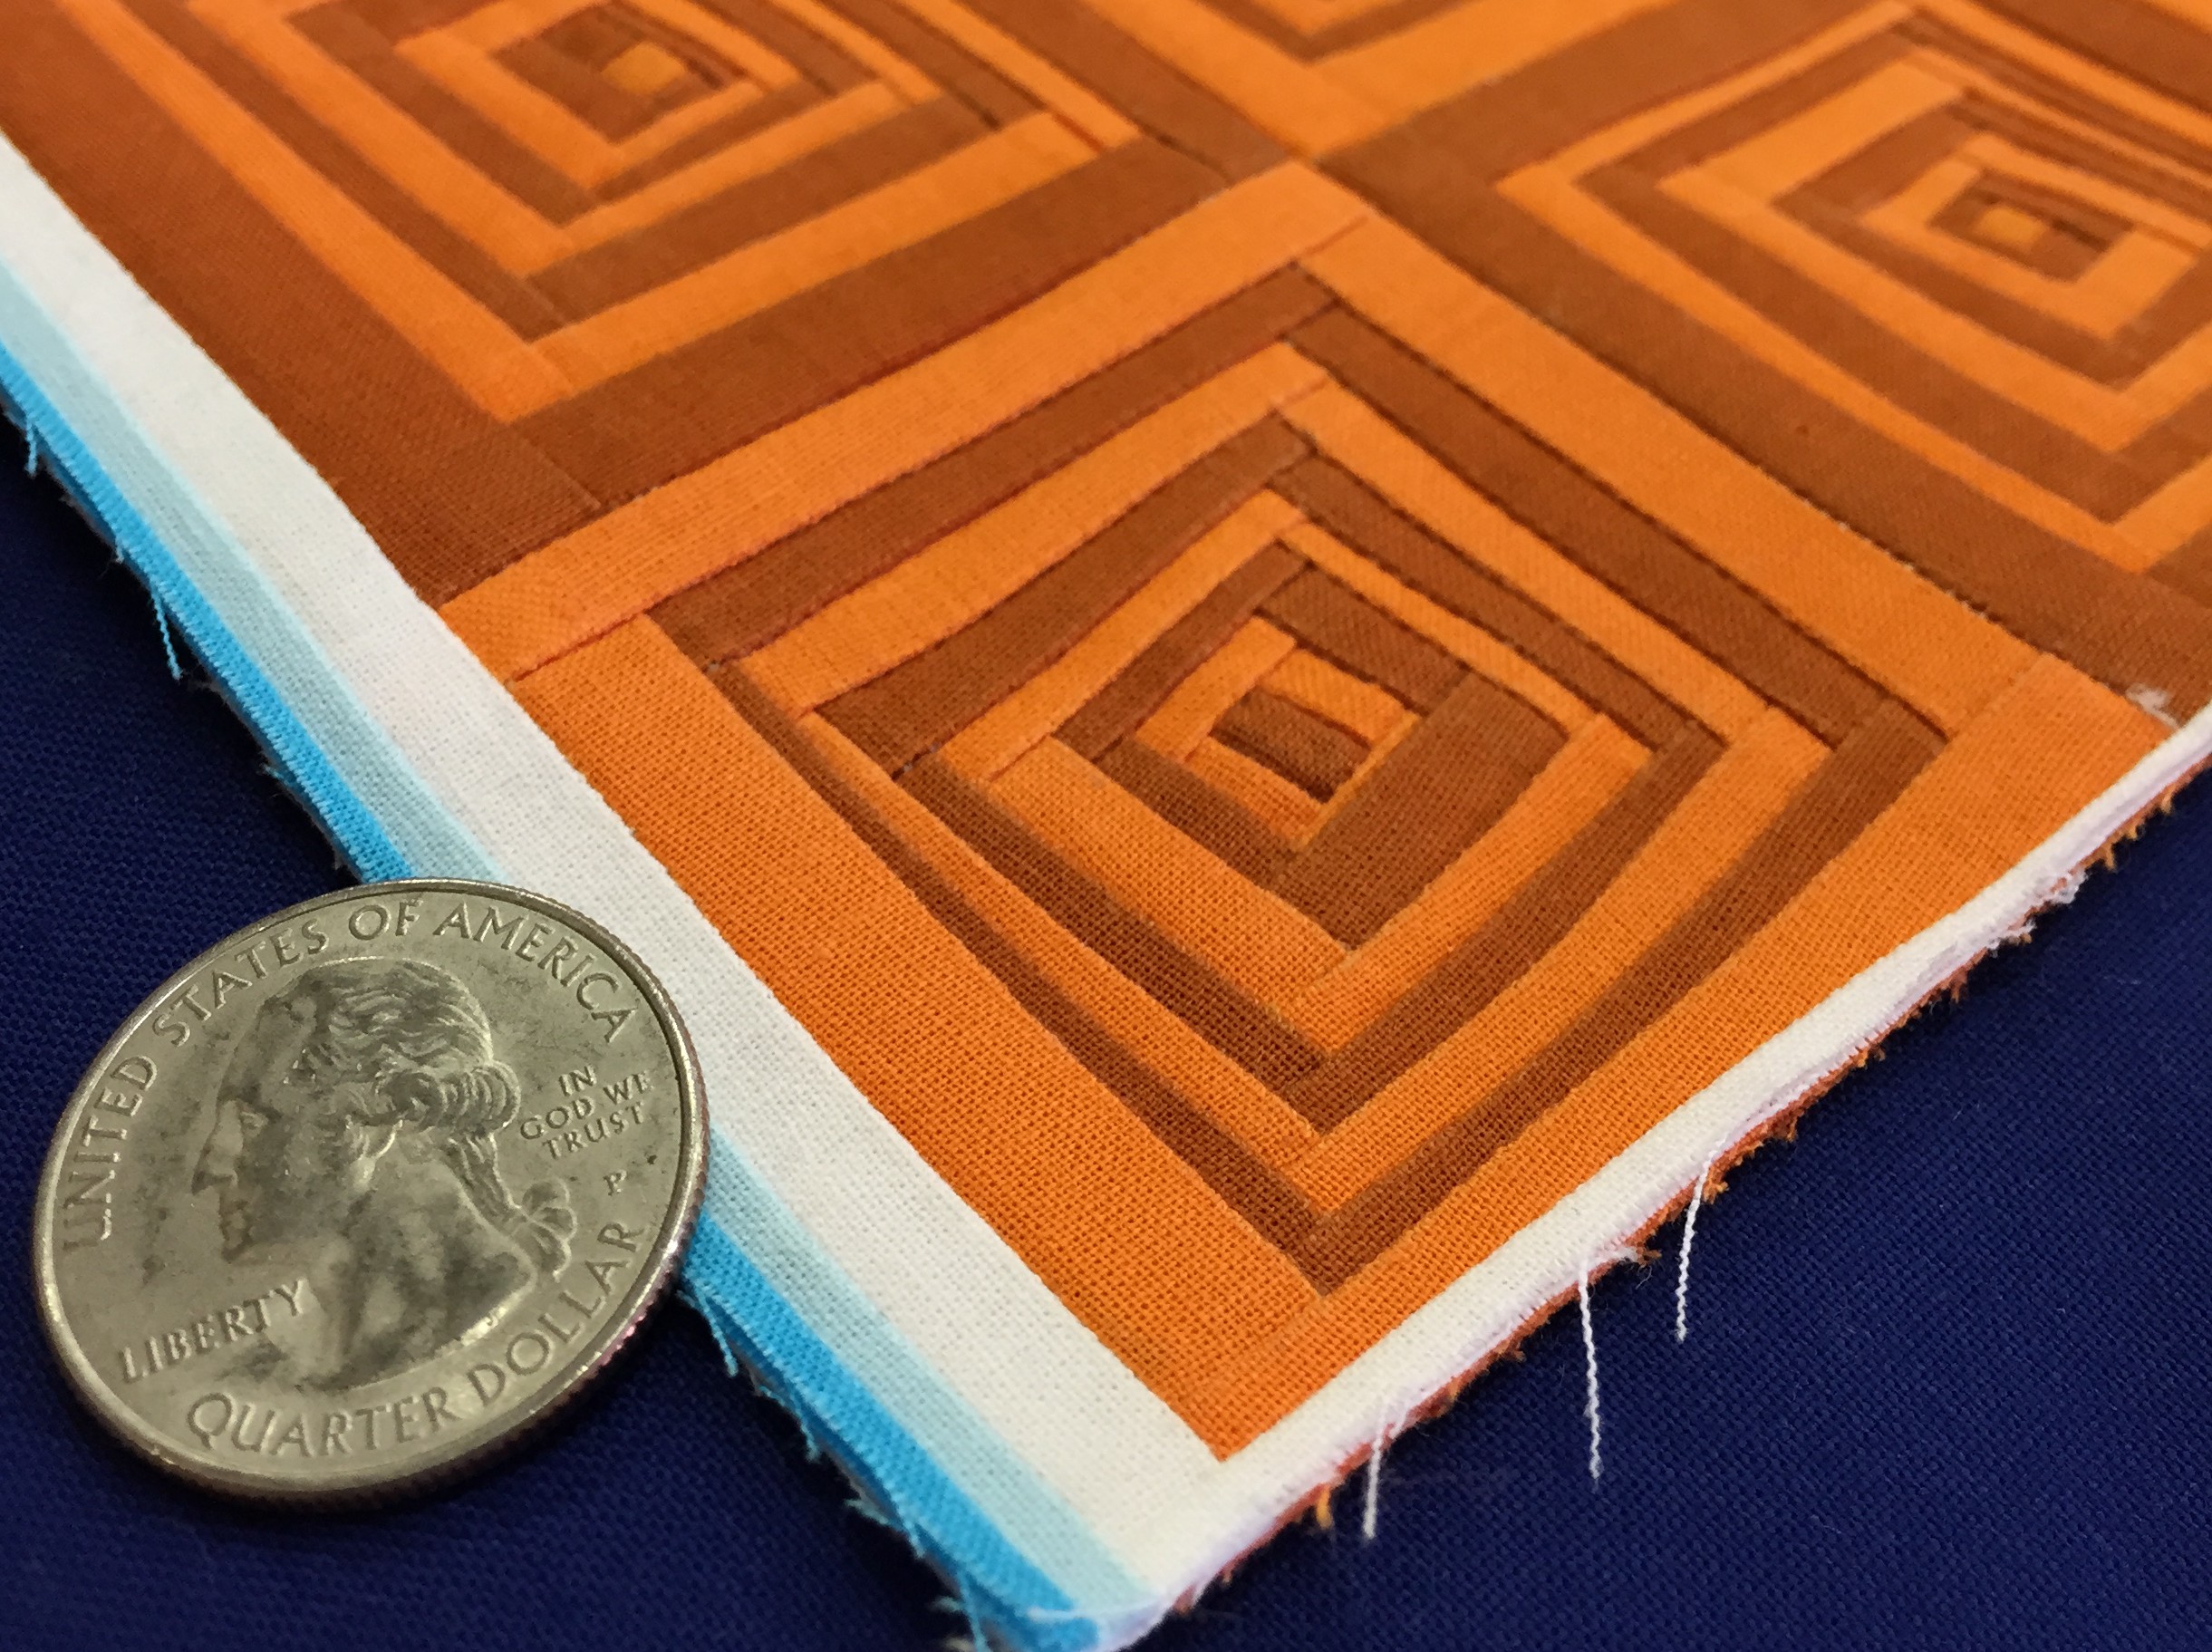
This month I made a Block 2, with wide light teal and narrow black/grey pieces. Creating the illusion of a curve is really quite simple with log cabin blocks. I drafted this block from the outside in, with 1″ strips on two edges and 2″ strips on the opposite two edges, ending with a 2″ square in the off-set center.
The finished quilt will require five (5) block 1s and seven (7) block 2s. Block 1 is a more improv, scrappy log cabin with strips varying in widths, but generally around 2″ or 2.5″ in width. Both blocks are quick and easy to make.
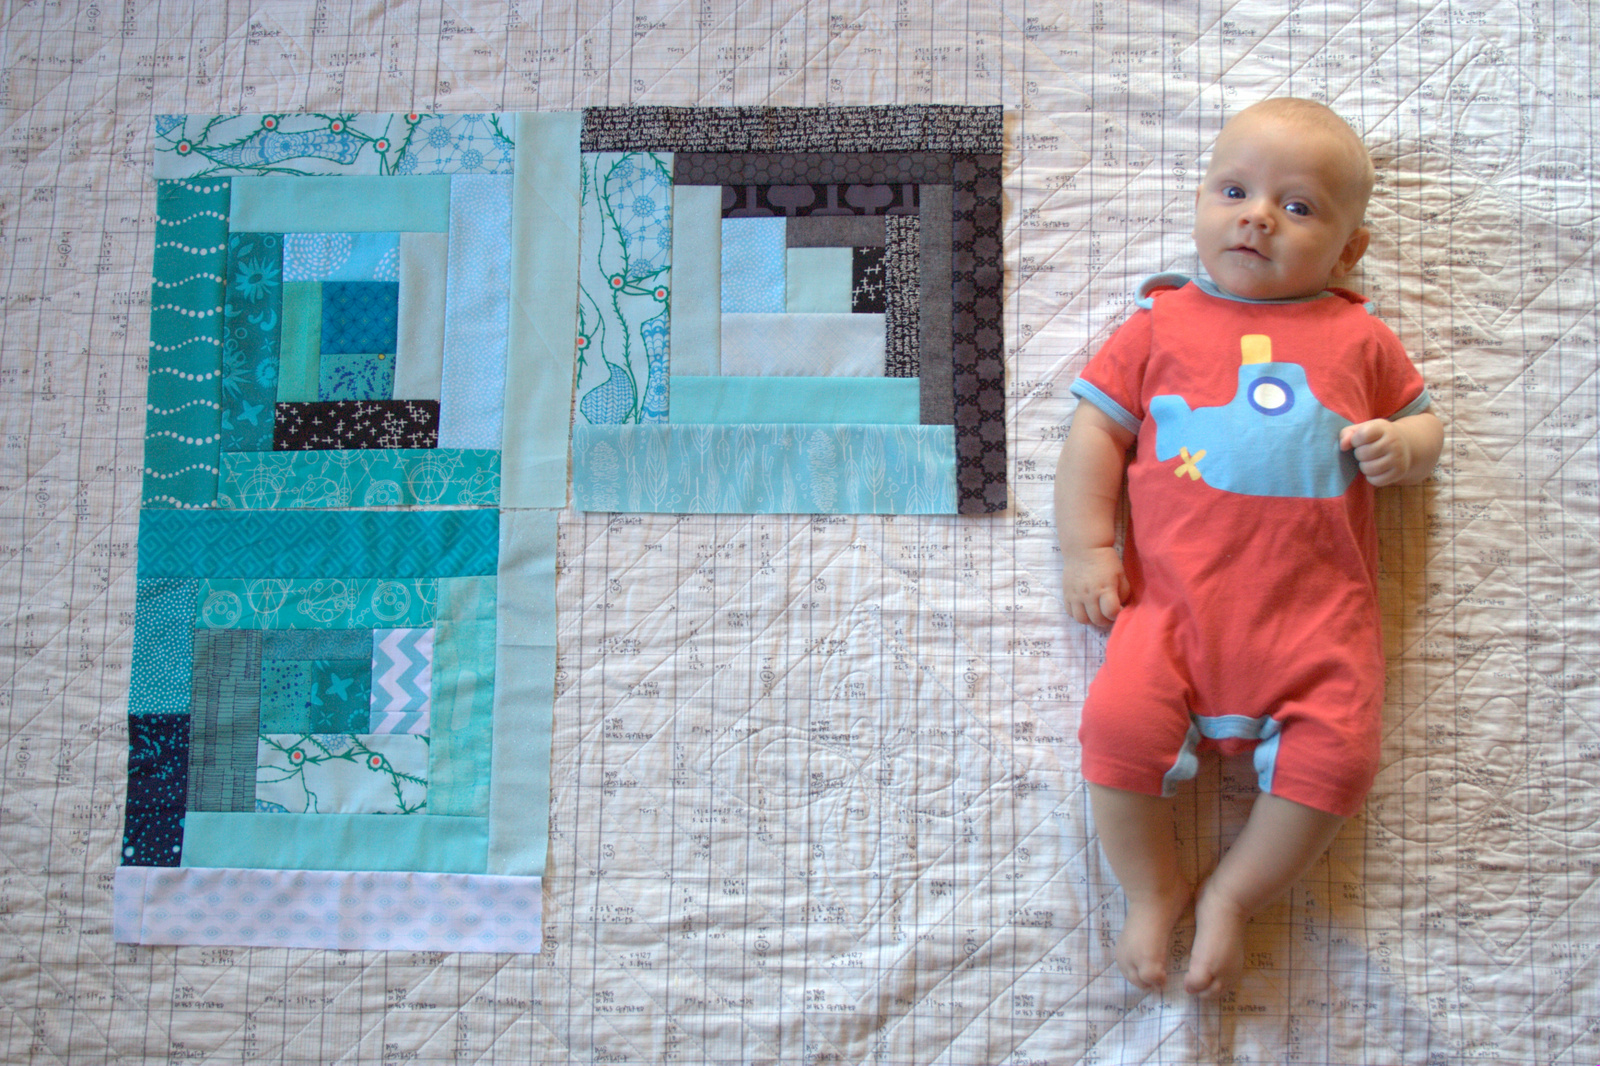
Enough about the quilt, though; I know you really want to hear about Finn! He is truly a blessing. He still loves to “talk” back and lights up whenever anyone looks him in the eye. His favorite thing as far as I can tell is having conversations with anyone who will sit and look at him, replying to his baby babble and grunts. He is generous and unbiased with his smiles, but the looks of true adoration are directed toward his siblings.
Finn just recently started finding his hands, which is really fun to watch. I love seeing him deep in thought, examining his hands and clearly working hard at figuring out how to get them to do his bidding. He grabs my arm or hand when it’s within his reach, but he’s not quite reaching out to grab things yet.
Now that I have a clear plan for the quilt, I’m even more excited to see it come together as Finn grows. While I’m tempted to up the ante to two blocks per month (one every 2 weeks feels doable), I am going to be easy on myself and stick with the one block per month plan. A finished 36″x48″ will be a great drag-around size as he grows into toddlerhood.
Use the code LaborDay2015 at checkout to get 15% off anything on their website all weekend (today, Saturday, September 4th through Monday, September 6th). Fiddlehead now has international shipping available, too! Check out the details on their Shipping Page.
My friend Jenn at A Quarter Inch from the Edge recently began a Throwback Thursday link-up where she encourages quilt-bloggers to share oldies but goodies–quilts from before their blogging days. Since I usually post my Color Inspiration posts on Thursdays, I have yet to participate. Plus, I think I only made two quilts, one wall hanging, and one table runner before beginning to blog, so you haven’t missed all that much! Since I’ve been sick (unfortunately Lyme tests came back positive, so I’m now on antibiotic treatment for that, hoping that my joint swelling and pain and extreme energy-level fluctuations will taper off and that we caught it early enough to avoid any long term Lyme crazies), I’ve been laying low without much sewing or inspiration to share. Since I missed Thursday anyway, I figure today is as good a day as any to dig through my photo archives for some pictures of the first quilt I ever made: my Rainy Days Picnic Quilt.
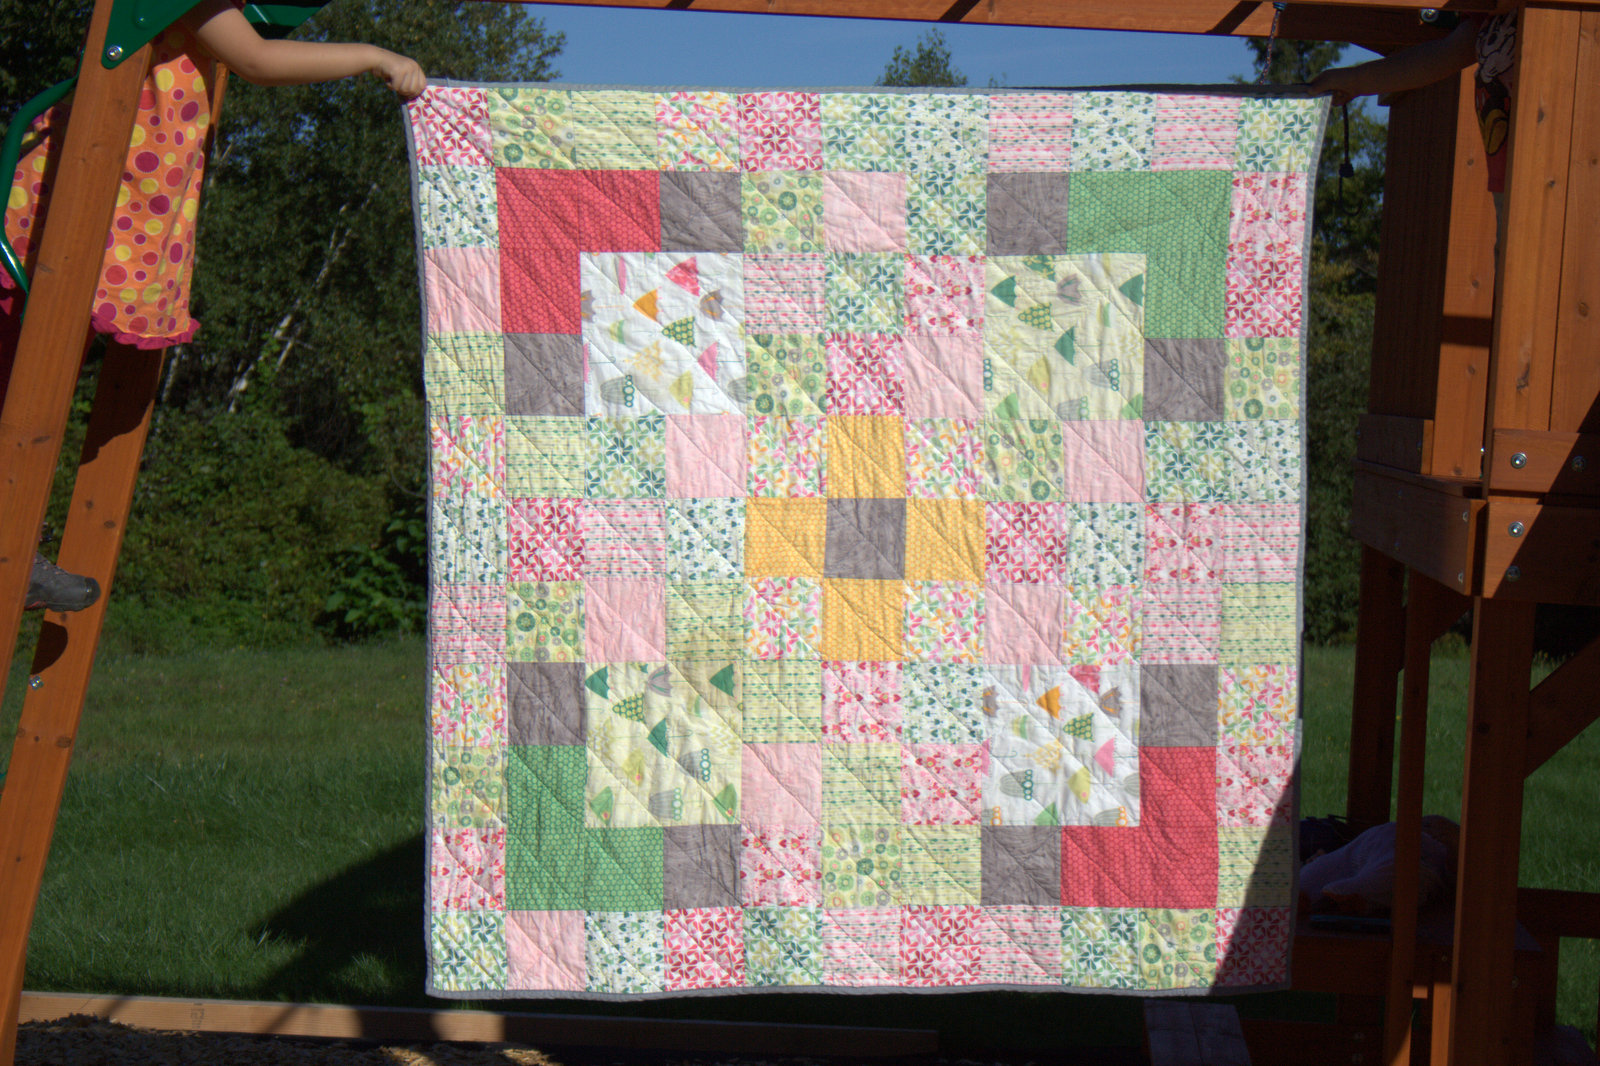
At the end of July, 2010, I purchased my first fabric bundle, Rainy Days and Mondays by Melimba and Beccabury for Riley Blake Designs, from FabricFly Shop on Etsy. With 15 fat quarters, and zero knowledge about quilting, I planned on making a quilt the only way I knew how: cut squares and sew them together. In my mind, this fabric was perfectly ironic for a picnic quilt: if there were rain and umbrellas all over our picnic quilt, then it would never rain on our picnics. Perfectly logical, right?
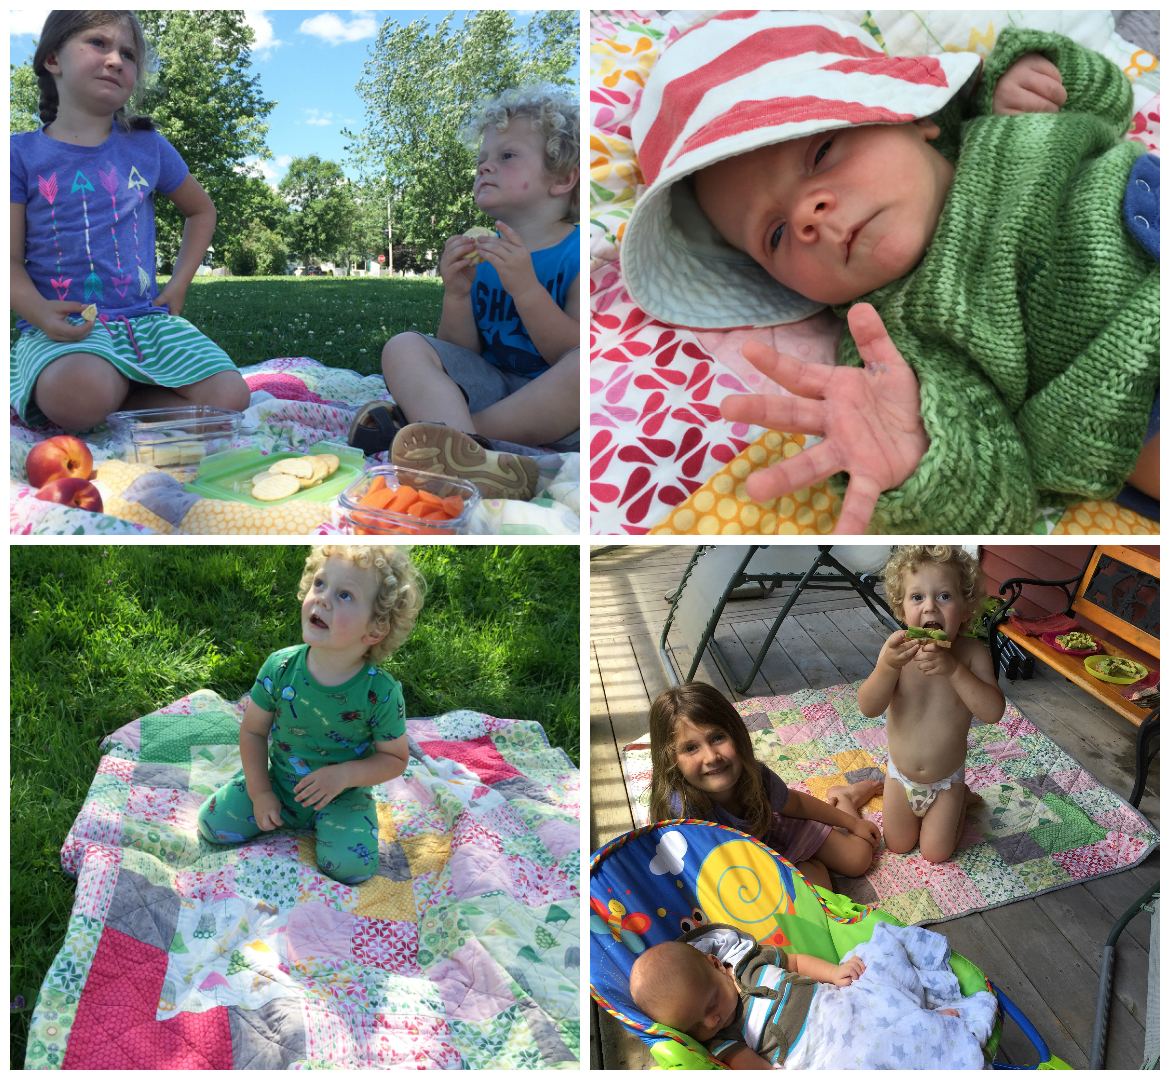
A picnic quilt was the perfect starting point, since it helped the stress level go WAY down. It was my first time ever making a quilt, but because it was slated to be a picnic quilt, with the knowledge that we would flop it down on the ground and spill food all over it, surely change diapers on it, drip lake water and watermelon juice all over it, smear avocado into it, and all of the other love-filled-things that happen on picnics, I was much less worried about imperfections. And boy, has it seen its share of babies and picnics!
Clockwise from top left: Picnic quilt in use at a playground, the beach, our front porch, and our back yard.Lunch on an island in the Great Pond Mountain Conservation Trust. We had a family canoeing day trip here in 2014, and of course the picnic quilt came, too!
At around 60″x60″, I remember thinking how HUGE it would be–perfect for picnics! Now that I really quilt, and now that I see the quilt laid out and finished, I realize that a picnic quilt for a family of 5 really should be at least 84″x84″ or even larger. For now, it is wonderful.
I don’t remember exactly when I finished this quilt, but it was definitely well into 2011 or even 2012. I remember quilting it on our kitchen table while my husband took Maddie out for a daddy day. Boy, I thought it was huge!
This quilt makes me laugh now because of how little quilting knowledge I had at the time. I actually bought double-fold bias tape, folded it over the edge and top-stitched it on. What method did I use to join the ends? Overlap and top stitch! I laugh because if I had even googled “how to bind a quilt” I could have learned how to actually bind a quilt. But honestly, I probably didn’t even know that the edging could be made with actual fabric and that it was called binding. Oh how far I’ve come in the past 3-4 years!
Despite all of these novice bits (or maybe because of them) it’s hands down our most used and loved quilt. (Although Maddie’s Rainbow Jellyroll quilt and my Doe Layers of Charm quilt are quickly becoming contenders with their permanent snuggle status on the couch).
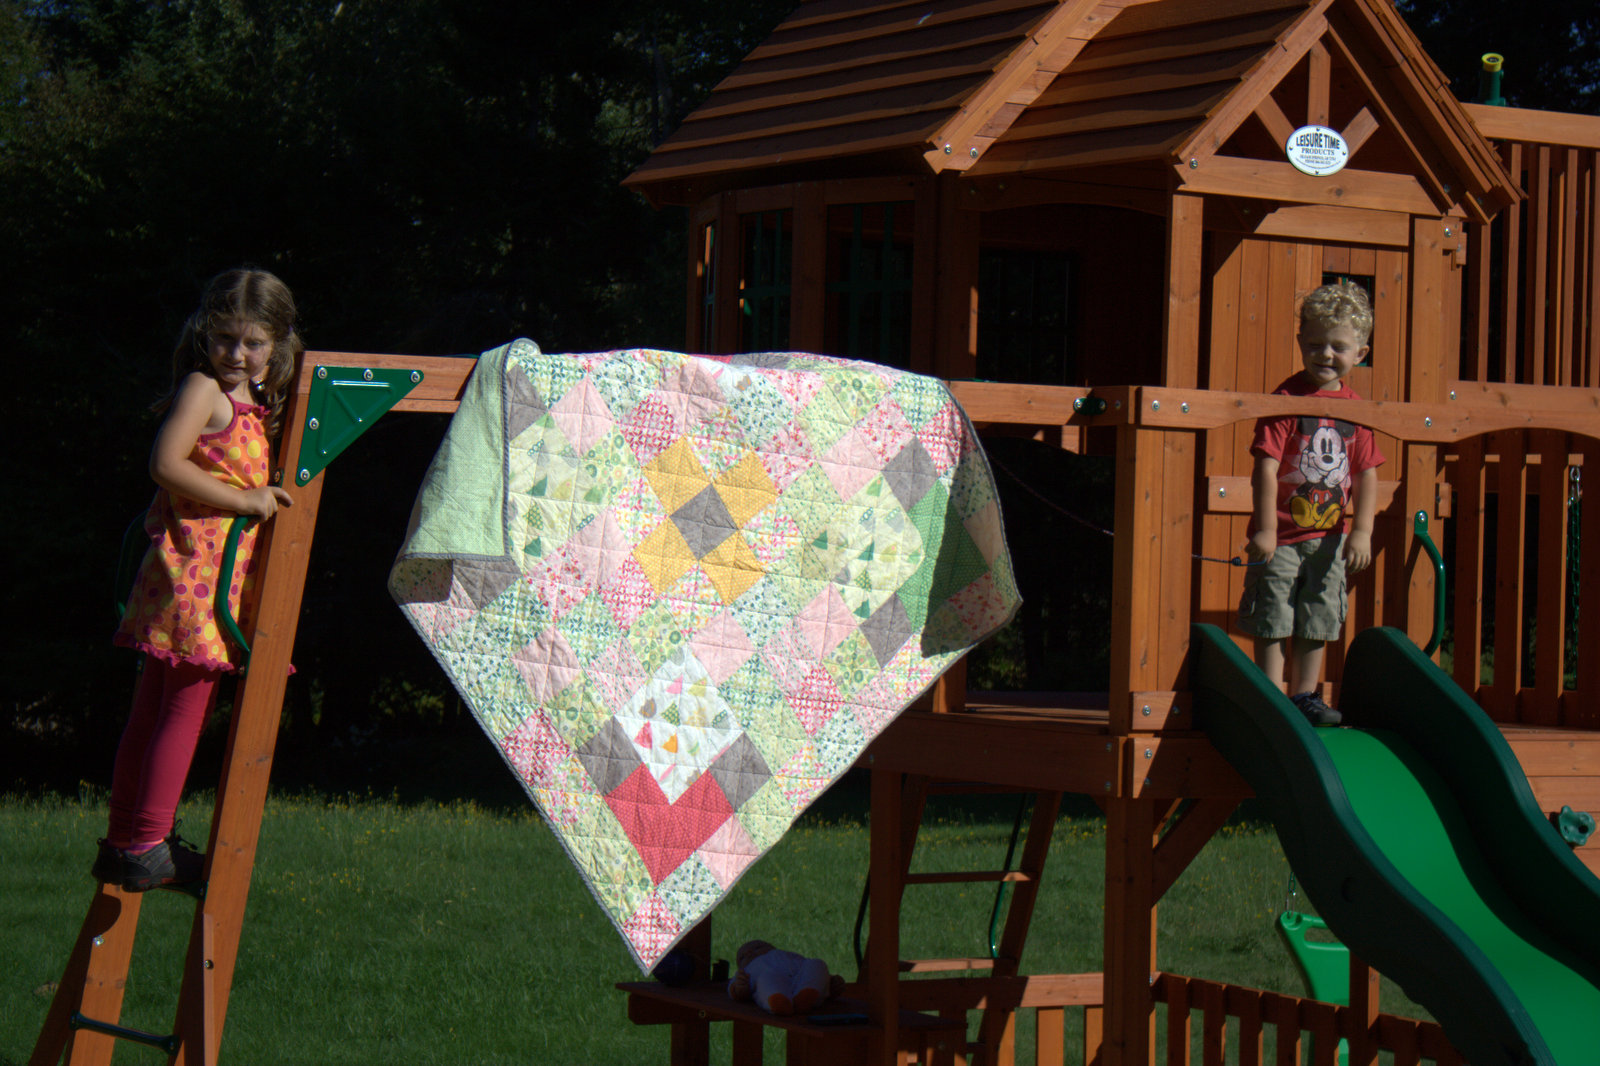
It should be noted that I broke many of my quilt photography rules in photographing this quilt today. But when I realized I didn’t have any photos that actually showed the entire quilt, I brought my little helpers outside to remedy that. Knowing the shortness of their arms and attention spans, I opted to use the most sturdy and level structure around: their new skyfort playground, in full sun. C’est la vie.
This Rainy Days Picnic quilt is special because it embodies my motto: just try it. I didn’t know how to quilt, so I did what I knew: I bought fabric, cut it into squares, moved it around until I thought it looked good, sewed it together, layered it with batting and backing, sewed straight lines corner to corner to hold the layers together (I used whatever thread was laying around and the same regular sewing machine foot I used to piece it), sewed a “binding” edge on and started using it. Everyone has to begin somewhere!
Do you remember the first quilt you ever made? I’d love to hear about it!
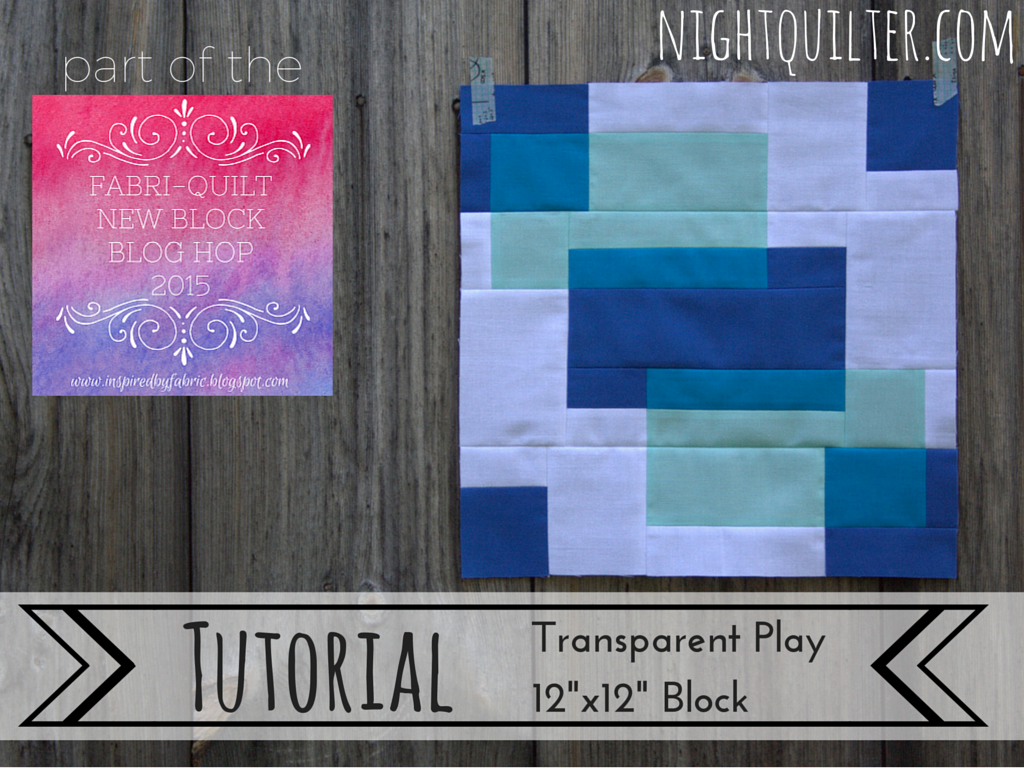
When I was invited to join the Fabri-Quilt New Block Blog Hop with the challenge of creating a new 12″ finished quilt block and sharing a tutorial, I immediately thought of transparency. I’ve been seeing fellow quilters play with transparency a lot lately (Yvonne’s Triangle Transparency quilt and the Transparency Bee Blocks by Hilary of Entropy Always Wins Blog and Leanne at She Can Quiltstand out in my mind most), and have yet to give it a go.
Colors chosen: Chartreuse, Turquoise, Coral, Aqua, Lapis Blue, White
As soon as I saw the color palette chosen, I knew that transparency it was (I’ll save the chartreuse and coral for an actual watermelon project)! I had fun creating a block that both looks cool on its own, but also can result in many fun layouts when replicated for a quilt. I call it Transparent Play (original, huh?!)
Today I’m going to share a tutorial for how to make the new block Transparent Play that I created using fat eighths provided by Fabri-Quilt. While I’m not typically a prewasher, I would definitely recommend prewashing the Fabri-Quilt solids with a color catcher or two.
Note that part of the challenge for creating this block was to make it out of only fat eighths of fabric, so cutting instructions assume a fat eighth is being used. Fat eighths typically measure 9″x21″.
General Notes
All seams are sewn with 1/4″ seam allowance unless otherwise noted. I like to press seams open since it helps the block lay flat and helps me better match seams. Do what works best for you.
Fabric Requirements & Selection
For this block, you will need a fat eighth of each of the following fabrics:
a neutral background (I used white)
a dark (I used lapis blue)
a light (I used aqua)
a blend or medium (I used turquoise)
Since the block is designed for playing with transparency, try to choose fabrics that give the impression of transparency. The blend fabric should be a color that could result from the dark and the light fabrics being overlapped. Note that while I made my block mostly monochromatic (one color), this block could be made with color blends, too. For example red as your dark, yellow as your light, and orange as your blend.
Cutting Instructions
Again, this tutorial is assuming a fat eighth of fabric is being used for each color. Strips should be cut along the long edgeof the fat eighth (usually 20-21″ long and called length of fabric (LOF) in this tutorial). Note that many sections of the block will be strip pieced, so the initial cutting keeps this in mind.
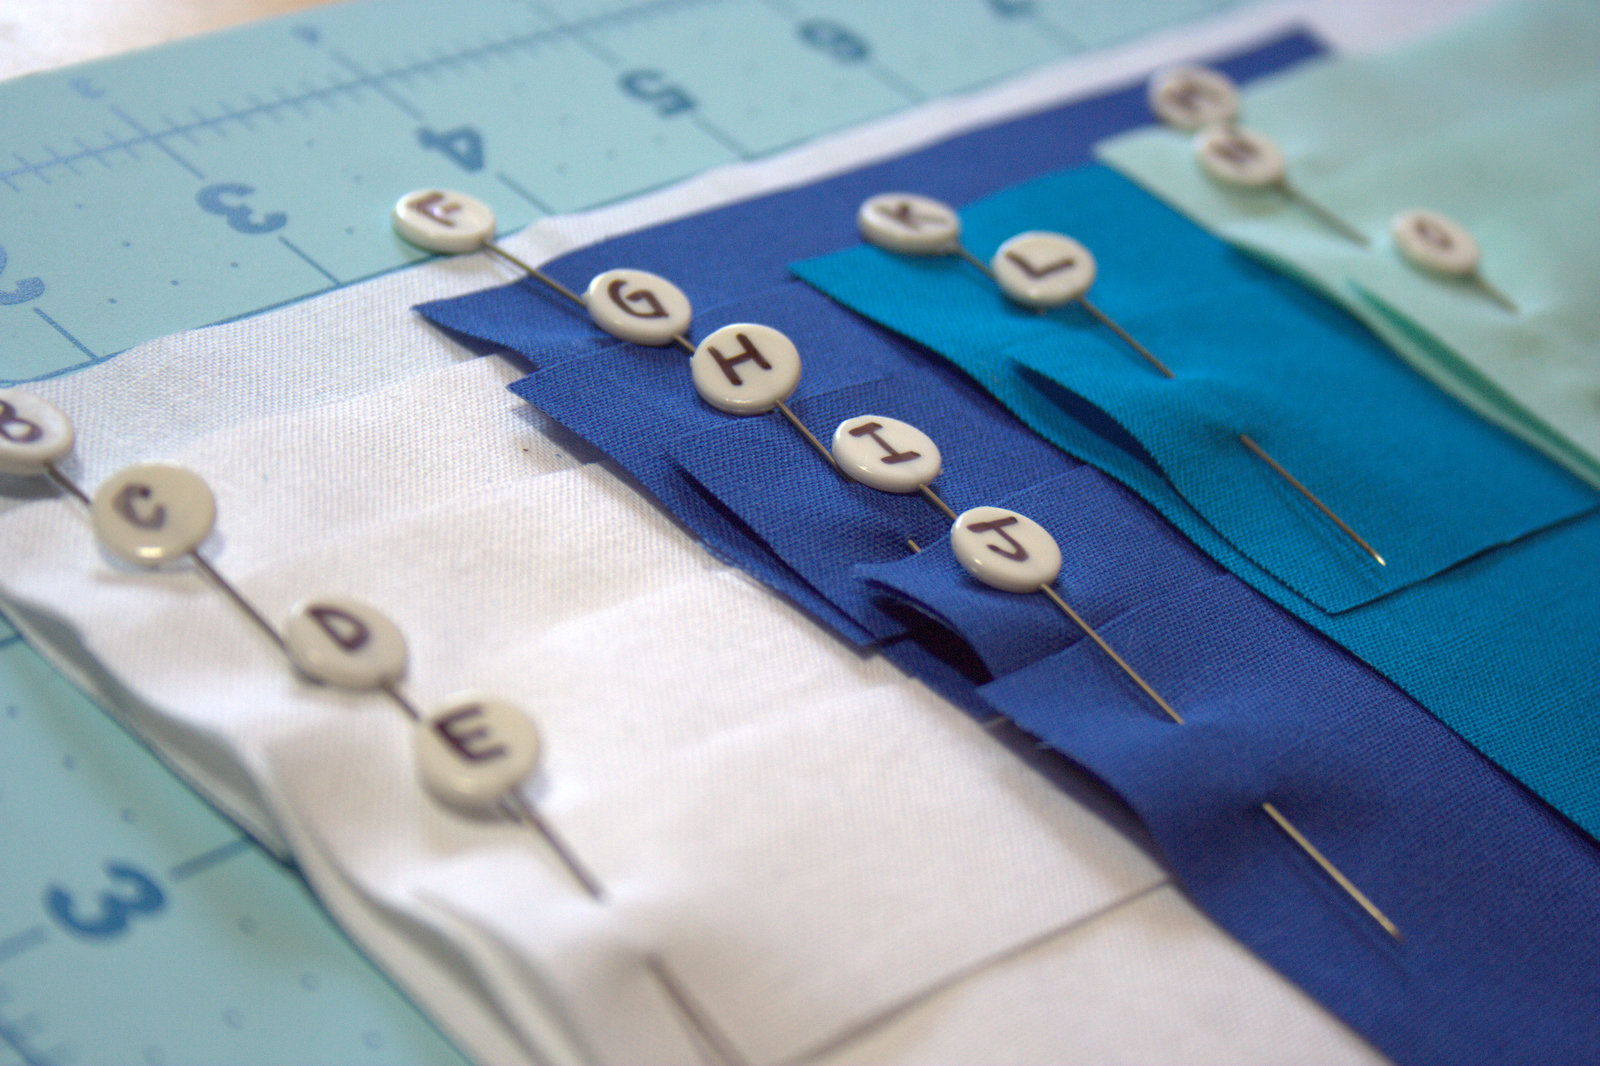
Be sure to label your pieces with the coordinating letters so that piecing is a breeze!
From white:
Cut 1 strip 1 1/2″ x LOF and subcut (1) 1 1/2″x10″ strip (A); and (2) 1 1/2″x5″ rectangles (B).
Cut 1 strip 3″ x LOF and subcut (2) 3″x3 1/2″ rectangles (C); (2) 3″x4 1/2″ rectangles (D); and (1) 1″x5″ strip (E).
From lapis blue (dark):
Cut 1 strip 2 1/2″ x LOF and subcut (1) 2 1/2″x5″ rectangle (F); (1) 1 1/2″x5″ rectangle (G); (1) 1″x5″ rectangle (H–note, this fits next to G in the strip); and (2) 1 1/2″x3 1/2″ rectangles (I).
Cut (1) 2 1/2″x7 1/2″ rectangle (J).
From aqua (light):
Cut (1) 1 1/2″x11″ strip (M).
Cut (1) 2 1/2″xLOF and subcut (1) 2 1/2″x5″ (N); and (1) 2 1/2″x10″ (O).
From turquoise (medium):
Cut (1) 3 1/2″xLOF and subcut (1) 3″x5″ rectangle (K); and (1) 1 1/2″x11″ strip (L).
Piecing Instructions
Making the Top and Bottom Panels
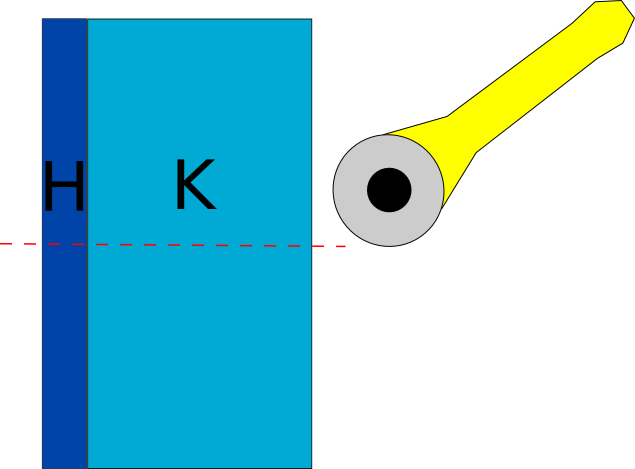
Sew H to K along the 5″ side. Cut into two equal 3 1/2″x2 1/2″ rectangles as shown above. These are the HK units.
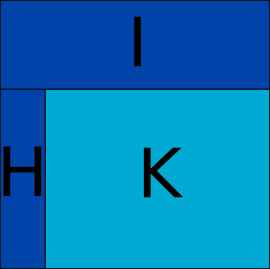
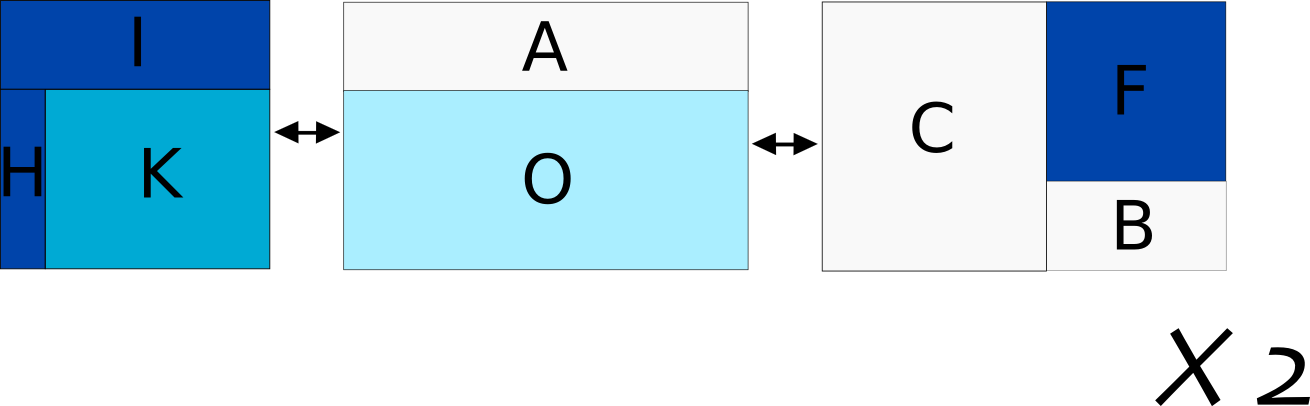
Sew I to the top of each HK unit, ensuring that the dark lapis blue H strip is on the left. You will have (2) 3 1/2″ squares (above). These are the IHK units. Set aside.
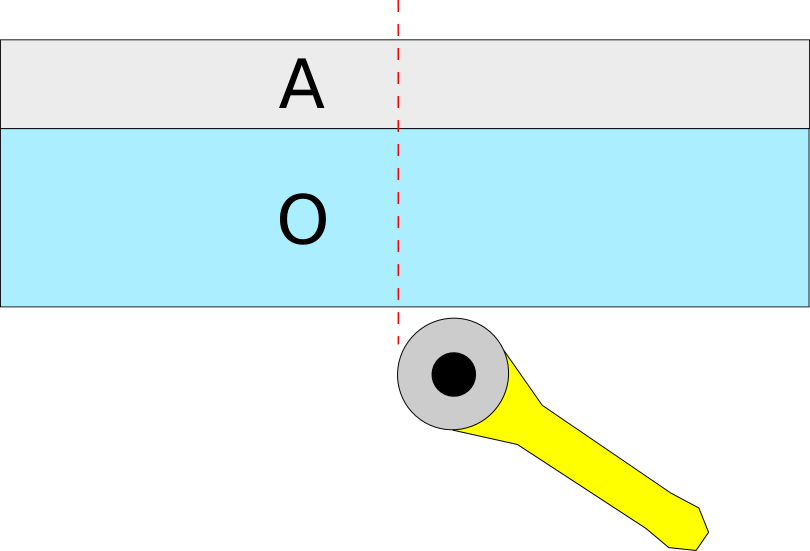
Sew A to O along the 10″ side. Cut into two equal 5″x3 1/2″ rectangles as shown above. Set aside.
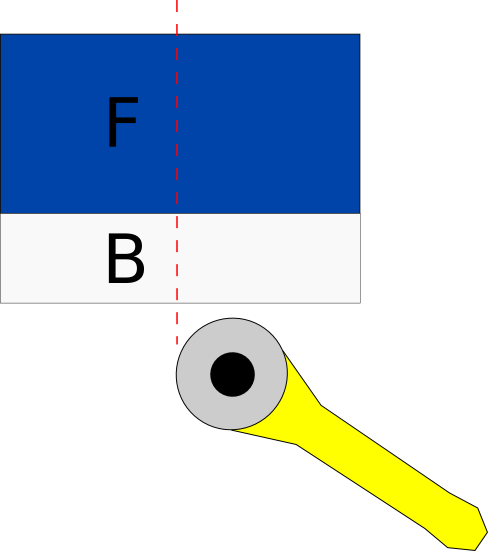
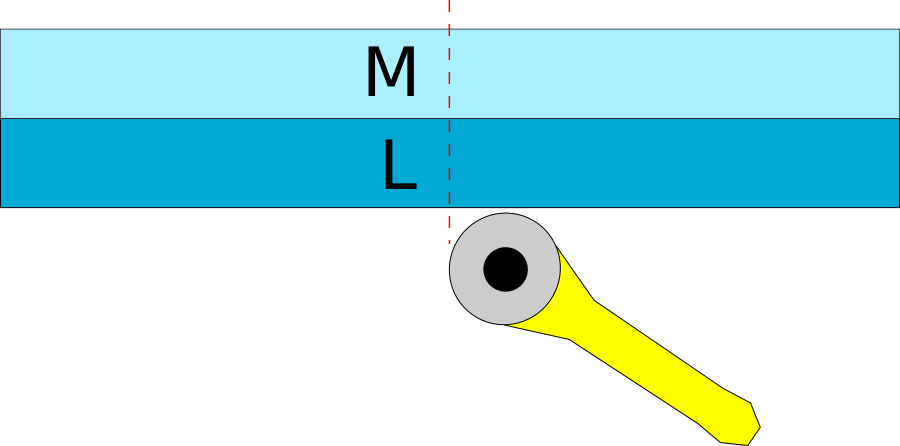
Sew F to one of the B pieces along the 5″ side. Cut into two equal 2 1/2″x3 1/2″ rectangles as shown above. These are the FB units.
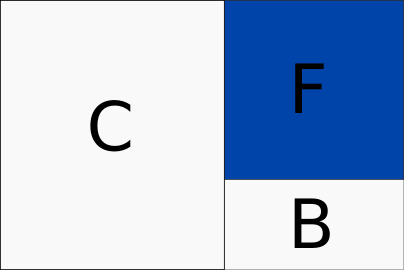
With F on top, sew C pieces to the left side of the FB units along the 3 1/2″ edge. These are the 3 1/2″x5″ CFB units.
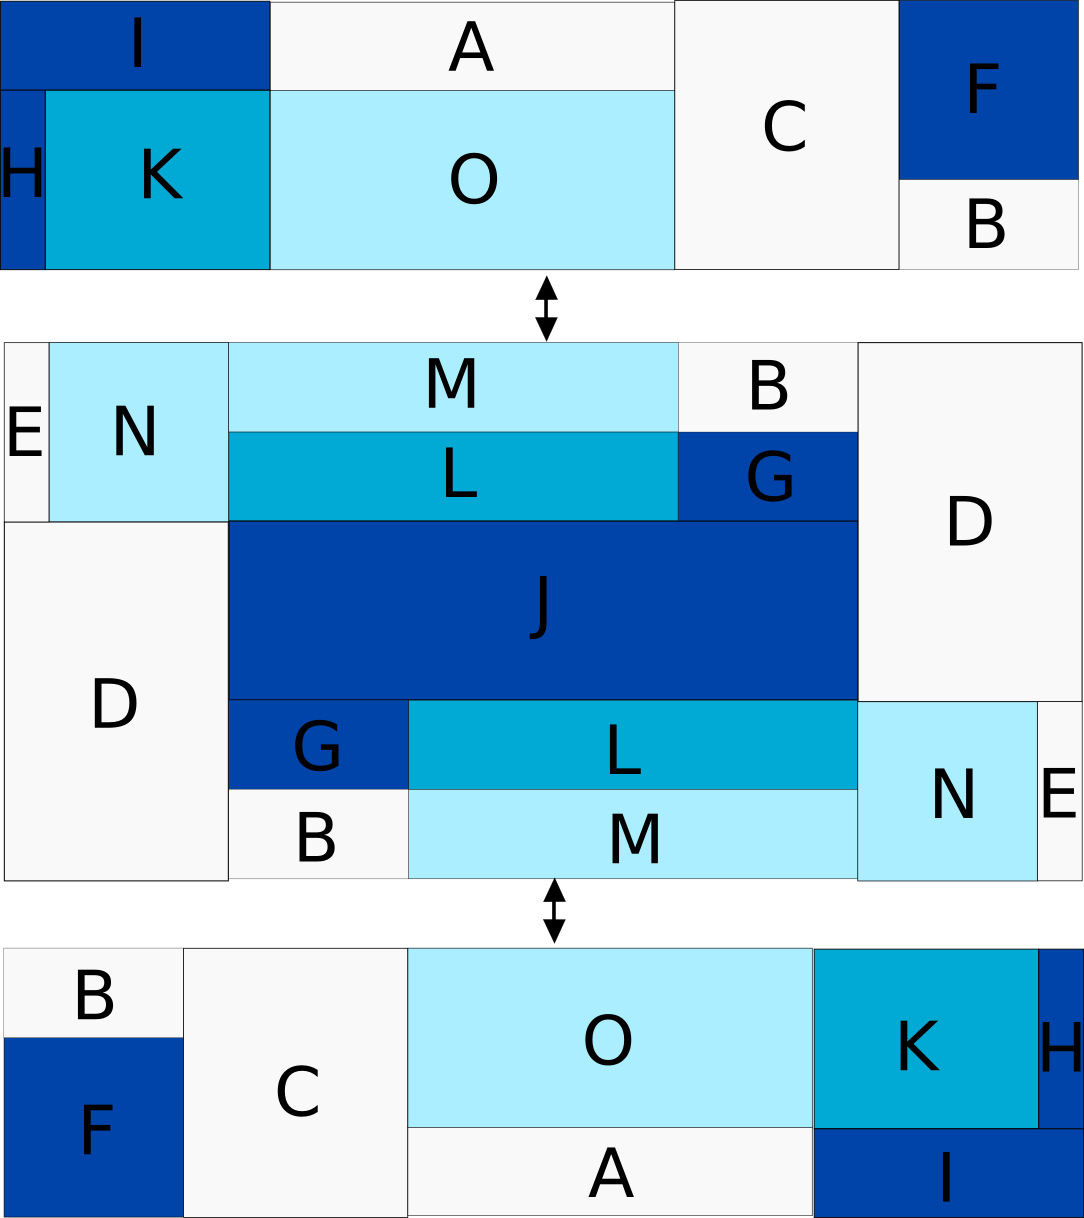
Assemble the top and bottom panels as shown above. Note that they can be assembled identically, but we will rotate one of them 180 degrees as the bottom panel before final assembly of the block.
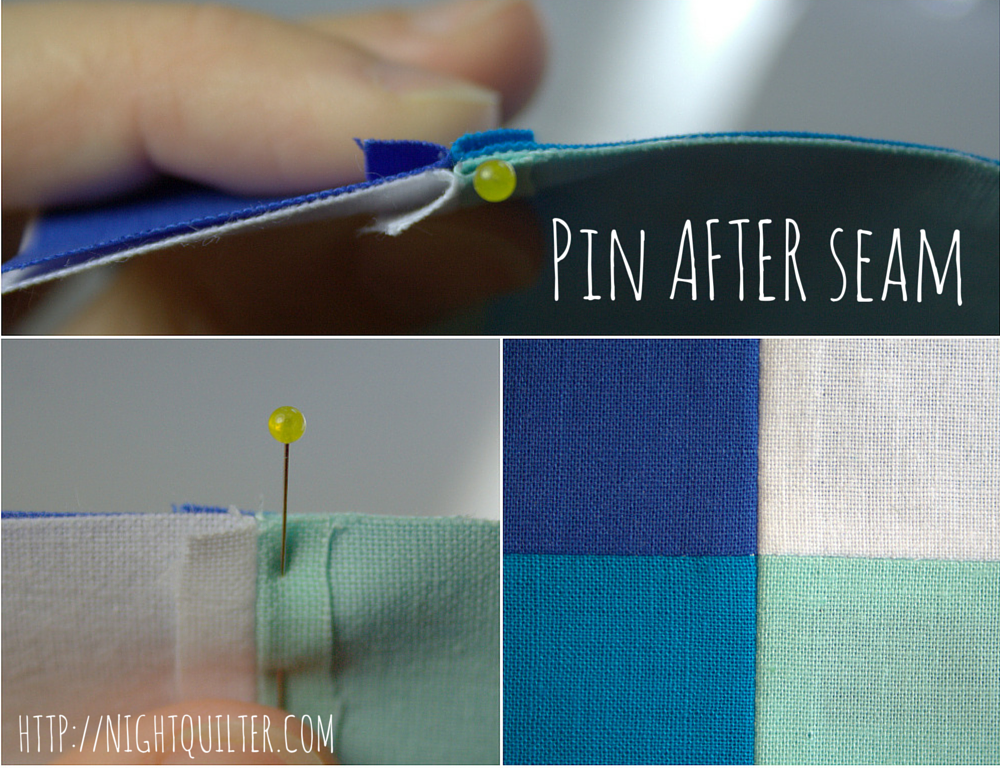
*Accuracy Tip*
When matching seams, line up the full length of the seams to be matched (not just at the raw edge) and then pin directly after the seam (about 1/16th “). This will ensure your seams stay in position without the pin skewing the fabric alignment when sewing. It will often result in perfectly matched seams.
Making the Center Panel
Sew M to L along 11″ side. Cut into two equal 2 1/2″x5 1/2″ rectangles as shown above. These are the ML units. Set aside.
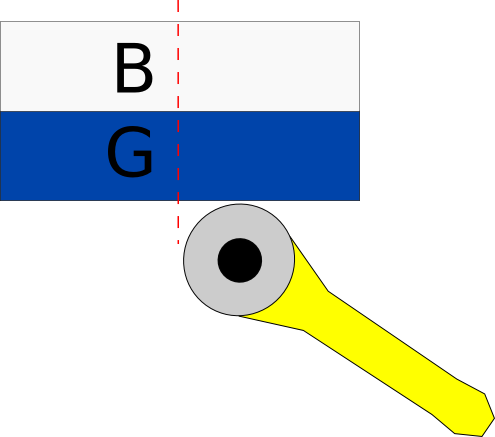
Sew B to G along 5″ side. Cut into two equal 2 1/2″x2 1/2″ rectangles as shown above. These are the BG units. Set aside.
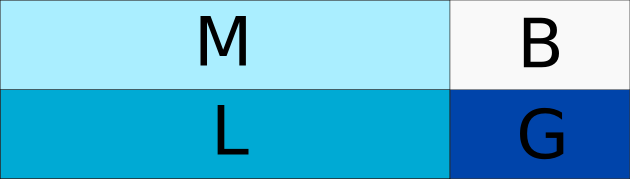
Sew ML units to BG units as shown above. These are the MLBG units.
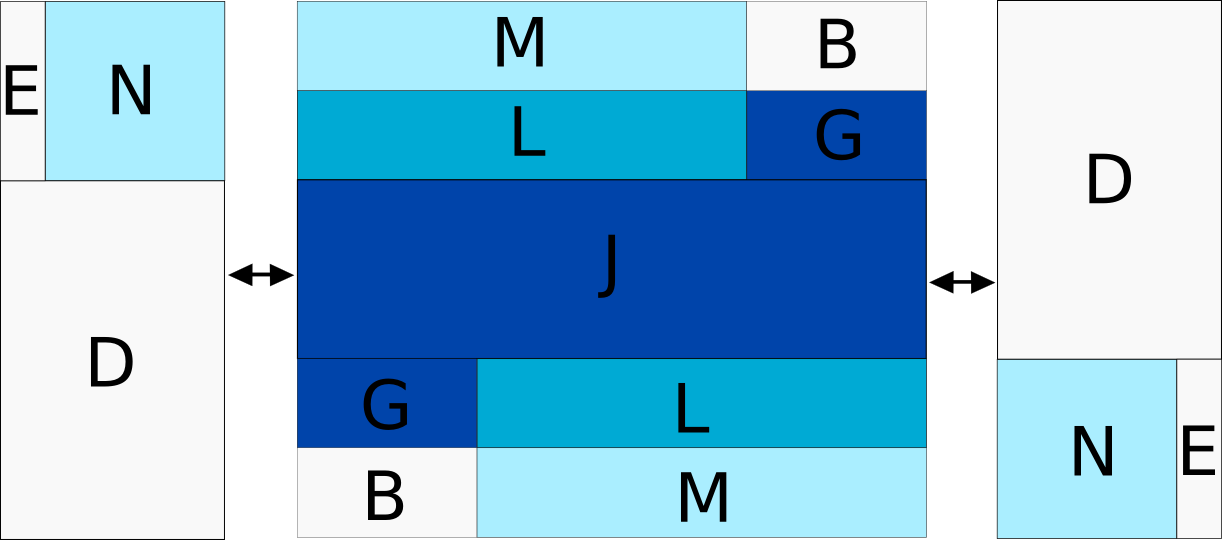
Sew MLBG units to long sides of J as shown. Note that the bottom MLBG unit has been rotated 180 degrees. Pay close attention to the position of the colors to ensure the MLBG units are mirroring each other. Set aside.
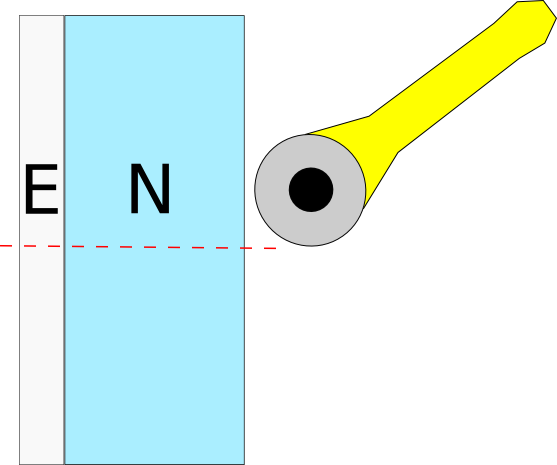
Sew E to N along 5″ side. Cut into two equal 3″x 2 1/2″ rectangles as shown above. These are your EN units.
Sew D to the bottom of each EN unit, ensuring that the background white E strip is on the left. You will have (2) 3″x6 1/2″ rectangles (above). These are the END units.
Assemble the center panel as shown above. Note that the right END unit has been rotated 180 degrees. Pay close attention to the position of the colors before sewing. The center panel should measure 12 1/2″ x 6 1/2″ at this point.
Sew top and bottom panels to center panel to complete the quilt block as shown above. Note that the bottom panel has been rotated 180 degrees.
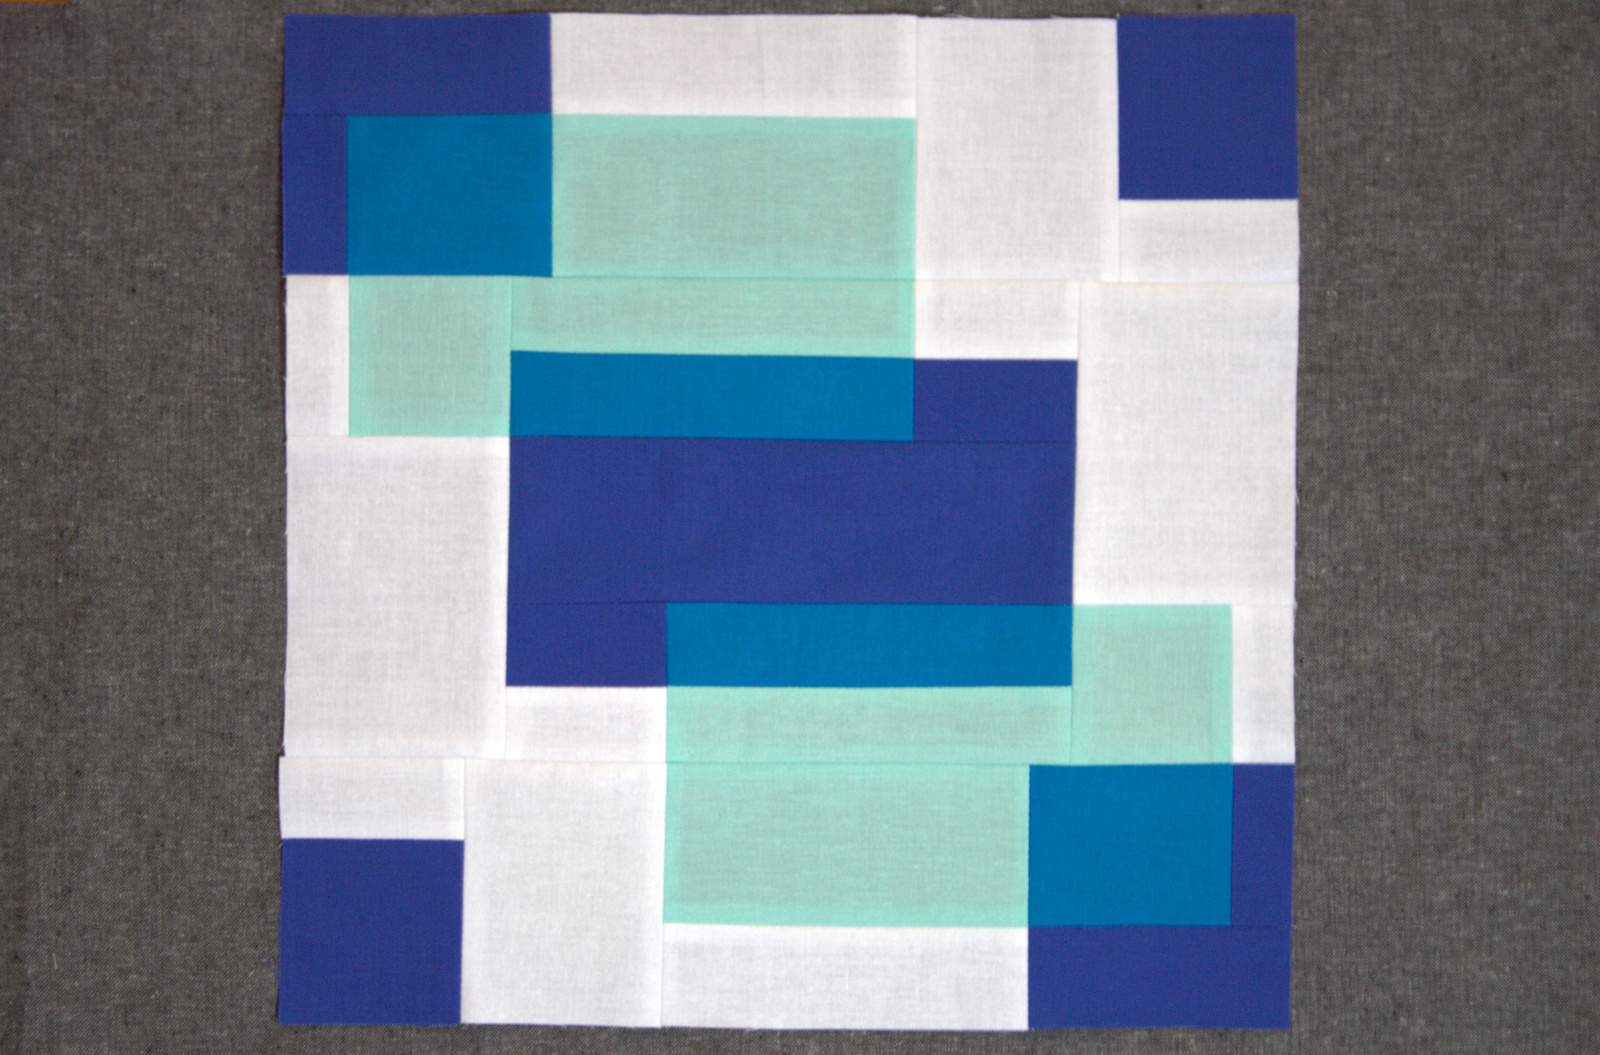
Congratulations! You just made your first Transparent Play block. It wasn’t nearly as tricky as it first looked, was it? Strip piecing is awesome.
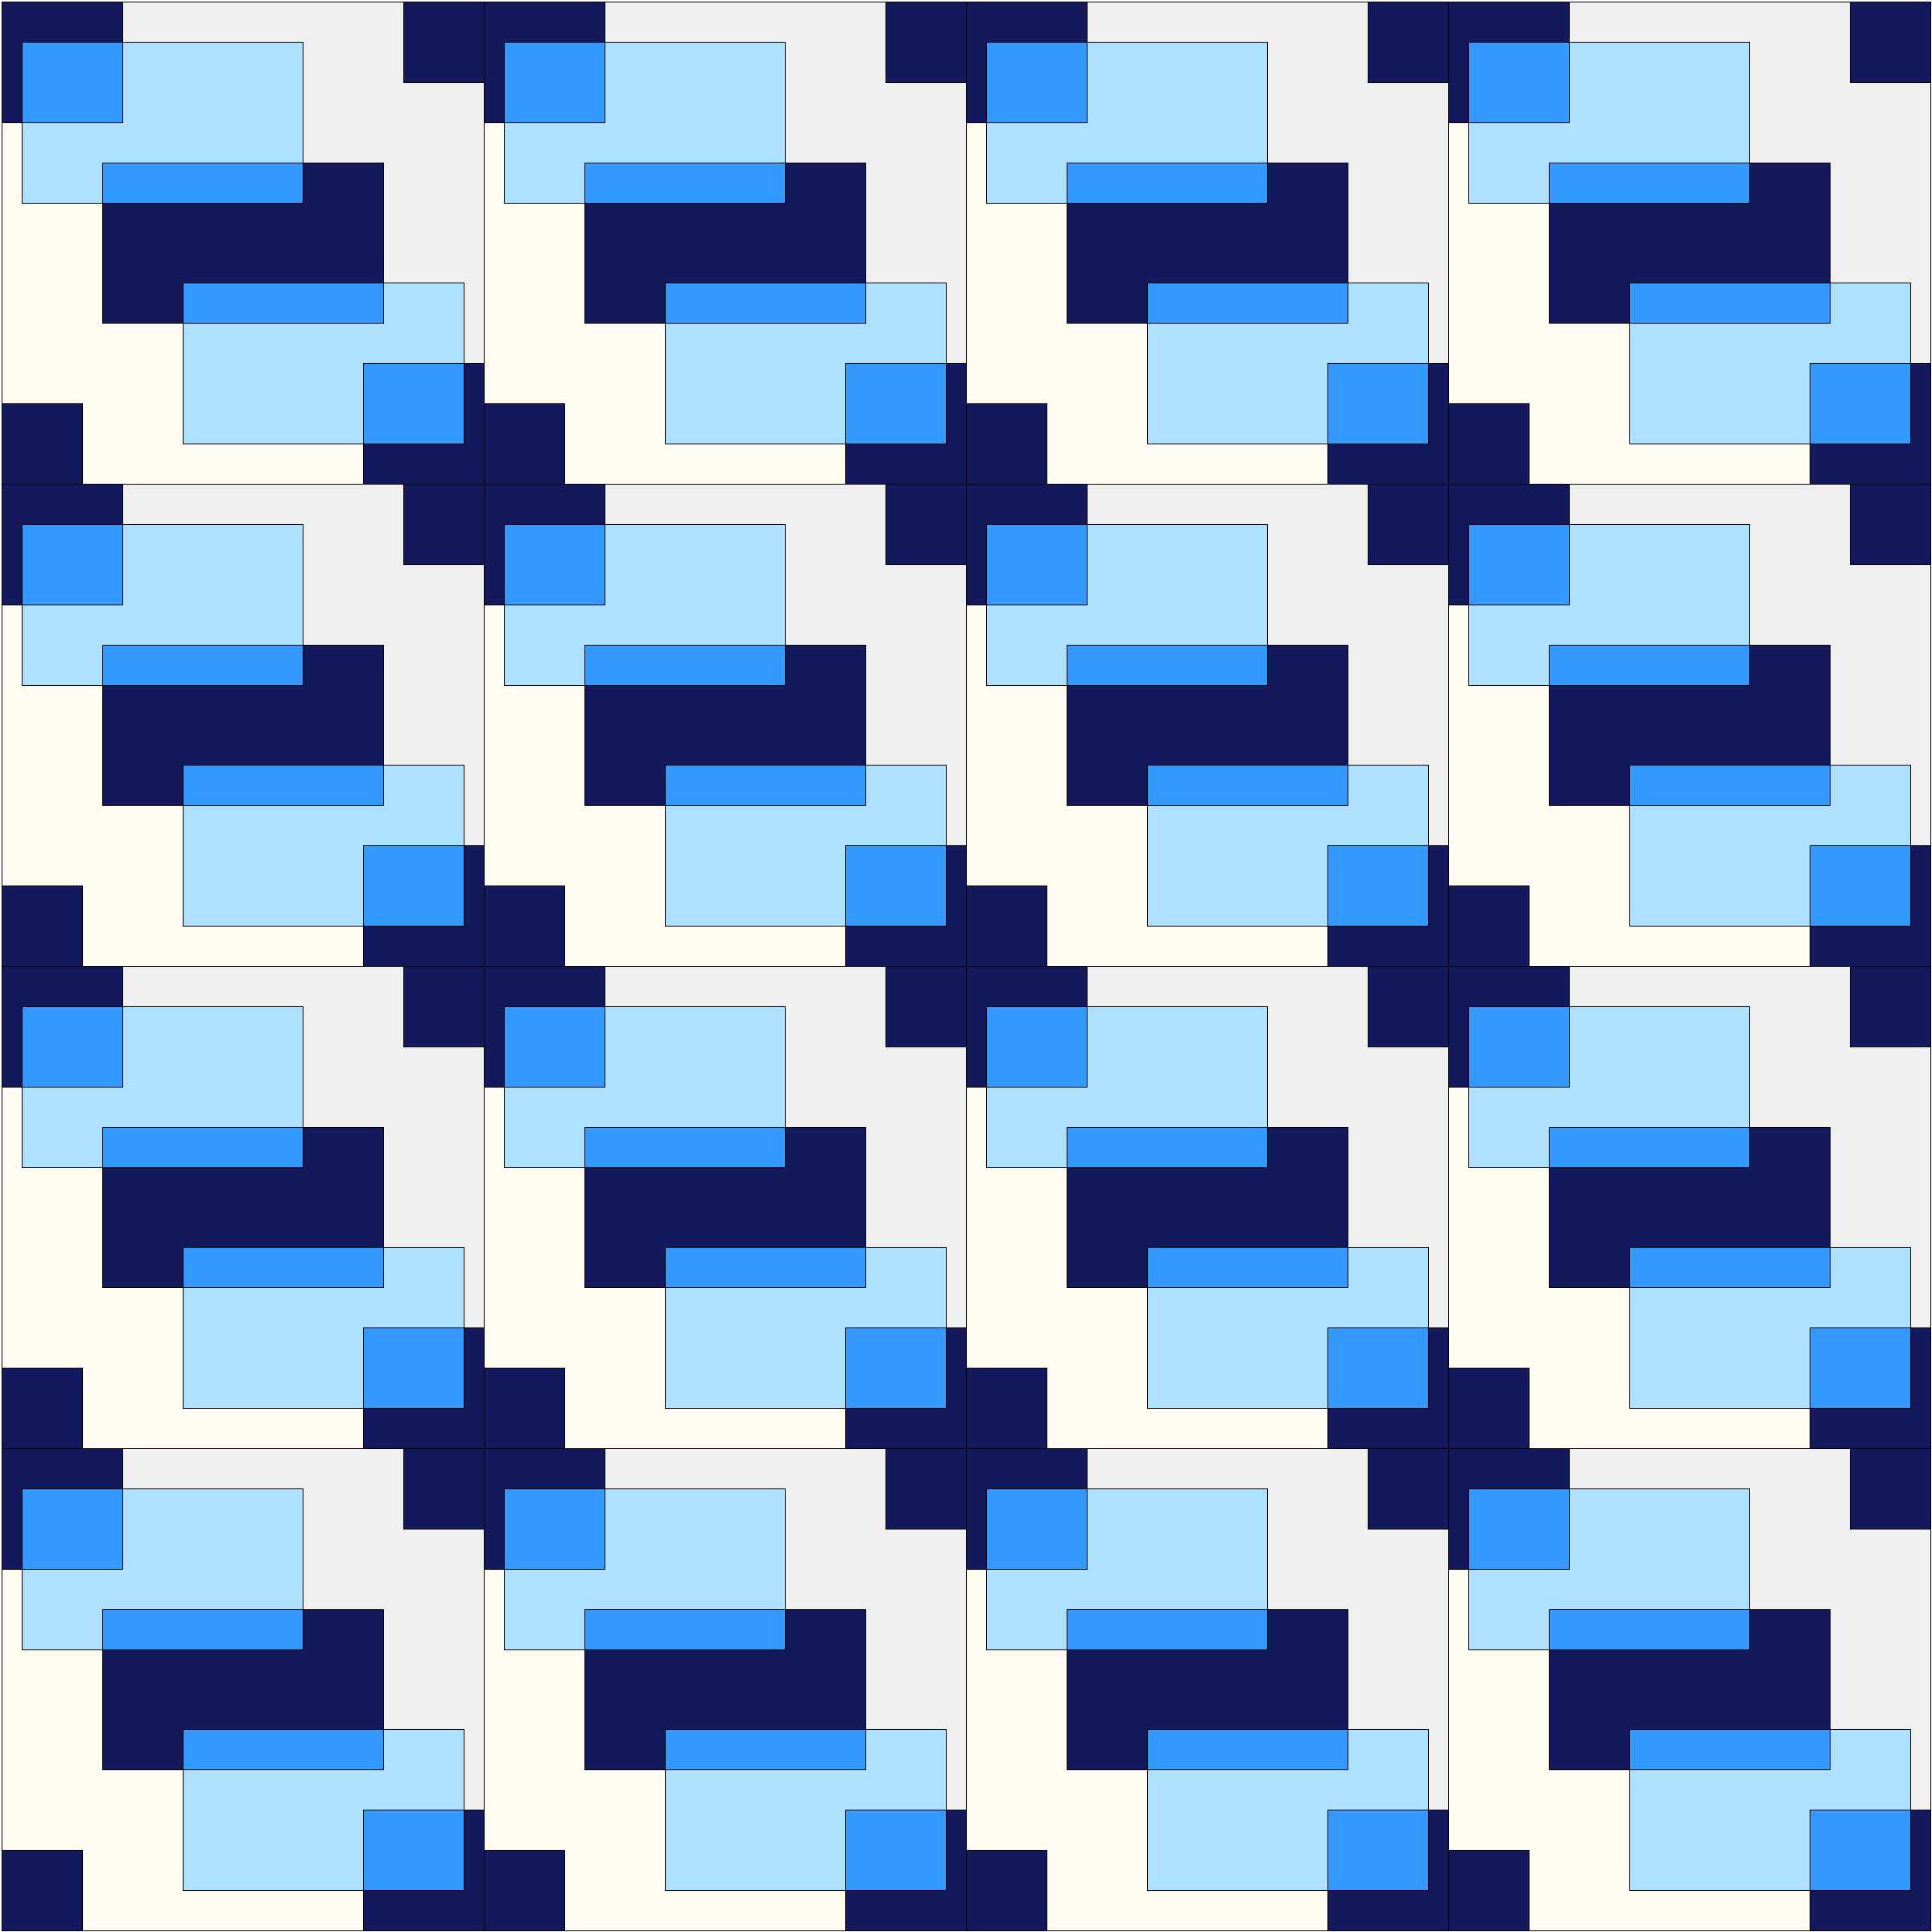
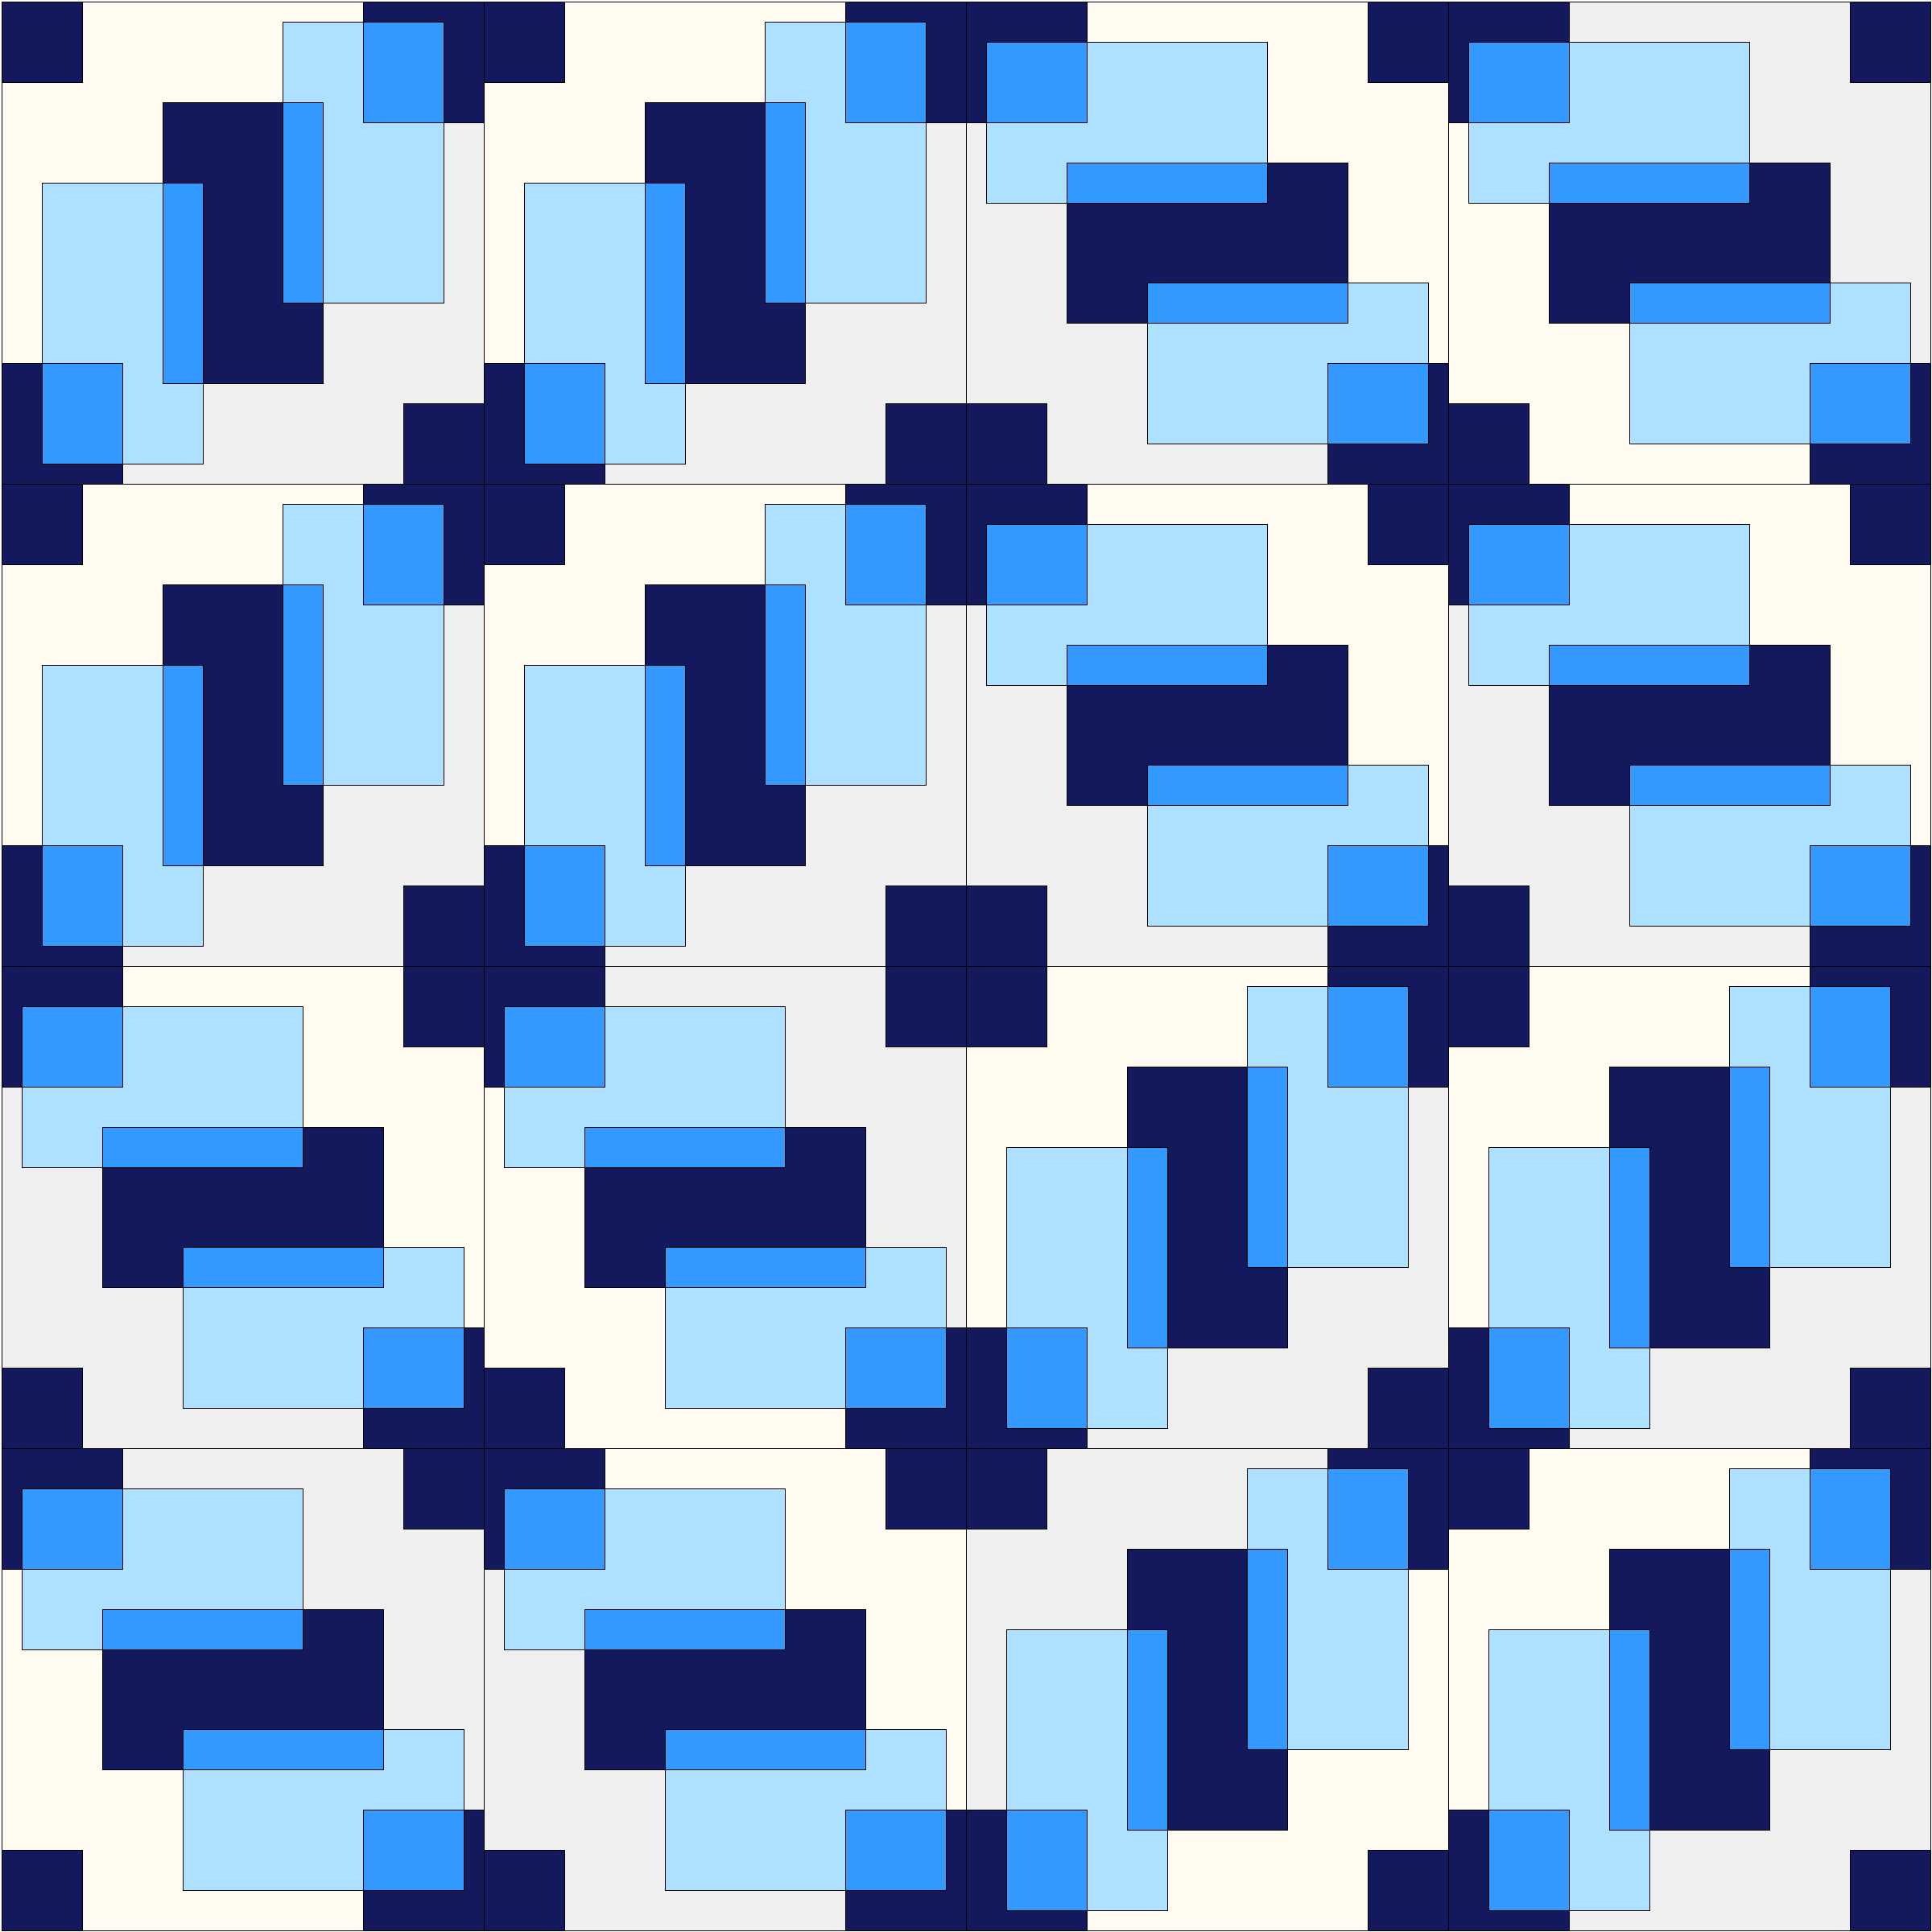
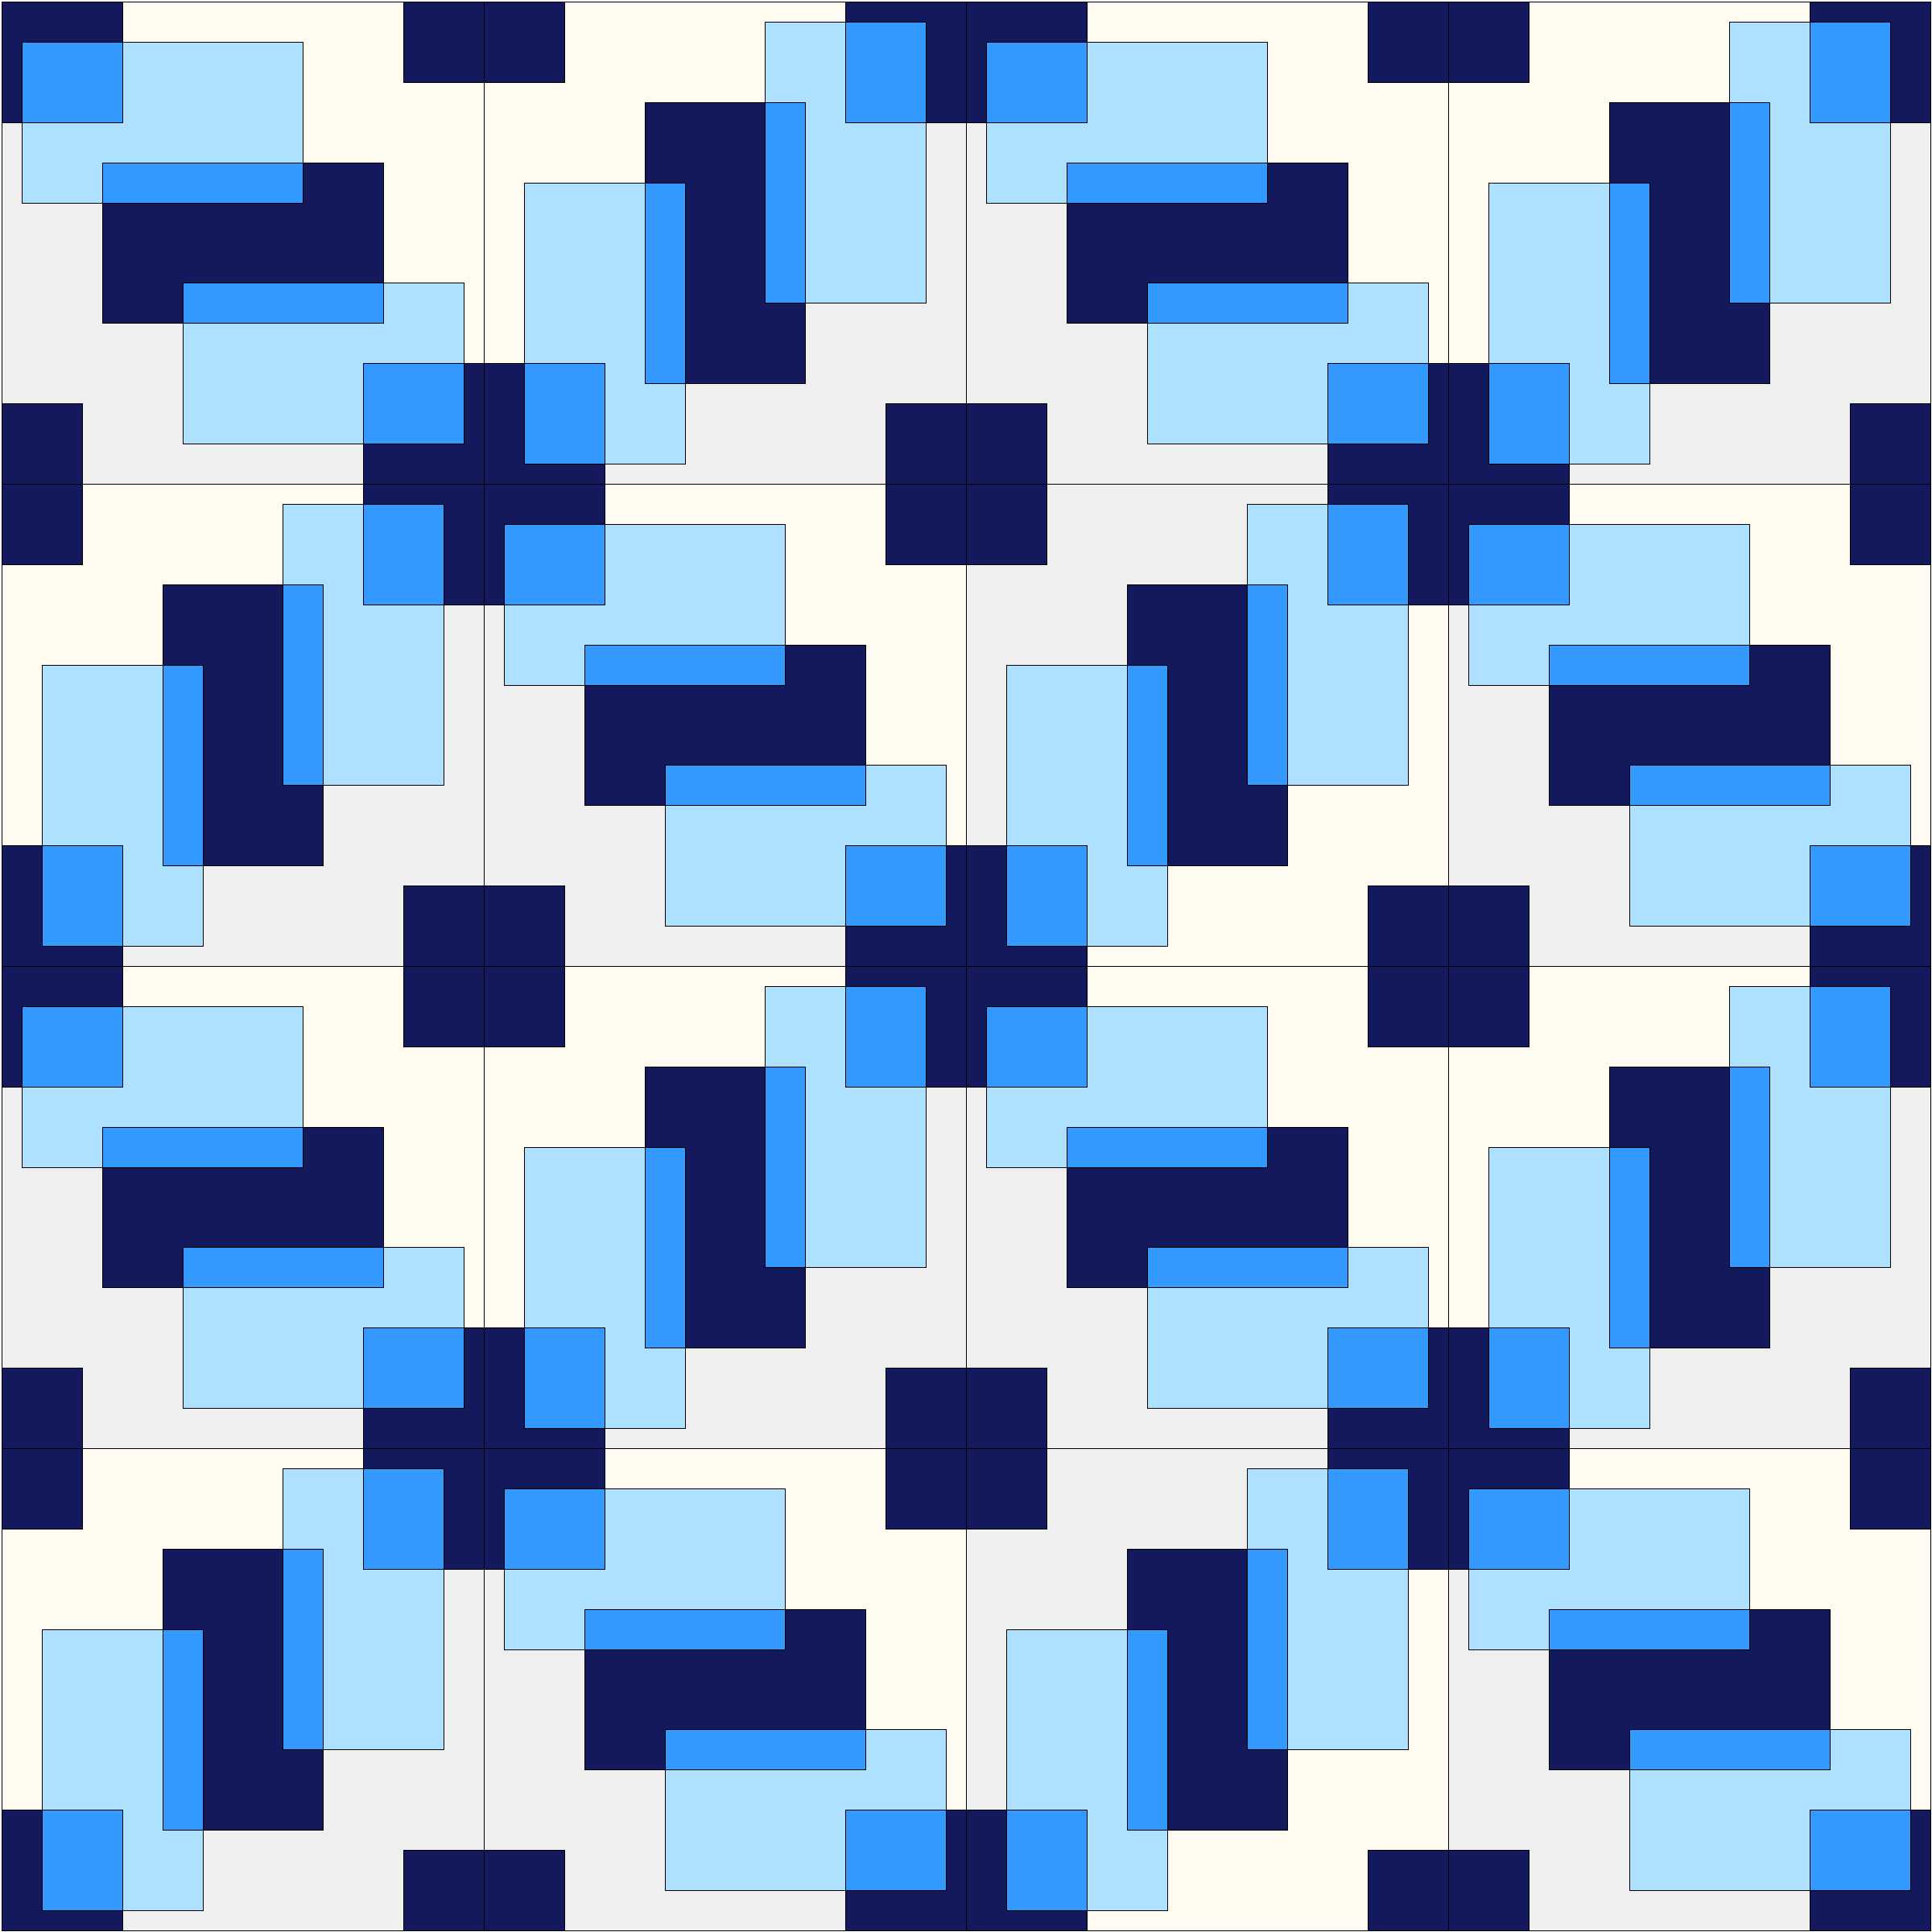
This block is fun to play with when it comes to layout, since by simply rotating the blocks, you can create a number of different visual layout effects. Here are just a few:
Layout 1: All blocks in line
Layout 2: Bull’s Eye
Layout 3: Braid
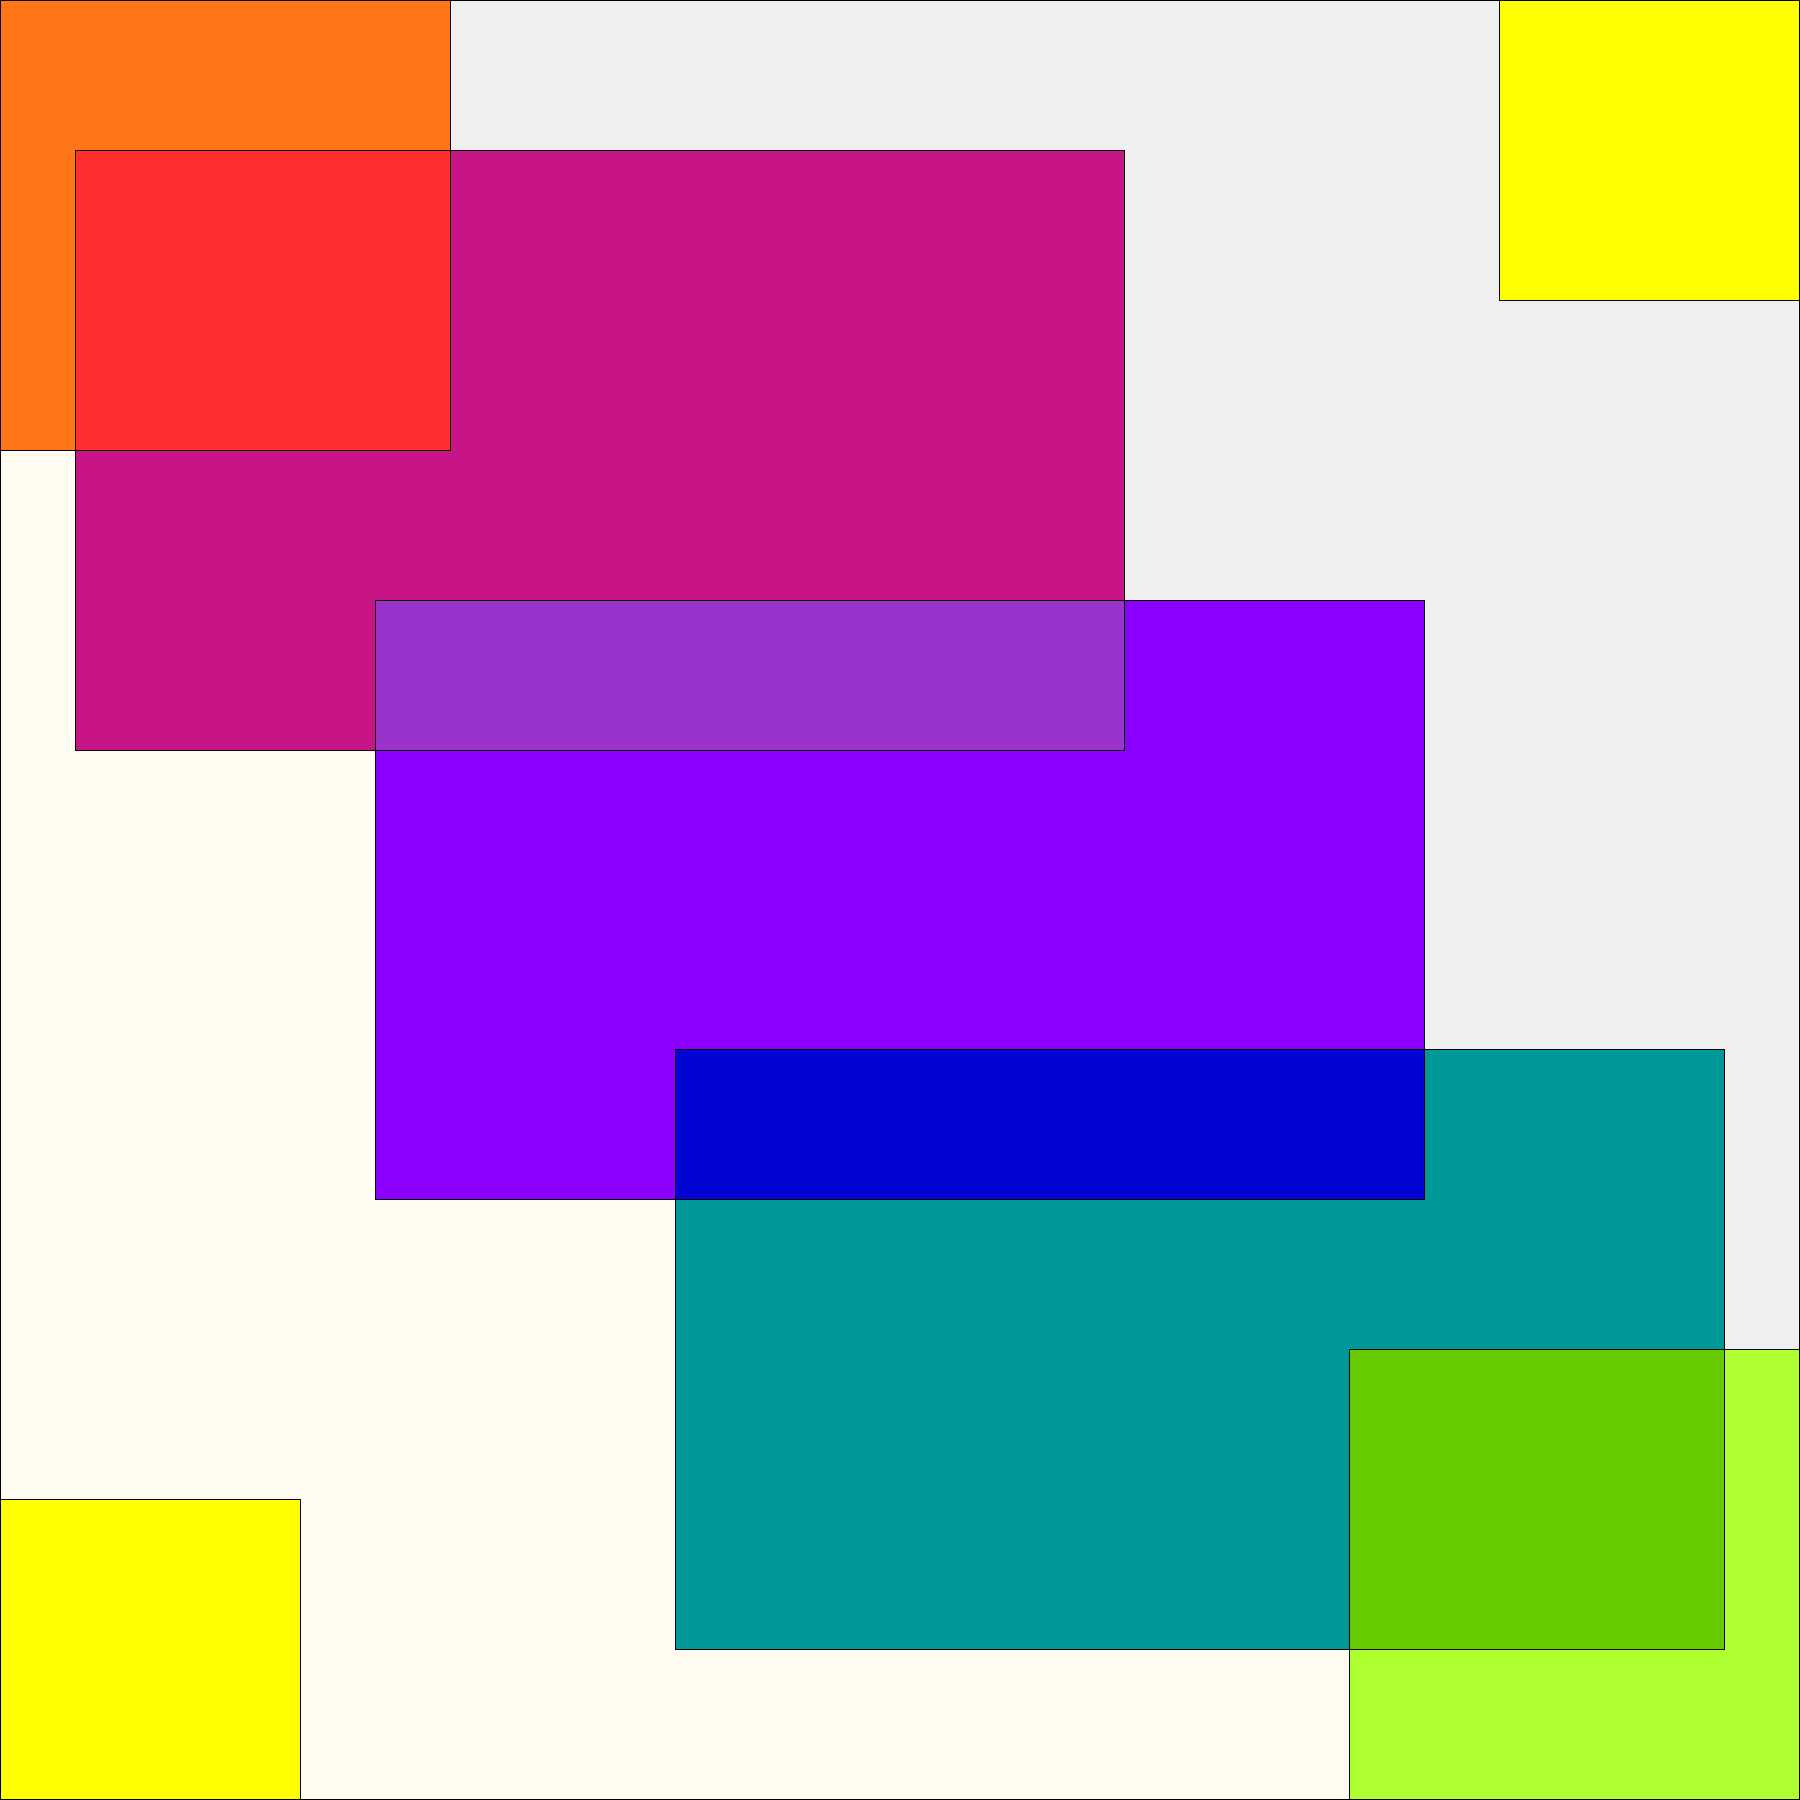
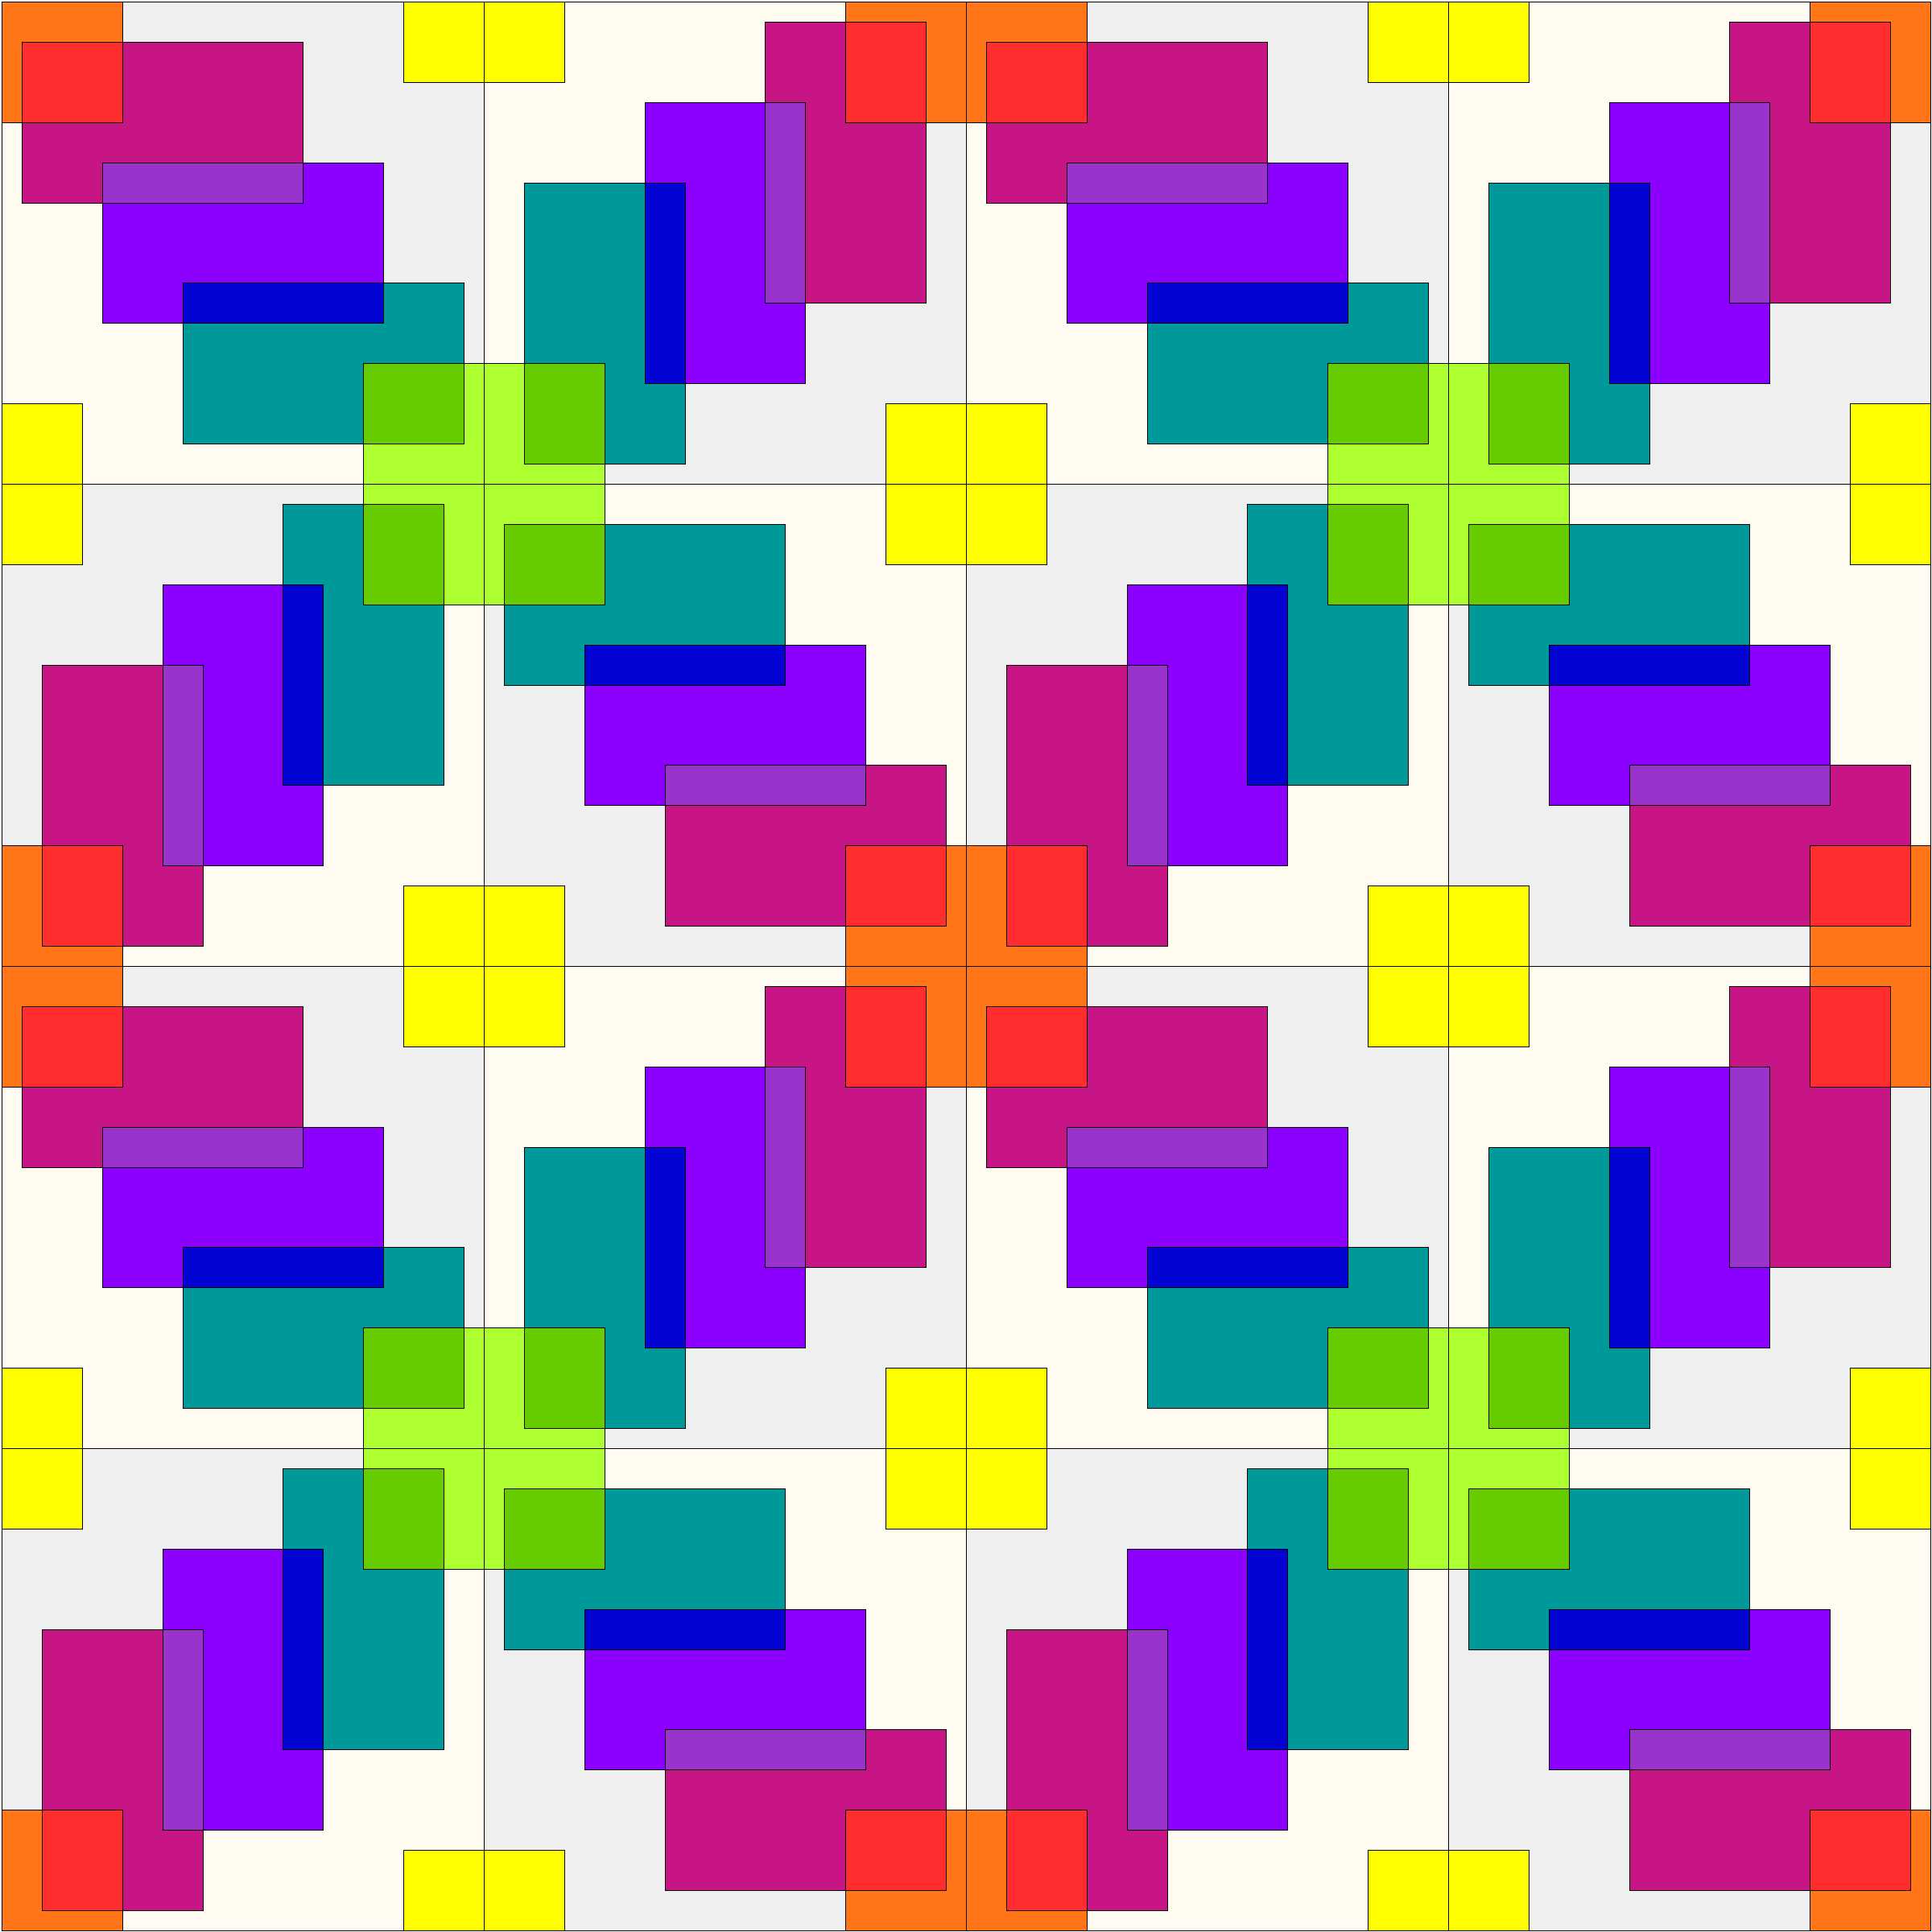
I also couldn’t let a post go without including a peek at a rainbow, so here’s a sample block using color gradient transparency instead of monochromatic transparency. and a resulting layout:
I hope you’ve had fun making your Transparent Play block, and please tag me @nightquilter on social media if you make it–I would love to see!
There are many other wonderful free block tutorials (60+!) posted in this Fabri-Quilt New Block Blog Hop. Here are the others posted today:
Also be sure to visit the others hosts’ pages (Yvonne @Quilting Jetgirl, Cheryl @Meadow Mist Designs, and Terri Ann @Childlike Fascination) for links to all of the blocks posted Monday through Thursday of this week. All of these blocks are being mailed to a host, who is assembling them into charity quilts.
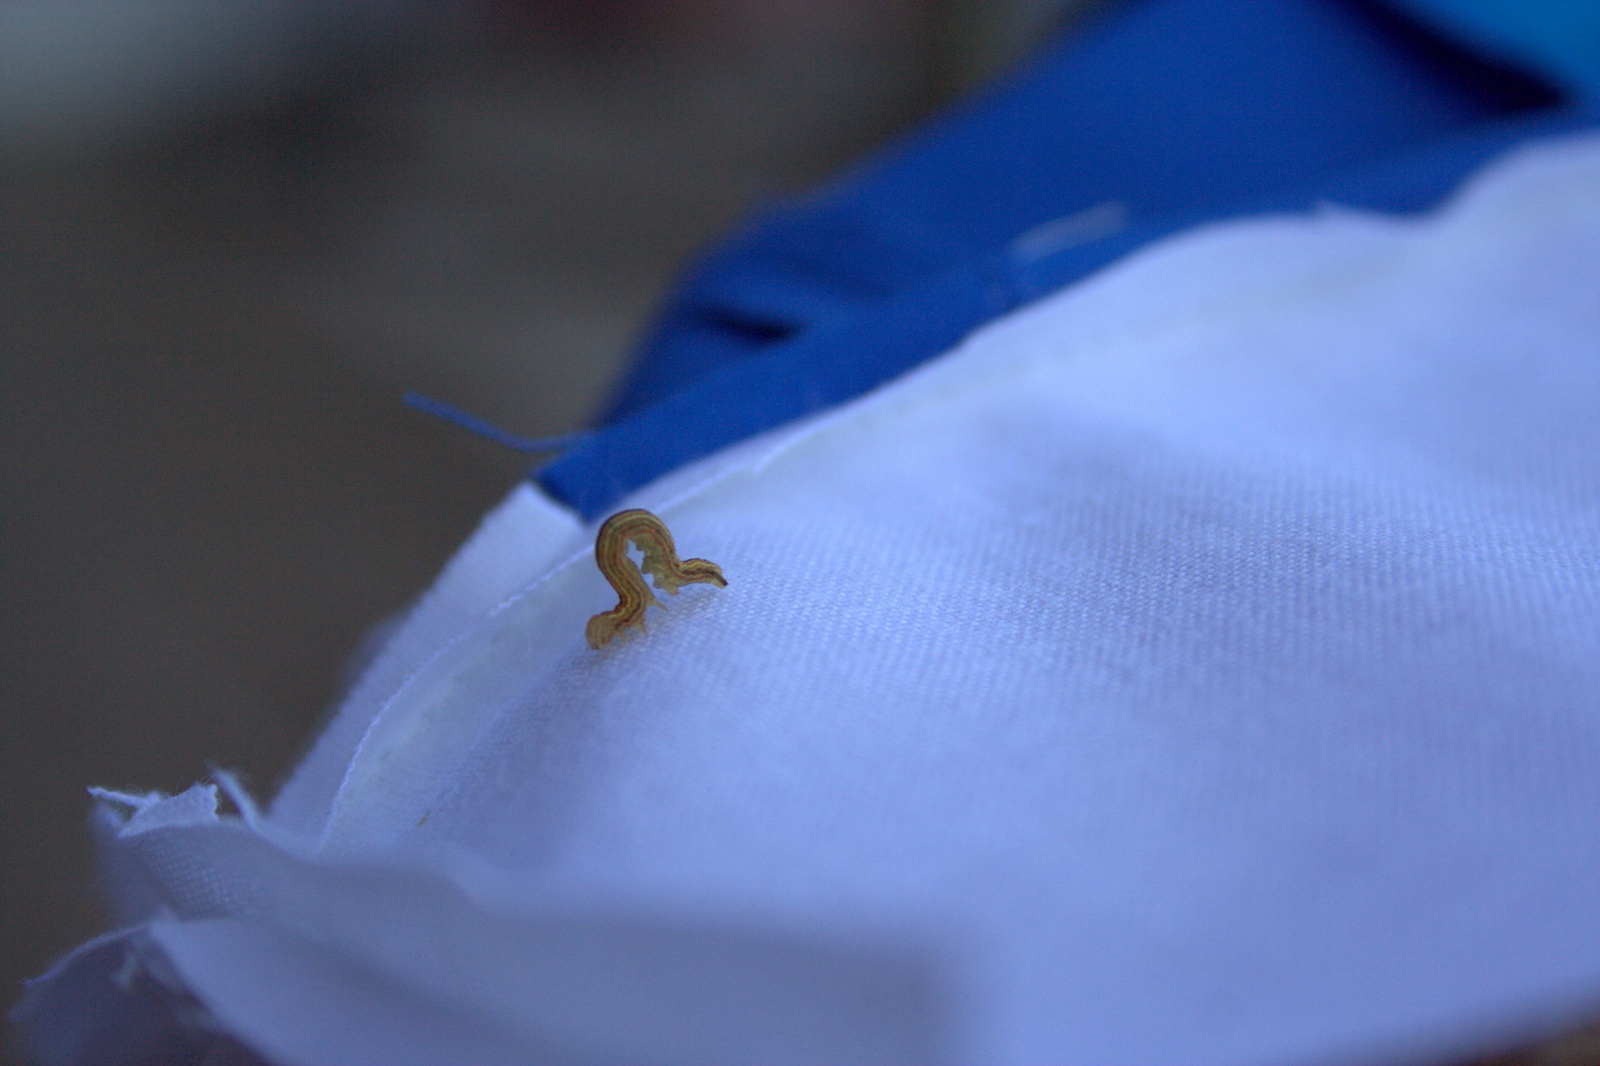
I made an inchworm friend while photographing this block. He was testing out my seams for good measure! (get it!? LOL) Have fun inching your way through the rest of the blog hop!
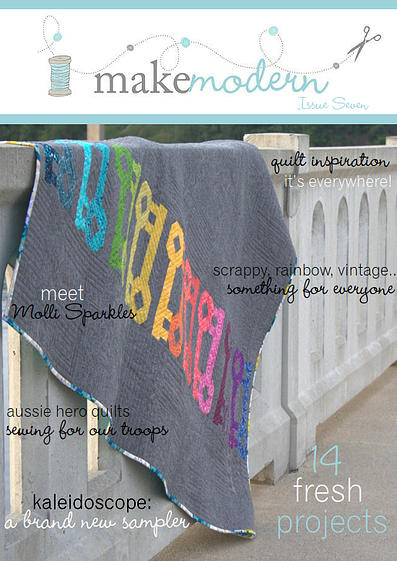
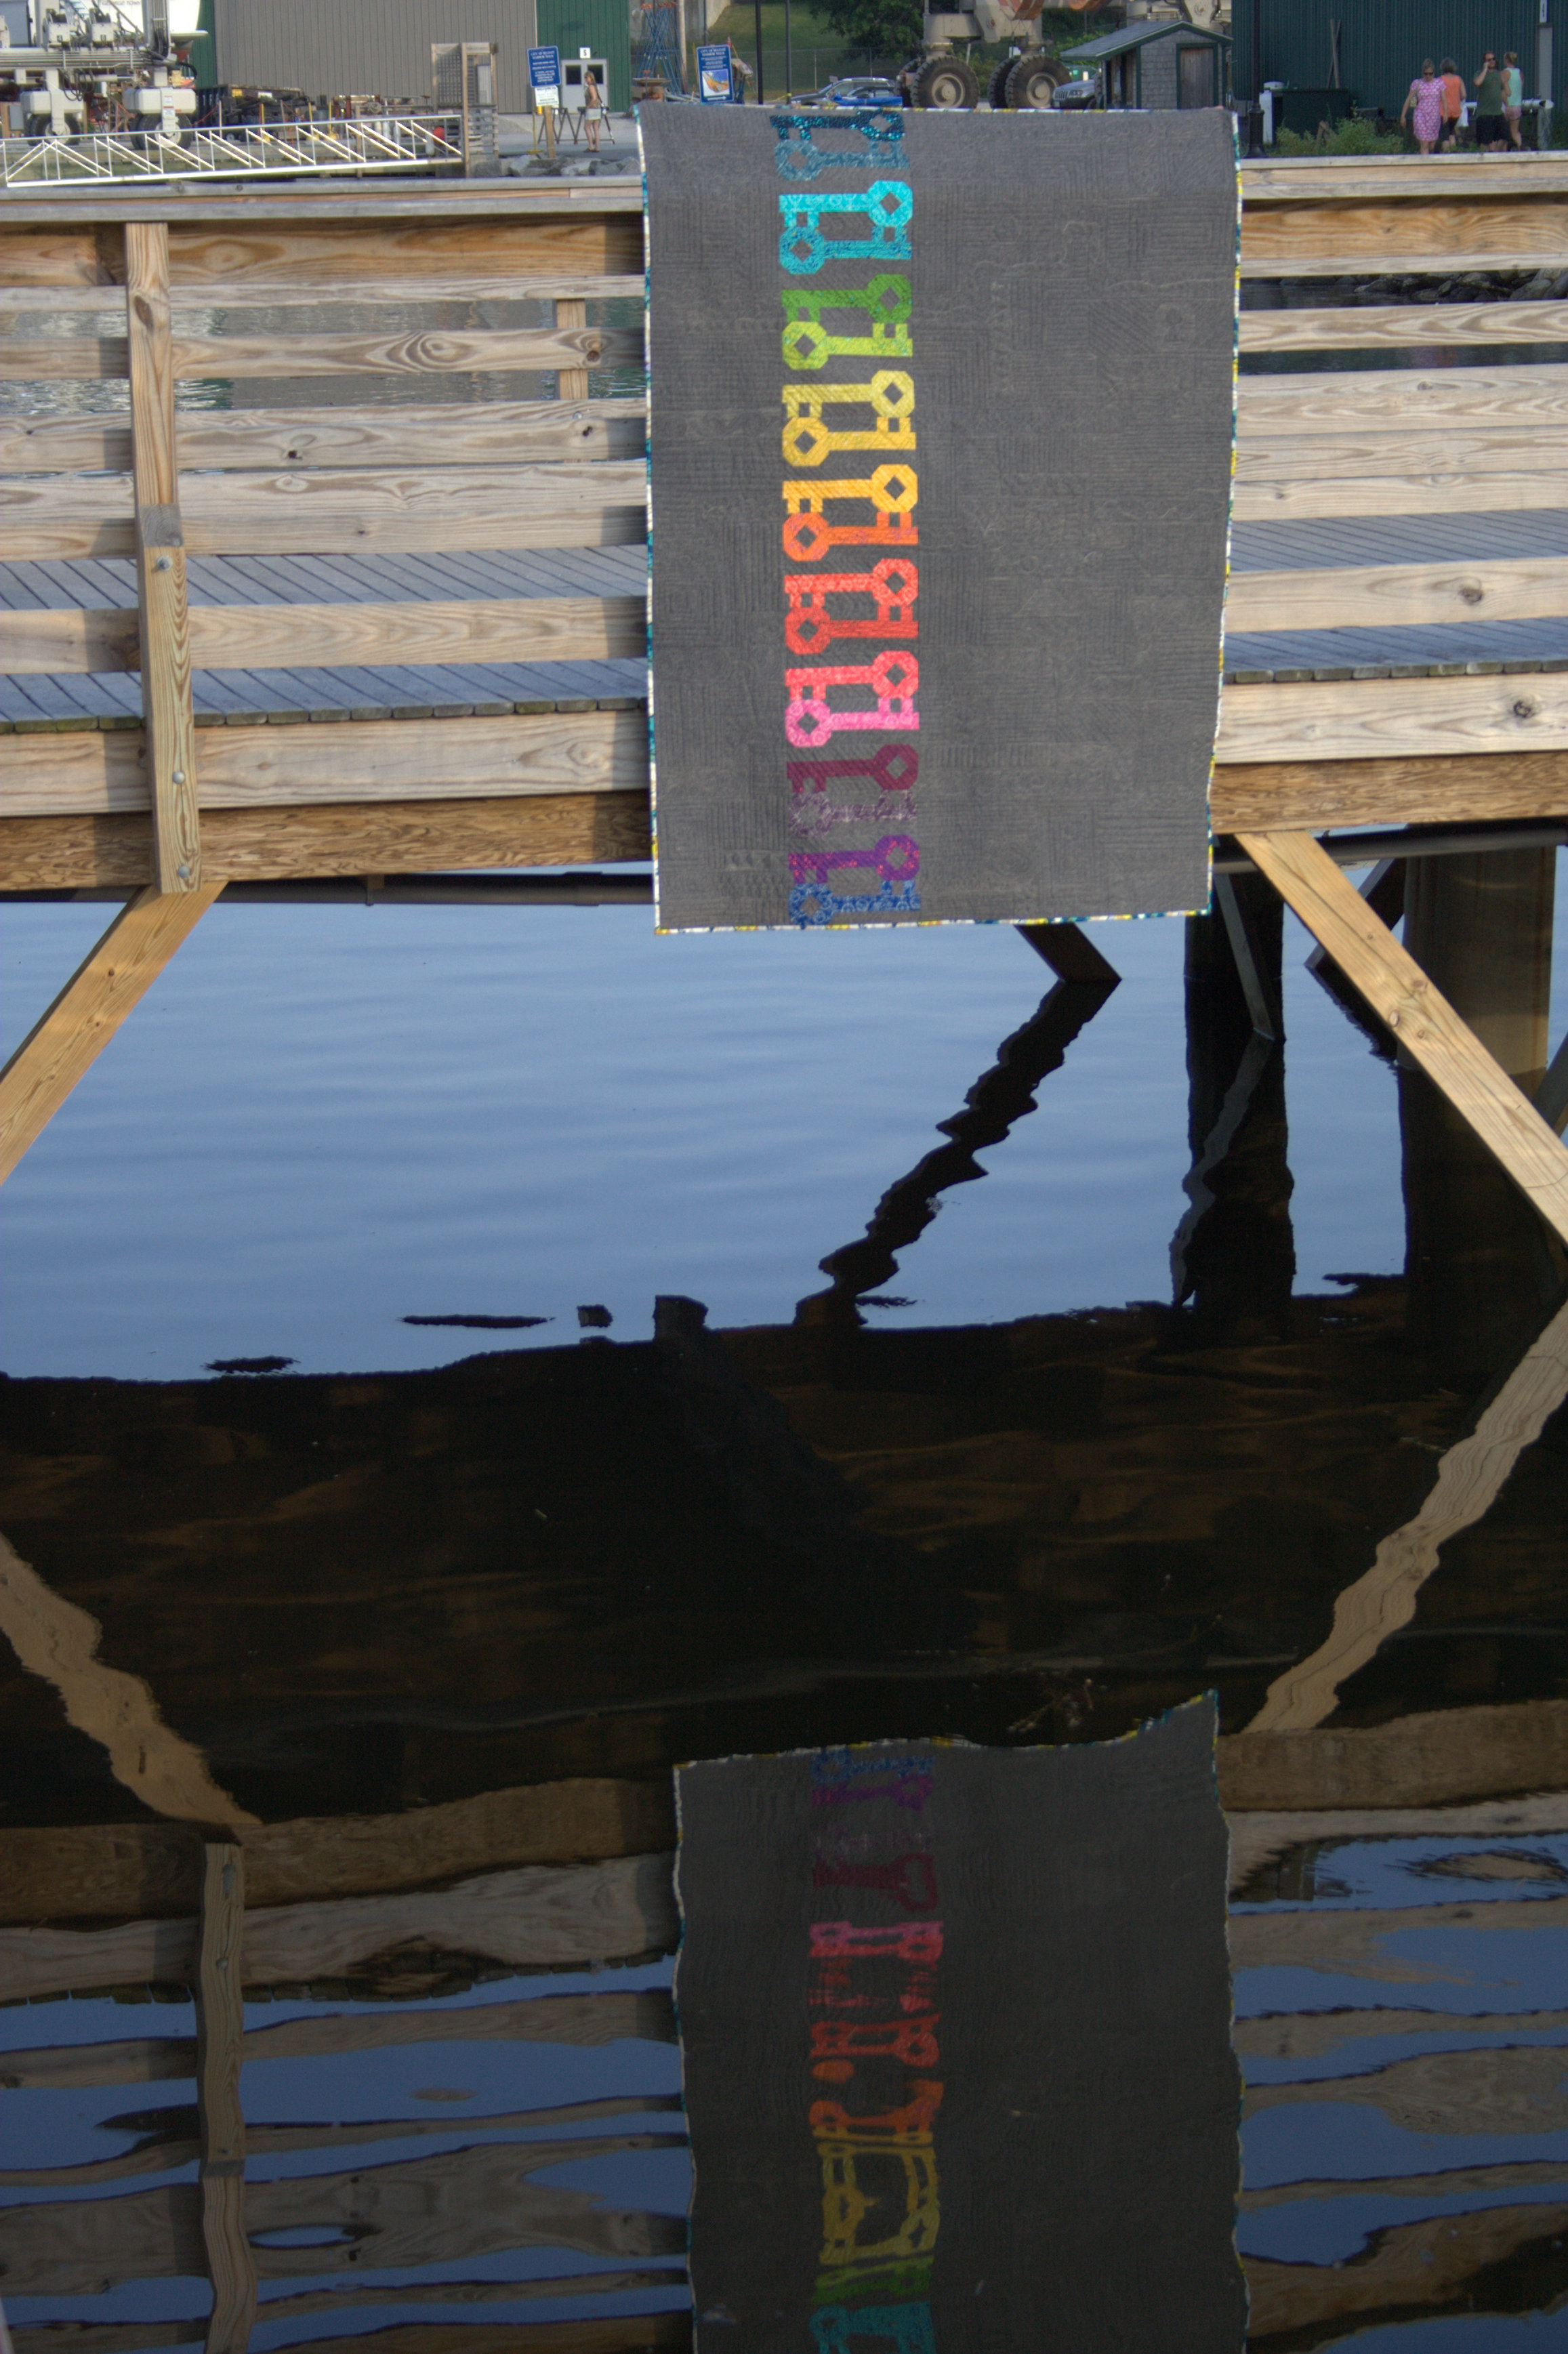
Today I’m so excited to share that my magazine debut (as the covergirl, no less!) is here. My pattern Unlocked appears in this month’s edition of Make Modern magazine, and even graces the cover (can you say excited!?!).
Make Modern is a digital modern quilting magazine, full of great patterns for quilts and smaller sewn items, articles, tips, and features. This issue (Issue 7) has a lovely meet and greet with none other than the most glittery quilter around: Molli Sparkles. Based in Australia, Make Modern was the brainchild of three quilting friends: Jane, Lara, and Kristy. You can read about their philosophy HERE, which I definitely recommend. From the sustainability and accessibility of a digital magazine, to being a positive driving force in the modern quilting world, they’ve got it going on.
You can purchase single issues of the magazine or can choose 3 issue (6 month) or 6 issue (yearly) digital subscriptions. I’m honored to be a part of this publication.
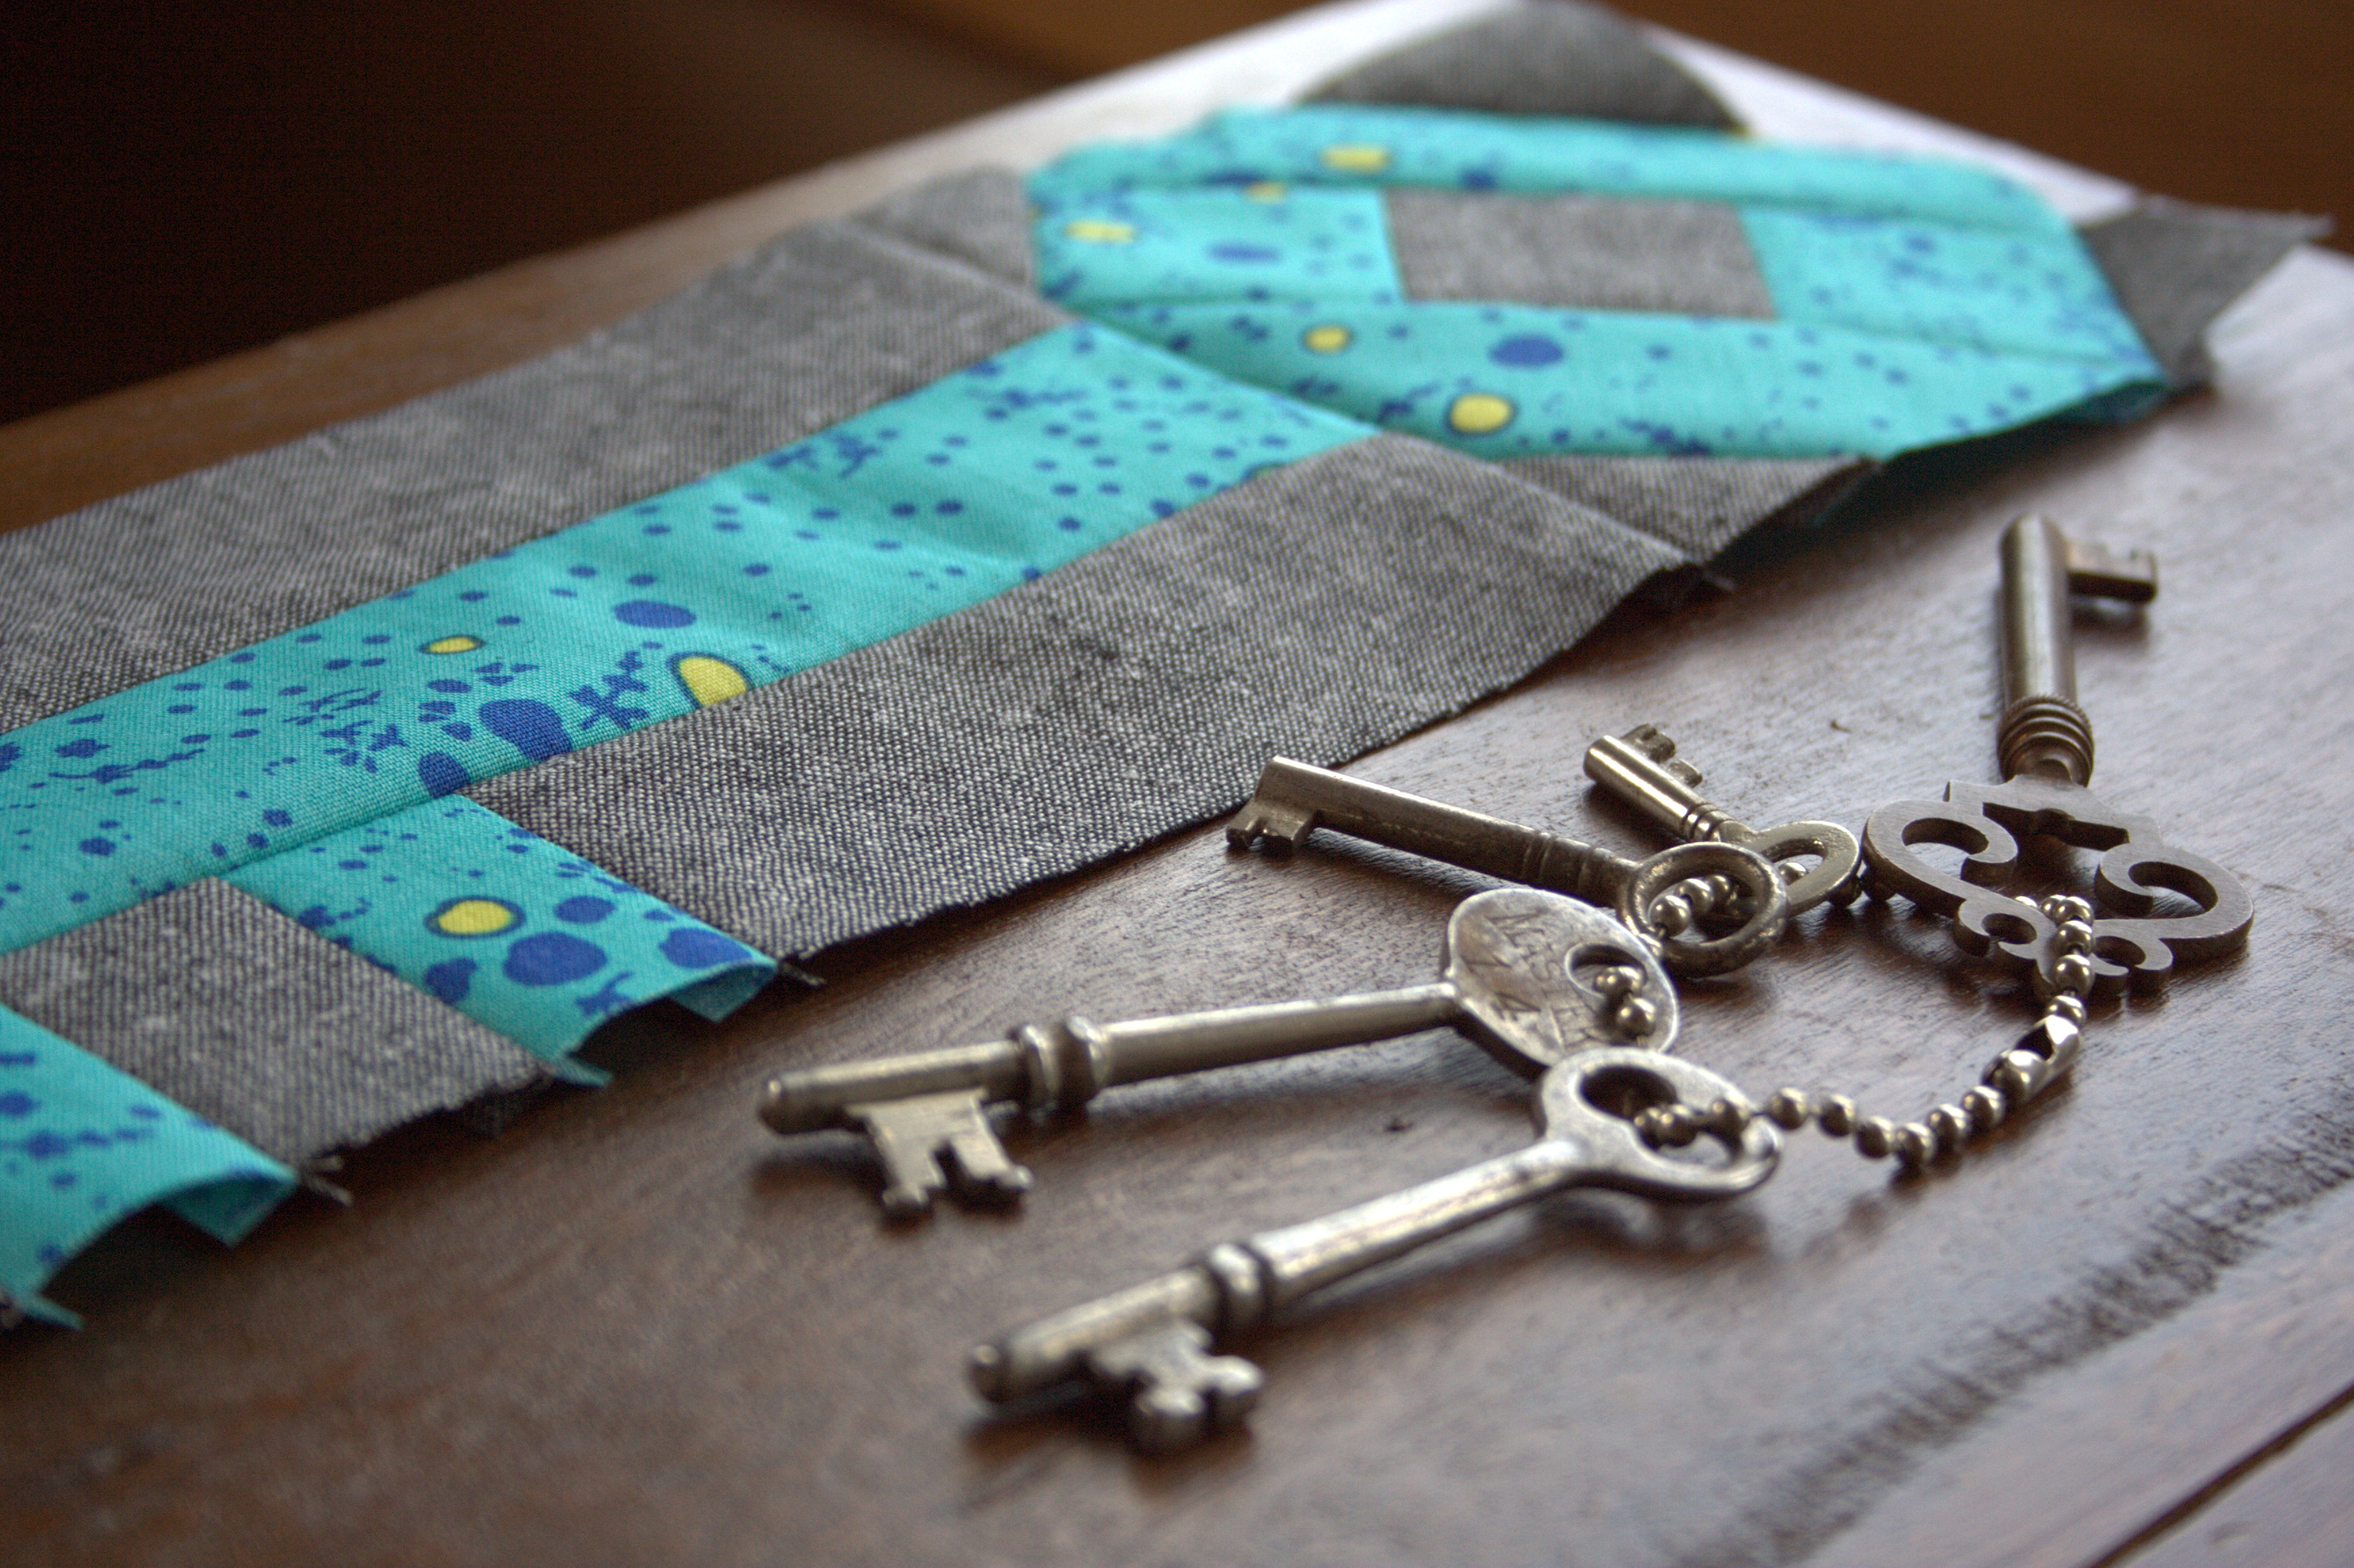
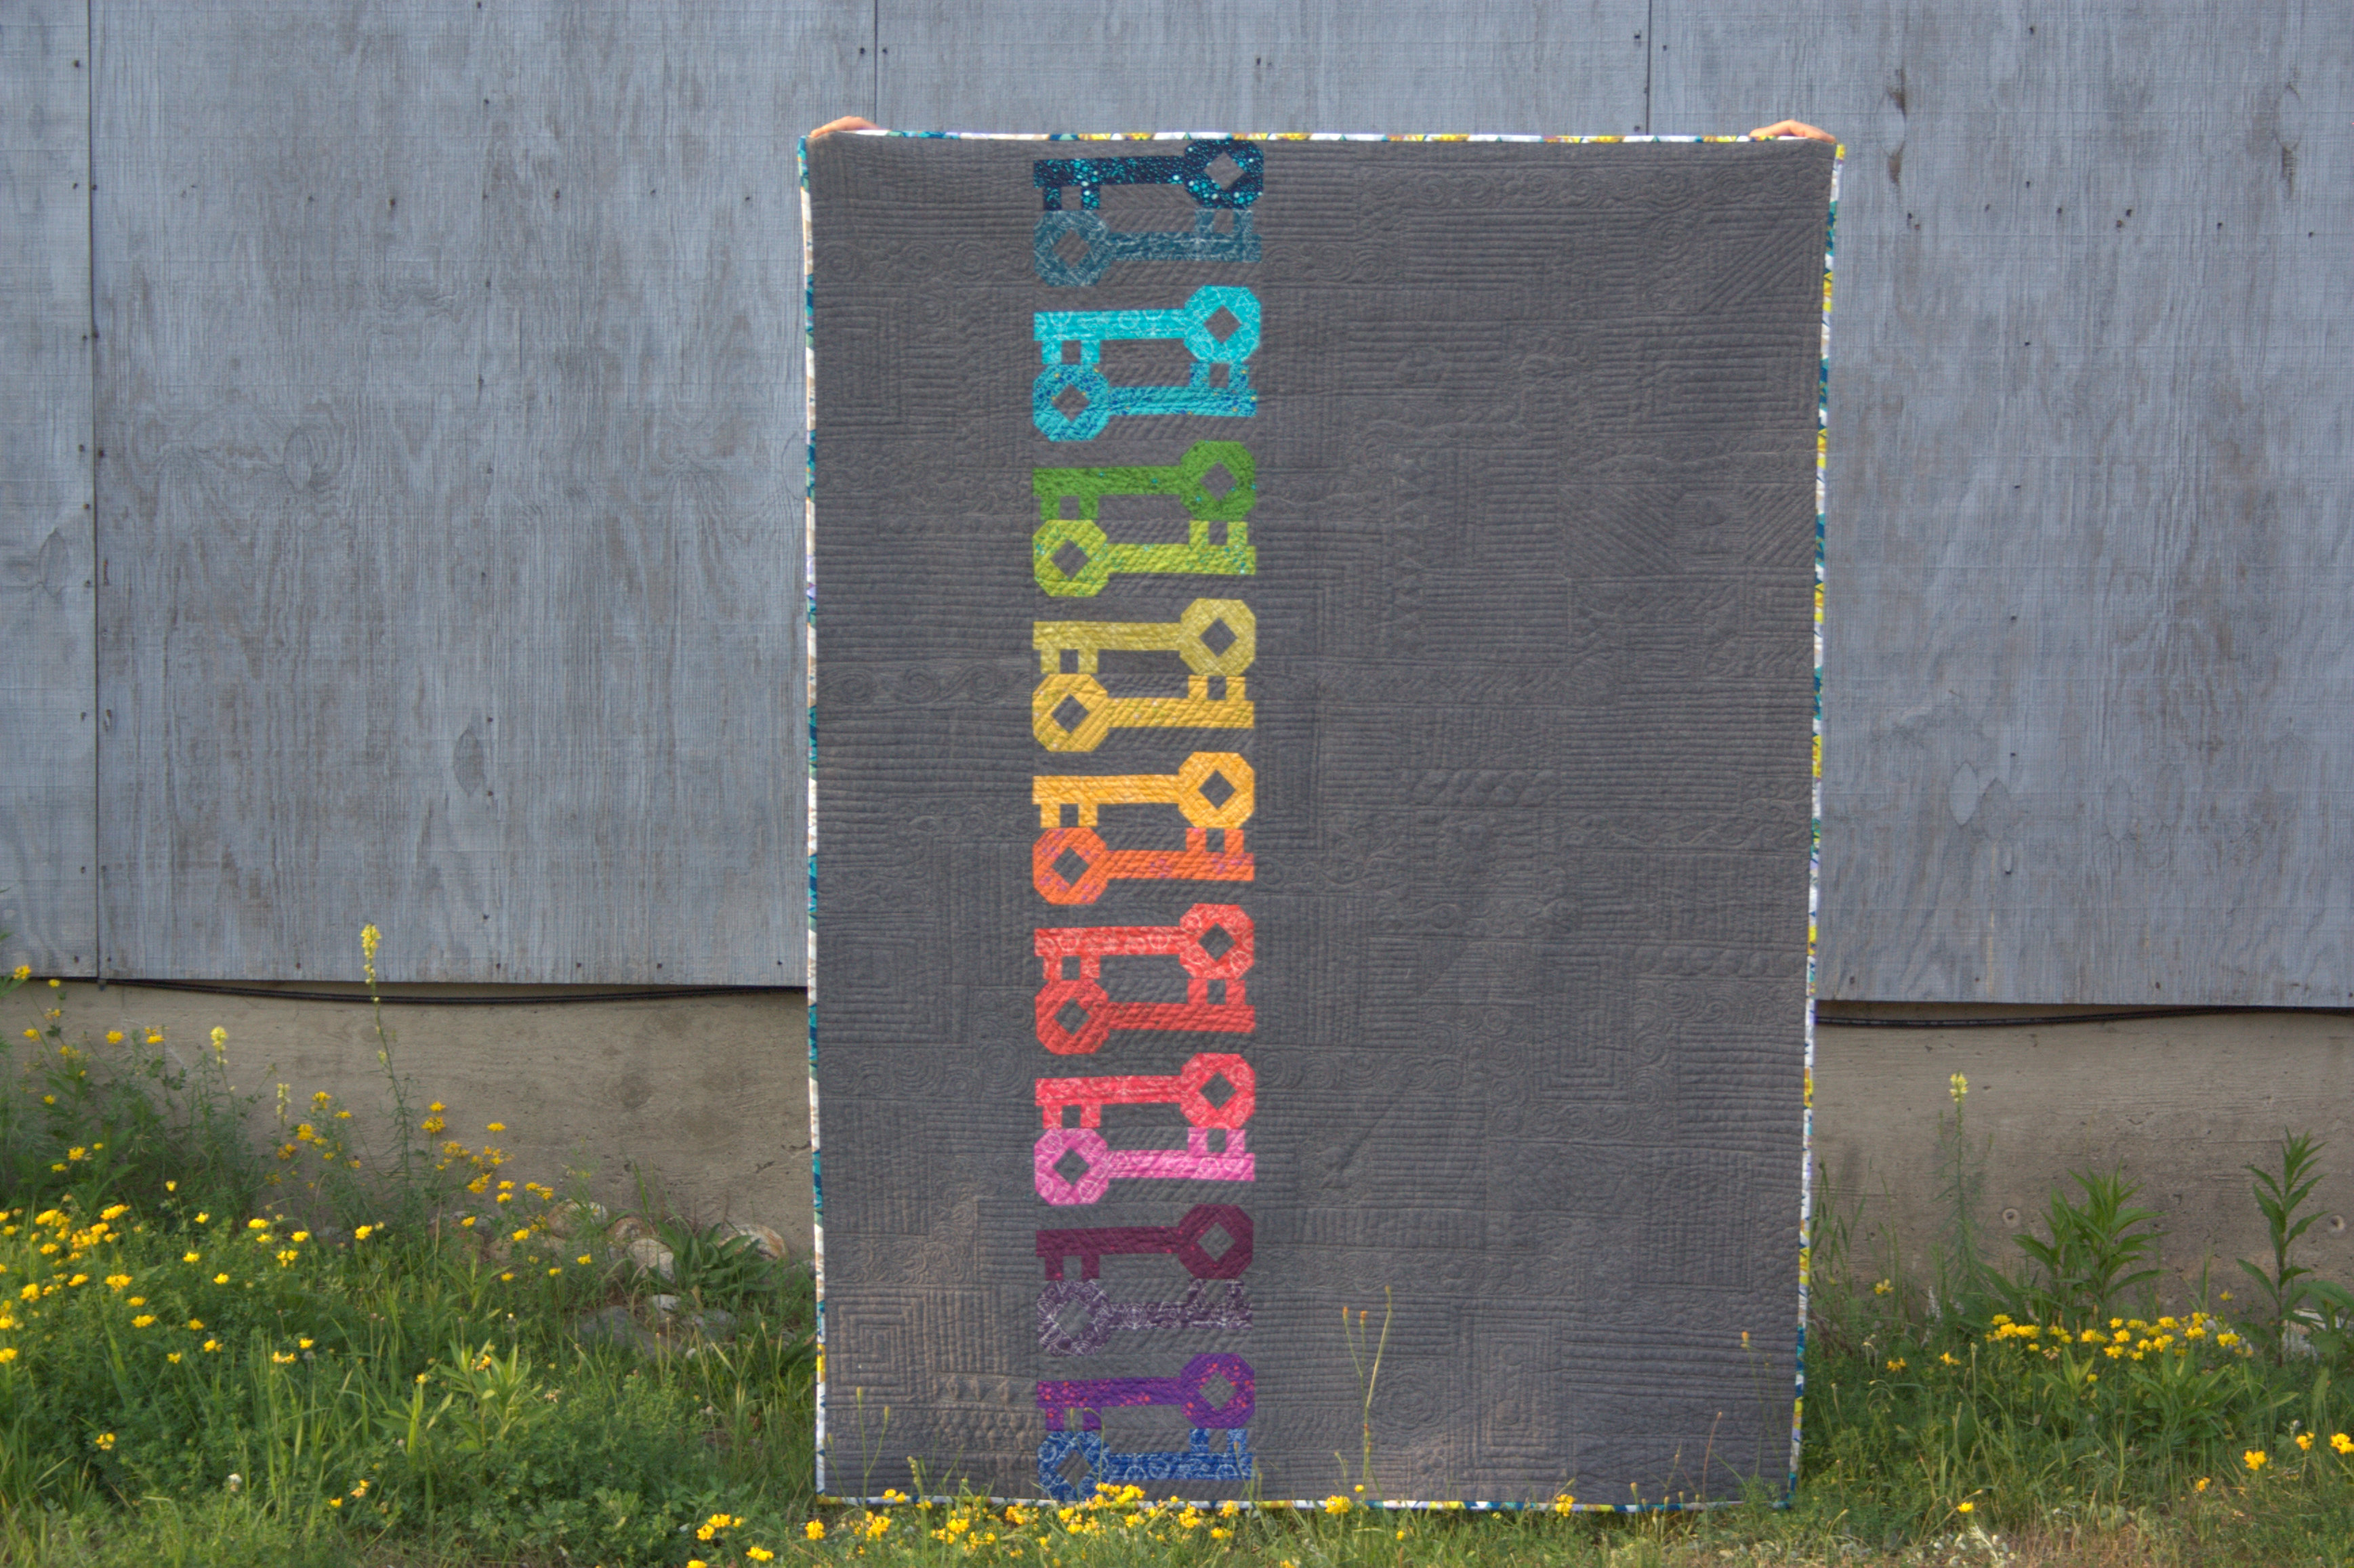
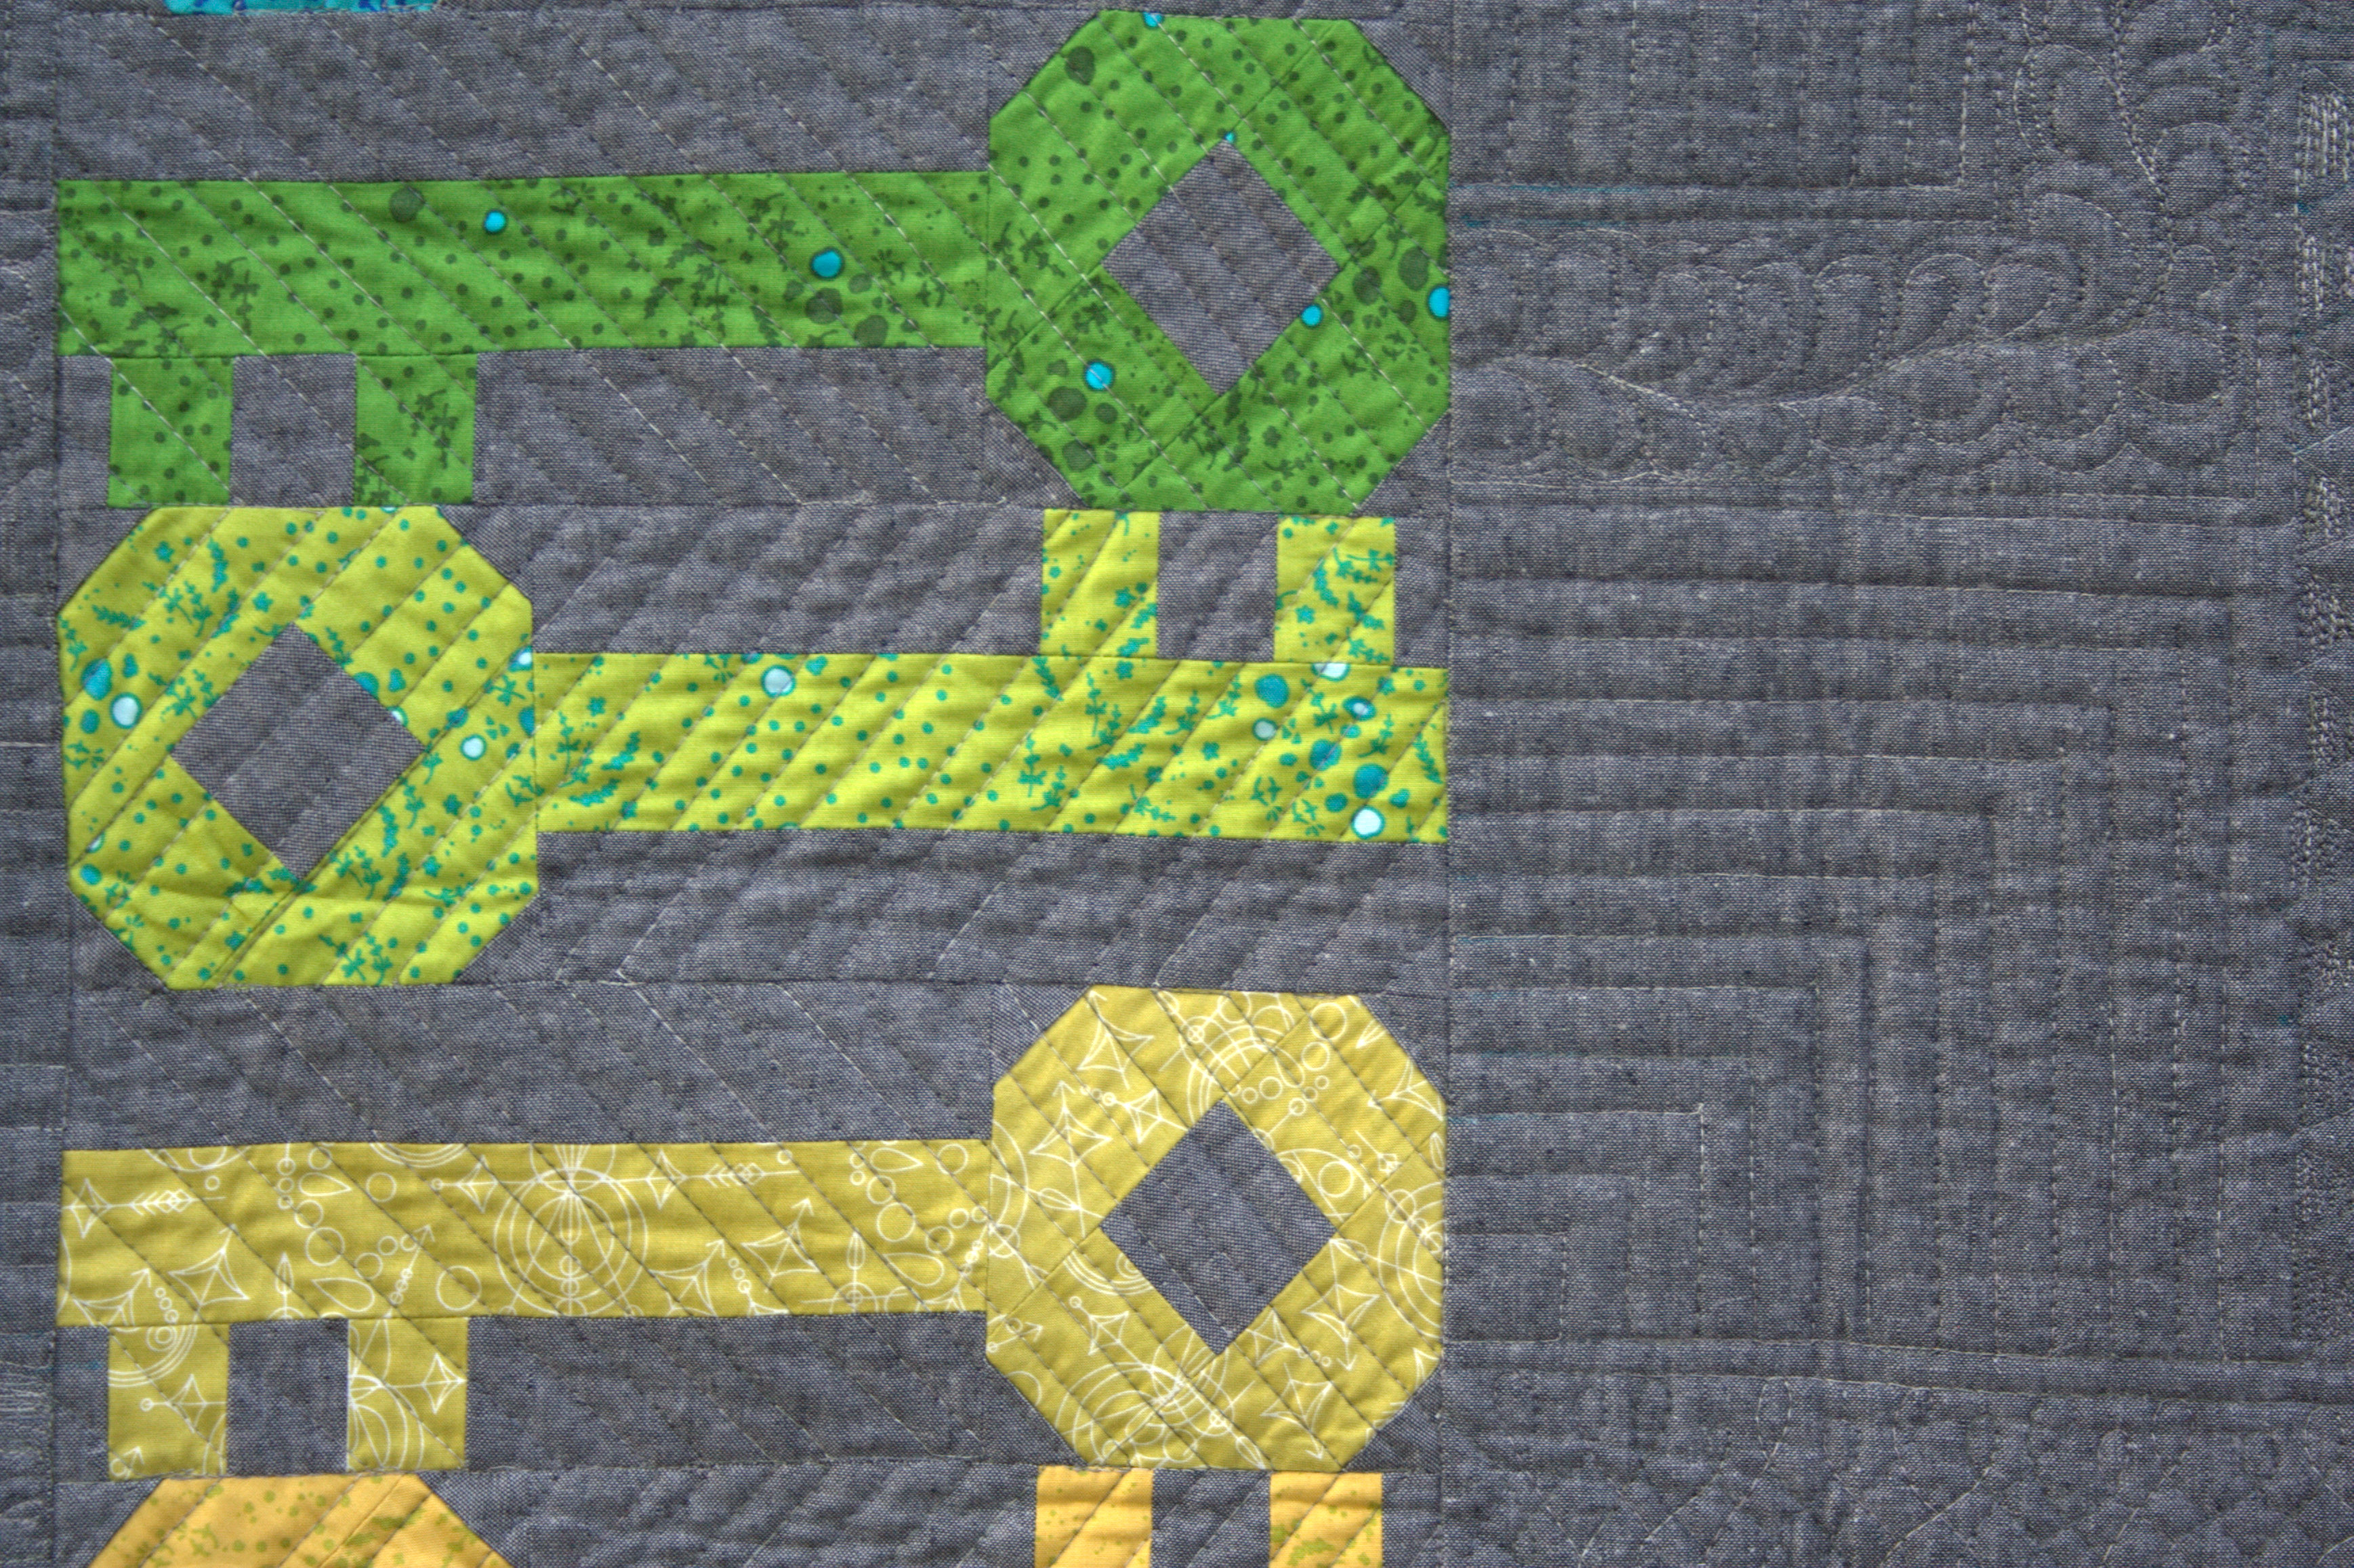
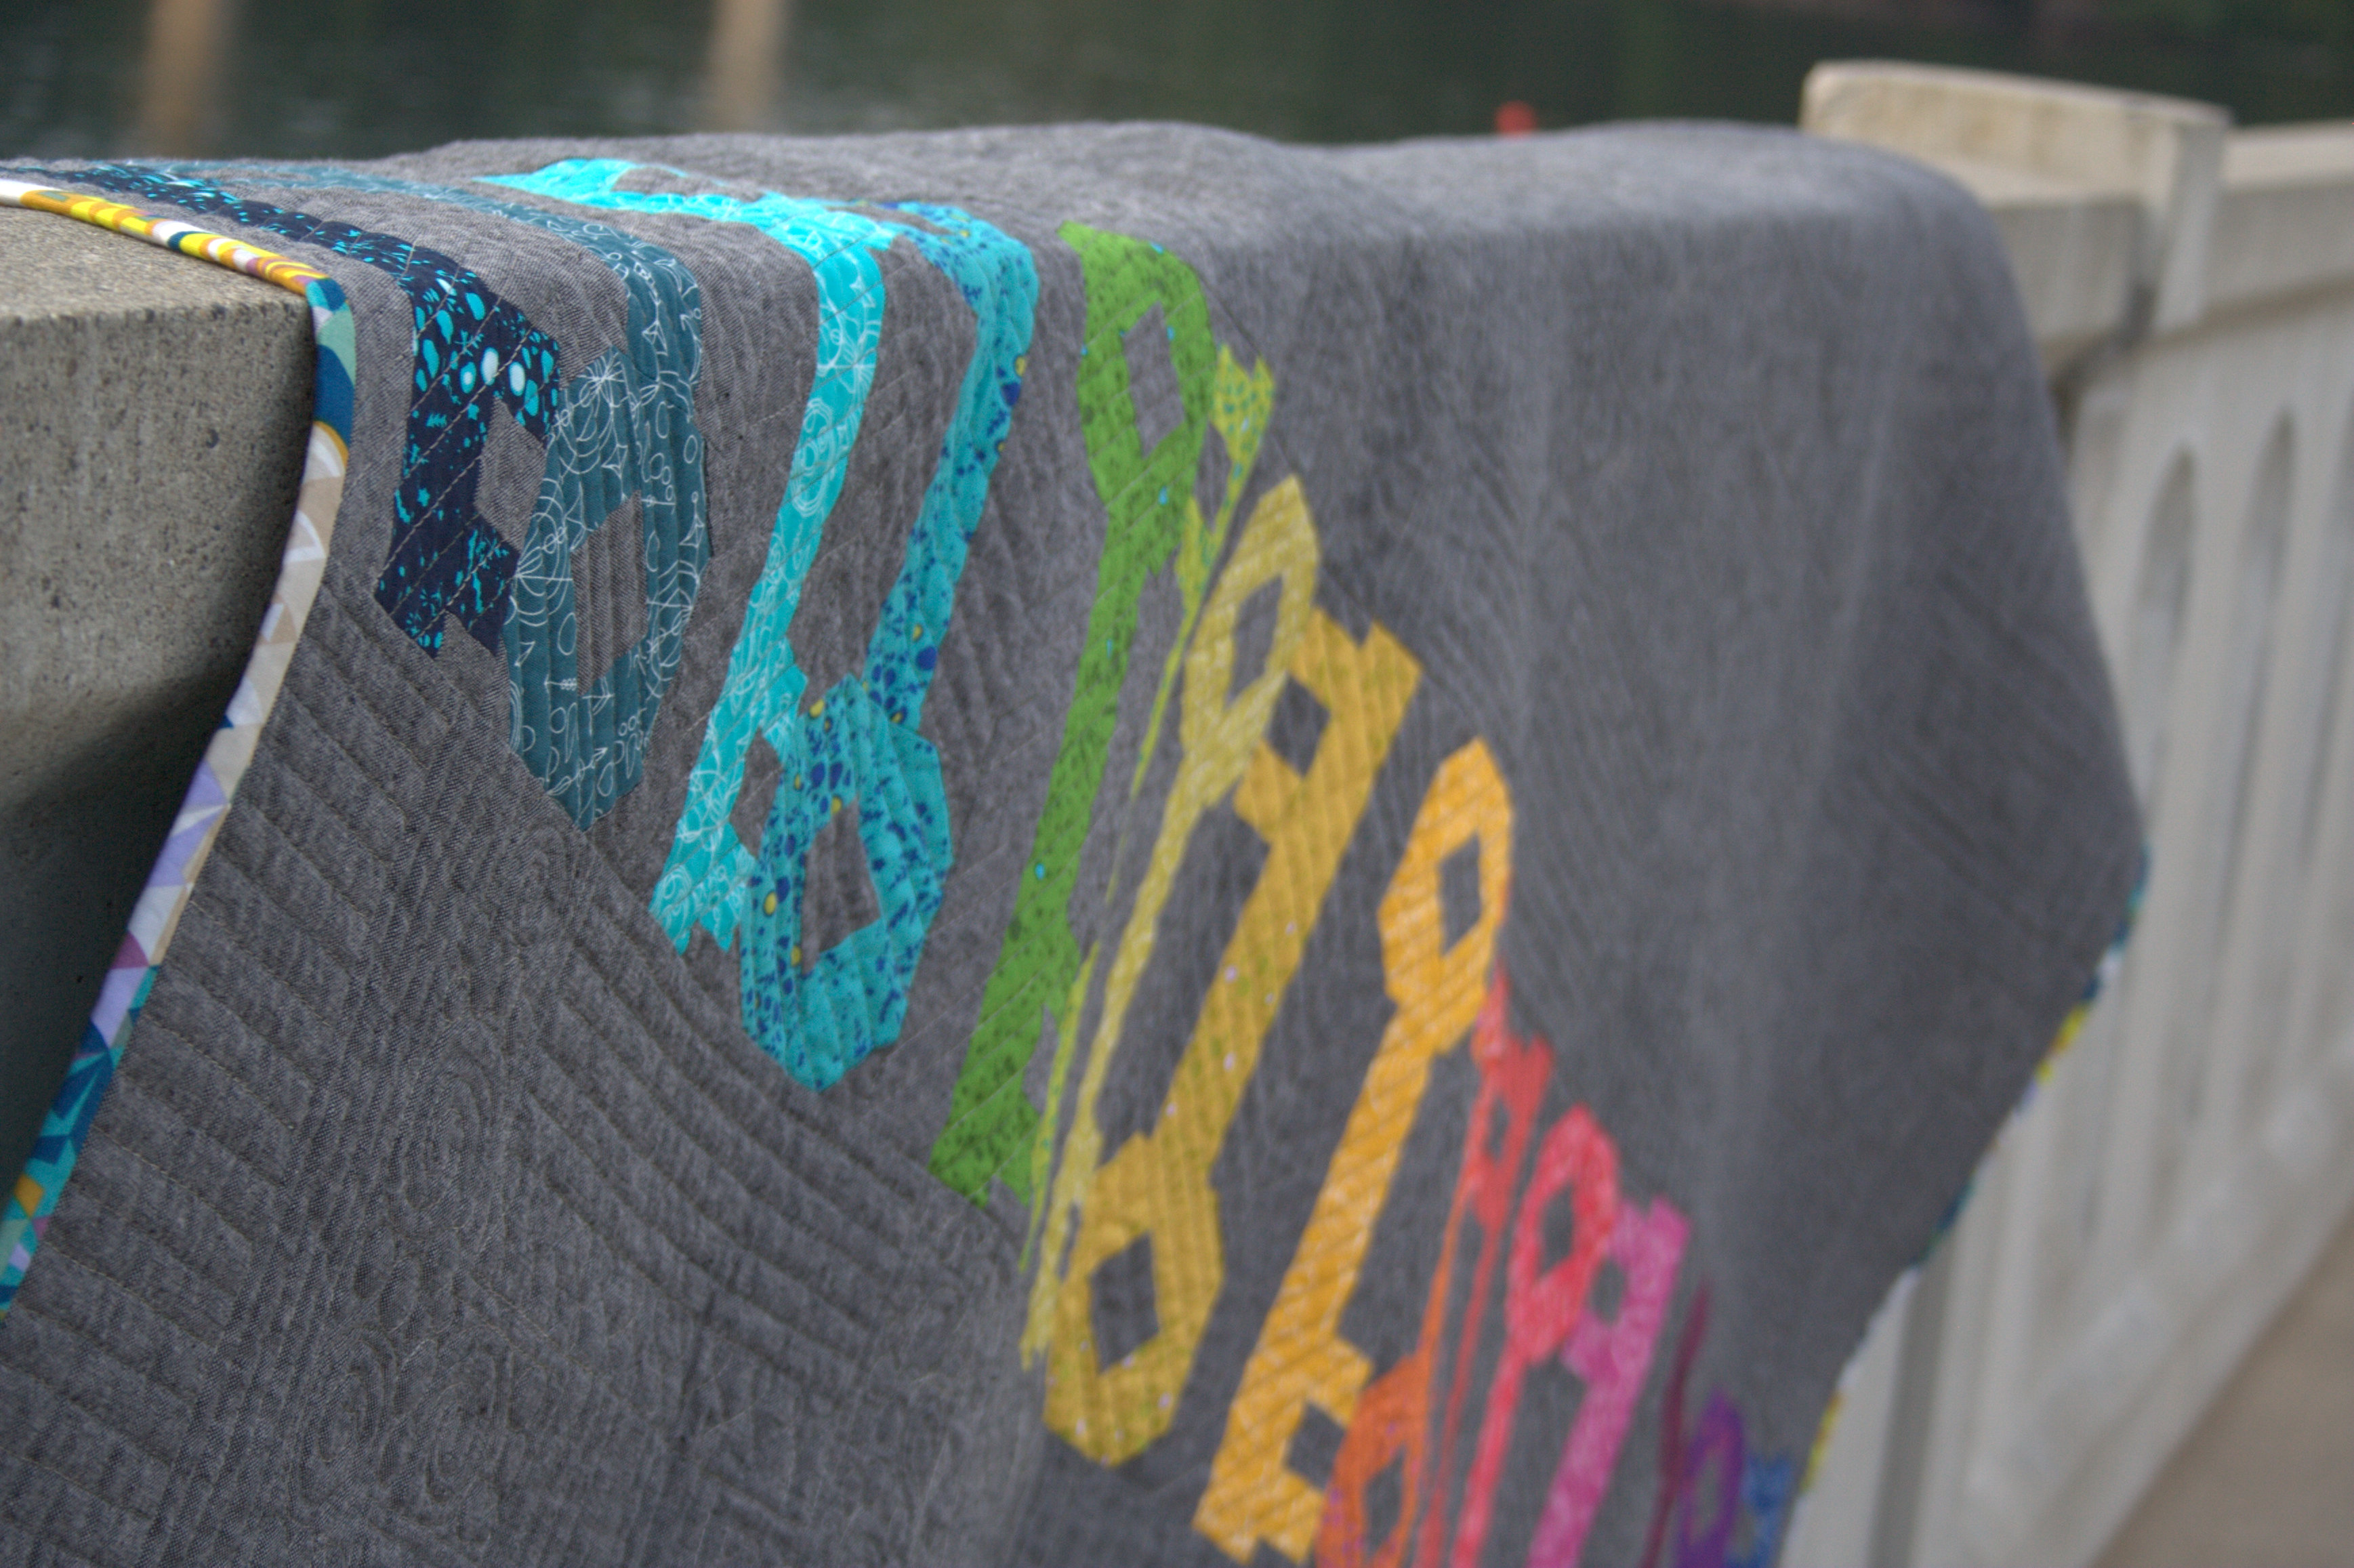
I’ve shown you tiny peeks at my quilt Unlocked, but really nothing that gave away more than the obvious: it features the full Mercury and Grove lines from Alison Glass’s 2015 Sun Prints, on a gorgeous Robert Kaufman Essex Yarn Dyed Linen in Charcoal background. I used my go-to thread panacea Aurifil Dove #2600 for piecing. It’s very scrap-friendly, since each key only needs a fat eighth of fabric. Unlocked is also super versatile since a simple adjustment of the number of keys made and surrounding background results in any sized quilt you want.
While I really wanted a castle door or giant gate in which to photograph this quilt, a trip to Ireland was not in the budget, so Belfast, Maine had to suffice. I have the world’s best quilt holding husband, who schlepped our kids and a quilt all over town at the whim of me, his crazy quilt-making photo-crazed wife. We got some great shots, though, so I’d say it was well worth it! He really should start a blog “Behind the Quilts”.
Unlocked was longarm quilted by my ever-talented friend Stephanie at Late Night Quilter and it looks amazing. She used the Cityscape Path straight line quilting style designed by Krista Withers and photos don’t even come close to doing it justice. I’m so grateful to Stephanie for quilting this, since I was able to finish the quilt top and mail it off to Stephanie right before giving birth to Finn. Then, she was able to quilt it and get it back to me a couple weeks postpartum so that I could bind it and photograph it in time for the publication deadline. Teamwork at its best!
Head on over to Make Modern and grab your copy of this fabulous modern quilting publication.
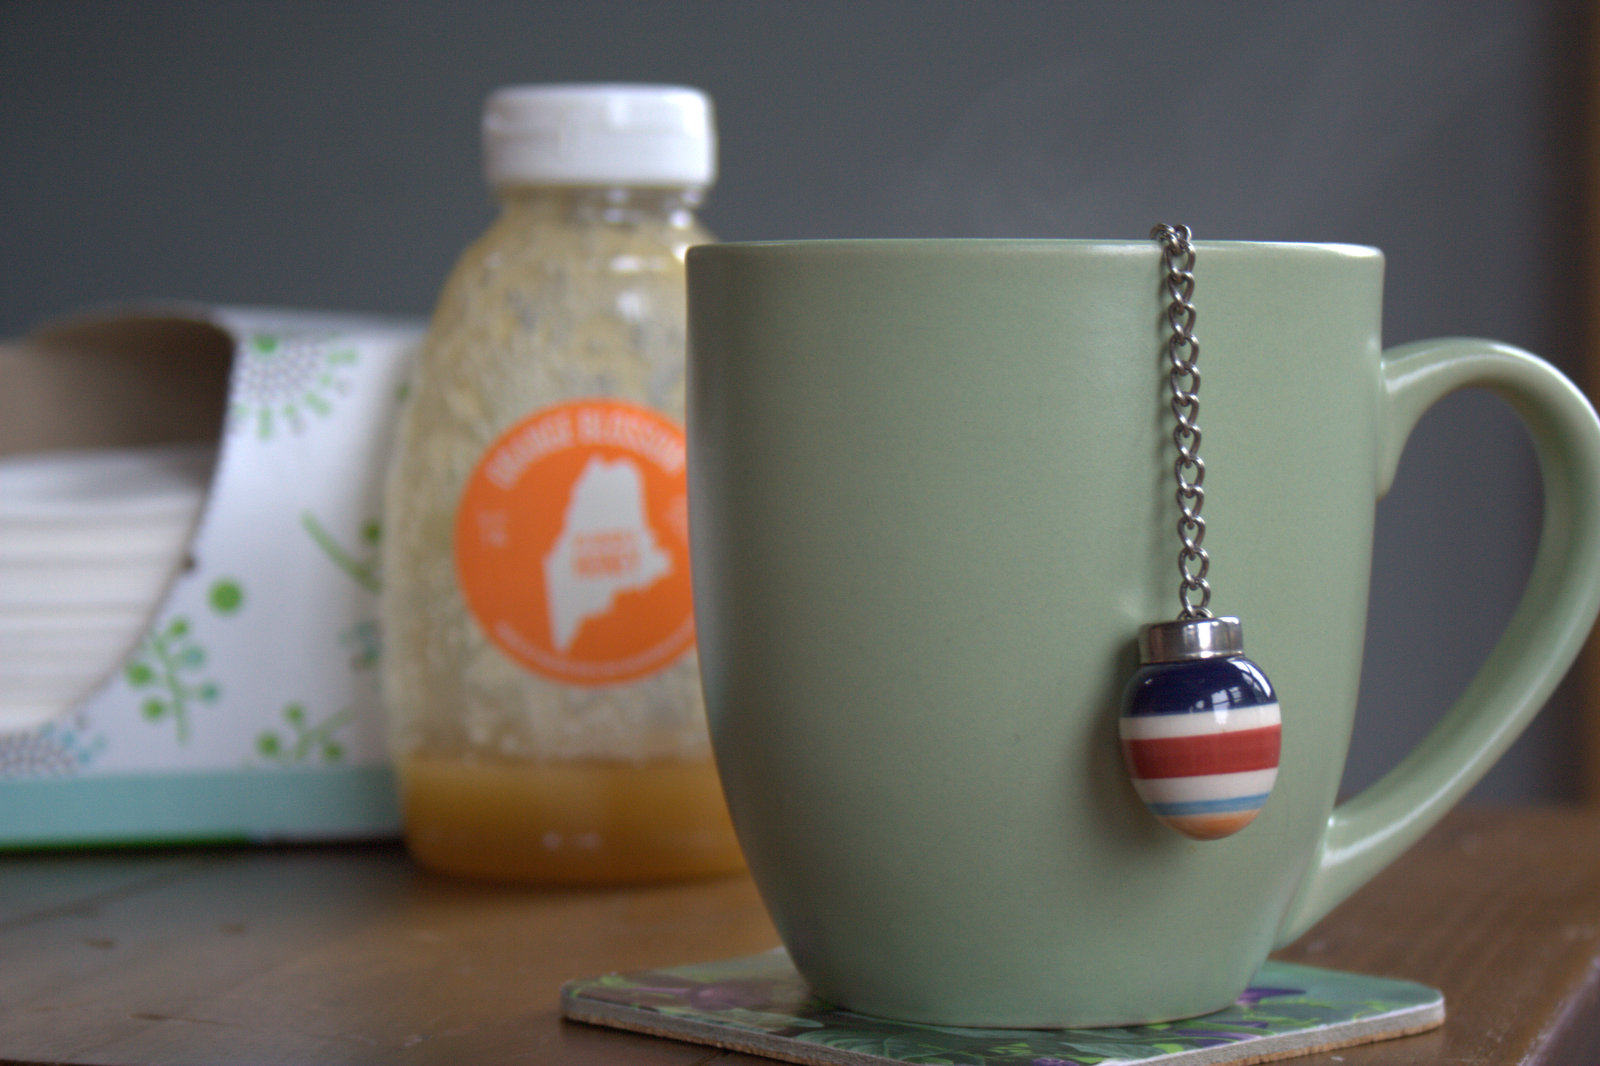
It’s been quiet here, and sadly I can’t even say it’s because I’ve been sewing up a storm. I’ve somehow caught a mean summer sickness that has knocked me down for the count. I’m going on 5 days of this crud and it’s slowly tapering off (I think… I hope), but my energy is still drained. My days have consisted of tea, tissues, sleep when possible (being a mom with 3 kiddos means no sick days for me), getting to necessary appointments with brief playground visits as a reward for my kids’ help, and a *tiny* bit of EPP.
I just wanted to pop in here to let you all know that I haven’t run off into the sunset, nor will have have a bevy of beautiful quilts to show you when I return. But I’m here. And I’ll return. One day, hopefully sooner than later.
Back to my tissues and tea, and another movie day for the kids. At least they don’t seem to mind my sickness, and the weather has been as cruddy as I feel. And so it goes. Happy stitching to you!
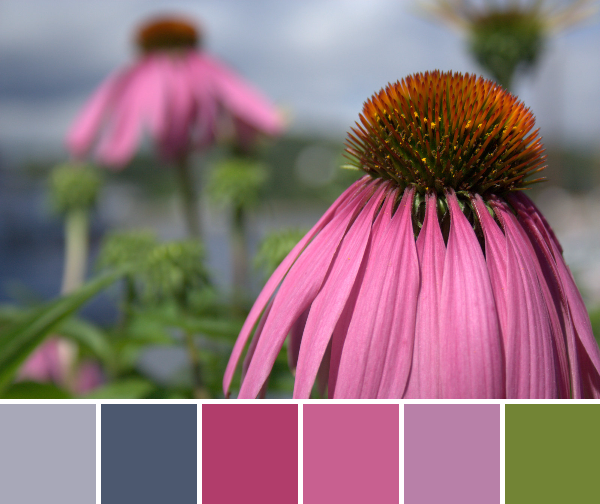
My Color Inspiration posts have been less consistent this summer, but not for a lack of color. I’ve been focusing on sewing and having quality family time outside, and with an infant, it’s a lot trickier to carry a camera around with me to capture the color all around us. But it’s still there, oh–it’s there! Last week we had a full, full house with my entire family visiting (minus one brother-in-law)–my parents, two brothers, sister, sister-in-law, aunt, and two cousins; it was a full house! This week I’ll be sharing some colorful flowers seen during forays into town, turned into color palettes with Play Crafts’ Palette Builder 2.1.
Corresponding solids from left to right: Kona Titanium, Bella Nautical Blue, Bella Magenta, Bella Peony, Bella Petal Pink, Bella Leaf
Corresponding Aurifil thread from left to right: 2606 – Mist 1310 – Med Blue Grey 2455 – Med Carmine Red 2479 – Med Orchid 2566 – Wisteria 2887 – Olive
Purple cone flower, or echinacea, is one of my favorite summer flowers. The color, the shape, the wild nature–I love it all. These were spotted along the Belfast waterfront, beautifying the view of the harbor.
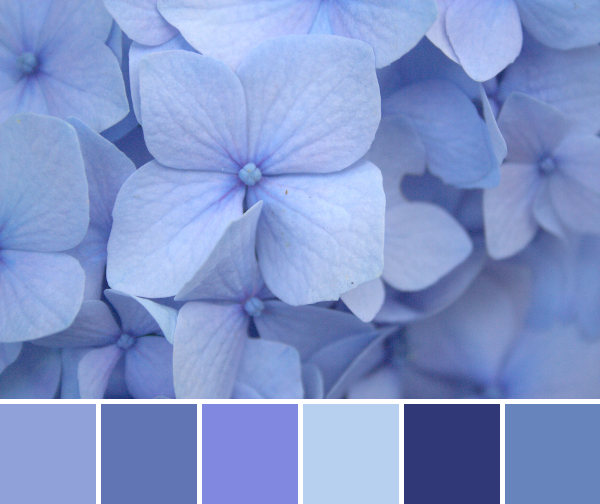
Corresponding solids from left to right: Kona Grapemist, Kona Amethyst, Kona Lavender, Kona Blueberry, Bella Sapphire, Kona Blue Jay
Corresponding Aurifil thread from left to right: 2770 – V Lt Delft 2720 – Light Delft 2725 – Lt Wedgewood 2560 – Iris 2775 – Steel Blue 4140 – Wedgewood
Hydrangea. Honestly, it took me a while to fully appreciate this flower. The color of course is hard to be topped, but the giant fluffball style just isn’t my thing. When seen close up, however, the beauty of the color and the detail of each individual petal wins over the goofy fluff. My daughter, on the other hand, LOVES these flowers. The bigger the better, in her opinion. Me, I’d opt for the delicate forget-me-not over the voluptuous (yes, I just called a flower voluptuous) hydrangea any day. But I’ll take the color anywhere I can!
Do you ever get to the point in a project where you are *so* close to finishing that you sort of let your mind think you already have, and it hops right over and latches onto a new project idea or three? Yeah, me too. I have at least three projects that are in their final stages yet have been put aside for the past month, while I instead started a handful of new projects. Who doesn’t love a new project?! Yesterday I decided it was time to get those nearly finished projects into the finished pile, and I pulled my favorite one to the top to start.
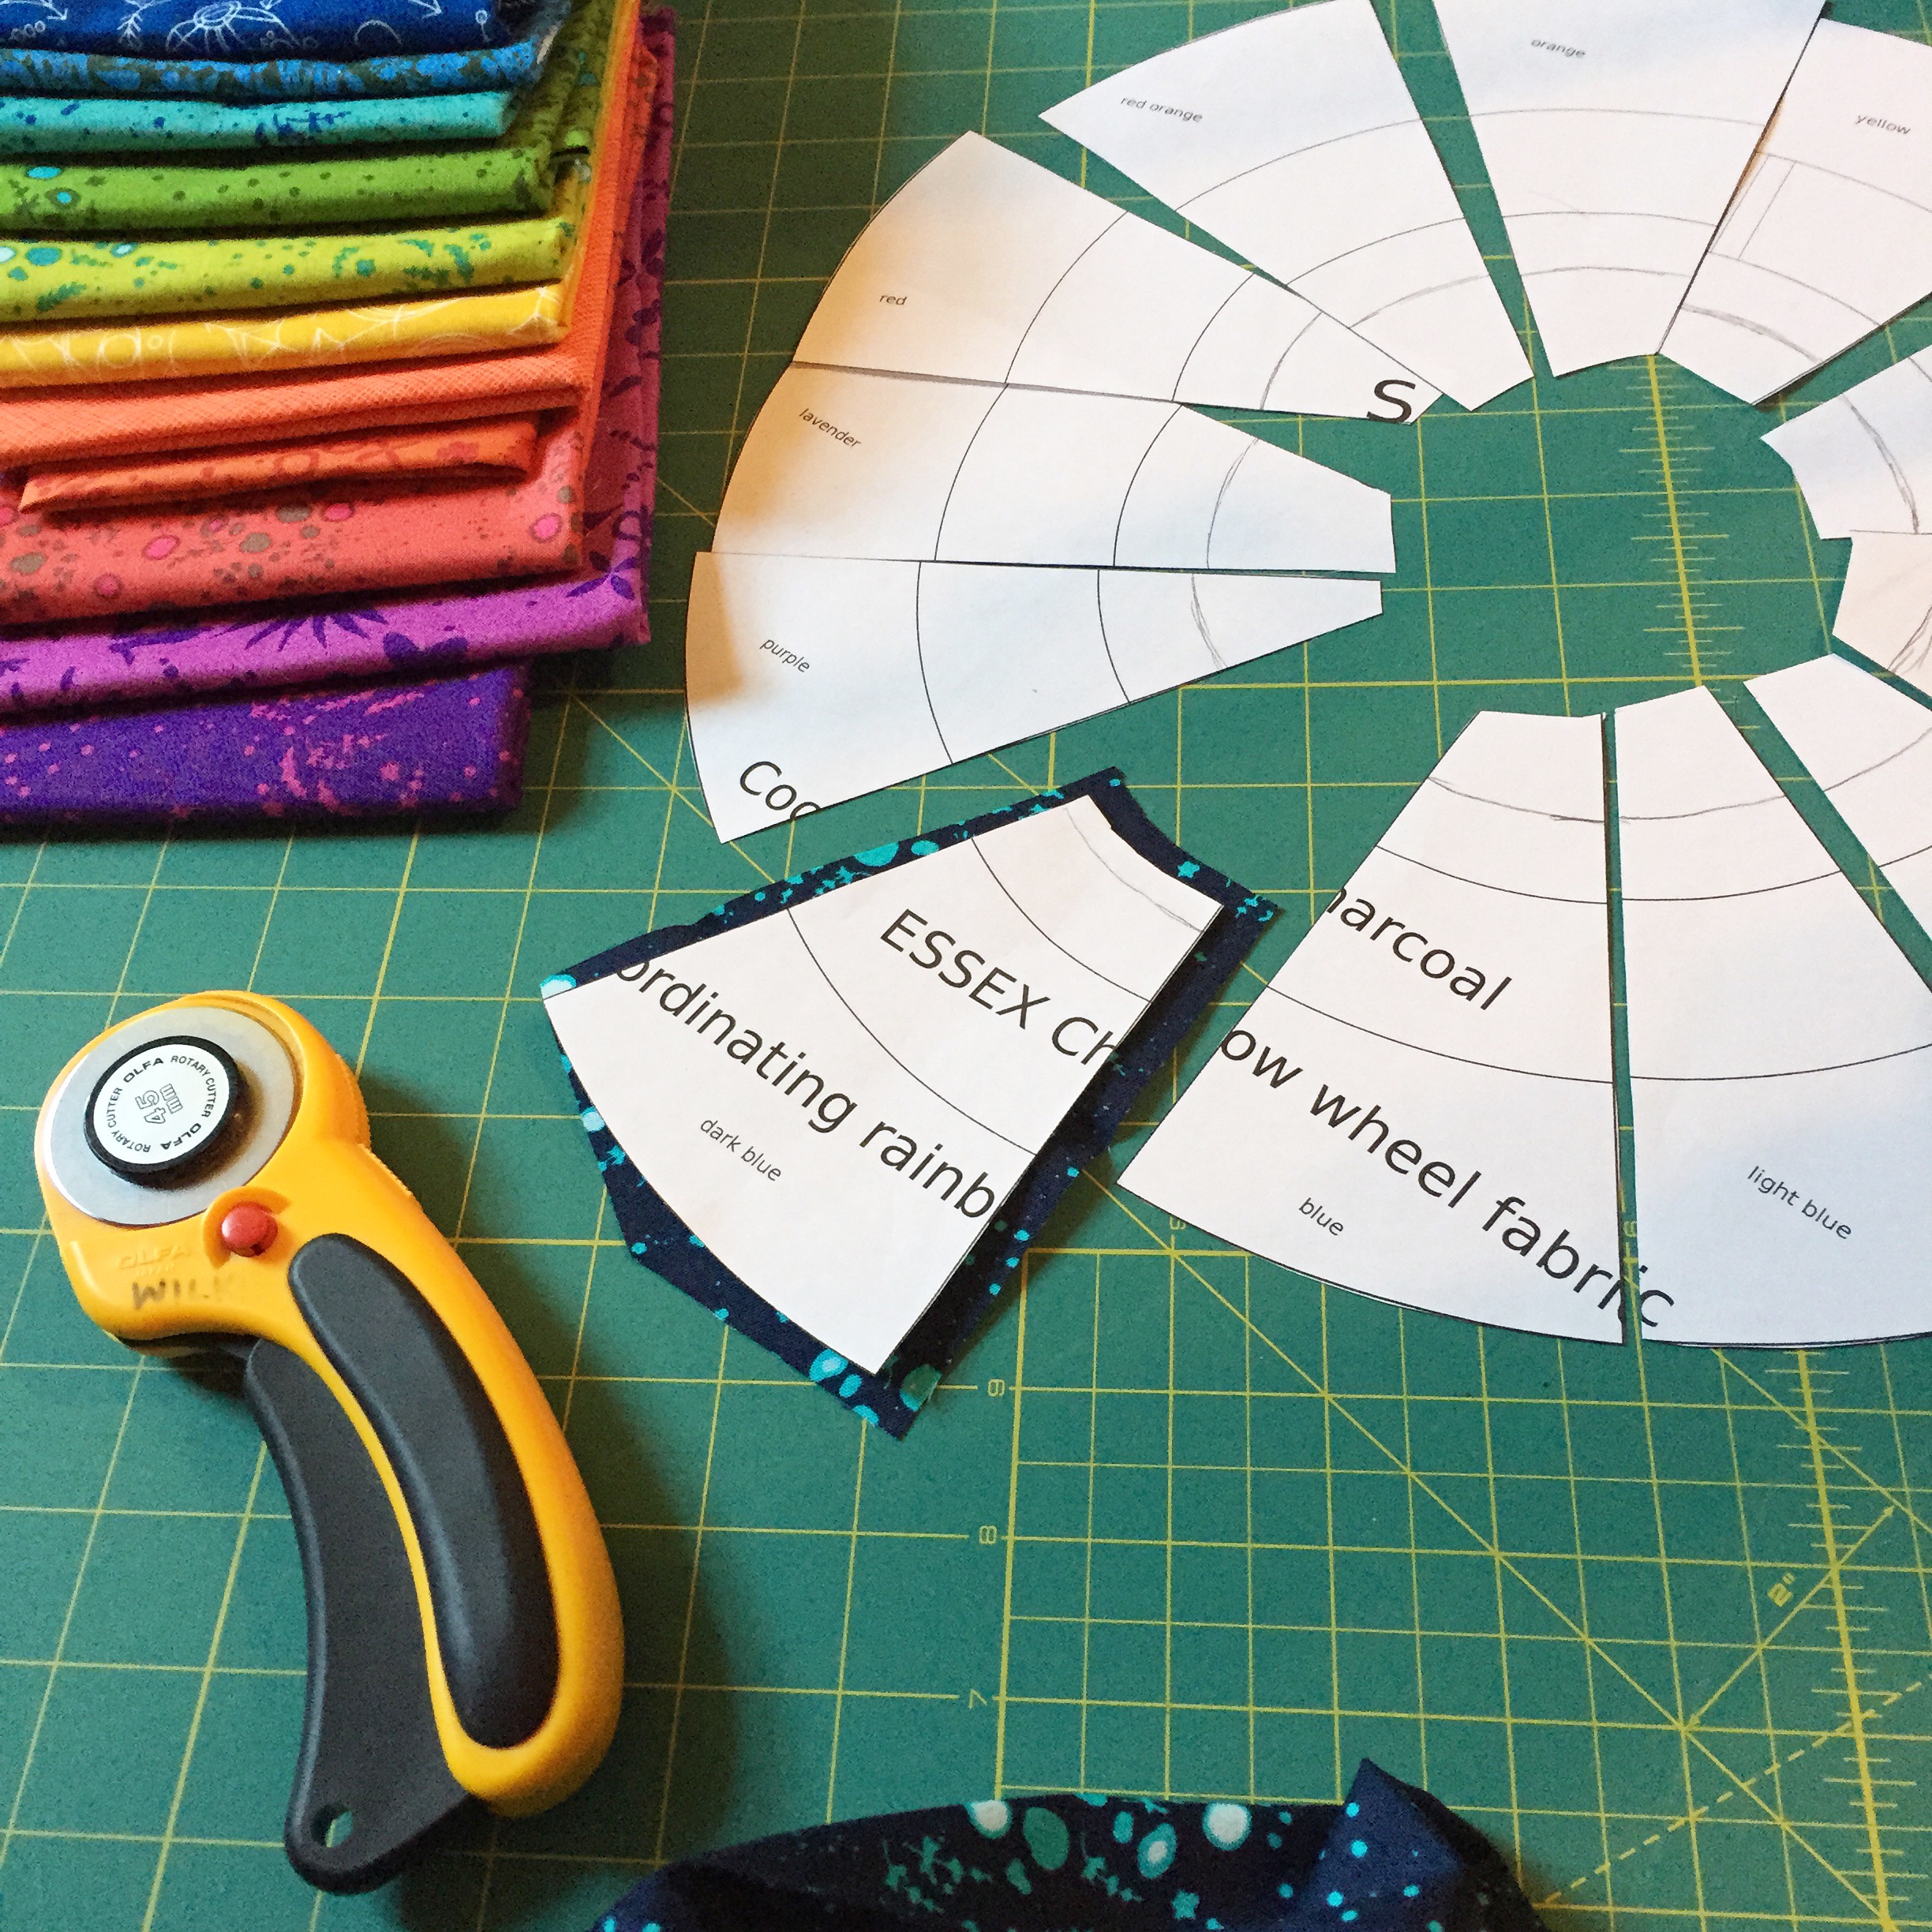
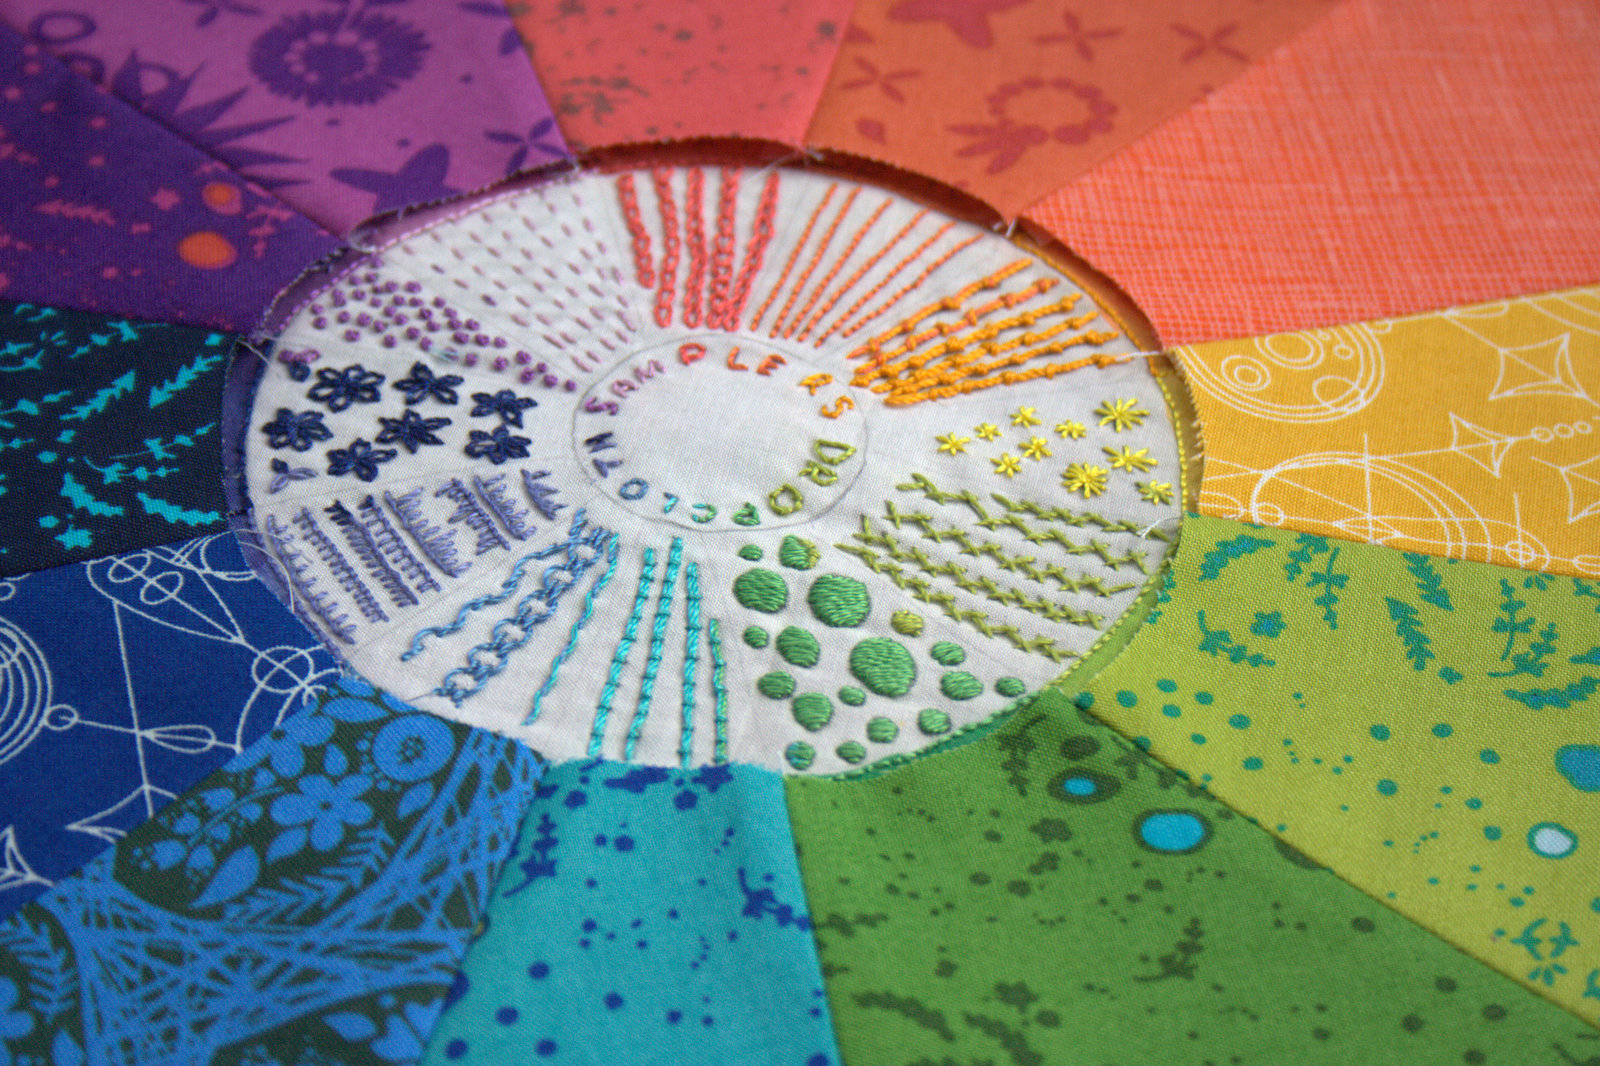
Remember this? Over a month ago, I finished my first ever embroidery sampler, this Color Wheel by Rebecca Ringquist of Dropcloth. I used Aurifil 12wt thread for the first time, learning the stitches as I went, and loved it SO much when it was finished that I just couldn’t let it be actually finished. So I hatched the plan to extend the color wheel using none other than my favorite saturated rainbow: Alison Glass’s 2015 Sun Prints. Putting it aside was not out of lack of love or excitement, don’t get me wrong. I LOVE this project and it feels so good to pick it up again. I just get into spots where the ideas burst and I have to get them started so that they are real. You know what I mean… a project with fabric cut and design sketched and a few stitches invested is a real project. It’s a lot less likely it will sit stagnant in the pool of unrealized ideas once it’s been at least partially begun.
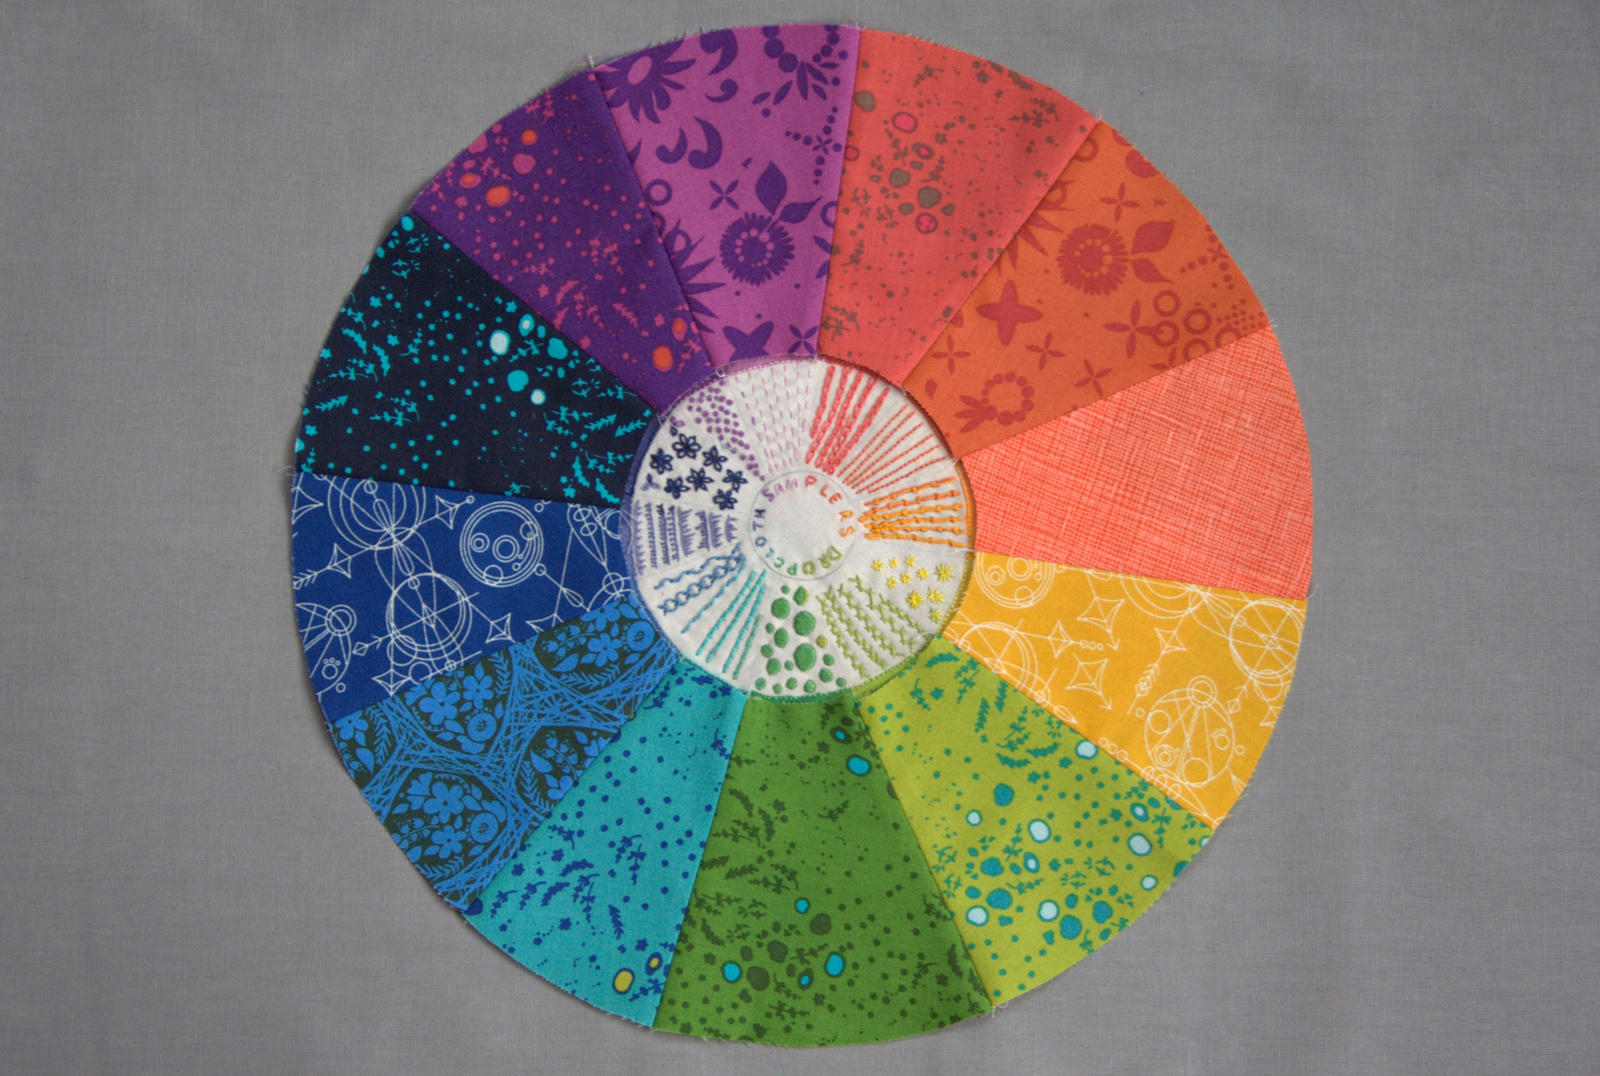
So back to my color wheel. I managed to match the fabrics almost exactly to the colors of the Aurifil embroidery, which is incredible. It seems like Alison Glass and Rebecca Ringquist and Alex from Aurifil must have all gotten together to design this harmonious flow with the perfect combination of design, color, thread, and fabric, it goes together that well. I wanted to be sure that the prongs of the outer color wheel aligned with the organically drawn prongs of the embroidery wheel, so I scanned my embroidery sampler and uploaded it to Inkscape, the free vector program with which I design patterns. I created larger circles, centering the embroidery, and extended the lines on the sampler to create wedges. I then printed it, cut out the wedges with scissors, and used them as templates to cut the fabric wedges, as shown in the Instagram photo above. I winged it, really, but amazingly it came together beautifully.
Right now the rainbow circle overlaps with the embroidery sampler’s edges, but don’t worry–I plan to either trim or fold the edge under so that the entire sampler is visible.It was an exciting day, since this is the first project sewn on my new sewing machine: a Bernina 560, which I recently purchased during one of their 0% interest, 60-month payment plan offer days. (I’ll give you a formal introduction soon, promise!)
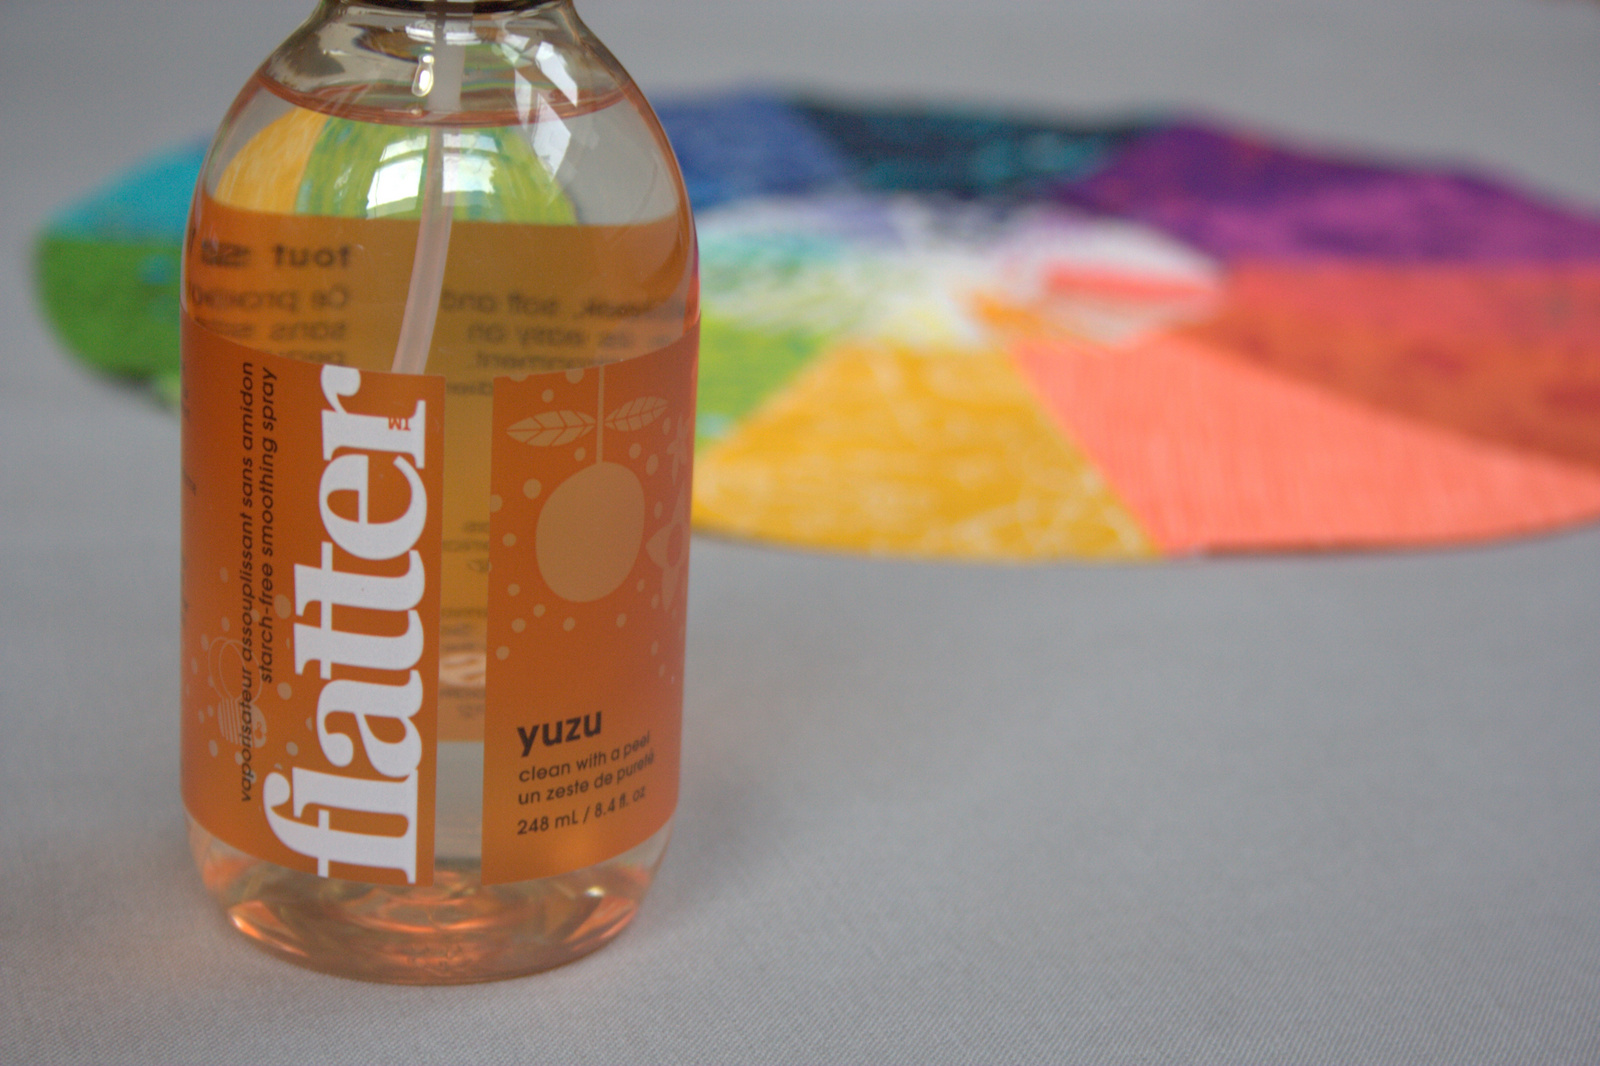
I also used Flatter by Soak spray for the first time since QuiltCon, and I’m amazed I survived without it. Between the new machine sewing like a dream and the seam-relaxing Flatter spray, this circle came together without a hitch.
Now I am going to study up on circles by watching Cheryl Arkison’s class Inset and Applique Circles by Machine on Craftsy (affiliate link). It’s my first time trying a class on Craftsy, but I hear there are subtitles. I also was fortunate enough to take a class with Cheryl Arkison at QuiltCon, so I have no doubt of her depth of knowledge and skill. I’m really looking forward to trying to attach these circles!
Having never sewn a circle by machine, and perhaps only one by hand, this will be a creation filled with firsts. I’m getting awfully close to completing this beauty, though, and I’m loving every step of the way.
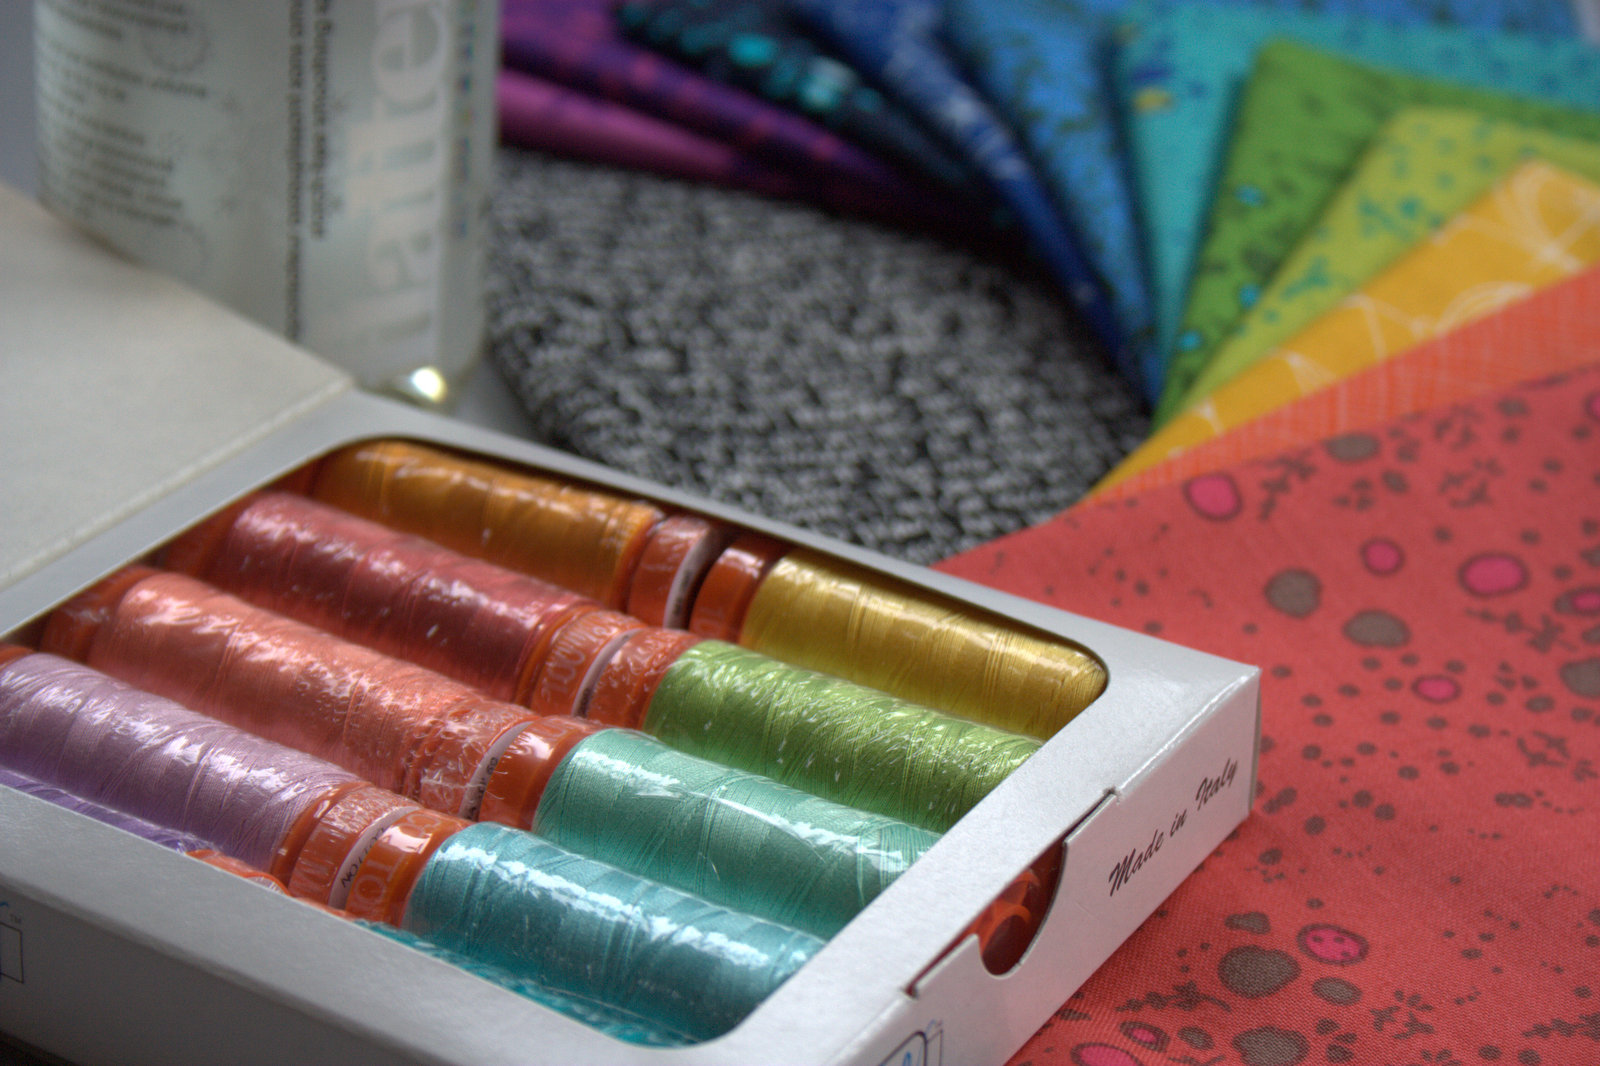
Also, for those of you on Instagram, I’m having an awesome giveaway to celebrate passing 1,500 followers, sponsored by Aurifil, Soak, and moi (with a fat eighth bundled pulled straight from my stash favorites, basically this color wheel!). Head over, follow me @nightquilter, and tag a quilty friend to enter. Here are some sneak peeks for eye candy (Note: This giveaway is on Instagram only):
Fat eighths bundle pulled from my stash favorites. Giveaway on Instagram only.Aurifil thread set and Flatter by Soak, graciously provided by Aurifil and Soak. Giveaway is on Instagram only.
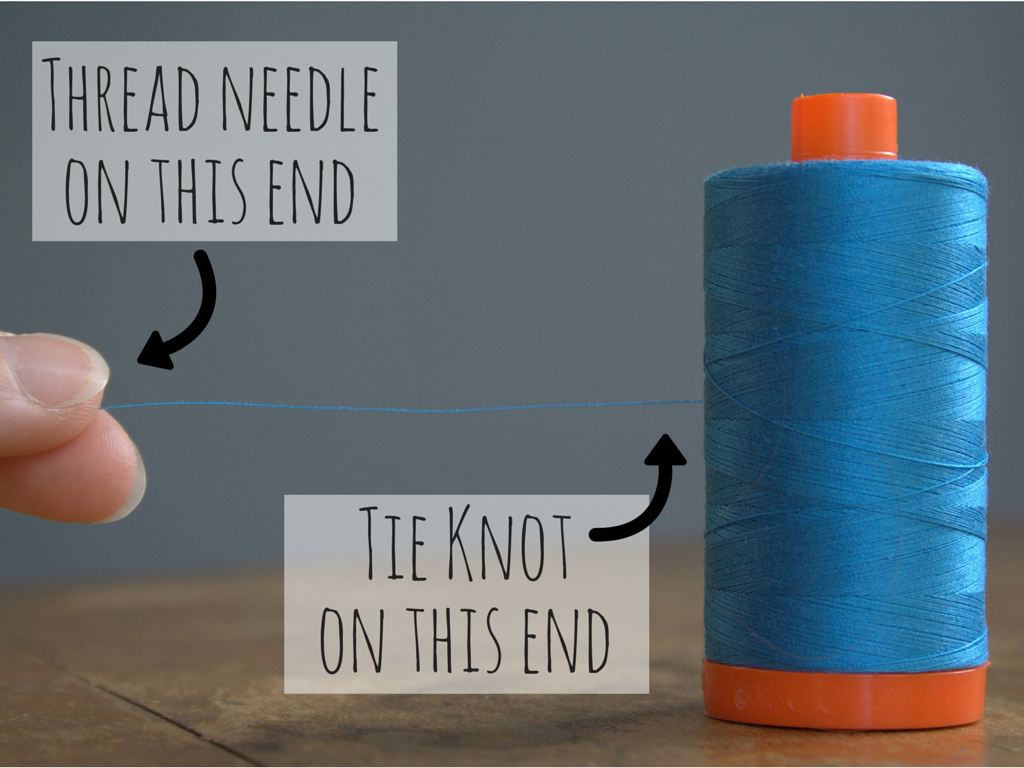
One of the perks of quilting retreats and other social sewing is that little tips are tossed around. Today I’m going to share a very simple yet important tip about using the thread you cut from a spool during hand stitching. As a self-taught sewist, these are the bits of knowledge that I miss, since rarely are there blog posts about the bare basics of sewing. While basting our needle-turn applique projects around the table at the Slow Stitching Retreat, I caught this important tip:
Use the thread in the same direction it comes off the spool. The tail end that you pull to unravel your length of thread should be the side you thread through your needle. The end that you cut should be the knot end. This way, you are pulling the thread through the fabric in the intended direction, which works with the ply of the thread instead of against. Using the thread in the proper direction significantly decreases tangles and twists while stitching. Simple, right?!
I never knew that it mattered which end was which, so I didn’t pay attention while cutting my thread lengths. Now, when I’m pre-threading a bunch of needles for a good binding or hand stitching session, I thread each needle as the thread is cut instead of accumulating a nice pile of threads and then grabbing any which end to thread through the needle.
Stephanie’s Tips and Tutorials link ups from previous weeks are filled to the brim with great time savers, tricks, and how-to’s. I’d definitely recommend browsing them with your Pinning finger ready. One of my favorites from last week was this tutorial by Veni Vidi Vicky on how to make your own sewing tags (which could easily be adapted to making your own quilt labels!). She gives great step by step instructions on how to use Spoonflower, which is something I’ve been tempted to do but have yet to try.
Now it’s your turn! Do you have any little tips or great tutorials to share this week? If you do, please link up below!
Powered by Linky Tools
Click here to enter your link and view this Linky Tools list…
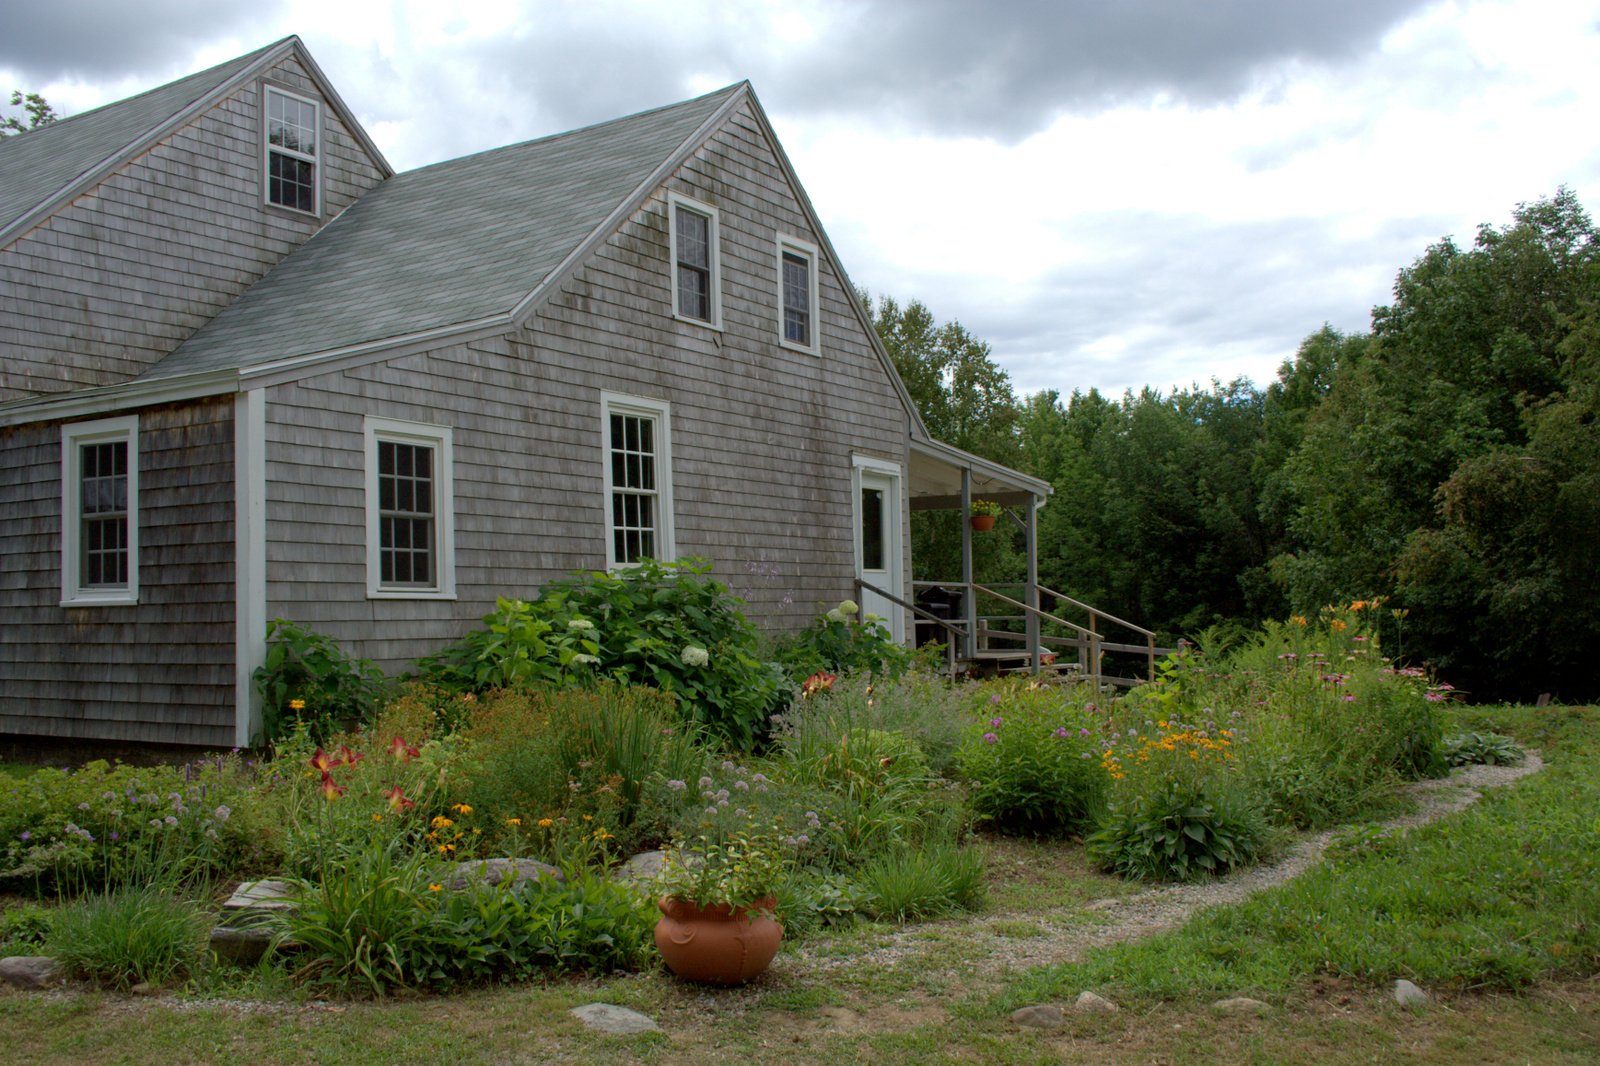
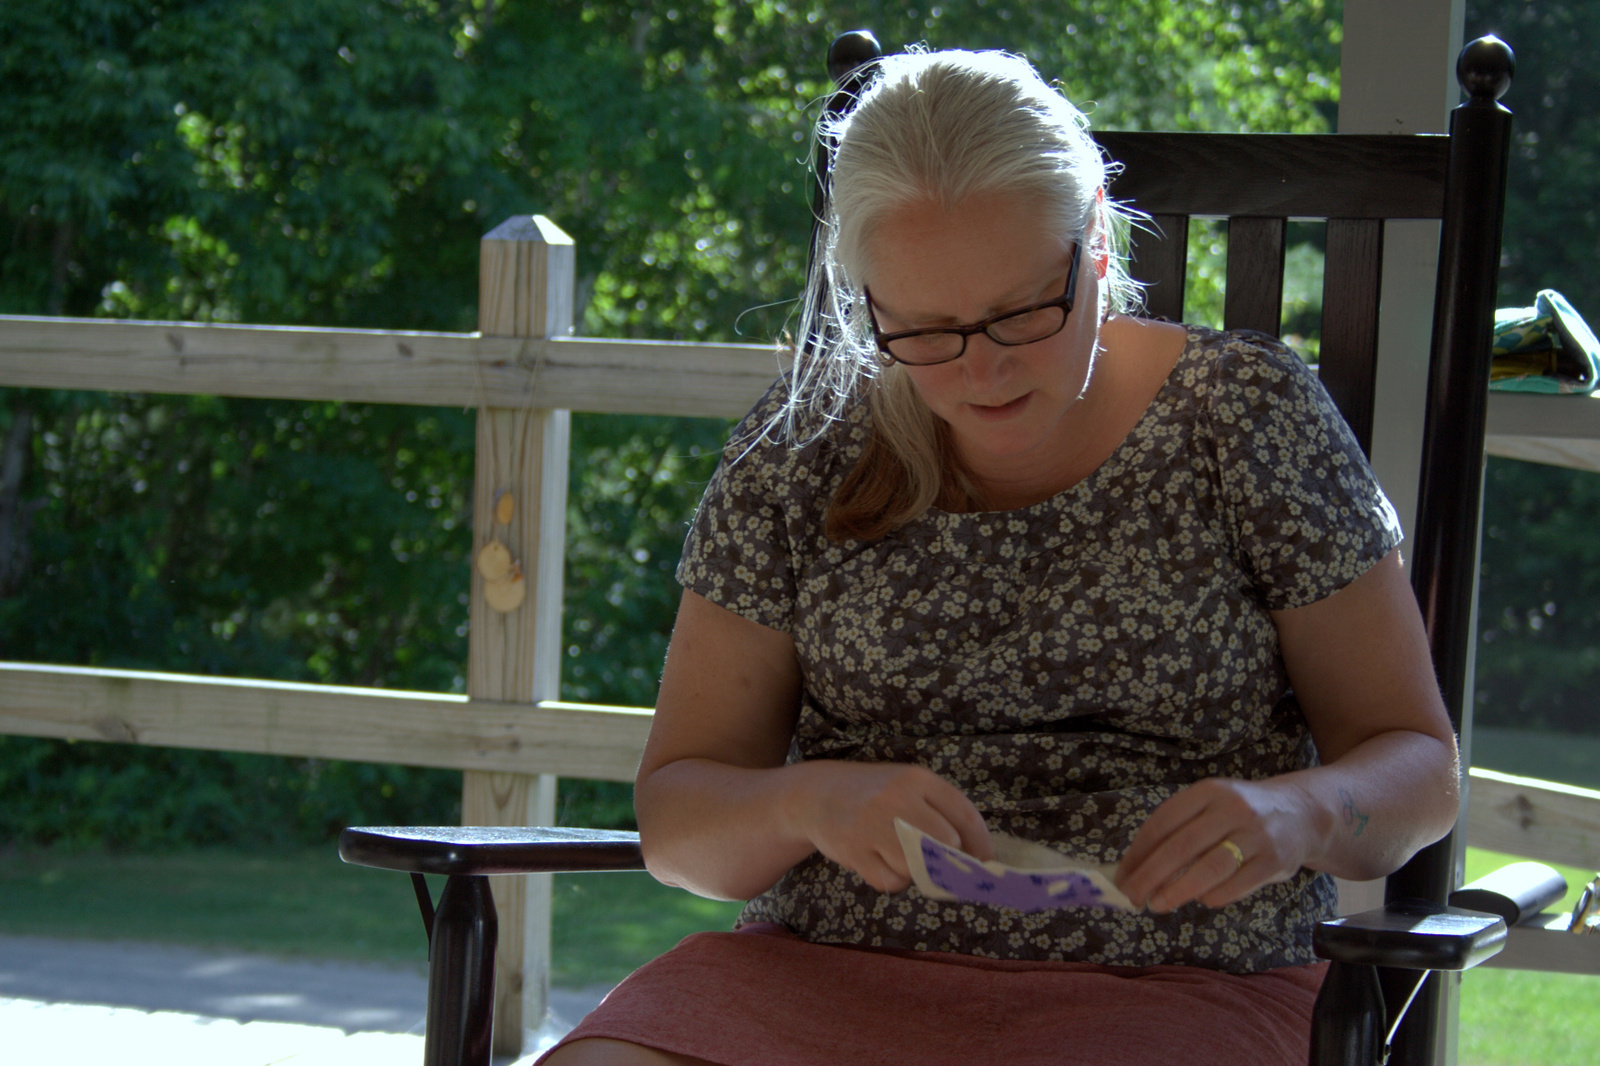
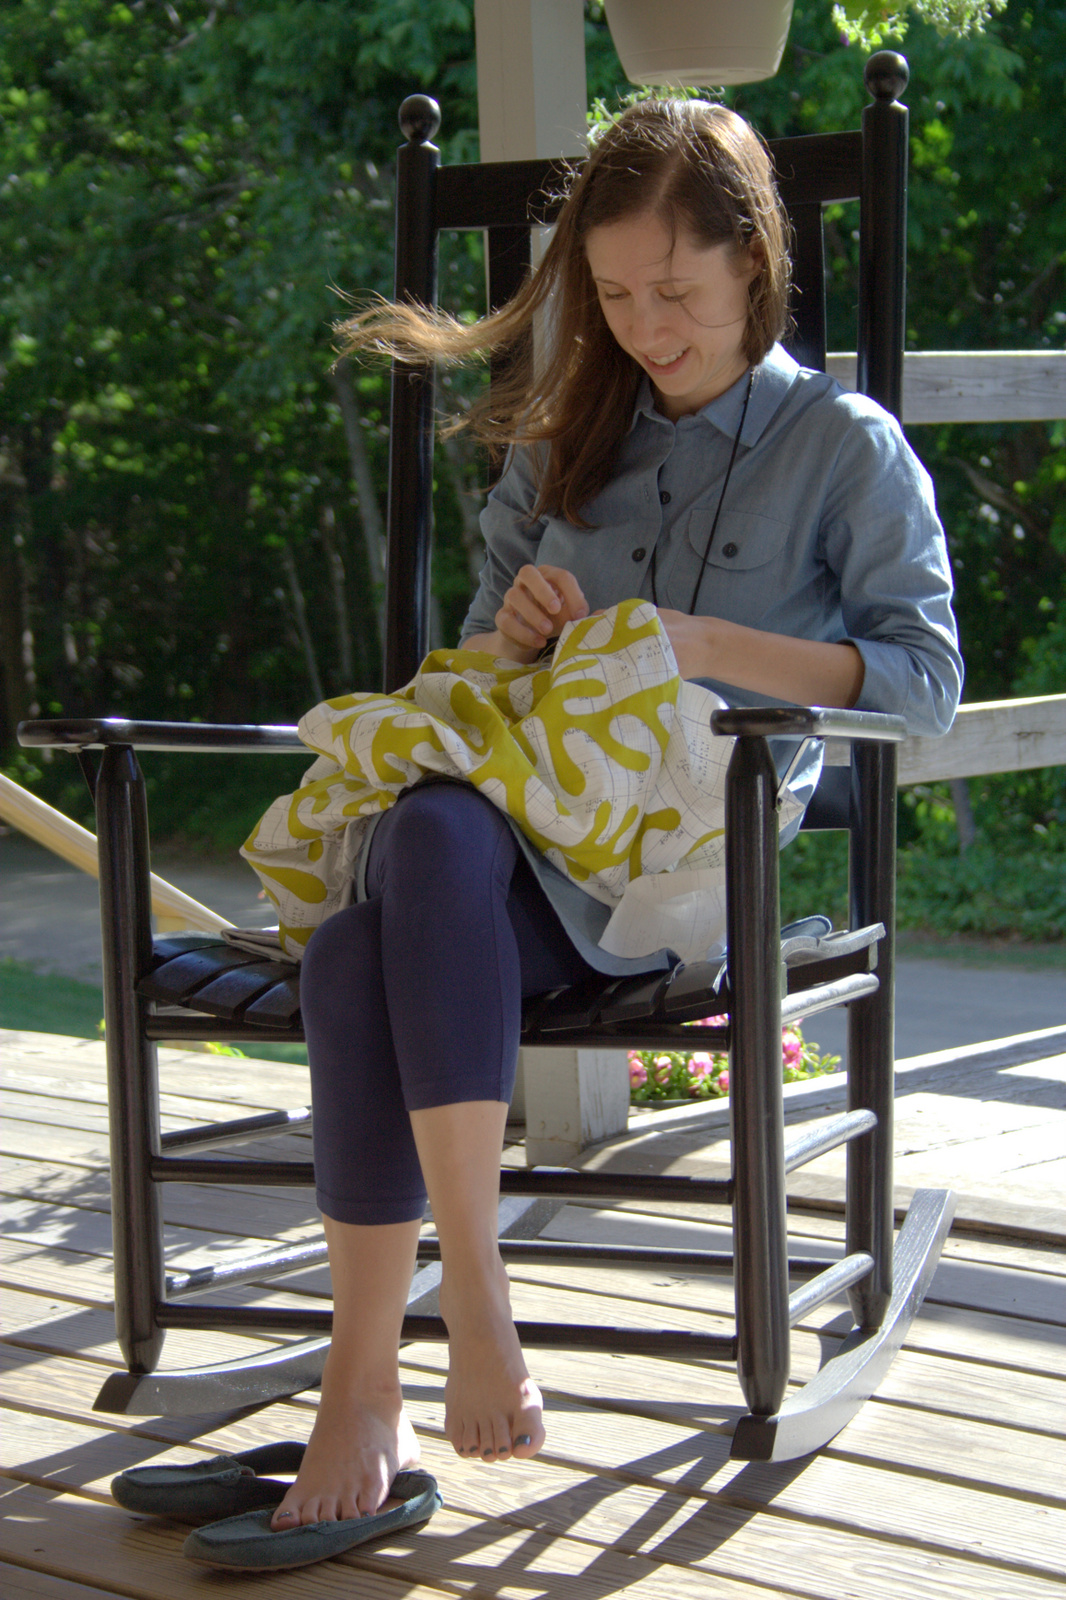
Imagine you’re sitting in a rocking chair on a sunny porch, sunbeams playing at your feet, a cool breeze blowing your hair, fabric in your hands, slowly stitching your way through the day alongside new quilting friends all doing the same, seeing your handwork grow at your fingertips. Bliss, right? Now add amazing quilters Carolyn Friedlander, Chawne Kimber, and Samantha Lindgren as teachers, mentors, and fellow slow stitching friends and there you have the Slow Stitching Retreat at Medomak Retreat Center in Washington, Maine. Last week, I was so blessed to be able to join the retreat for a day, with baby Finn in tow.
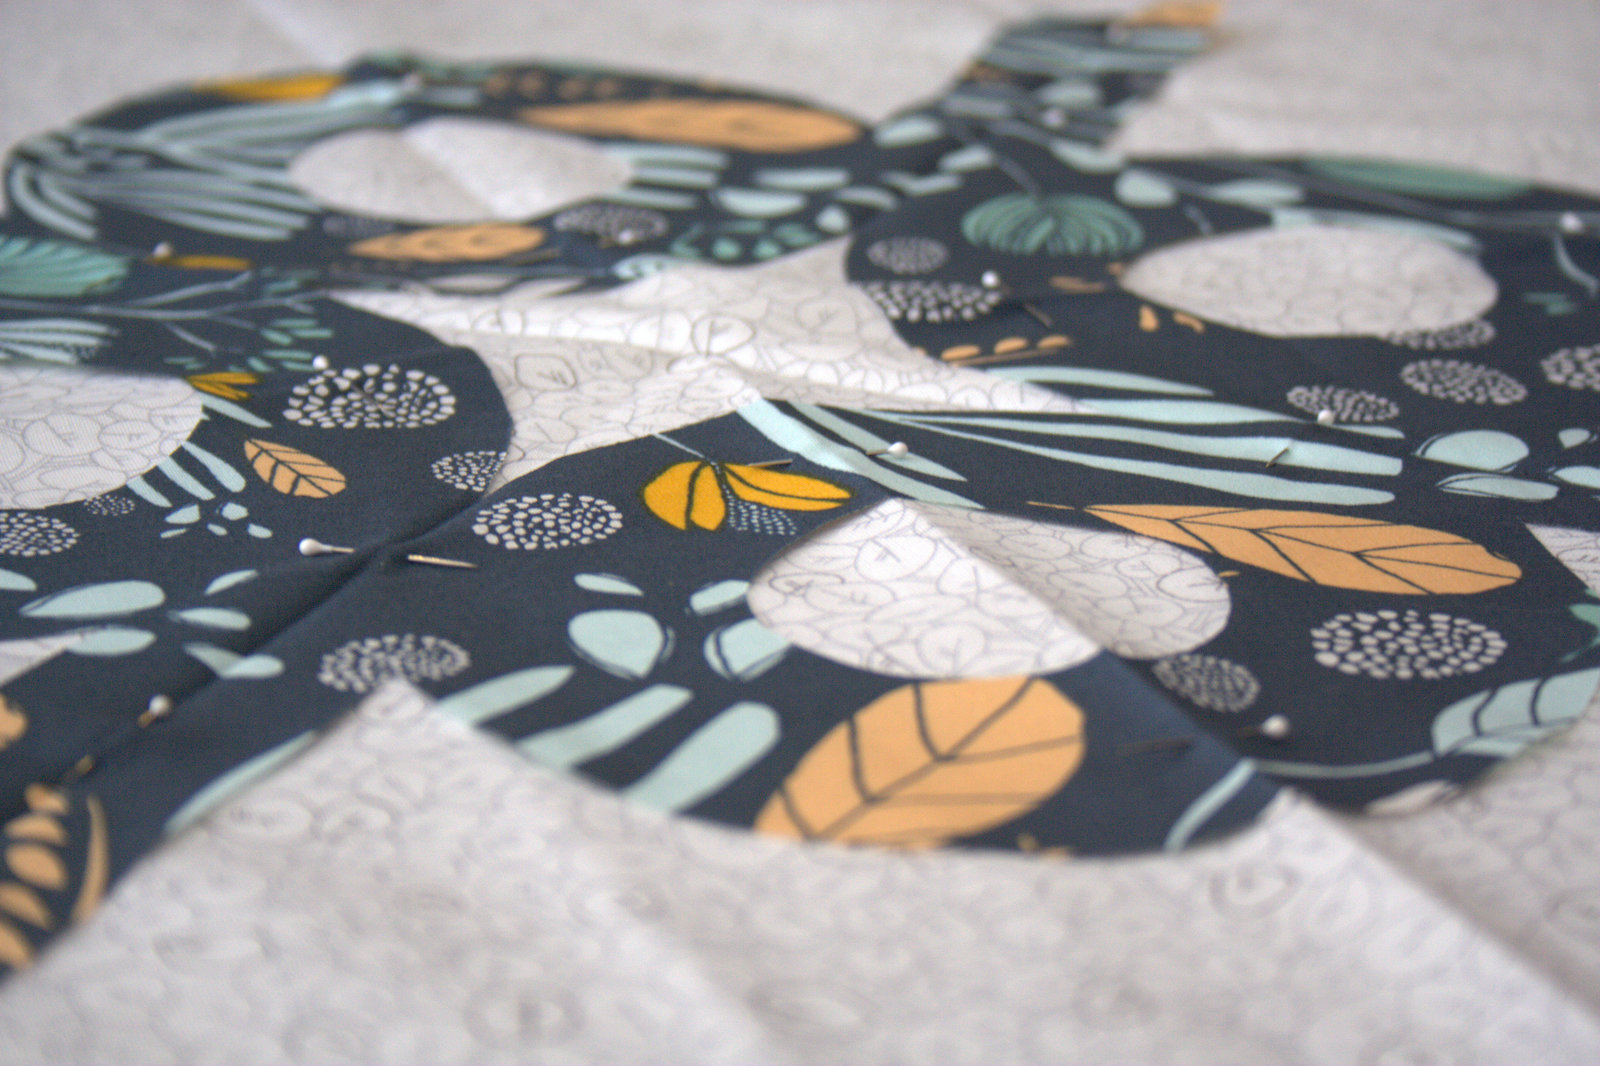
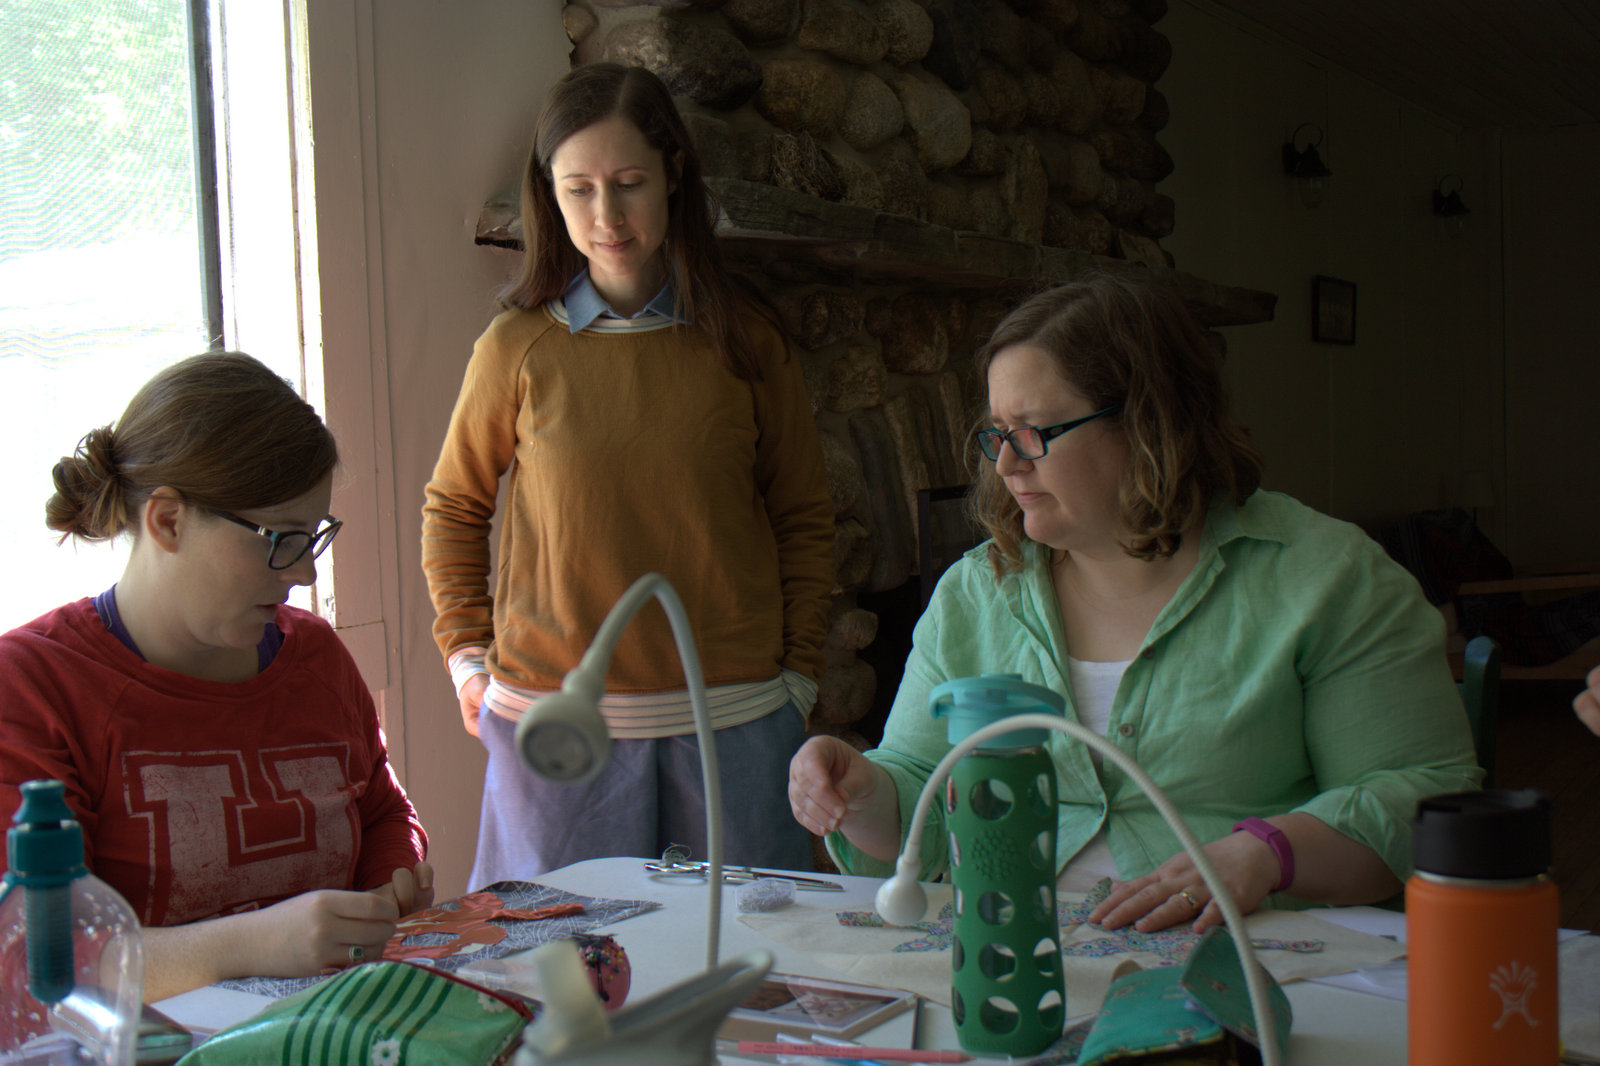
The retreat was the brainchild of Sam from A Gathering of Stitches, and was just as blissfully amazing as the name Slow Stitching Retreat suggests. I attended on Thursday, and joined the group learning the Park needle turn applique quilt block from Carolyn Friedlander. Those of you who know me know that Carolyn is one of my all time favorite fabric and quilt designers. I love her architectural influence, highly textured fabric designs, and simple geometric pattern style. It was all I could do not to jump up and down and squeal like a little fangirl when I first met her at QuiltCon. To spend the day learning from her and relaxing with a room full of equally enthusiastic and experienced sewists was such a rejuvenating and inspiring way to spend a day. It certainly helped that Carolyn is super easy going and we all had a great time chatting and stitching the day away.
Getting started: basting my Park blockCarolyn walked around helping and answering questions as we dove into needle-turn applique, some for the first time.
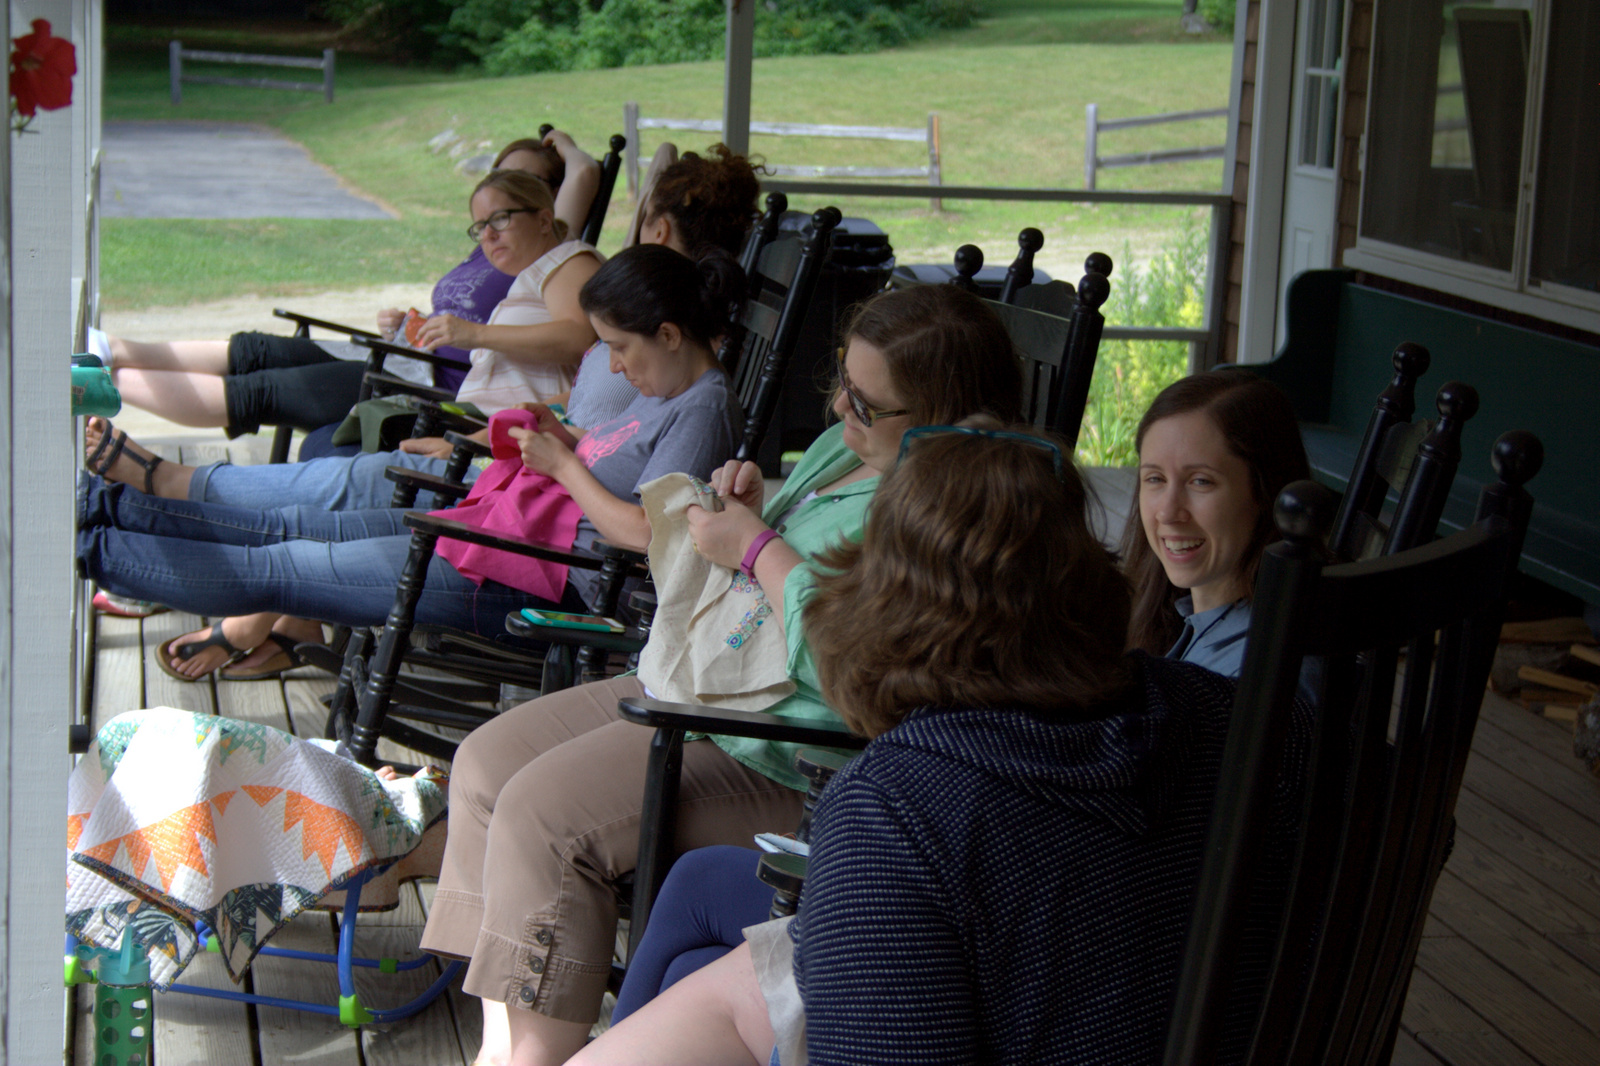
After we all had basted our Park patterns, we headed out to the sunny porch to slowly stitch in bliss. It was a truly fabulous experience, and one I think everyone should enjoy!
Finn was there with me, of course, and he was absolutely perfect. Honestly, he happily rocked and watched all of us sew, joined in on conversations with his smily baby babble, and was happy all day long. I think he will be a slow stitcher when he’s a bit older, too!
Sam joined us for some slow stitching on the sunny porch. Such a gorgeous day!Carolyn Friedlander doing some slow stitching of her own.
Since I was only able to attend for a day, I wasn’t able to take Chawne Kimber‘s class on tiny stitching. I did sneak over to their workspace to gawk at her amazing creations and talk a bit about her sewing process, though.
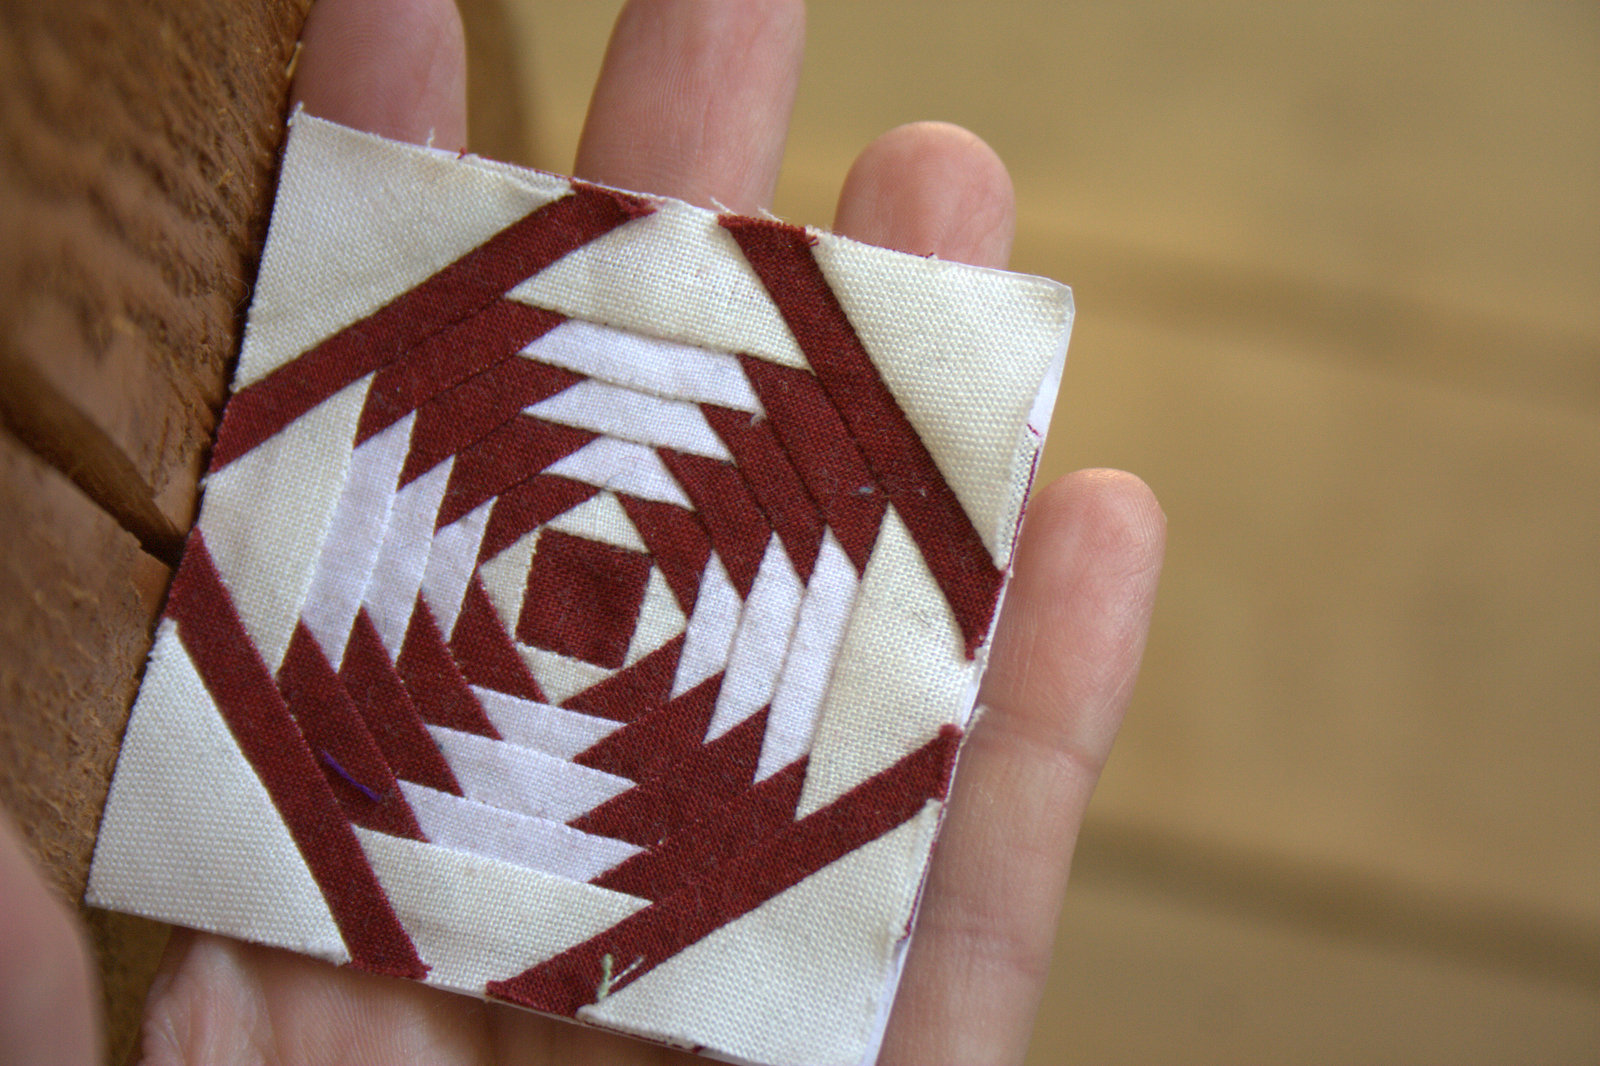
These teeny, tiny bits stitch together into such gorgeous, substantial quilt blocks, it blew my mind. Chawne had a thick stack of many different quilt block samples, all tinier than the tiniest block I’ve ever sewn and all absolutely stunning. They begged to be touched, and then once I touched them, there was no denying: I had to sew a teeny tiny block, even if it was soooo slow that it took me a year to complete. Chawne was also so easy to talk to, and such an inspiration. I wish I could have stayed all weekend and chatted away for hours.
A blurry picture, but meeting Chawne is worth documenting even if it’s blurred!
After returning home, I finished stitching the outside edge of my needle-turn appliqued Park block, and I spent two #sewtake20 sewing breaks to get started on a Chawne-inspired tiny quilt block. I’m stretching far out of my comfort zone by going wonky AND tiny!
Here’s my 40-minute, not quite 4″ square quilt block start. I am loving it, and being able to use the scraps of fabric from my “too small to save” bin feels good.
This day spent slowly stitching flew by, but solidified my feeling that quilting retreats should be a part of every sewist’s life. I am very much looking forward to being able to attend a full retreat in a couple of years when my mama milk bar is not in full use, and I plan to start saving pennies now. I’m so grateful that Sam is bringing quilt retreats to Maine with A Gathering of Stitches, and I look forward to seeing what rejuvenating, peacefully refreshing quilt retreats she organizes in the future. Thank you to Sam, Carolyn, Chawne, and all of the other retreat attendees for the lovely day and burst of inspiration.
I’m linking up my tiny quilt block beginning with Design Wall, since all quilt blocks matter, no matter how small.
I grab a needle and thread once the kids are in bed


 My goal is to finish my Summer EPP Table Runner. I have a small bit of hand quilting remaining, and then I need to bind it. Easy peasey.
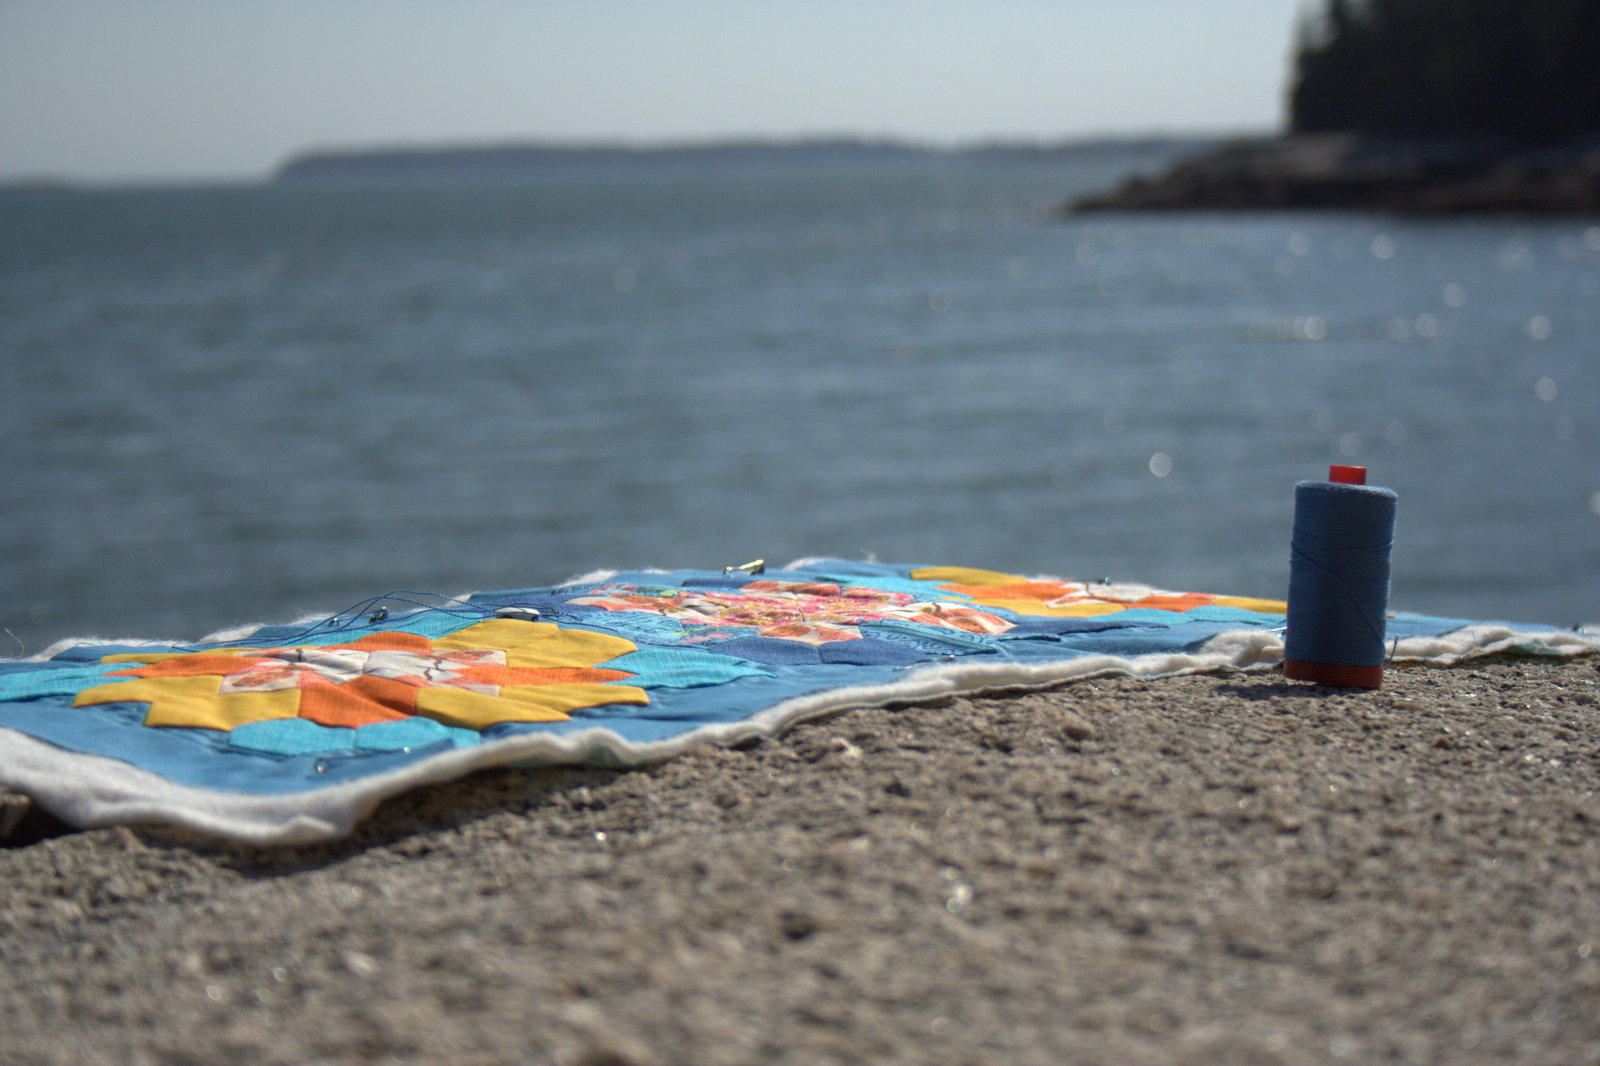 We spent a lovely relaxing family day at the beach today, so I decided to have an impromptu photo shoot. I always carry a couple of hand-sewing projects with me, either a small hand quilting project like this one, some English Paper Piecing, or both! The strong cool breeze of the ocean made the 90 degree day feel absolutely perfect, but it made it a bit tricky to photograph this light weight runner. I took a few photos in full sun, which is typically a photography no-no, but with the gorgeous view and glittering water, how could I resist?
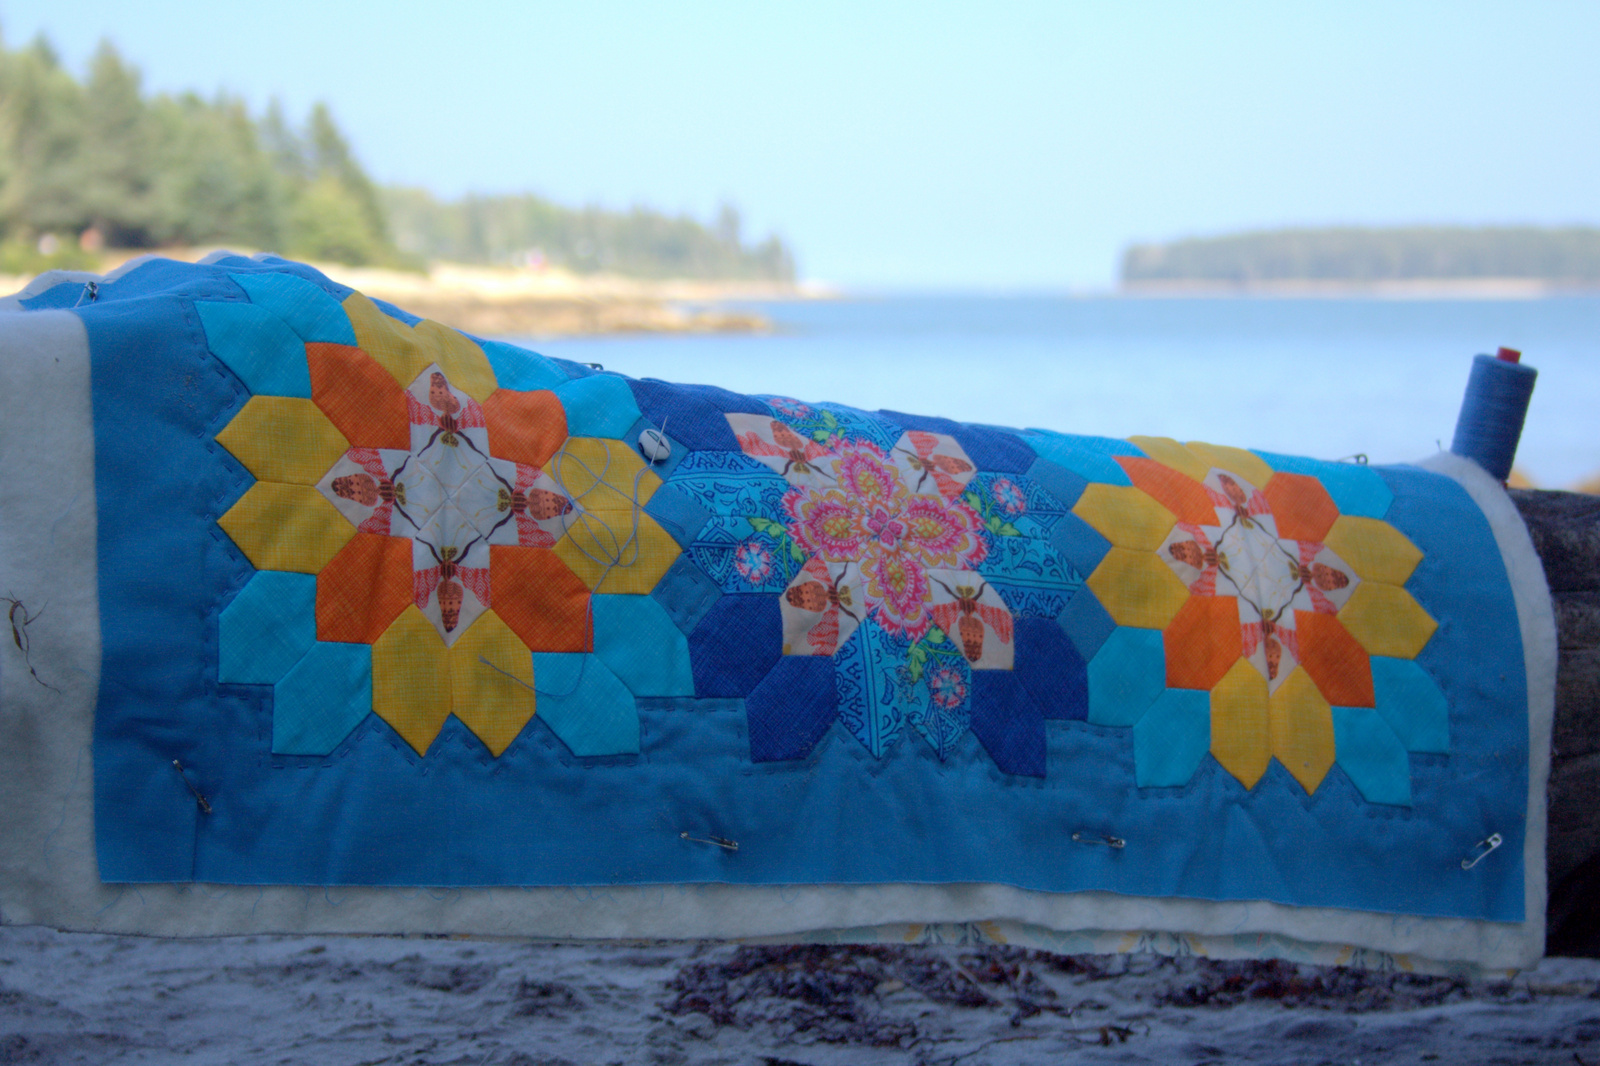
 I decided to back this table runner in Bee Sweet in the Morning colorway from Bonnie Christine’s Sweet as Honey fabric line. The bees in the table runner top are from the Bee Sweet in the Sunset colorway, so it coordinates fabulously.
 I have only a bit more hand quilting to do, and then I MIGHT do a little bit of machine quilting to make sure all stays nice and securely despite the many inescapable washes that surely await anything that will live on our table.
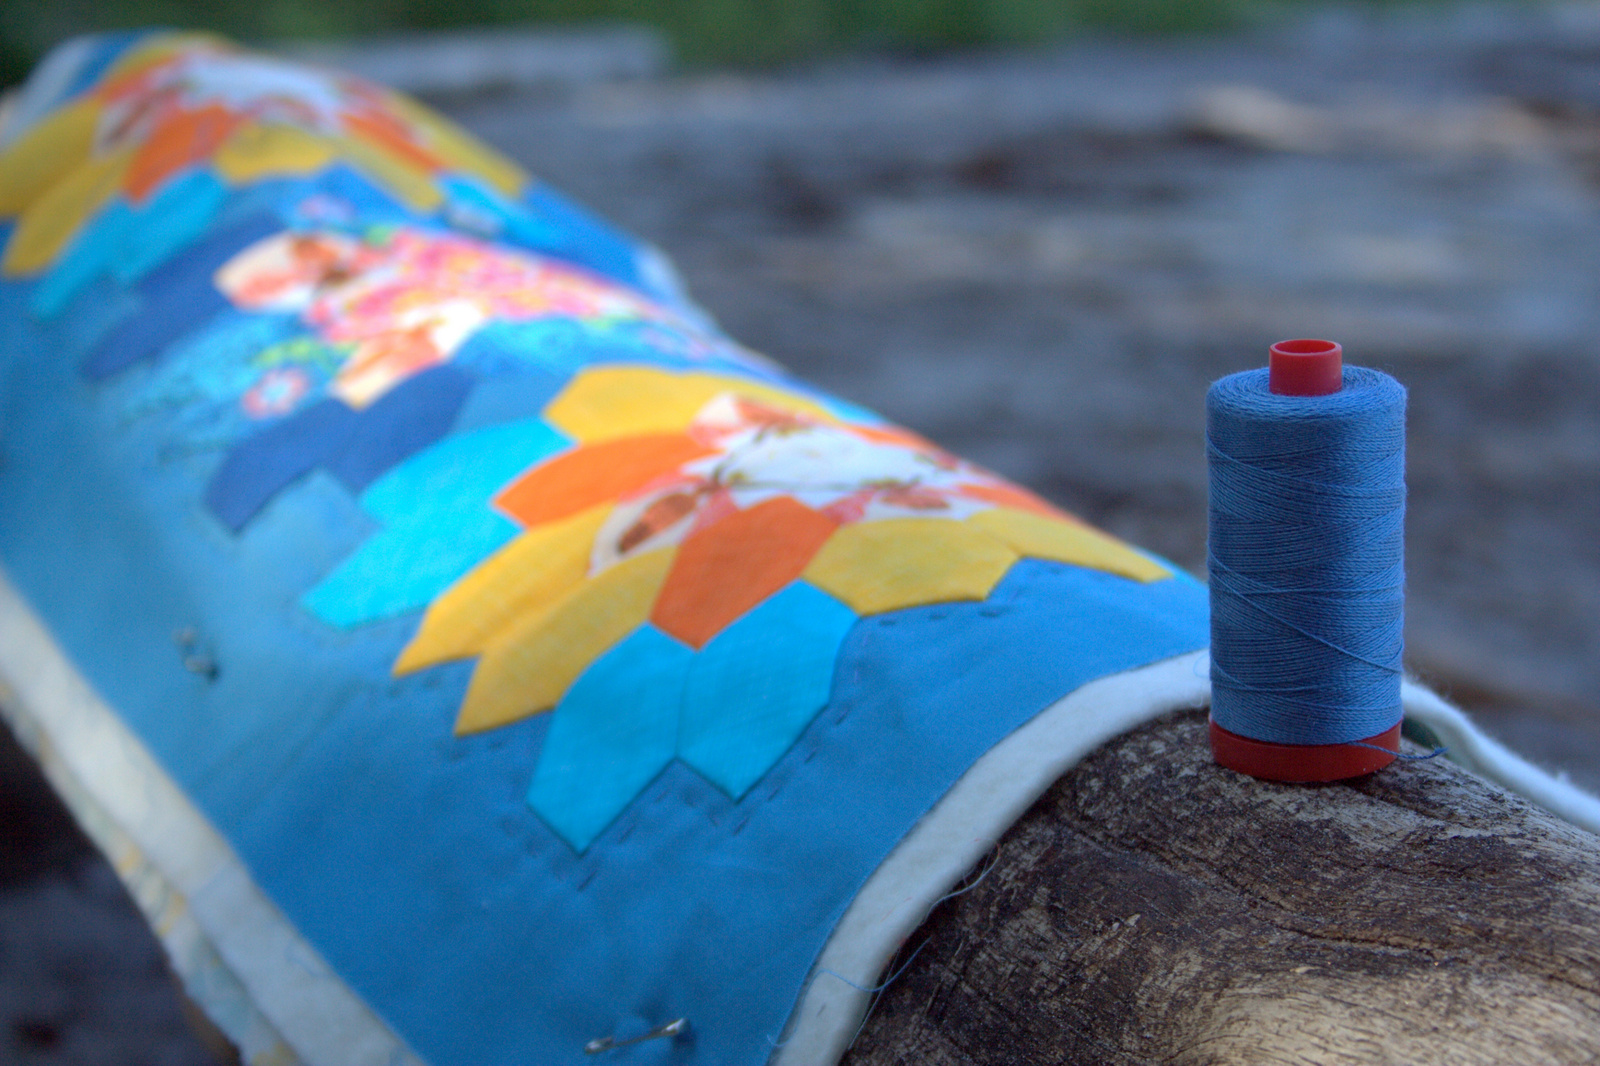 I’m using 12 wt Aurifil thread #4140 Wedgewood, which is a perfect match. I love the subtle effect of the large quilting stitches in a coordinating color, and I’m very much looking forward to having this table runner finished and on our table. It can be a lingering reminder of our fun and beautiful summer. And it WILL be finished by the end of September!