Alison Glass Prismatic Medallion Flimsy Finish

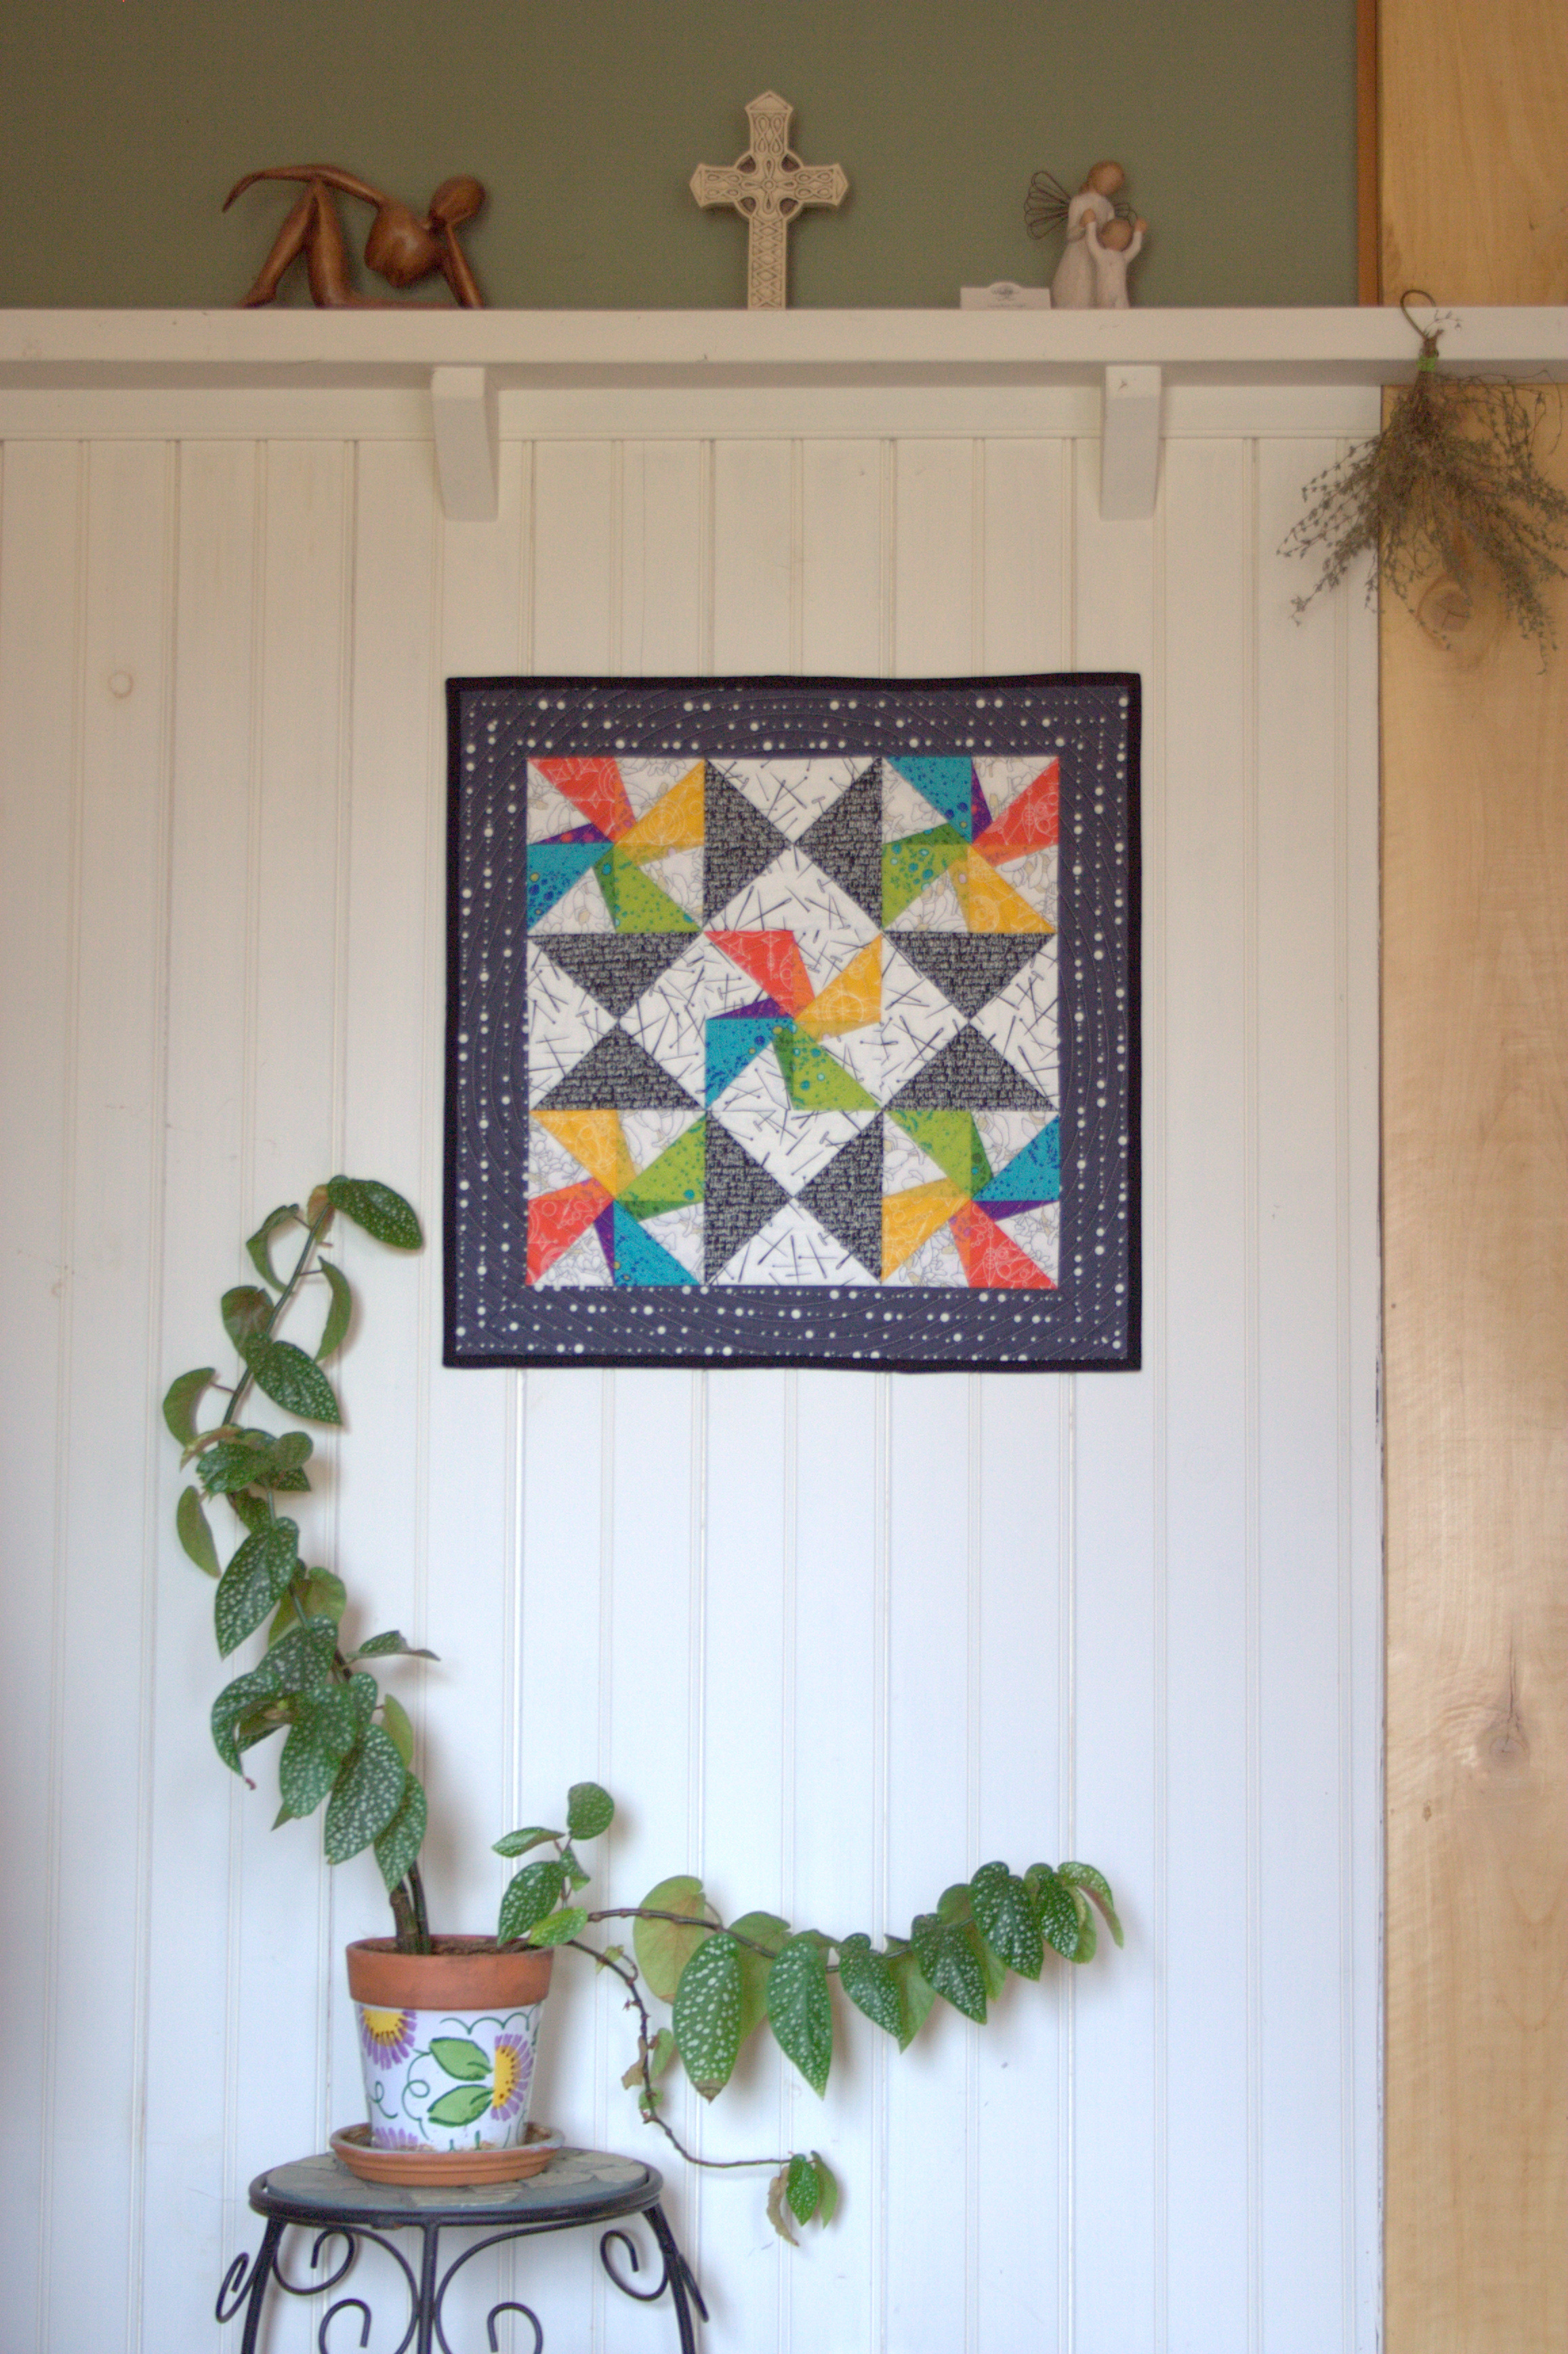
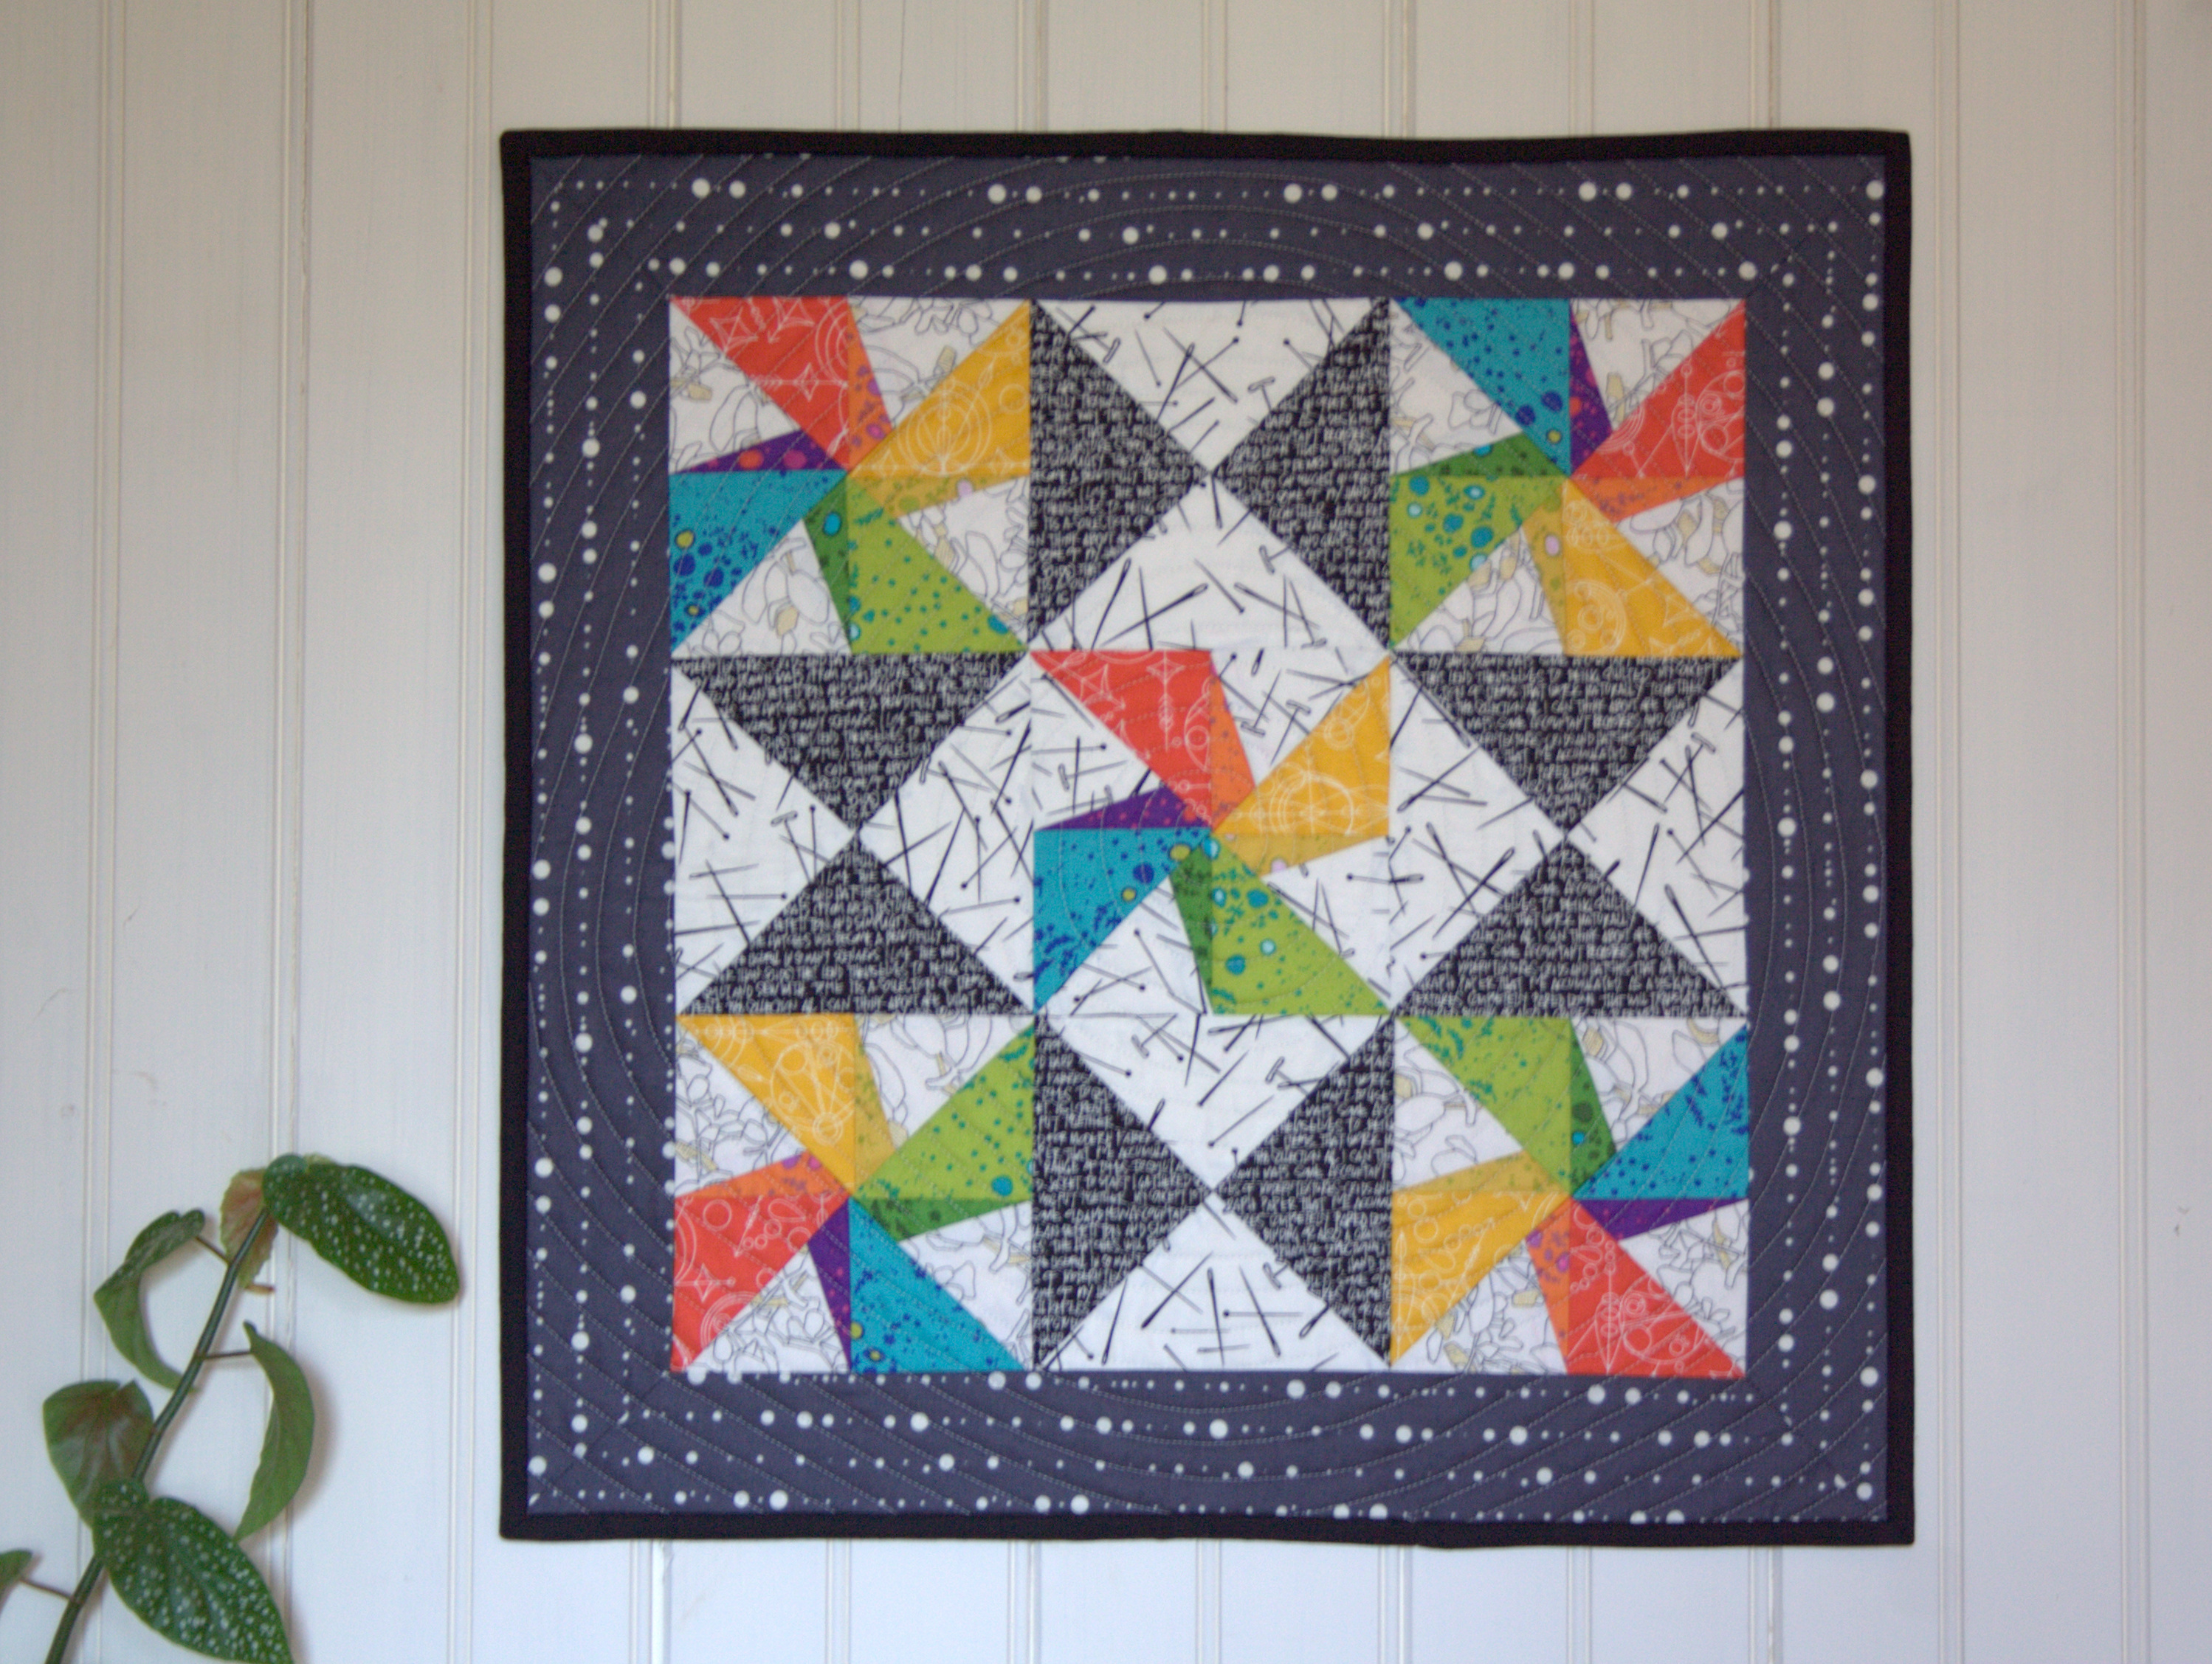
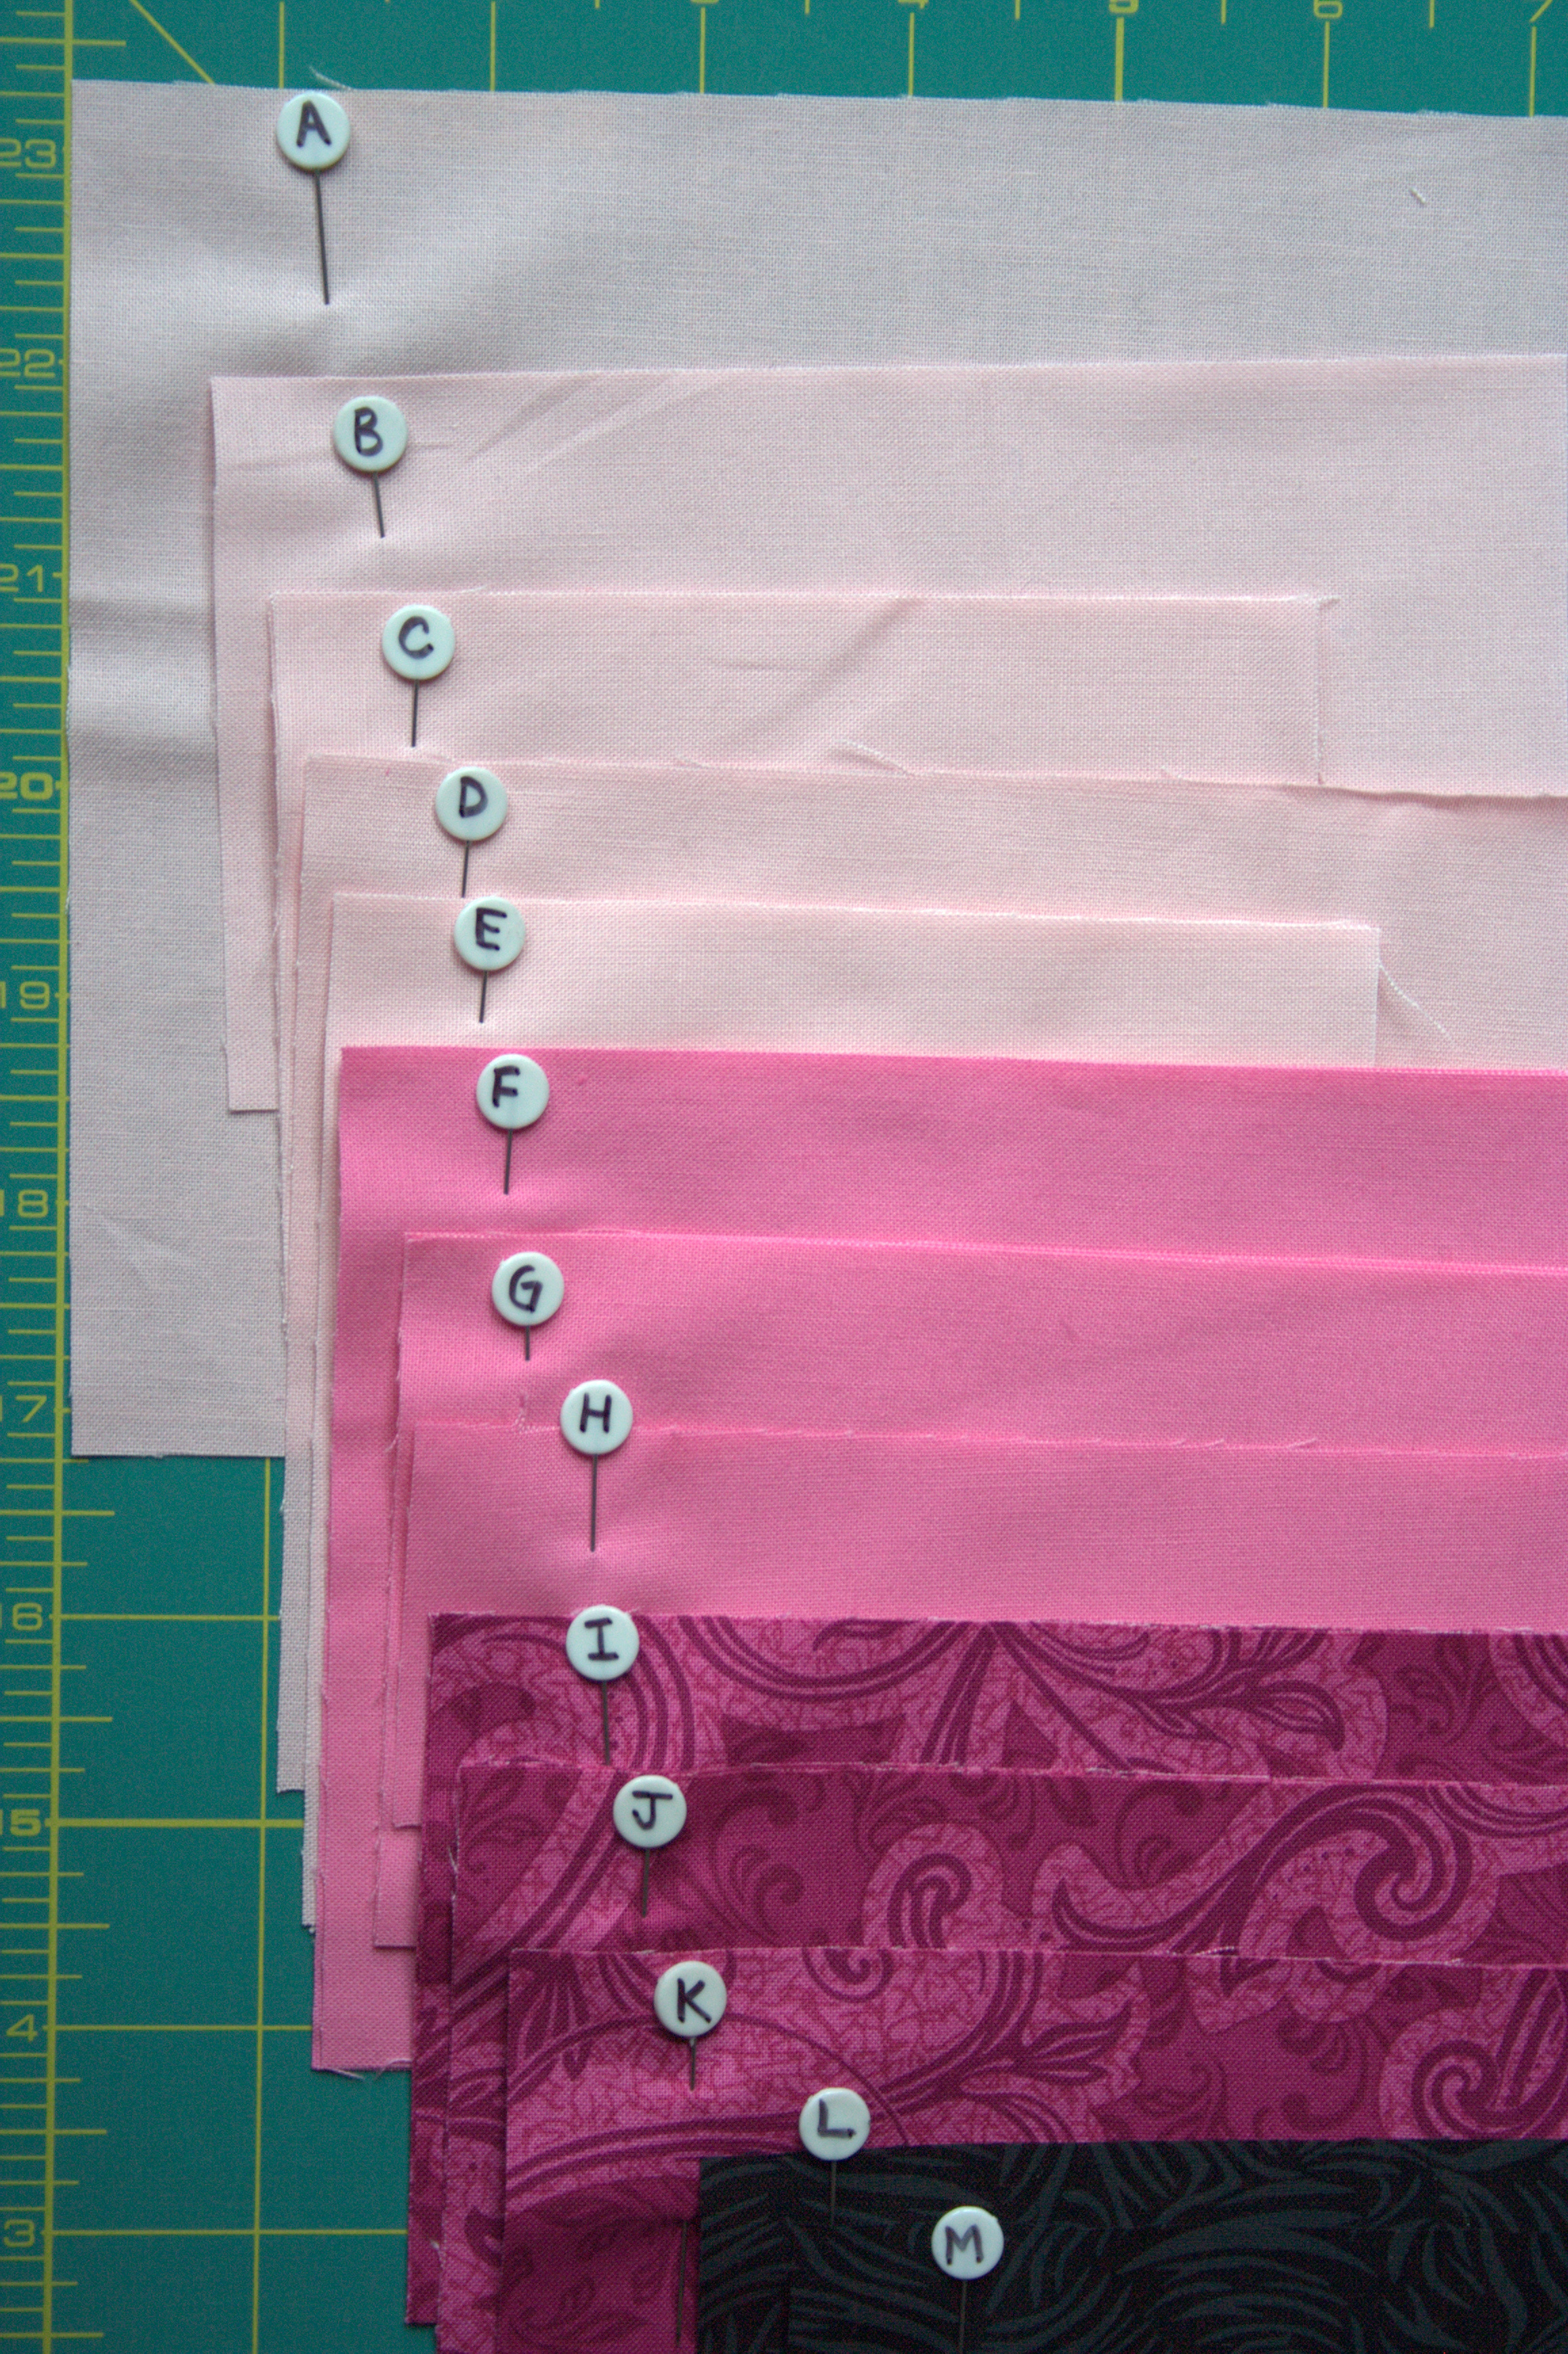
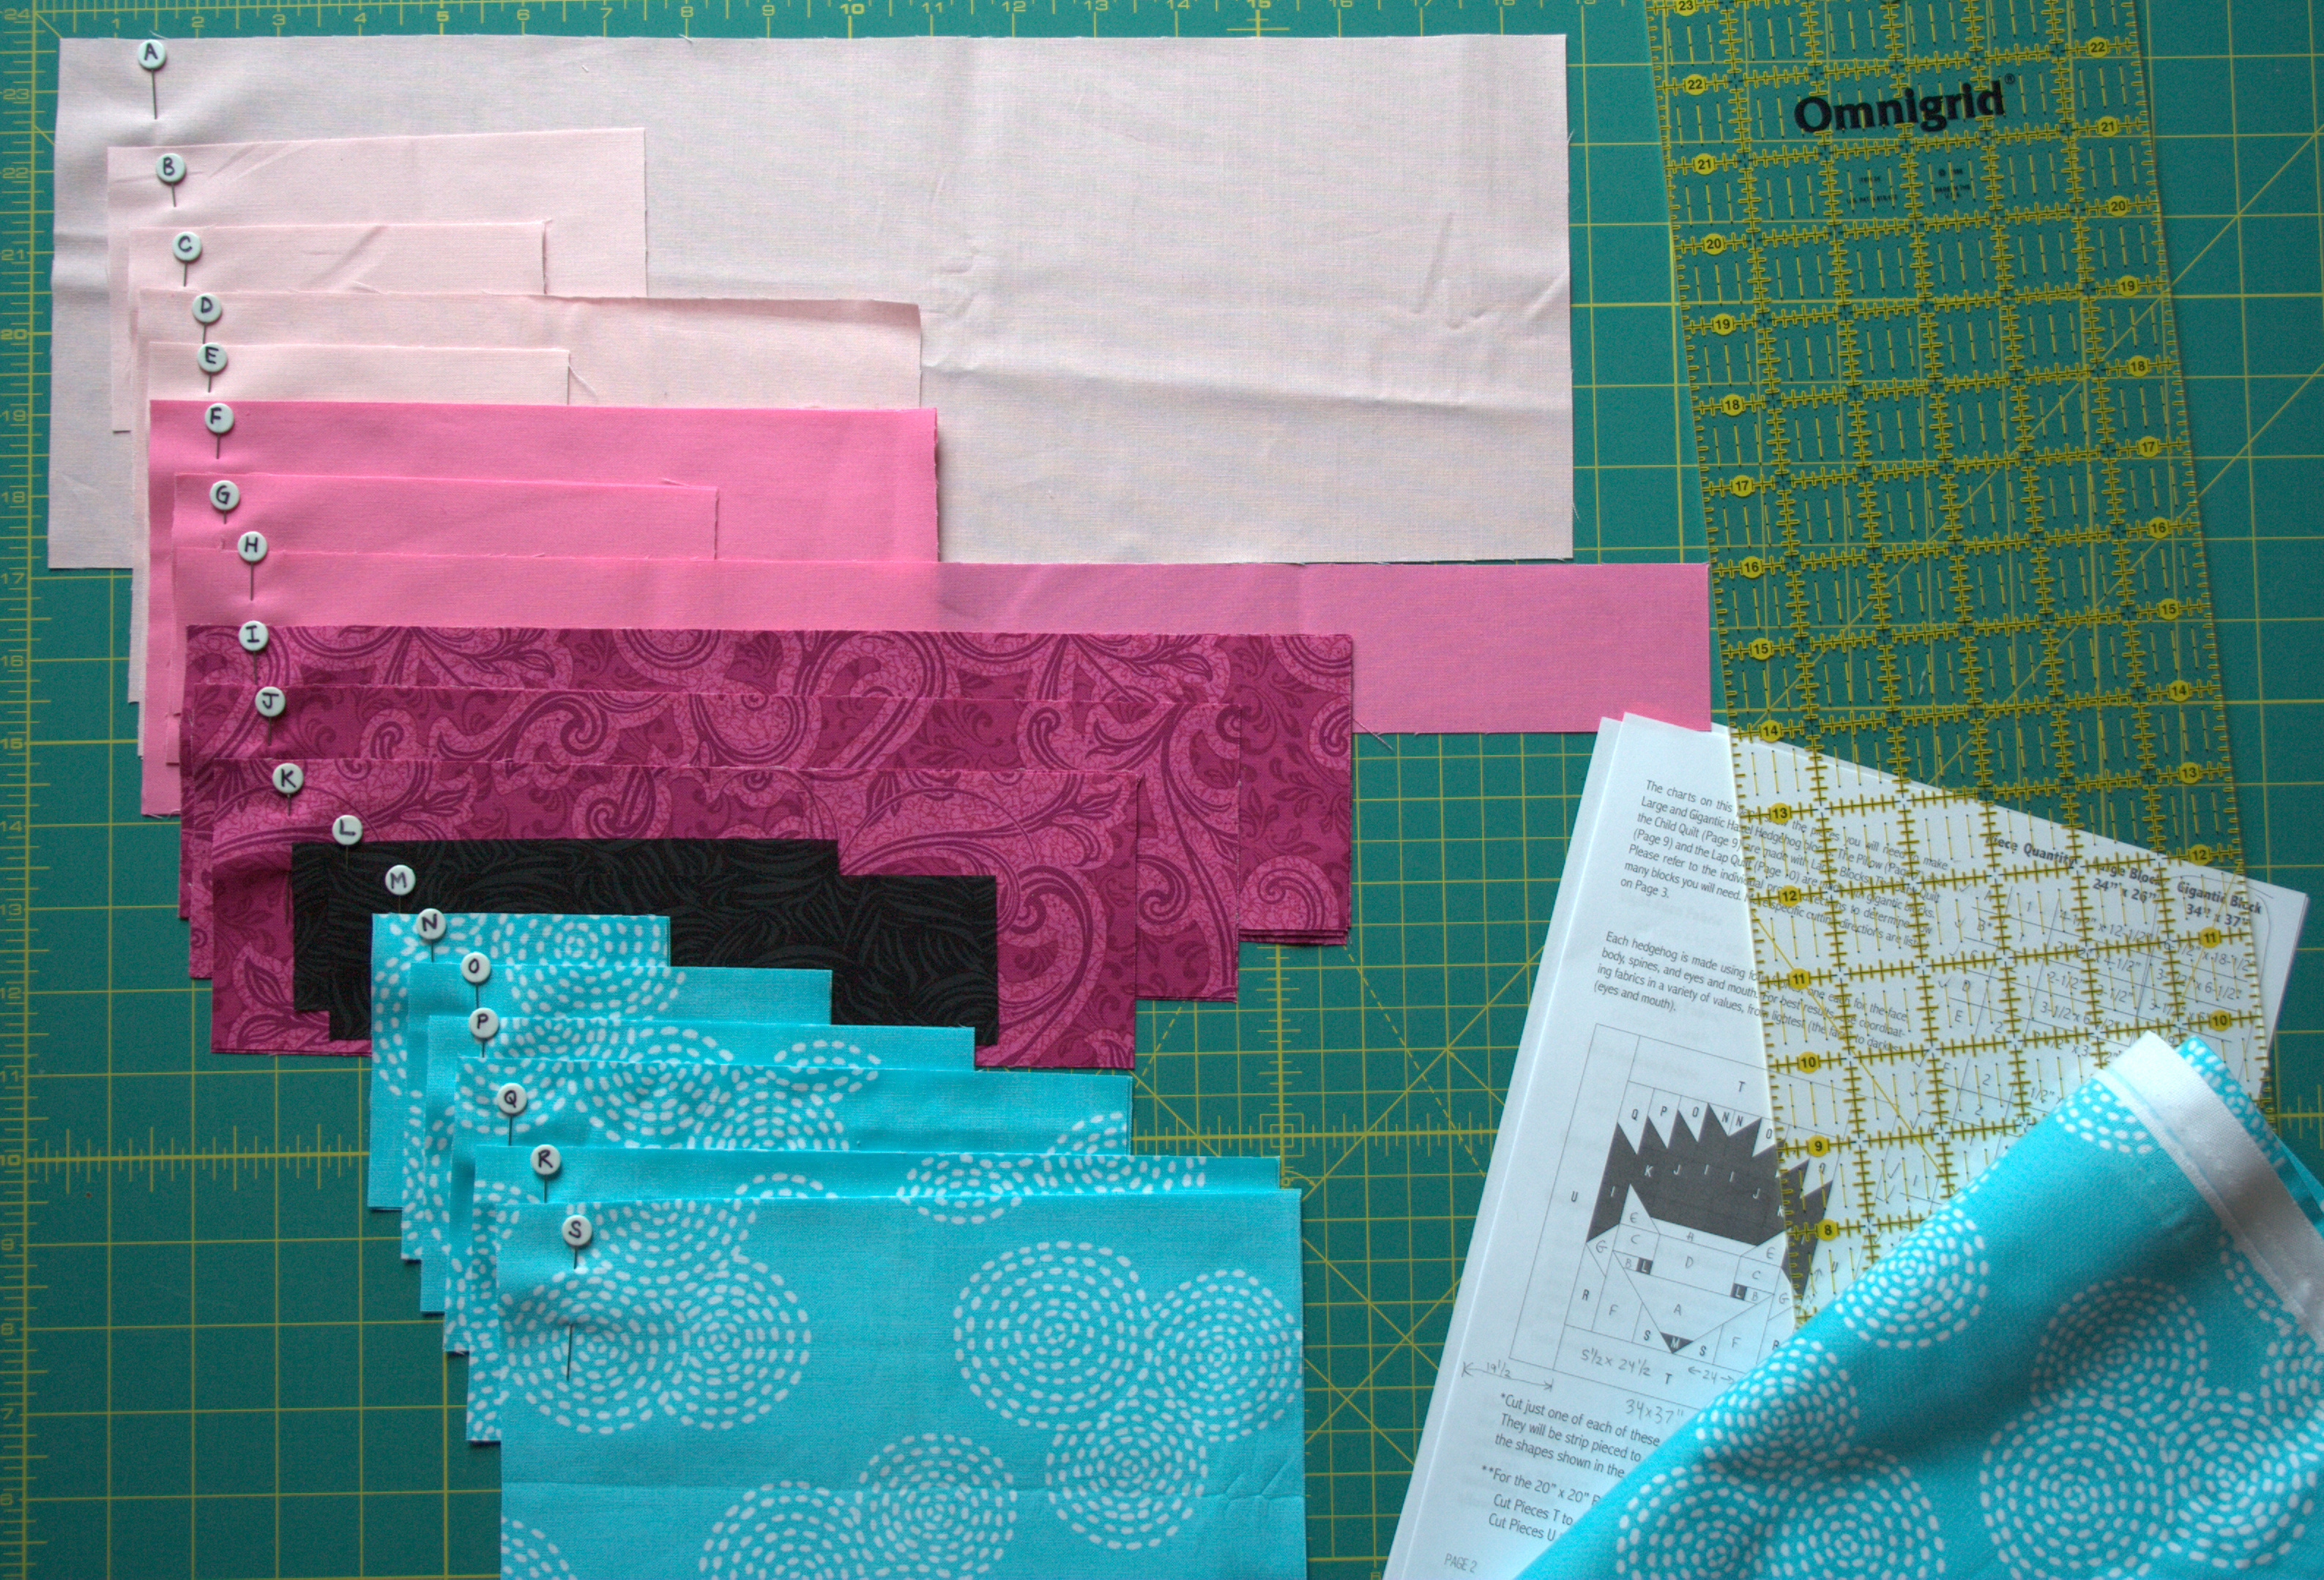
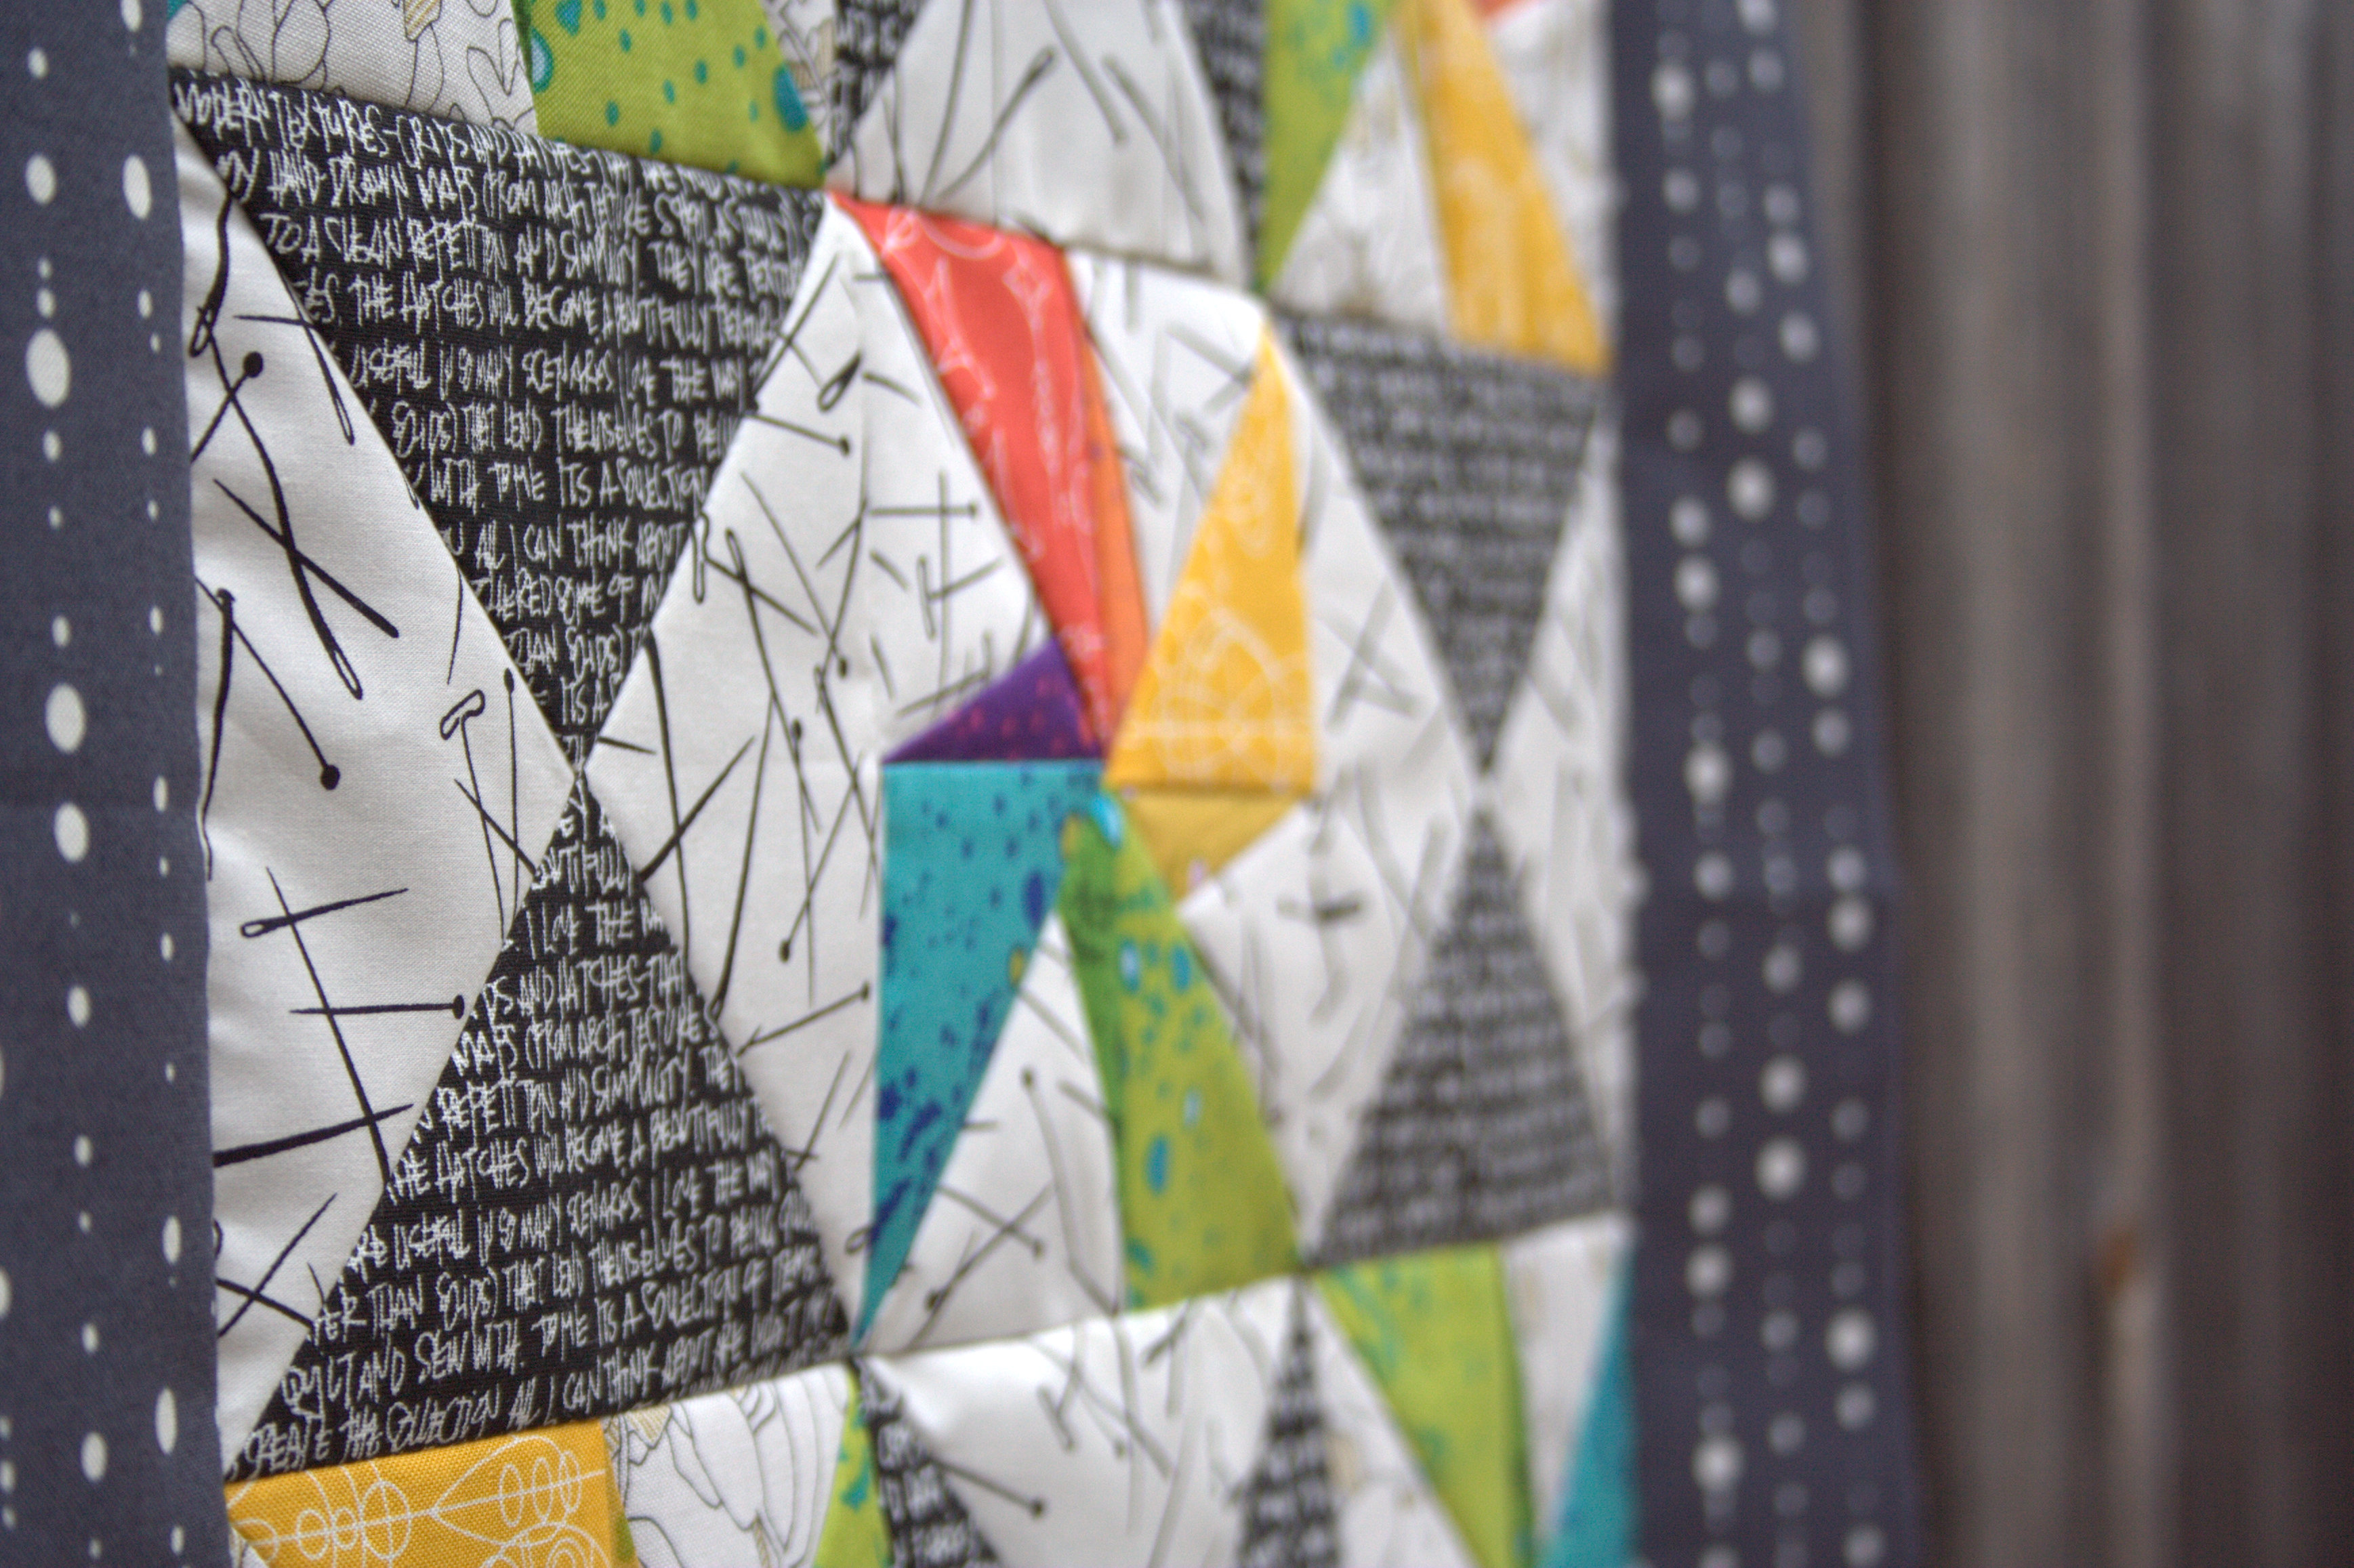
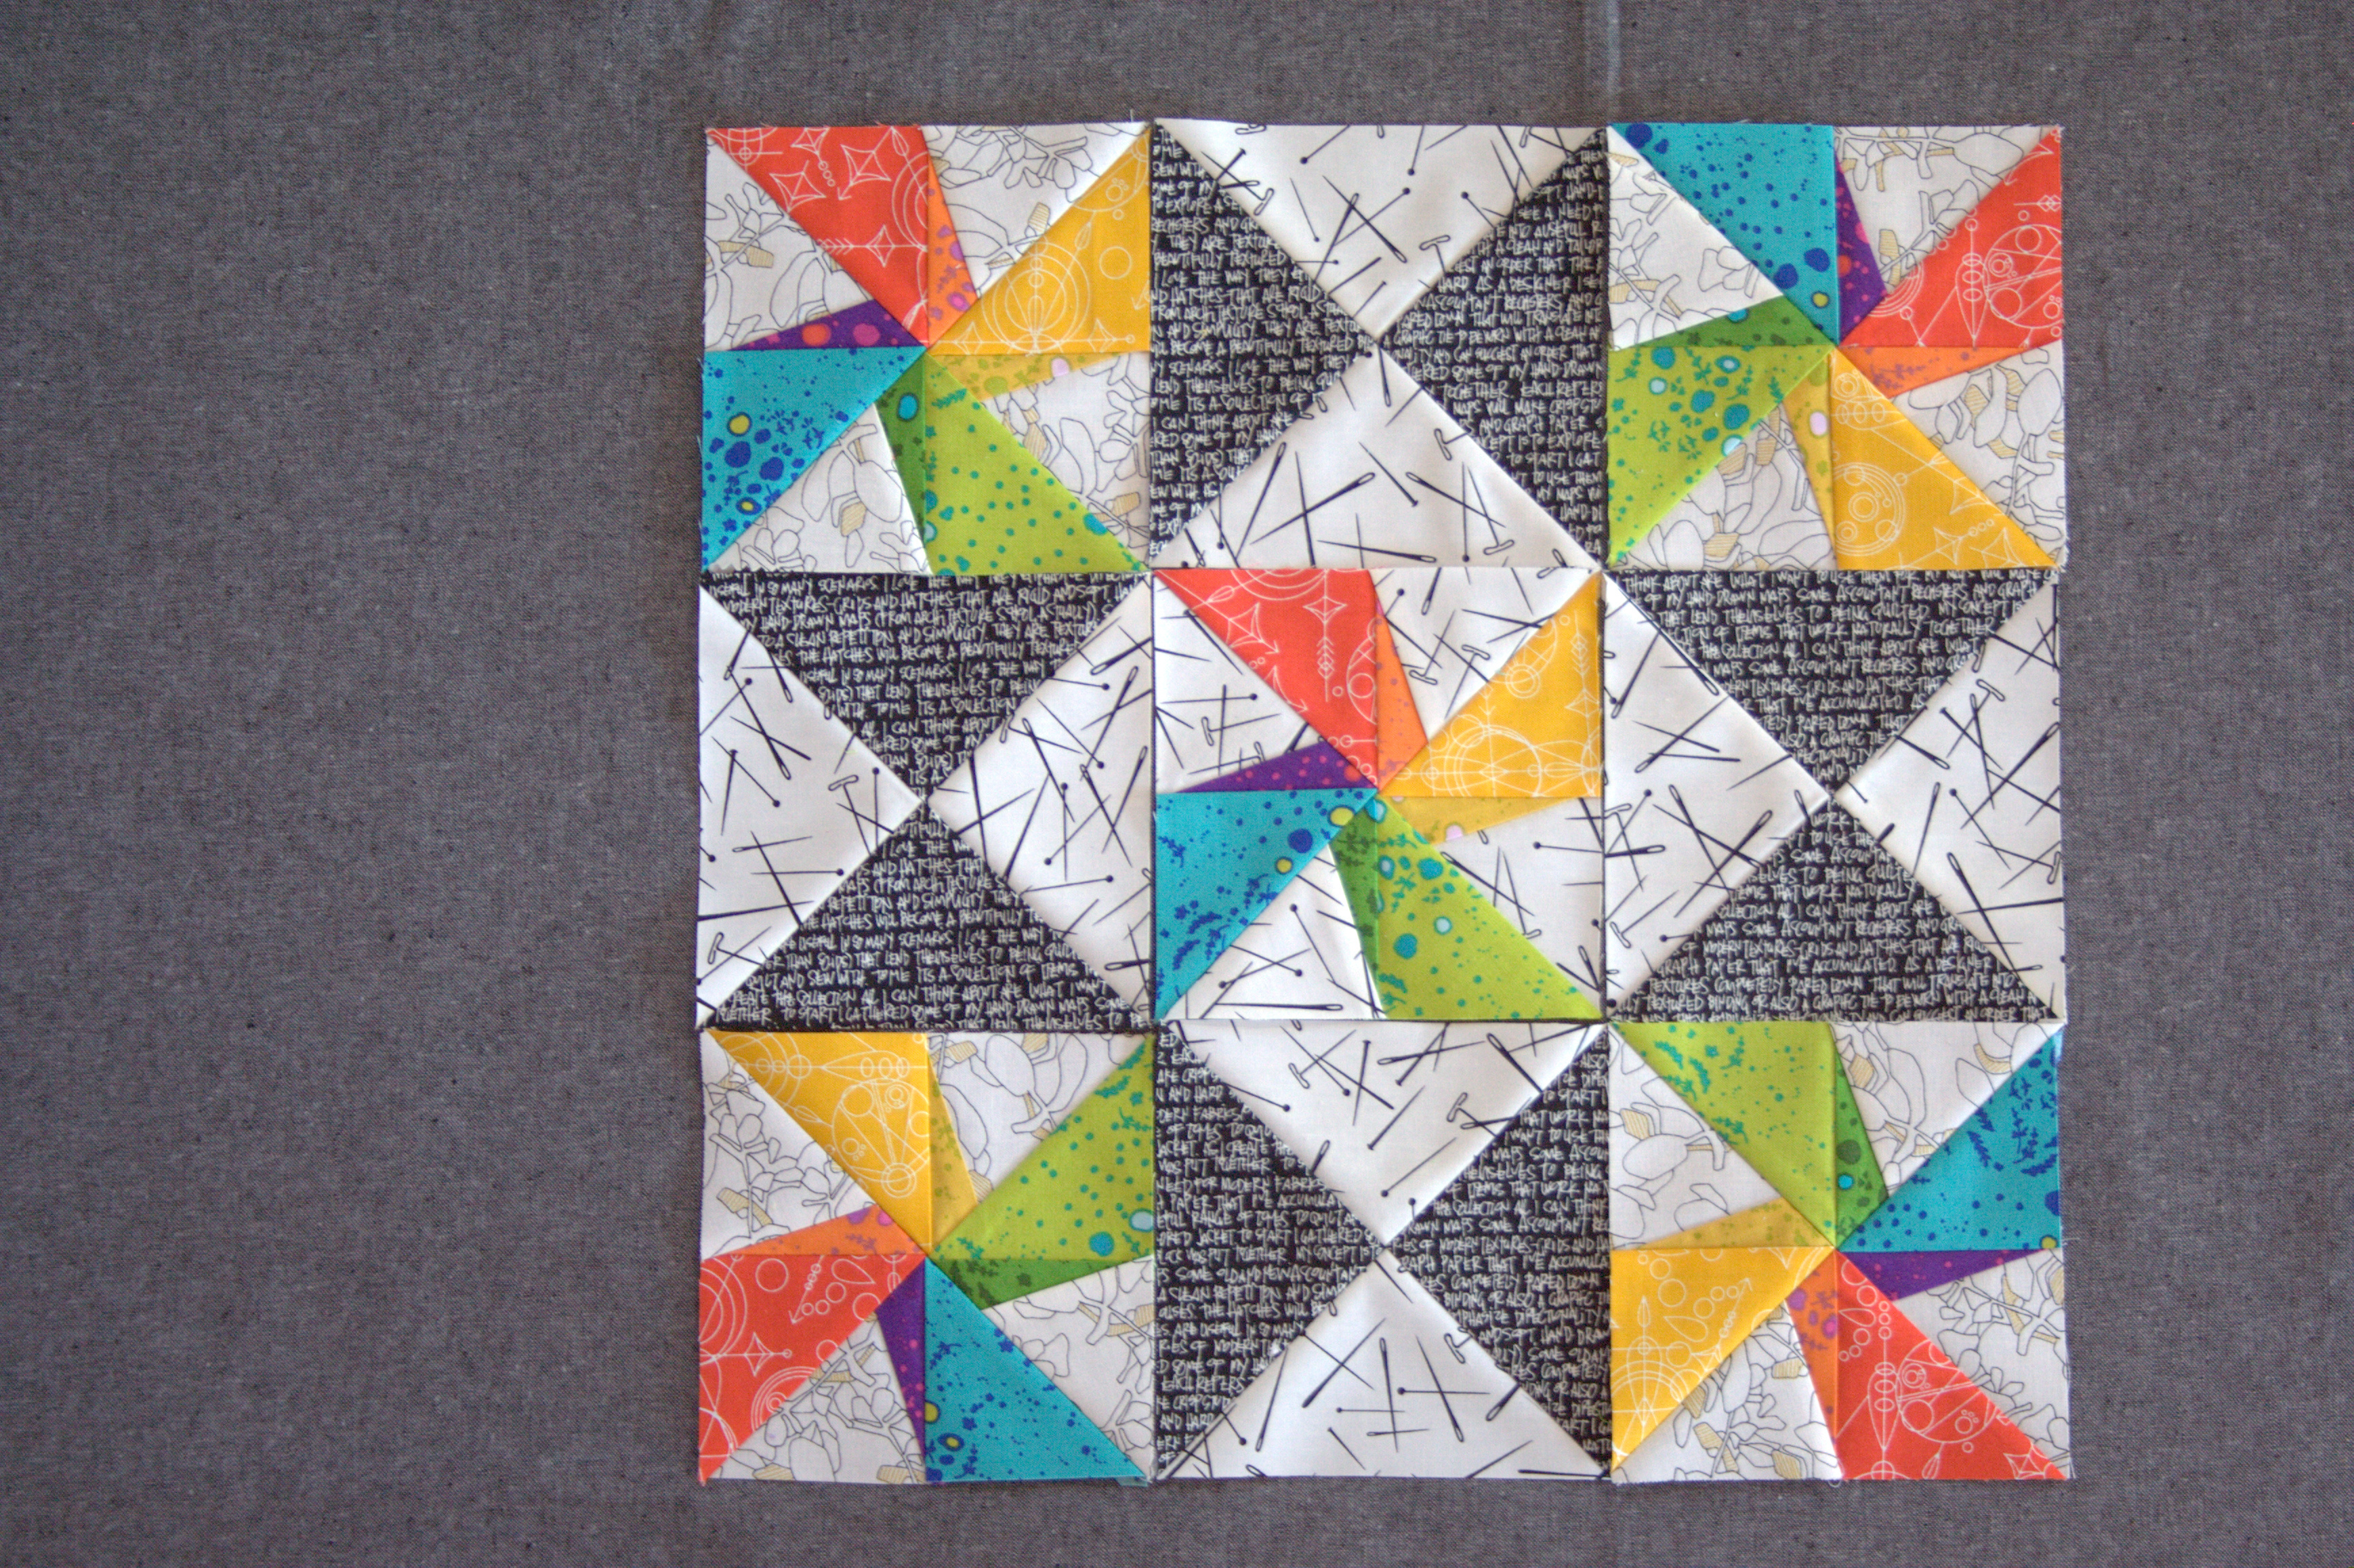
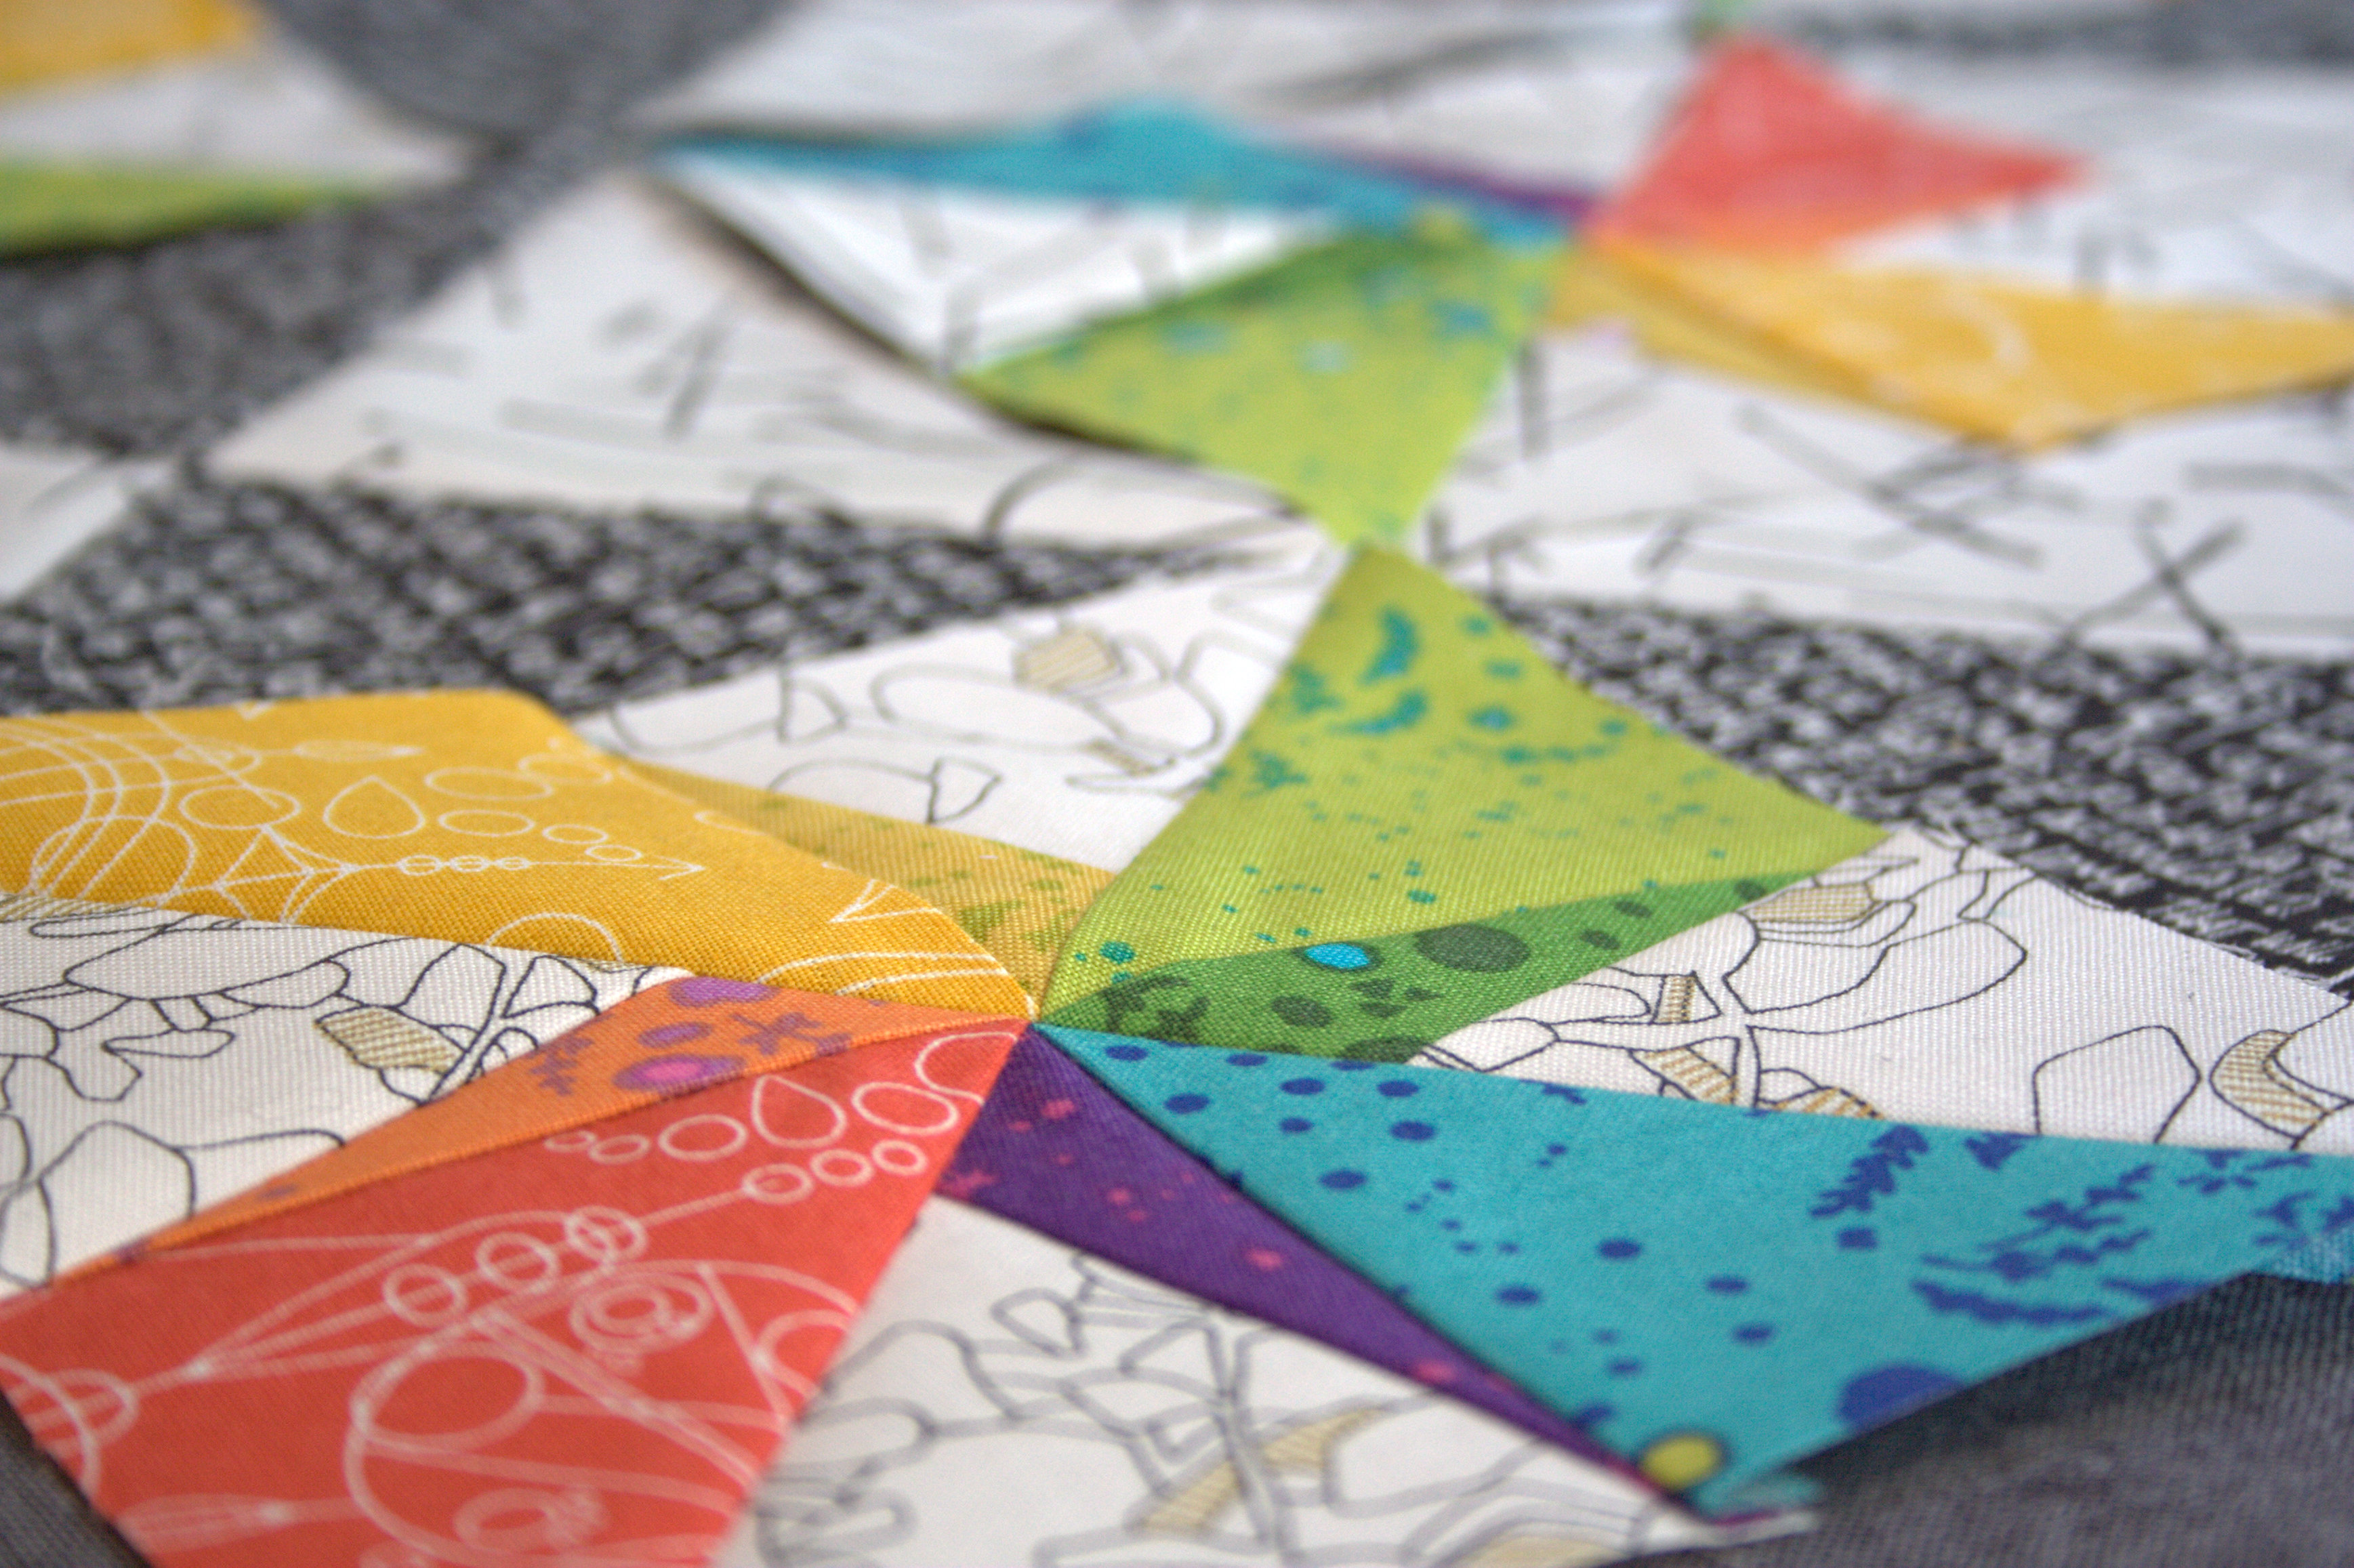
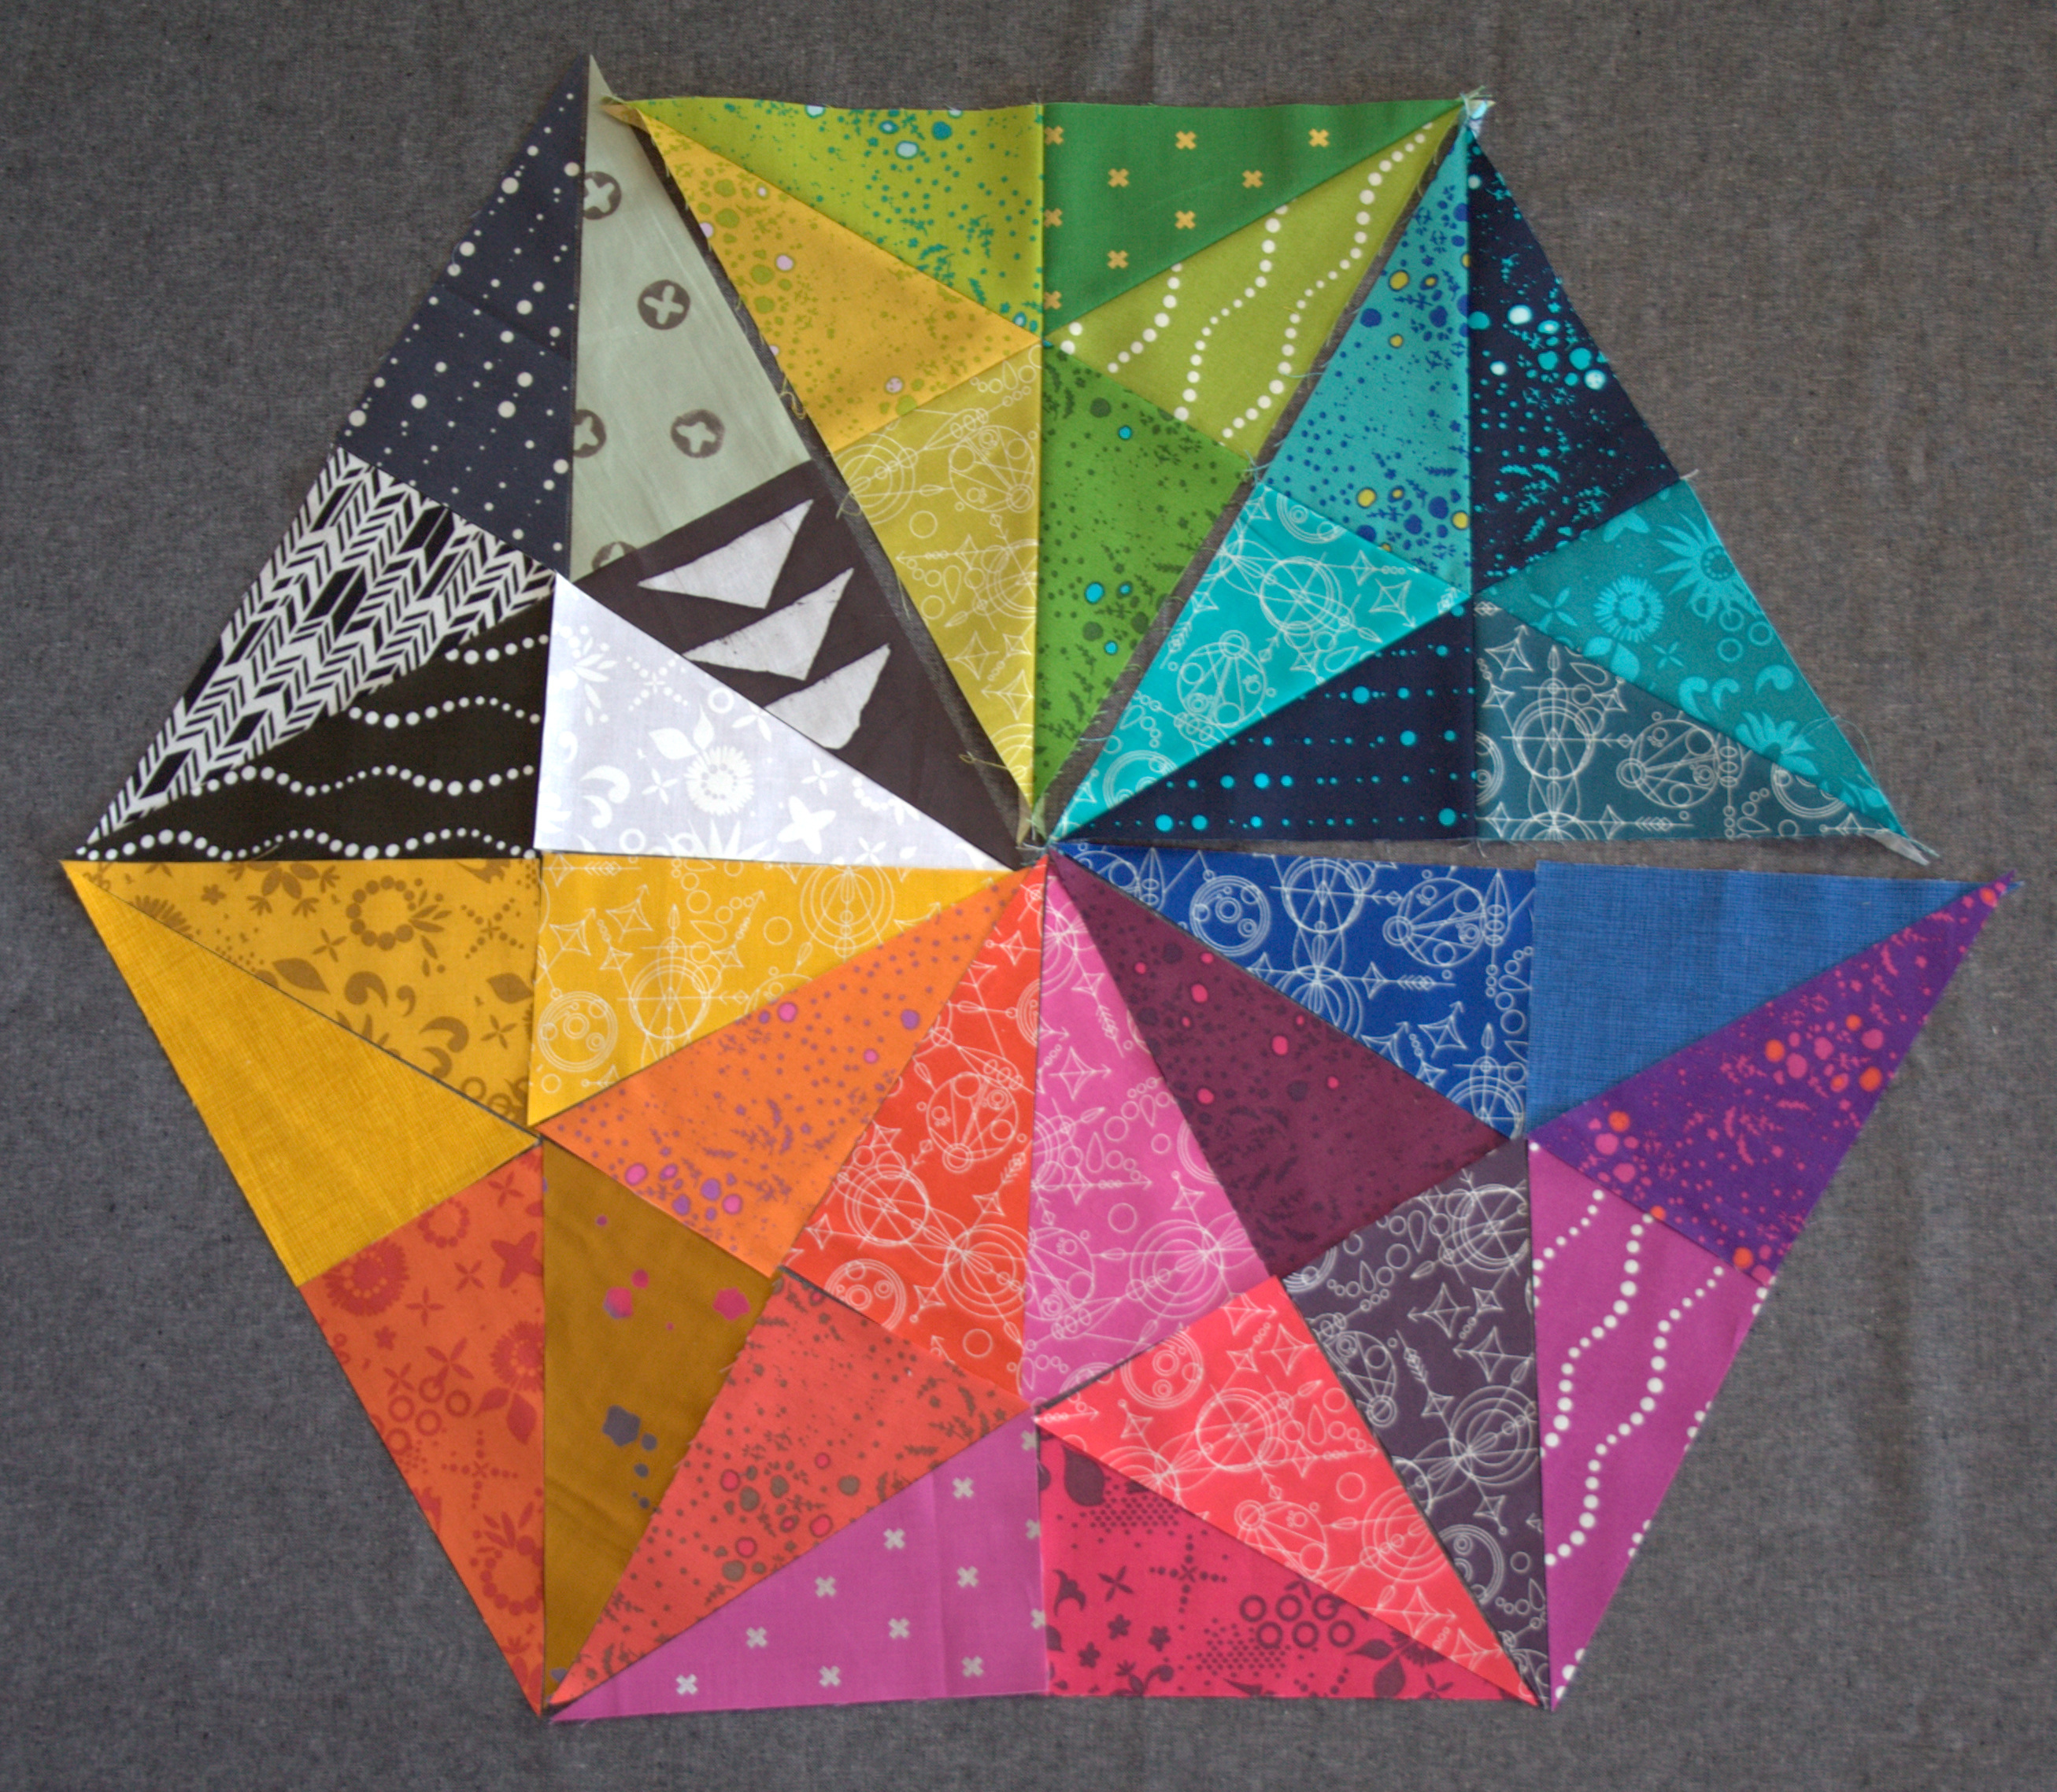
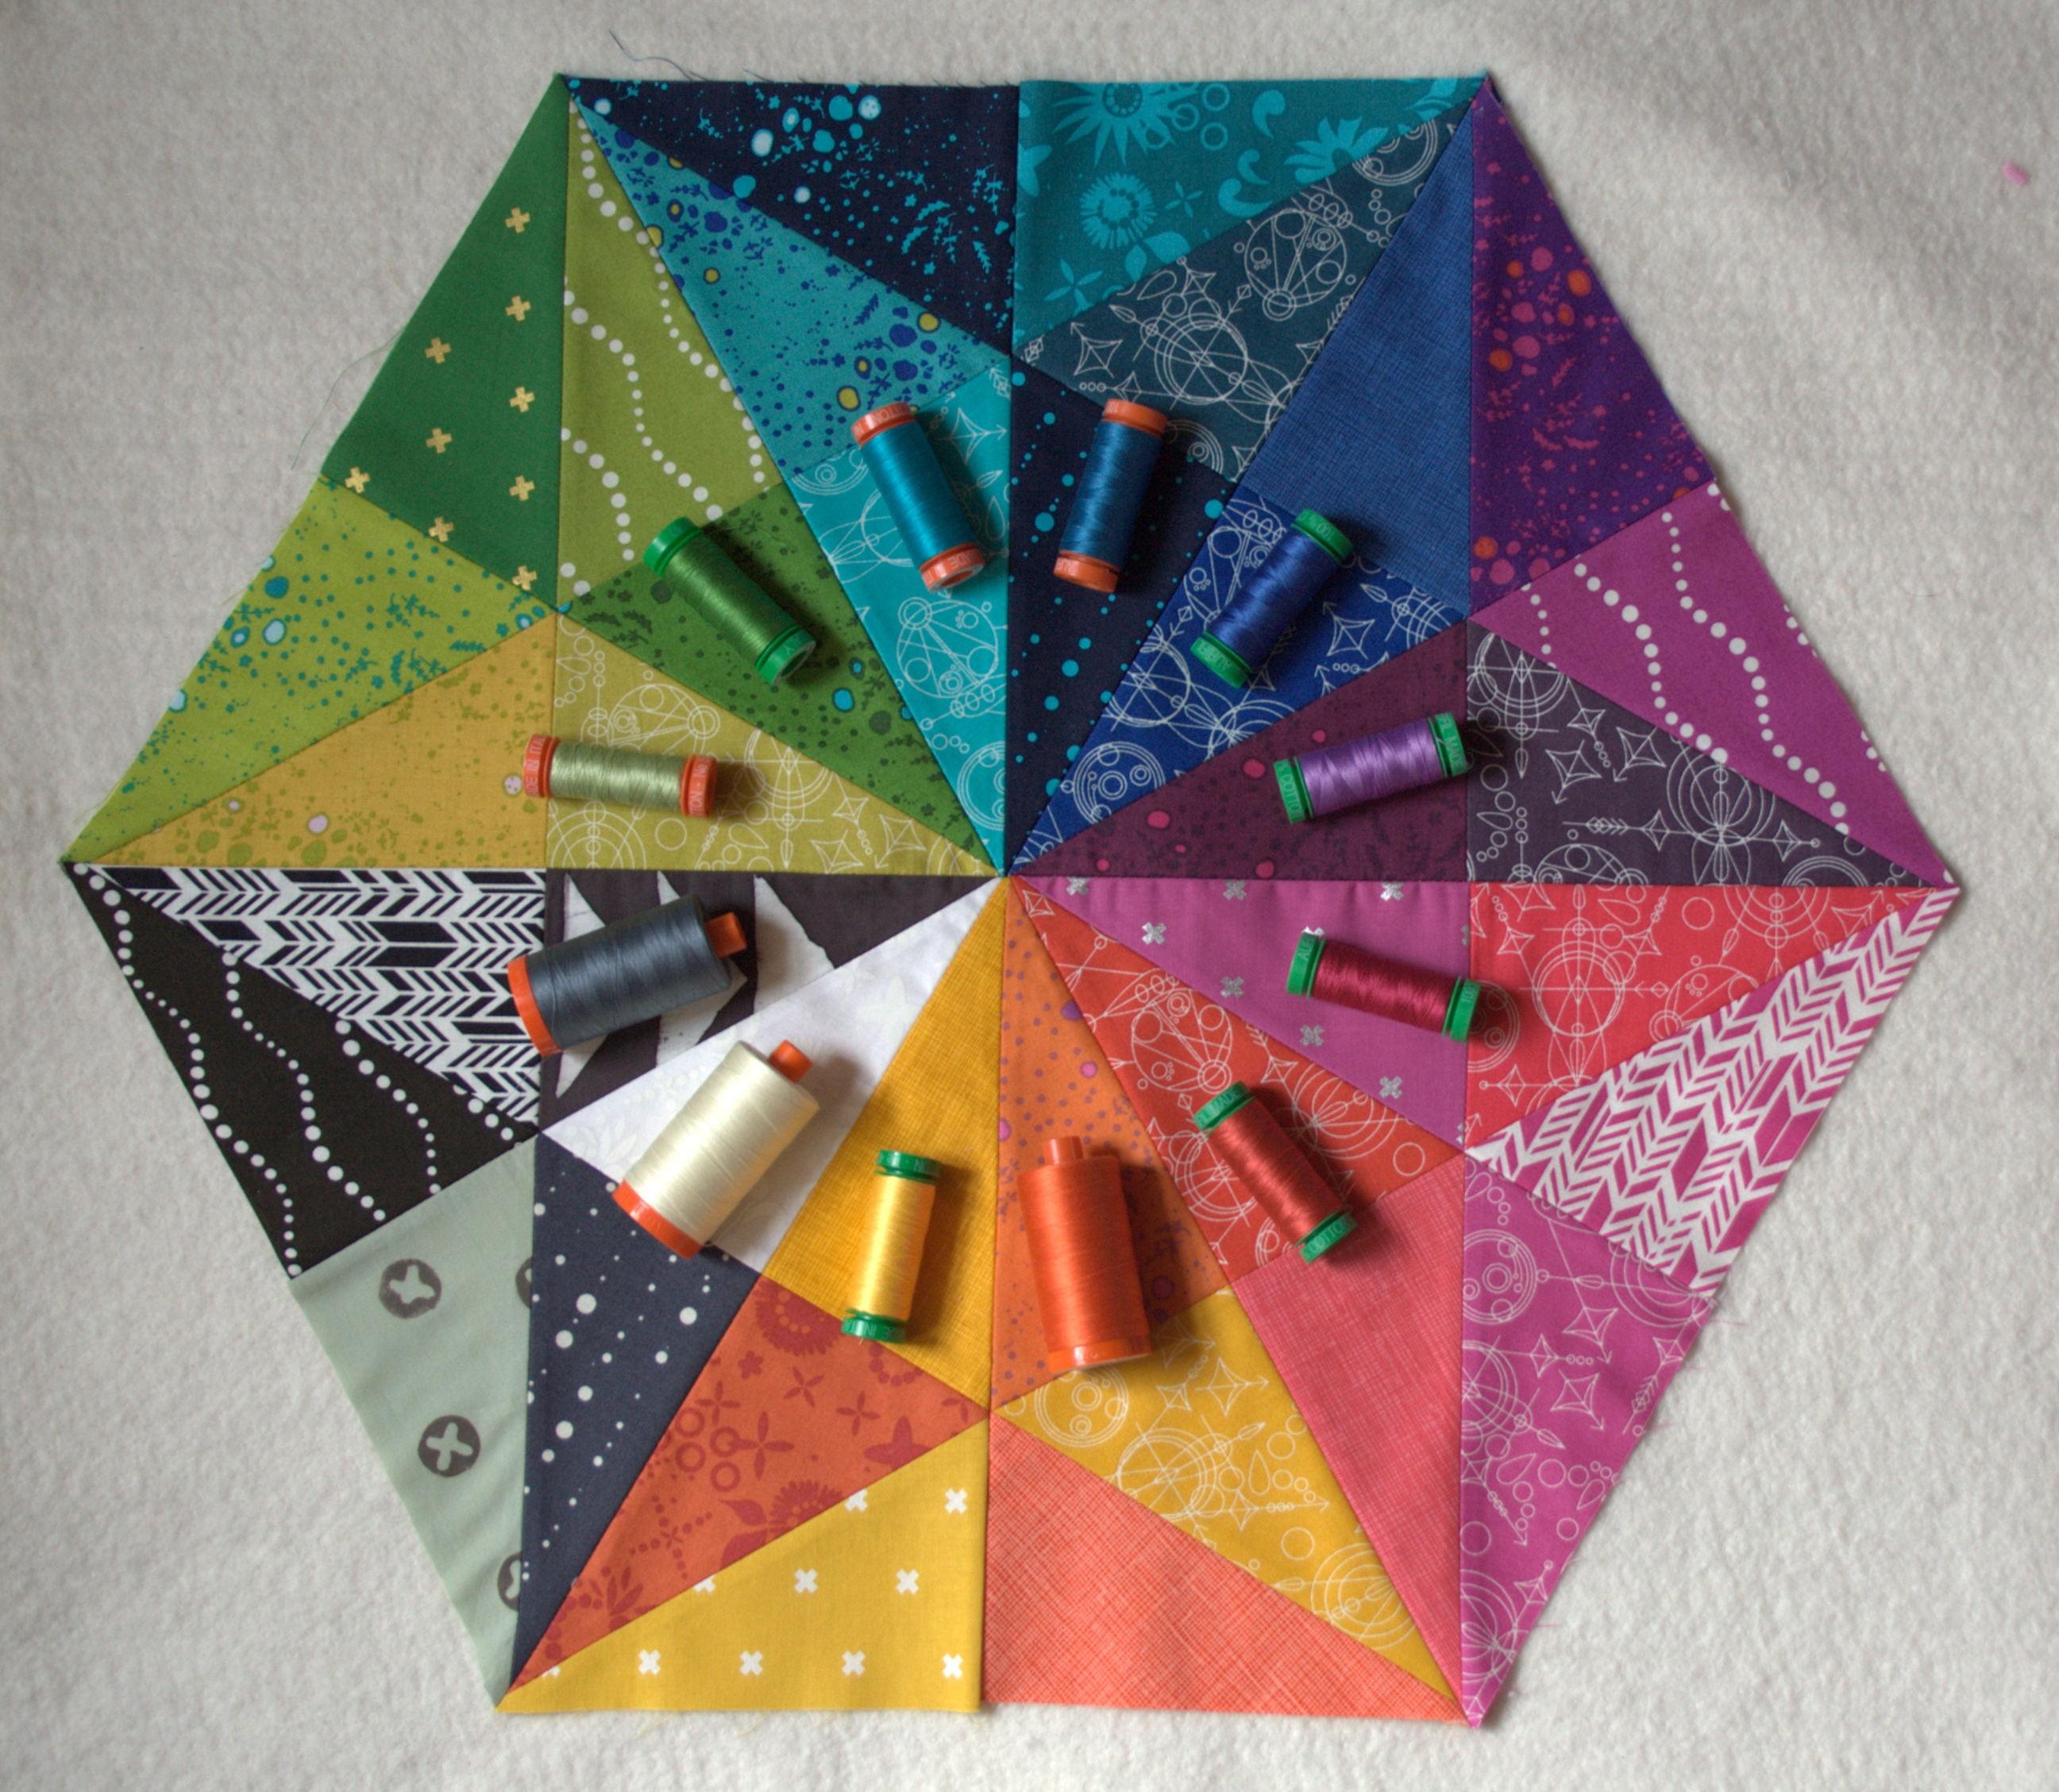
Choosing fabrics for the Prismatic Medallion mini quilt pattern has been hands down the most difficult part of the entire process. As you read in my last progress post for this project, I have been humming and hawing over fabric choice and placement for the last few sections of the quilt for about a month. Finally, this past week, I bit the bullet, made the decision, and finished sewing together the quilt top. Verdict: I LOVE it!

prismatic medallion flimsy finish and matching aurifil thread
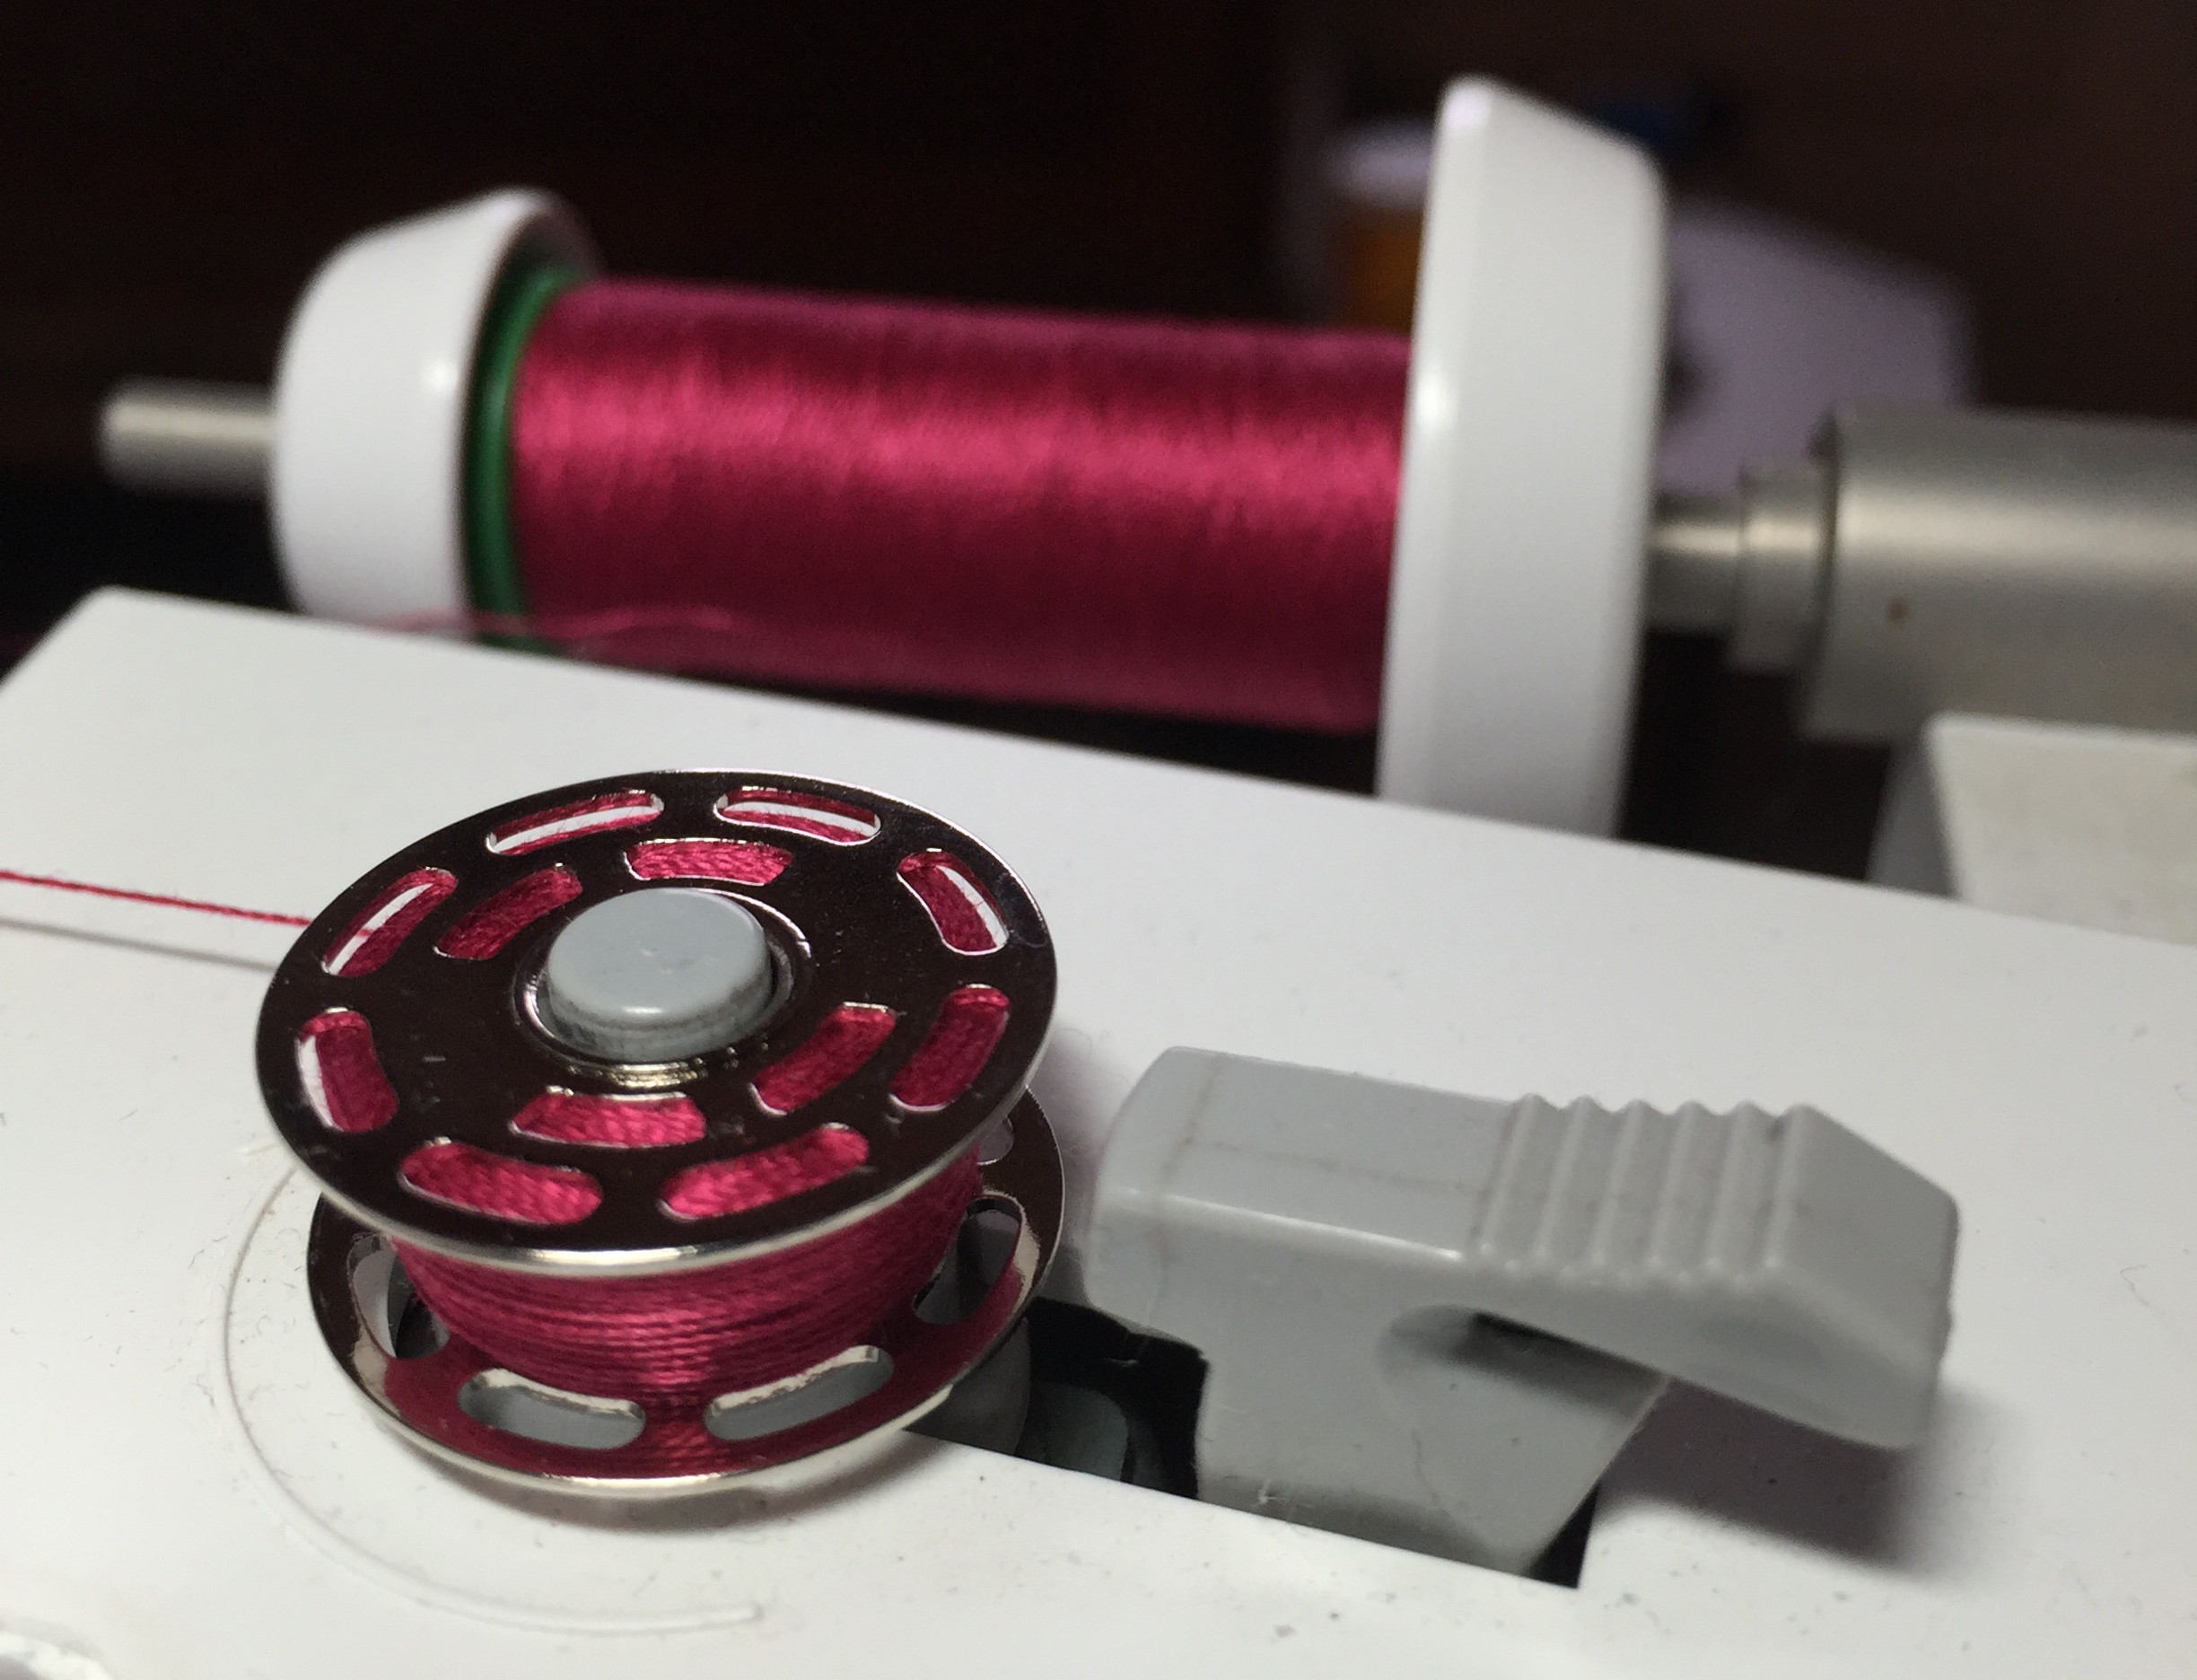
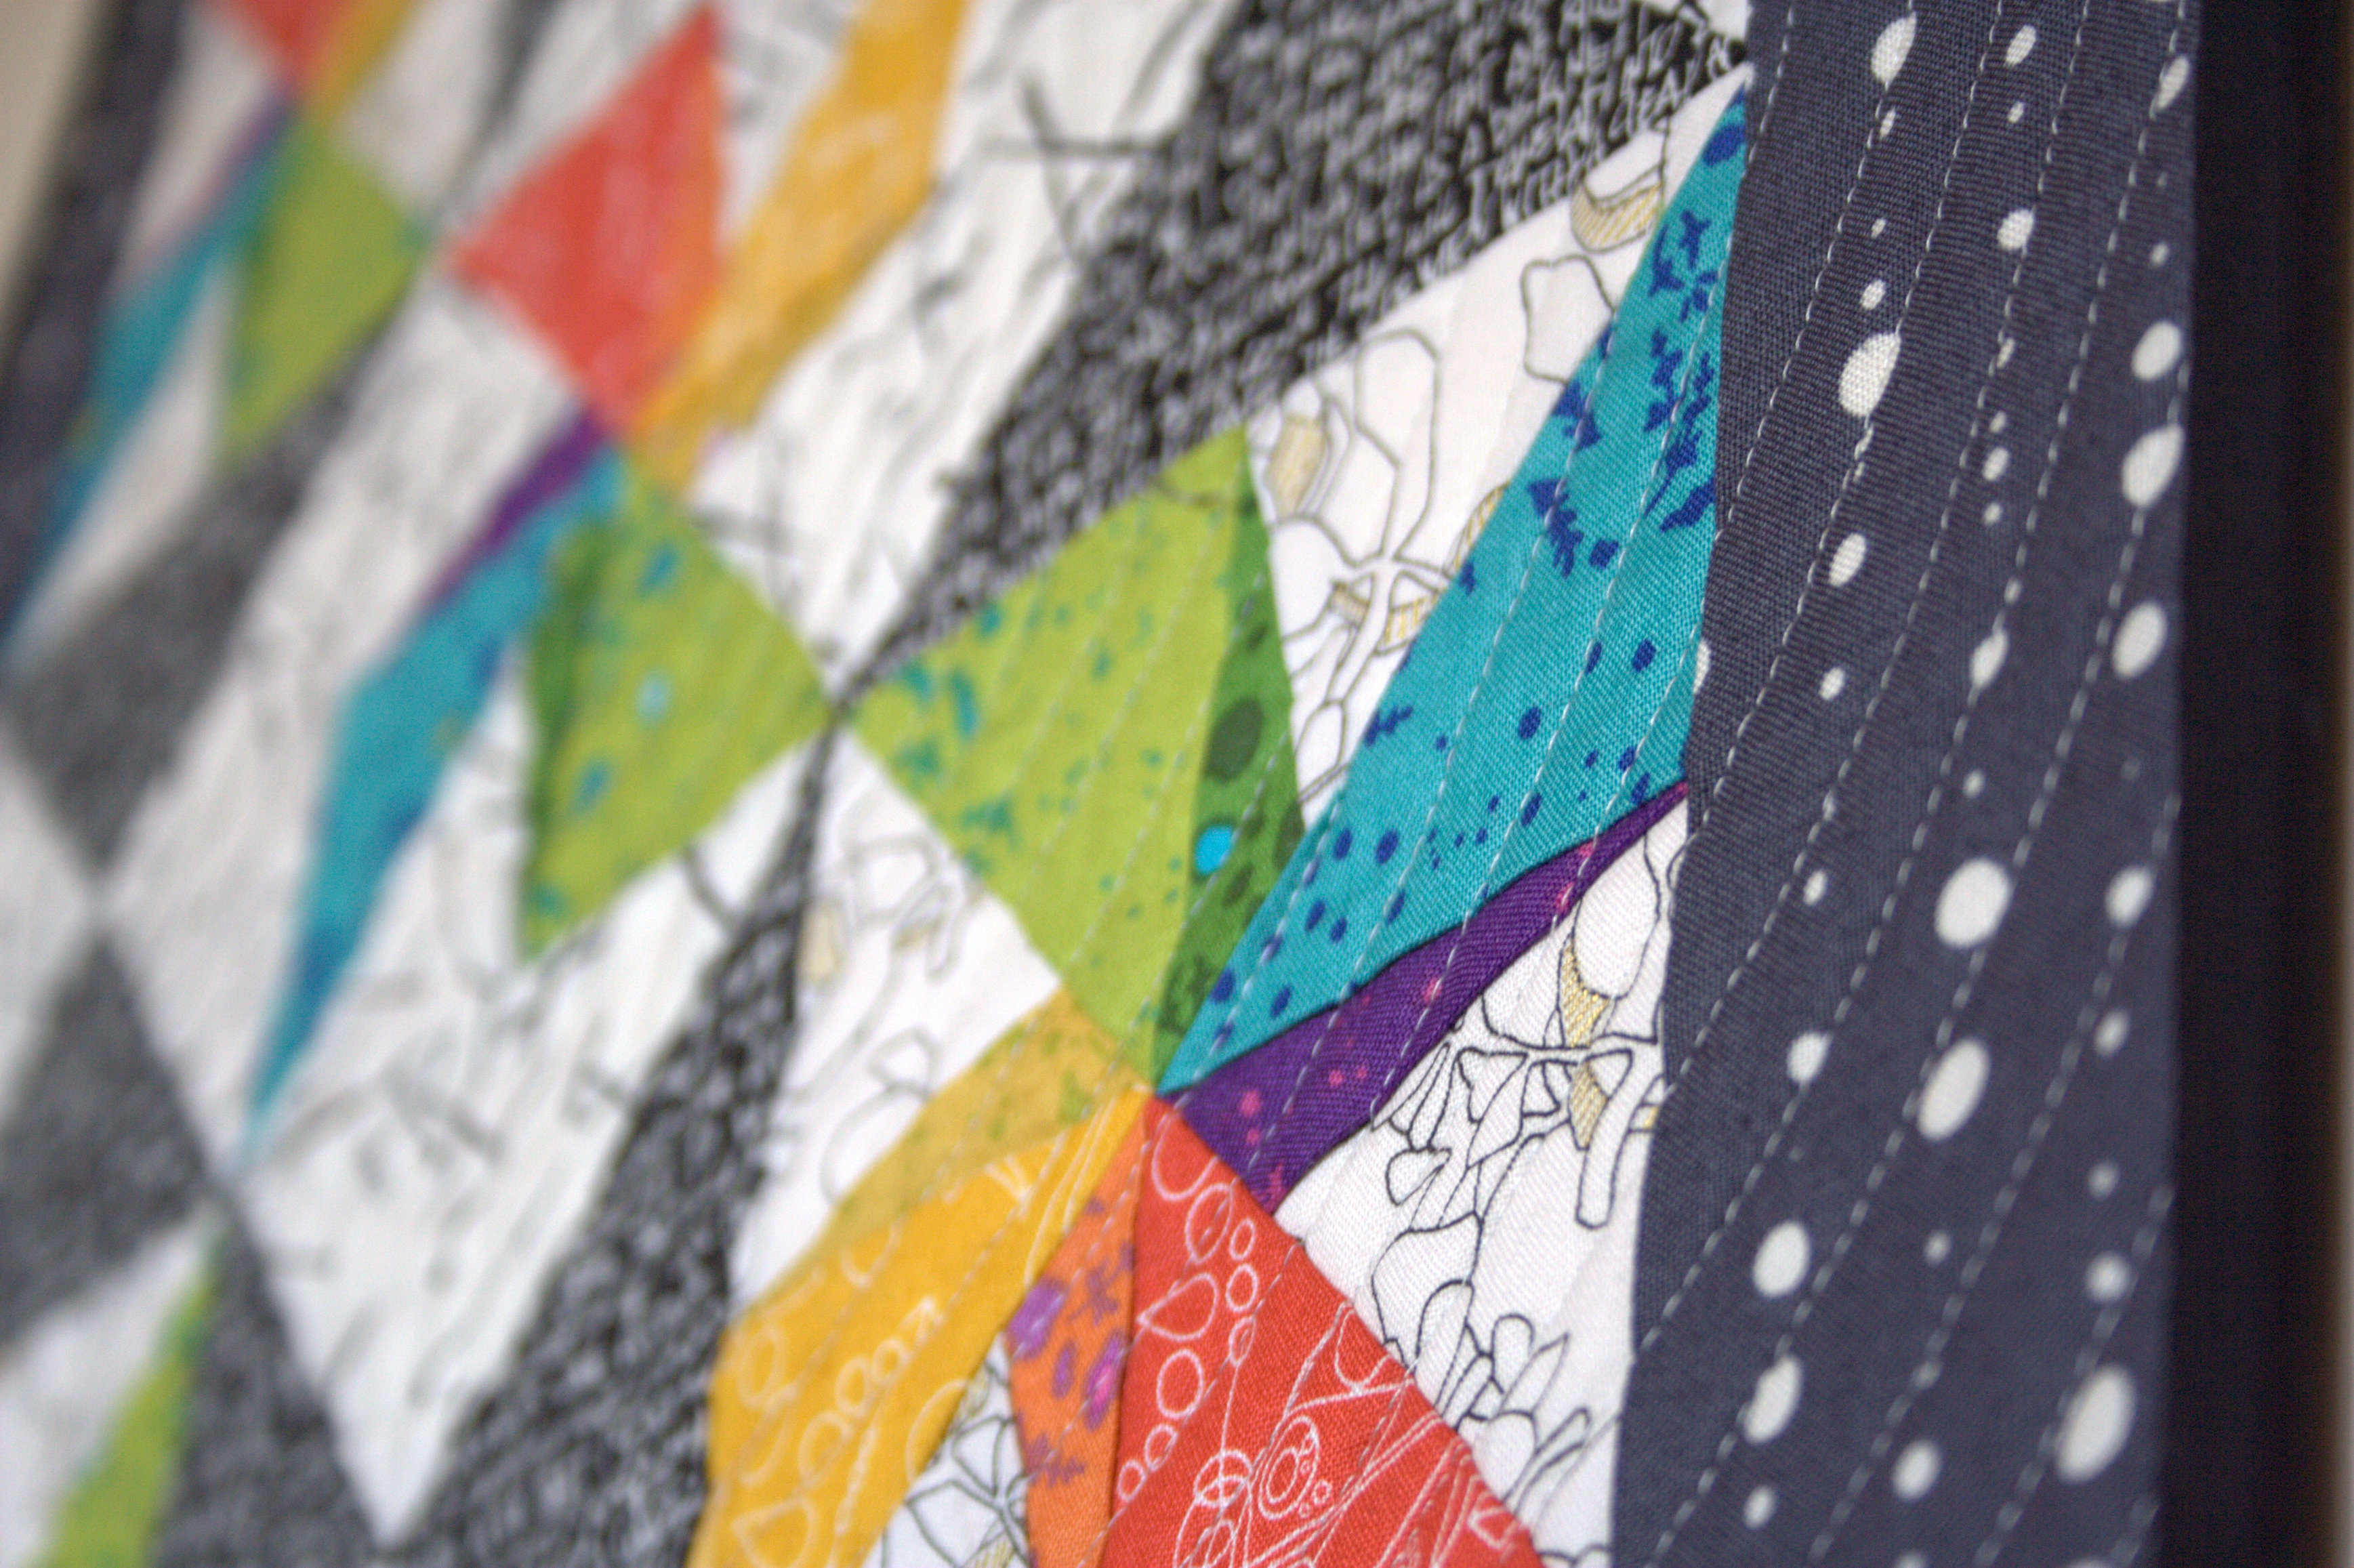
I realized that I didn’t take a single photo of the flimsy without the matching Aurifil thread on top, so I apologize! Then again, I don’t really apologize, since how gorgeous is that thread circle paired with the quilt top!?

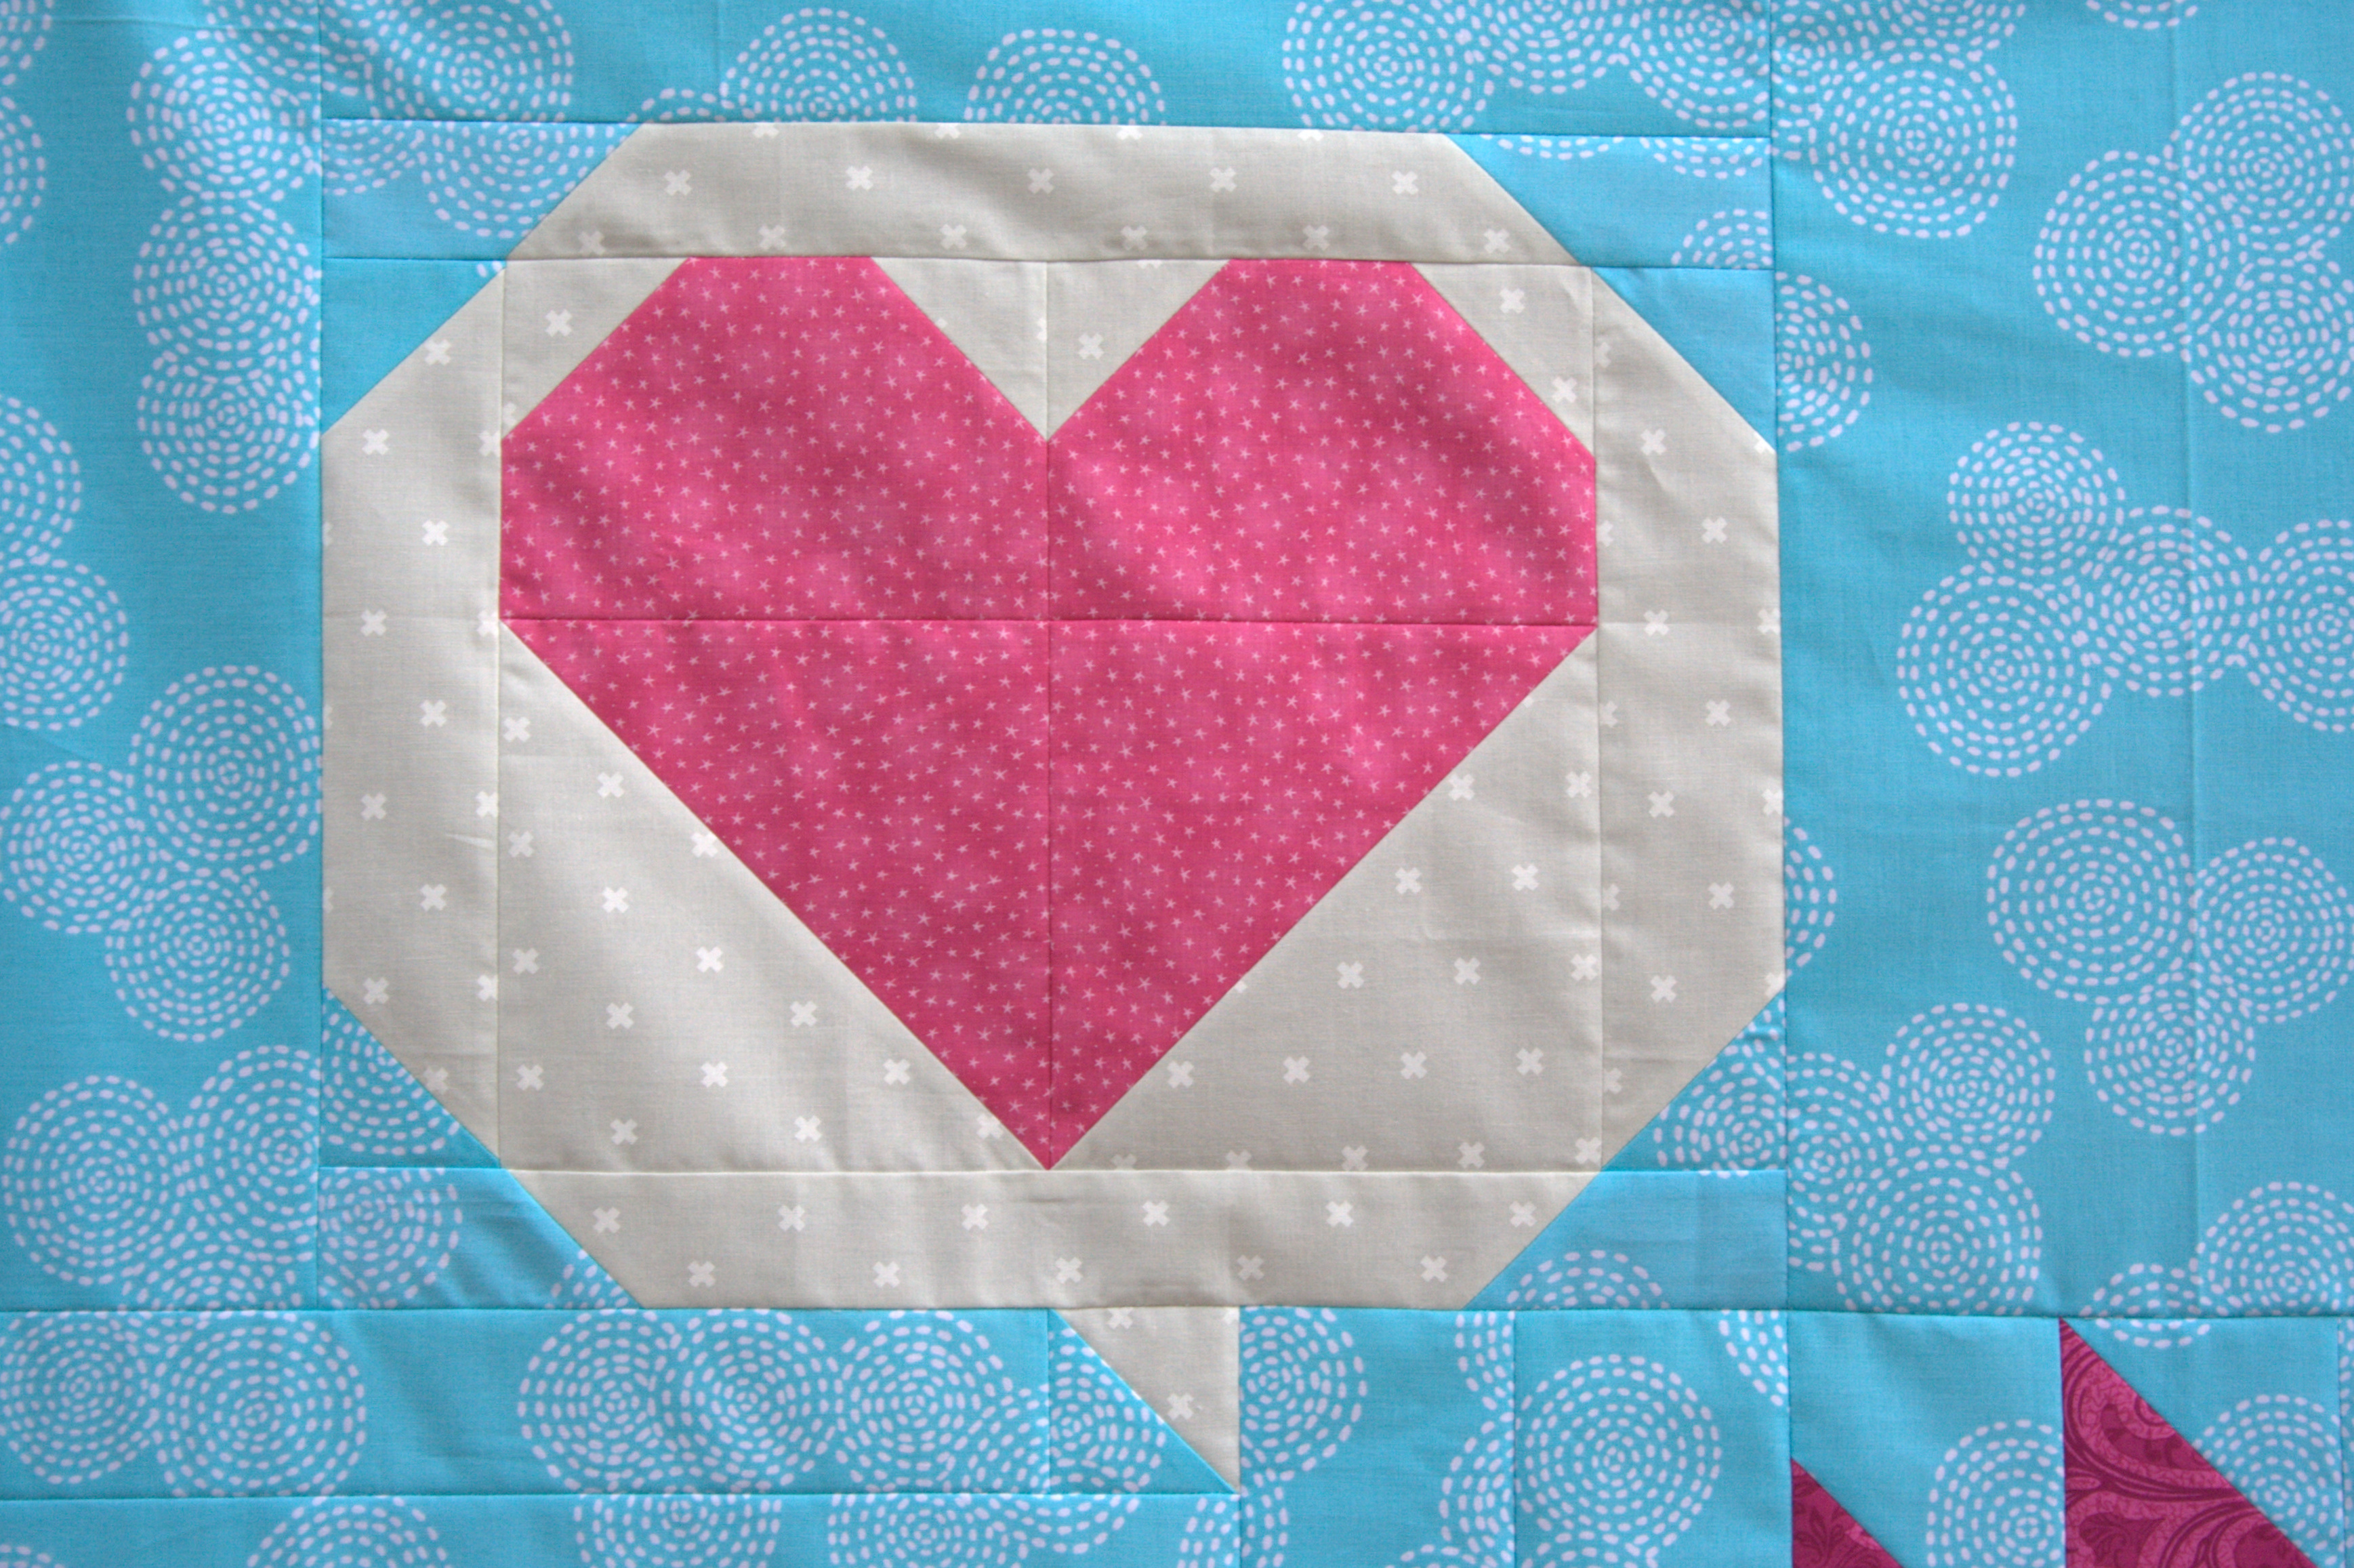
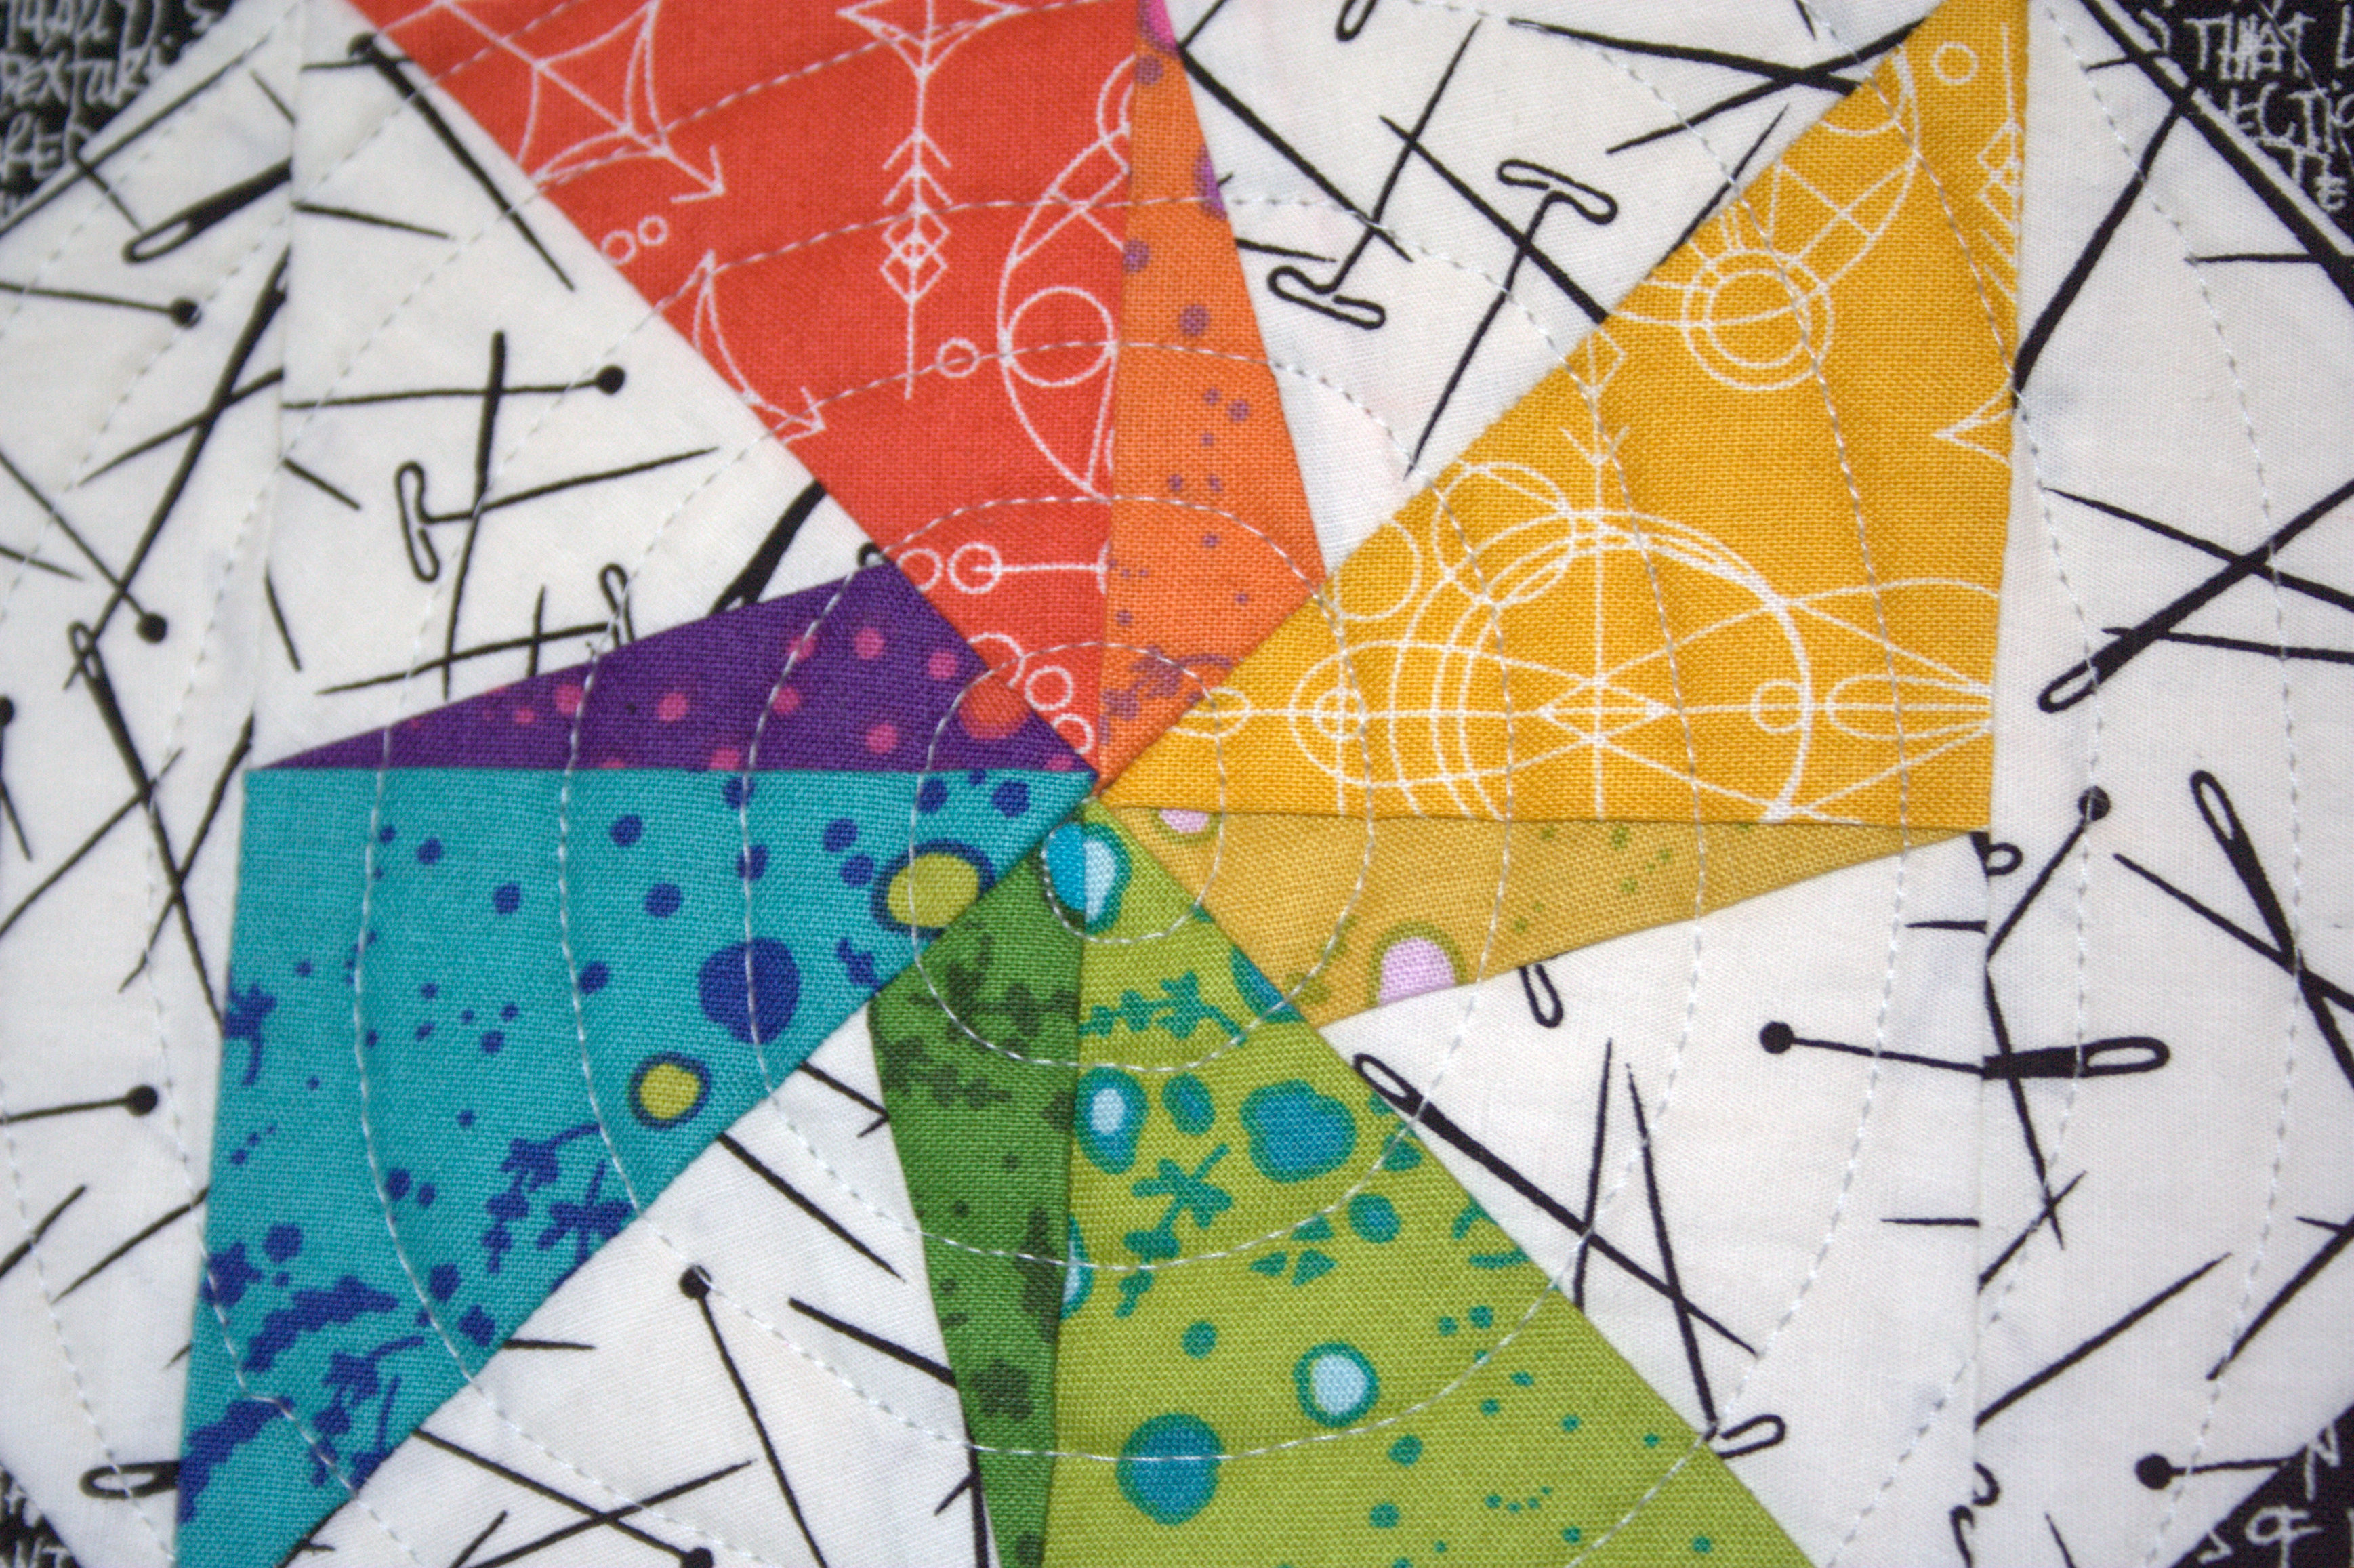
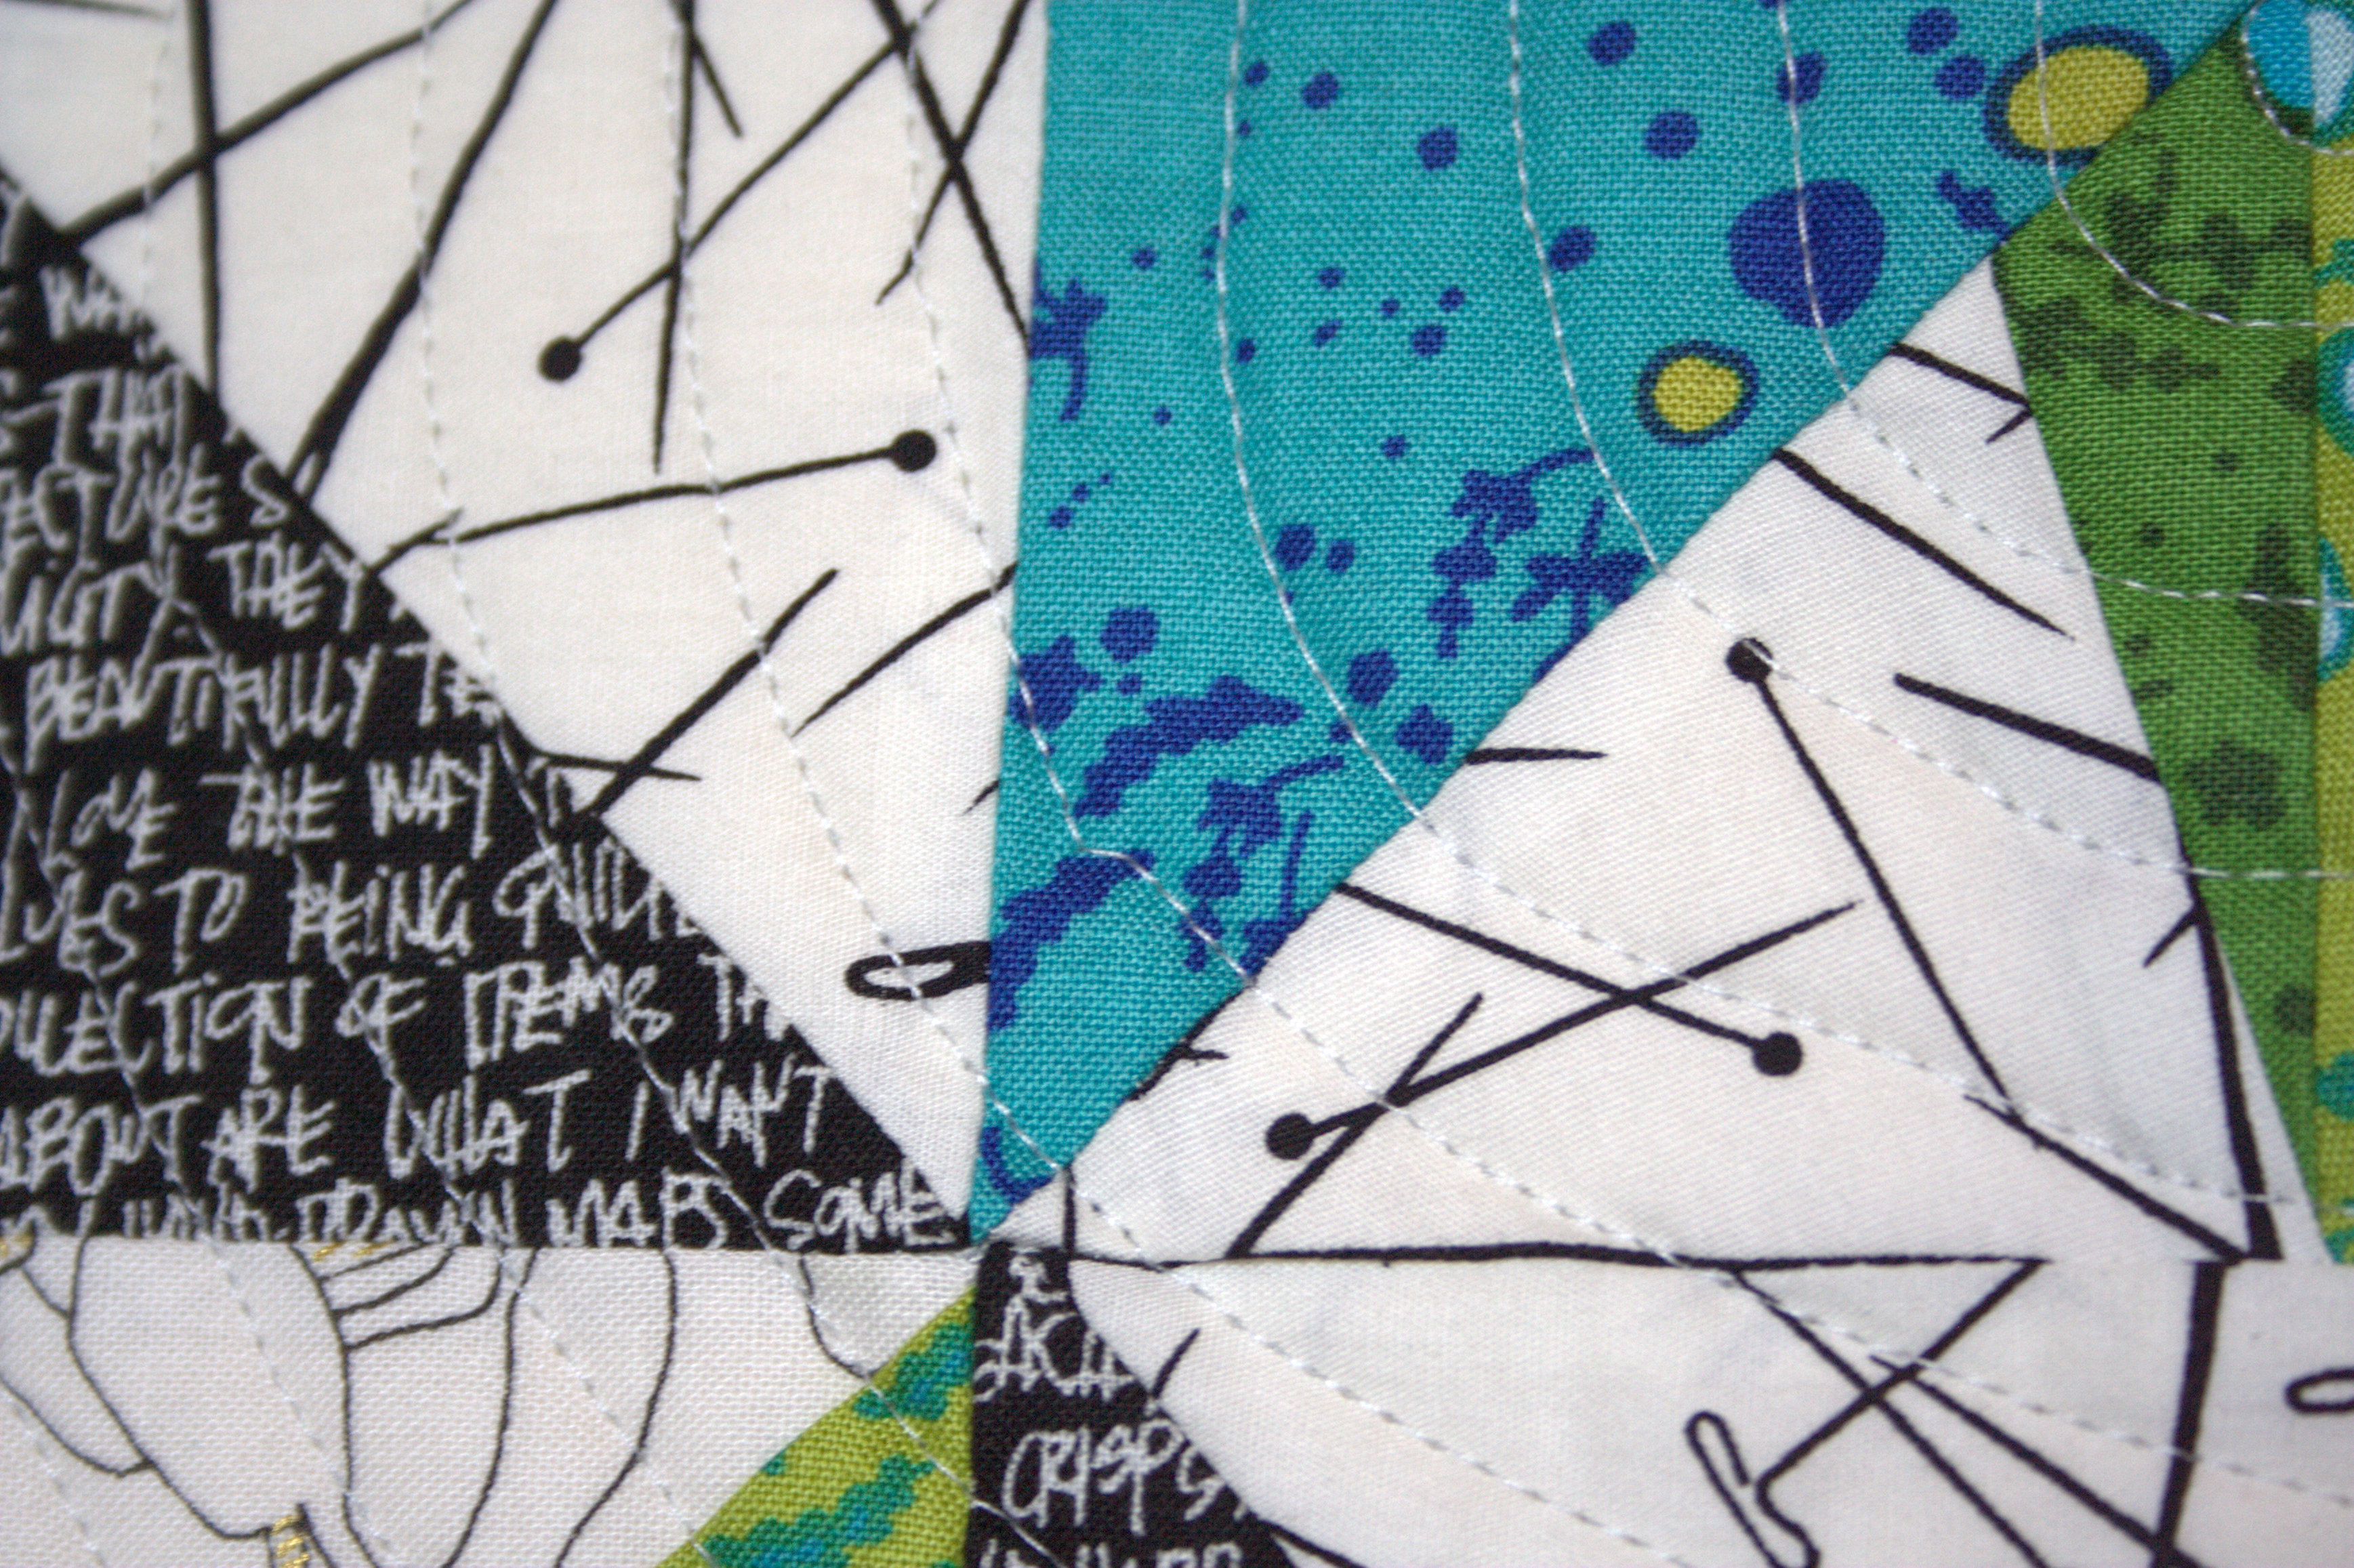
Ultimately, I opted to add some Carolyn Friedlander Architextures Crosshatch in Tangerine to balance out the yellow-orange section, and swapped out some of the more saturated magenta/red Alison Glass Sun Prints for her Feathers in Dahlia, and added in a pinky-orange Sketch section to finalize the magenta-red section. I’m really happy with the outcome.

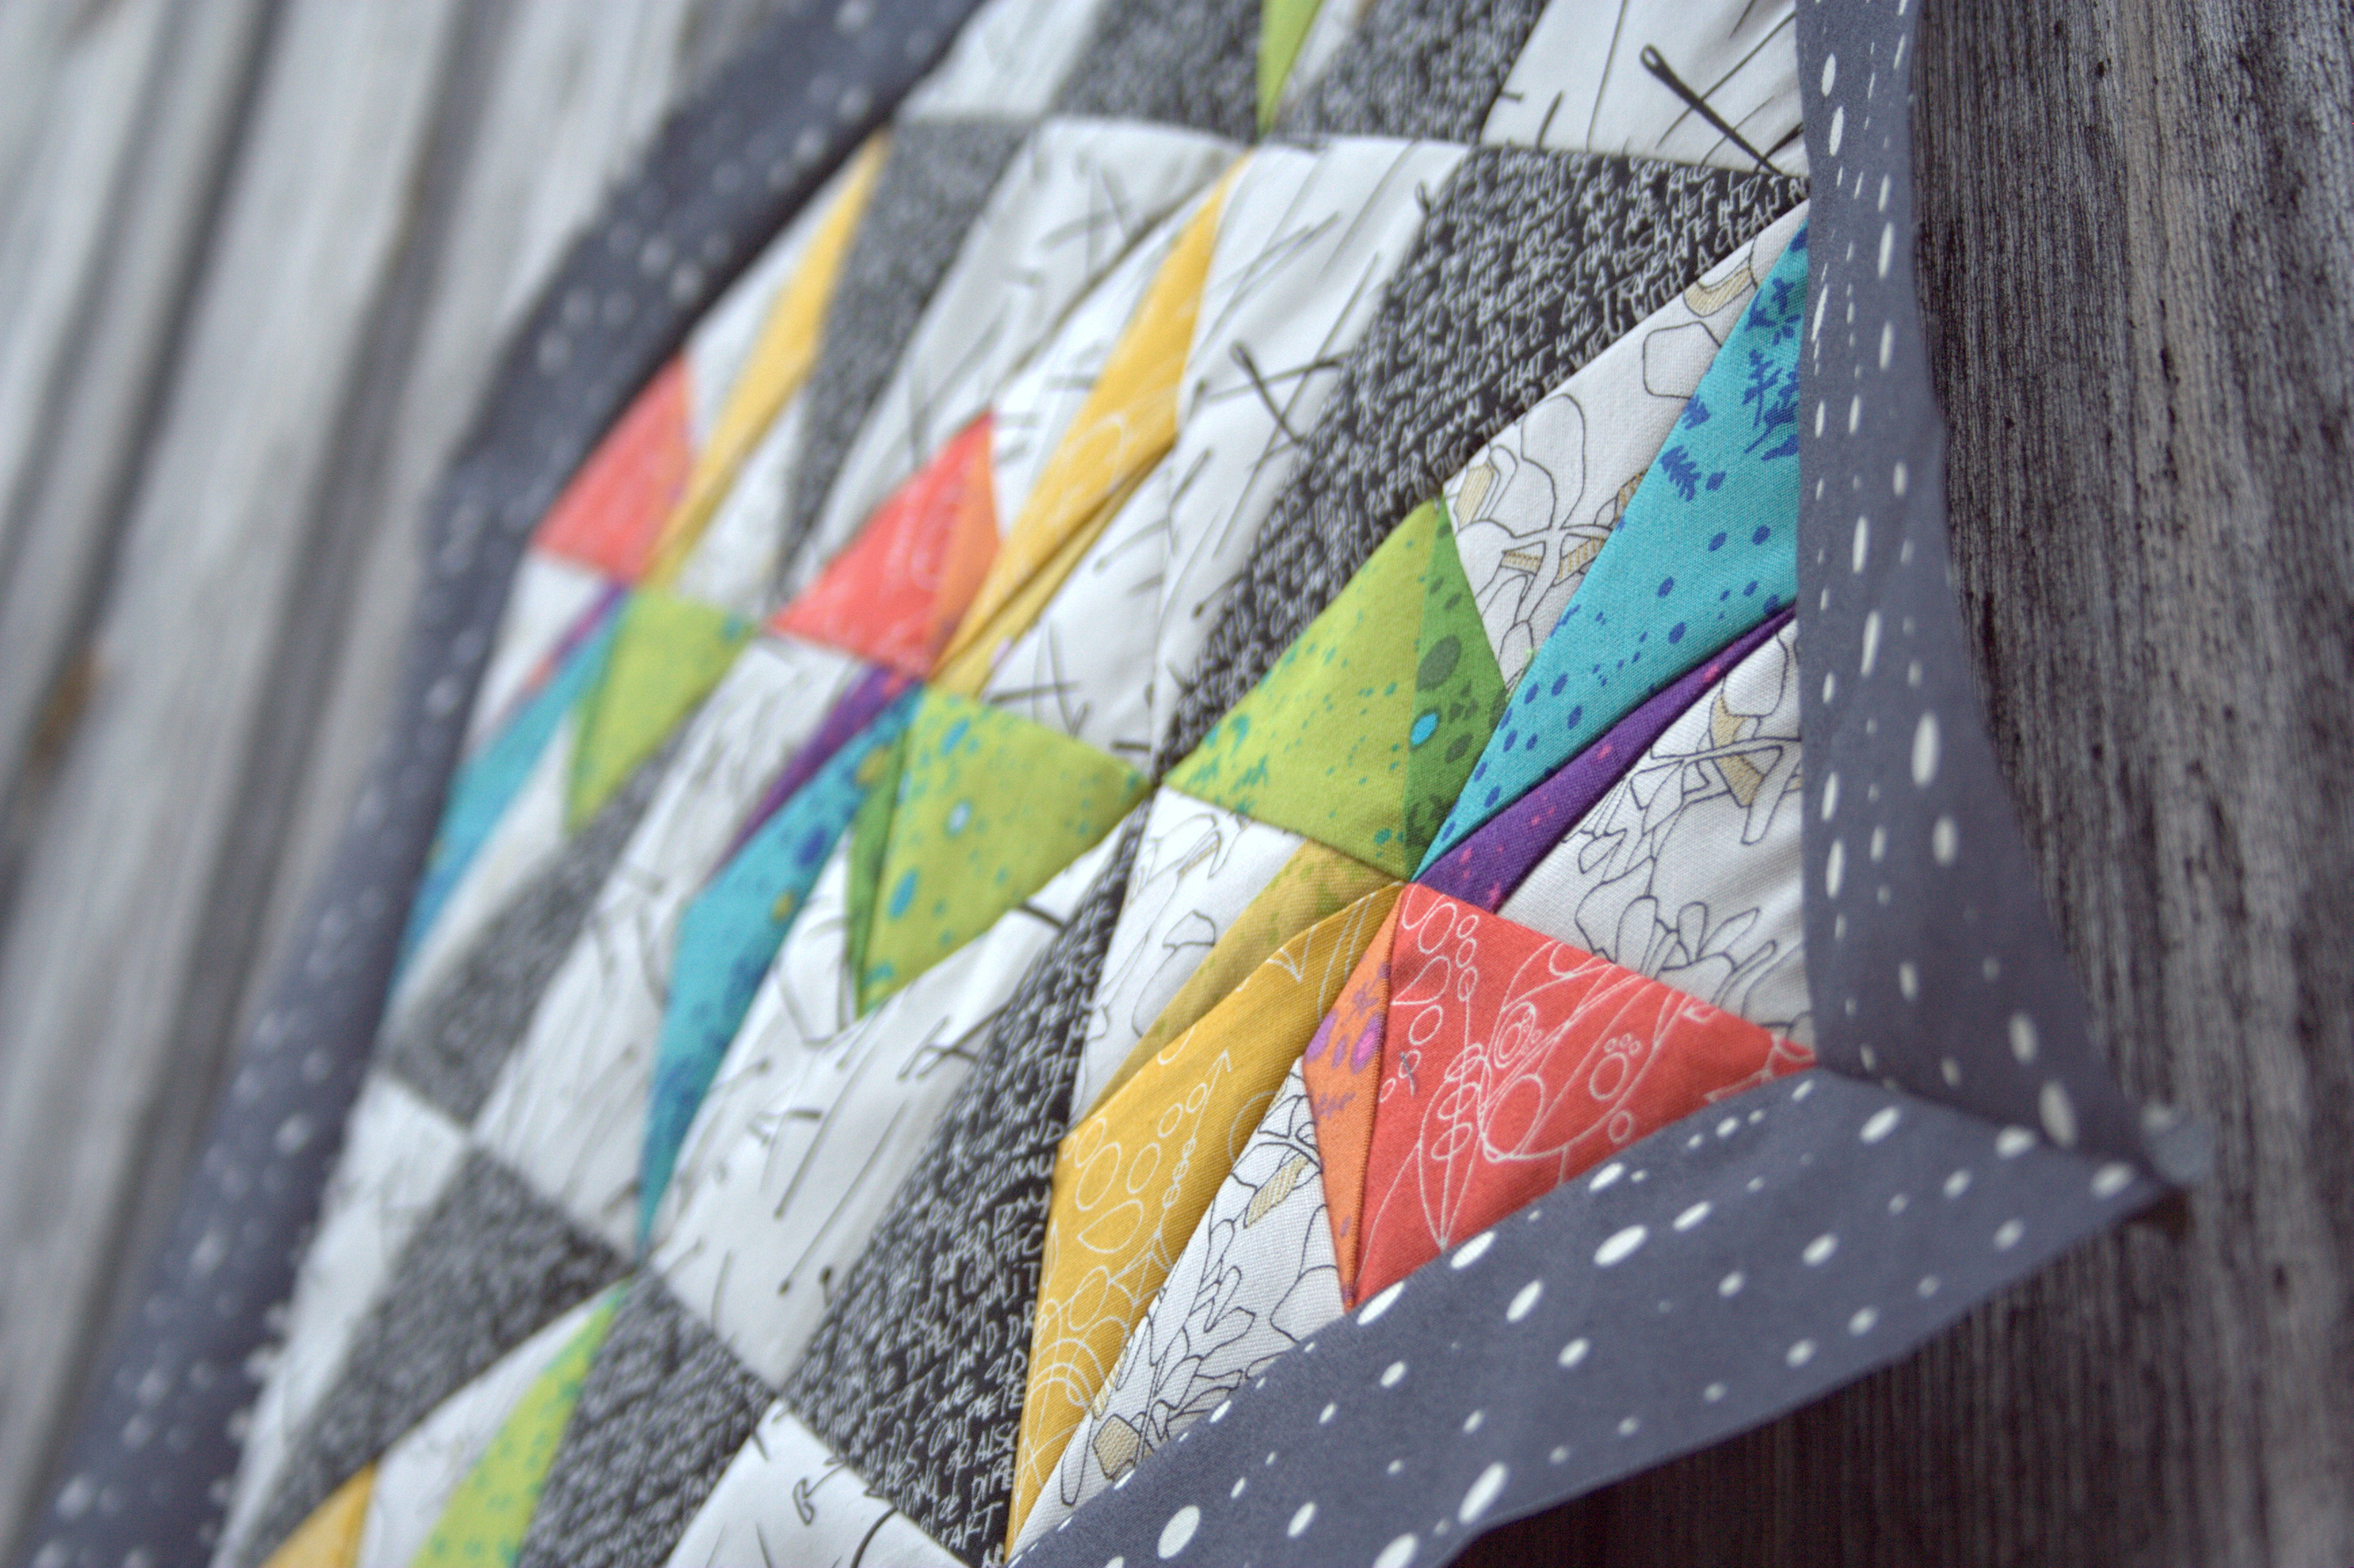
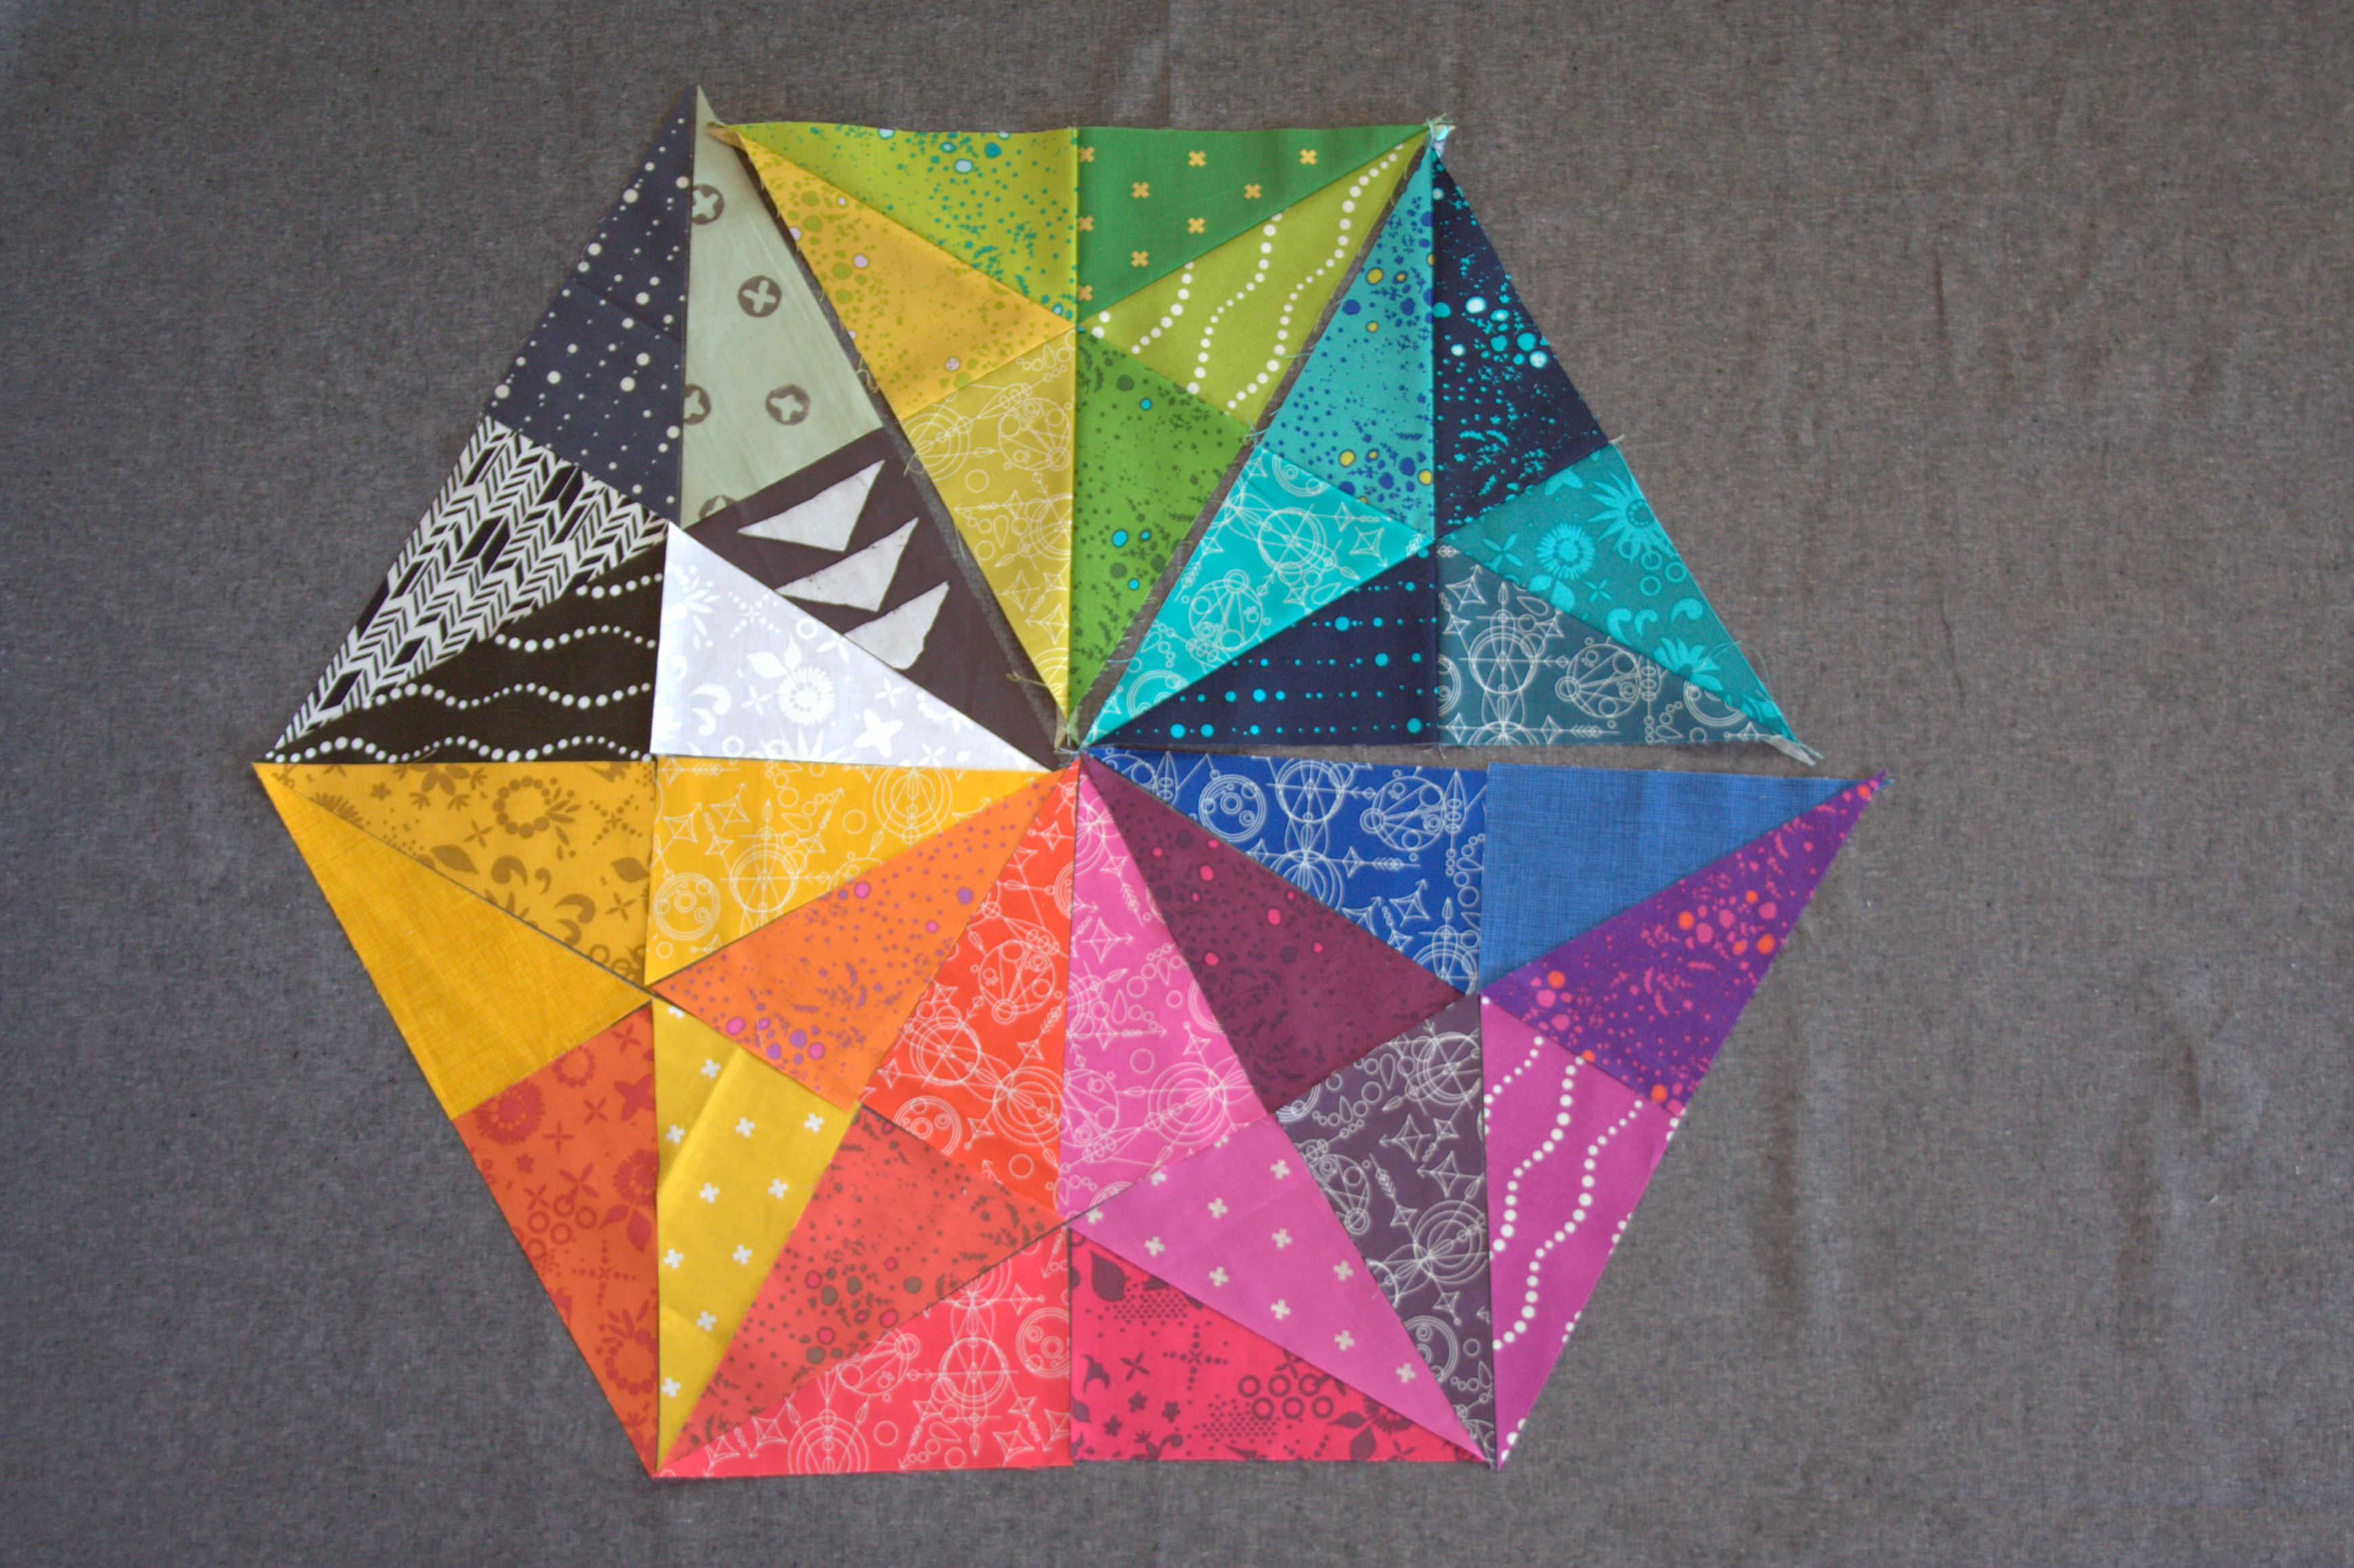
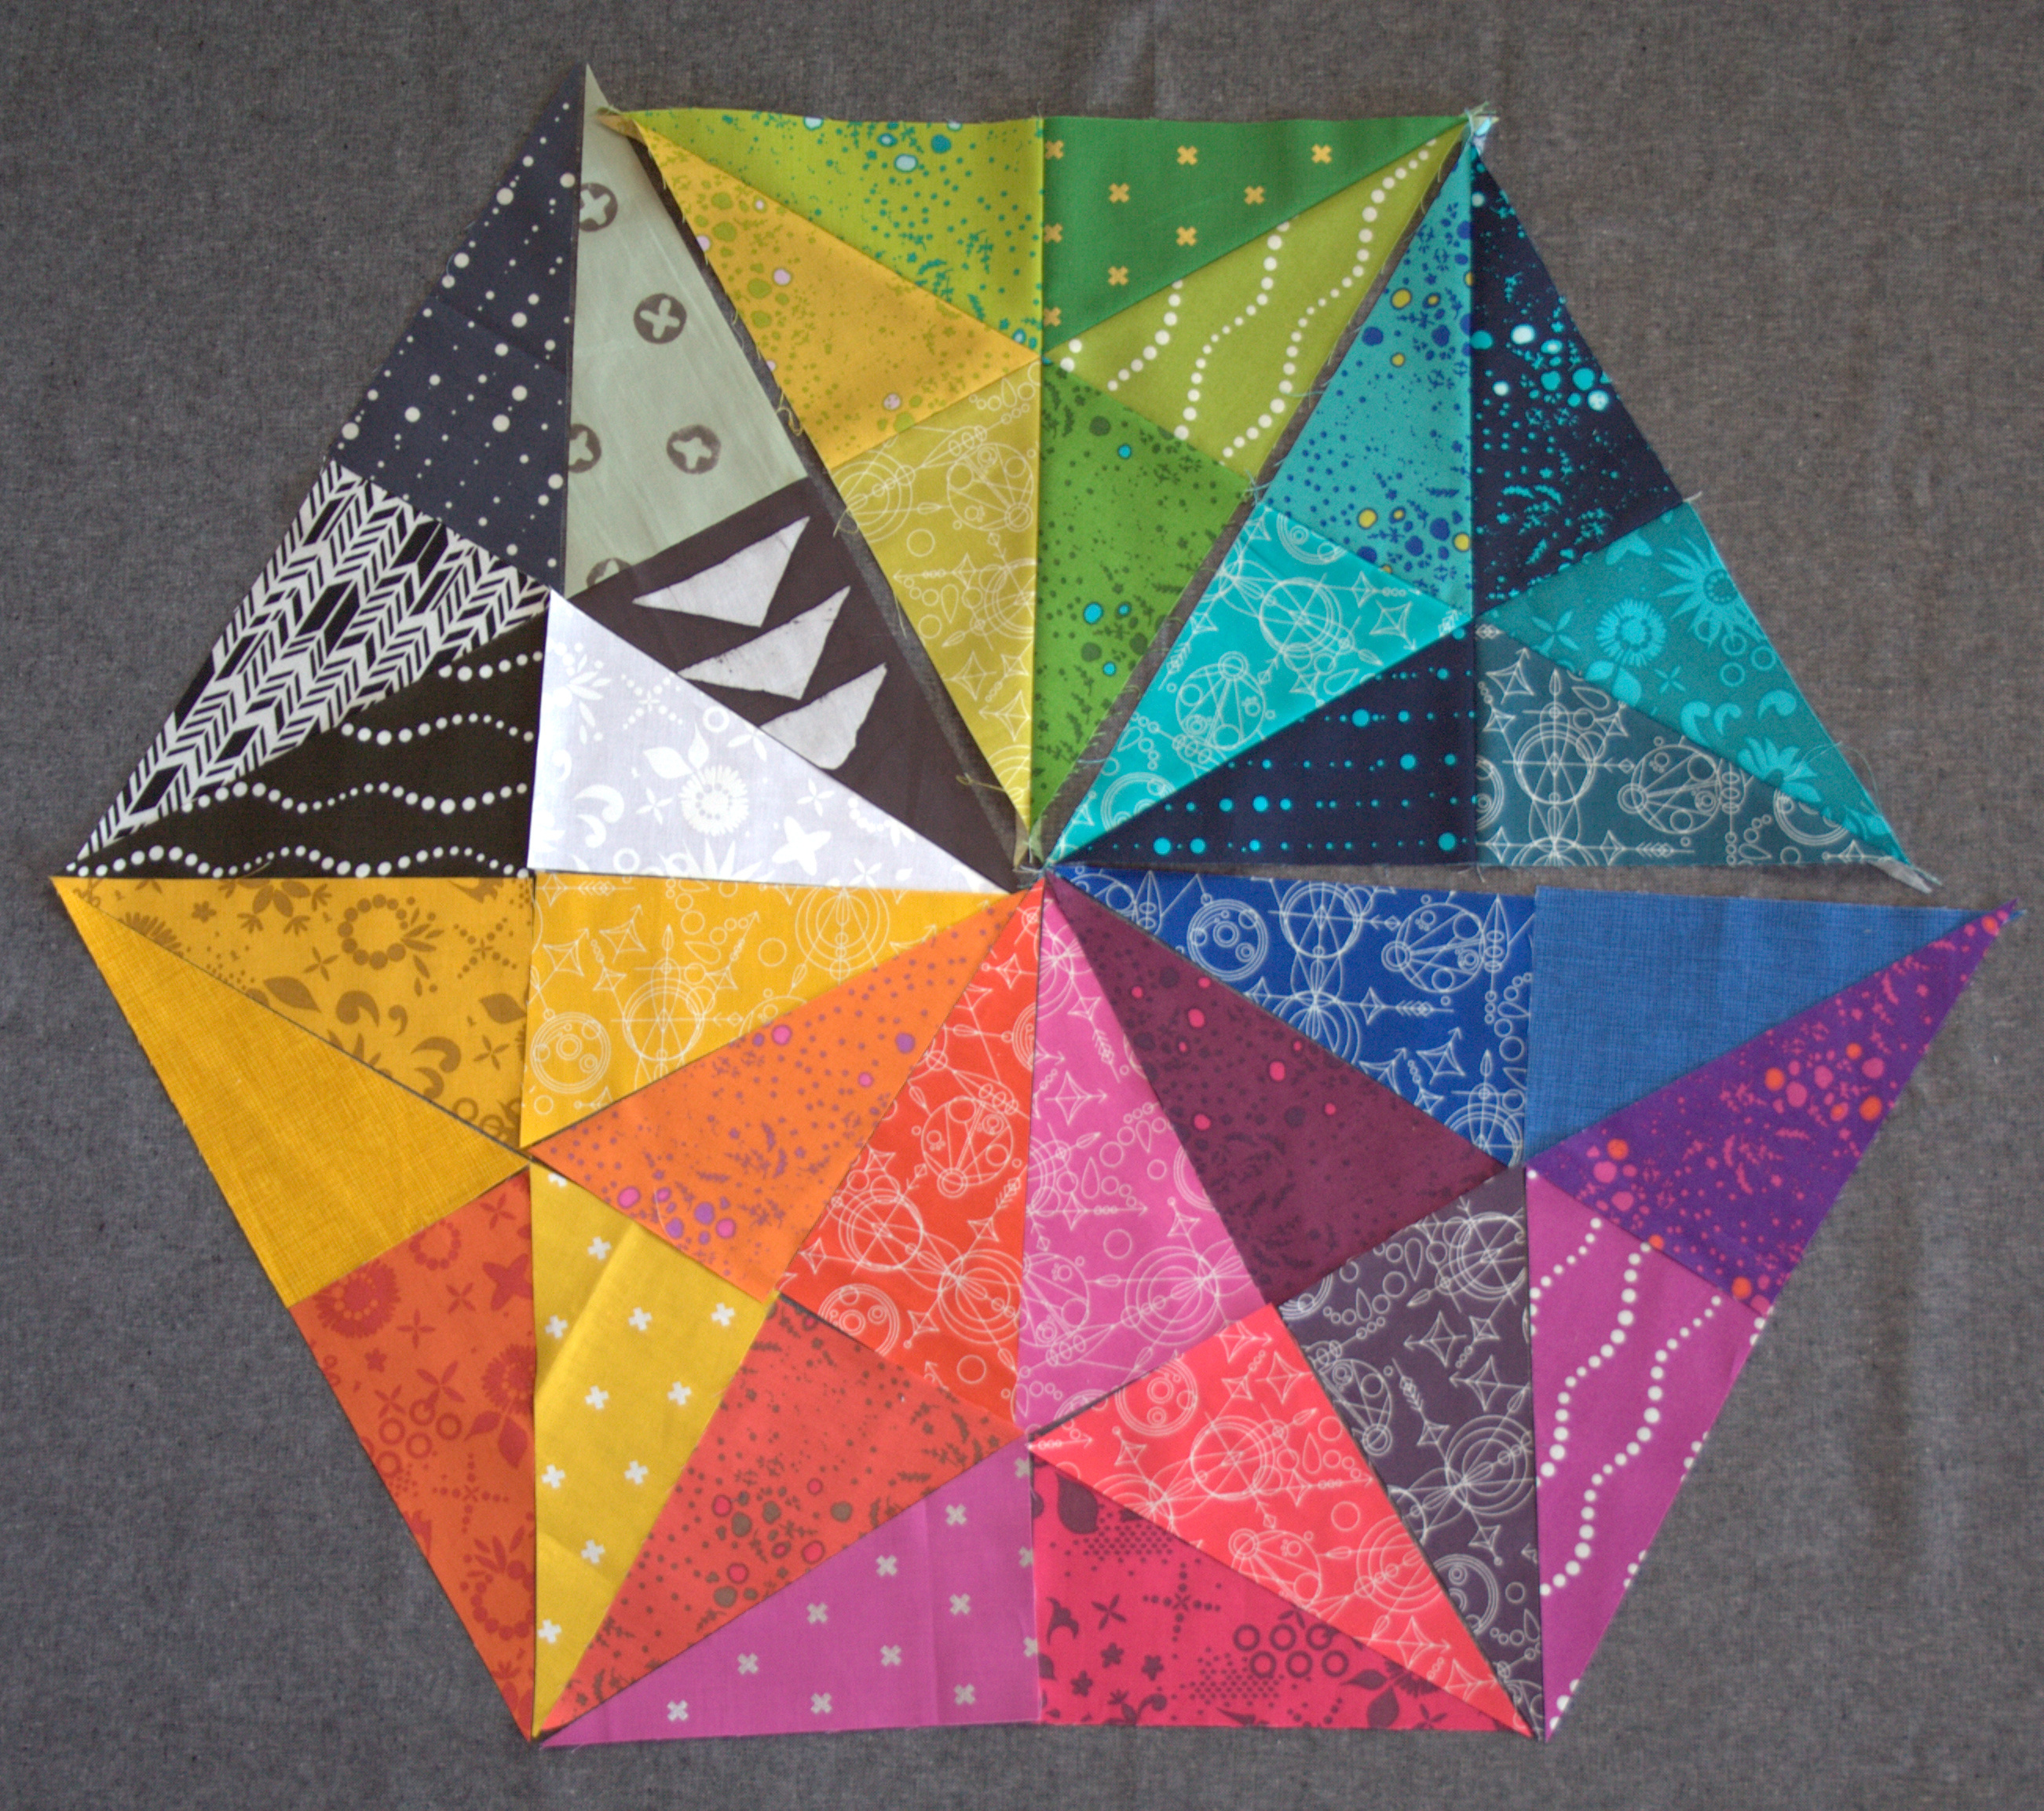
While photographing this mini, I realized that when viewed from different perspectives, the entire look of the quilt changes. Here is the exact same photo from above, just taken upside-down (or right-side-up?):

prismatic medallion flimsy finish and matching aurifil thread
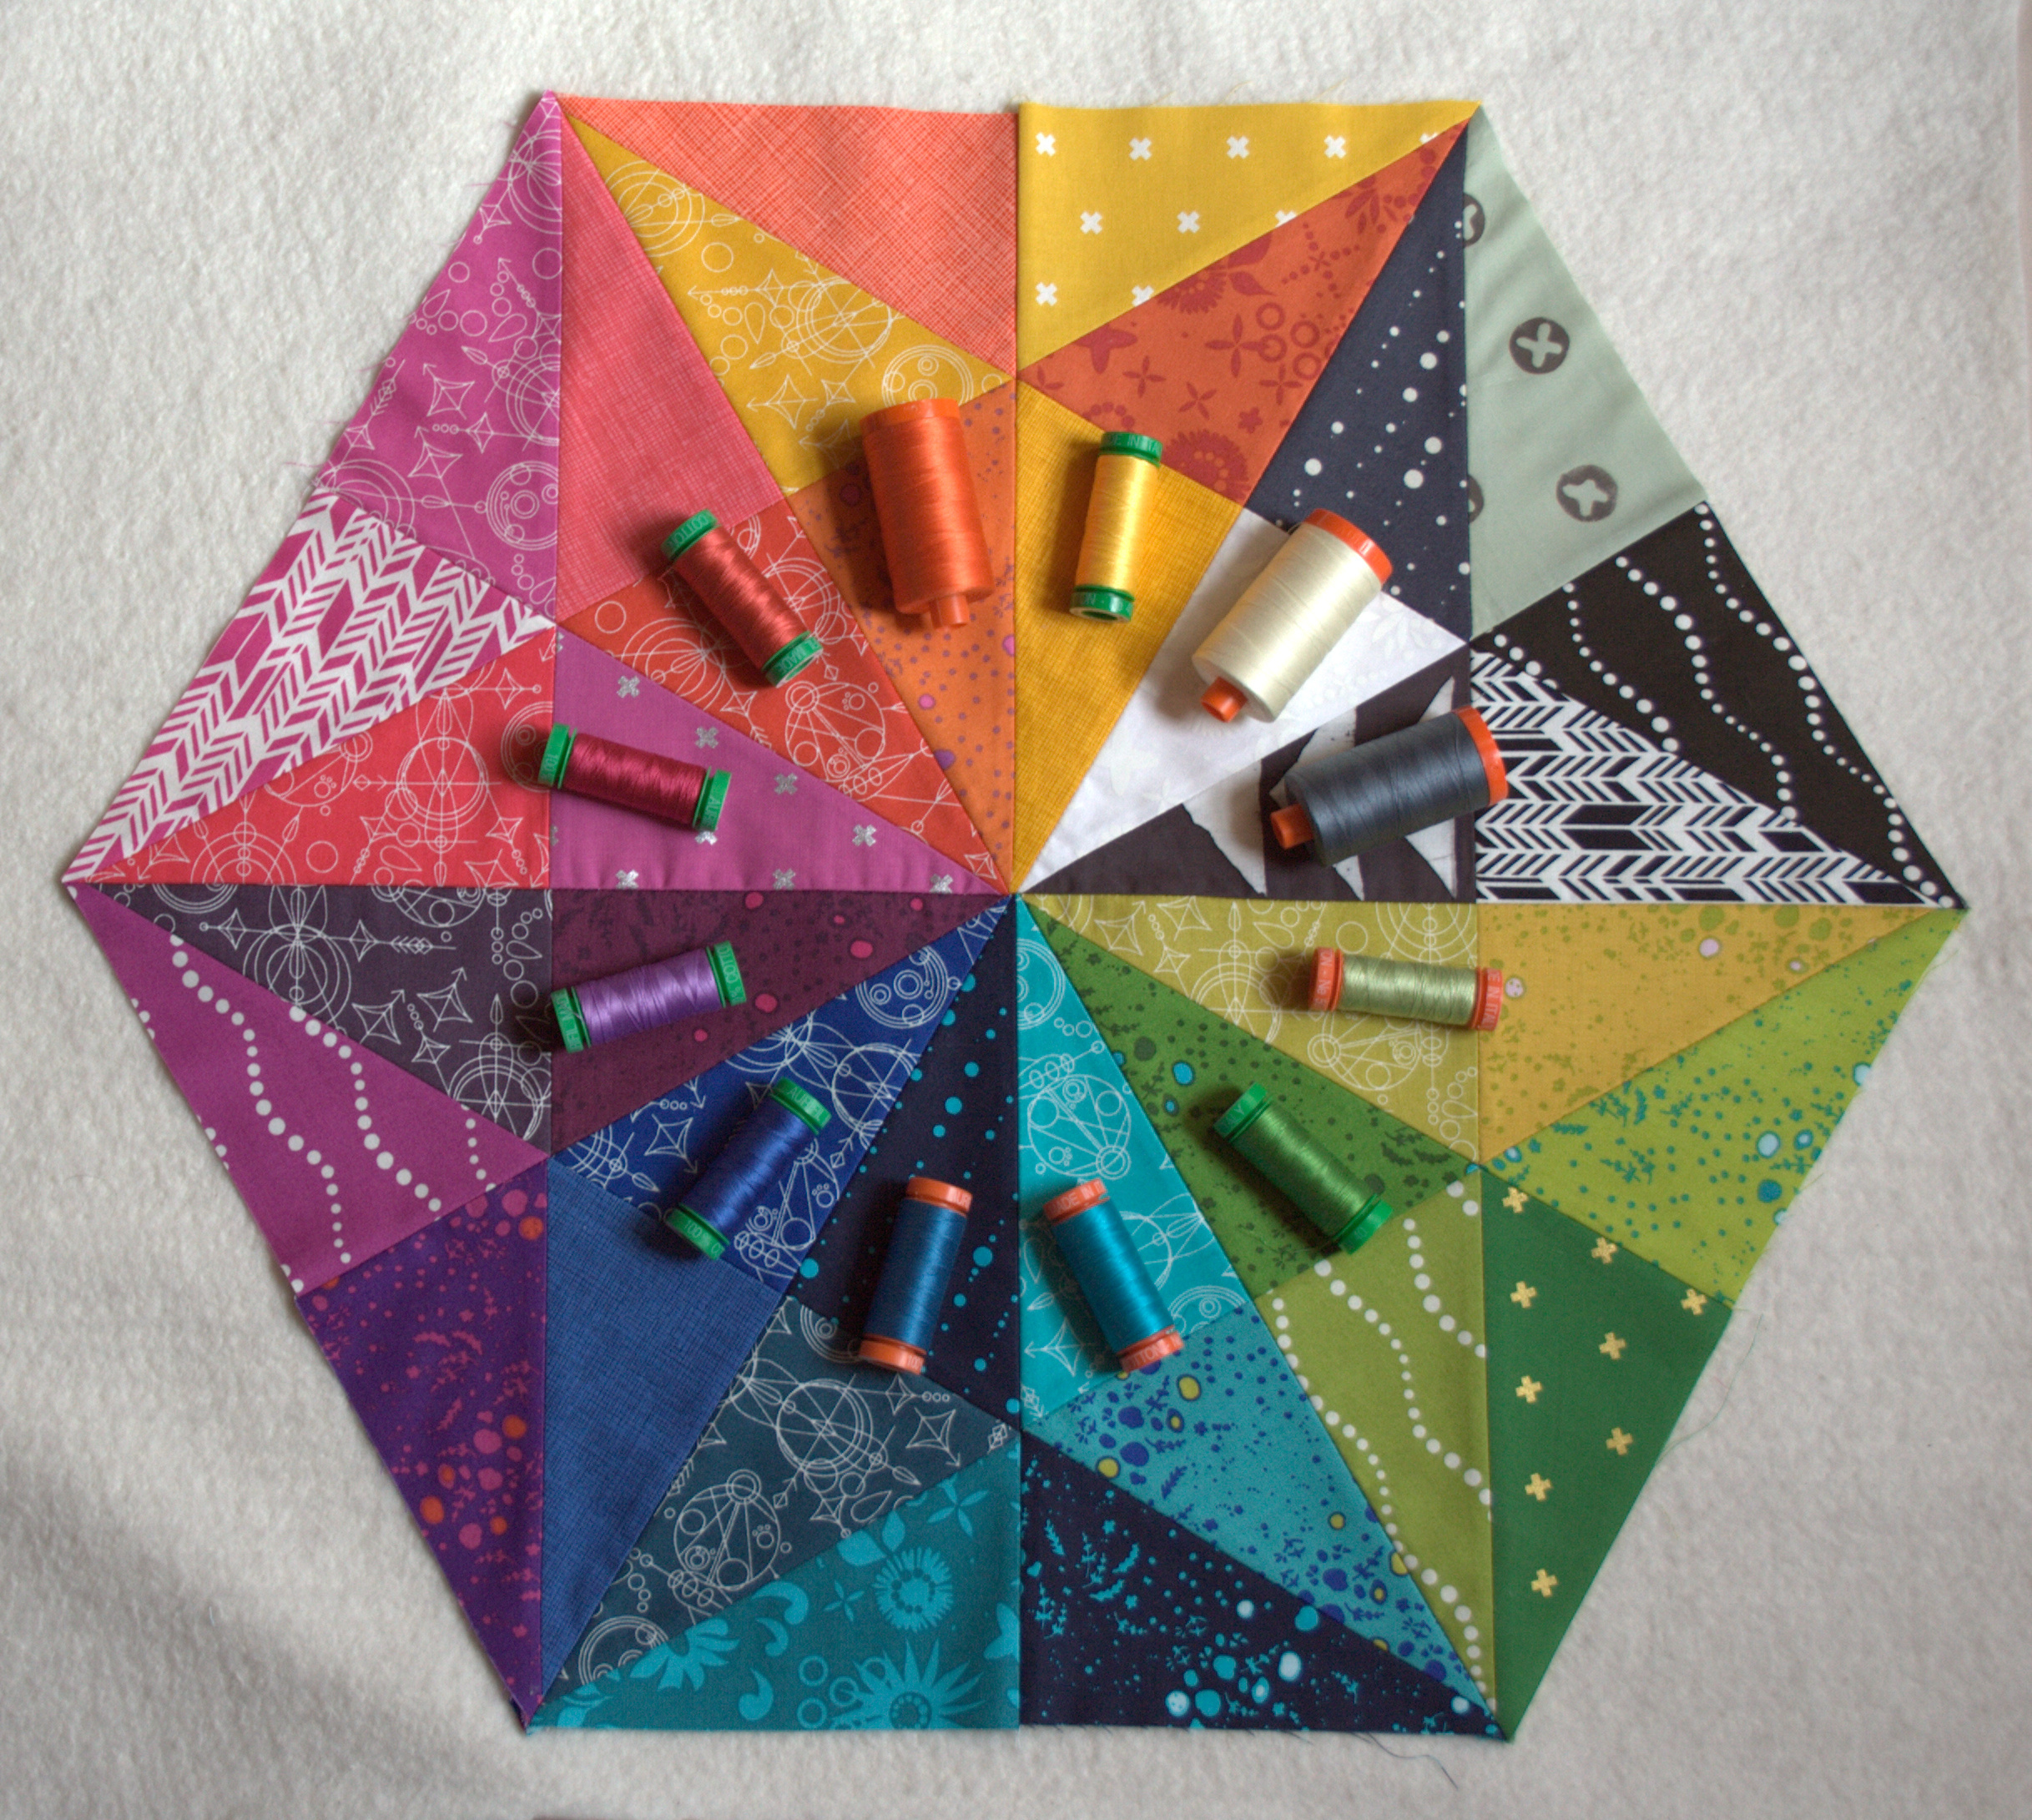
Here they are side by side, with a wide white border so that you can view each individually.

AG Prismatic Medallion compare

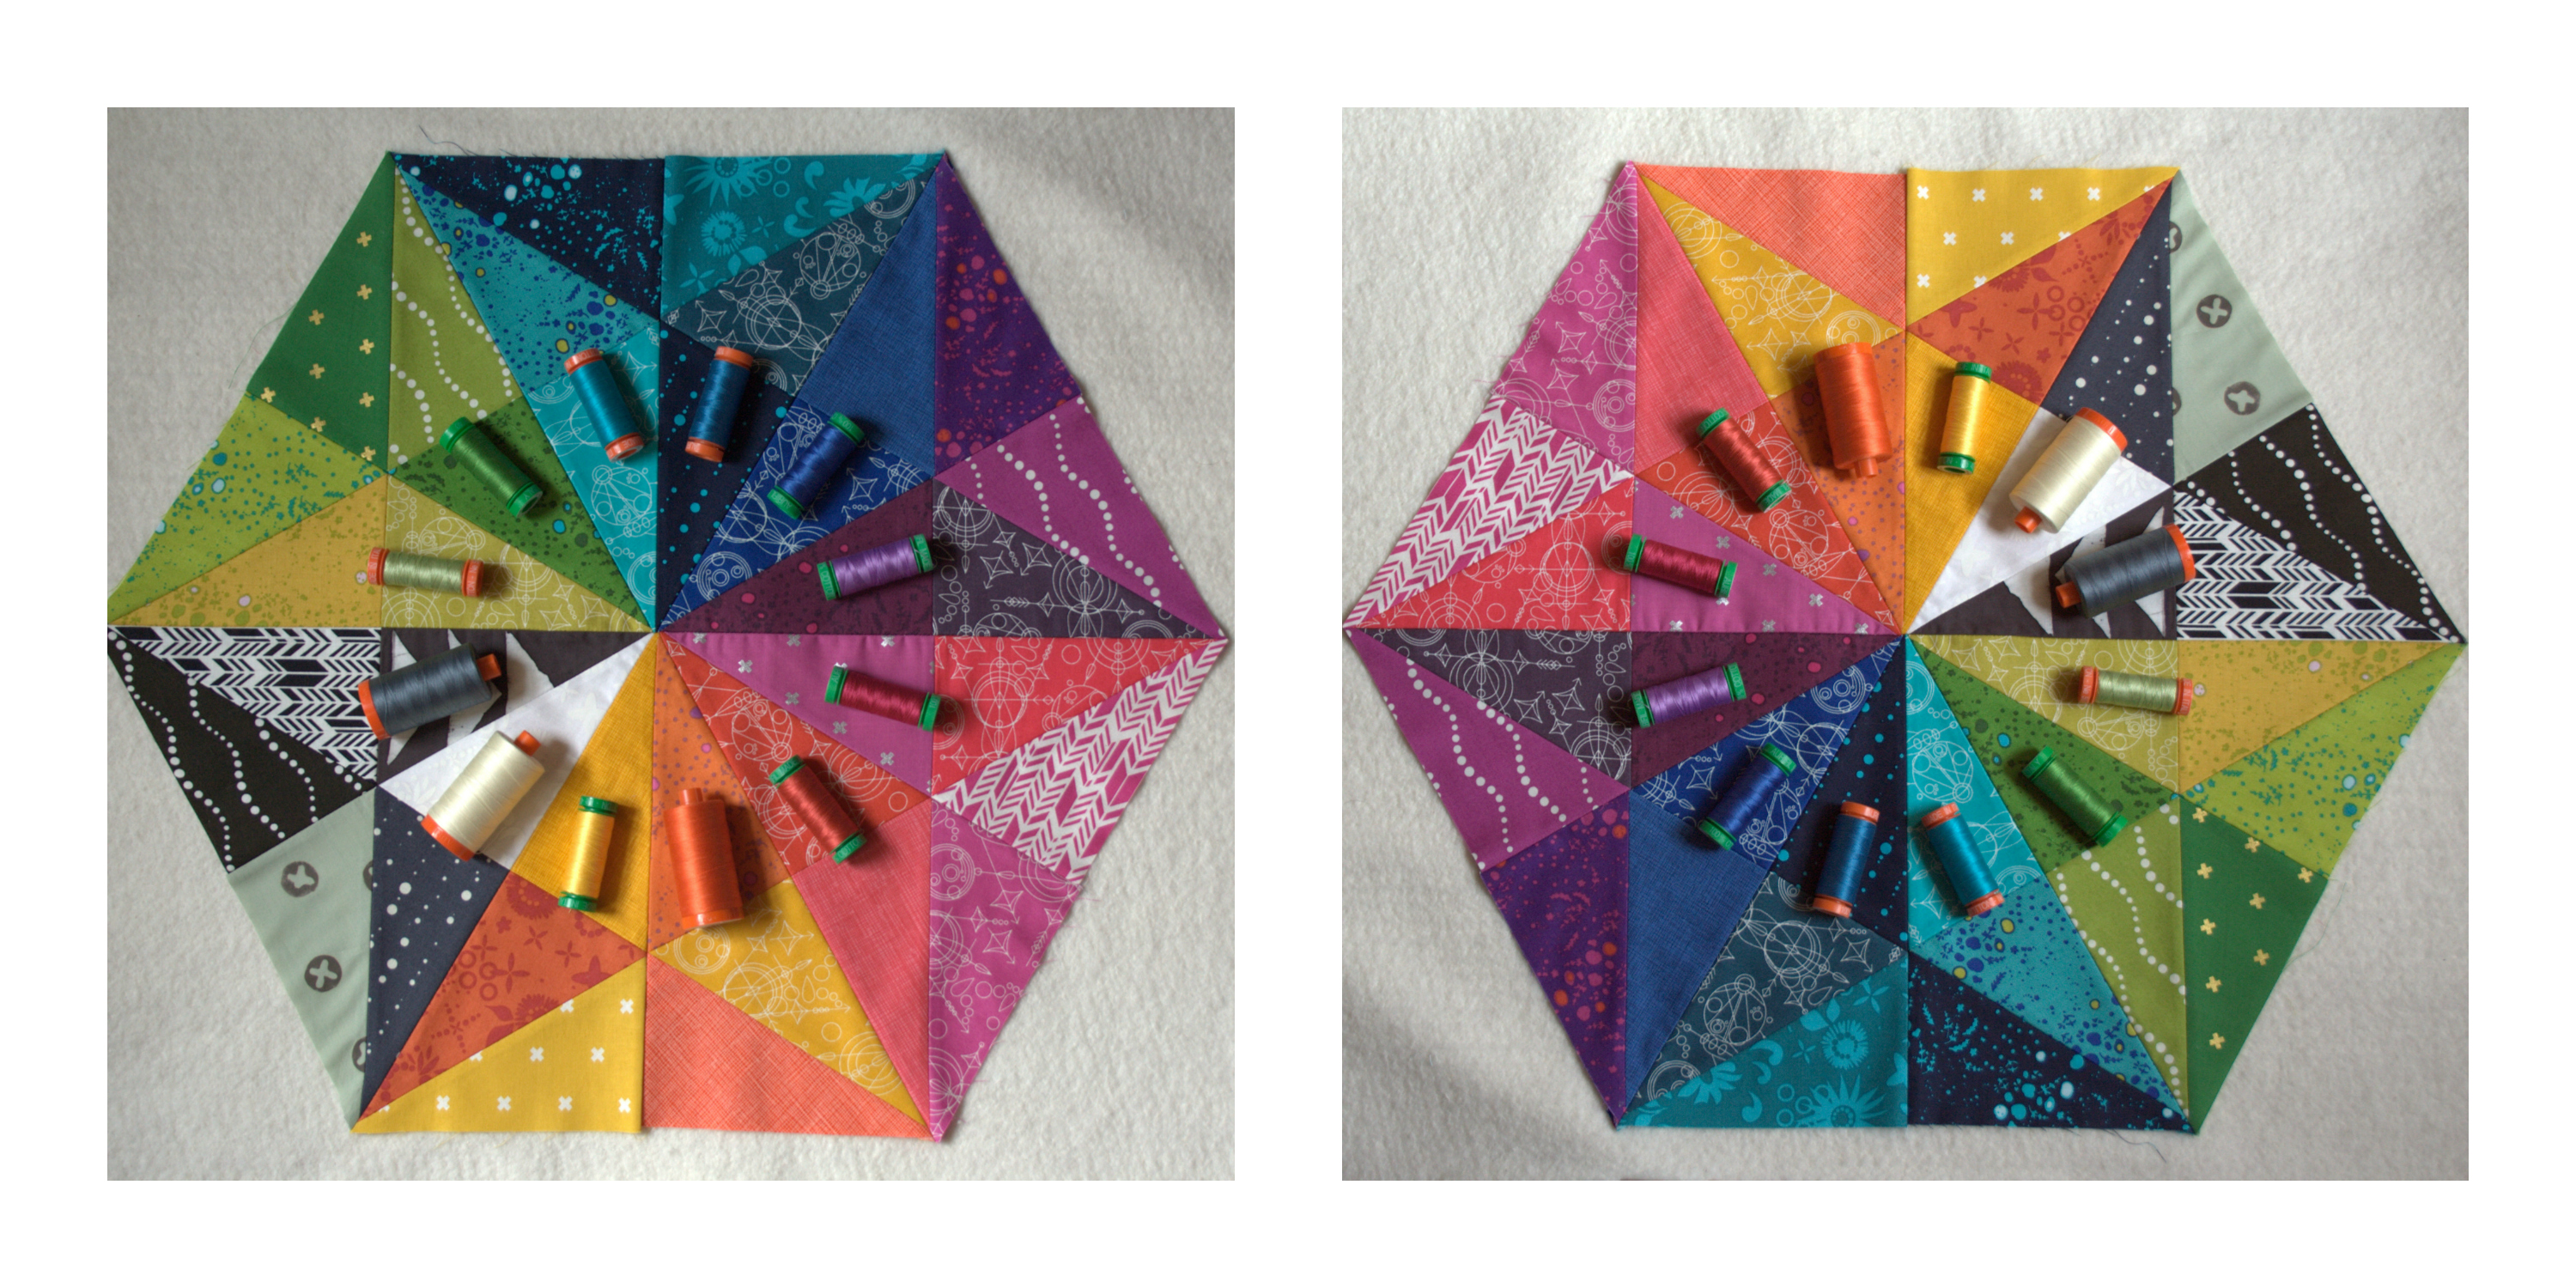
Is it just me, or do they look completely different depending on what side you call the top? For this reason, I think I will hold off on attaching a hanging sleeve to this mini before mailing it off to my Alison Glass Mini Quilt Swap partner. That way, while it means they will need to handle hanging “hardware”, they can decide what aesthetic view they prefer.

AG Prismatic Medallion compare

AG Prismatic Medallion compare
Aurifil fairy circle

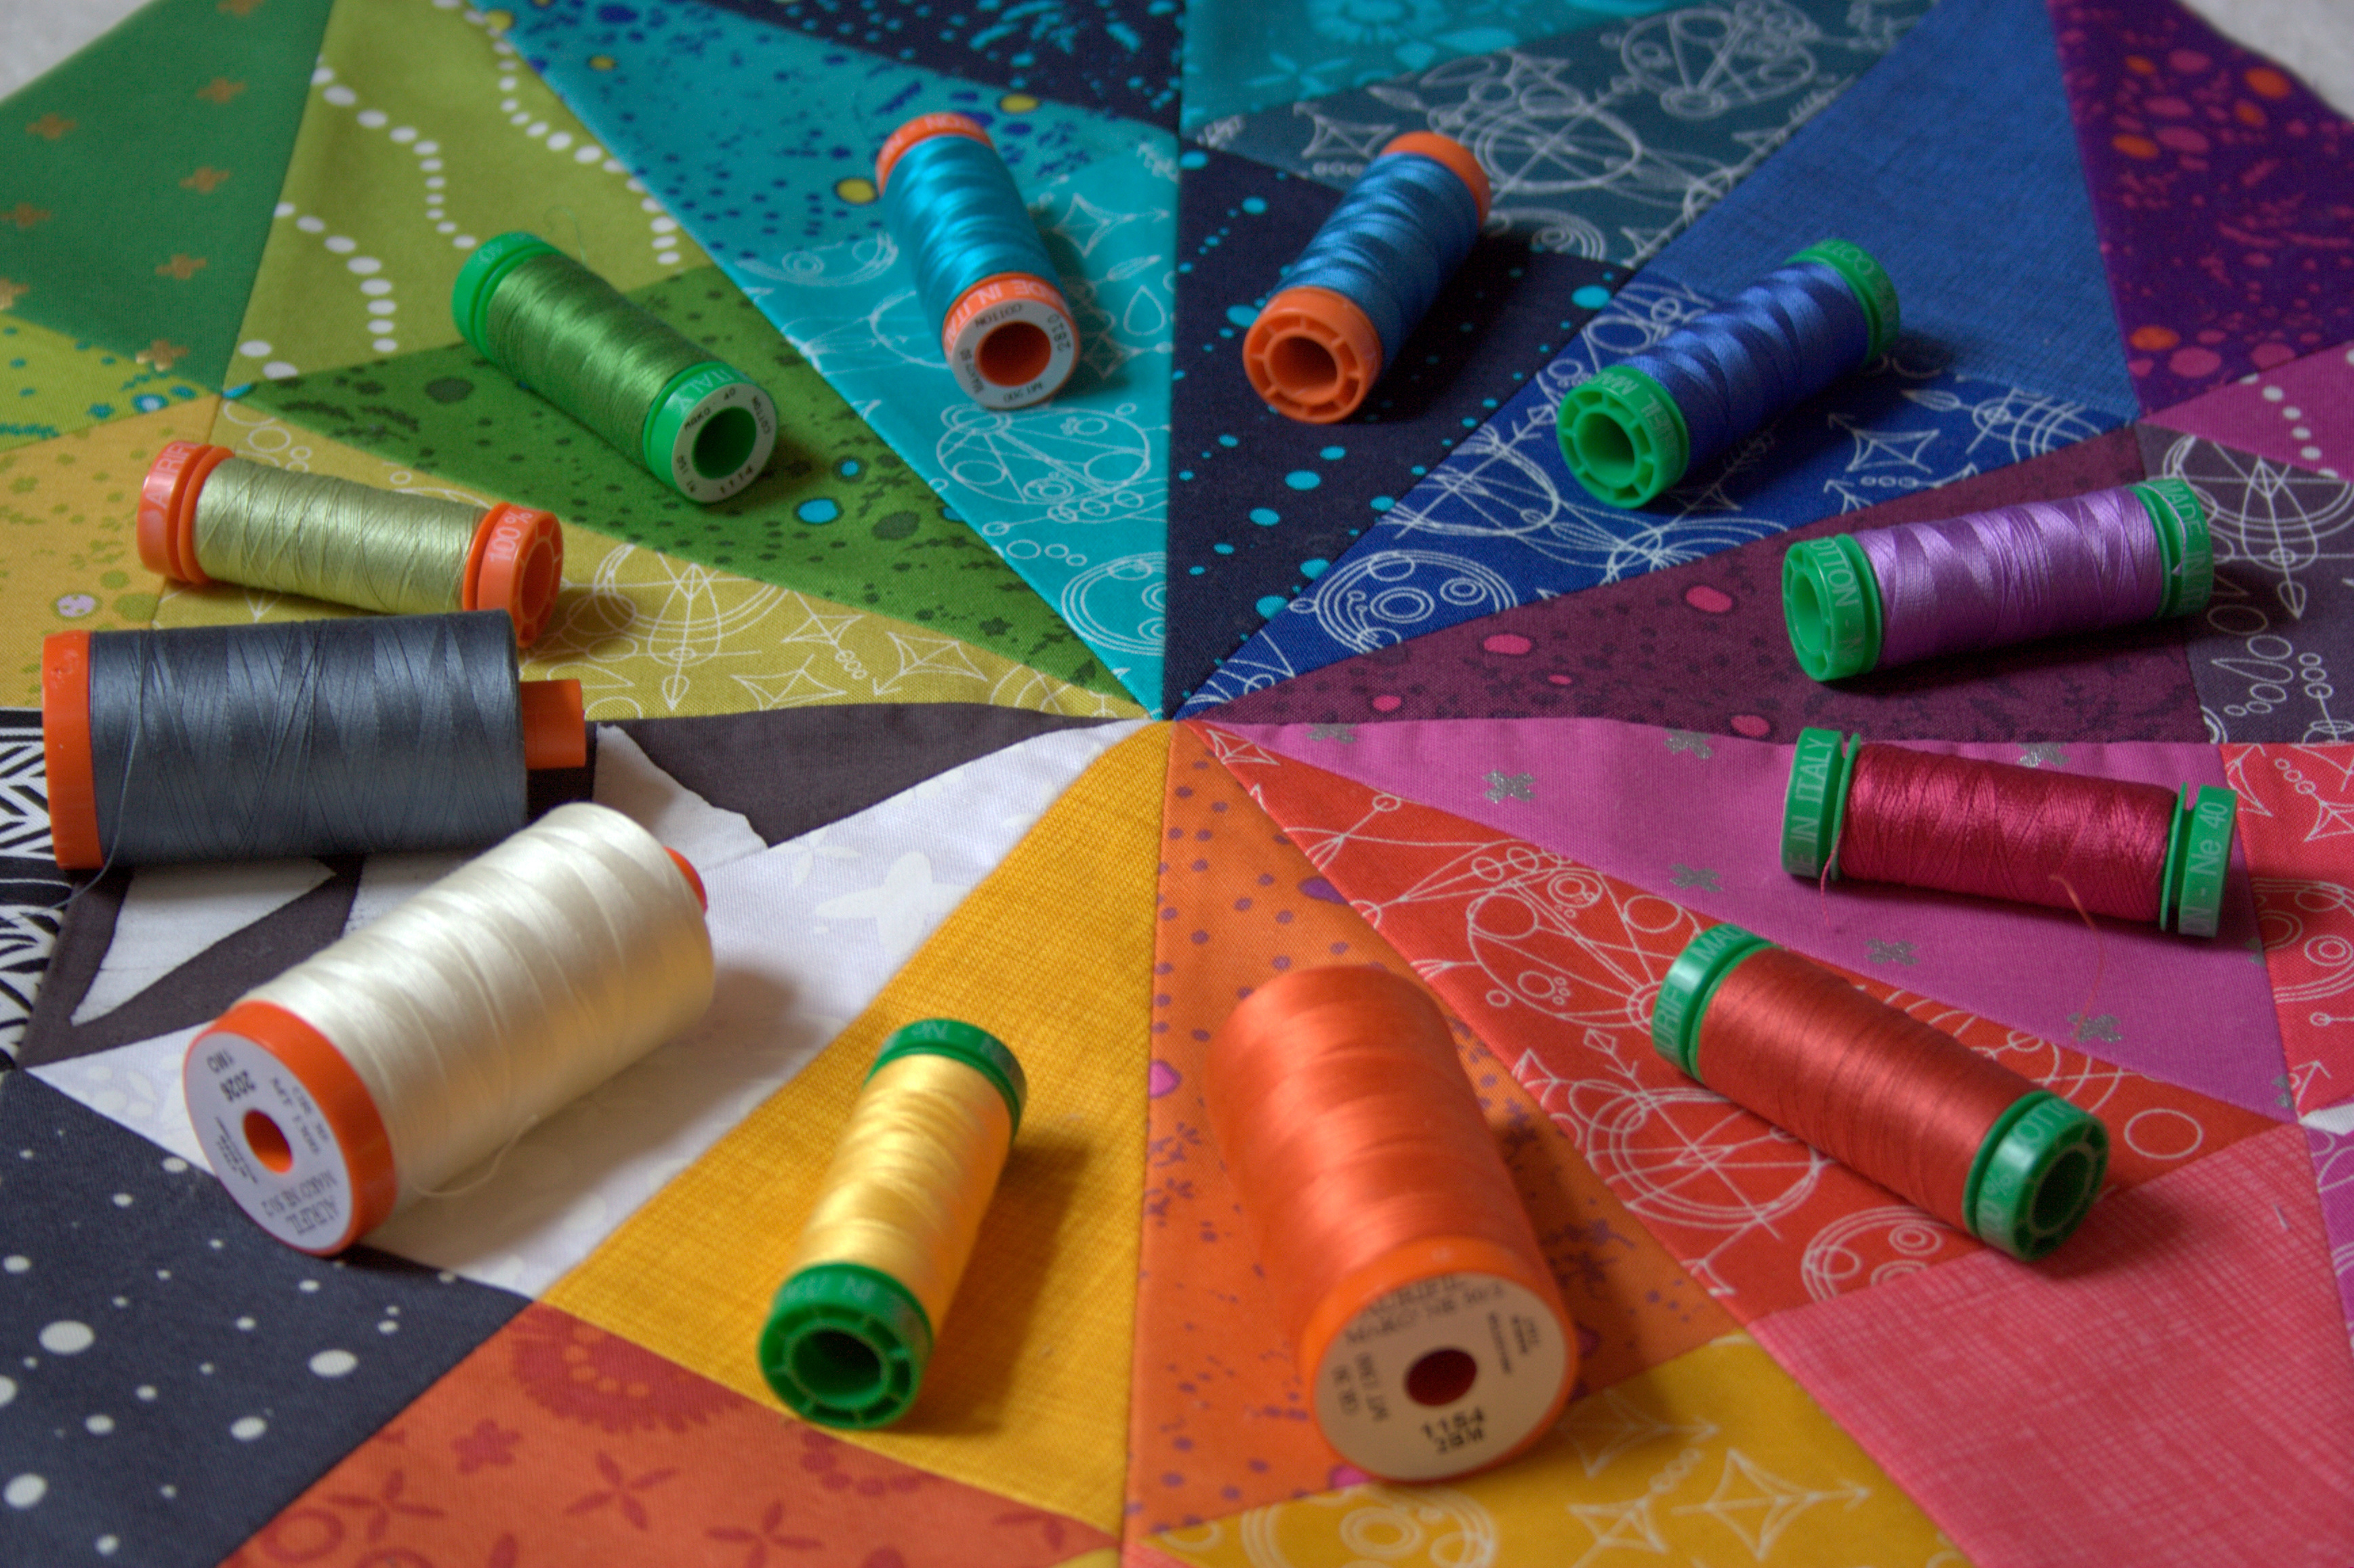
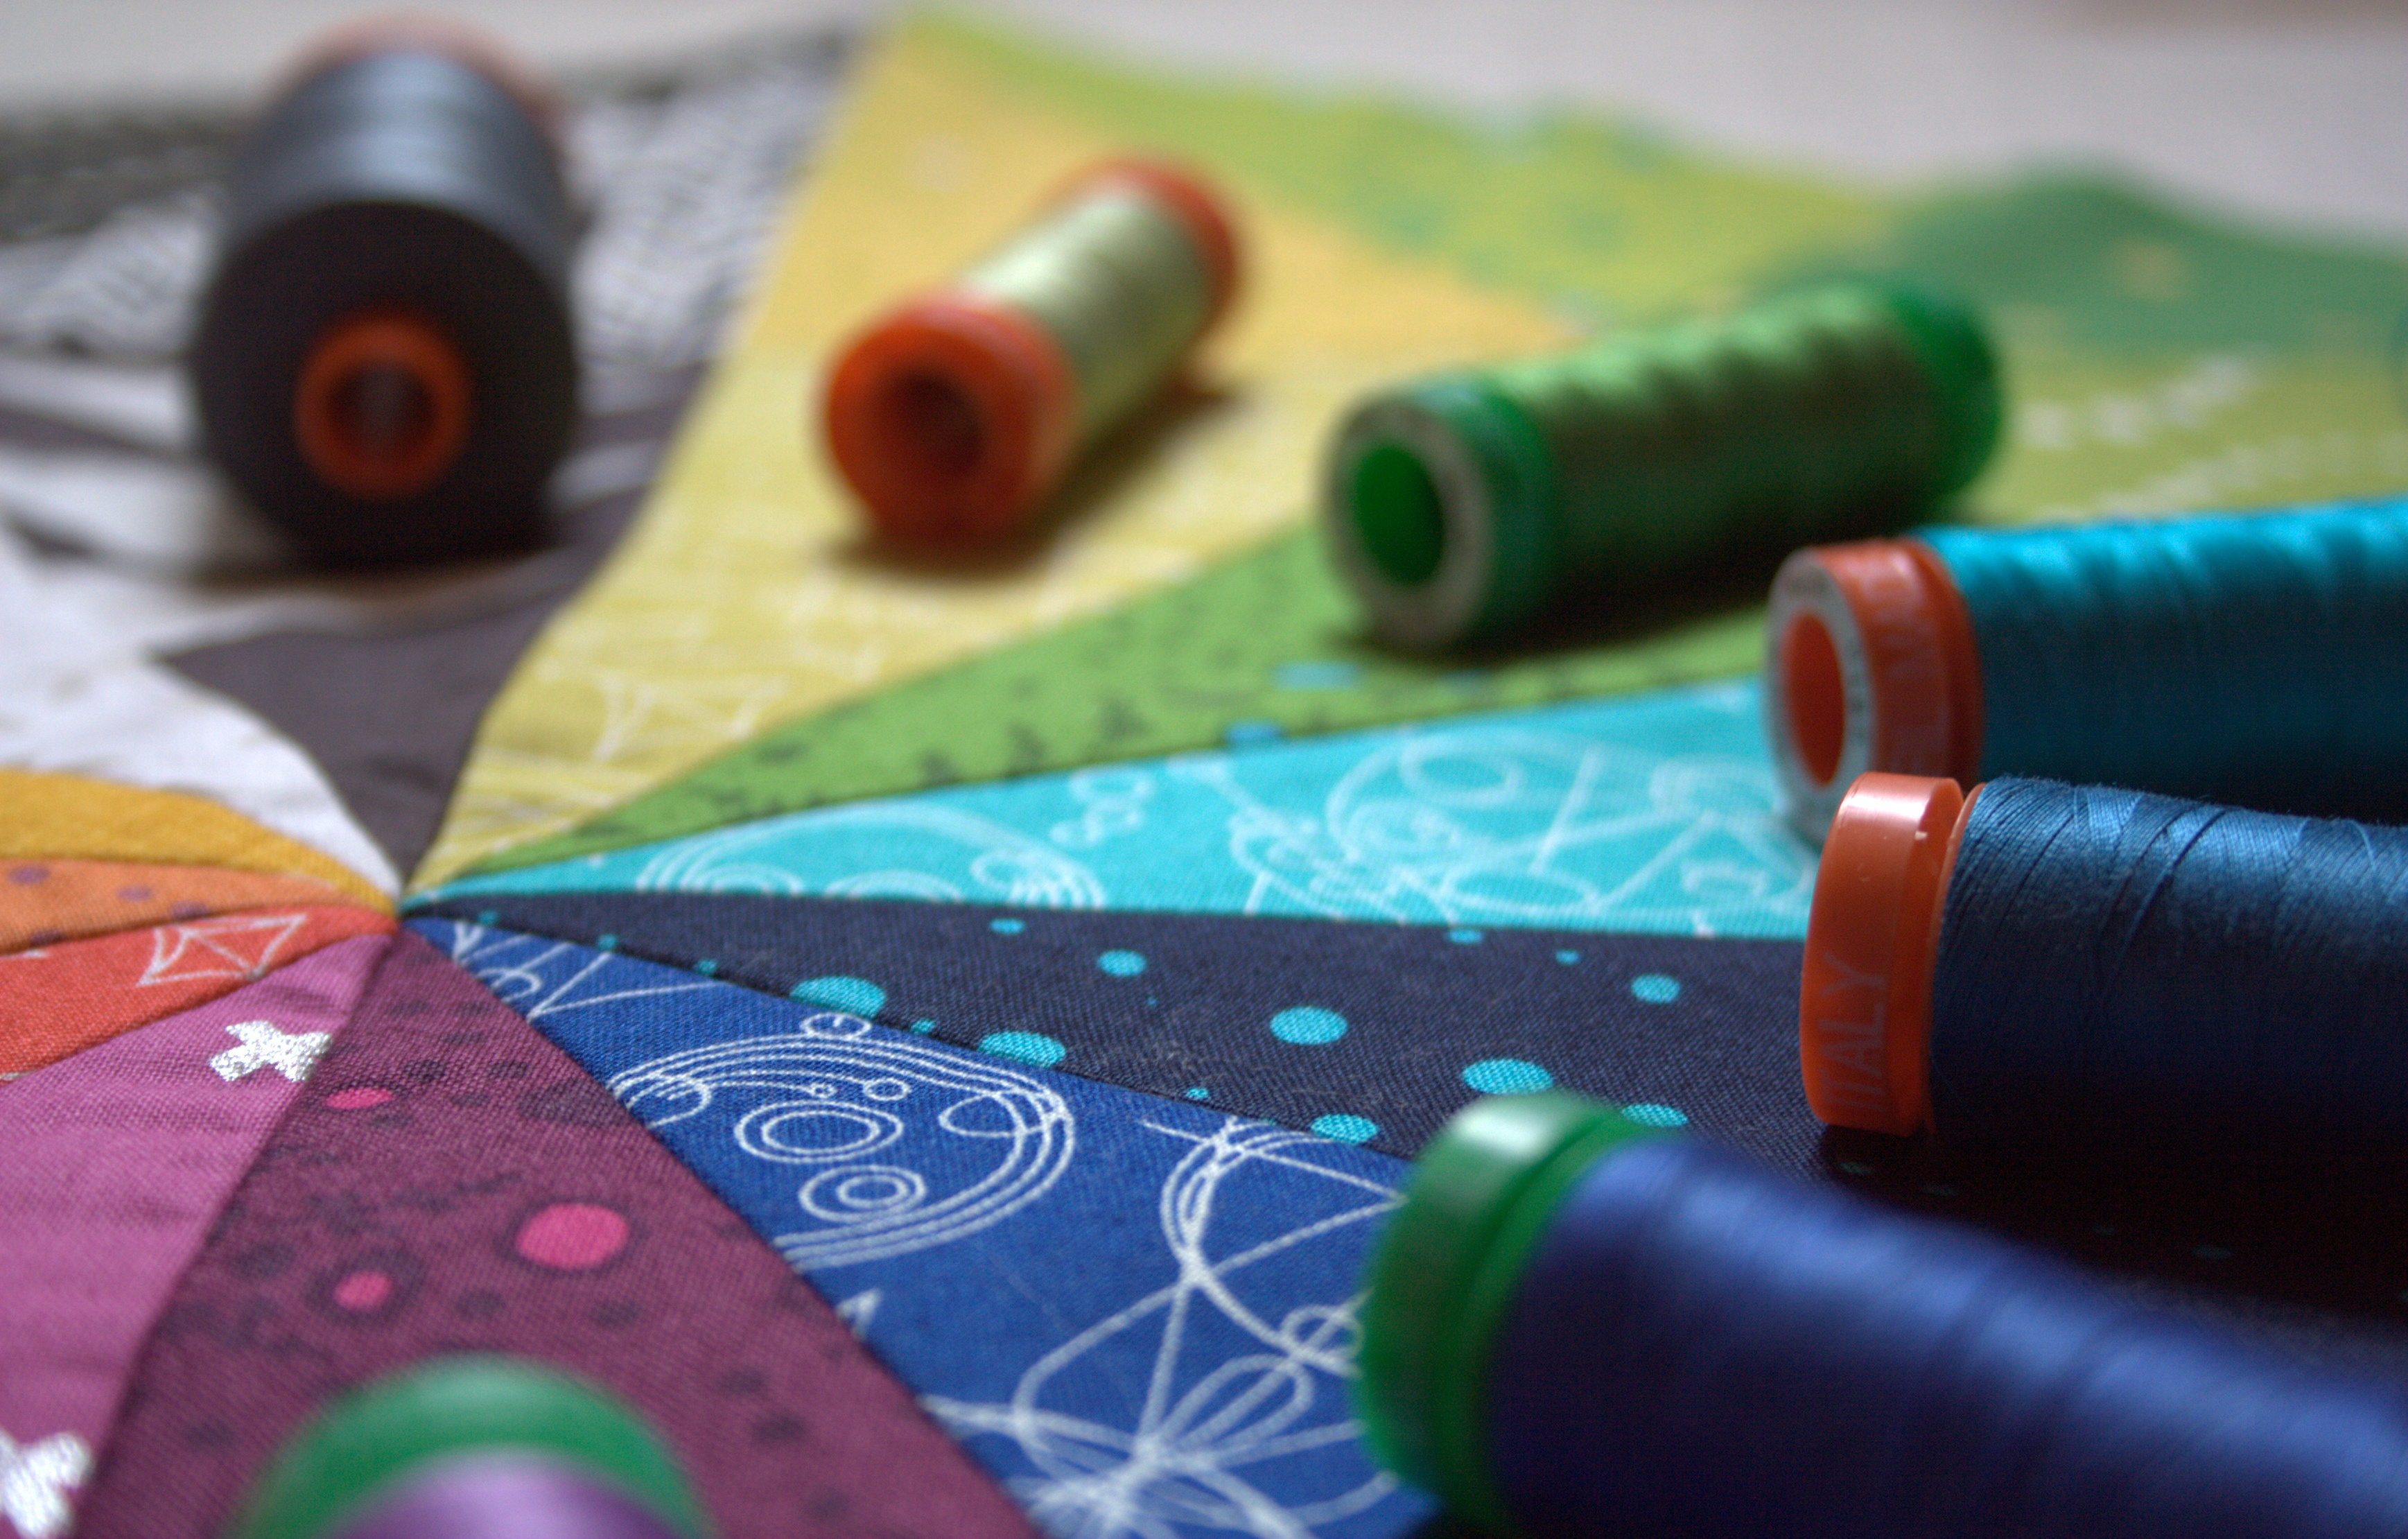
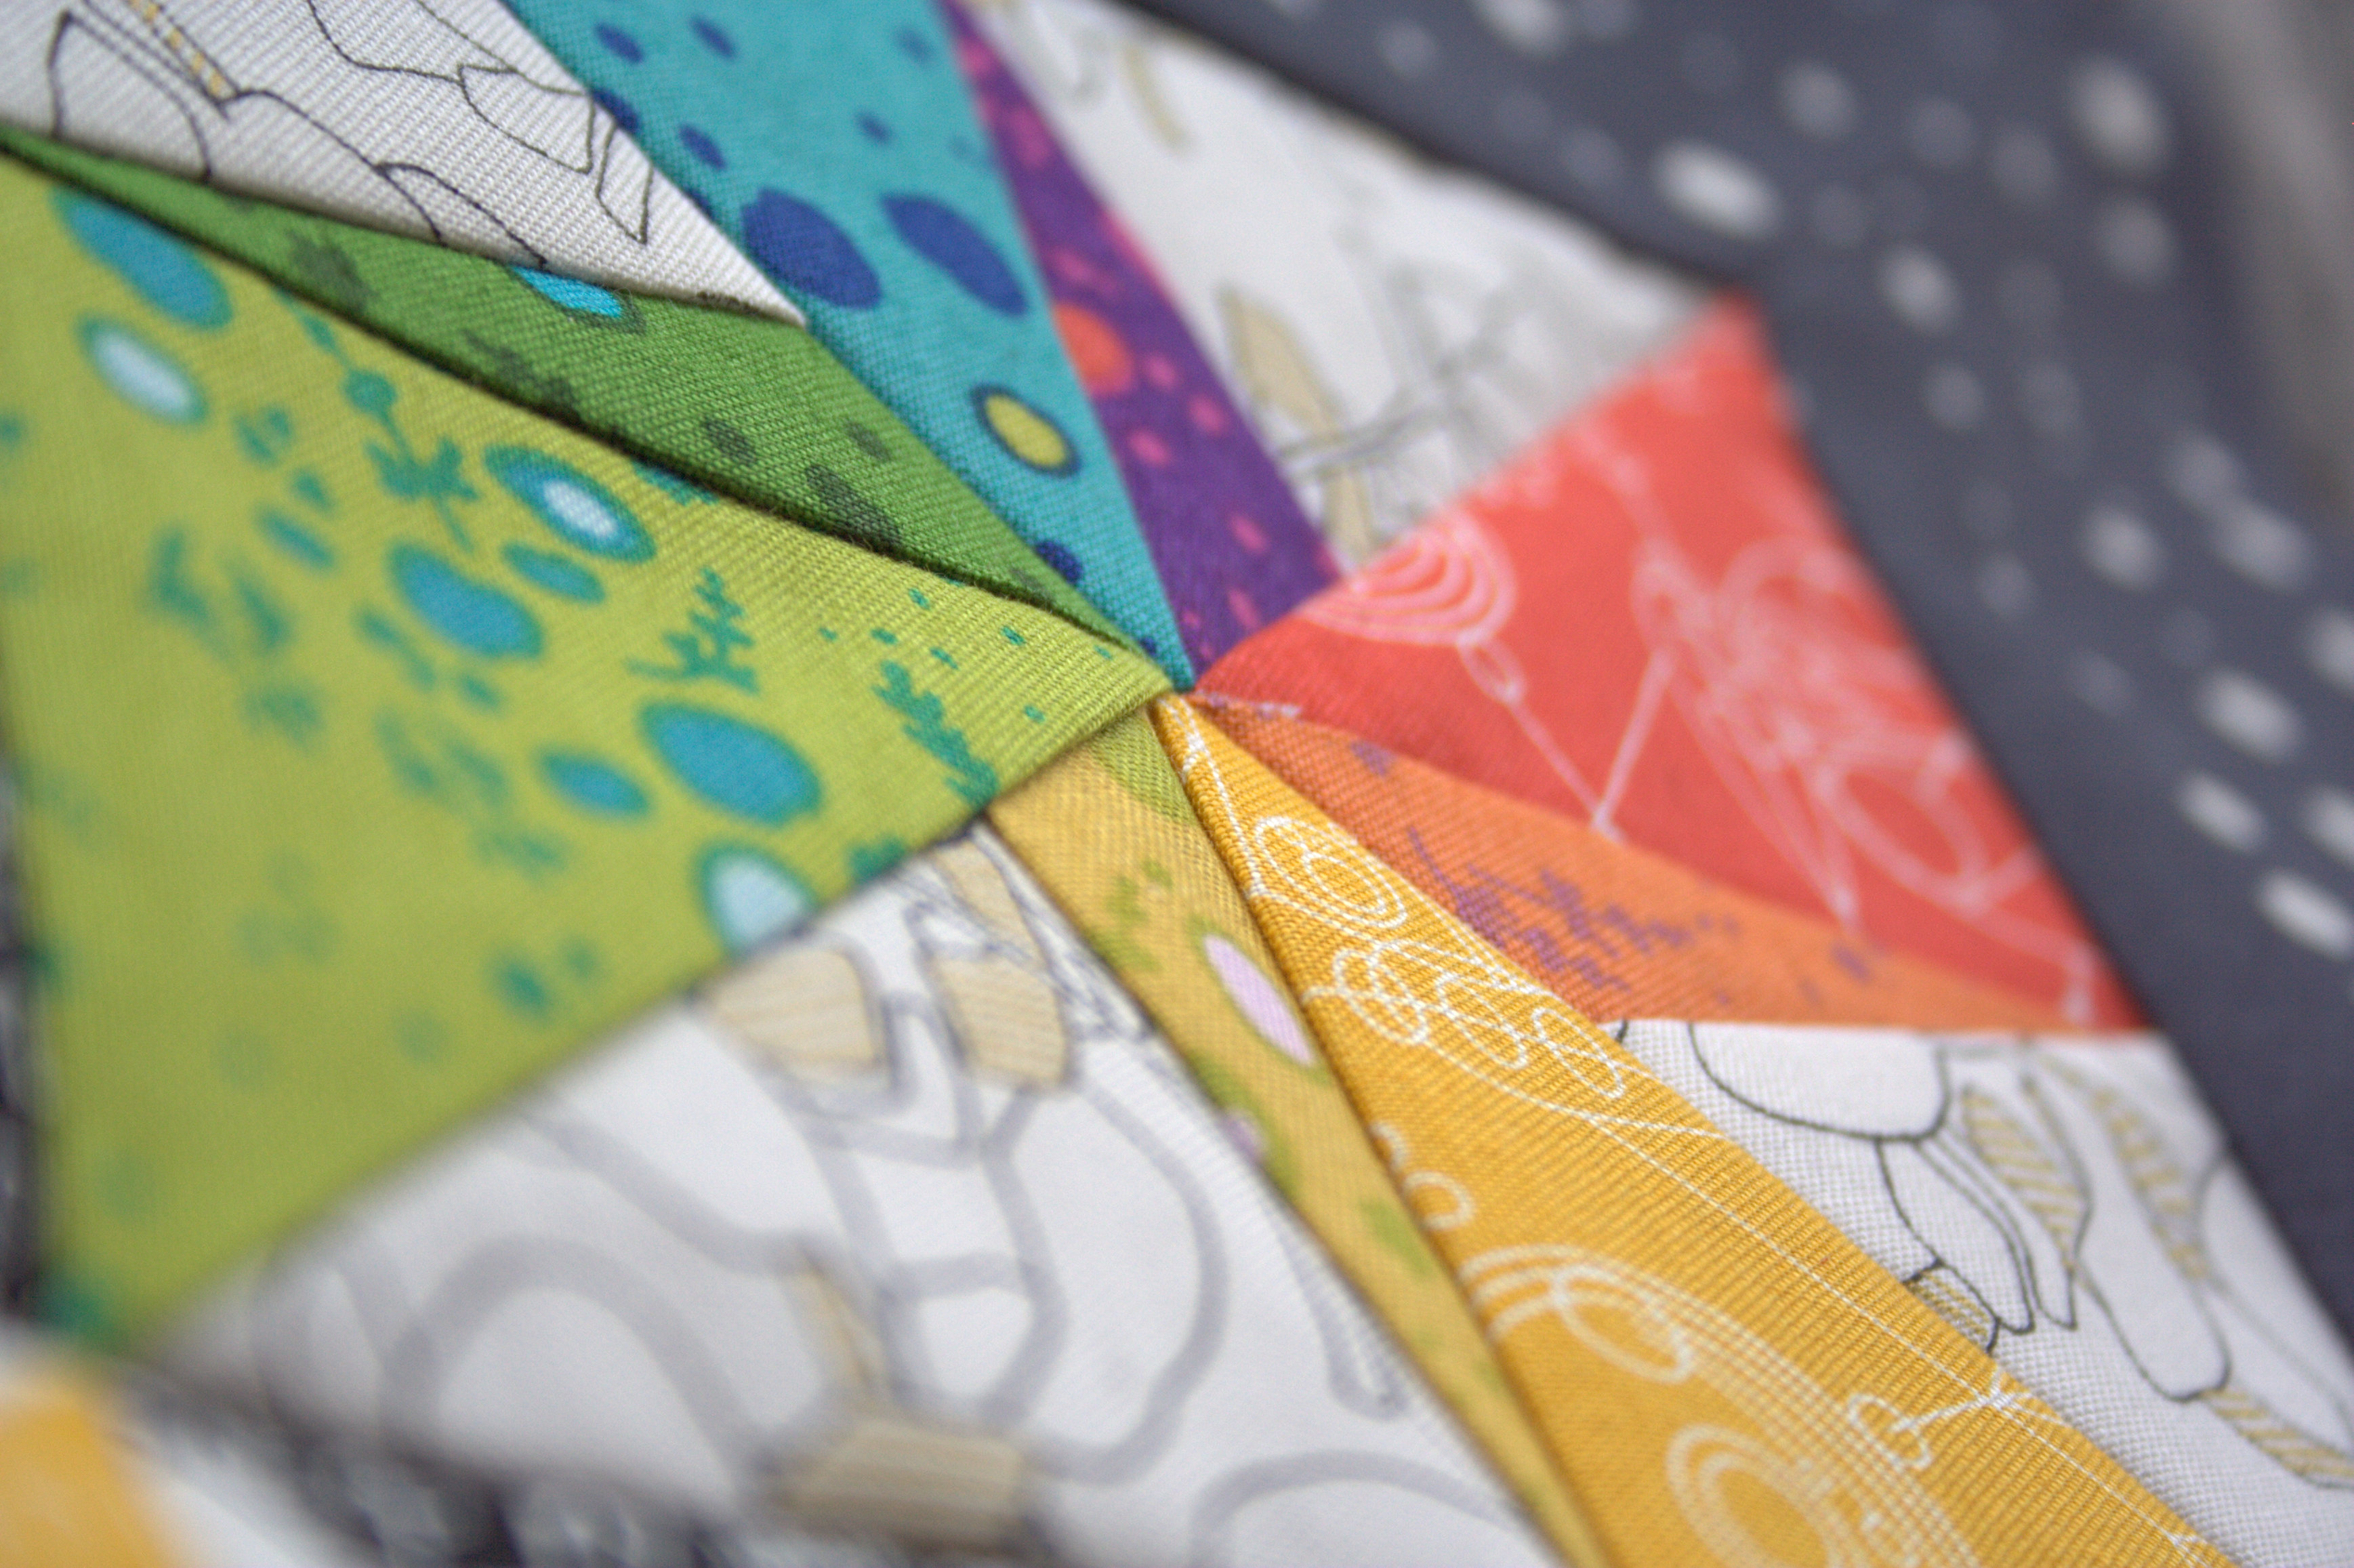
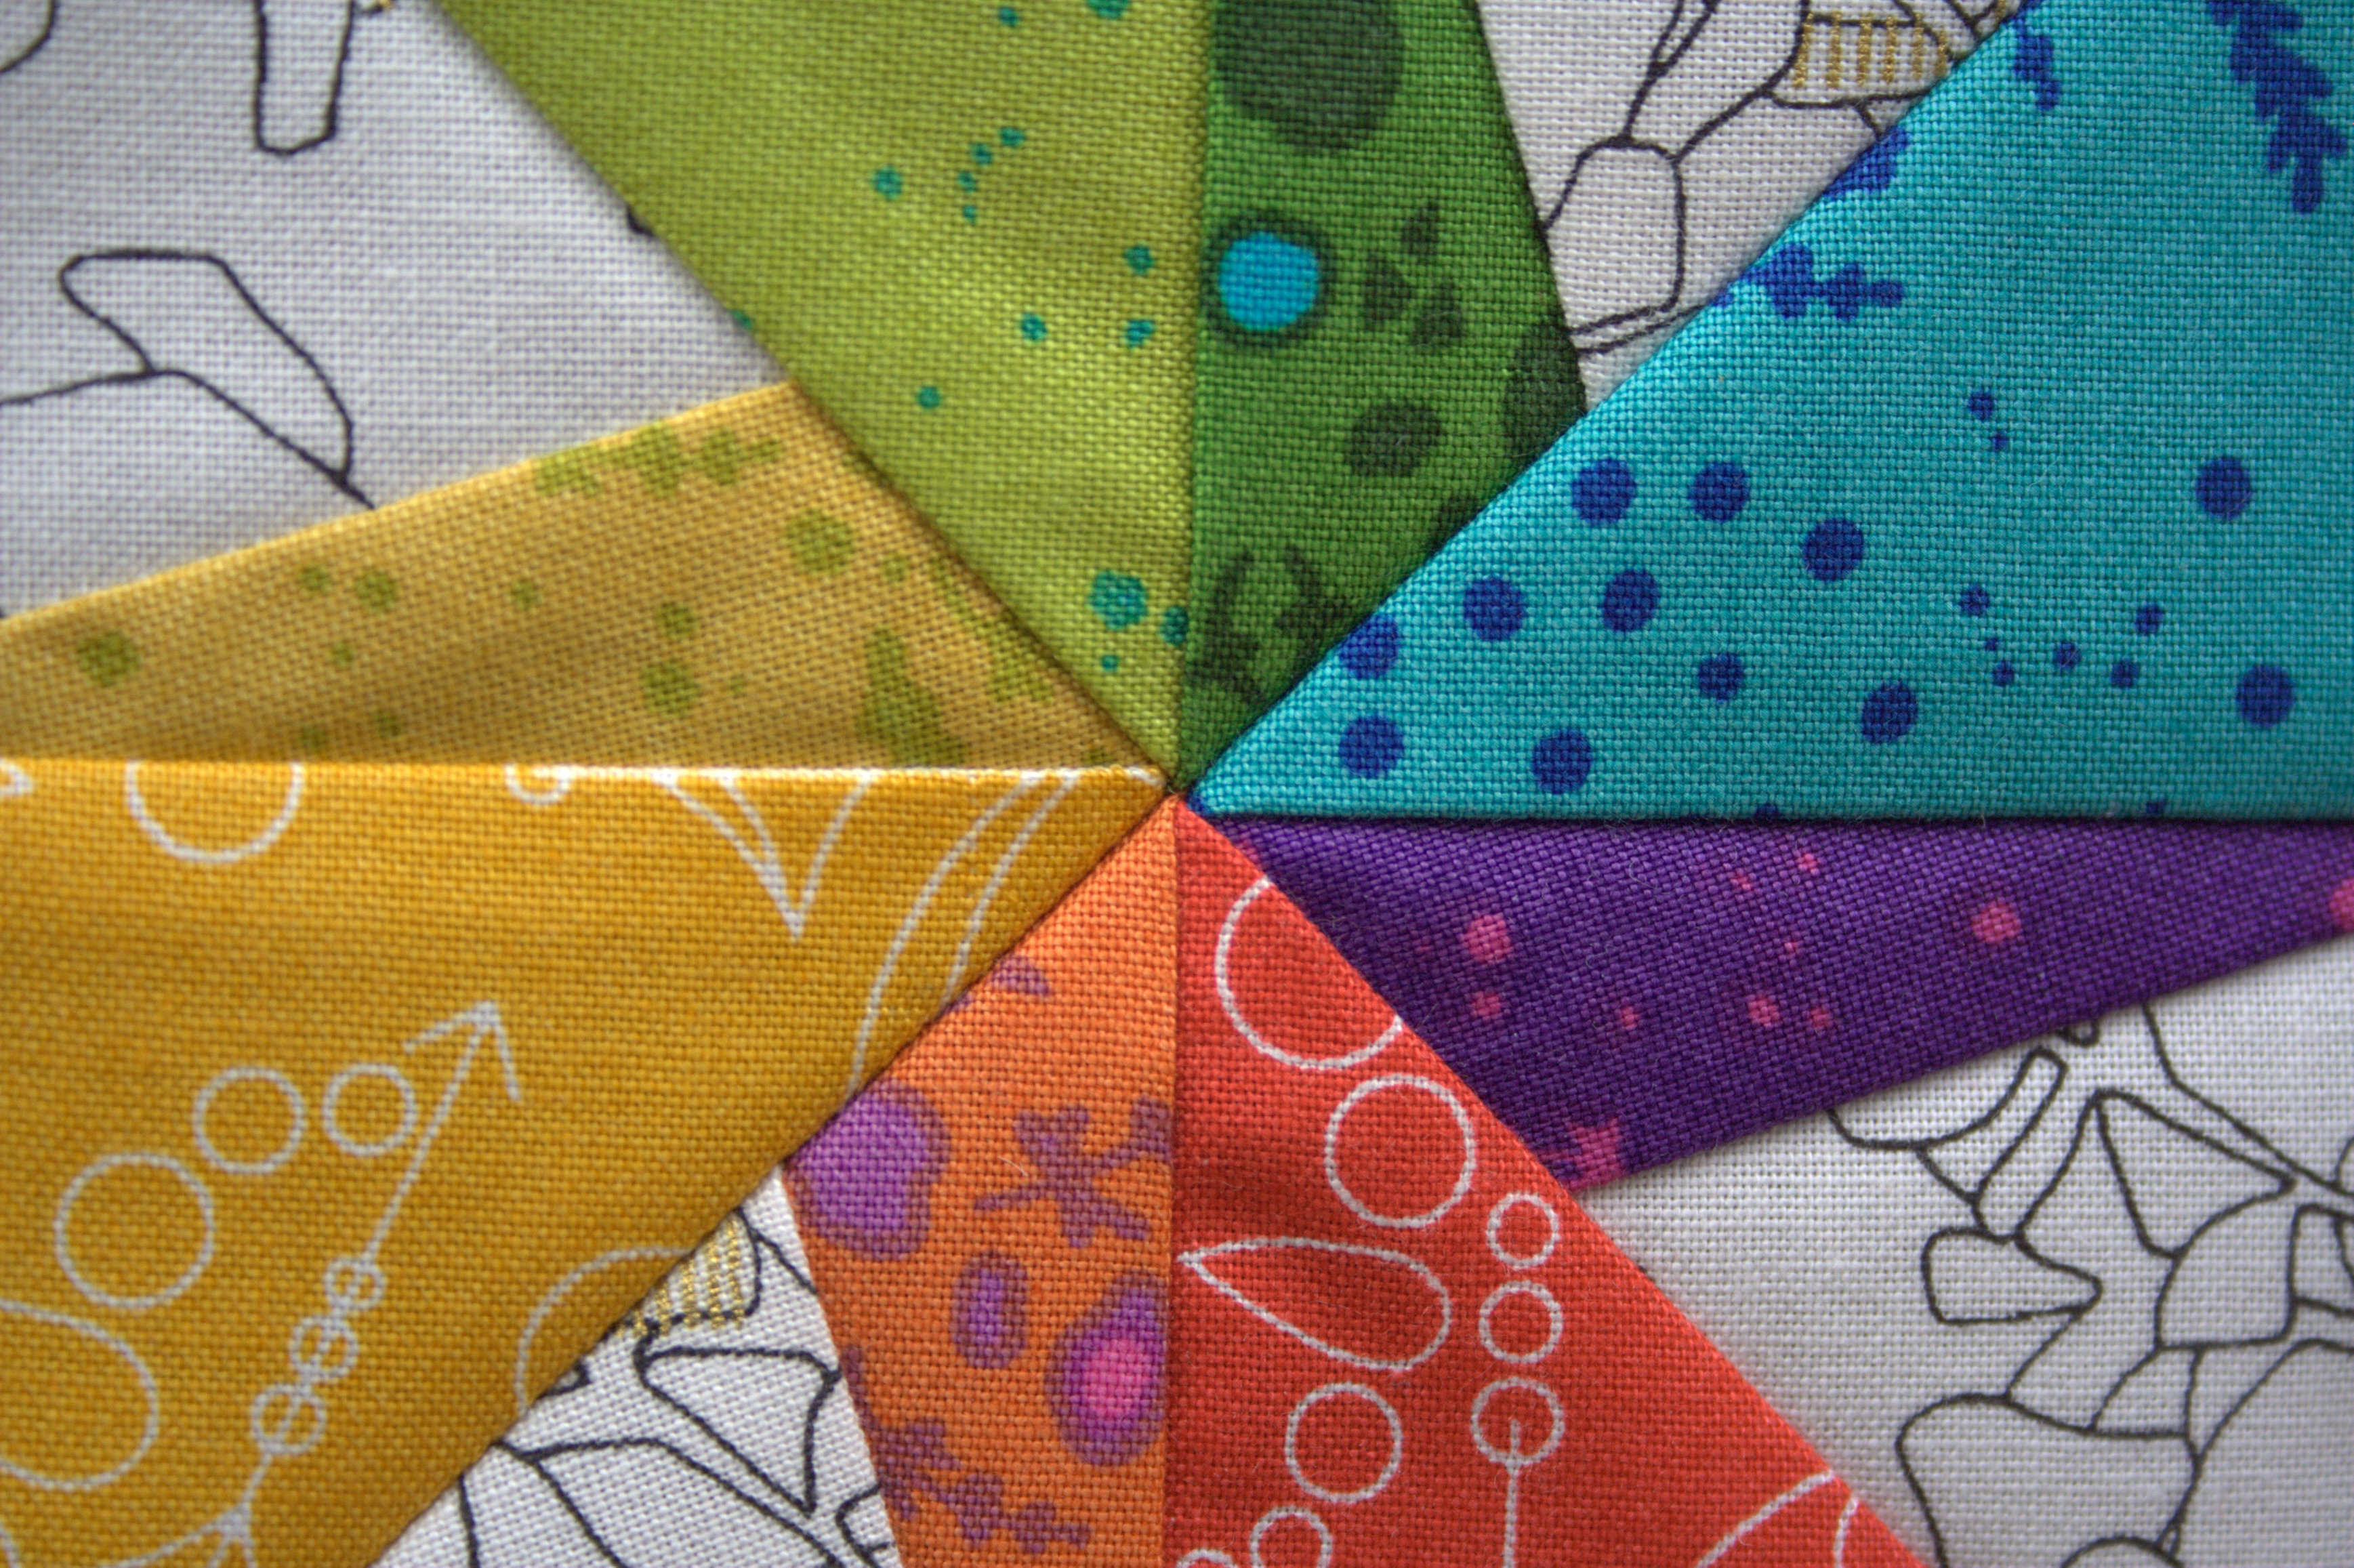
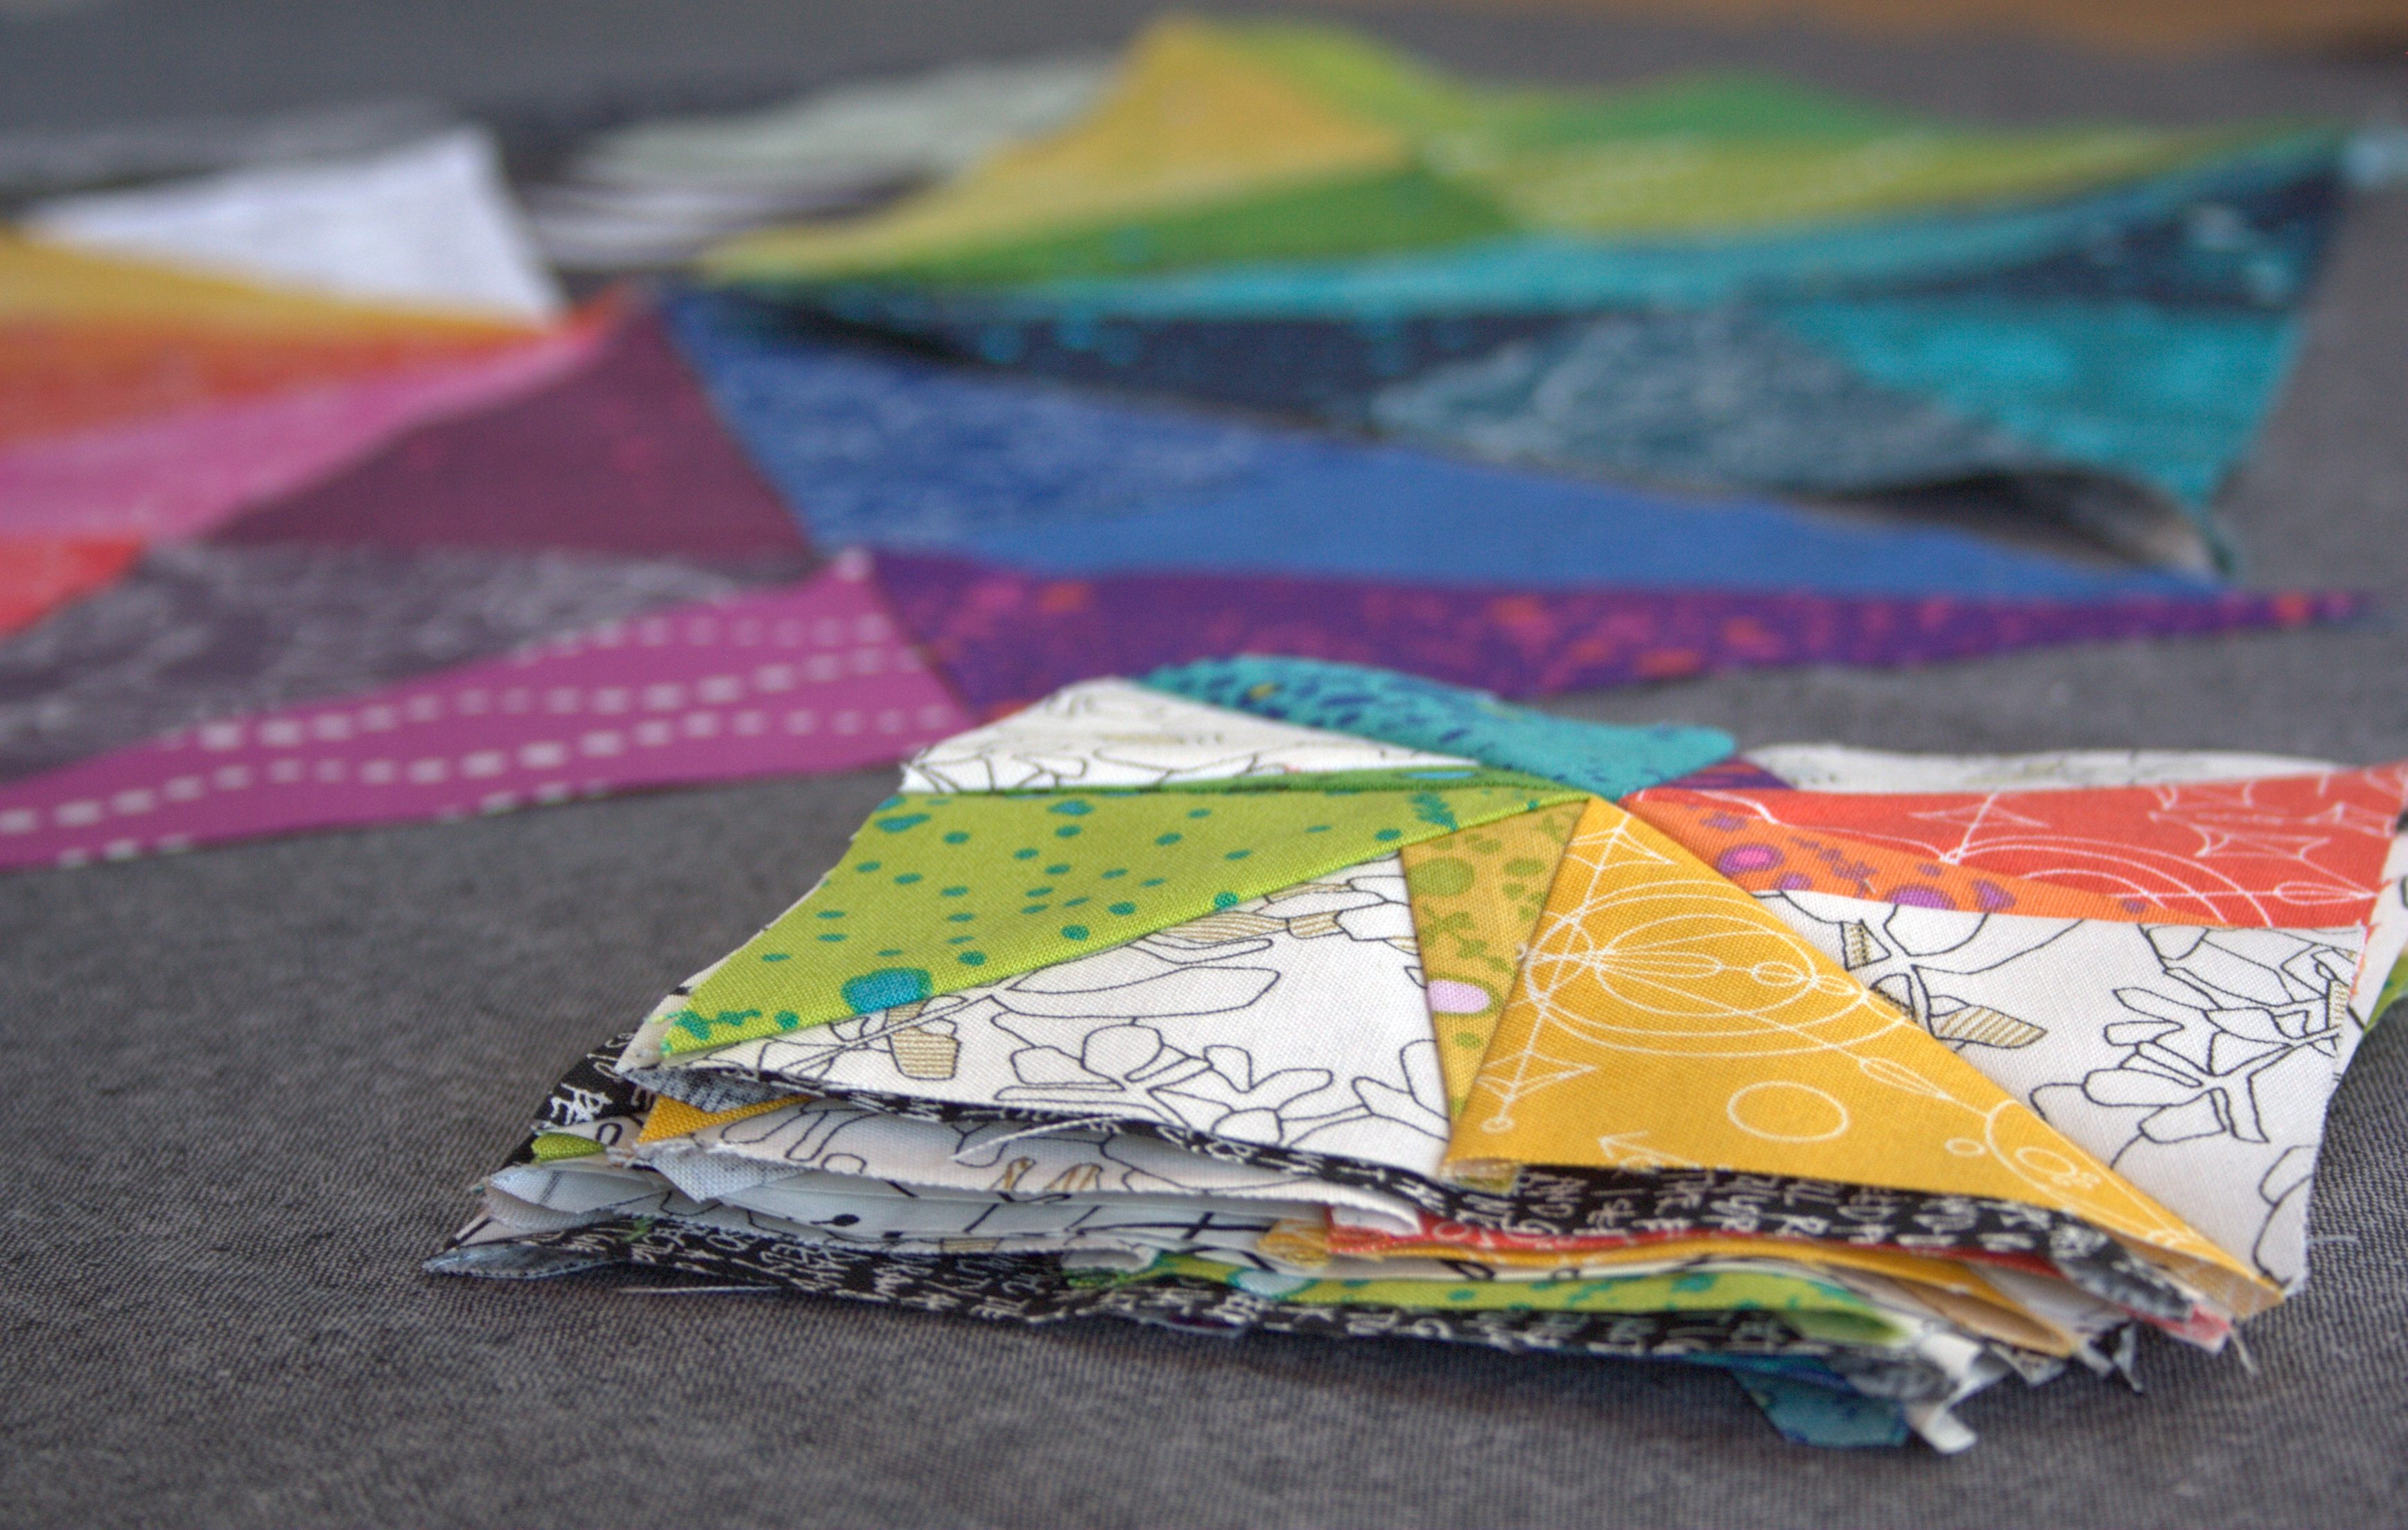
As you can see, I had a lot of fun going through my Aurifil thread stash to find matching thread. My penchant for rainbows paid off, since I had an exact match for most of the colors, and a reasonable match for the remaining one or two.

I decided on a prismatic-style quilting pattern, in lieu of the basic “echo quilting the seams” and I’m silly excited about it. I actually finished quilting this yesterday (shhh don’t tell), but haven’t buried any of the threads or tackled binding yet. The full finish will have to wait, but I’m getting close!

It feels good to have finally made the fabric choice decision and have this mini quilt on the fast track to “finished”. I’m also doubly excited now that I have enough fabric half-rectangle-triangles to make a duplicate of this mini. That’s a definite plus to the Prismatic Medallion pattern–two quilts with one cutting bout!

I’m linking up with Crazy Mom Quilts Finish it up Friday and TGIFF.


Quilty Thankful Thursday

Color Inspiration has been laying dormant for the past few weeks, much like the plants outside and the baby in my belly. Actually, neither the plants outside nor the baby in my belly are truly dormant–they are moving and working and growing like mad, but so far it has all been out of sight. They are both getting ready to burst forth with vigor, though, I can feel it. With mere weeks now until potential baby time, I’ve been spending a lot of time sewing in an attempt to wrap up my pre-baby quilty to-do list, which means a bit less time for blogging. I still love you, I promise.

Last Thursday I had a particularly thank-FULL day and decided to share some of the highlights this week, linking up with Yvonne at Quilting Jetgirl’s Quilty Thankful Thursday. Be forewarned: I’m breaking one of my biggest blogging rules in this post and using almost entirely iPhone pictures (gasp. shudder). Gratitude does not discriminate, though, and I’d rather share my thanks than hold back due to a lack of appropriately awesome photos. Please forgive me.

Sewing time

Last week was spring break week, which meant no preschool for Maddie. The kids and I had a *mostly* exciting week full of play dates. To top it off, my mother-in-law was free to play with both kids all day on Thursday. This gave me some much needed, uninterrupted sewing time so that I could finish the Pinkalicious Hazel Hedgehog baby quilt for my sister-in-law. I know once little baby boy makes his appearance, long stretches of sewing time will be impossible for a good long time. I breathed deeply and enjoyed every moment.

Unexpected Fails-Turned-Wins
quilt math error win
Top right and bottom left are a bit too big, but nothing a bit of squaring can’t help!

During my epic sewing day, I discovered that the small fabric shop from whom I’d purchased the background fabric had made an error and sent 1.25 yards instead of 1.5 yards of the necessary fabric (unexpected human error: fail). With my original plan, the 1.25 yards not only would require exorbitant piecing, but would simply not be enough to fill the background (epic conundrum made more epic by the severe time crunch). BUT, since I had made the last minute decision to piece a heart in a speech bubble to add to the quilt top, I was able to finagle all of the dimensions and cutting calculations to make it work. Without the speech bubble, it would not have been possible. AND the errors I made while reconfiguring the quilt layout (shh, I was tired!) resulted in slightly larger than necessary pieces instead of too small (accidental quilt math fail-turned-win). Awesome. What could have been a total bust of a soon-to-be-extinct sewing day resulted in a completely pieced, layered, basted, and partially quilted baby quilt. Blissfully grateful!

Surprise Gifts

surprise gifts

In the midst of this wild sewing day, I received a package. It was addressed to me and from a machine embroidery shop, but I could not for the life of me remember what I had ordered. Surprise!! It was a completely amazing and unexpected gift of 20 bobbins from Yvonne. It immediately took my bobbin count from one to 21, which is unfathomably amazing.

loading a bobbinI now can quilt with MANY colors, and have a bobbin to match! AND I can load multiple bobbins before quilting to smooth out the process. Life changing. I’m continuously amazed by and grateful for the generosity and kindness that runs so deeply in our quilting community. Yvonne, through picking up on a little single-bobbin-juggling aside during an email exchange, decided to invite my husband into a mission of espionage to send me a gift. Yvonne, you are SO kind and I am grateful for our friendship.

Power of Community

flowers for eleni

One last bit of gratitude, from just yesterday. As another example of how powerfully positive the quilting community can be, Jodi from Tales of Cloth posted about the completion of the #flowersforeleni quilt tops made for Rachel from Stitched in Color. 550 flowers, made by 240 women from 4 continents, all in loving support of a fellow quilter whose baby girl was born with unexpected complications and an unknown future. I recommend you read Jodi’s full post HERE, but I am so grateful that I was able to be a part of this effort. I made two of those 550 flowers, filled with hope, and prayers, and support. There’s power here in this quilting community, and from what I’m seeing, we are using it for immense good. It makes my heart swell.

I’ll leave you with one of my favorite quotes, a little reminder about the importance and value of gratitude:

“Gratitude unlocks the fullness of life. It turns what we have into enough, and more.
It turns denial into acceptance,
chaos to order,
confusion to clarity.
It can turn a meal into a feast, a house into a home, a stranger into a friend.
Gratitude makes sense of our past, brings peace for today and creates a vision for tomorrow.” – Melody Beattie

Go ahead. Unlock the fullness of life. It takes practice, but it is possible. Thank you, Yvonne, for getting us quilters into the habit of being grateful.  I’m linking up with Thankful Thursday, although I will try to be thankful every day.

April Finish: {ALYoF} Pinkalicious Hazel Hedgehog Quilt Top, Plus Some!

I went easy on myself this month for A Lovely Year of Finishes (ALYoF) and set my April goal at finishing the quilt top for my sister-in-law’s baby shower yesterday. I made a totally pinkalicious Hazel Hedgehog quilt featuring a giant sized hazel and a fun heart speech bubble I created just for this project. Did I meet my goal? Yes!

hazel hedgehog flimsy finish
Hazel Hedgehog “Hello, Love” baby quilt flimsy finish.

Even with the heart speech bubble addition, I was able to finish the flimsy (quilt top) before the baby shower. Since I finished this flimsy in the midst of a rare “full mommy sew day” when my mother-in-law took the kids for a play day, I decided to forge ahead and start basting and quilting little (giant) Hazel.

After a particularly late night and early morning quilting/binding session, I managed to quilt the entire background and speech bubble, AND make and attach the binding. Normally, I would complete all of the quilting before binding, but since I really wanted a presentable quilt for my sister-in-law Stephanie’s baby shower, and since the unquilted portion is completely enclosed in quilted background, I decided to get a little cheeky and bind the quilt before completely quilting.

quilt wrapped nicely
The purple bag with pink tissue and ribbon on the left contains the quilt.

With the quilt bound, I was able to roll it, wrap it nicely in tissue paper and a ribbon-bound bag, and gift the quilt with no worries of fray.

gorgeous spring baby shower gifts
Spring baby shower gift table decor–so alive!

Stephanie opening her quilt

Gifting Hazel hedgehog quiltMy sister-in-law LOVED it, so mission accomplished! Even with a few basting pins still in Hazel and the heart, which will be quilted as soon as the color matched Aurifil thread arrives, it was fun to get to give this gift. Just think: hidden behind this quilt are two big baby bumps–cousins destined to be rolling around on top of this fun quilt (Stephanie is due a couple weeks after I am).

I will share more detail photos of the quilting and finishing in a later finish post once the quilt is completely finished (this will help keep the fire lit under my bum so that I actually finish it before baby time!) But for now, here’s a closer look at the speech bubble heart I’m calling “Hello, Love”. I’m planning on writing up a pattern for this block, since it’s such a perfect block to add to any of Elizabeth Hartman’s giant creatures, and I could definitely go for a speech bubble heart pillow!

speech bubble heart pieced block

I’m linking up with the ALYoF April Finishes Party, as well as Monday Makers and Design Wall.


Twirling Star Mini Quilt Finish {Pattern Testing for Devoted Quilter}

Visitors entering our home will now be greeted by a bright and colorful quilt (of course we will also greet any visitors in person… but, you know what I mean!). I’ve finished the Twirling Star mini quilt I was testing for Leanne at Devoted Quilter, and I’m loving it in its new home.

twirling star mini quilt finish

It was really fun to make Leanne’s pattern with a modern aesthetic. Here’s Leanne’s version:

Twirling Star Mini Leanne's VersionI love how different choices of fabric and colors can completely change the look of a quilt. The mini quilt finishes at 19 1/2″ x 19 1/2″ and features both traditional piecing (the hourglass blocks) and paper piecing (the pinwheel blocks). The pattern also includes a coloring page, where you can test out different color arrangements before starting. I tried out a lot of different color possibilities before deciding on this one, and the coloring page is KEY (and so much fun). Leanne’s pattern is now available in her Etsy and Payhip shops, so if this looks like a mini you’d like hanging in your home, too, head on over and buy the pattern!

twirling star mini quilt finishI decided to quilt this mini with one big radiating spiral, and I’m quite happy with how it turned out. I followed the tutorial on Crazy Mom Quilts and began the spiral with free motion quilting (FMQ) in the center and then switched to my walking foot for the outer spirals. Since I have yet to find an actual pen/chalk/pencil that I trust for writing ON my quilts, so I decided to just wing it and do it by eye. I’m quite happy with how it turned out, and it was a lot easier than I anticipated.

center of spiral quilt patternOnce I quilted past the center, I switched to my walking foot, which proved to be a lot more difficult than I anticipated. Keeping a steady curve with the walking foot was tough, although I can see that I did improve as I moved outward, either the result of more practice or the less severe angle. As with any quilting, I found that I was more consistent with spacing and more accurate with the curve when I went slowly.

quilting "jump"
A little quilting “jump” as a result of less-than-smooth maneuvering with the walking foot.

There were quite a few “jumps” where I had stopped sewing to reposition the quilt under my machine and must have restarted sewing with too much torque on the quilt. Either that, or perhaps I tried to turn the curve while my machine was stopped. (You can see one of the “jumps” in the bottom of the blue triangle. Just a little wiggle.) If I were planning to submit this quilt to shows or give it to someone who would noticed the imperfections (are there such gift-quilt recipients?), I might have ripped out the quilting and tried again. But for this, a quilt meant to hang in our own entryway, I opted to just let them be. When you step back and view the quilt as a whole, the imperfections are lost.

twirling star mini quilt finish

I didn’t keep track of the time I spent making this quilt, but here are the other quilt finish stats:

Twirling Star Mini Quilt

Completed April 2015
Pattern: Twirling Star Mini Quilt pattern by Leanne at Devoted Quilter
Size: 19.5″x19.5″
Fabric: Pinwheels are pieced using rainbow fabric from Alison Glass’s 2015 Sun Prints, Mercury and Grove (Andover Fabrics), with a background of Modern Floral in Charcoal from the Botanics fabric line by Carolyn Friedlander (Robert Kaufman Fabrics).
Hourglass blocks are pieced using Scribble Notes in Black from the Architextures fabric line by Carolyn Friedlander (Robert Kaufman Fabrics) and Make and Pin fabric from the Makers fabric line (Art Gallery Fabrics).
Border is Ink in Charcoal from Alison Glass’s 2015 Sun Prints (Andover Fabrics).
Binding is Black Kona cotton (Robert Kaufman Fabrics).
Quilting: Spiral quilting using free motion quilting in the center and a walking foot for the outer spirals
Thread: Aurifil 50wt 2600 – Dove for piecing and quilting
Related blog posts: Embrace the Rainbow, Twirling Star Flimsy Finish

I’m linking up with Crazy Mom Quilts Finish it up Friday.


Hazel Hedgehog Progress

The giant version of Elizabeth Hartman’s Hazel the Hedgehog pattern goes together quickly! I thought that it might, but I’m pleasantly surprised by exactly how quickly I was able to get this adorable pinkalicious hedgehog together. I cut the fabric for this project on Monday, and after only two short nights of sewing (a total of just under 3 hours), Hazel is complete!

hazel hedgehog progressShe finishes at 24″x27″ since I have not yet put the borders on. She’s huge! Here are a few photos of Hazel with my kiddos for scale. Don’t mind my sword-bearing super hero son; he’s harmless, really!

giant pink hazel hedgehog and kids for scale

giant pink hazel hedgehog and kids for scale

I want to use a single giant hazel, but have the baby quilt finish a bit larger than the 34″x37″ baby quilt version in the pattern. Since I’ve pieced Hazel so quickly, of course my brain immediately came up with a lovely idea of how to make it super adorable (and not as quick to finish).

sketchbook plans for hazel layout
Glimpse into my sketchbook.

Originally, I was planning to add borders to have Hazel in the bottom right of a 48″x52″ baby quilt, with simple negative space/background around her. Easy peasy. There is actually a good chance I could have the quilt entirely finished by the baby shower on Sunday if this plan is chosen. Then, as I was sketching it out to calculate how big the borders should be, I thought an appliquéd heart in the top left would be a cute touch, which then progressed to a pieced speech bubble heart. How adorable would that be, though!? This is how my brain works, folks. If something is easy, I will immediately find a too-cute-to-ignore way to make it more complex (but awesome).

What would you do? Stick with the original, adorable, but super simple and easily completable-ahead-of-schedule plan? or try out the speech bubble heart idea? Only time will tell which I will choose!

I’m linking up with Work in Progress Wednesday hosted by Lee at Freshly Pieced .


Pinkalicious Hazel Hedgehog Baby Quilt Beginnings

My pink-loving sister-in-law is having a baby girl in June. When I say she’s pink-loving, note that that is a dire understatement. I mean, she loves pink. Pink on pink on pink with an accent of pink is her signature style. As a long-time pink avoider who is just recently embracing the joy that pink conveys, I am planning to work a *little* out of my comfort zone for the sake of making a quilt for her baby girl that she will love. I’m making a pinkalicious Hazel Hedgehog baby quilt, with one giant sized super-pink Hazel.

pinkalicious hazel hedgehog baby quilt

Hazel will be completely pink, with the lightest pink for her face, the bright pink her body, and the swirly magenta-pink as hair. The majority of you who commented on my last blog post about this project voted for the grey face and body and pink hair. As much as I think the grey face and body would look awesome, too, I just didn’t feel like the resulting giant grey-bodied Hazel would be pinkalicious enough for my sister-in-law. So pink it is. The turquoise Stitch Circle by Michael Miller will be the background, and my aesthetic anchor. I have to admit, I’m quite excited!

My sister-in-law’s baby shower is this coming weekend, which means I’m giving myself a typical time-squeeze goal of completing the quilt top before her shower. This is also my ALYoF goal for April, so it’s a good thing I’m finally getting started on it!

numbered quilting pinsSo far I’ve finished cutting for Hazel and her immediate background, which finally gave me a great opportunity to use the numbered pins my husband got for me for Christmas. They are called Marilee’s Numbered Q-Pins (*Amazon affiliate link) and are super useful. They can also be purchased from the Quilting Pins website, and you can visit them on Facebook. (Tell them Kitty aka Night Quilter sent you!) I took the advice of the little sticker on the back of the pins that suggested customizing the backs with letters, colors, etc. if more than numbers were needed. Elizabeth Hartman’s Hazel Hedgehog pattern clearly lays out the cutting and piecing instructions with letters, so the pins were perfect for keeping track of pieces.

numbered pins for organizing cut quilt pieces

numbered pins for organizing cut quilt pieces

hazel hedgehog and numbered pins for organizing cut quilt piecesWith 20 numbered pins, I was able to create letters enough for all the Hazel pieces, while letting the letters correspond to the numbers (1 = A, 2 = B, etc.). This lets my OCD side rest easy knowing that my letters will be as easily organized and found as the numbers.

I also did a TINY bit of fabric buying for this project, so I’ll show you another addition to my stash. While auditioning fabrics, nothing worked better for the background than the little scrap of this Michael Miller Stitch Circle I had remaining from a previous project. I scoured local shops and the internet and finally found some at FreshStash on Etsy. I ordered the 1.5 yards needed for this project, and added in 1 yard of Essex Linen Blend in Smoke.

stash building

stash buildingI love the look of stacked fabric!

I’m hopeful that since this Hazel is ginormous, it will be quick to piece. Quilt top in a week: totally doable, right?

I’m linking up with Monday MakersDesign Wall, and Molli Sparkles’ Sunday Stash!

Twirling Star Flimsy Finish

I have had such a fun time testing the Twirling Star pattern for Leanne at Devoted Quilter. The pattern is a combination of traditionally pieced and paper pieced blocks, which allows each technique to compliment the blocks perfectly.

Twirling Star Flimsy finishI did break one of my big rules of pattern testing, though, and did not follow the pattern exactly as written in one spot: I mitered the corners of the border. The pattern calls for a straight-edged border, but using this directional fabric, I feel like miter was necessary. Other than that little detail, I followed the pattern exactly. Go me!

twirling star quilt patternThis mini embodies some of my favorite aesthetic combinations these days. Low volume fabrics paired with black and whites with splashes of bright, rainbow colored fabrics. I love it!

twirling star quilt pattern

twirling star quilt patternI particularly like the rainbow pinwheels. Since they are paper pieced, the points fit together so well. The precision of paper piecing just can’t be beat!

rainbow pinwheel twirling star quilt patternI’m happy to check this flimsy finish off my list, and will post one more time when the pattern is ready to be released and I have this baby quilted and bound. I’m thinking I am going to go with a center spiral quilting pattern. I’ve never tried it before, and I think a mini quilt like this is the perfect place to start!

I’m linking up with Crazy Mom Quilts Finish it up Friday.

Color Inspiration Thursday {44}

This past weekend, my husband and I escaped for a long weekend getaway to the Bay of Fundy. It was our first trip alone together since our almost 5 1/5 year old daughter was born, and with another baby expected in the next month or so, it was most likely our last for another couple of years. A babymoon, if you will. We made the most of it and adventured more than we would be able to with little kids in tow, and relaxed more than we would be able to with little kids in tow. It’s all about balance.

bay of fundyThe Bay of Fundy is known for having the highest tidal range in the world. I’ve wanted to travel to the Bay of Fundy in Canada since my estuarine ecology studies in college. There’s something about 40 foot tides and vast mud flats that makes me happy. Our short timeframe and my 8 months pregnant body didn’t really allow for as much exploring as I’d have liked, but we had a great time anyway. Today I’ll be sharing some color palettes from photographs taken on our trip, created with Play Crafts’ Palette Builder 2.1.

bay of fundy color paletteCorresponding solids from left to right:
Kona Lake, Bella Etchings Charcoal, Kona Slate, Bella Navy, Kona Black, Bella Dusty Jade

Corresponding Aurifil thread from left to right:
2715 – Robins Egg
1158 – Med Grey
4140 – Wedgewood
2784 – Dk Navy
2692 – Black
2845 – Lt Juniper

Low tide on the Bay of Fundy means boats are grounded, many feet below the dock. I loved how the blue of the boat hull matched the sky.

red rocks bay of fundy color paletteCorresponding solids from left to right:
Bella Soft Finish Black, Bella Etchings Slate, Bella Tan, Bella Platinum, Kona Mocha, Kona Taupe

Corresponding Aurifil thread from left to right:
1285 – Med Bark
2625 – Arctic Ice
5011 – Rope Beige
2560 – Iris
2468 – Dk Wine
2375 – Antique Blush

The geology at the Bay of Fundy was decidedly red-brick colored. Between the red mud and the red rocks, there was a heavy theme of brick (marsala!?) in my photographs. The rocks exposed at low tide are shaped by the tides, the strength of the rocks, and the presence of the joints in the rocks. The rock in the cliffs the stacks are being cut from are arkosic sandstone and coarse poorly sorted conglomerates (thank you, Wikipedia–geologists, please correct me if I’m wrong!). We loved exploring caves carved into the soft red sandstone at St. Martin’s Caves. Isn’t the power of nature amazing!?

battered bay of fundy boat color paletteCorresponding solids from left to right:
Kona Black, Bella Lead, Bella Stone, Kona Crimson, Kona Teal Blue, Bella Caribbean

Corresponding Aurifil thread from left to right:
2692 – Black
1246 – Grey
2606 – Mist
2345 – Raisin
1310 – Med Blue Grey
2850 – Med Juniper

This boat has seen better days, but never have I seen one more full of character! I think because of the drastic change in tide each day, the sides of the boats moored to the dock get a beating. It’s still gorgeous, though!

Not only did color abound, but there was plenty of texture and pattern to be enjoyed as well.

battered rocks at the bay of fundyRocks as pocked and battered as this one littered the beach. I suppose this is what happens when 40 feet worth of tides come in and out each day, rolling and bashing the rocks against each other.

seaweedSeaweed. Gorgeous. This feathery seaweed covered the exposed rocks, creating a seascape of brown-green-red as far as the eye could see.

st johns city market gateI loved the gate at City Market in St. John’s. It’s a lovely balance of geometry and balanced aesthetic. Quilt inspiration is everywhere!

I’ll leave you with a good laugh. With a tendency to take a million photos, I wanted to be sure to have at least one of my husband and me together on our adventures, and an arms-length selfie just wouldn’t cut it. So of course, I set up a timer photo with the plan to run and join my husband for the photo like I always do. After three or four failed attempts, we decided that maybe the one who wasn’t 8 months pregnant should do the running. The first photo is my favorite fail, with the camera set by yours truly. The second photo is the first try with my husband setting the camera, successful with a good second to spare!

babymoon to the bay of fundy photo fail

babymoon at the bay of fundy

I’m linking up with Yvonne’s Thankful Thursday, since I’m thankful for our little escape. Spending time as a couple, while seemingly impossible with little kids, is so essential. I’m so glad we make the time to have together time on a regular basis now! (Did I mention that my husband encouraged me to take my sewing machine with us, and during the relaxing afternoon following our adventure I was able to do some sewing? Talk about gratitude!)

Embrace the Rainbow

Rainbows make me happy. As early as I can remember, I’ve enjoyed arranging things in rainbow order. In high school and college, I would always eat M&Ms in rainbow order. No exceptions. As a mom, putting colored pencils or crayons away in rainbow order fills me with a weird feeling of bliss. It’s no surprise, then, that rainbow order finds itself into so many of my quilts. For a while, I thought I would “grow out of” my penchant for rainbows. For some reason, in my mind, rainbow order isn’t as mature as, say… marsala, or gold. Then I had a little blog comment conversation via email with Jenn from A Quarter Inch from the Edge, where she pointed out, “Why does one need to get over a penchant for rainbows? We see them so rarely in real life… we’ve got to make a few of our own!” True that! And so, I have embraced my love of rainbows and I’m letting it shine! Here are two of my current works in progress as proof.

Twirling Star by Leanne at Devoted Quilter pattern testingI’m testing a pattern called Twirling Star by Leanne at Devoted Quilter. It has been fun getting feedback on Instagram about fabric choices along the way. I opted for an entirely low volume background, just switching up the background fabric for the outer pinwheels to help the center star stand out a bit more. Opinions were pretty evenly split between using this Botanics Foliage in Charcoal fabric versus using Ledger from Carolyn Friedlander’s Architextures line. As much as I LOVE Ledger (can you tell I love pretty much all things Carolyn Friedlander?), I was toying with the idea of spinning the outer rainbow pinwheels, but wanted the flexibility to make the decision after seeing the blocks. With Ledger, the directionality issue would have required that I make the decision before assembling the blocks. Foliage, it was!

twirling star rainbow pattern testing for leanne at devoted quilterNow I just need to sew these blocks together and add the borders and this mini quilt top will be finished!

prismatic medallion rainbow alison glass versionNext up is my progress on the Prismatic Medallion mini quilt I’m making for my partner in the Alison Glass Mini Quilt Swap. I definitely attribute my recent burst of rainbow to my purchase of the newest Alison Glass Sunprints. How could you resist making EVERYTHING with these fabulously bright and saturated fabrics!?

I’ve finally received all of the supplemental fabrics needed to fill out the black and white section, and all of the pieces are cut. Only the green and blue/turquoise triangles are sewn together so far. I’m really happy with the black and white triangle, and have come to accept the blue/purple triangle. I’m still debating the yellow/orange and the red/orange/magenta sections.

prismatic medallion alison glass version
Alison Glass handcrafted added in. I think it’s too brown for this palette.

In the yellow/orange triangle (beneath the black and white one), I originally bought a fabric from Alison Glass’ s Handcrafted line to vary the colors a bit. Now I’m thinking it may be too brown for this palette. I’m leaning toward the brighter Cotton & Steel basics yellow instead.

prismatic medallion alison glass version
Magenta-purple spread out a bit in the bottom triangle.

In the red/orange/magenta triangle (bottom center), I’m thinking I will spread out the purply magenta triangles a bit more. I’m thinking this bottom layout will be the final layout, with the C&S yellow and the spread out magenta. I need to decide soon and get this sewn together! What would you do?

embrace the rainbow

I’m linking up with Lee at Freshly Pieced for Work in Progress Wednesday.


Color Inspiration Thursday {43}

Meet Yvonne Fuchs, known as Quilting Jetgirl. I first met Yvonne in the New Quilt Bloggers Blog Hop hosted by Beth at Plum & June about a year ago. Since then, through blog comment exchange and other quilty interaction, we’ve become friends. I was fortunate enough to spend time with Yvonne in person at QuiltCon and I’m looking forward to many more quilting hang outs in our future, despite the fact that we live a country-width apart.

yvonne quilting jetgirl color palette

Corresponding solids from left to right:
Kona Pepper, Kona Tomato, Bella Longhorn, Kona Straw, Bella Pastel Blue, Kona Surf

Corresponding Aurifil thread from left to right:
4241 – V Dk Grey
2395 – Pumpkin Spice
2155 – Cinnamon
2320 – Lt Toast
2612 – Arctic Sky
2740 – Dk Cobalt

Today’s People Palette features Yvonne in front of her quilt Namibia Trees. The color play is fabulous, since who doesn’t want to pair bright reds & golds with royal blue!? Great choice in attire, Yvonne!

Yvonne is a big proponent of building and embracing the online quilting community, which is one of the many awesome things about her. She’s also not afraid to be real, and opens philosophical discussions about all things quilting and beyond. As she says on her blog, “Quilting is more than just a creative outlet for me. I want to pause and reflect on larger ideas to cultivate a community of discussion and insight.” You can read her philosophy discussion posts HERE. I particularly recommend The Four Agreements and Creativity and Time.

Quilting Jetgirl triangle-transparencyYvonne both creates custom quilts and designs quilt patterns, and recently released a gorgeous pattern called Triangle Transparency, which is currently available for sale in her CraftsyEtsy, and Payhip stores for $6 through Sunday, April 12th, which is a savings of 33% off of its regular price. Here are some more of my favorites from her recent quilts:

quilting jetgirl quilts
Top to bottom, left to right: Foothills Mystery Quilt, Love and Loss (Pantone quilt), Life: Ups and Downs, Tessellated Leaves

I asked Yvonne to answer three short questions to help the world get to know the color inspiration star of the week a little more intimately:

Where do you fit into the worldwide family tree of quilting?
I define my branch as the introverted, cat lady, quilter, blogger. I think I span between traditional and modern quilts in terms of style, but left to my own devices (aka with no commissioned quilts), I would lean heavier on the modern aesthetic.

What is the #1 most played song on your iPod?
I don’t know about song, but my favorite bands are Coldplay, Linkin Park, and Chevelle, and their songs are featured heavily in my music playlists. 🙂

What is your least favorite mode of transportation?
What an interesting question! That is really hard for me to answer. I love to walk, and I am amazed by cars, trains, and planes. I can get a bit motion sick in cars and boats, but a bit of planning ahead almost always solves that issue. I have only ridden a horse twice in my life, but both times were enjoyable experiences. Can I say riding a camel just because I never have (but I’d be willing to try!)?

I confirmed with Yvonne that she was choosing riding a camel as her least favorite mode of transportation, since she talked a lot about enjoyable transport, and she confirmed: I know it said LEAST favorite, and I guess I vote for riding a camel as least favorite (they spit, right?). I guess I just am super thankful I can still walk comfortably and I am amazed at modern contraptions to get me places faster than that.

Spit, they do! Thank you so much, Yvonne, for being my People Palette star!

You can find Yvonne in the bloggy quiltiverse here:

Blog
Instagram
Twitter
Facebook

Etsy

– – – – – – – – – – – – –

The color palette was created using Play Crafts’ Palette Builder 2.1 and a photo provided by Yvonne. All images were provided by Yvonne.

I grab a needle and thread once the kids are in bed