We are now two weeks into the year-long 1930s Farmer’s Wife Sew Along hosted by Angie at Gnome Angel and sponsored by Fat Quarter Shop and Marti Michell. I’m a block behind already, but it’s okay. No, seriously, I planned for this. At this point in my life, I have learned to actually PLAN for being behind schedule. (Is that weird or just really resourceful? I haven’t decided yet).
The final layout and block setting I chose/created includes background blocks between the farmer’s wife blocks, so my finished quilt only needs 72 blocks instead of the full 99. This gives me some much needed wiggle room and a whole lot less stress when I’m running “behind”. No worries. This is fun!
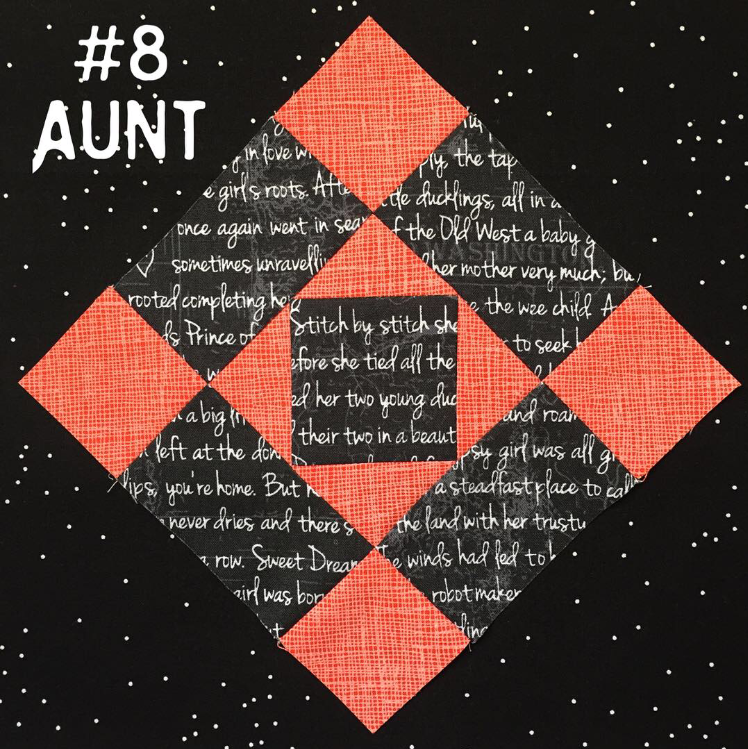
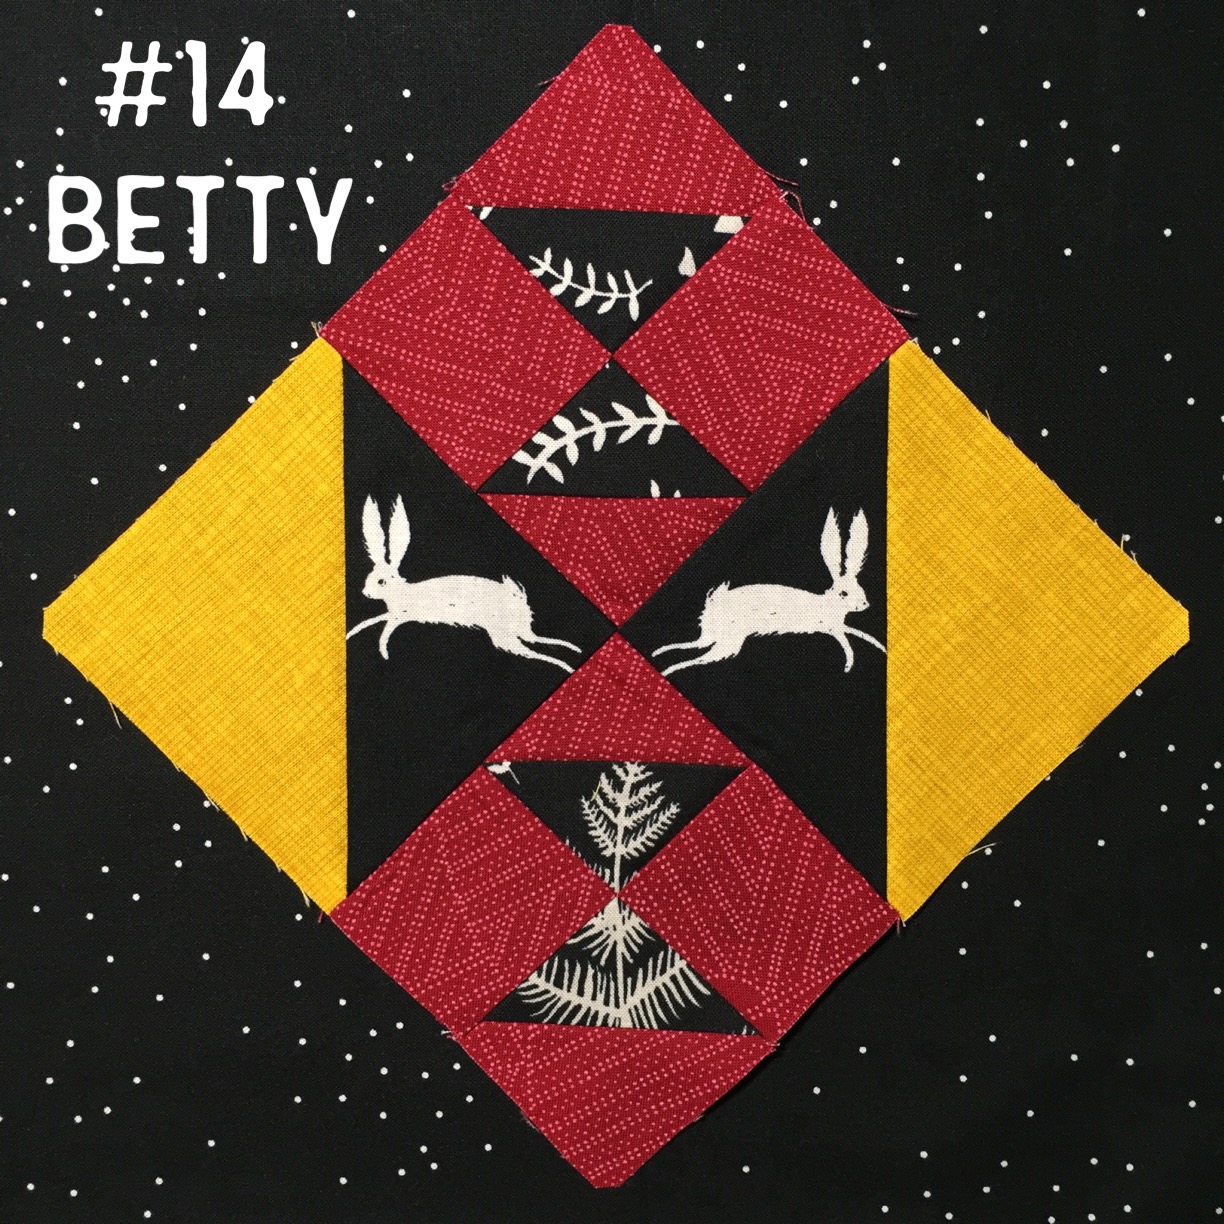
I’m having a great time so far experimenting with warm and cool color combinations as I put together the 6″ blocks. Here are the ones I have completed so far. For photos, I’m backing the warm colors with the black fabric in which they will be sashed, and the cool colors in a white/low volume print. I may swap a more grey-silver fabric in as sashing in the final quilt construction. Time will tell.
As you can see, I’ve been inspired by the gorgeous blocks being made by other quilters, especially the fun use of meticulous cutting. While I don’t have many “fussy cut”-able tone on tone fabrics, you can be sure you’ll be seeing more meticulous cutting in future blocks wherever I can make it work. It’s so much fun!
Reading the letters that correspond to each block has been my favorite part. The determined spirit of the farmer’s wives in the 1930s is inspiring and really puts things into perspective. While my block sewing has not been as reflective and relaxing as I imagined (shocker), I am enjoying this journey.
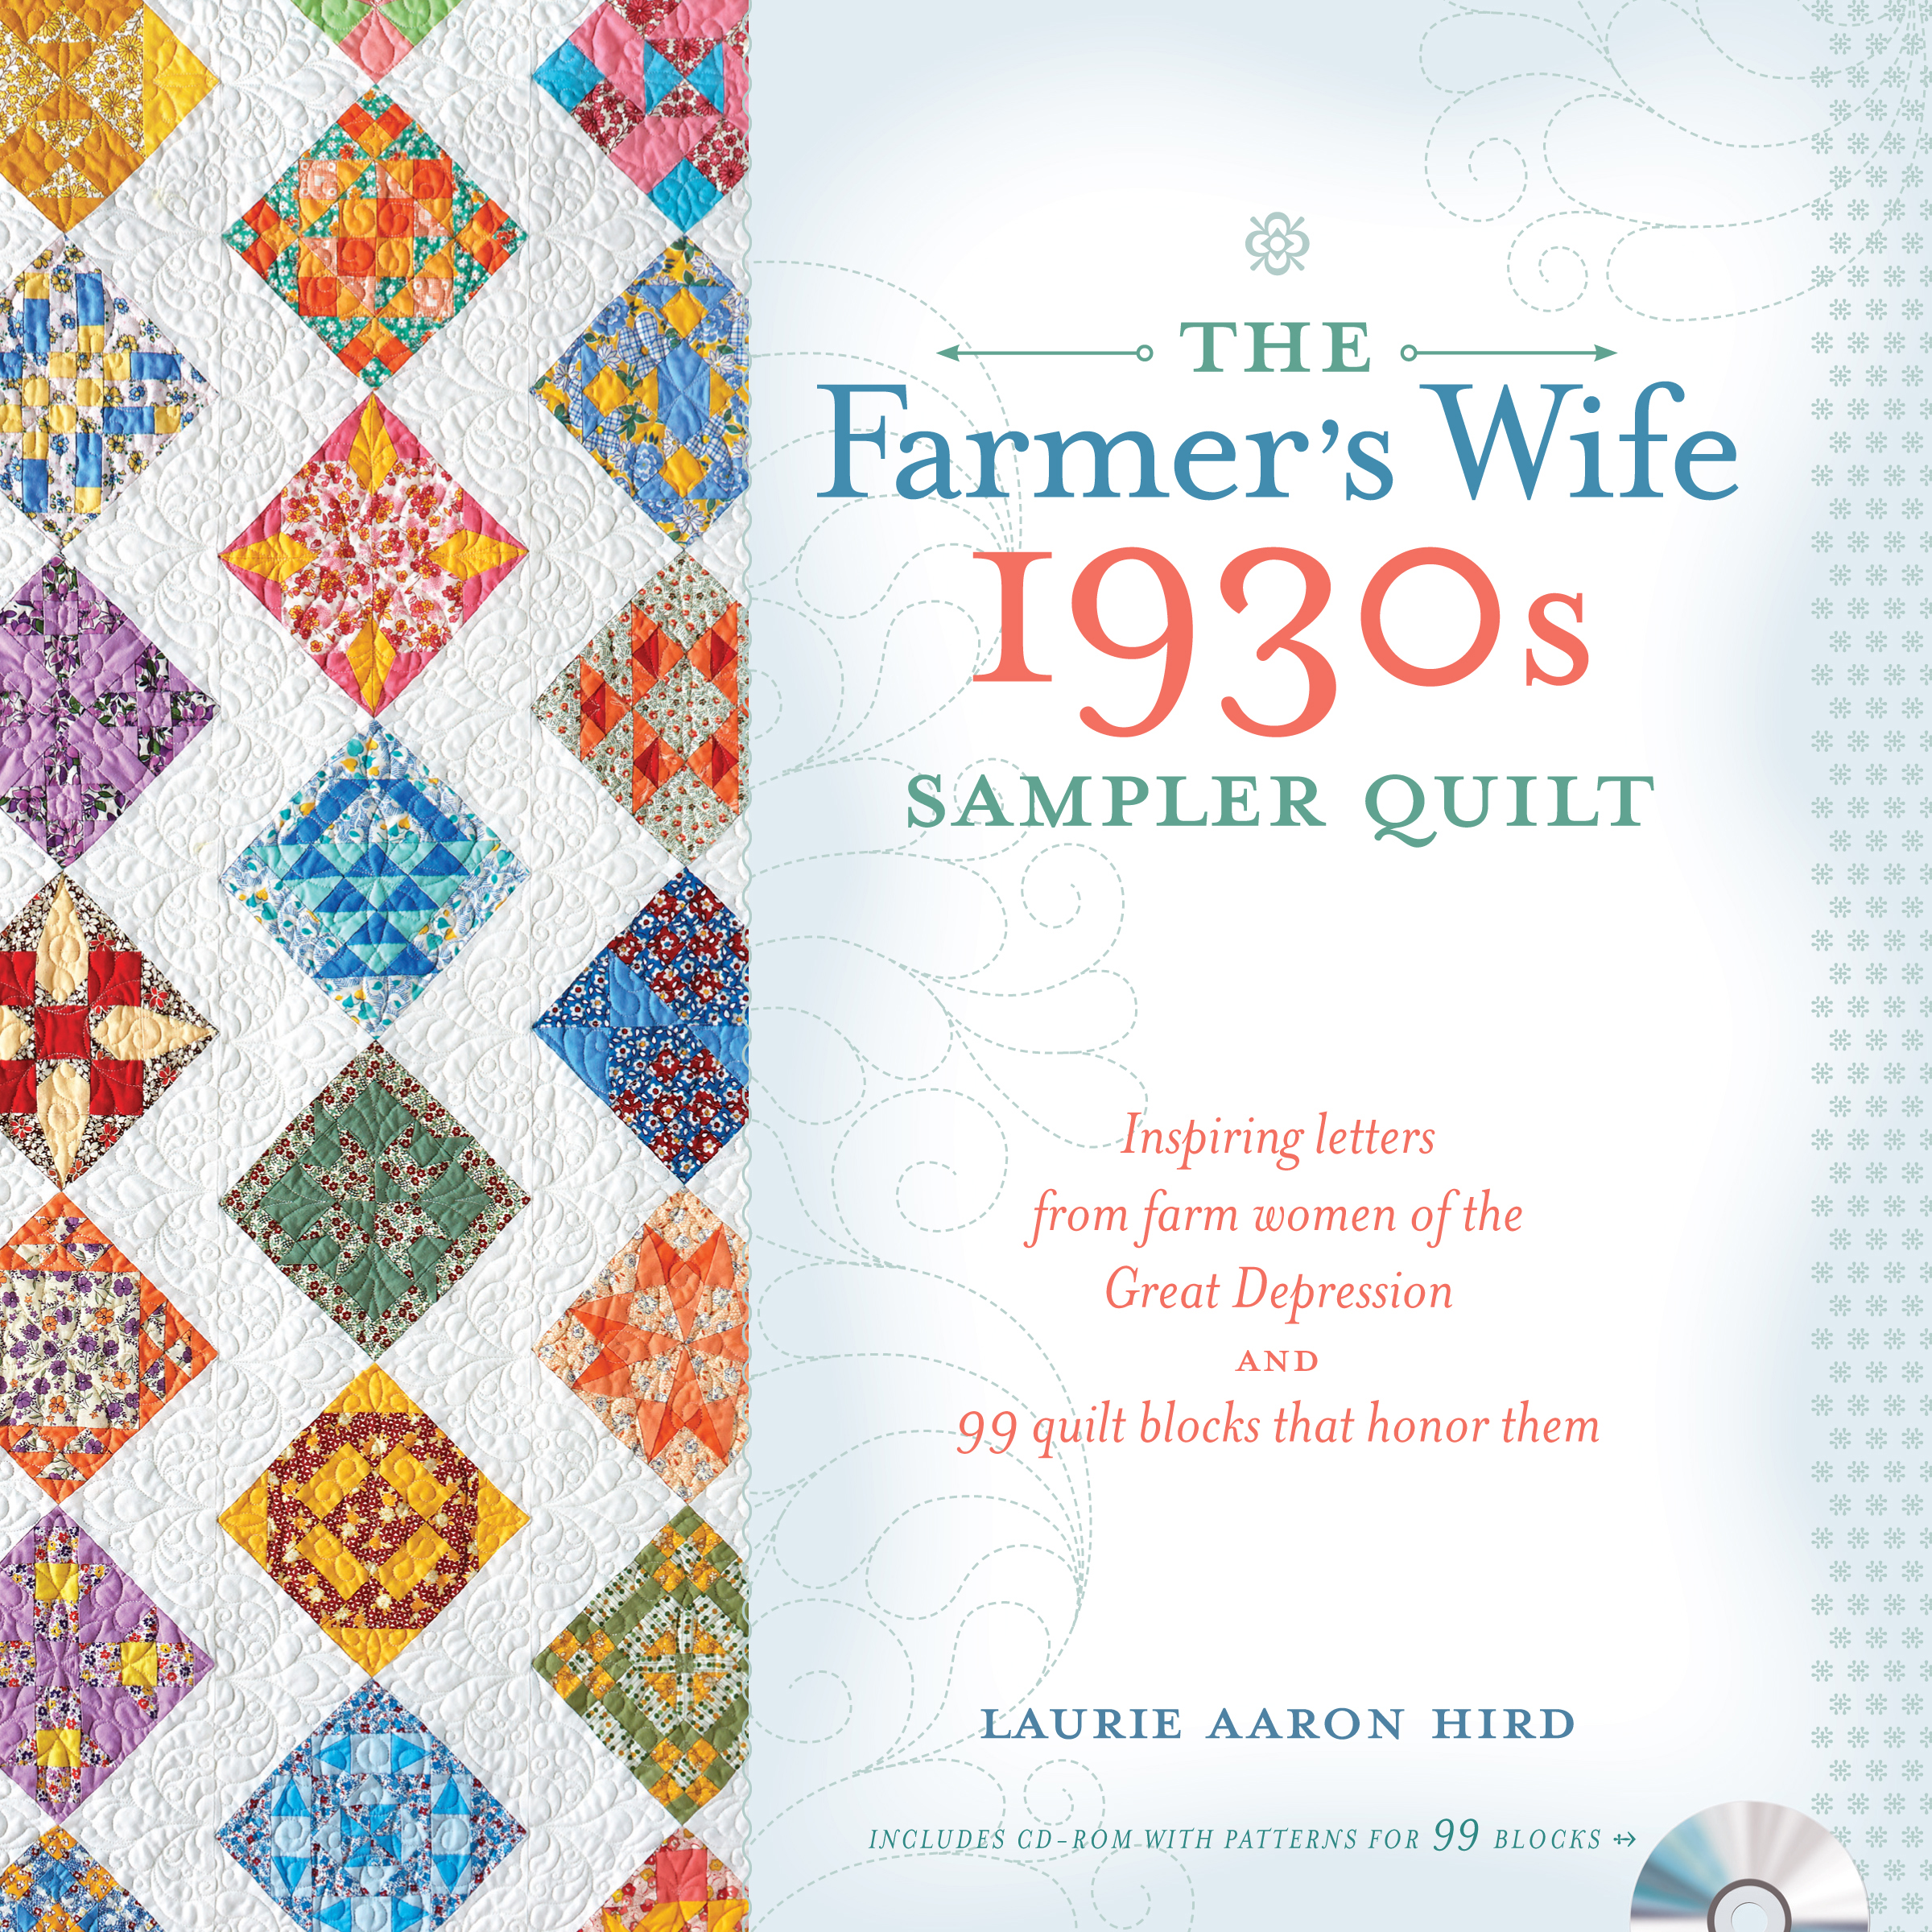
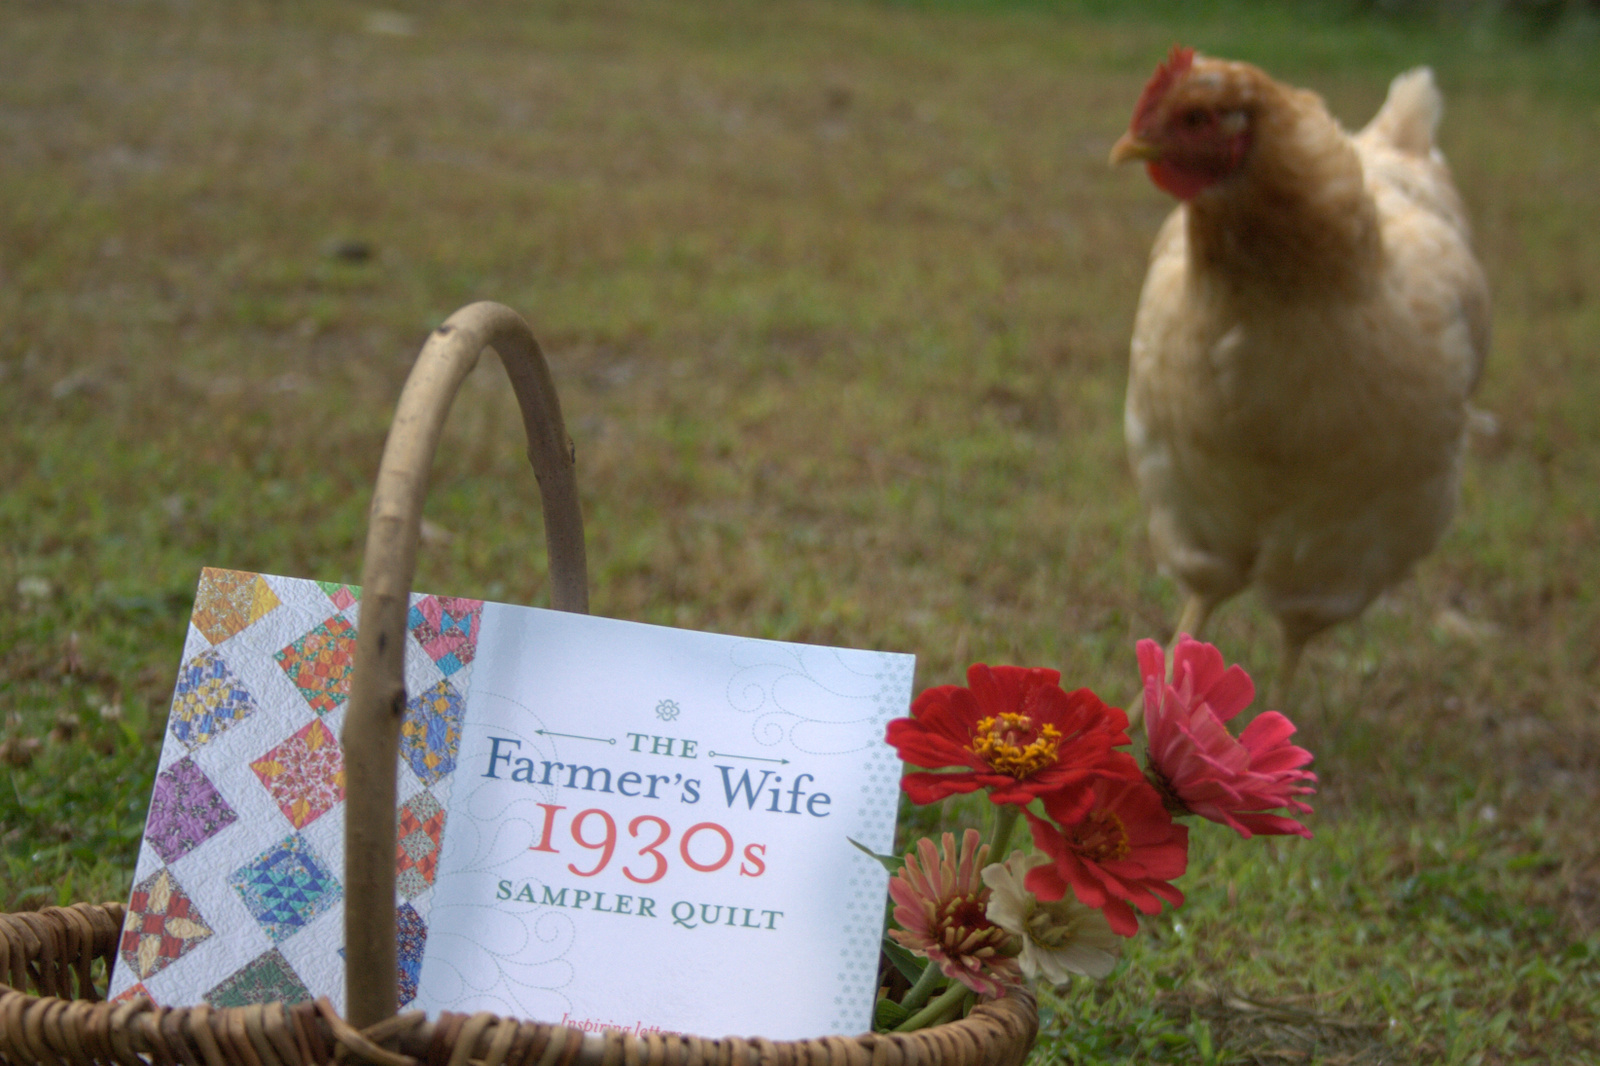
The Farmer’s Wife 1930s Sampler Quilt: Inspiring Letters from Farm Women of the Great Depression and 99 Quilt Blocks That Honor Them by Laurie Aaron Hird for Fons & Porter/F+W; RRP $28.99 – Click here to purchase.
The only requirement for this sew-along is that you have the book by Laurie Aaron Hird, since the block measurements, directions, and templates are all included only in the book. There is also now an ebook available, which makes it super easy to jump right in.
I’m linking up with Angie’s Farmer’s Wife 1930 Sew Along Link up, week 2. I encourage you to hop over and see all of the gorgeously diverse blocks that have been made so far. It’s amazing how each person’s personal style and tastes can be put into the very same block! You can also visit the extremely active and growing Facebook group, which is now over 4,000 strong! I’m looking forward to making more of these blocks, and reading more inspiring reflections by the farmer’s wives of the 1930s.
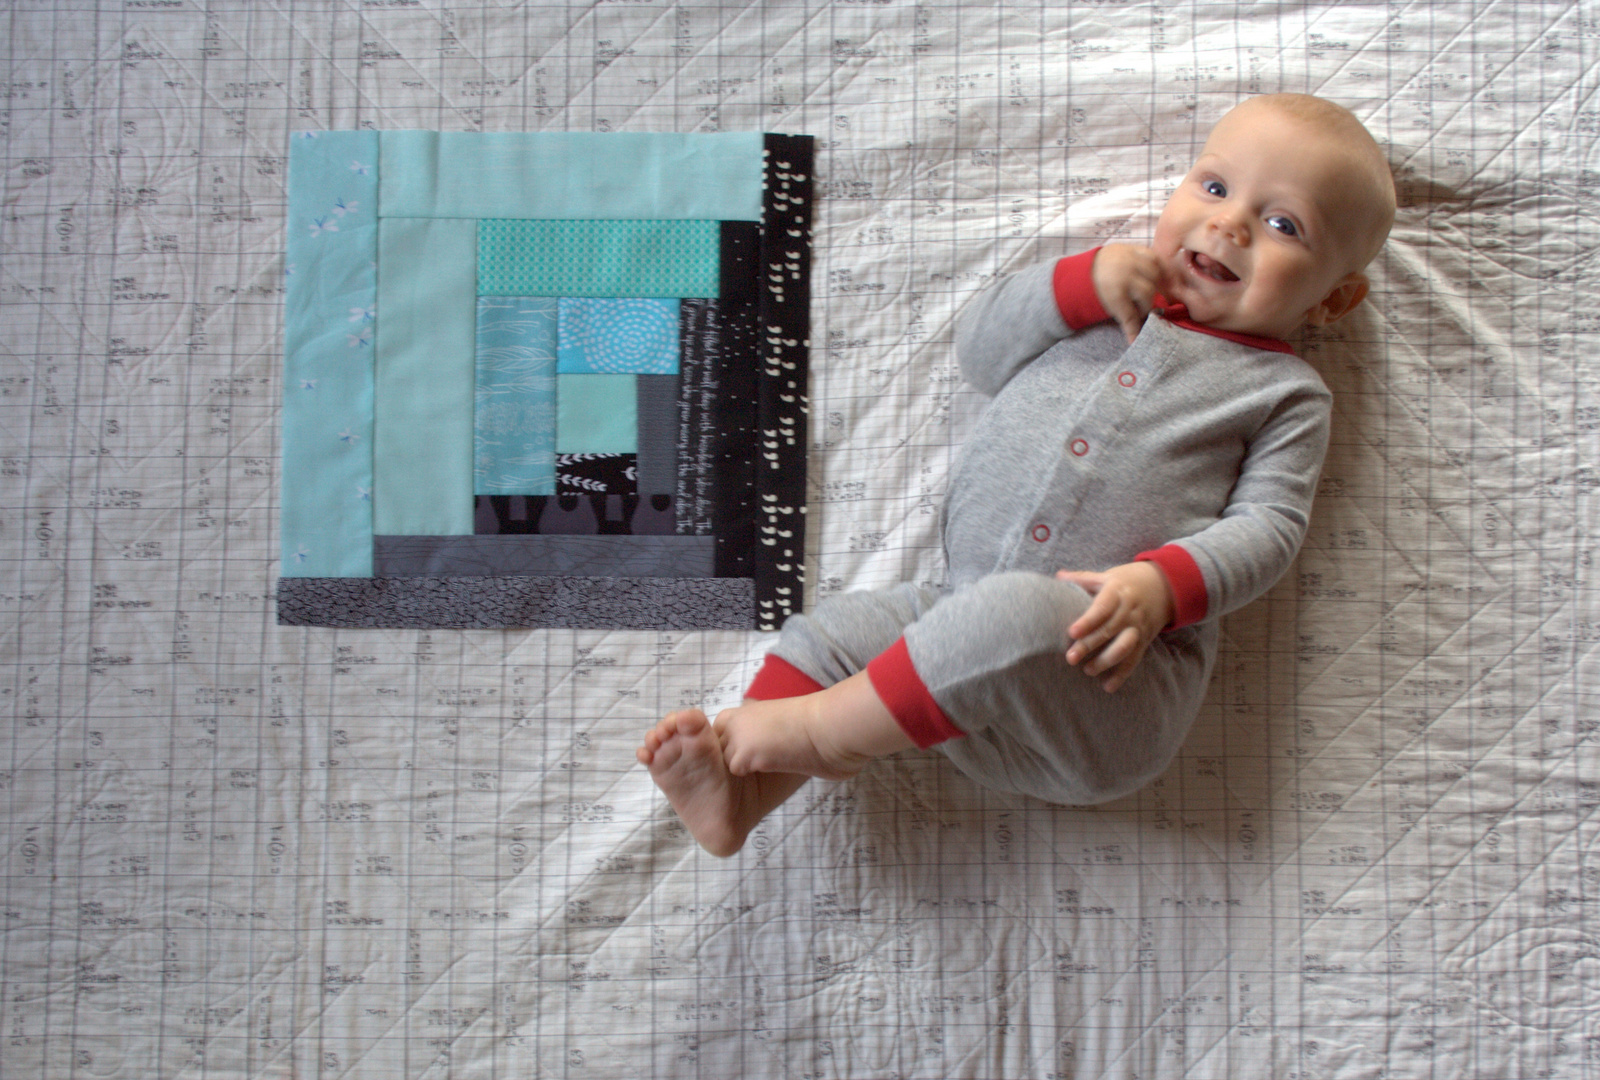
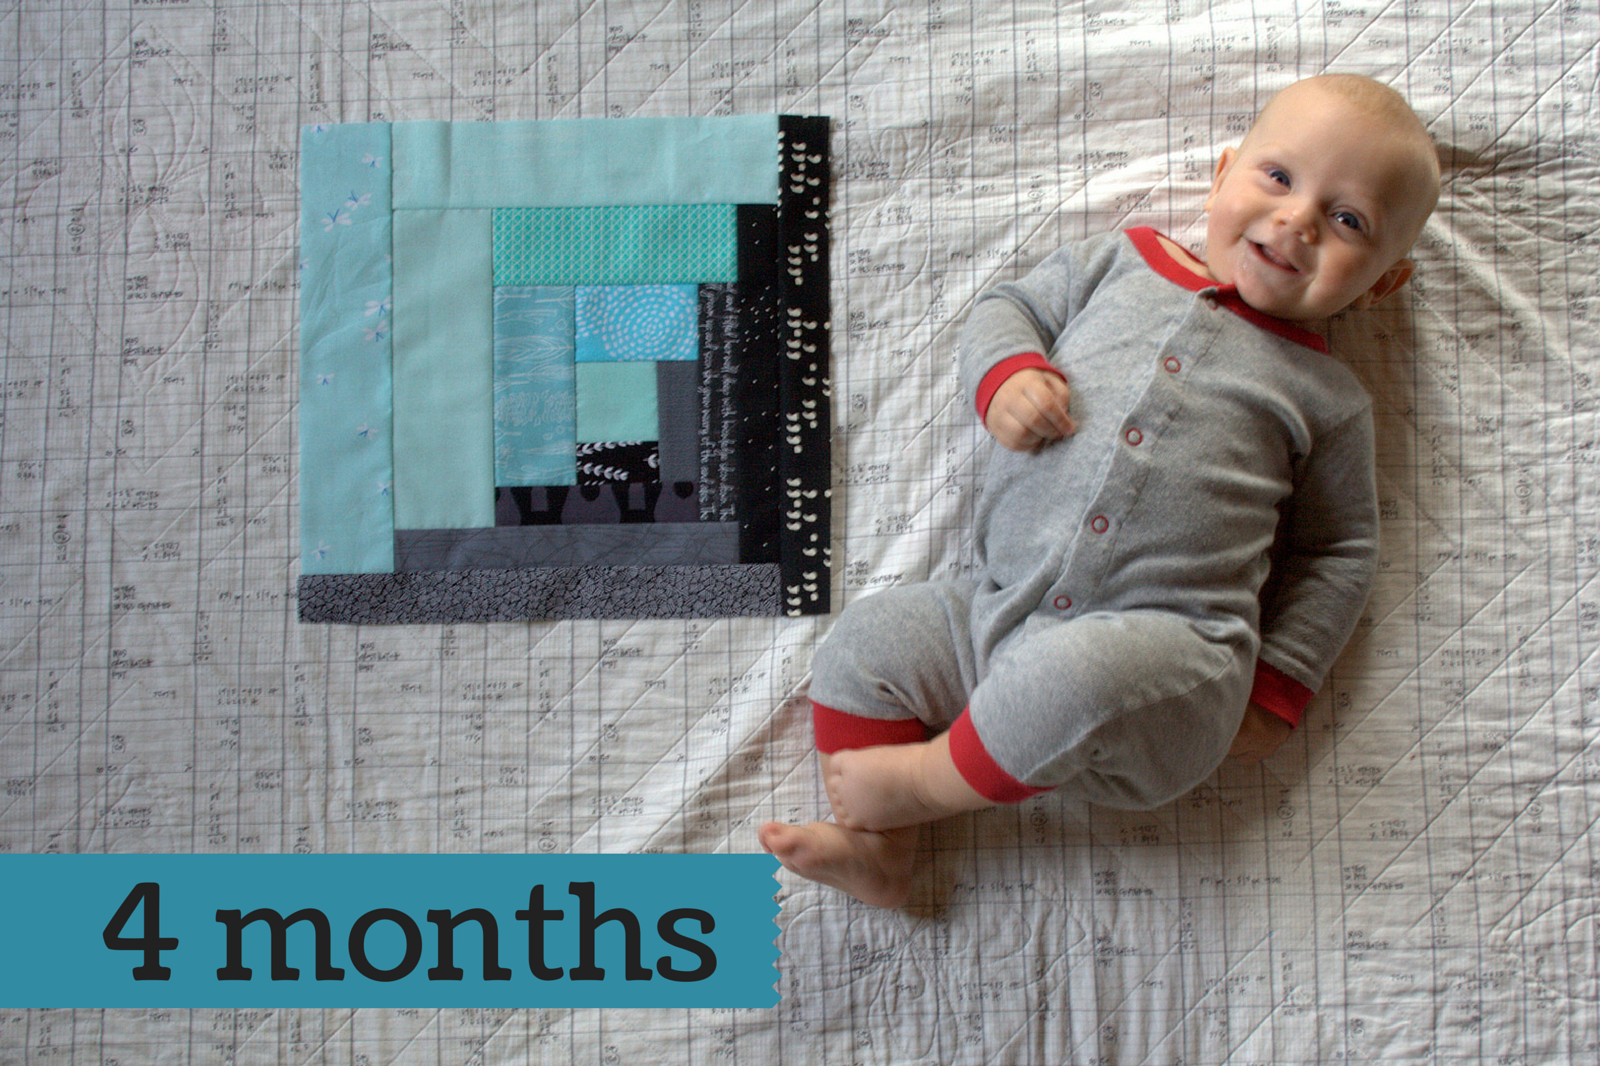
Four months old! Which means I’m now four blocks into my milestone quilt for Finn. For those of you new to this project, my husband had the brilliant idea (through jest) to make a quilt block every month with which to photograph my baby Finn as he grows, and sewing them into a quilt for him as a birthday present in celebration of his first year. I took the idea and ran, and haven’t looked back yet.
This project is still feeling very doable and I’m considering adding an additional four blocks to make it a big larger of a quilt at the end of the year. For now, though, I’m sticking with the one quilt block per month idea, and so far I’m four for four (great record!). You can see my planned layout in my 3 Month post here.
Finn is growing as only babies can. He’s a very stretched out baby, who loves to flex his legs and stand whenever he can, but he also has found the potential in rolling to the side, and has made it halfway over before getting stuck. He sucks and chews on his fingers, either for soothing or maybe he’s teething already (I sure hope not!). He is still so aware of everything around him and loves to “talk” with his baby babble and big bright eyes.
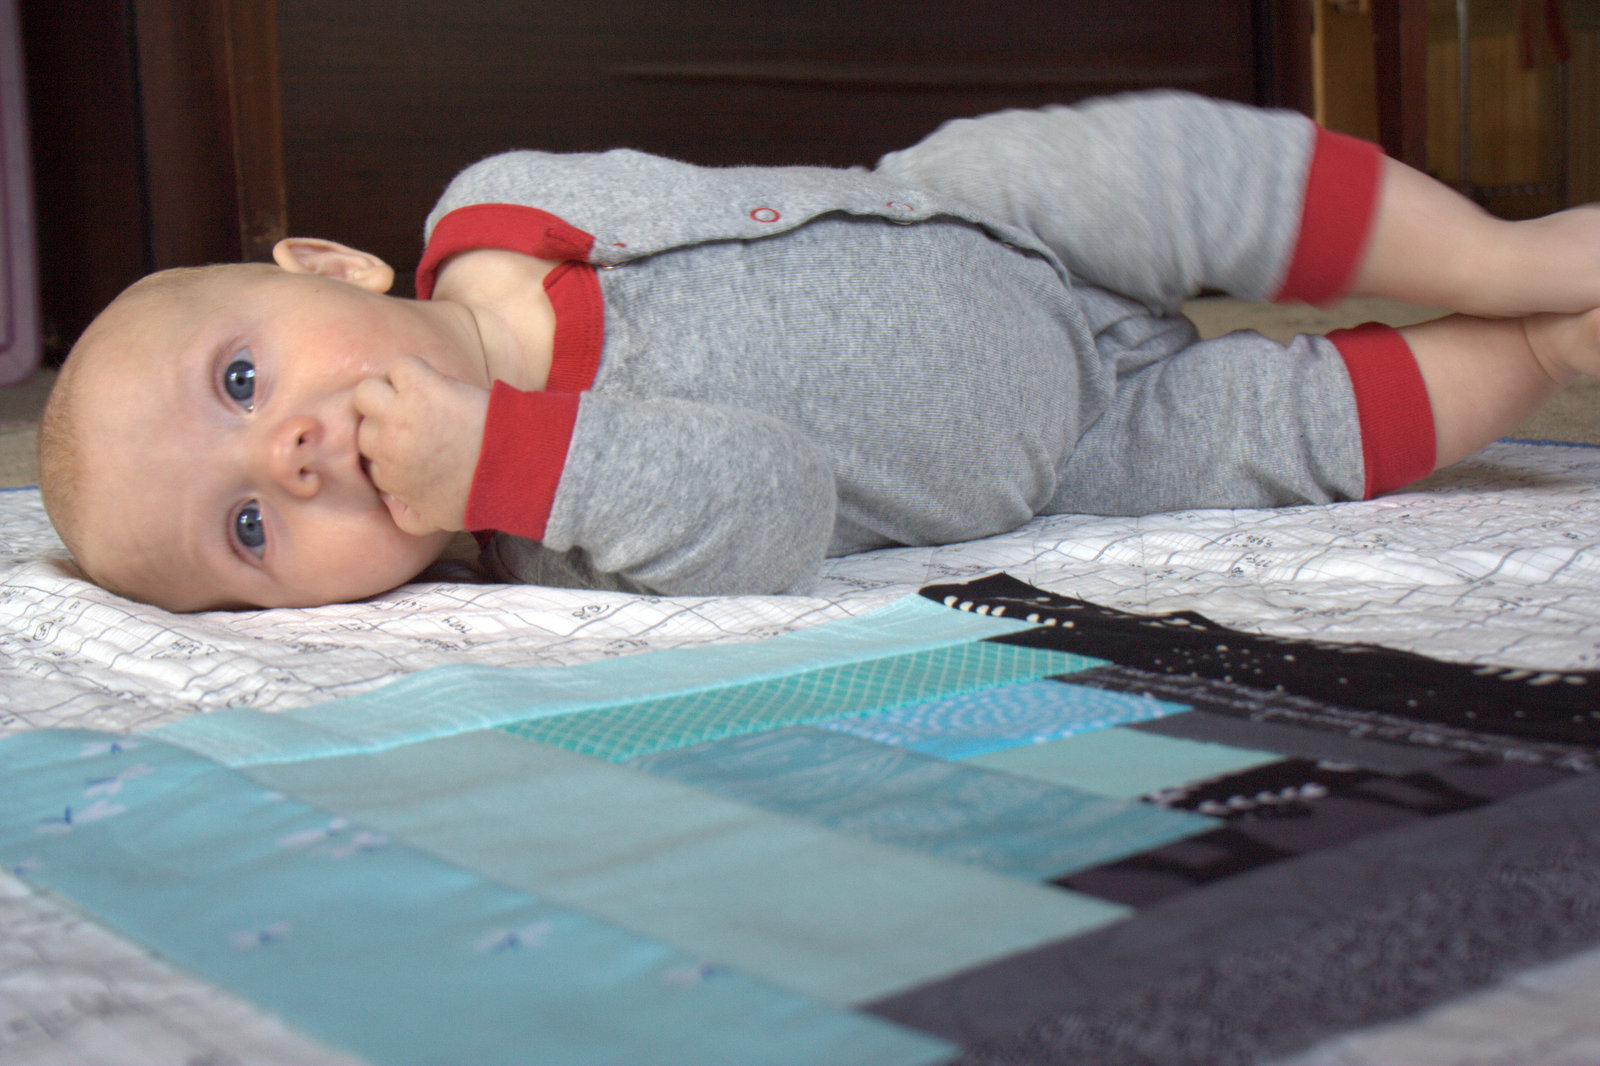
His newfound love of movement makes it quite difficult to get a good photo, but I managed to get a few. Even today, when he’s in the thick of a slimy, drippy, coughy cold, he is so full of bright eyed smiles and giggles. I caught myself almost defiantly asking him the other day, “How are you so happy ALL the time!?”, feeling like I was missing out on something. But then I realized since smiles are contagious, seeing him smile makes me happy no matter how stressed, tired, or otherwise cranky I might be. He’s a gift for sure.
Always on the move, with a smile in his heart.
I am really enjoying creating this quilt along with Finn’s growth. Setting small, attainable goals makes the entire quilt-making process not only doable, but it makes it part of my journey through his first year.
Now up I go to relieve my husband and take my shift holding our poor slimy guy upright so that he can get some sleep without coughing and spitting up slimy gunk. It may be a long night ahead, but hey… it’s all part of the journey and it’s a blessed one indeed.
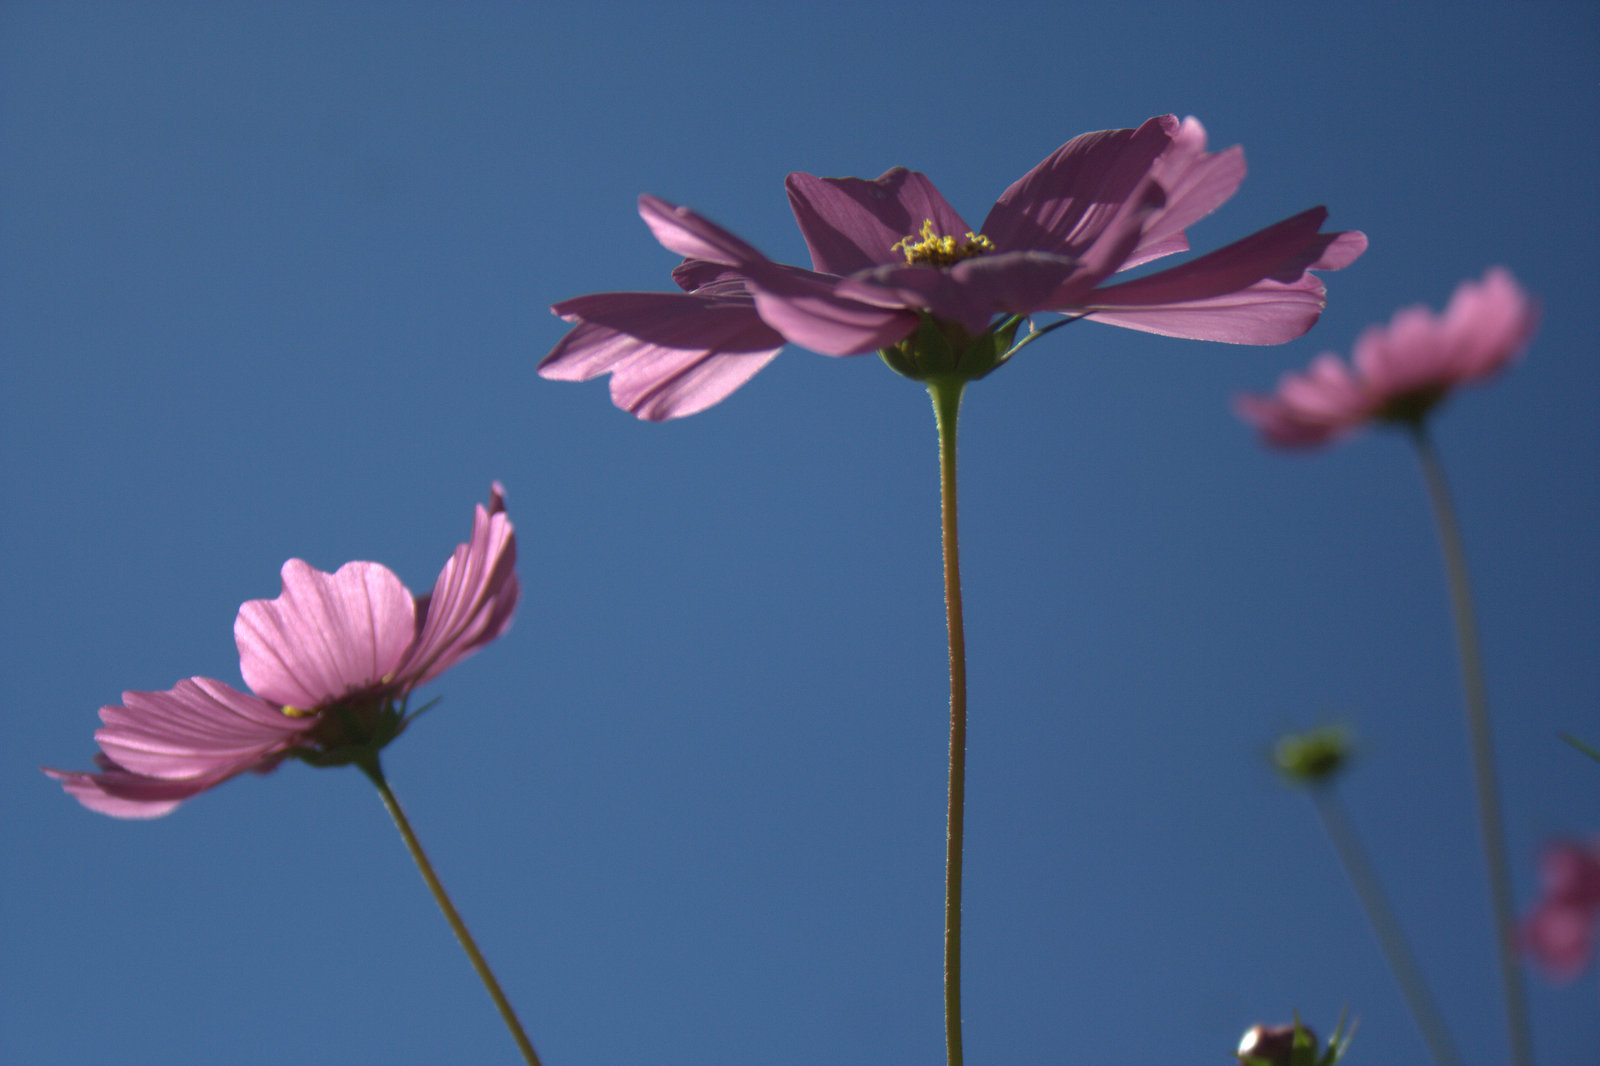
As long as it’s before midnight, it still counts as Thursday, right? I don’t want this week to slide, so I’m squeaking this beauty in before the buzzer. We’ve been getting doused in rain (I hear we got 9″ yesterday!), so these poor gorgeous flowers have been beaten down into a horizontal position since these photos were taken, but that doesn’t mean we can’t bask in their beauty!!
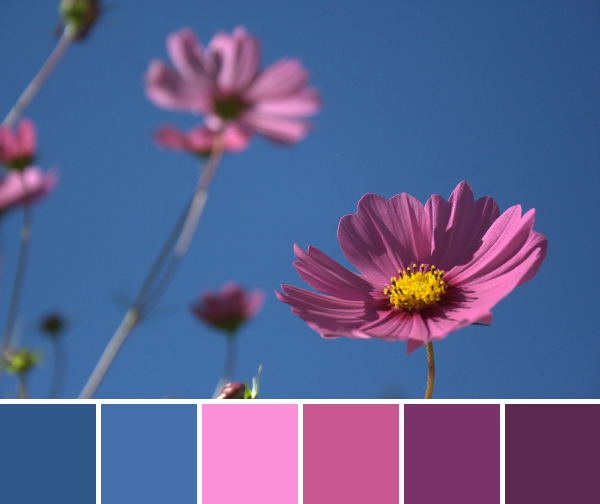
Today’s color inspiration features Cosmos from my garden, a perfect magenta-pink against a bright blue sky. The color palette was created using Play Crafts’ Palette Builder 2.1 and the matching solids and Aurifil thread are an awesome perk!
Corresponding solids from left to right: Bella Cobalt, Bella Amelia Blue, Kona Candy Pink, Bella Fuchsia, Bella Boysenberry, Kona Eggplant
Corresponding Aurifil thread from left to right: 1248 – Grey Blue
4140 – Wedgewood
2515 – Light Orchid
2479 – Med Orchid
4030 – Plum
1240 – V Dk Eggplant
Take a deep breath. Soak in the glorious sun (c’mon, play along with me, even if it’s nighttime). Imagine these dainty flowers peacefully bobbing together in the gentle breeze, warm sun shining down upon them. Just looking at this photo makes me feel lighter. It surely helps that I LOVE these colors together. In fact, I very well might take this palette to create my first official color inspiration quilt. I’ll need to include a pop of golden yellow, of course. Maybe?…
I’m sharing a few more photos of these flowers, sans color palette, since the palette above embodies the colors and brightness so well, but I can’t resist sharing these other angles with you. Enjoy!
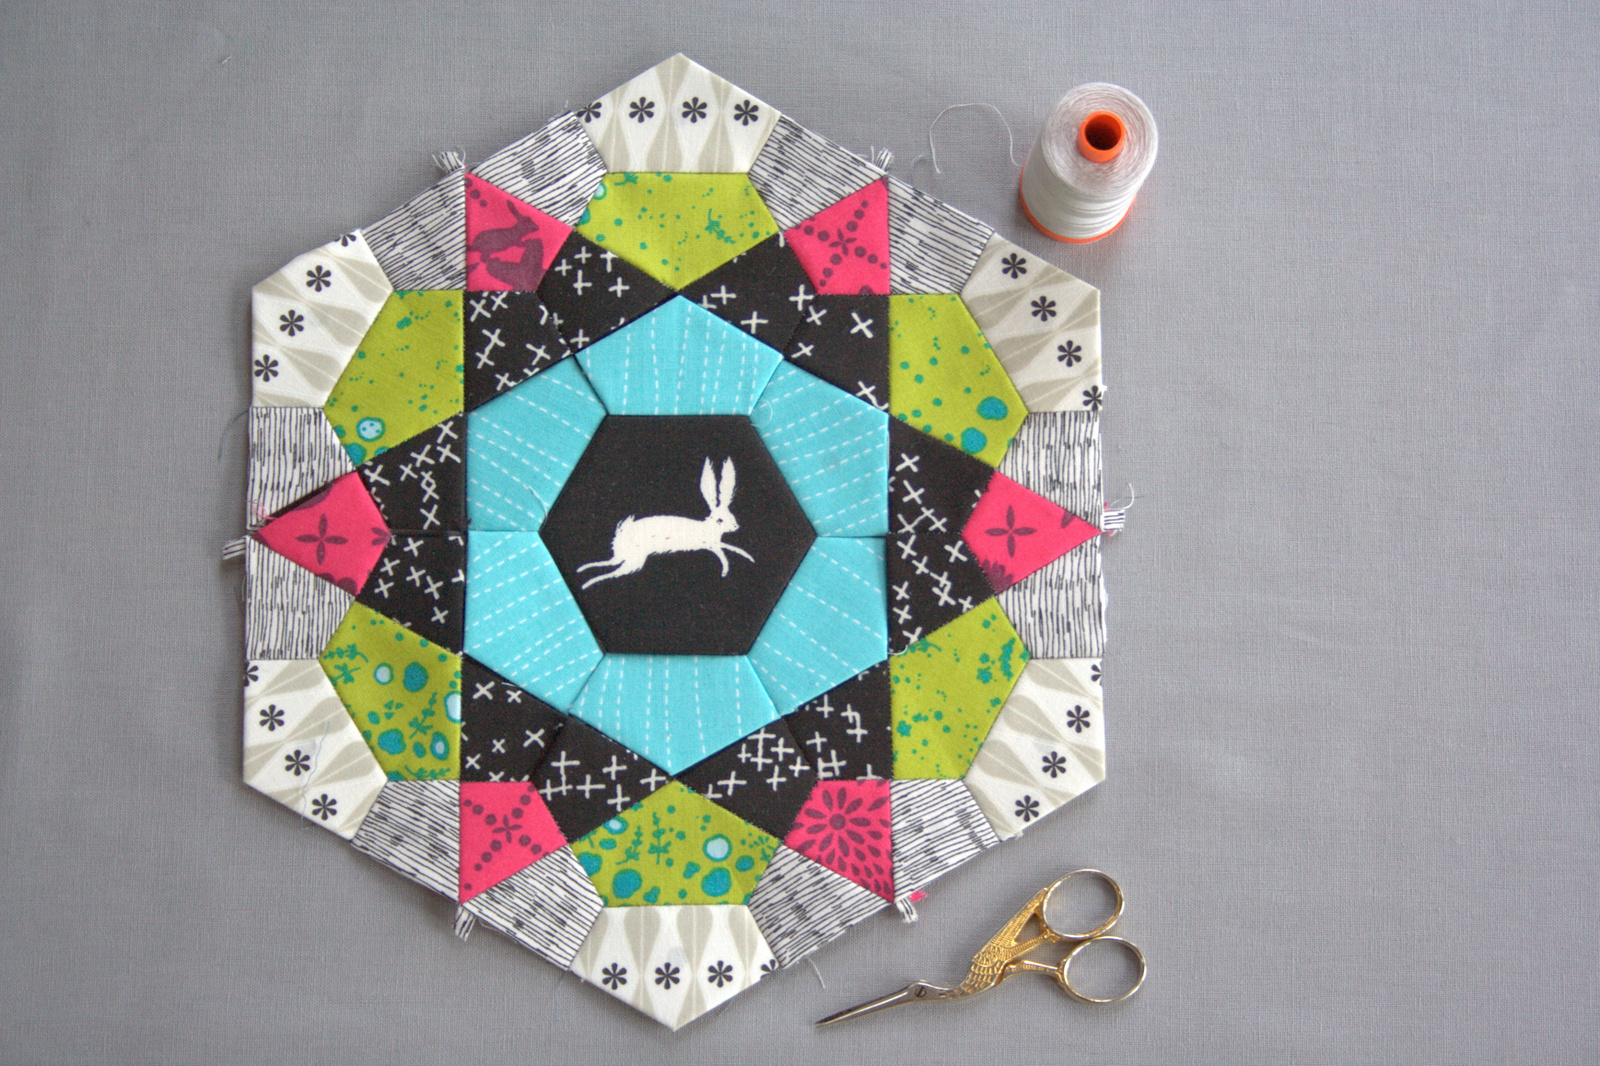
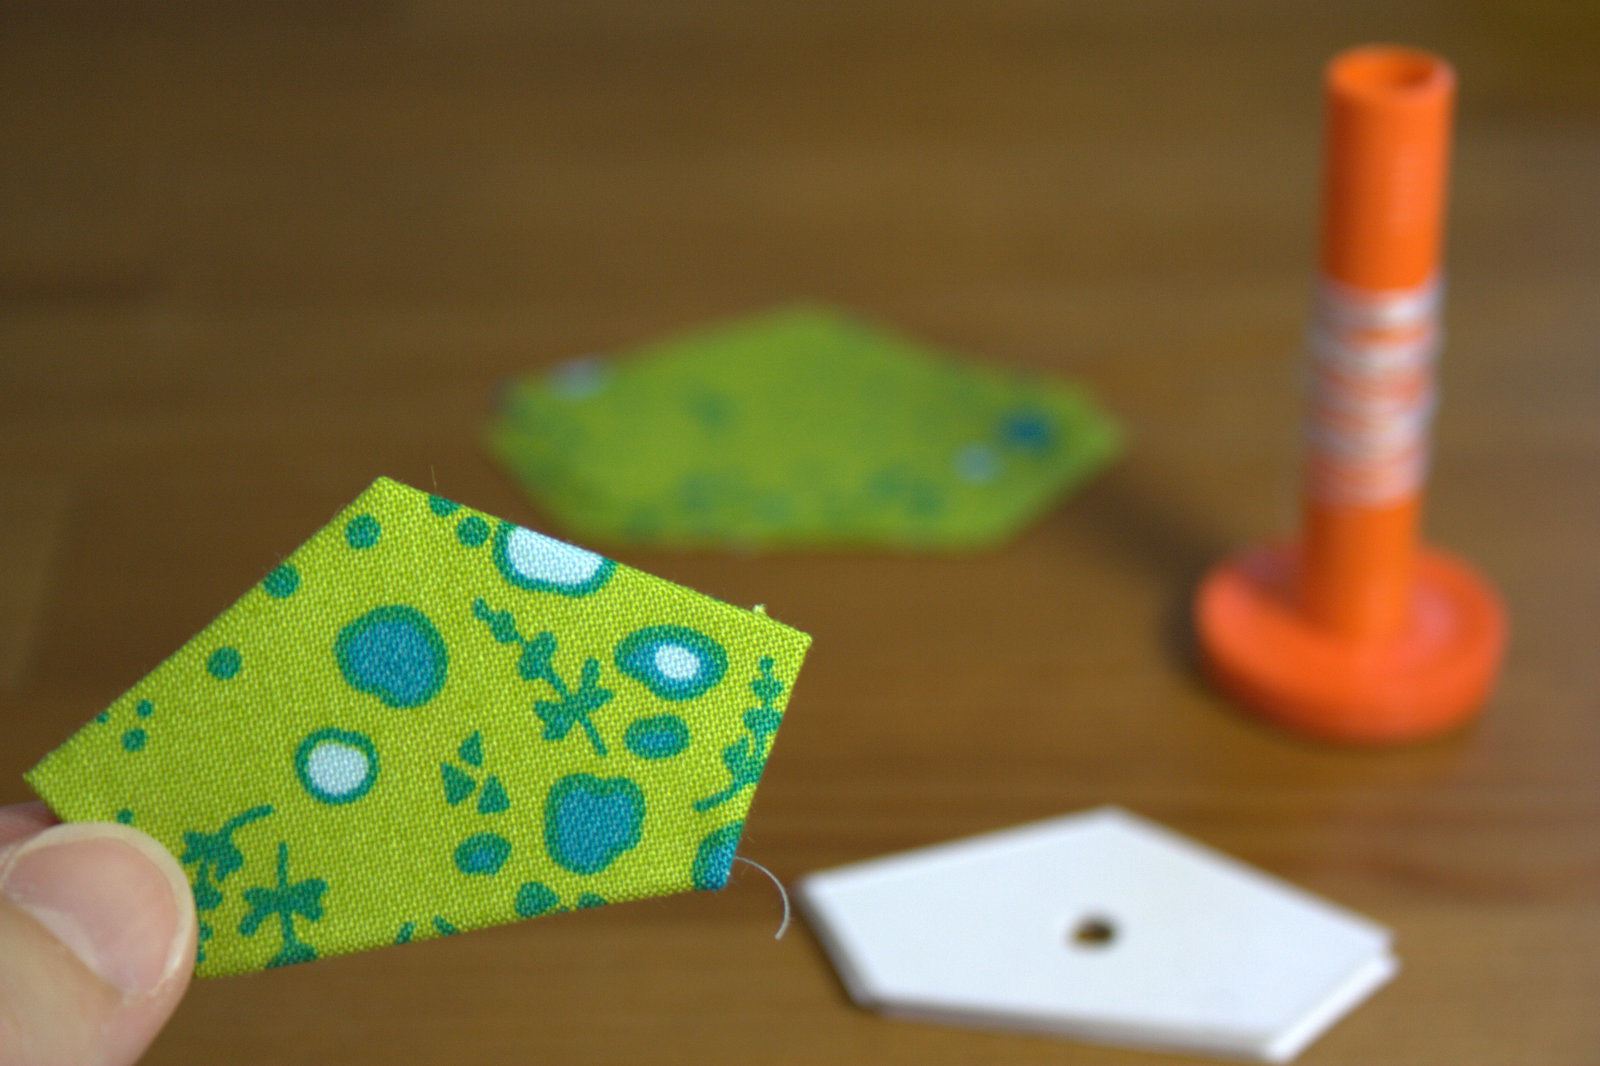
I’m excited to share that today is my Sizzix Design Team debut! Over on the Sizzix blog, I share a tutorial on how to get started on making an awesome English Paper Pieced (EPP) mug rug using the Rose Star die.
Did you know that there are Sizzix dies created specifically for paper piecing!? I cut all of the templates and fabric needed to piece this EPP star all from a single die! Pretty awesome.
In the tutorial, I take you step by step through the process of making and basting EPP pieces, including some helpful tips, so if you’ve been wanting to learn or brush up on your piecing, go check it out!
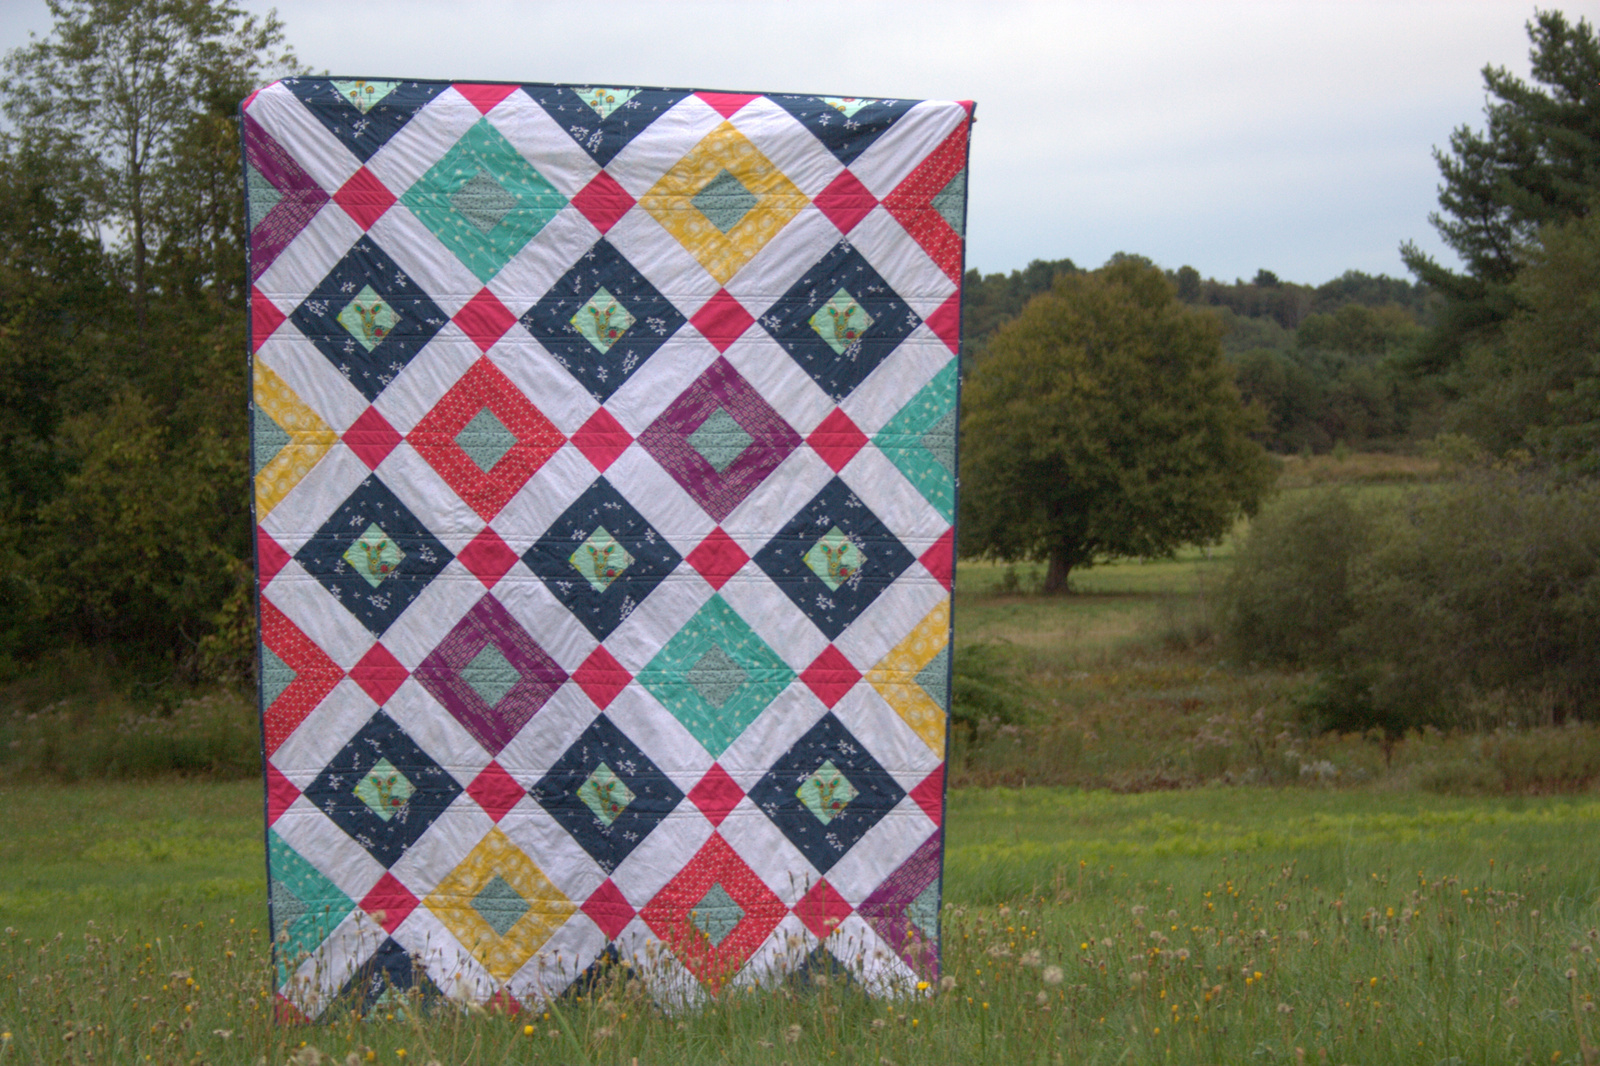
I’m excited to share one of the big behind-the-scenes projects I’ve been furiously sewing over the past few weeks: my version of the Welded Quilt, the newest free quilt pattern released as part of a collaboration between Art Gallery Fabrics and Fat Quarter Shop called AGF Stitched with Kimberly (or #agfstitched).
This quilt is the third pattern released by Fat Quarter Shop and Art Gallery fabrics (you may have seen the Birchen and Fractal quilt patterns already released). The original version of the Welded quilt features Artisan by Pat Bravo. There’s an awesome instructional video HERE that helps make the organization and piecing of this on-point quilt very straight forward, without having to worry about bias edges. Fat Quarter Shop also has quilt kits and backing sets available.
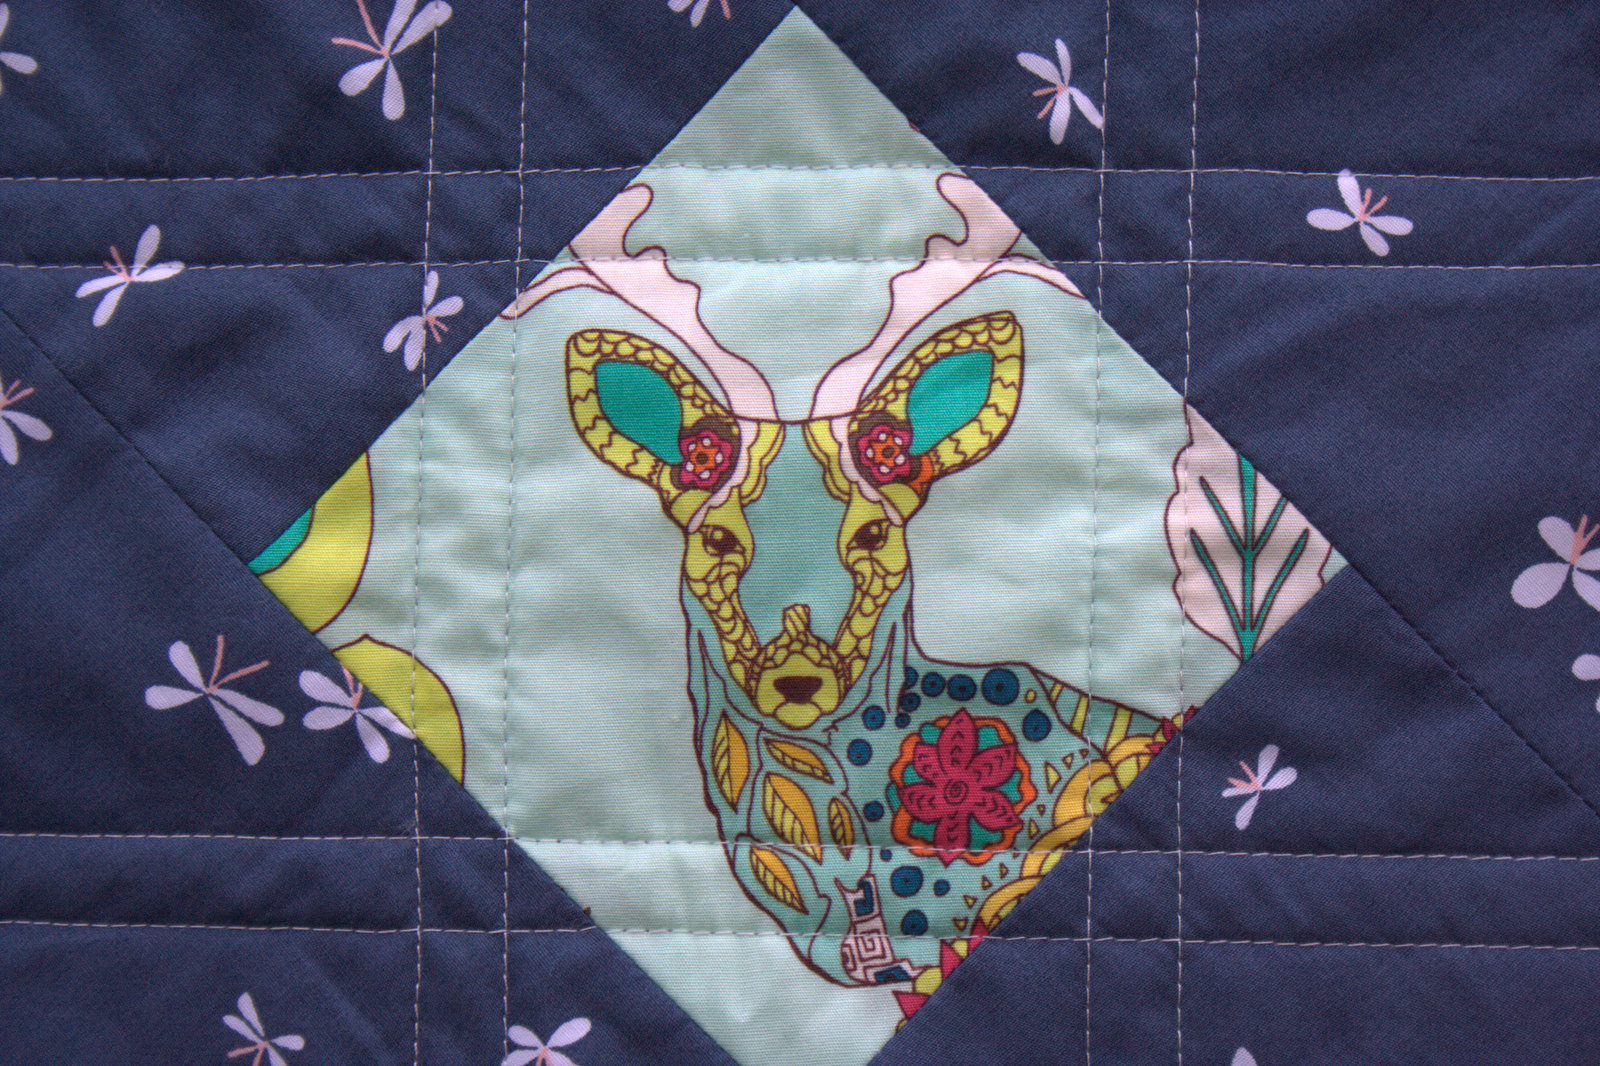
When I was invited to be a part of the team to make this quilt, I accepted excitedly. I loved the idea of making an on-point quilt, and I knew that I wanted to use the focal diamonds to feature some meticulous cutting (fussy cutting to the rest of the quilting world). I also know how easy Kimberly makes quilt-making with her simple instructions.
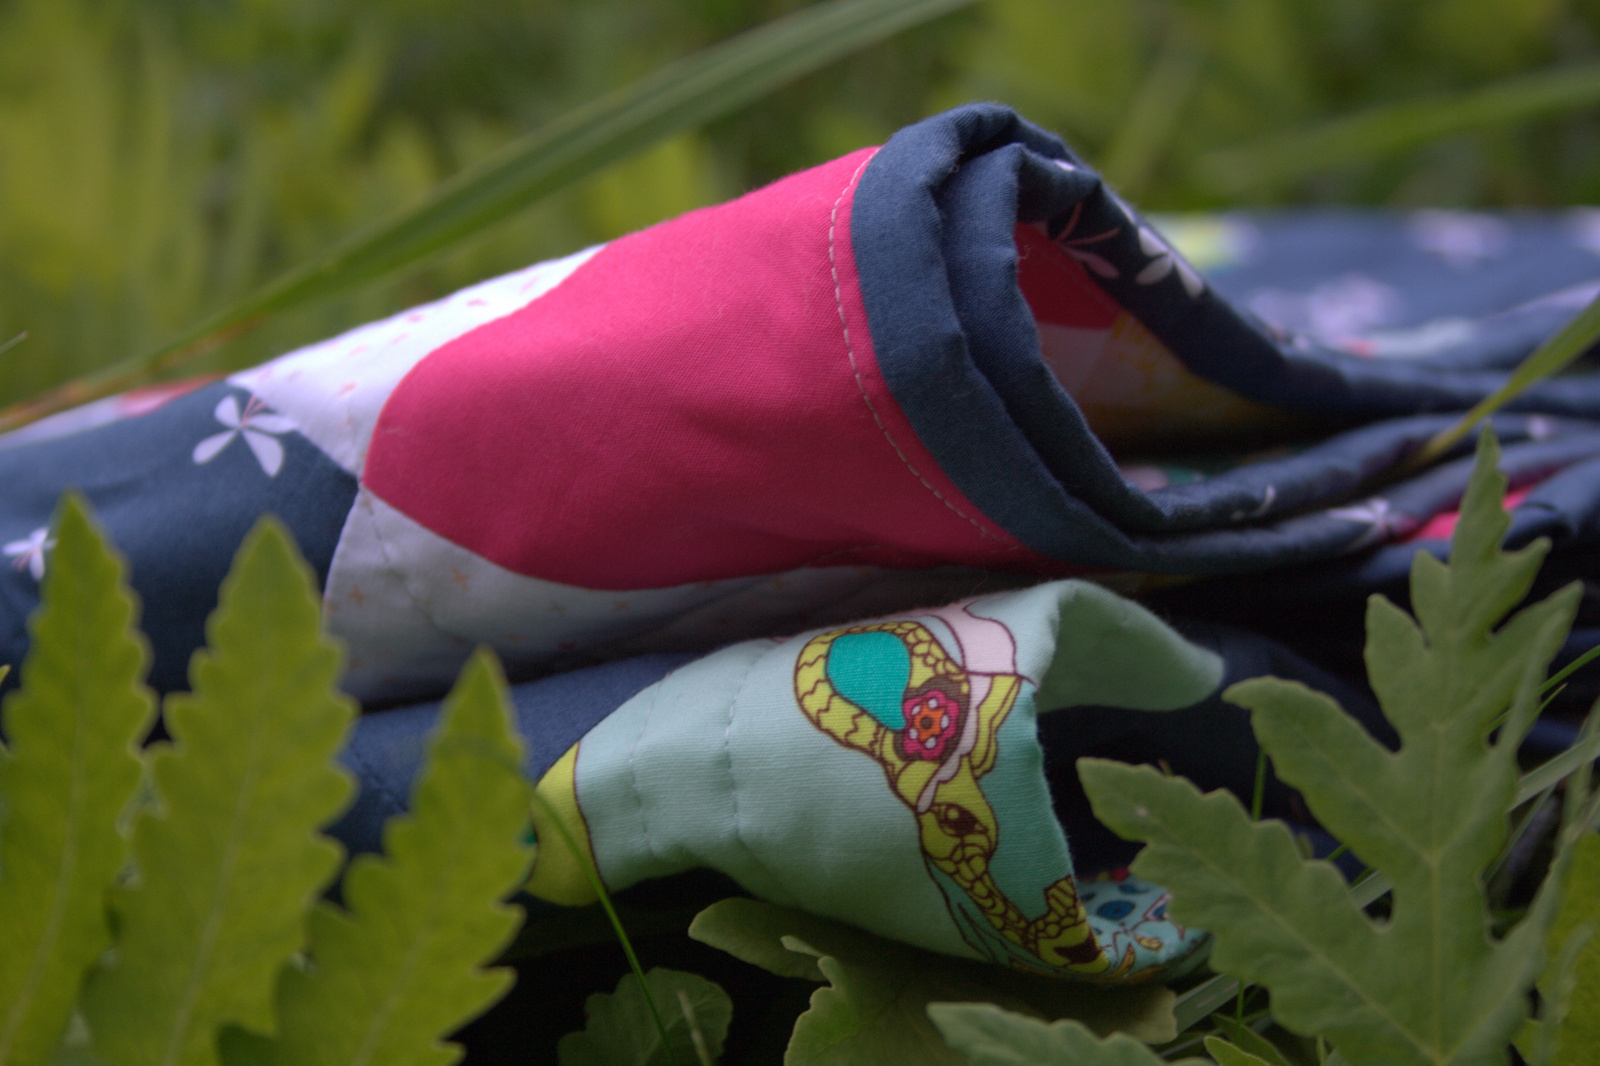
I was invited to use the Art Gallery fabrics of my choice to make this quilt, and the fabric was generously provided by AGF. I quickly selected fabrics from Utopia by Frances Newcombe, including this Dreamlandia Irradiated (featuring the awesome deer), and some coordinating Curiosities by Jeni Baker. I added Art Gallery Pure Elements in Raspberry Rose, Teensy Weensy Lotus from Littlest for the light sashing, and Optical Origami Mod from Urban Mod by the AGF Studio to round out the palette.
I did have a few extra dates with my BFF the seam ripper due to directionality miscalculations, so pay extra attention to directionality of your edge pieces if you choose fabric with a distinct top and bottom. Those seam ripping dates were well worth it, though. I’m thrilled with the resulting quilt.
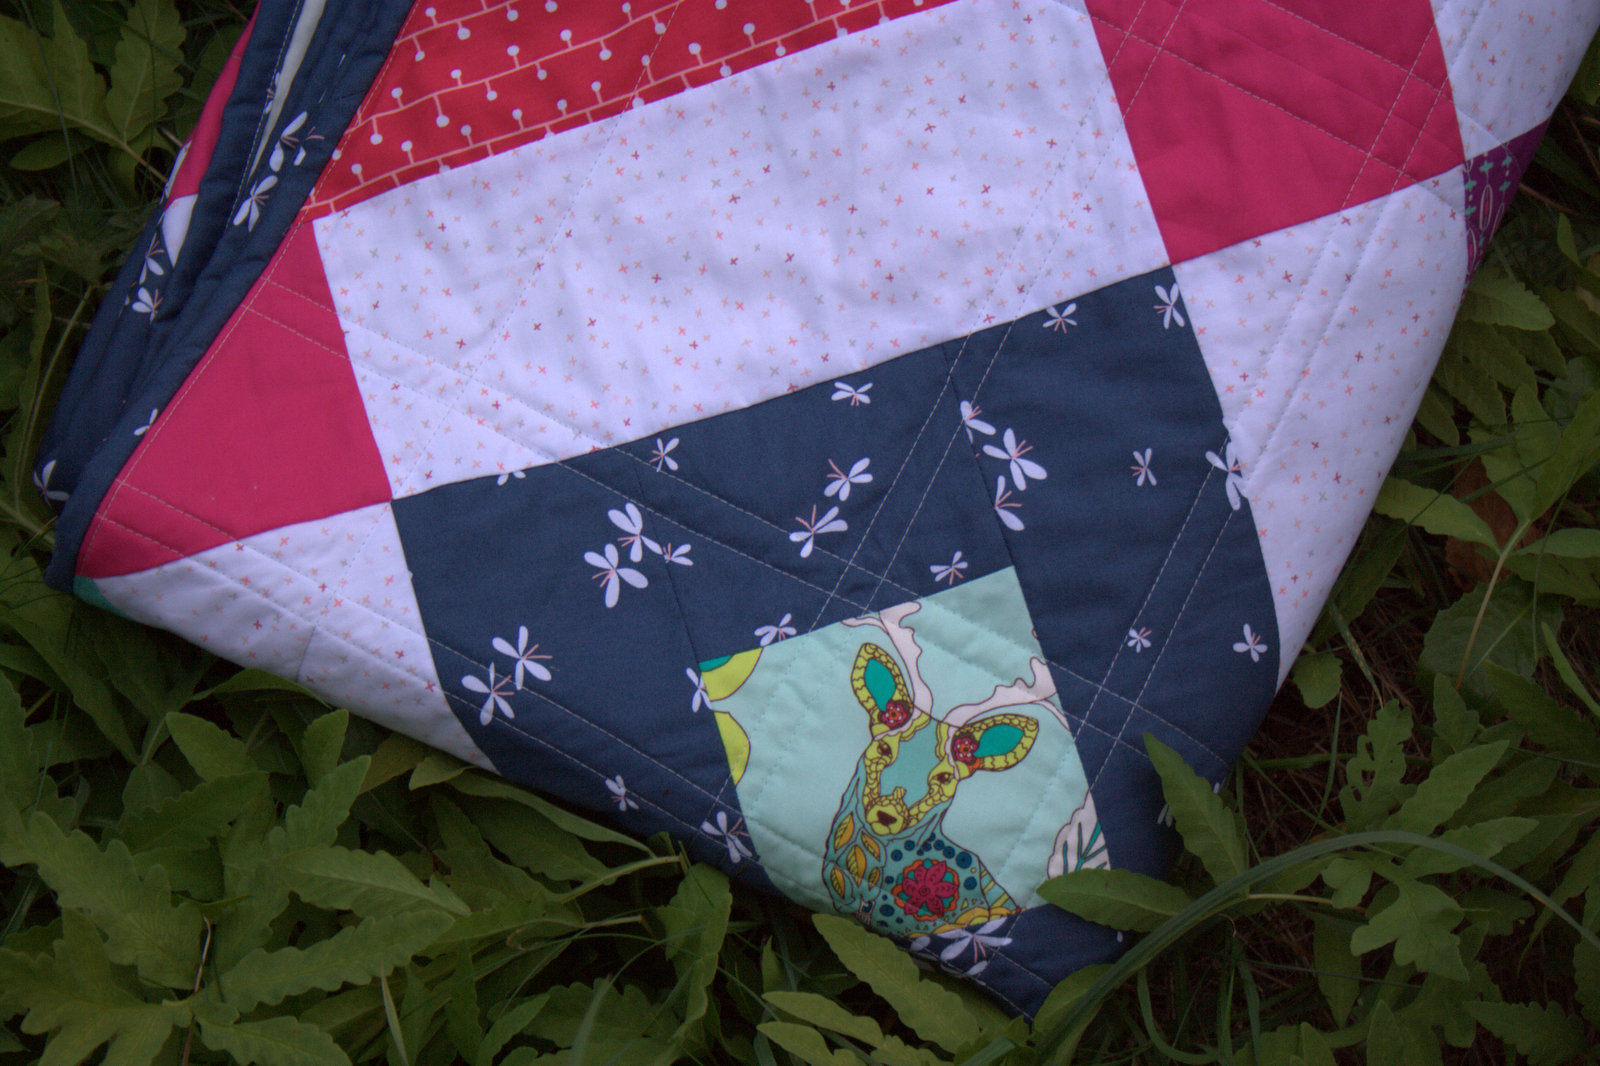
I quilted it with straight lines in a grid work pattern framing the center diamonds, using my domestic Bernina 560 and a walking foot. I kept the quilting fairly minimal to preserve the super softness of the Art Gallery fabrics. I used my go-to thread, Aurifil 50wt in 2600-Dove for both piecing and quilting. I LOVE how this thread complements just about every fabric color combination and pattern.
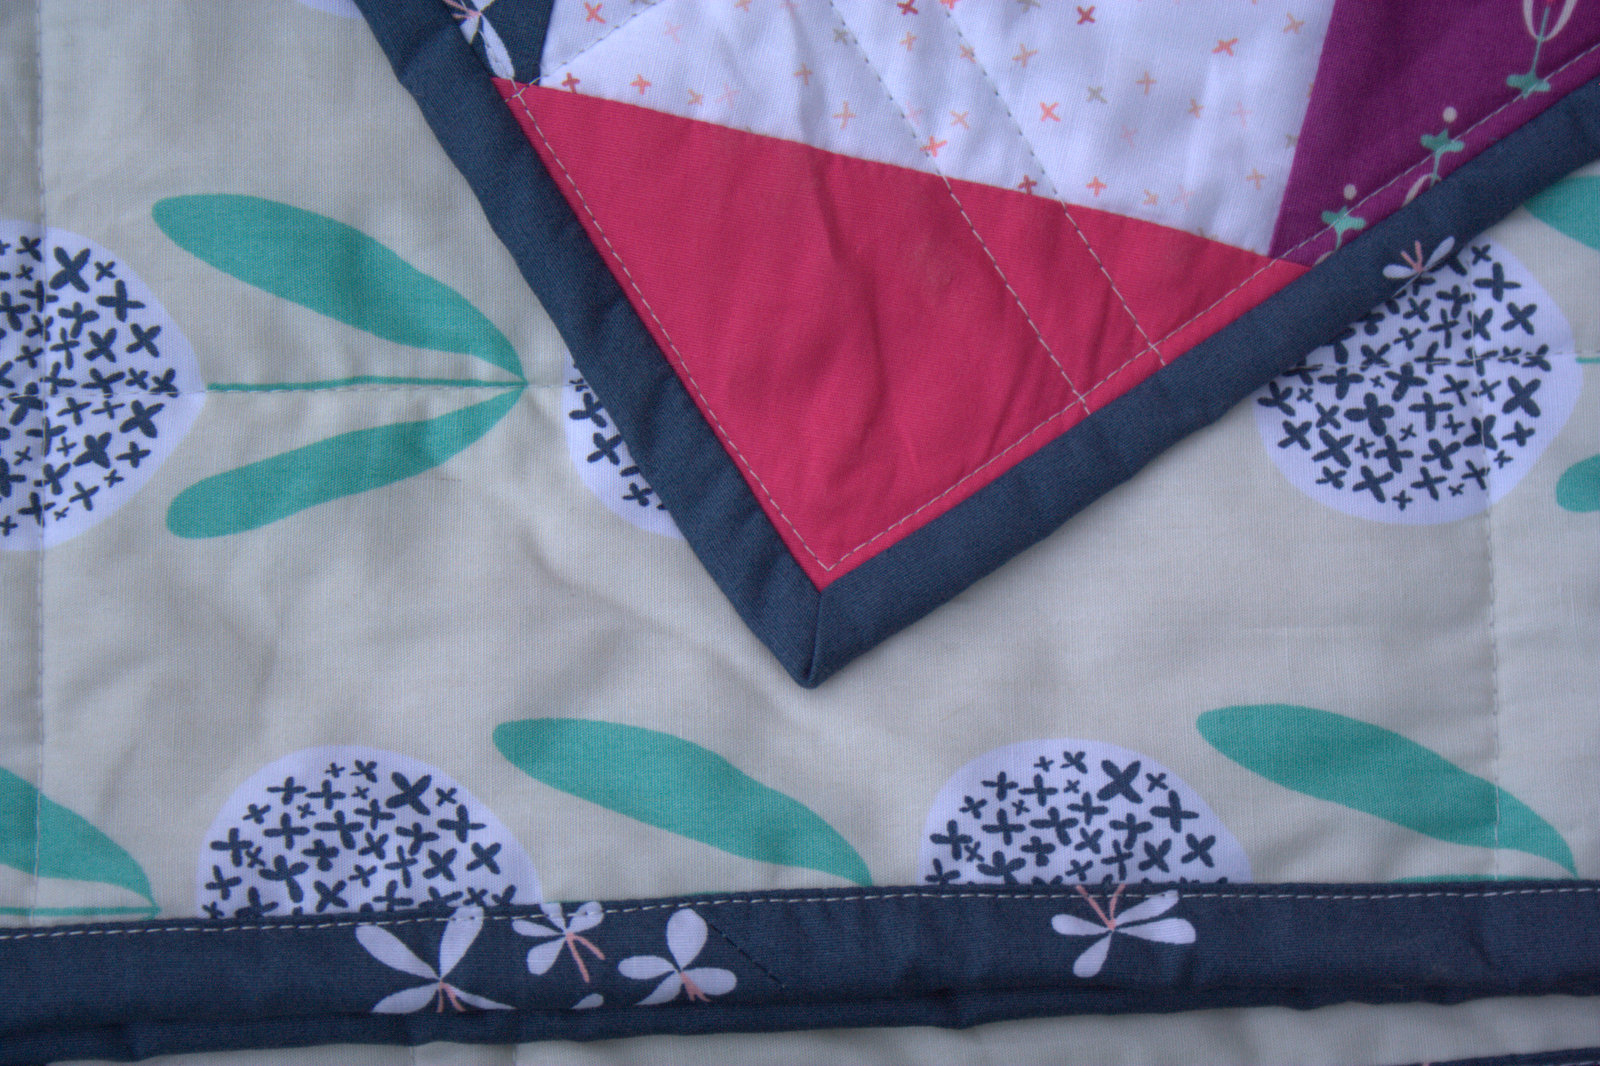
I machine bound the quilt for durability using the fabulous machine binding tutorial by Allison at Cluck Cluck Sew, and it turned out so well. Practice certainly helps, but I’m finding myself favoring the sharp look of the machine binding more and more (although I will always love hand stitching binding!).
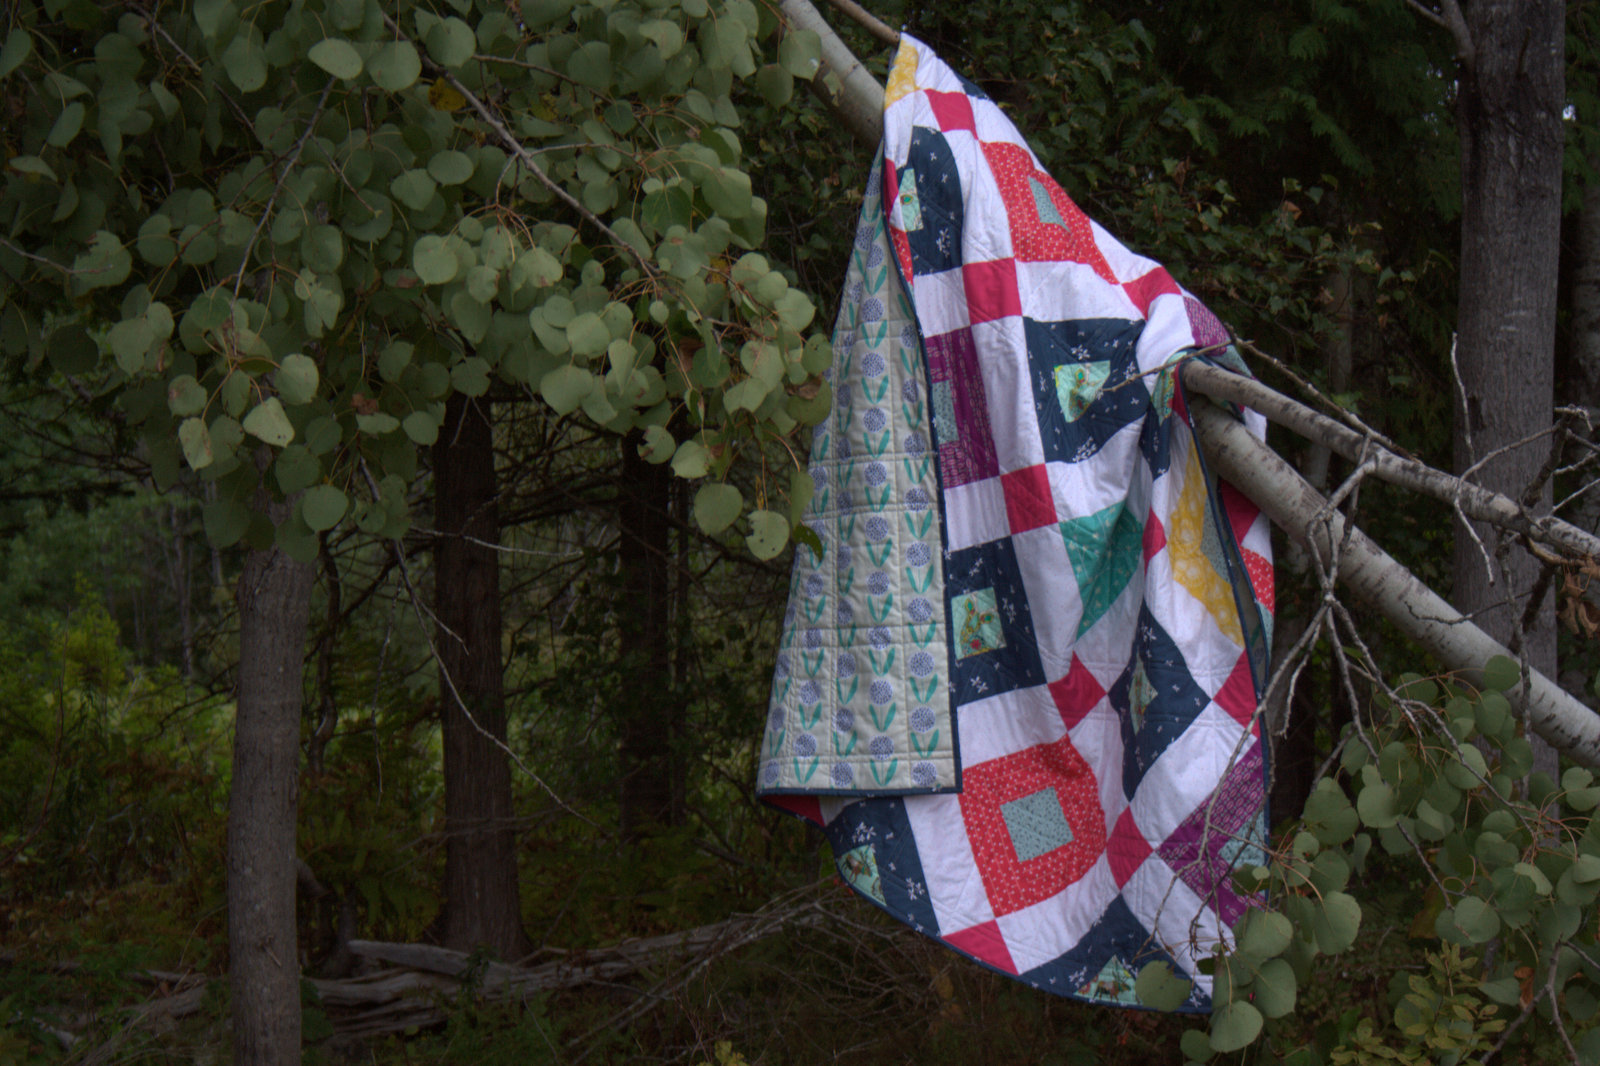
I just can’t get over how cute those Utopia deer are peeking out from this quilt. As you can probably tell, I had a blast prancing through our front field with the rest of my family for this quilt photo shoot.
Quilt Stats
Pattern: Welded, part of the AGF Stitched with Kimberly collaboration (instructional video here)
Size: 61” x 79.5″
Fabric (all by Art Gallery Fabrics): Front: Dreamlandia Irradiated, Specks of Carambola, and Atomic Influx Perse from Utopia by Frances Newcombe; String Lights Carmin, Book Pressed Memories, and Firefly Jar Dark from Curiosities by Jeni Baker; Art Gallery Pure Elements in Raspberry Rose, Teensy Weensy Lotus from Littlest, and Optical Origami Mod from Urban Mod by the AGF Studio. Back: Candied Lollies Mint from Curiosities by Jeni Baker. Binding: Firefly Jar Dark from Curiosities by Jeni Baker.
Batting: 100% cotton Soft n’ Crafty batting
Thread: Aurifil 50wt in 2600 – Dove for both piecing and quilting
Quilting: Straight line quilting in a grid work pattern using my Bernina 560 and a walking foot
Time:
Piecing the top: 14 hours 20 min (includes fussy cutting and seam ripping to fix directionality)
Piecing the back: 45 minutes
Squaring, layering, and basting: 1 hour
Quilting: 5 hrs 10 min
Finishing (squaring): 25 minutes
Binding: 2 hr 30 min Total: Approx. 24 hours 10 min
Why did it take me so long to bind!? Meticulous machine binding, I suppose! It was worth every minute!
++++++++++++++++++
Now, for a giveaway!
Fat Quarter Shop has generously offered a giveaway to one of my readers. Comment below to be entered to win a bundle of your favorite Art Gallery Fabrics collection! You can enter by leaving two comments:
What Art Gallery Fabric collection would you choose?
If you follow me, Night Quilter, let me know how–or visit my right sidebar to follow me if you don’t already, then tell me how! (e-mail, WordPress, Bloglovin’, Instagram, Twitter, Craftsy)
The giveaway will be open until Wednesday, September 30th 12noon EST. I will select one winner randomly from the comments below. Good luck!Note: This giveaway is now closed! Congratulations, Nicole!
Once you enter, be sure to check out the versions of Welded created by the other talented quilt bloggers participating in this event (links will be added as soon as available):
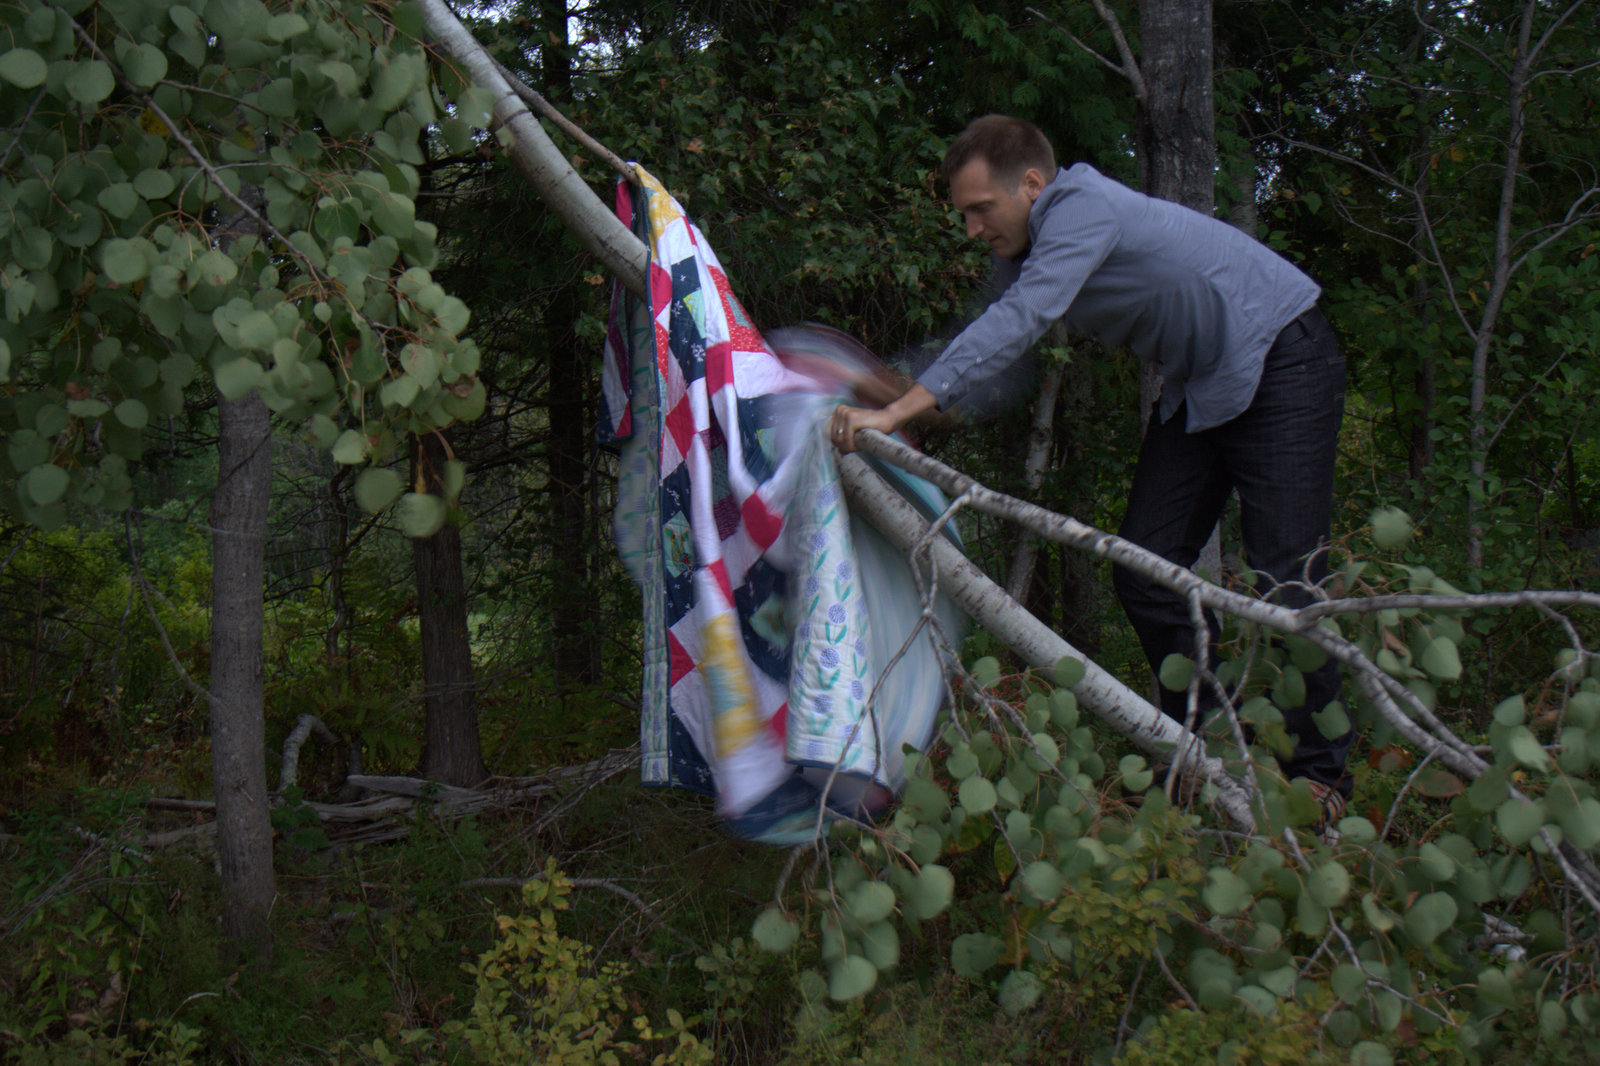
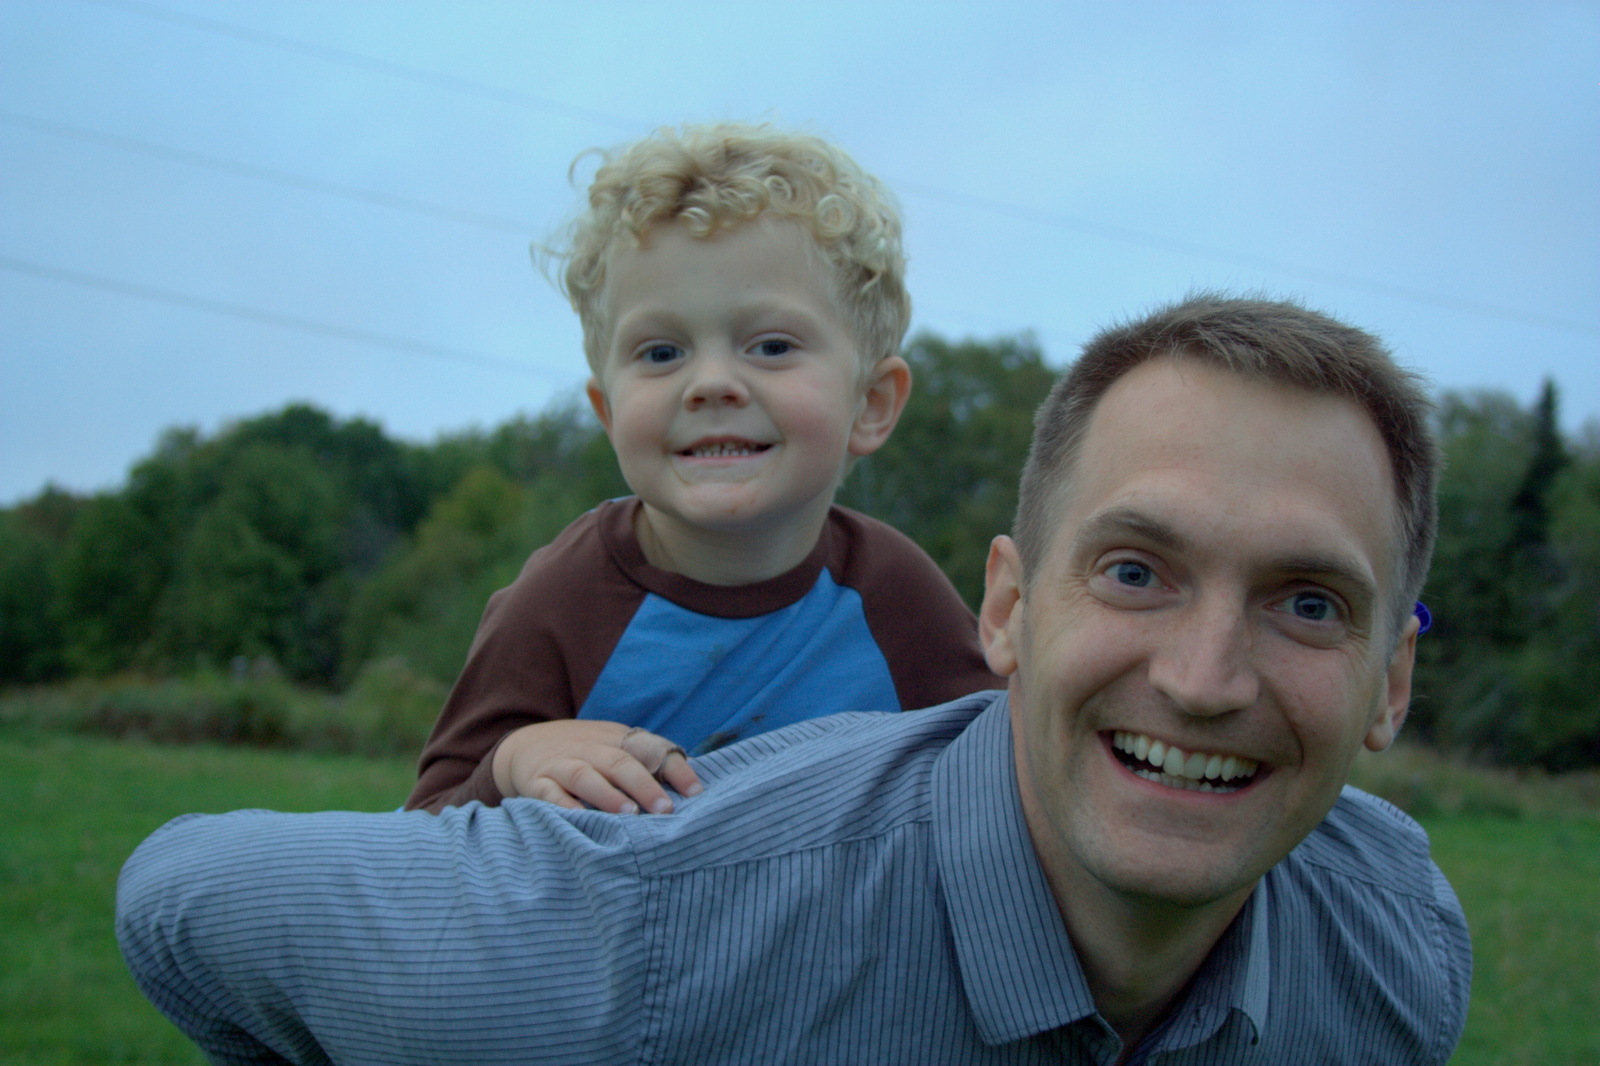
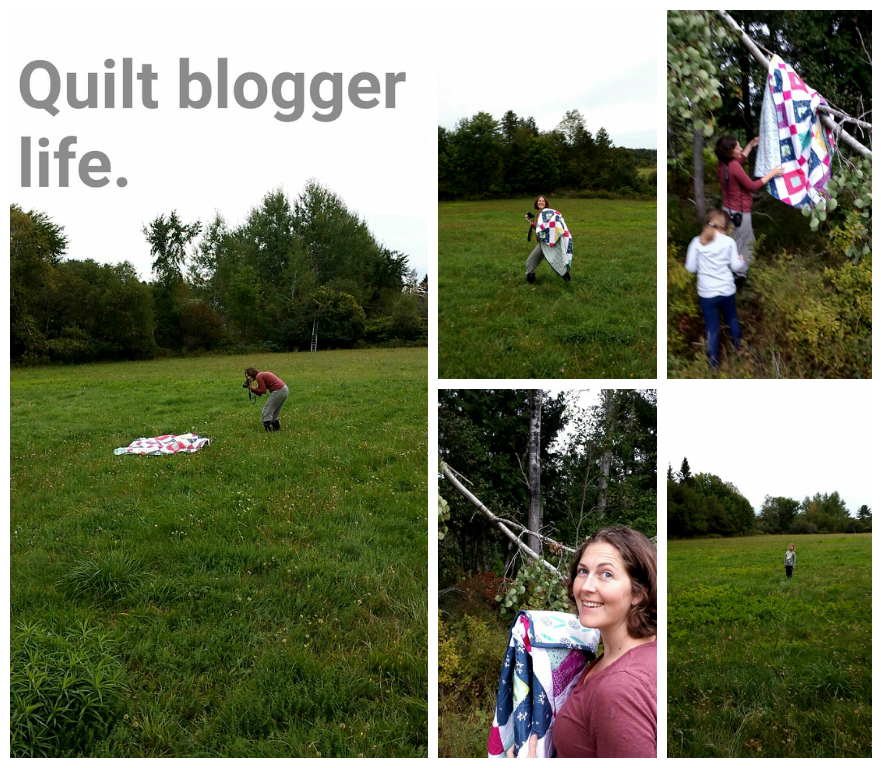
Just for fun, here are some behind the scenes shots from our frolicking fun family photo shoot:
My awesome husband not only is a champion quilt holder, but he also climbs downed branches to help adjust the quilt *just so*.Finn cheered us on from the stroller while Maddie and Max ran wild.Max needed a piggy back all the way home after playing in the field and climbing the apple tree to pick apples.
Everyone’s husband makes a SnapChat story about his family’s quilt photoshoot adventures, right? Yes, my husband is a tech geek extraordinaire! We had fun. Thanks again to Fat Quarter Shop and Art Gallery Fabrics!
P.S. I always try to respond to comments, but may not be able to on the giveaway posts due to the high number of comments. Please know I appreciate your visit and hope you follow or come back again!
The Farmer’s Wife quilt is one that while straight-up traditional, I’ve been itching to make for a while now. I’m not technically a farmer’s wife, but I certainly live in farm country and some of my closest friends are farmers (I’ll call mine the Programmer’s Wife in Farm Country quilt). There was just something about the idea of reading “inspiring letters from farm women of the Great Depression” and then making the respective quilt blocks that really appealed to me. Inspiration plus quilting: what’s not to like? When Angie asked if I would join the official bloggers team for the sew along, I knew that this was my chance–how could I say no?
This sew along is going to be super cool. All you need to participate is a copy of Laurie Aaron Hird’s book The Farmer’s Wife 1930s Sampler Quilt and your fabric of choice. I’m going to try to make mine almost entirely from stash, since frugality is part of the farmer’s wife experience.
Over the course of the year, Angie and the blogger team (including me!) will share tips and tricks to help you create all 99 blocks from the book, 2 per week in a non-chronological, easy to more difficult, order. Blocks finish at only 6″ square, and can be paper pieced, hand pieced, you can use templates, do English paper piecing, use a rotary cutter and sewing machine, or try all methods. I will most likely use a variety of methods, heavily favoring the rotary cutter-machine piecing and foundation paper piecing options.
I have my book, took it for a little photography tour of our homestead, introduced it to our chickens, and have been thinking about how I want to make my quilt. I really lean heavily toward the modern aesthetic, so I want to try to make this uber traditional quilt “night quilter style”. We’ll see if I can pull it off.
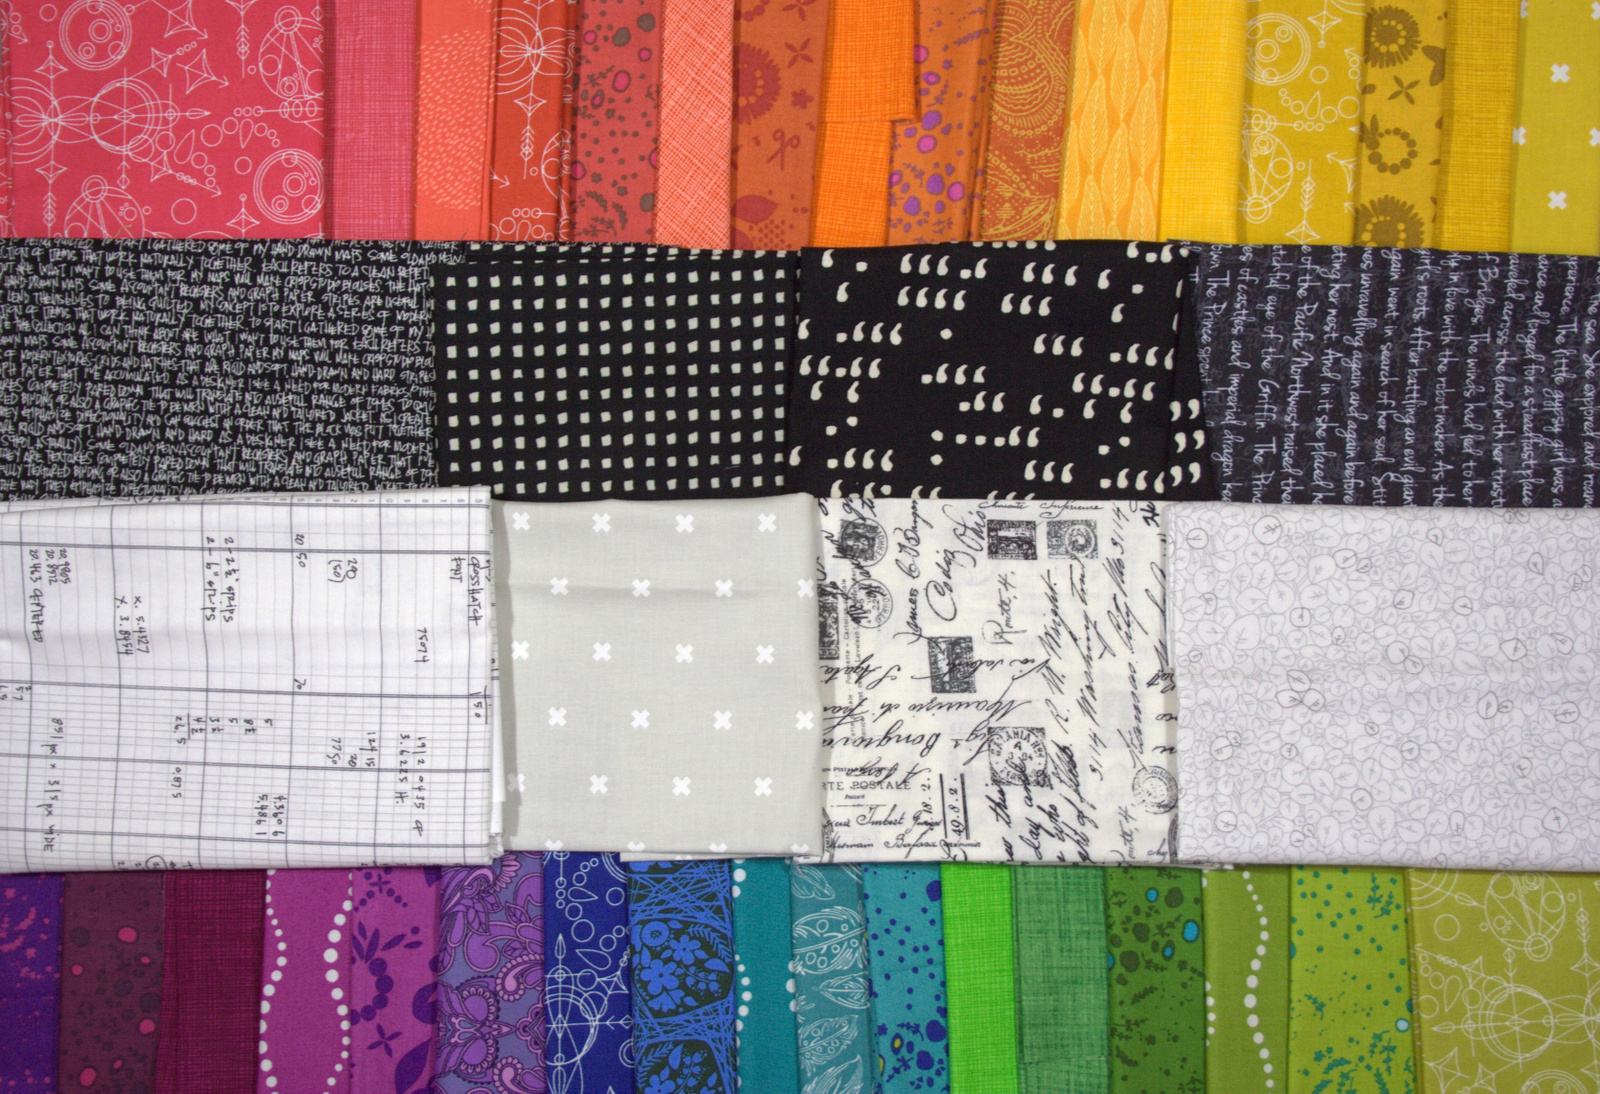
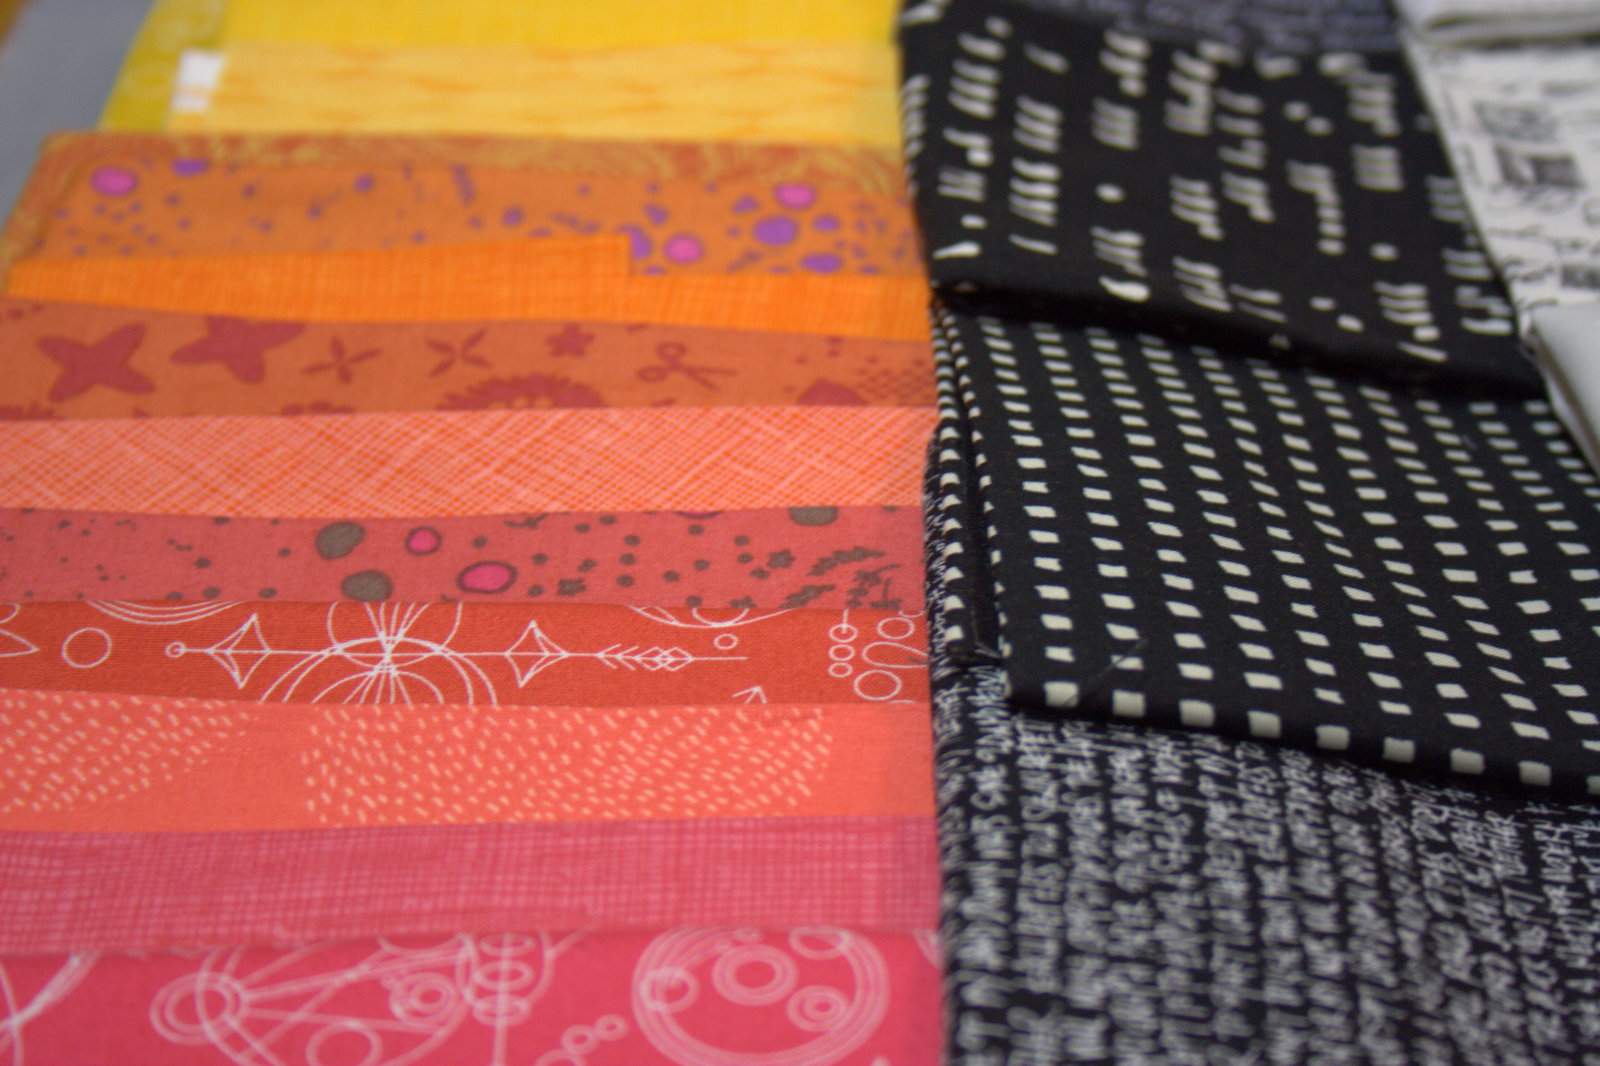
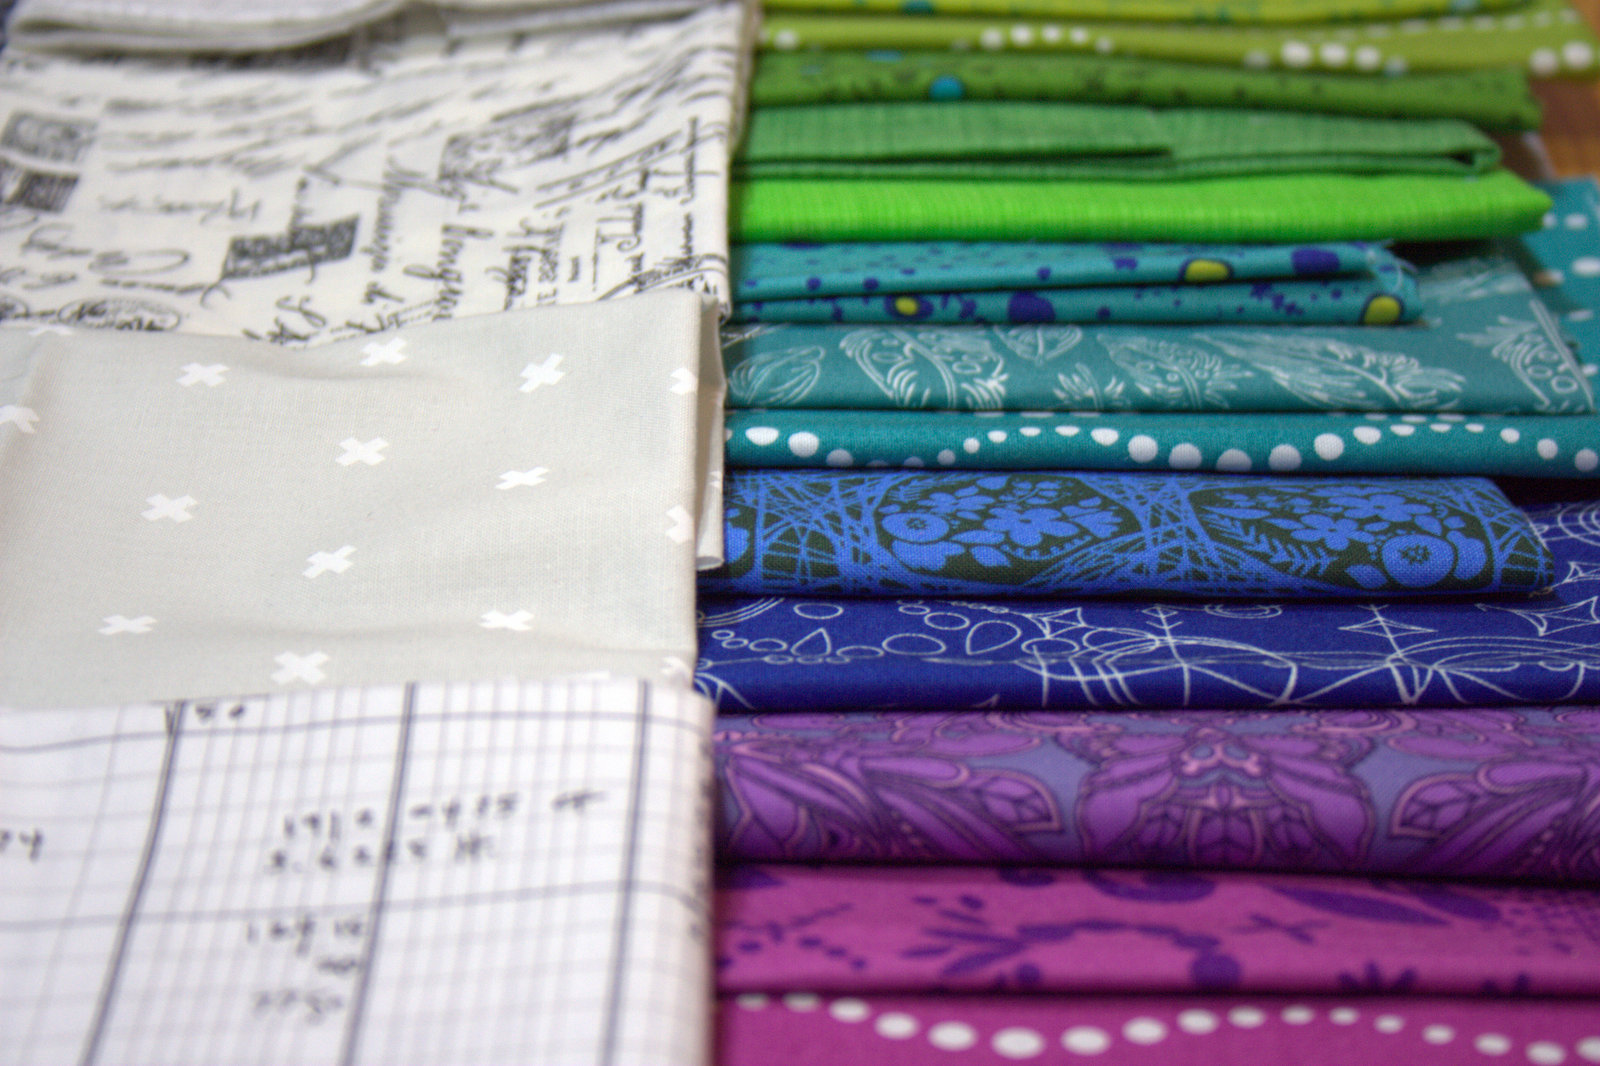
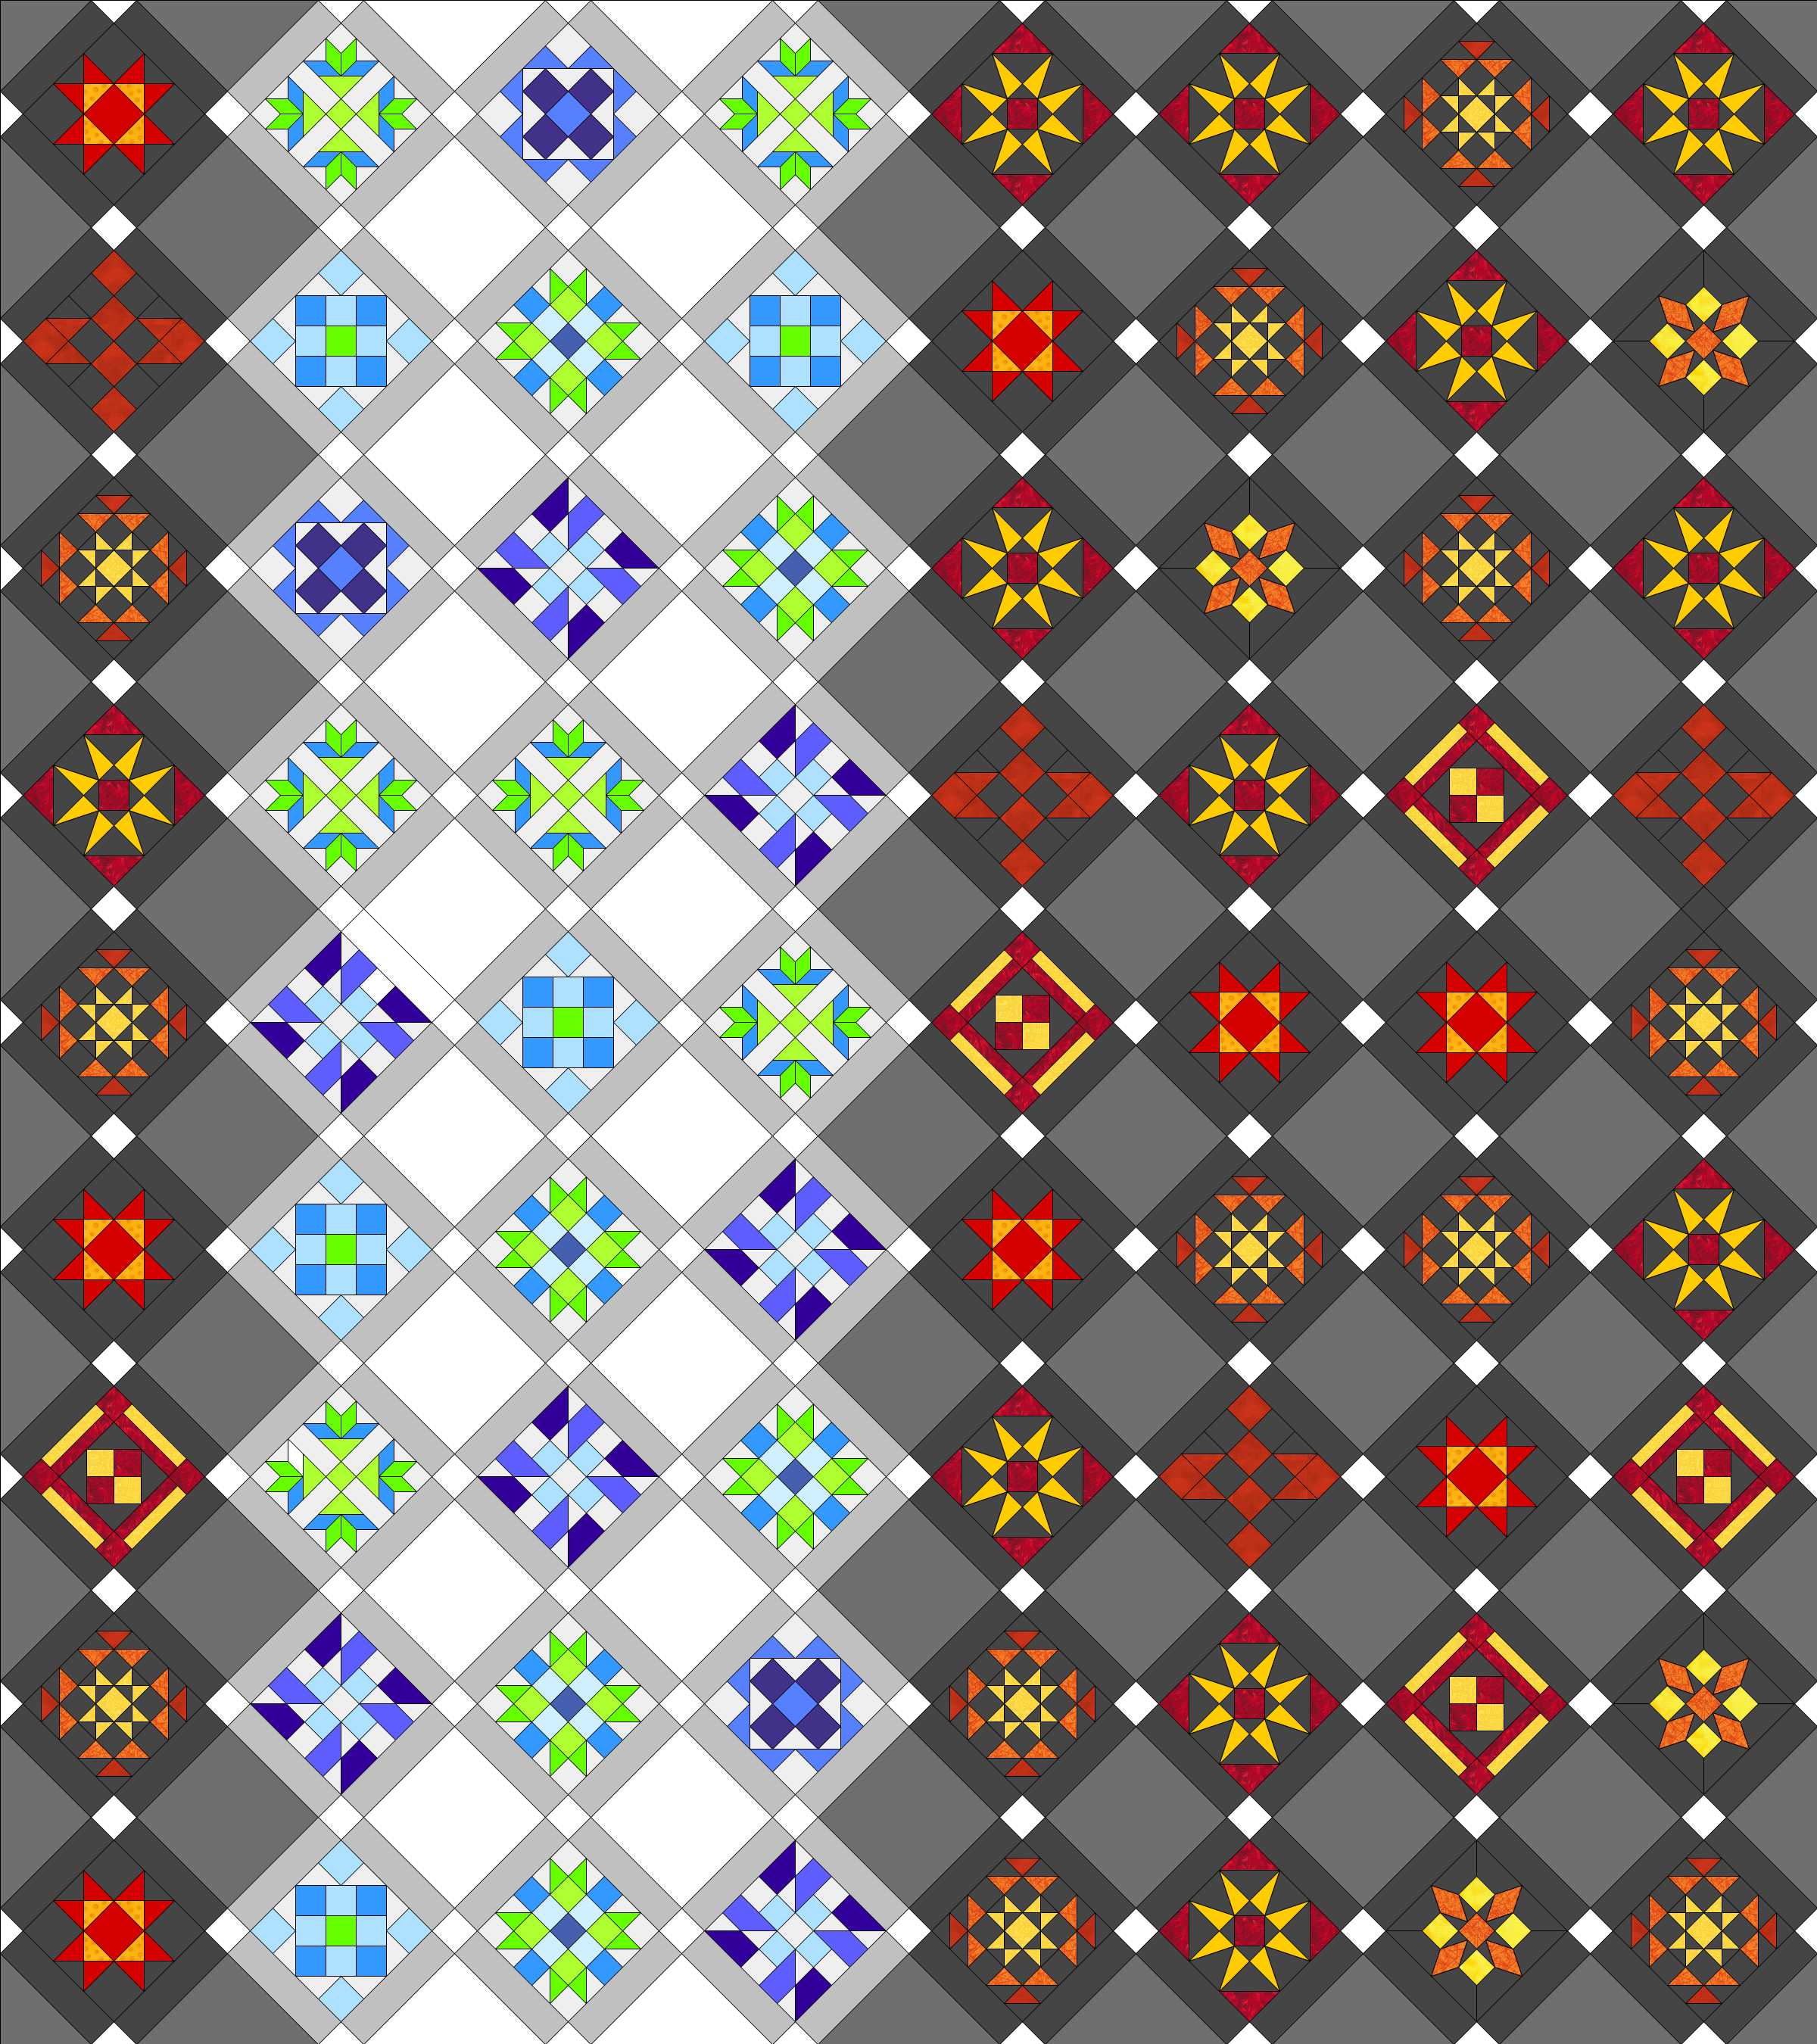
The fabric pull is pretty predictable, but this time instead of a simple rainbow gradient, I want to play with warm vs. cool colors. I’m planning on making the warm colored blocks with a black background and the cool colored blocks with a low volume/white background.
I really like how fiery the warm colors look paired with black.
Conversely, the cool colors look almost icy paired with the low volume/whites. I’m really hoping I can find a layout that emphasizes these visual characteristics!
Now that I have EQ7, it makes playing with layout options *really* quick and easy. Knowing that I am a busy, busy mama of three and that there is a decent chance I won’t be able to make ALL 99 blocks, I’ve opted for a layout that includes whole cloth background squares between the blocks, as well as sashing. I plan to use Essex yarn dyed linen in charcoal for the whole cloth background squares, or *maybe* (with the last layout) a gradient from even lighter to darker. Here are some of the layouts I’ve played with. I haven’t landed on one I LOVE yet. What do you think?
Note that rather than buy the entire Farmer’s Wife block file for EQ7, I just used some of the free quilt blocks included in the program. I made them the colors I wanted and then used them in duplicate to get the general aesthetic of the quilt.
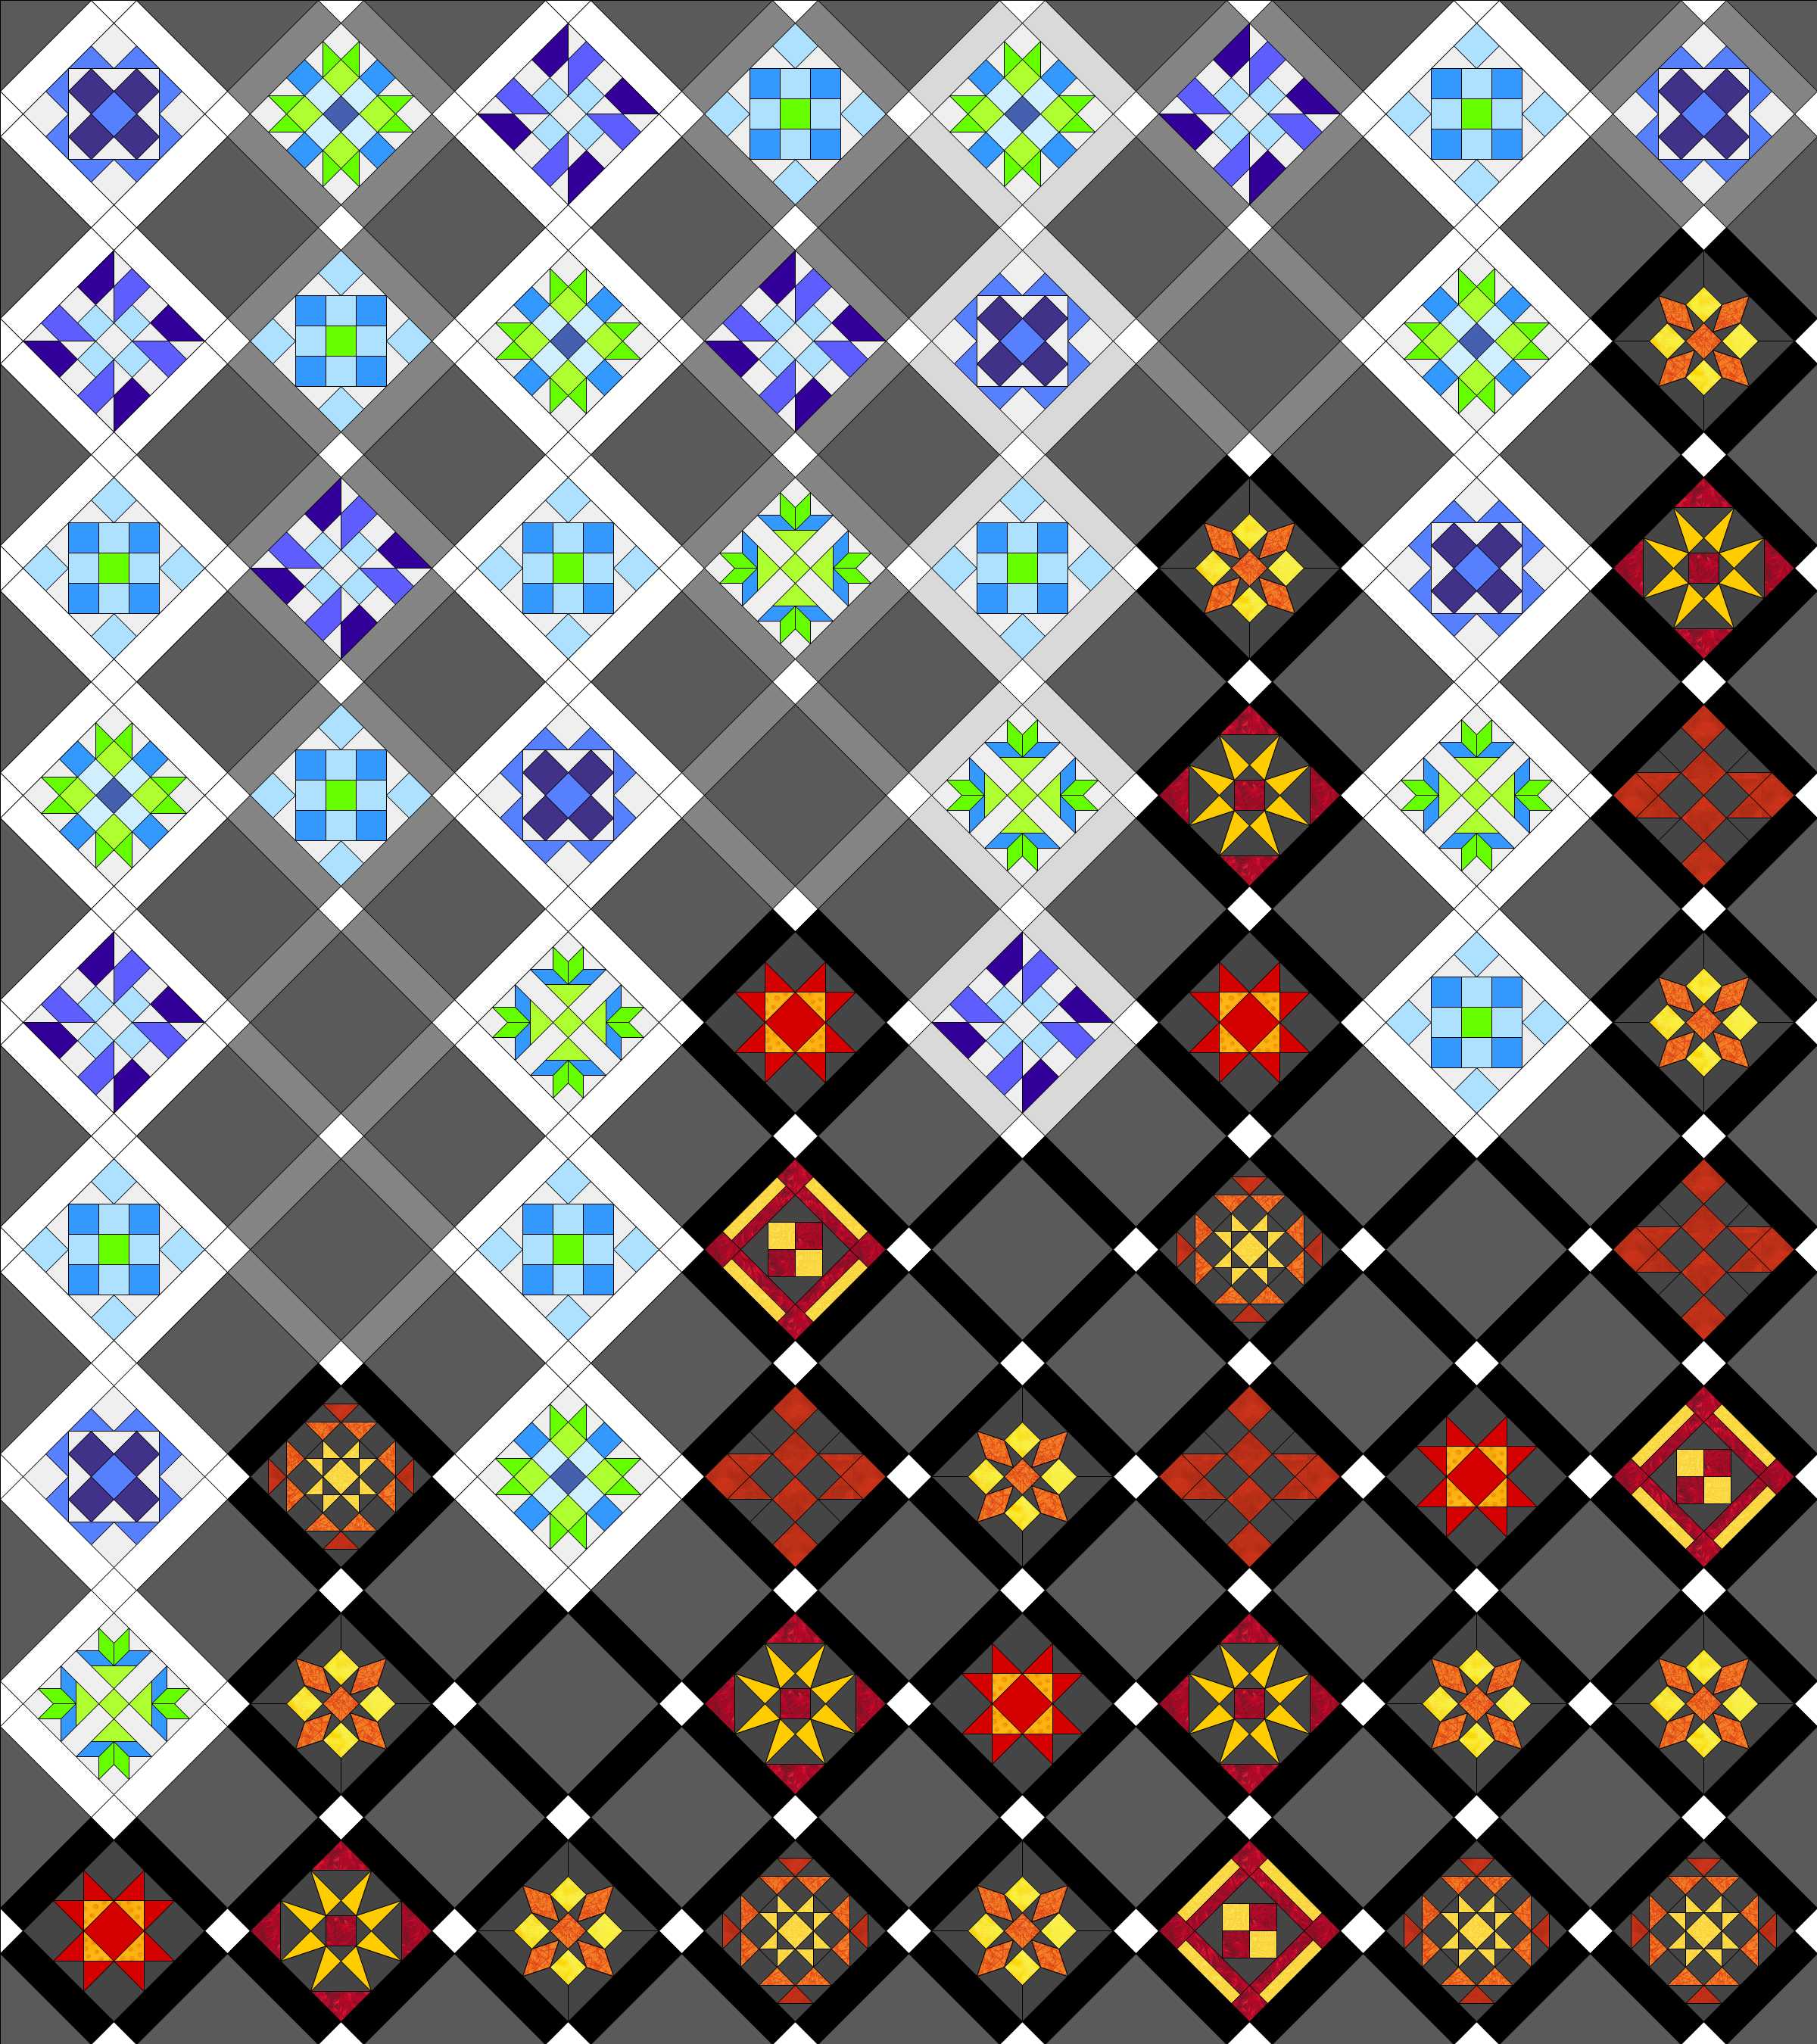
Farmer’s Wife Layout 1: Warm Cool Converge
Layout 1. This one feels too stark to me.
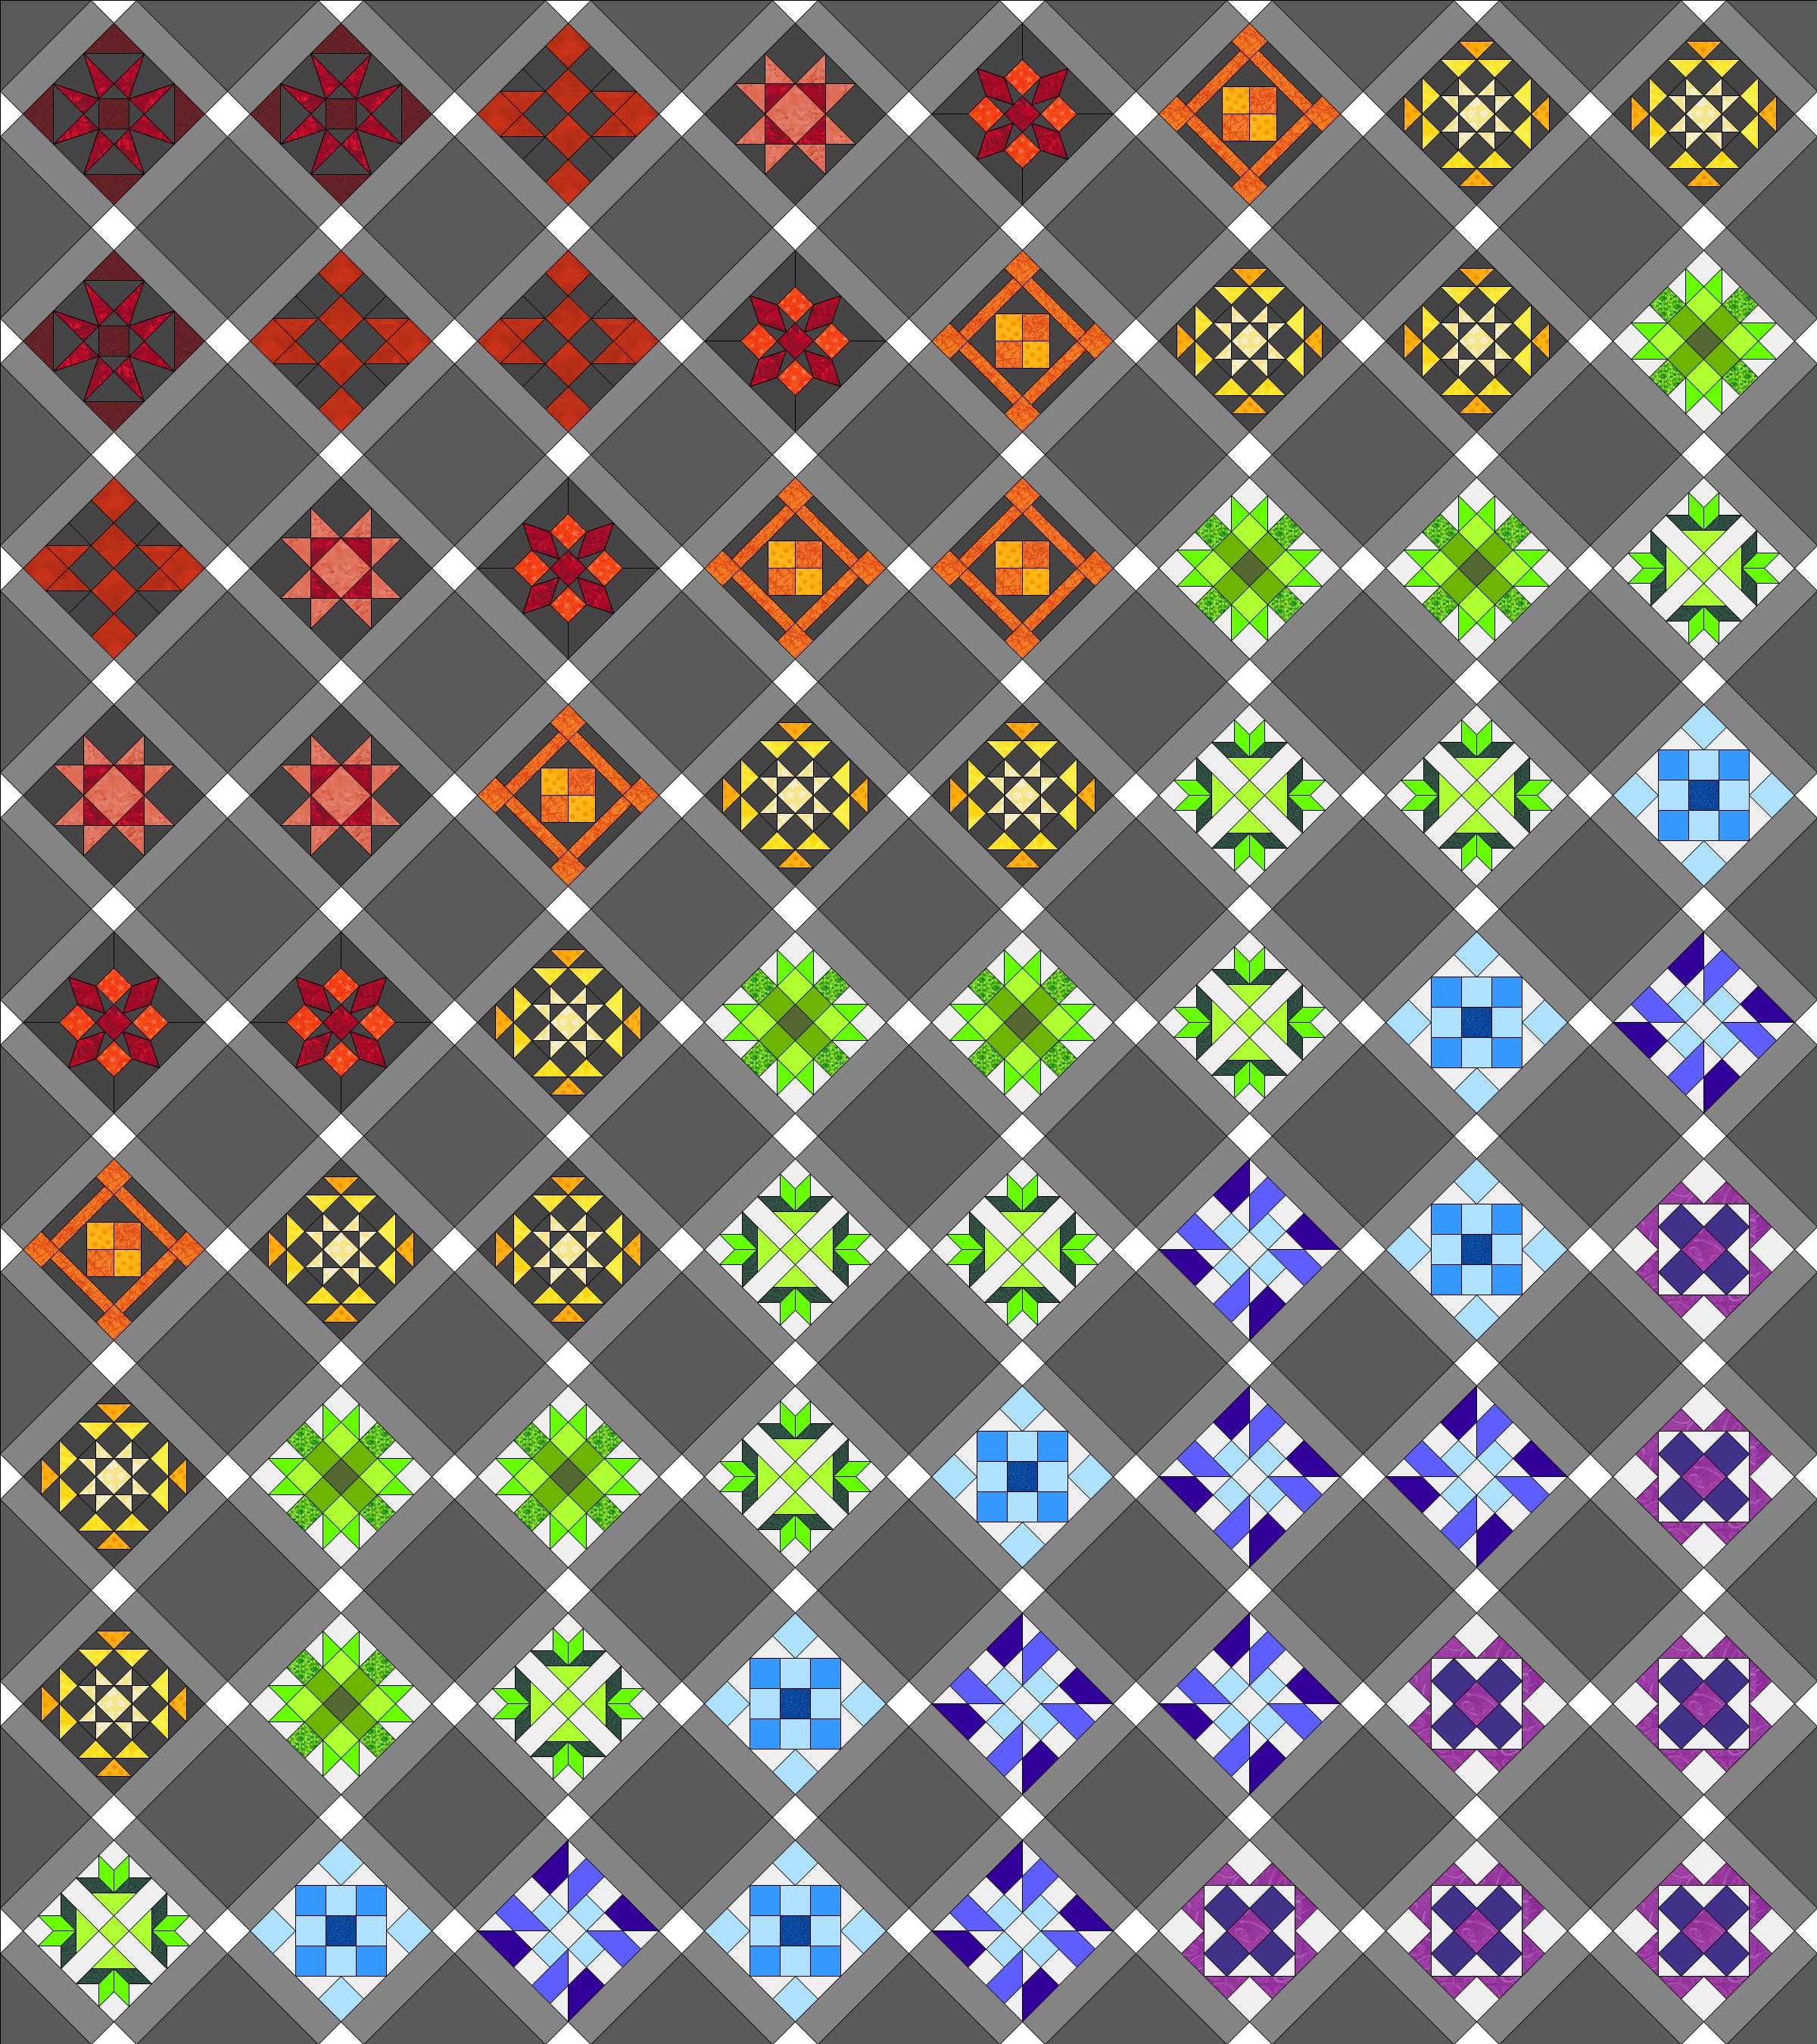
Farmer’s Wife Layout 2: ROYGBIV blend
Layout 2. Note that I’ve pretty much decided I’m not going to use this layout. It’s easy, sure, and looks great, but I want to try to stretch my color play muscles a little bit.
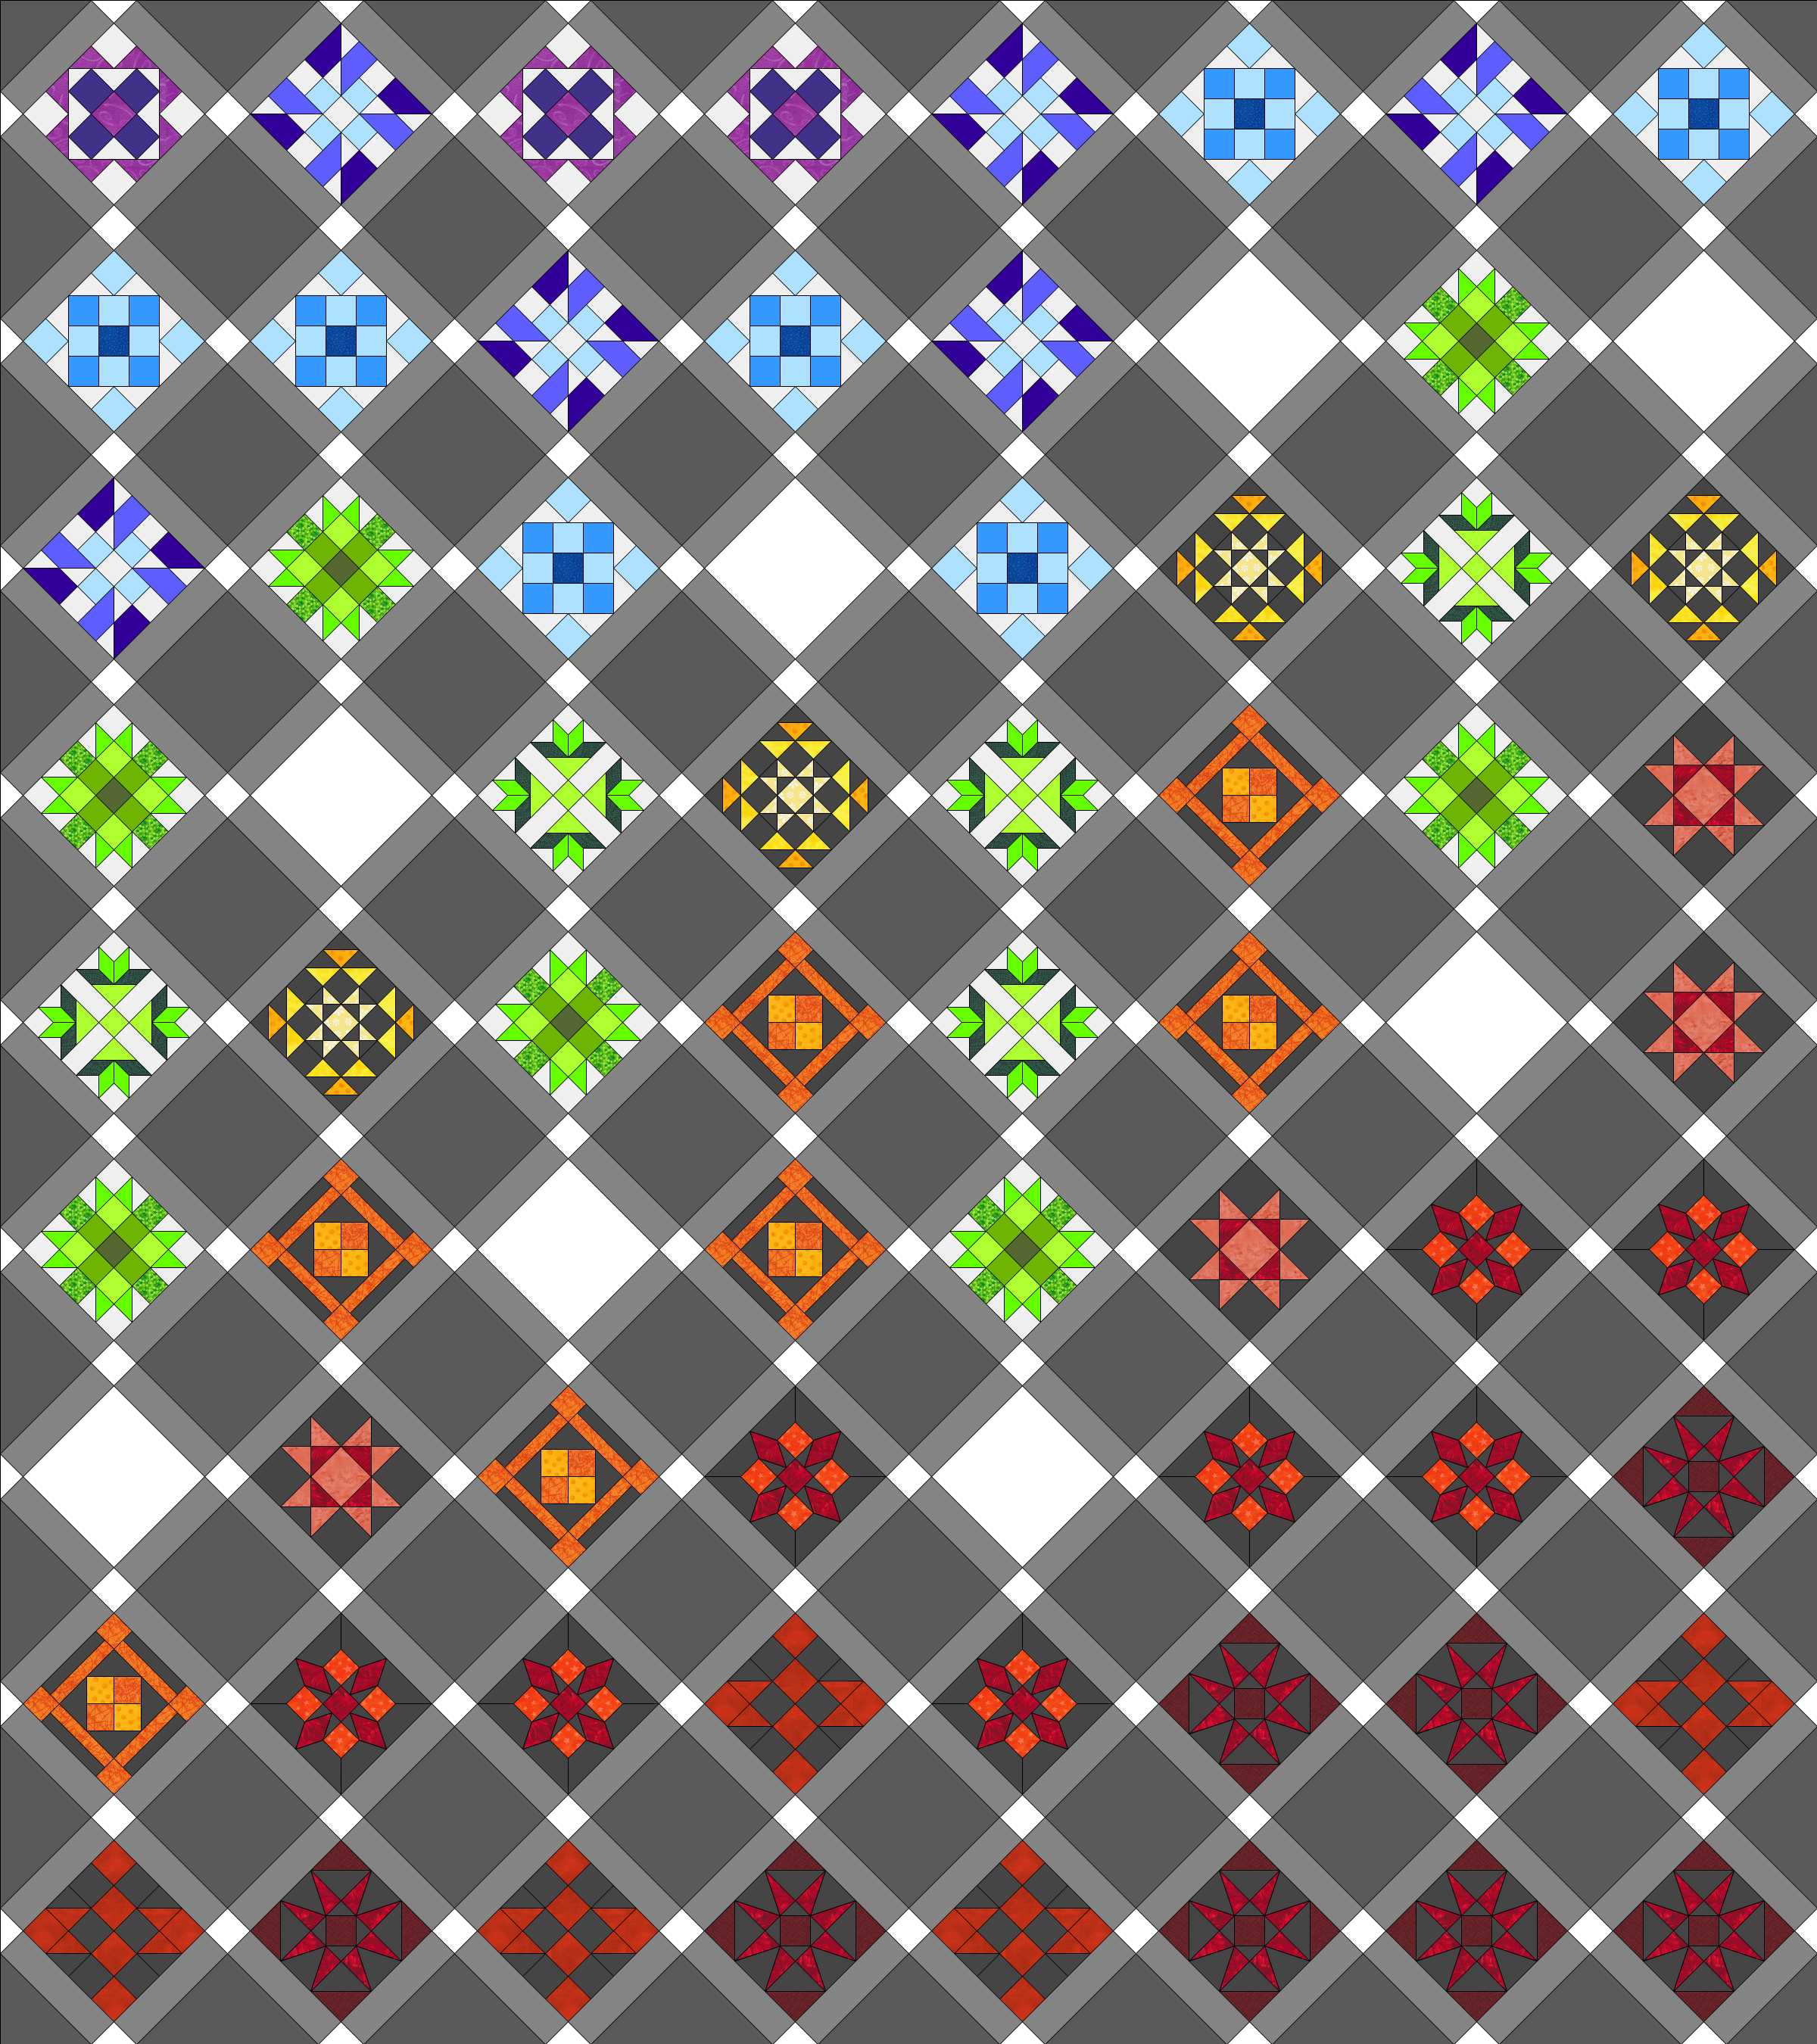
Farmer’s Wife Layout 3: cool warm
Layout 3. I like this one, with consistently colored sashing and background/filler squares. But I’m still not sure it’s exactly what I want. I want to create the effect of the fiery warms rising to meet the cool colors, which are dripping to meet and mingle with the warm.
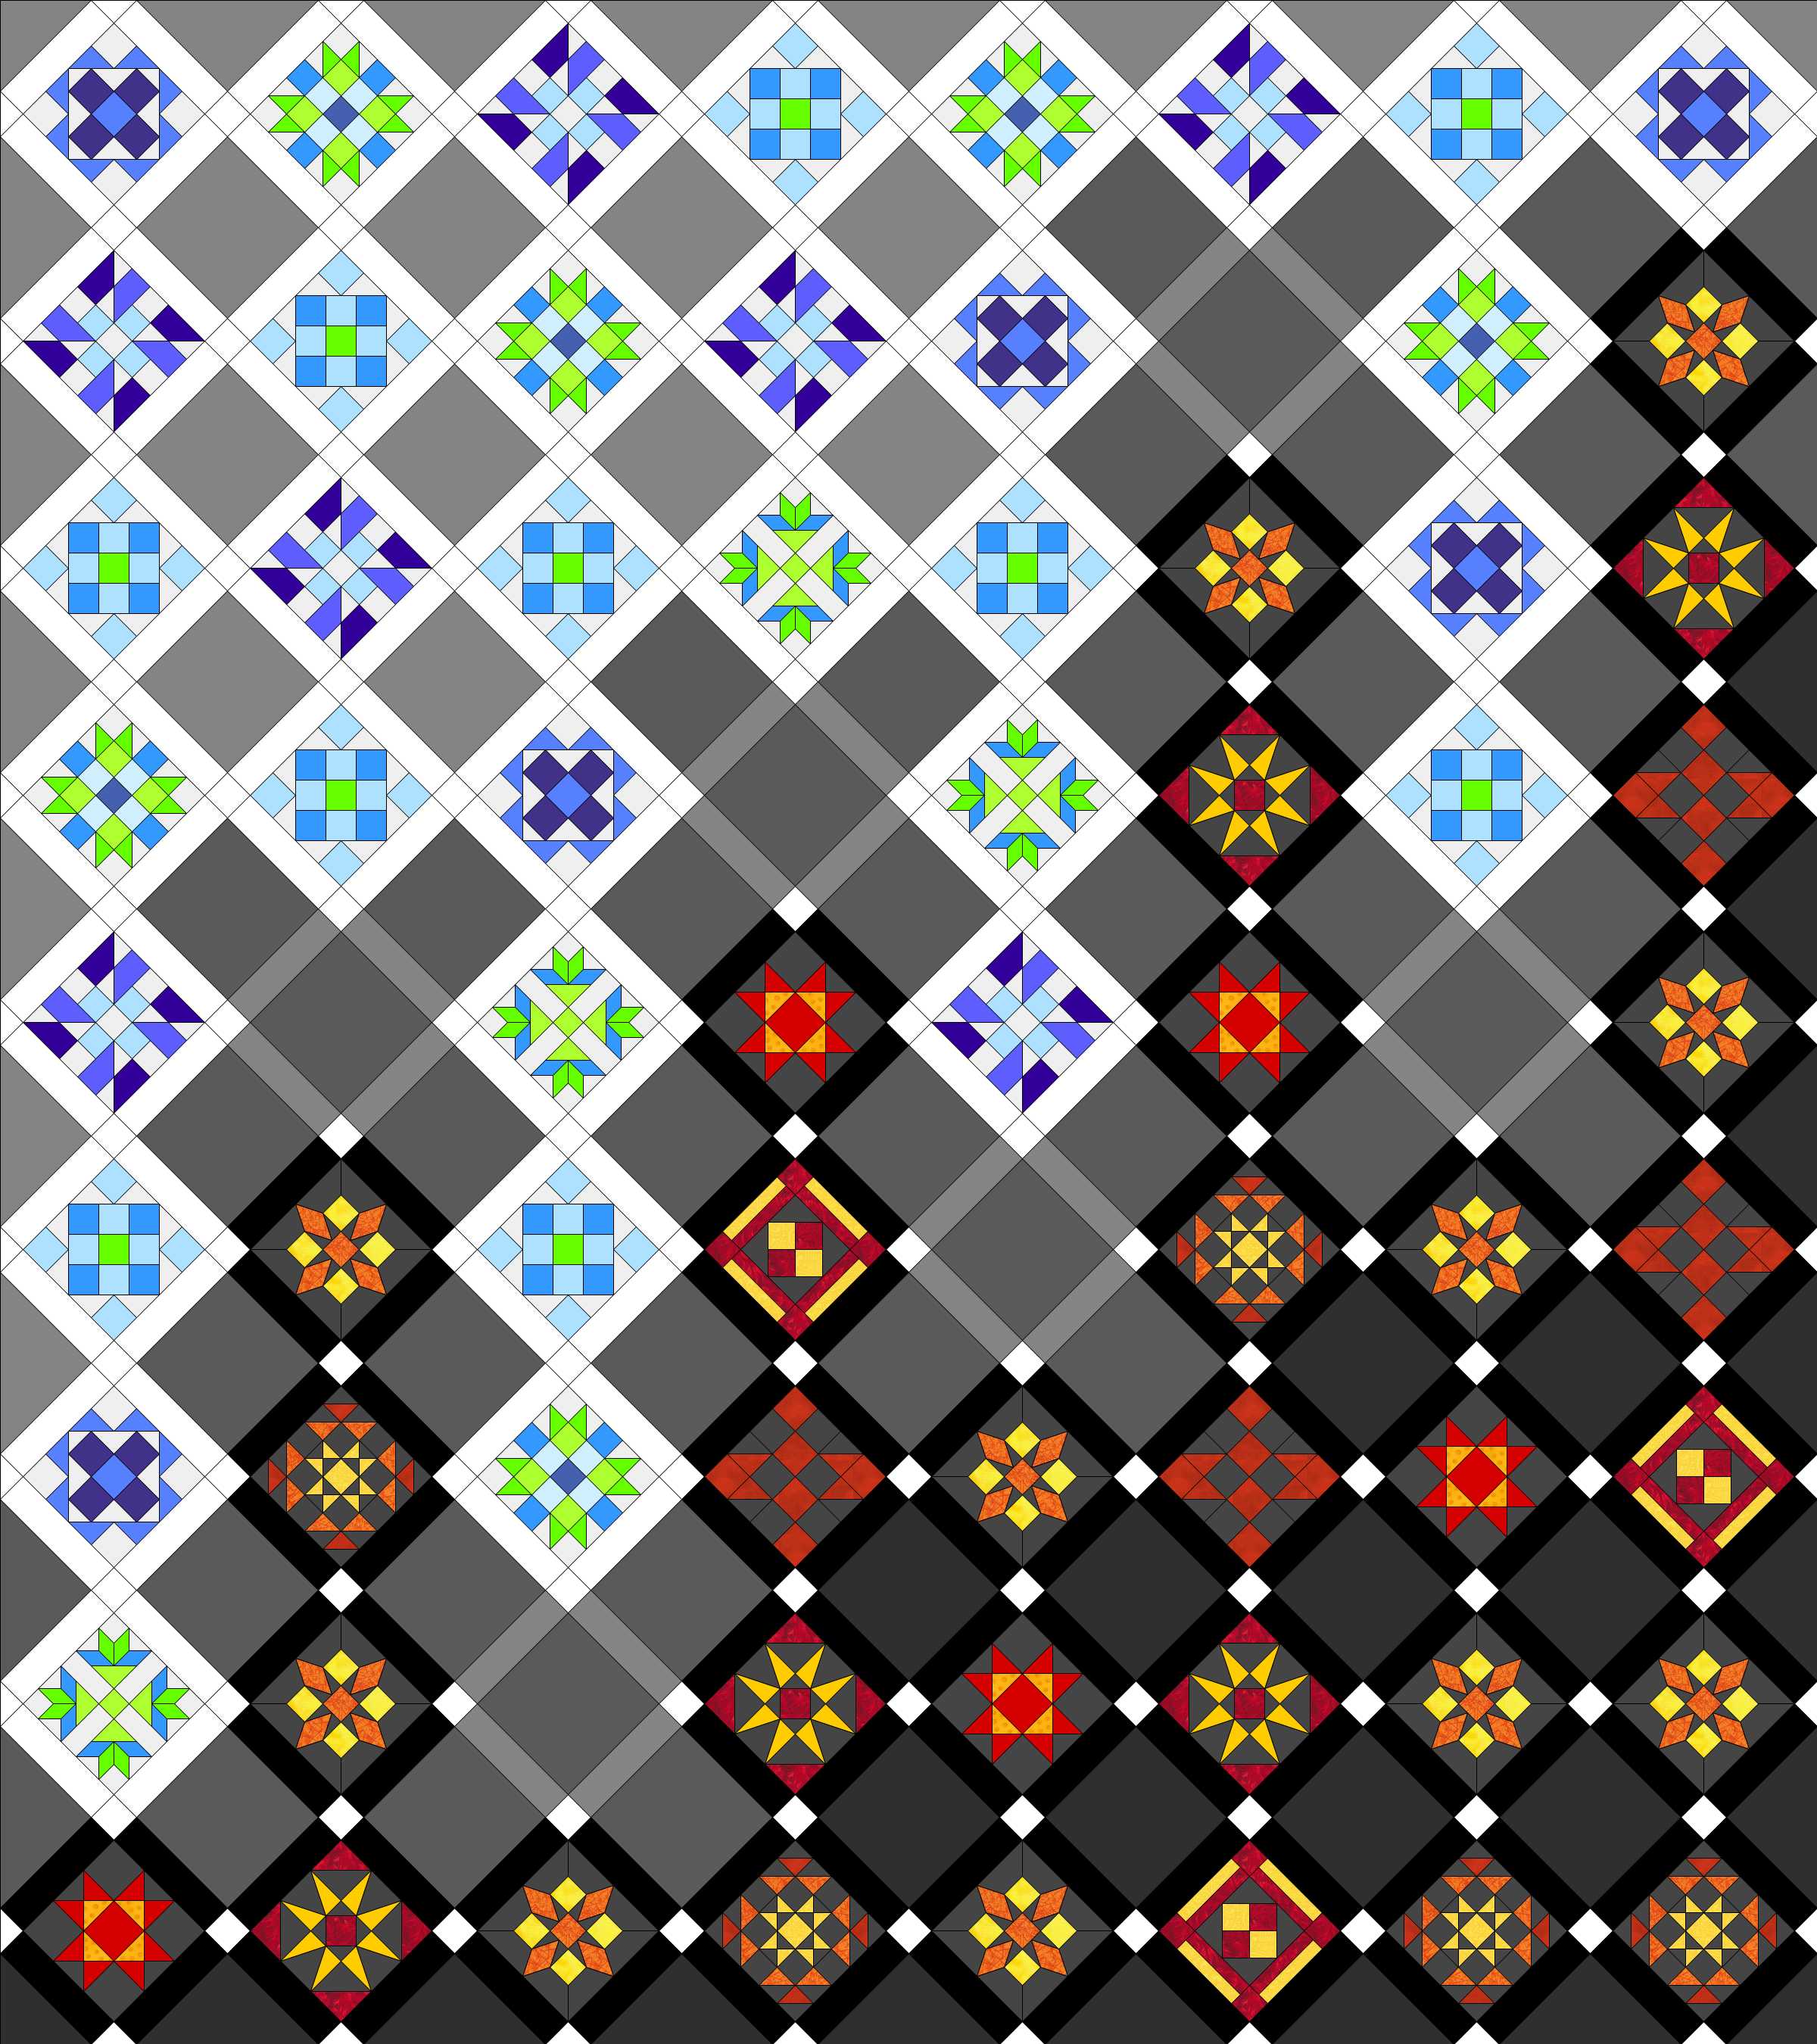
Layout 4: Cool Warm Converge Blended Background
Layout 4. I like this one more than Layout 1, but I’m still not sold completely.
For now I will plan to start making my cool/warm blocks when the Sew Along begins in two weeks, and will continue to play with layout until I find one I love. Will you be joining in on the Farmer’s Wife Sew Along? If you do, be sure to join the super active Facebook group, too. It will be a fun journey!
Heat and humidity still run deep here in Maine, although nights are beginning to cool off. Even still, with school starting and the garden passing its peak, we are clearly headed into autumn, like it or not. Today’s color inspiration includes a couple of photographs I took while my family was visiting in early August. I’ve saved them until now, though, since they have a decidedly autumnal feel to me. Color palettes are created using Play Crafts Palette Builder 2.1 and my photographs. The matching solids and Aurifil thread are an awesome perk of using the Palette Builder; they are automatically generated for you!
Corresponding solids from left to right: Kona Coal, Bella Green, Kona Spring, Bella Baby Blue, Bella Plum, Bella Eggplant
Corresponding Aurifil thread from left to right: 1158 – Med Grey
5014 – Marine Water 2850 – Med Juniper 2606 – Mist 2566 – Wisteria 2568 – Mulberry
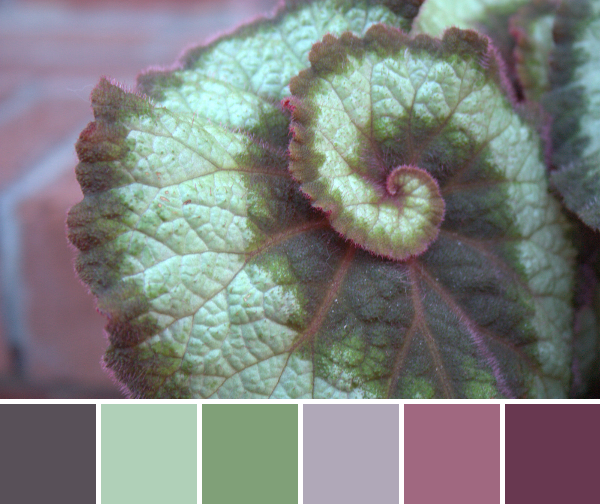
This awesome spiral ornamental plant was spotted outside one of the businesses in downtown Camden, Maine. It’s variegated, but beyond that I have no idea what species of plant it might be. I thought the combination of the unique spiral of the soft green leaf, the brick tinged veins and leaf border, and the brick step background would make a gorgeous palette. It feels like fall to me.
Corresponding solids from left to right: Kona Pepper, Kona Chocolate, Bella Acid Green, Kona Amber, Kona Cedar, Kona Spice
Corresponding Aurifil thread from left to right: 2785 – V Dk Navy
1285 – Med Bark 2120 – Canary 2145 – Yellow Orange 2390 – Cinnamon Toast 2385 – Terracotta
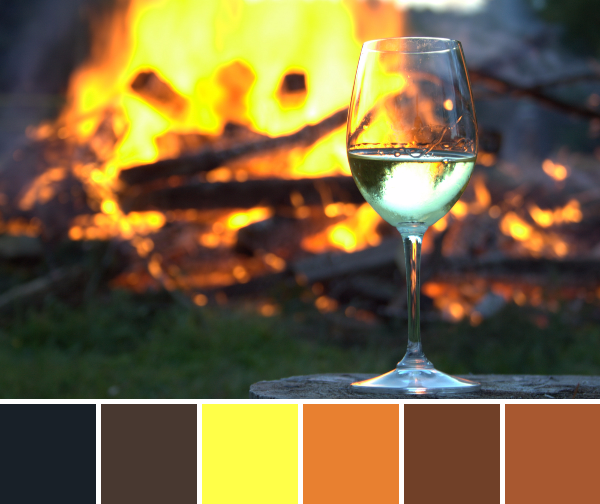
Wine and a bonfire. What’s not to like? While this scene was enjoyed during a hot midsummer’s night, the resulting color palette screams fall. Maybe it’s the fiery orange and yellow with the dark black/brown background that seems reminiscent of jack-o-lanterns and autumn leaves. I’d certainly love to enjoy a nice glass of wine by a bonfire, but I’ll have to wait until my month-long antibiotic Lyme-kicking regiment is finished before I imbibe. This photo will just have to suffice for now.
Taking this photo reminded me that I haven’t paired wine and fabric in a while. I think it’s high time I got back to that, since it makes for some fun creative fabric play. If you’re a wine drinker, what are some of your favorites? Perhaps I’ll try to find one and pair it up with the perfect fabric match!
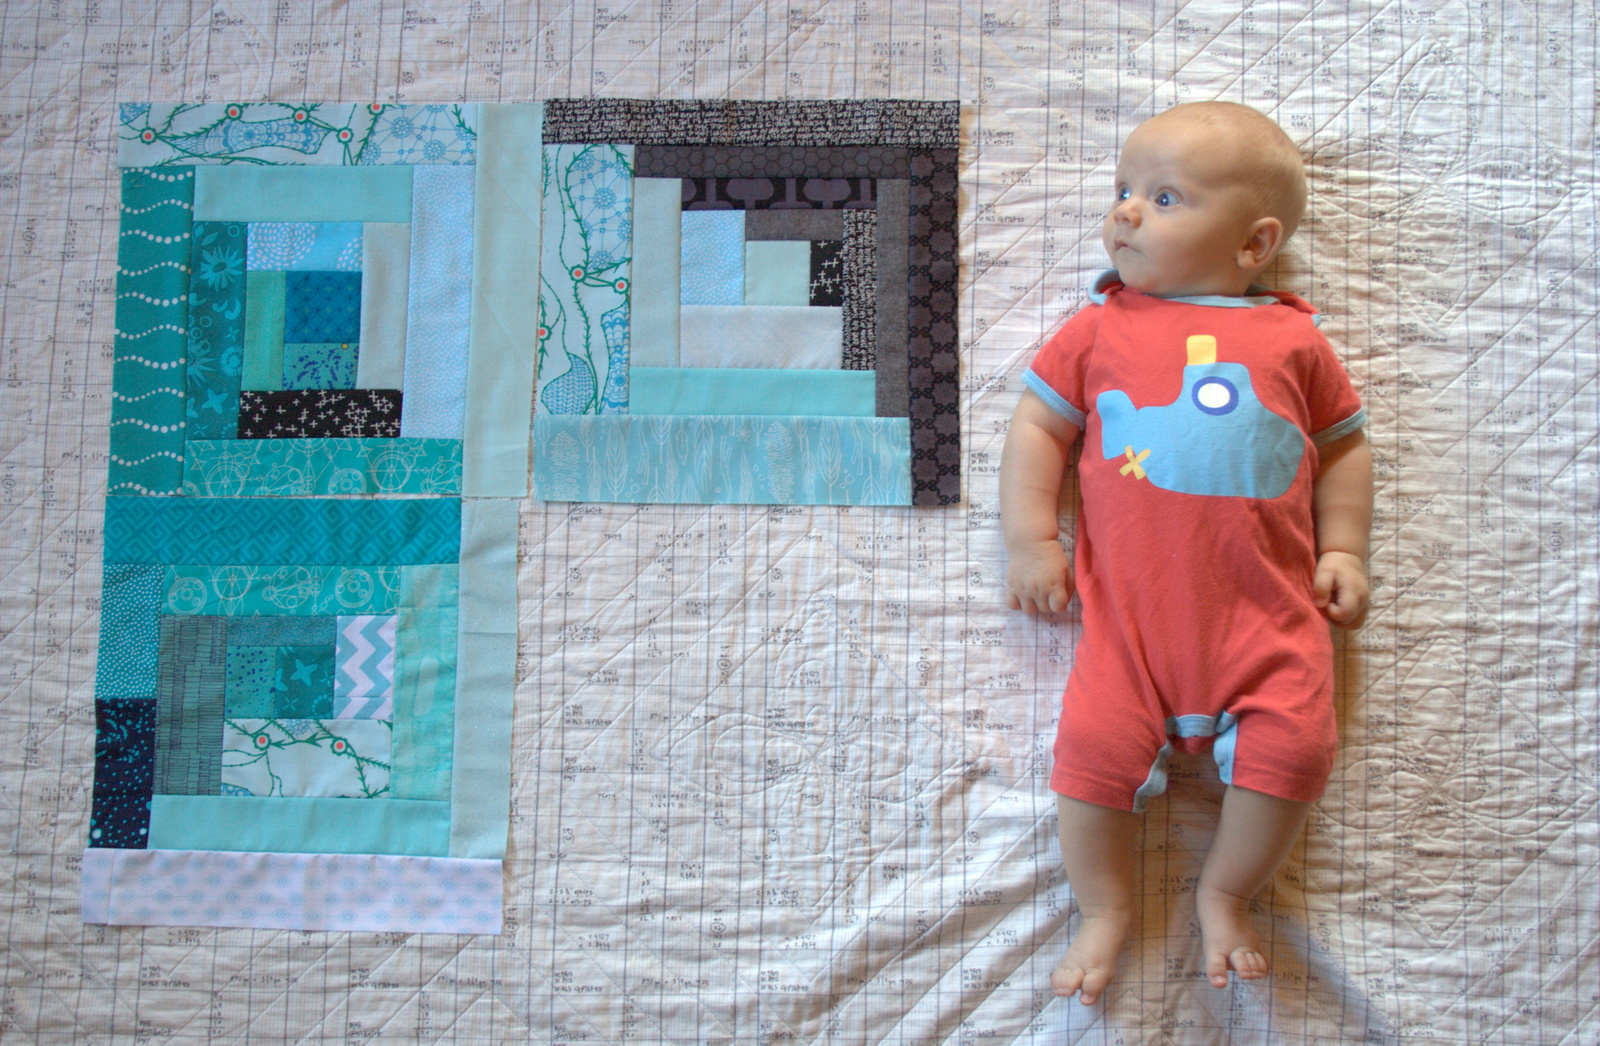
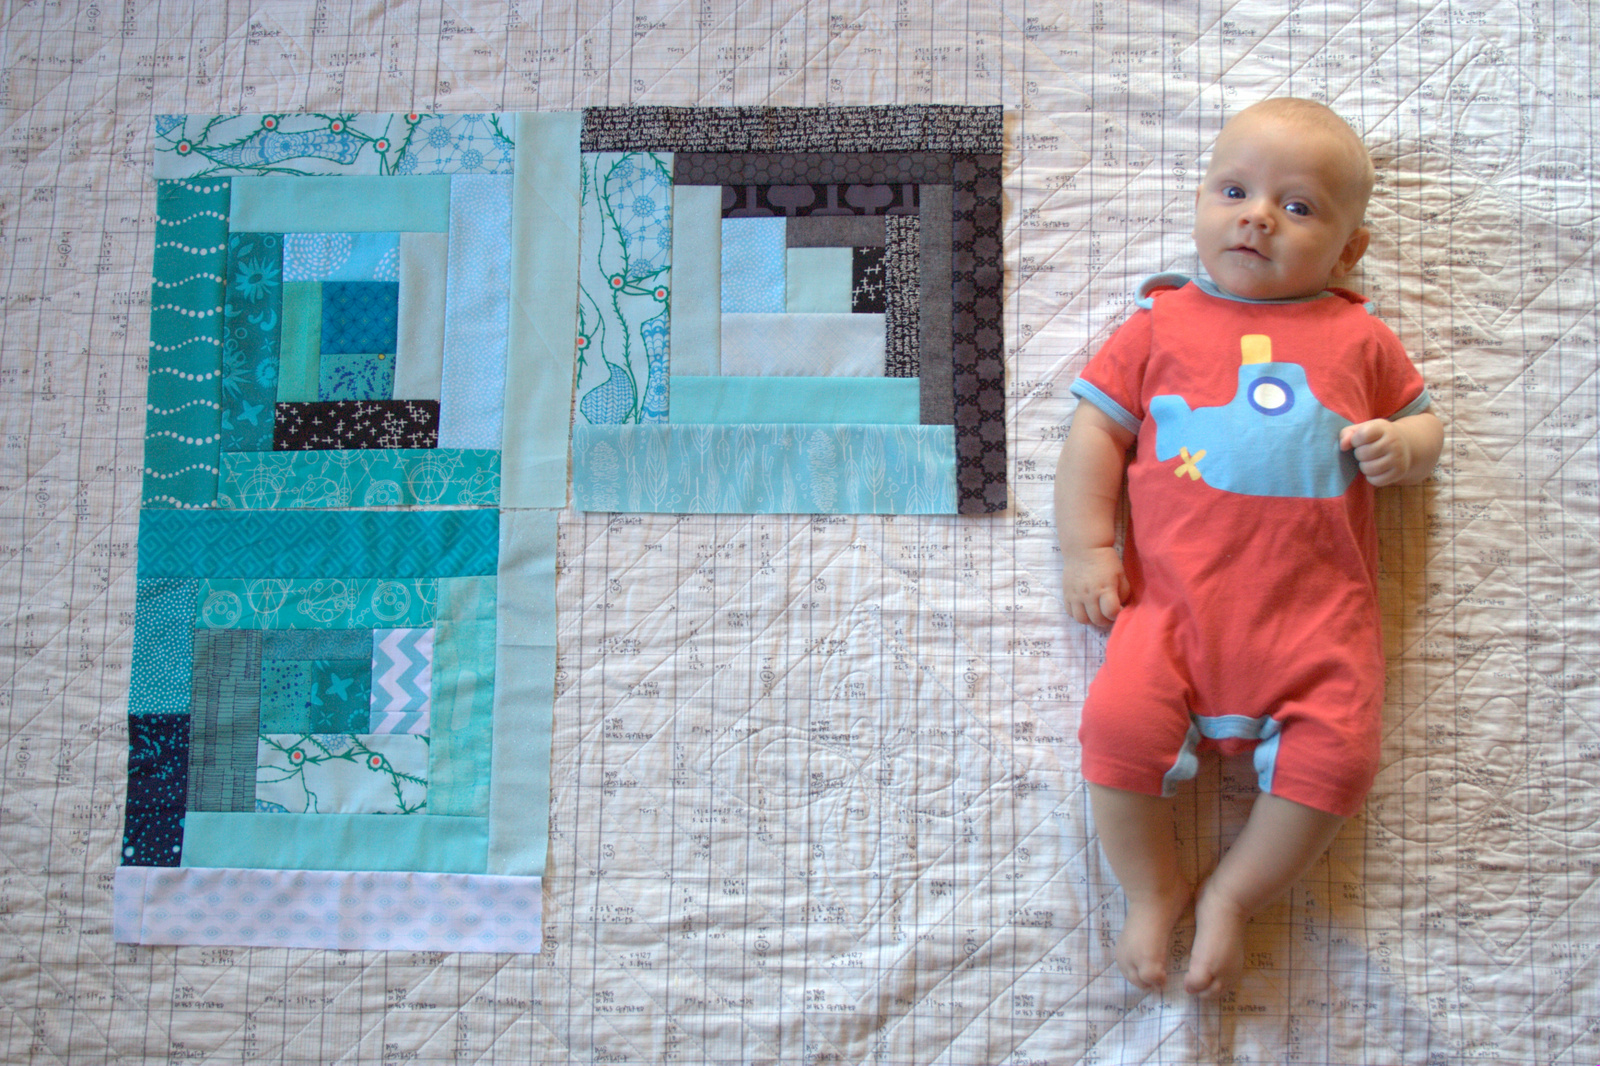
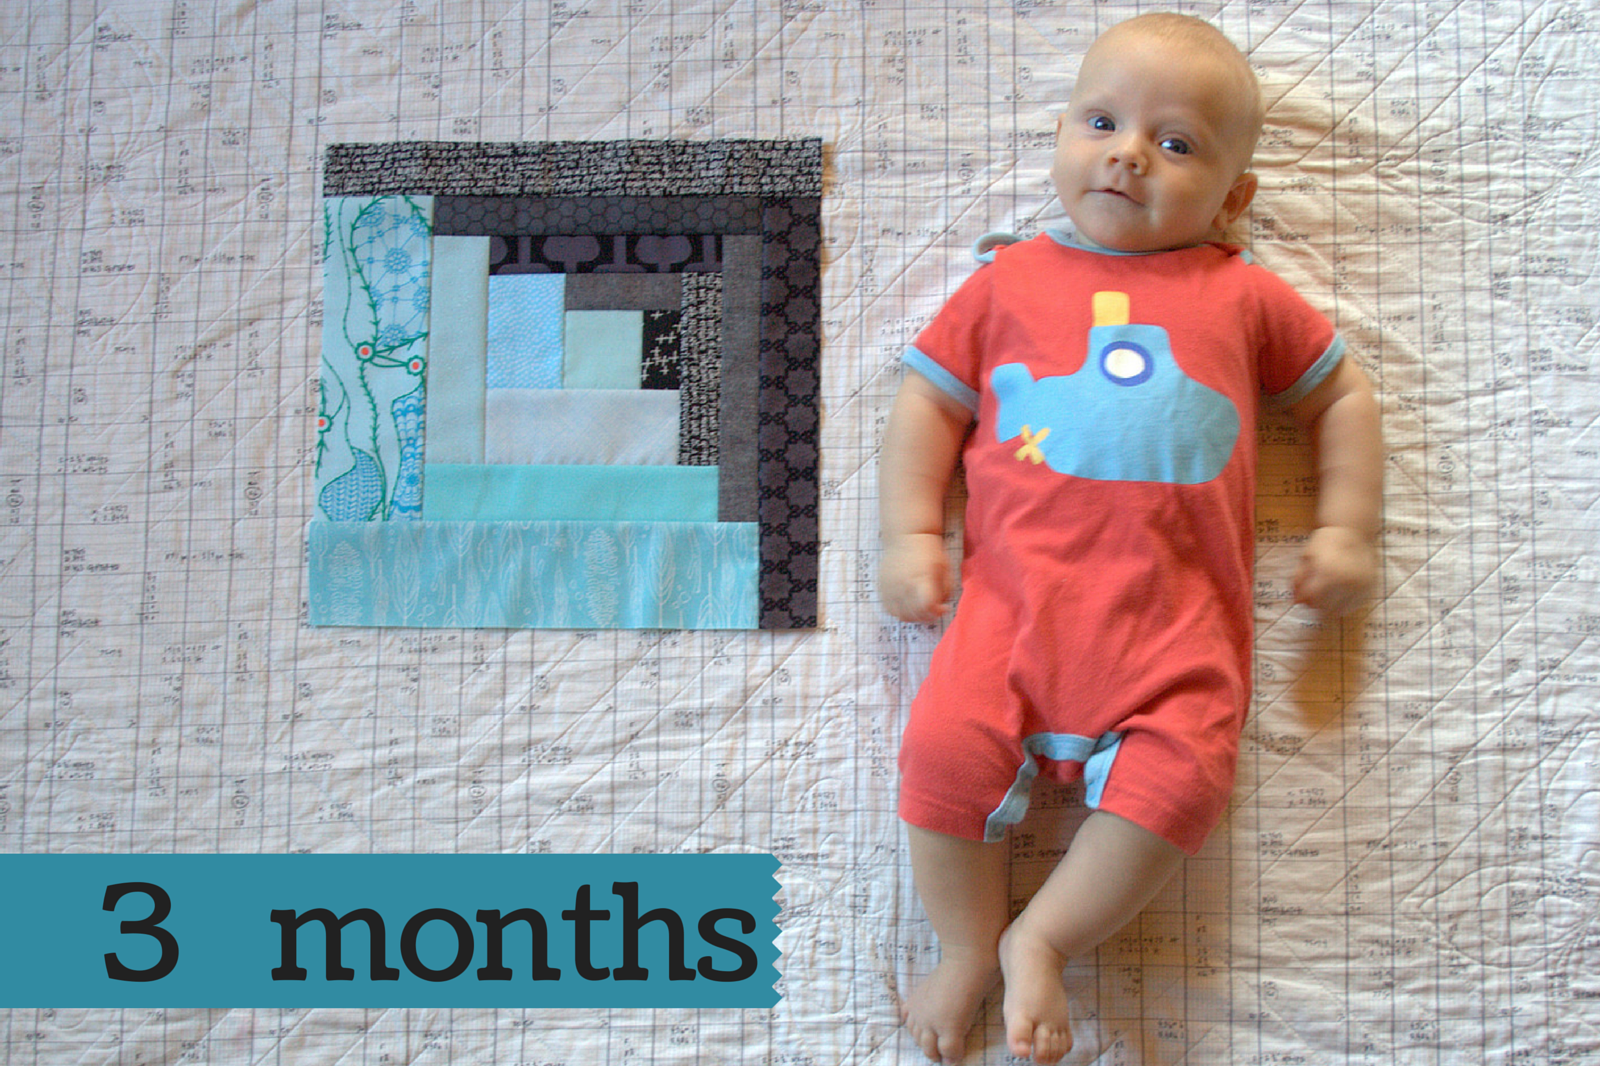
Time flies. Really, it does. It’s so cliche, but when it hits me how quickly hours become days, days become weeks, weeks become months, and then, surely, the months become years, it makes me slow down and remember how important it is to make the most of each moment. Three months have already passed since little Finn joined us on the outside. The first quarter of his first year is complete. I actually planned ahead this month, too, so that means a quarter of his monthly milestones baby quilt is complete.
“Wow, that’s growing!”
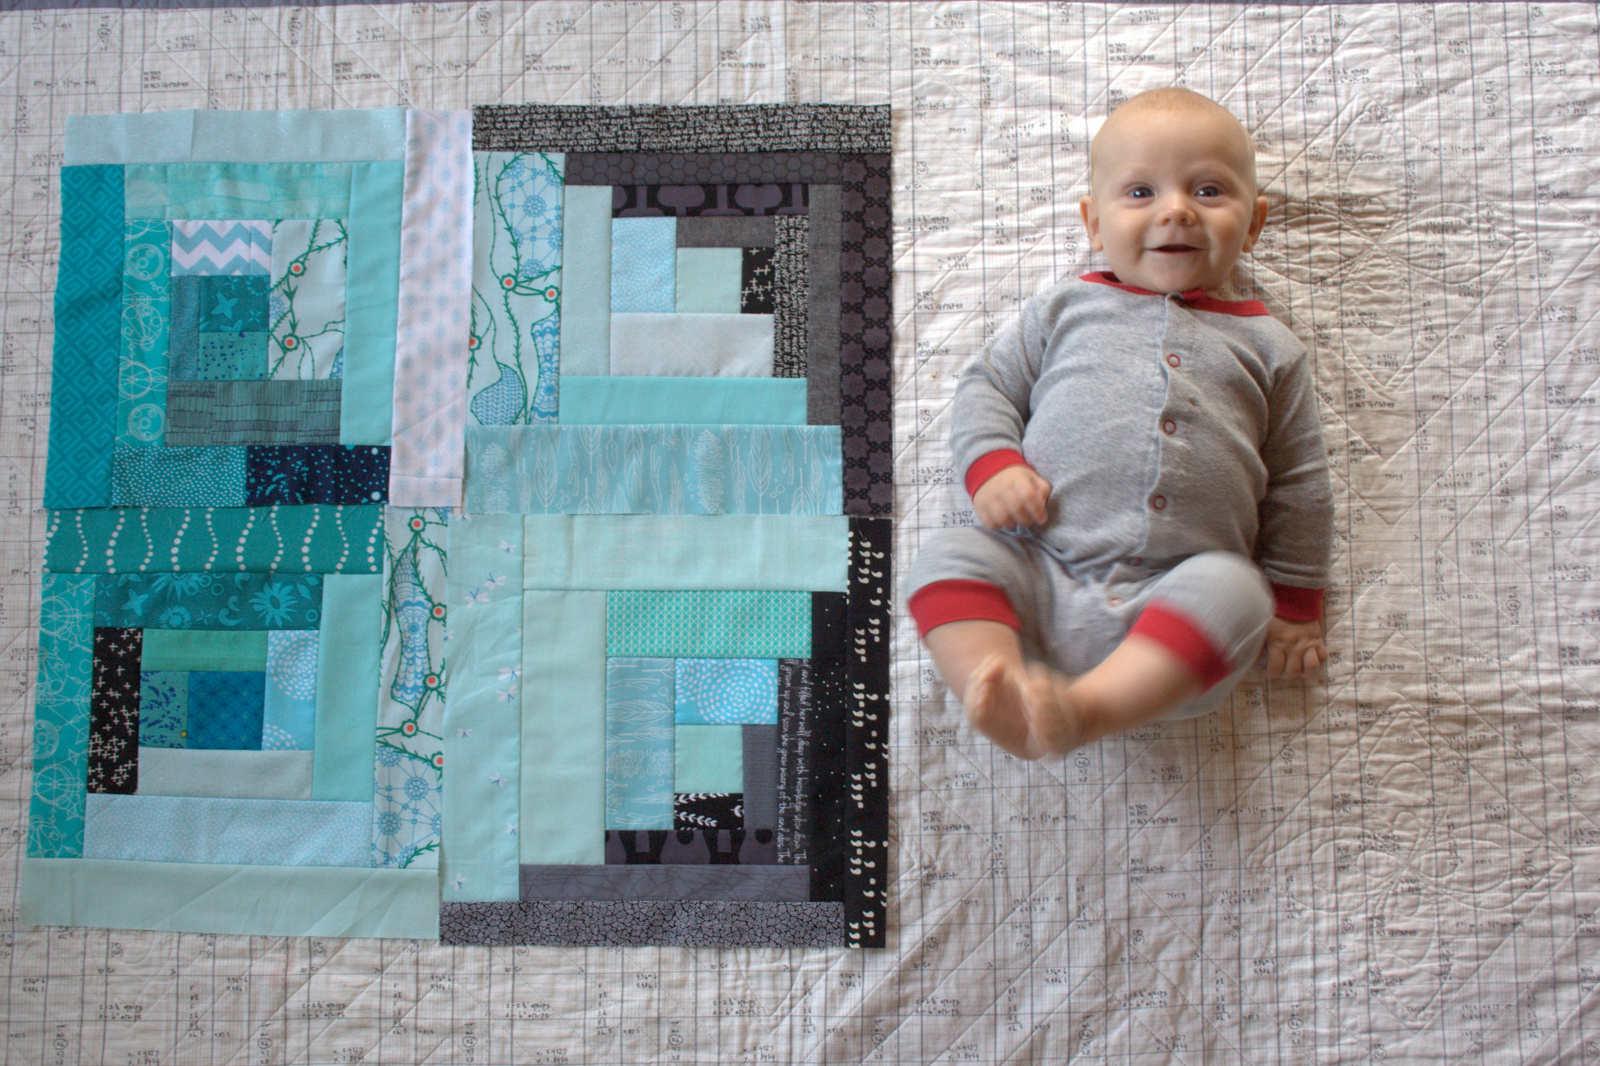
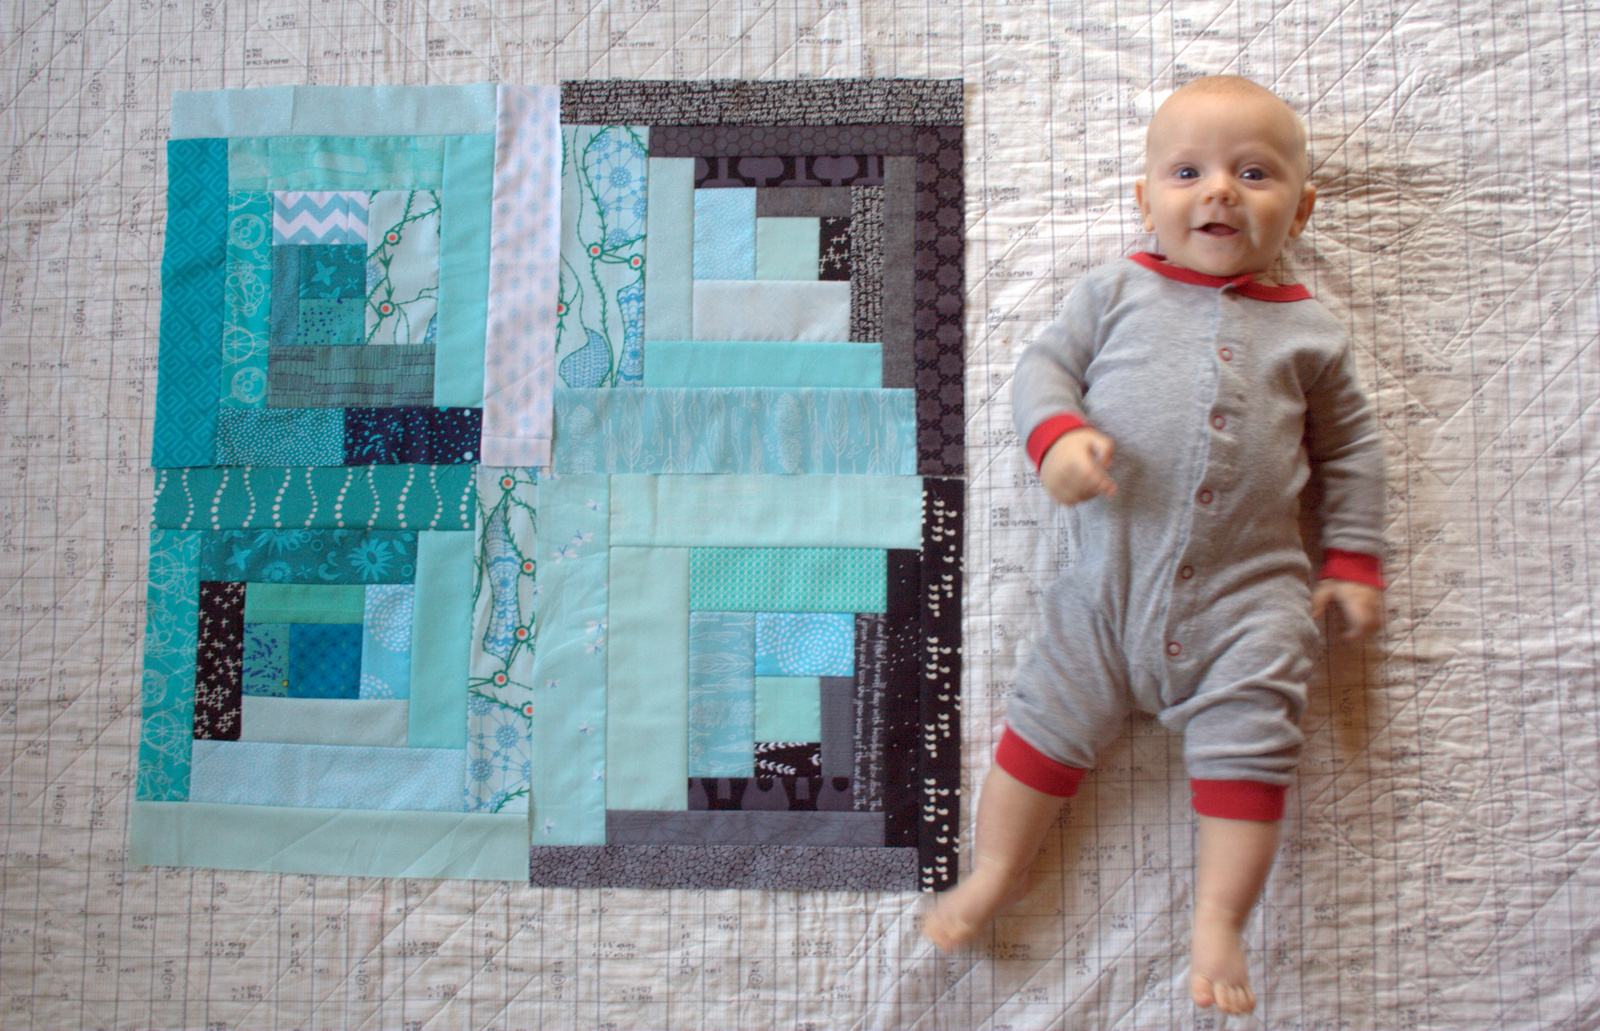
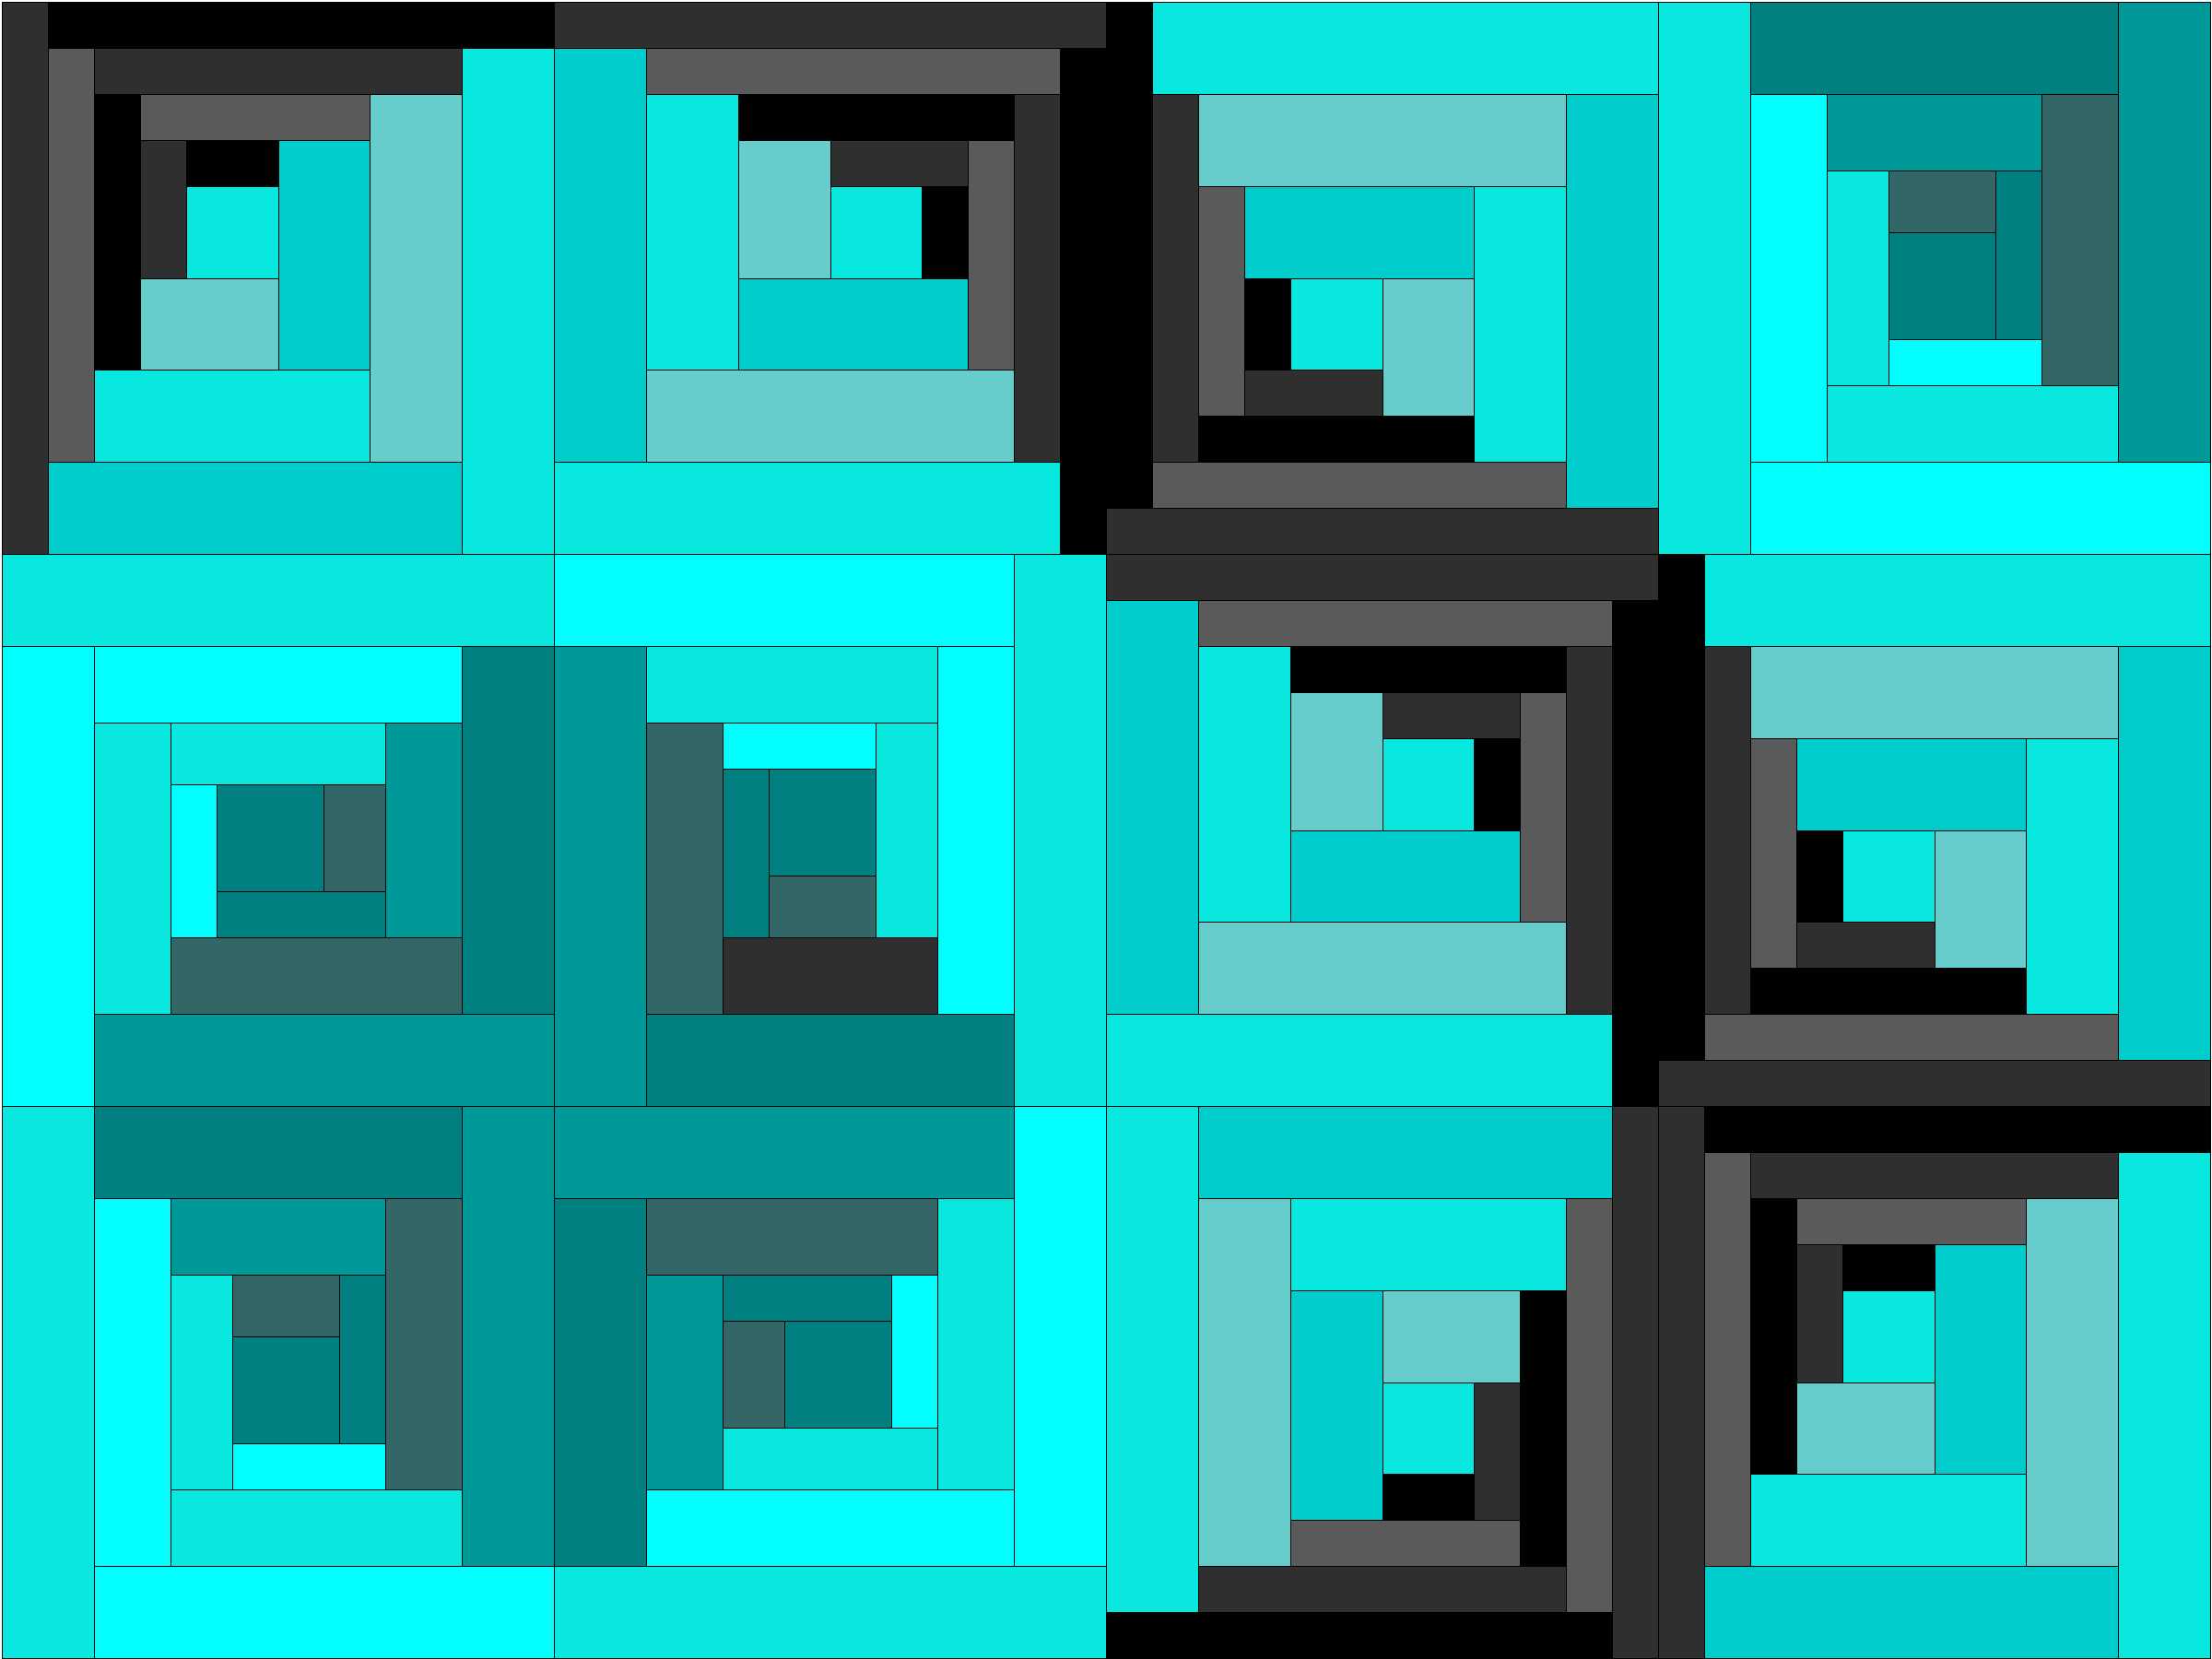
As promised, I finally settled on an overall layout and design for this quilt, and now I’m even more excited for the outcome.
I settled on a color scheme of dark and light teal and blacks/greys, both because they are fabulous colors, but also because I have plenty of teal and black/grey fabric in my scraps pile and stash. I also added a slightly skewed log cabin block to help provide the appearance of some curves and to add some interest to the overall quilt.
Monthly Milestones quilt Block 2
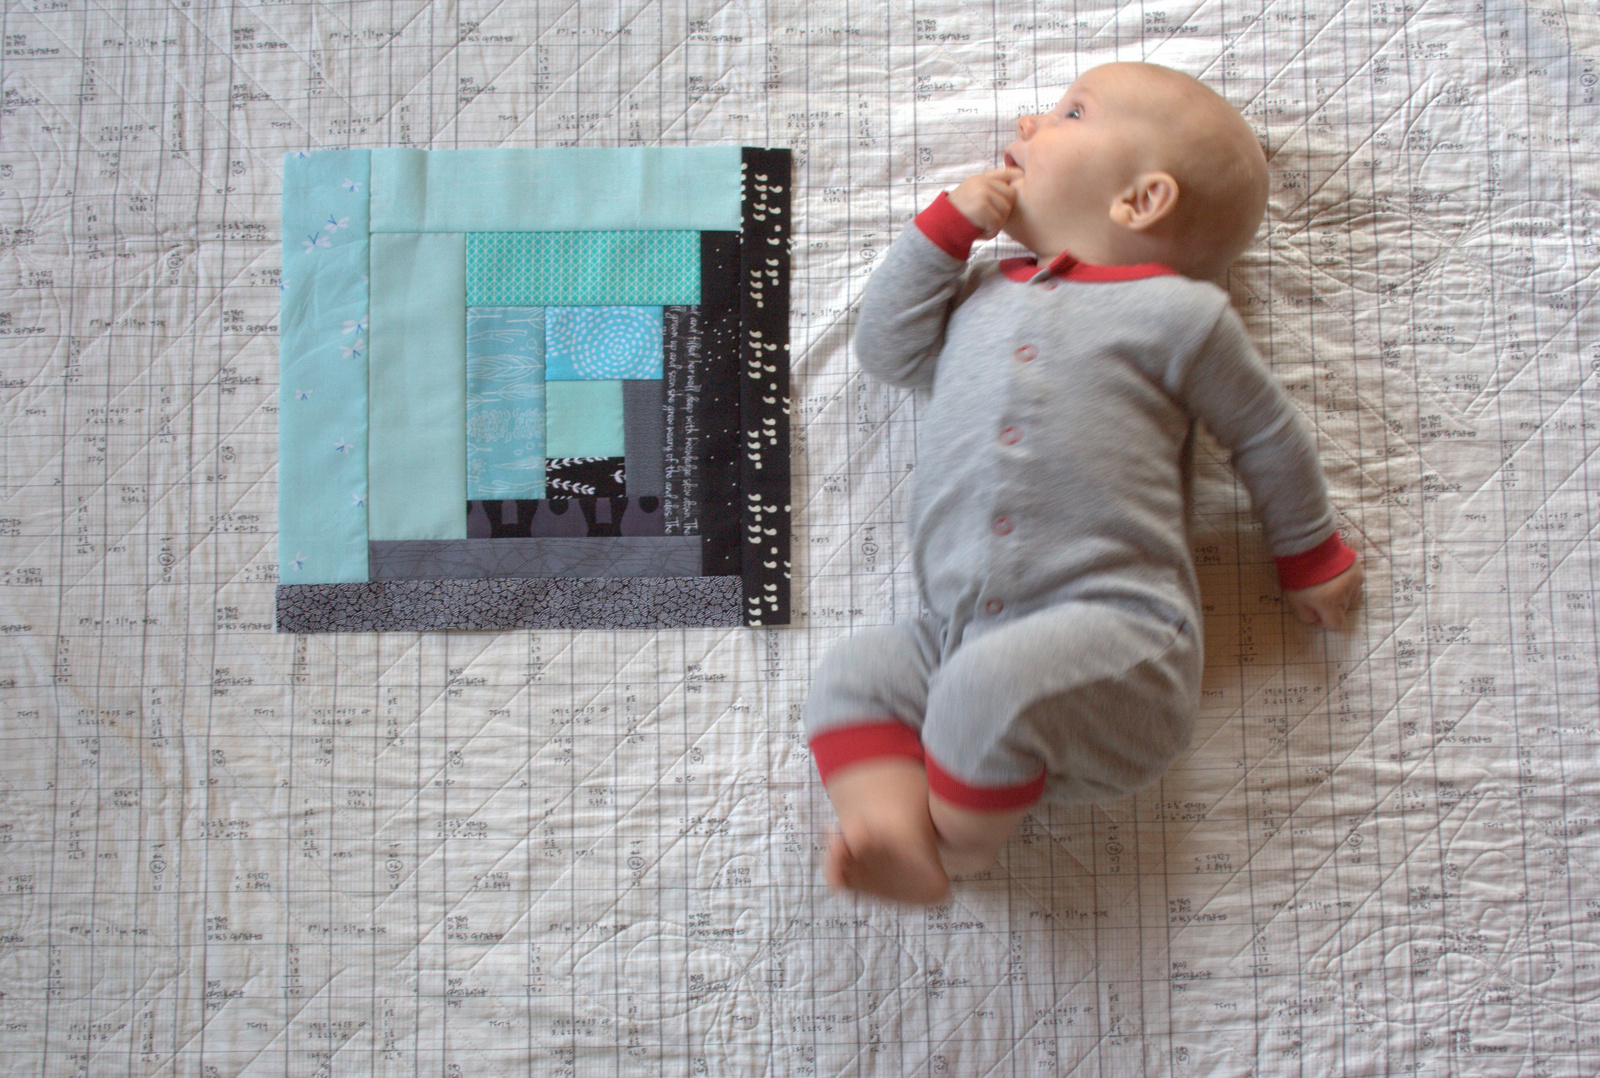
This month I made a Block 2, with wide light teal and narrow black/grey pieces. Creating the illusion of a curve is really quite simple with log cabin blocks. I drafted this block from the outside in, with 1″ strips on two edges and 2″ strips on the opposite two edges, ending with a 2″ square in the off-set center.
The finished quilt will require five (5) block 1s and seven (7) block 2s. Block 1 is a more improv, scrappy log cabin with strips varying in widths, but generally around 2″ or 2.5″ in width. Both blocks are quick and easy to make.
Enough about the quilt, though; I know you really want to hear about Finn! He is truly a blessing. He still loves to “talk” back and lights up whenever anyone looks him in the eye. His favorite thing as far as I can tell is having conversations with anyone who will sit and look at him, replying to his baby babble and grunts. He is generous and unbiased with his smiles, but the looks of true adoration are directed toward his siblings.
Finn just recently started finding his hands, which is really fun to watch. I love seeing him deep in thought, examining his hands and clearly working hard at figuring out how to get them to do his bidding. He grabs my arm or hand when it’s within his reach, but he’s not quite reaching out to grab things yet.
Now that I have a clear plan for the quilt, I’m even more excited to see it come together as Finn grows. While I’m tempted to up the ante to two blocks per month (one every 2 weeks feels doable), I am going to be easy on myself and stick with the one block per month plan. A finished 36″x48″ will be a great drag-around size as he grows into toddlerhood.
Use the code LaborDay2015 at checkout to get 15% off anything on their website all weekend (today, Saturday, September 4th through Monday, September 6th). Fiddlehead now has international shipping available, too! Check out the details on their Shipping Page.
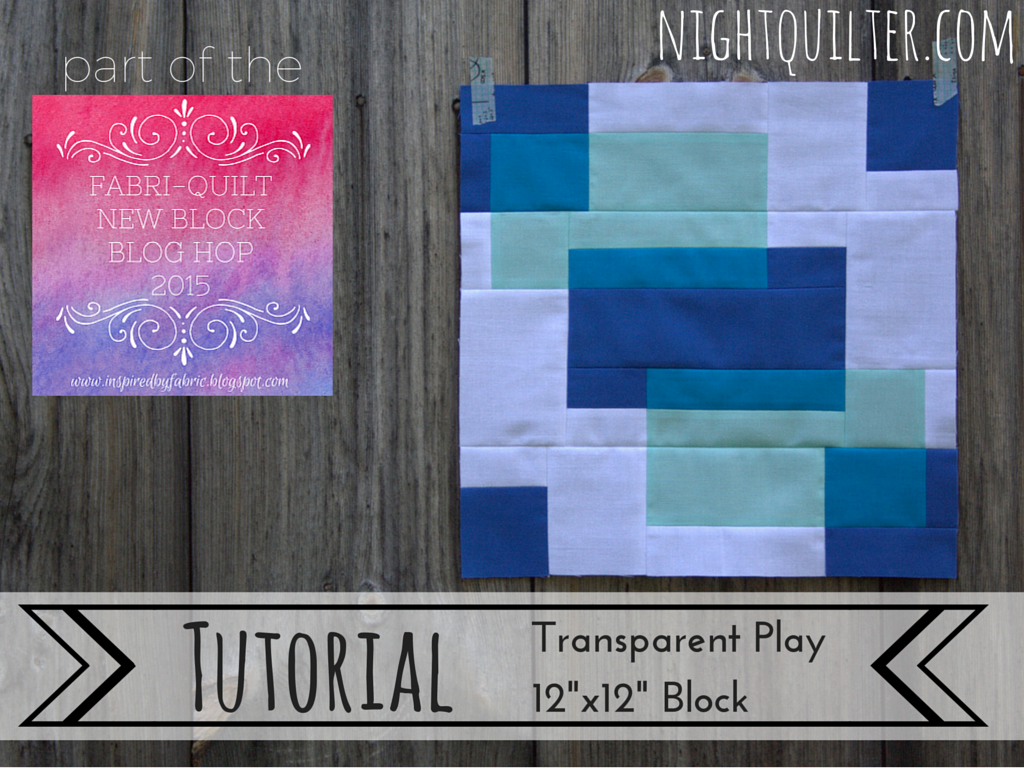
When I was invited to join the Fabri-Quilt New Block Blog Hop with the challenge of creating a new 12″ finished quilt block and sharing a tutorial, I immediately thought of transparency. I’ve been seeing fellow quilters play with transparency a lot lately (Yvonne’s Triangle Transparency quilt and the Transparency Bee Blocks by Hilary of Entropy Always Wins Blog and Leanne at She Can Quiltstand out in my mind most), and have yet to give it a go.
Colors chosen: Chartreuse, Turquoise, Coral, Aqua, Lapis Blue, White
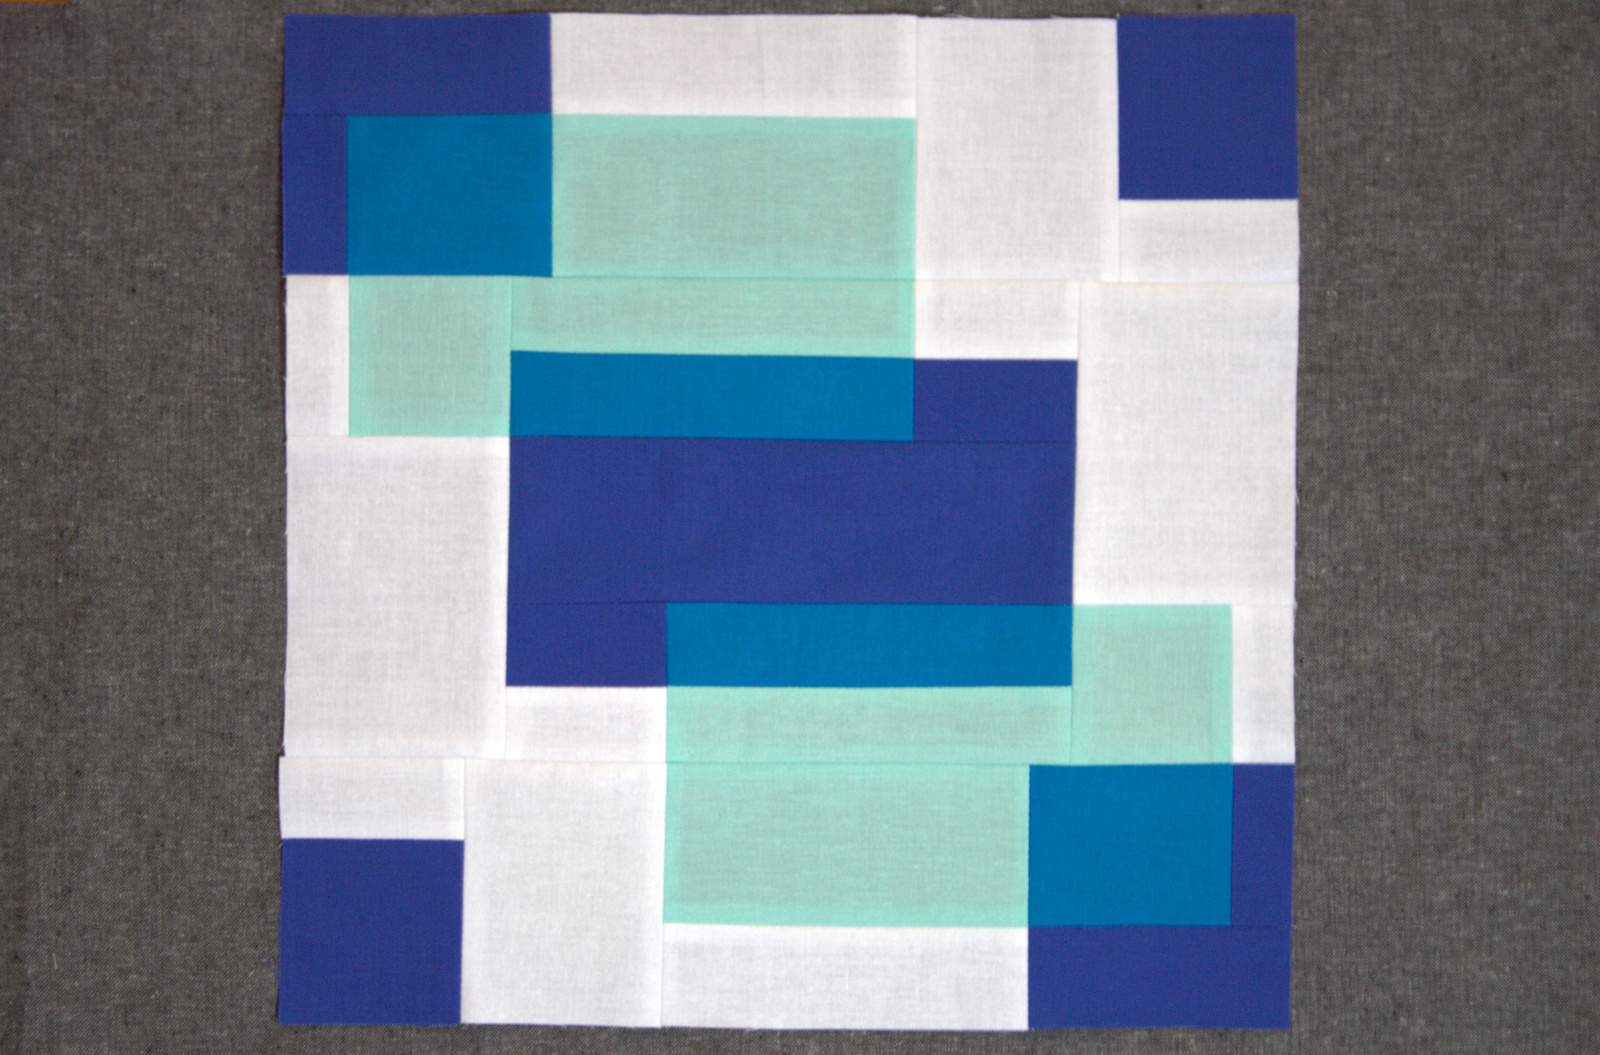
As soon as I saw the color palette chosen, I knew that transparency it was (I’ll save the chartreuse and coral for an actual watermelon project)! I had fun creating a block that both looks cool on its own, but also can result in many fun layouts when replicated for a quilt. I call it Transparent Play (original, huh?!)
Today I’m going to share a tutorial for how to make the new block Transparent Play that I created using fat eighths provided by Fabri-Quilt. While I’m not typically a prewasher, I would definitely recommend prewashing the Fabri-Quilt solids with a color catcher or two.
Note that part of the challenge for creating this block was to make it out of only fat eighths of fabric, so cutting instructions assume a fat eighth is being used. Fat eighths typically measure 9″x21″.
General Notes
All seams are sewn with 1/4″ seam allowance unless otherwise noted. I like to press seams open since it helps the block lay flat and helps me better match seams. Do what works best for you.
Fabric Requirements & Selection
For this block, you will need a fat eighth of each of the following fabrics:
a neutral background (I used white)
a dark (I used lapis blue)
a light (I used aqua)
a blend or medium (I used turquoise)
Since the block is designed for playing with transparency, try to choose fabrics that give the impression of transparency. The blend fabric should be a color that could result from the dark and the light fabrics being overlapped. Note that while I made my block mostly monochromatic (one color), this block could be made with color blends, too. For example red as your dark, yellow as your light, and orange as your blend.
Cutting Instructions
Again, this tutorial is assuming a fat eighth of fabric is being used for each color. Strips should be cut along the long edgeof the fat eighth (usually 20-21″ long and called length of fabric (LOF) in this tutorial). Note that many sections of the block will be strip pieced, so the initial cutting keeps this in mind.
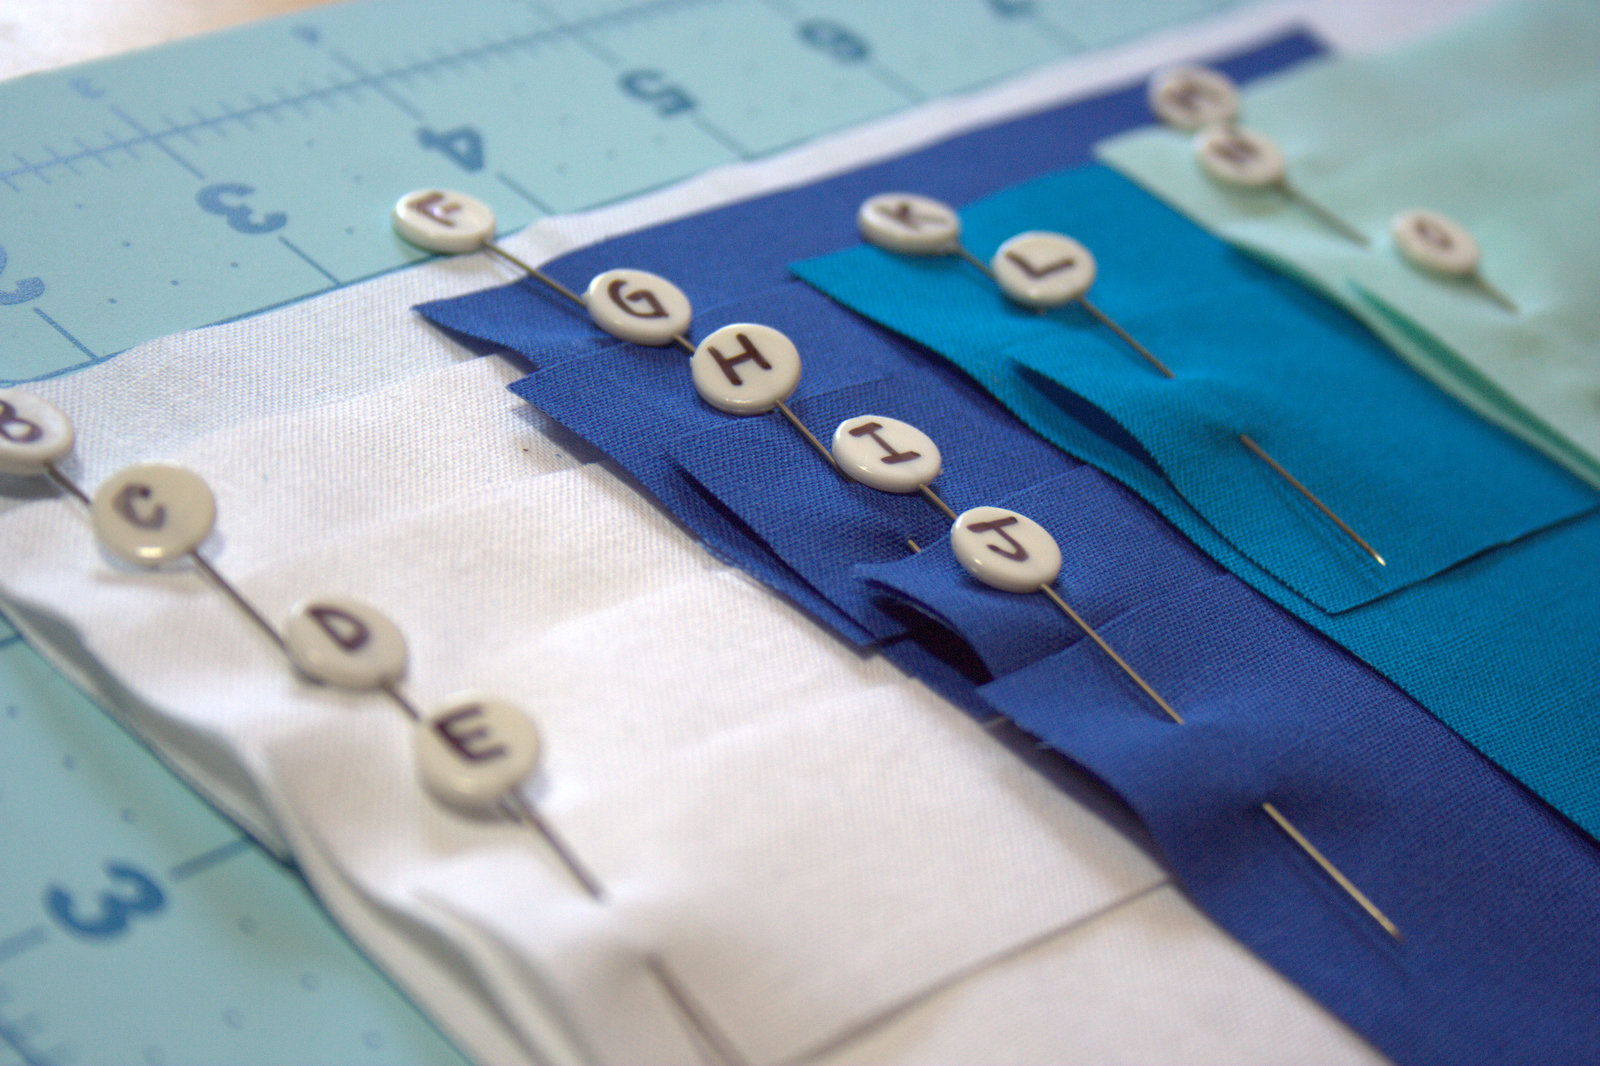
Be sure to label your pieces with the coordinating letters so that piecing is a breeze!
From white:
Cut 1 strip 1 1/2″ x LOF and subcut (1) 1 1/2″x10″ strip (A); and (2) 1 1/2″x5″ rectangles (B).
Cut 1 strip 3″ x LOF and subcut (2) 3″x3 1/2″ rectangles (C); (2) 3″x4 1/2″ rectangles (D); and (1) 1″x5″ strip (E).
From lapis blue (dark):
Cut 1 strip 2 1/2″ x LOF and subcut (1) 2 1/2″x5″ rectangle (F); (1) 1 1/2″x5″ rectangle (G); (1) 1″x5″ rectangle (H–note, this fits next to G in the strip); and (2) 1 1/2″x3 1/2″ rectangles (I).
Cut (1) 2 1/2″x7 1/2″ rectangle (J).
From aqua (light):
Cut (1) 1 1/2″x11″ strip (M).
Cut (1) 2 1/2″xLOF and subcut (1) 2 1/2″x5″ (N); and (1) 2 1/2″x10″ (O).
From turquoise (medium):
Cut (1) 3 1/2″xLOF and subcut (1) 3″x5″ rectangle (K); and (1) 1 1/2″x11″ strip (L).
Piecing Instructions
Making the Top and Bottom Panels
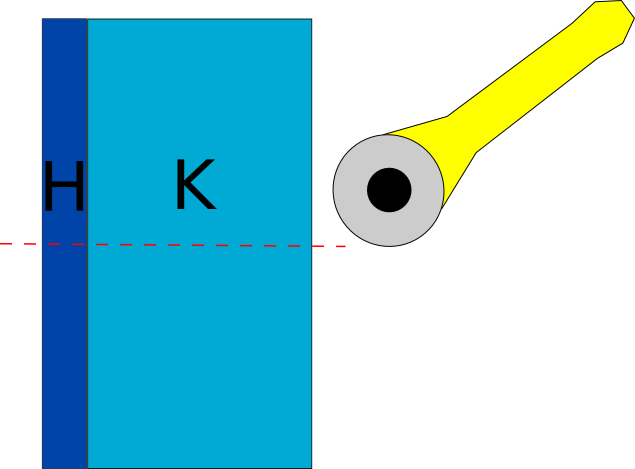
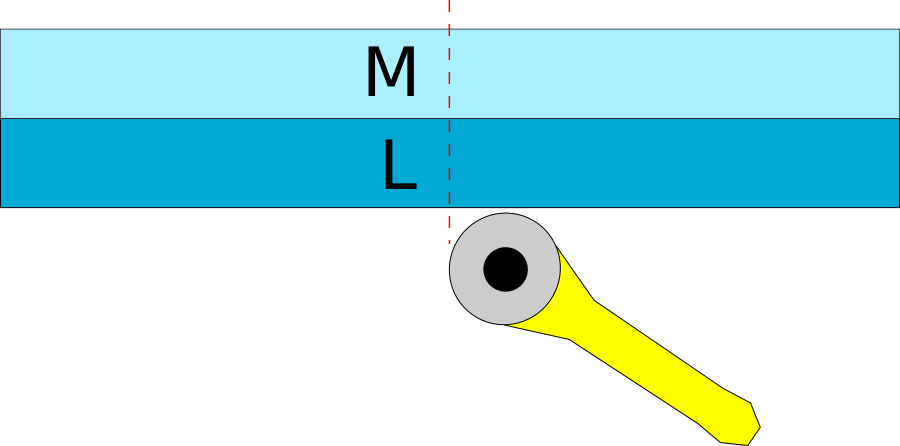
Sew H to K along the 5″ side. Cut into two equal 3 1/2″x2 1/2″ rectangles as shown above. These are the HK units.
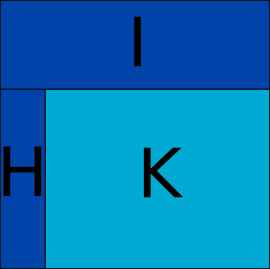
Sew I to the top of each HK unit, ensuring that the dark lapis blue H strip is on the left. You will have (2) 3 1/2″ squares (above). These are the IHK units. Set aside.
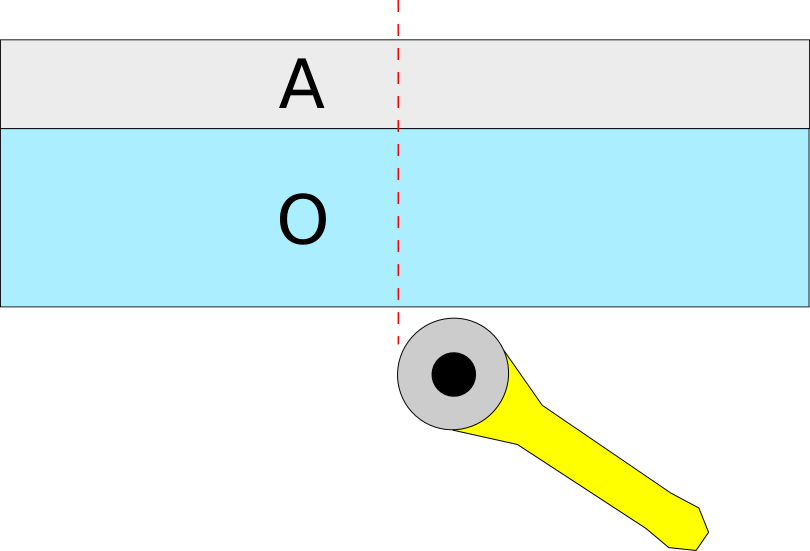
Sew A to O along the 10″ side. Cut into two equal 5″x3 1/2″ rectangles as shown above. Set aside.
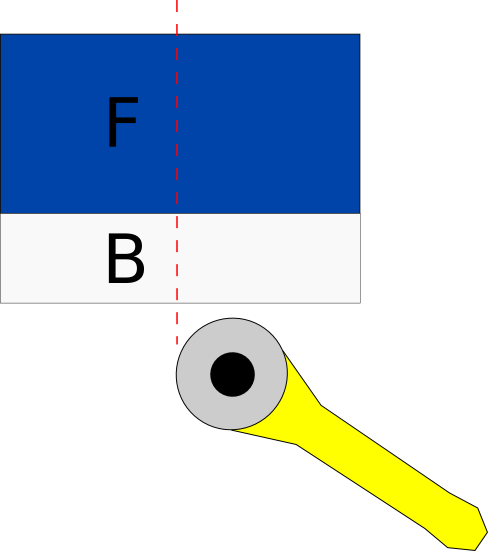
Sew F to one of the B pieces along the 5″ side. Cut into two equal 2 1/2″x3 1/2″ rectangles as shown above. These are the FB units.
With F on top, sew C pieces to the left side of the FB units along the 3 1/2″ edge. These are the 3 1/2″x5″ CFB units.
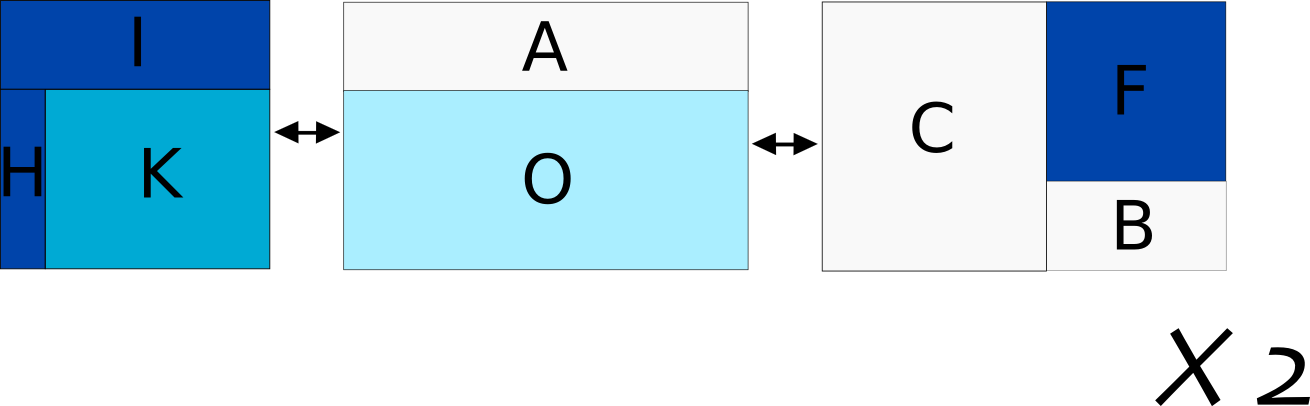
Assemble the top and bottom panels as shown above. Note that they can be assembled identically, but we will rotate one of them 180 degrees as the bottom panel before final assembly of the block.
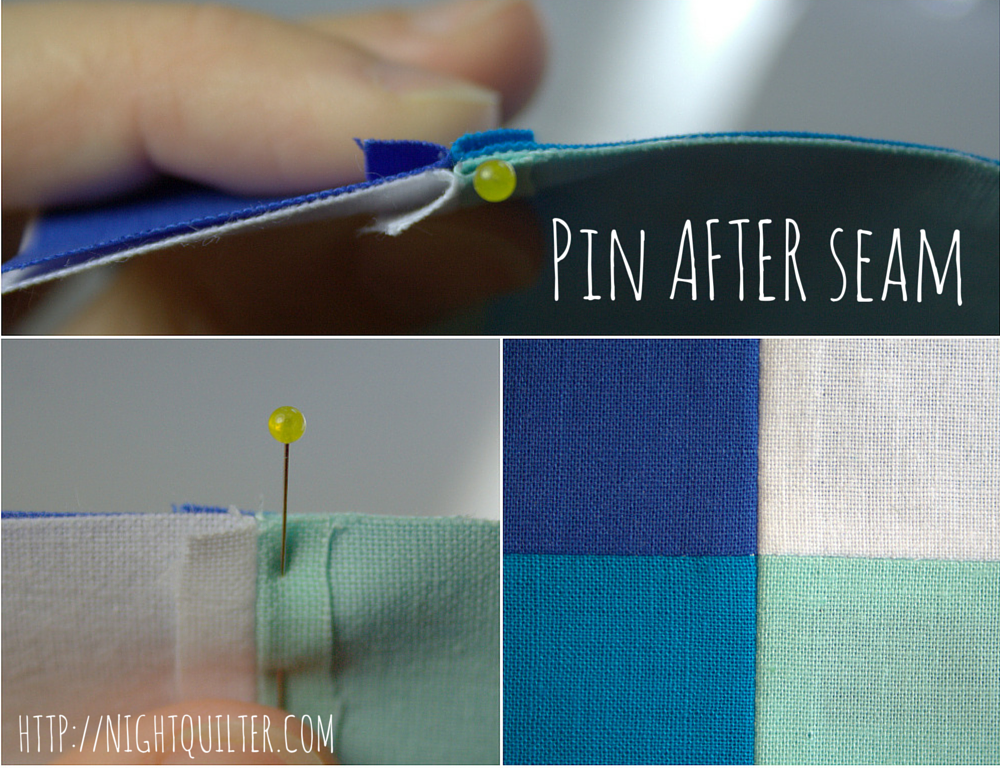
*Accuracy Tip*
When matching seams, line up the full length of the seams to be matched (not just at the raw edge) and then pin directly after the seam (about 1/16th “). This will ensure your seams stay in position without the pin skewing the fabric alignment when sewing. It will often result in perfectly matched seams.
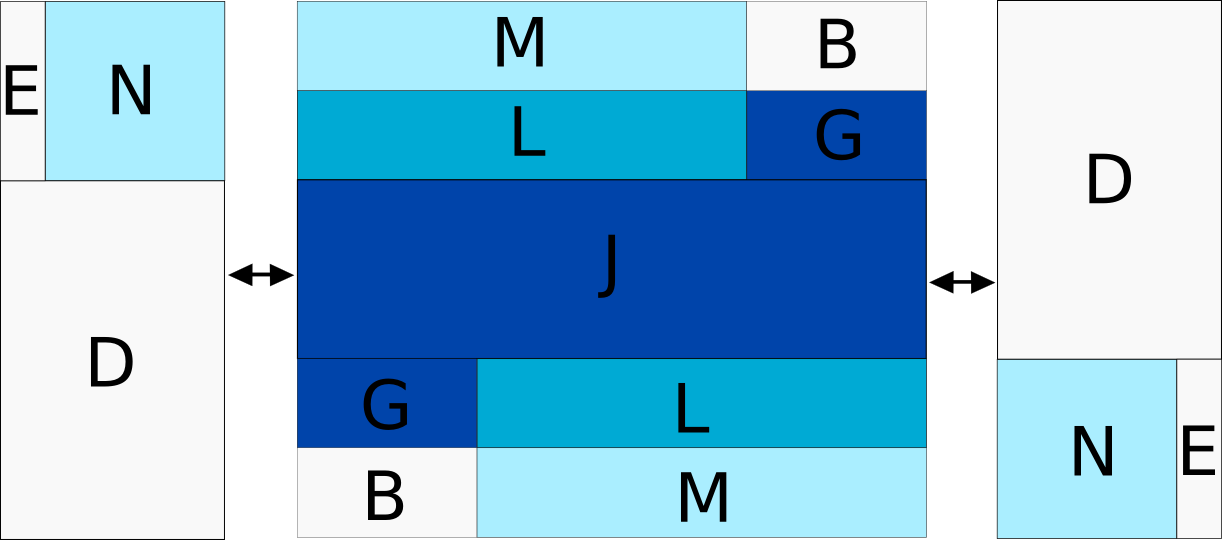
Making the Center Panel
Sew M to L along 11″ side. Cut into two equal 2 1/2″x5 1/2″ rectangles as shown above. These are the ML units. Set aside.
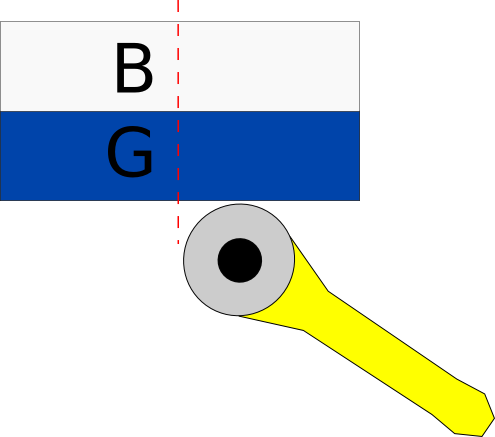
Sew B to G along 5″ side. Cut into two equal 2 1/2″x2 1/2″ rectangles as shown above. These are the BG units. Set aside.
Sew ML units to BG units as shown above. These are the MLBG units.
Sew MLBG units to long sides of J as shown. Note that the bottom MLBG unit has been rotated 180 degrees. Pay close attention to the position of the colors to ensure the MLBG units are mirroring each other. Set aside.
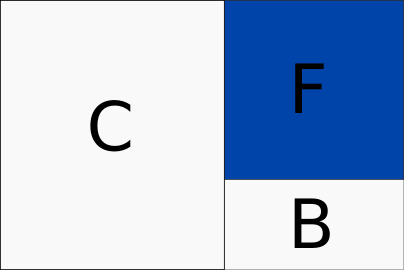
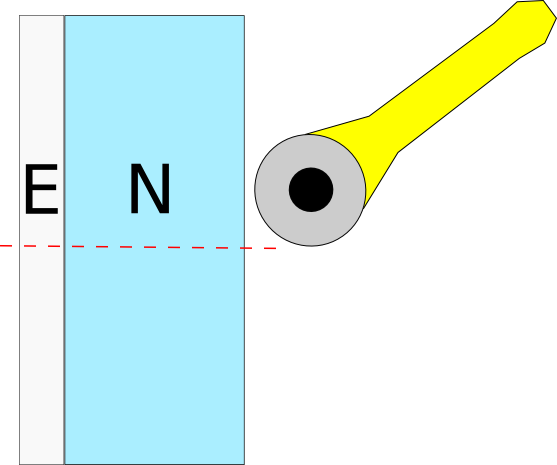
Sew E to N along 5″ side. Cut into two equal 3″x 2 1/2″ rectangles as shown above. These are your EN units.
Sew D to the bottom of each EN unit, ensuring that the background white E strip is on the left. You will have (2) 3″x6 1/2″ rectangles (above). These are the END units.
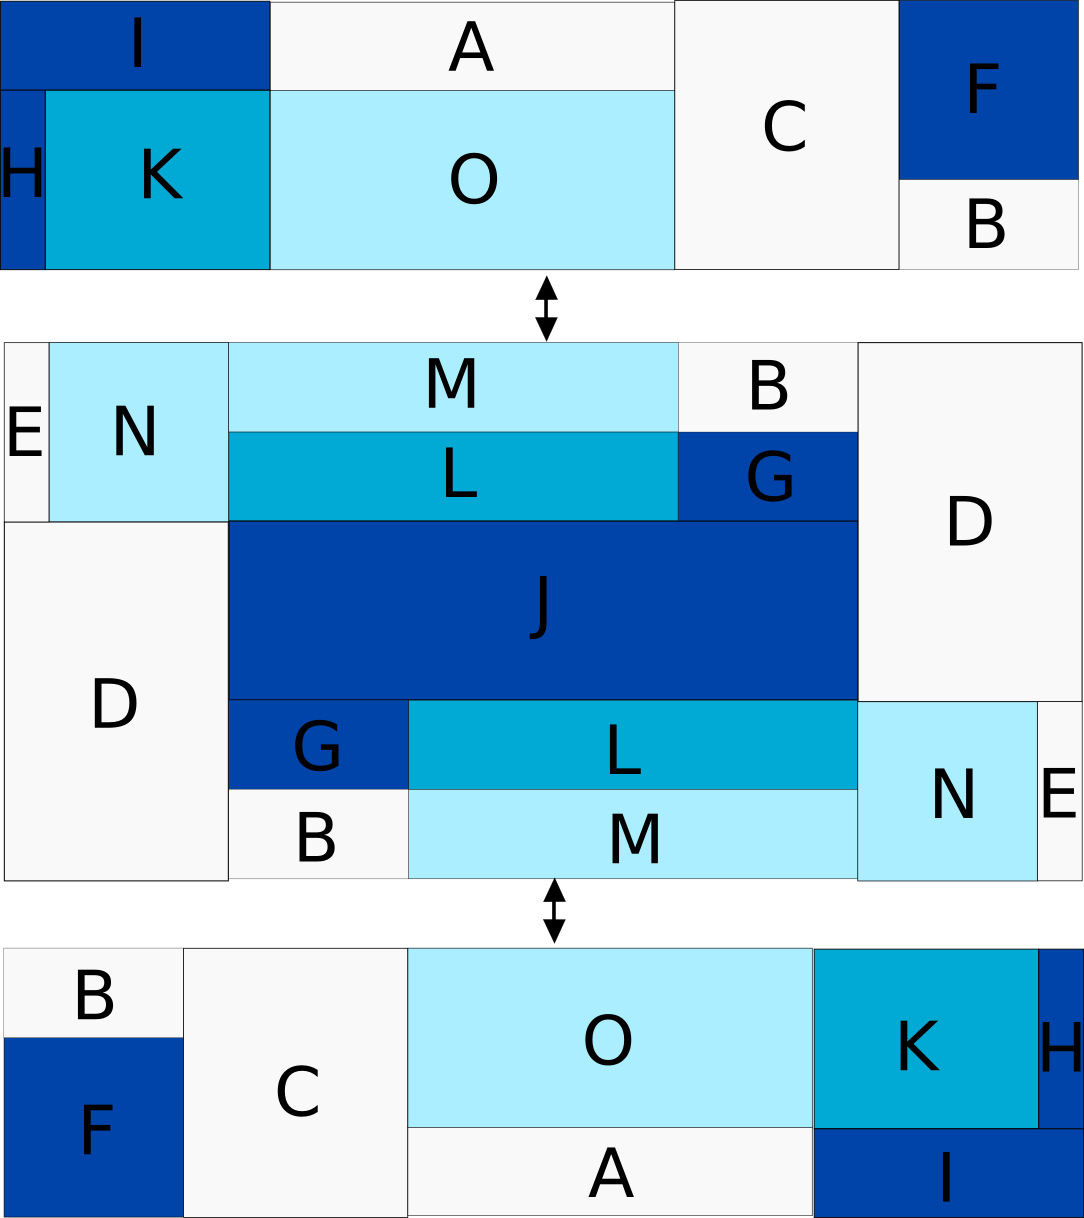
Assemble the center panel as shown above. Note that the right END unit has been rotated 180 degrees. Pay close attention to the position of the colors before sewing. The center panel should measure 12 1/2″ x 6 1/2″ at this point.
Sew top and bottom panels to center panel to complete the quilt block as shown above. Note that the bottom panel has been rotated 180 degrees.
Congratulations! You just made your first Transparent Play block. It wasn’t nearly as tricky as it first looked, was it? Strip piecing is awesome.
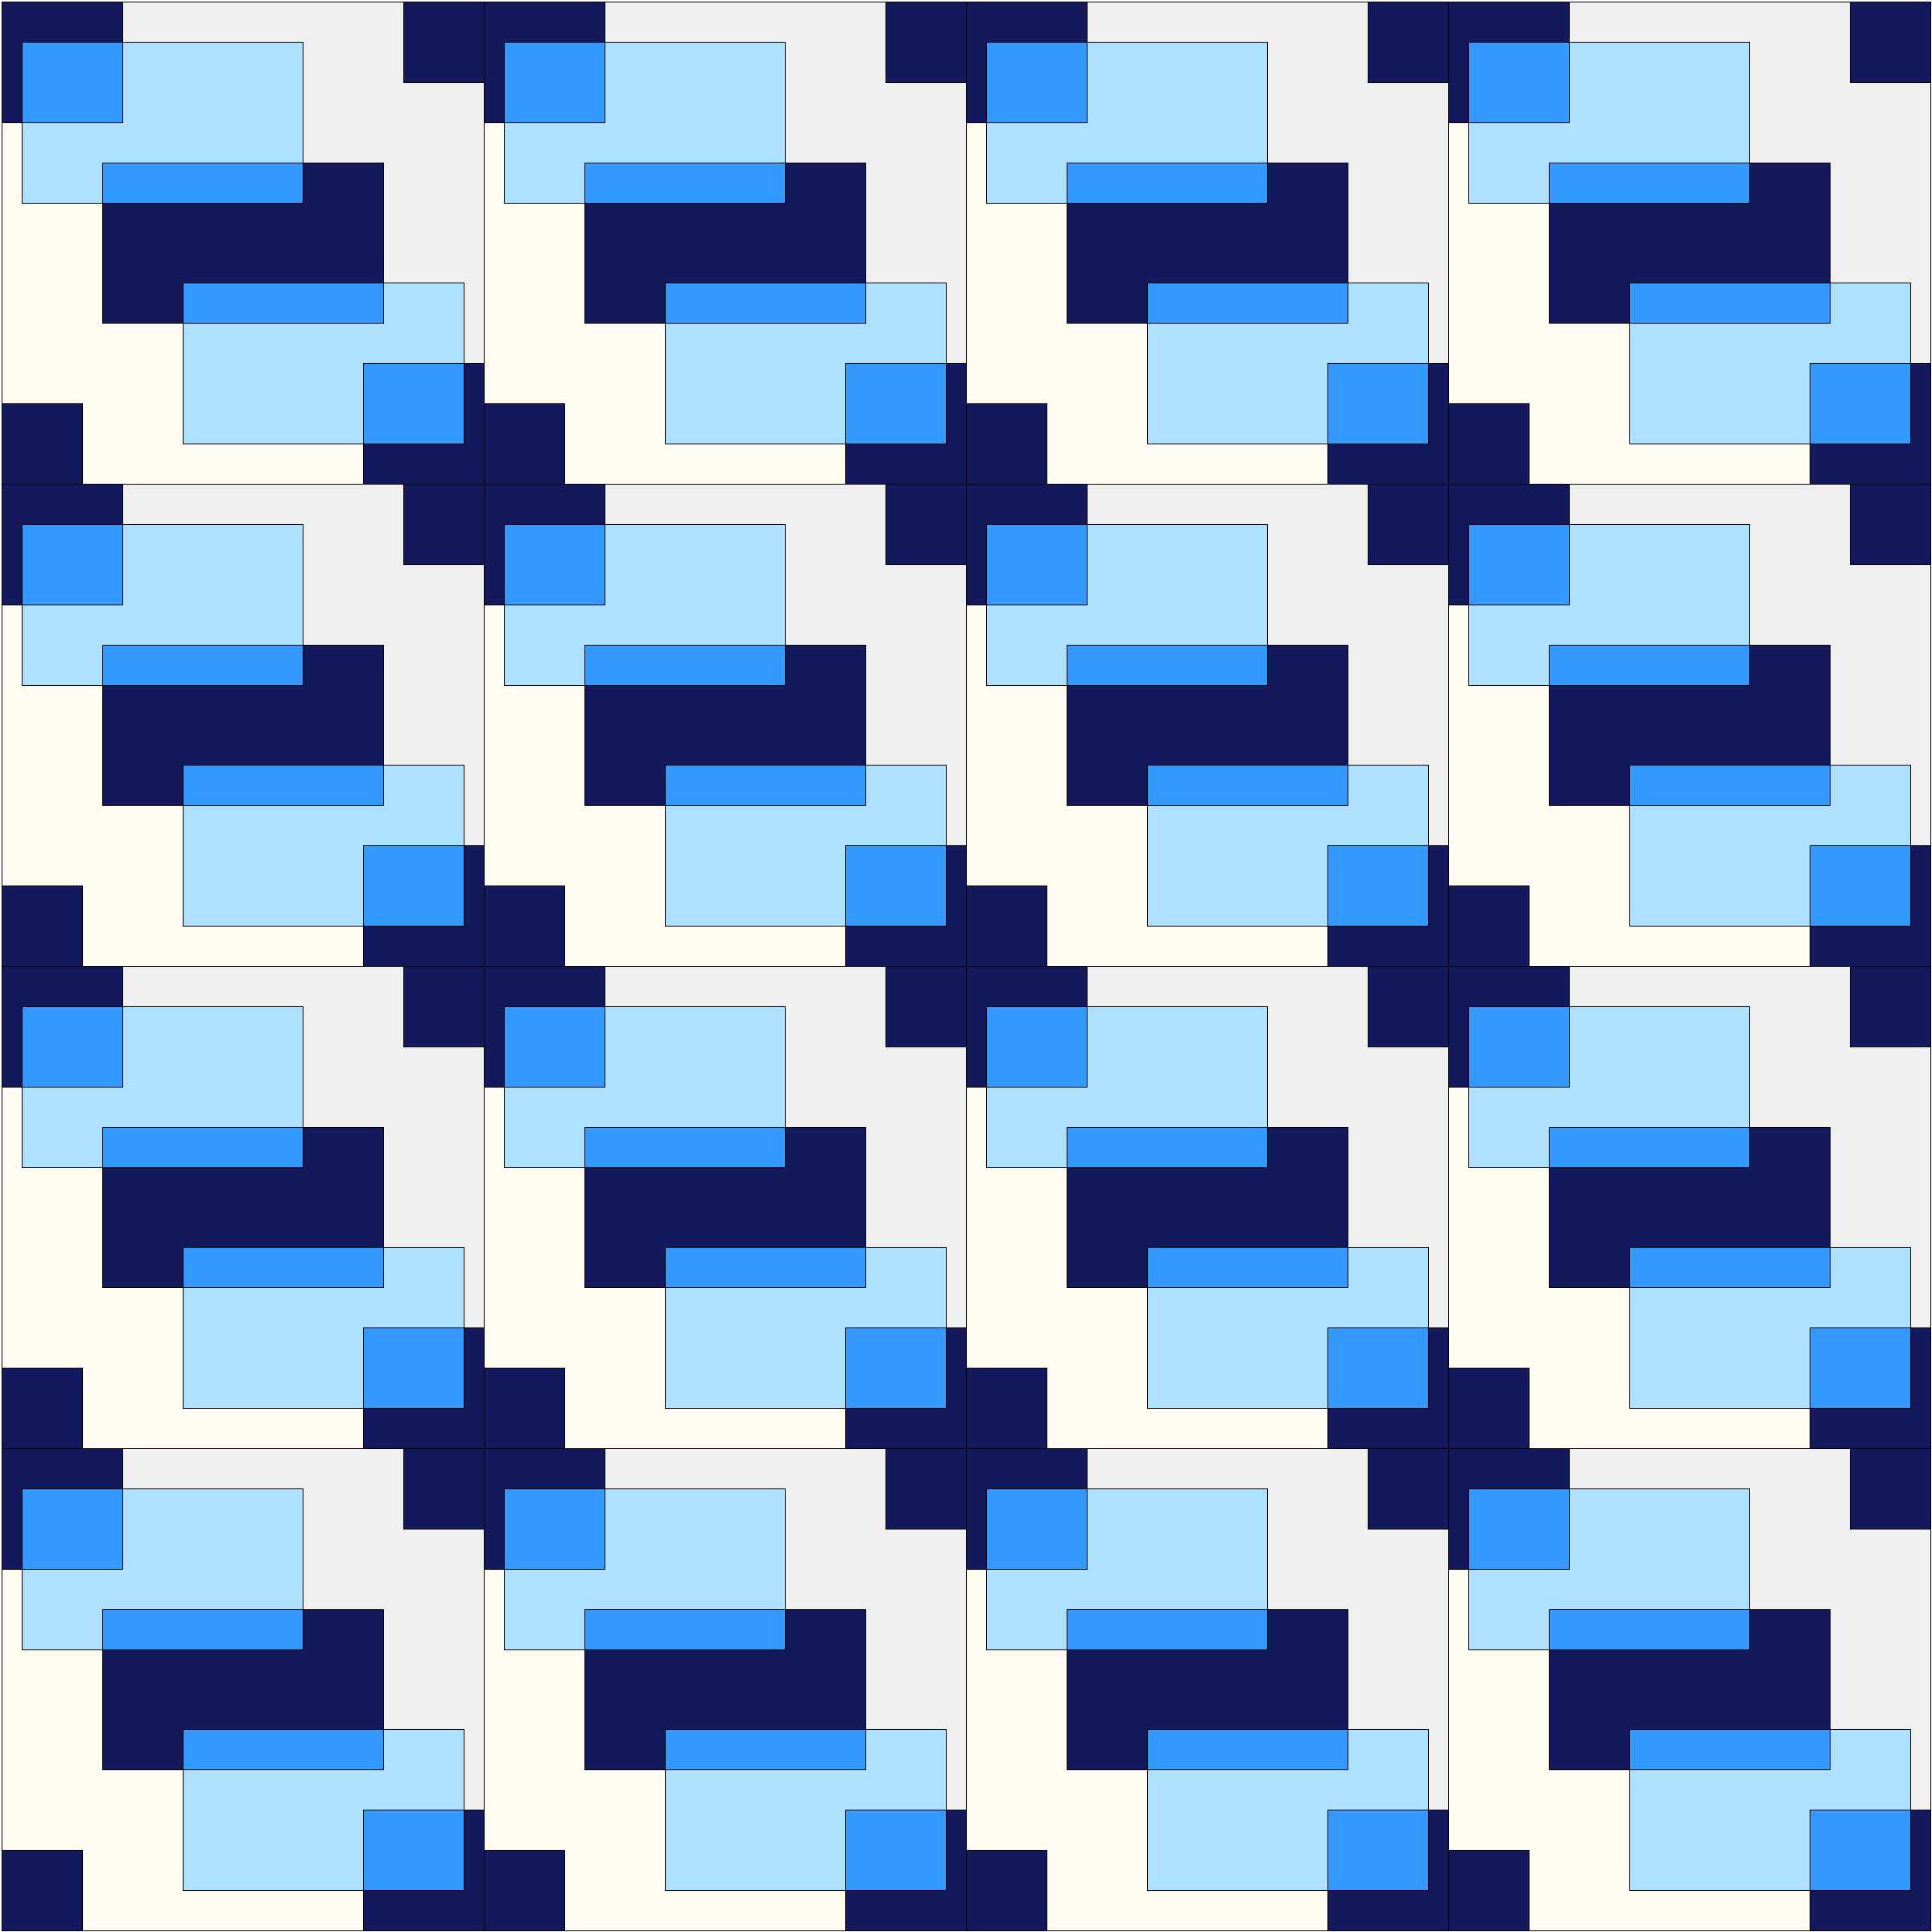
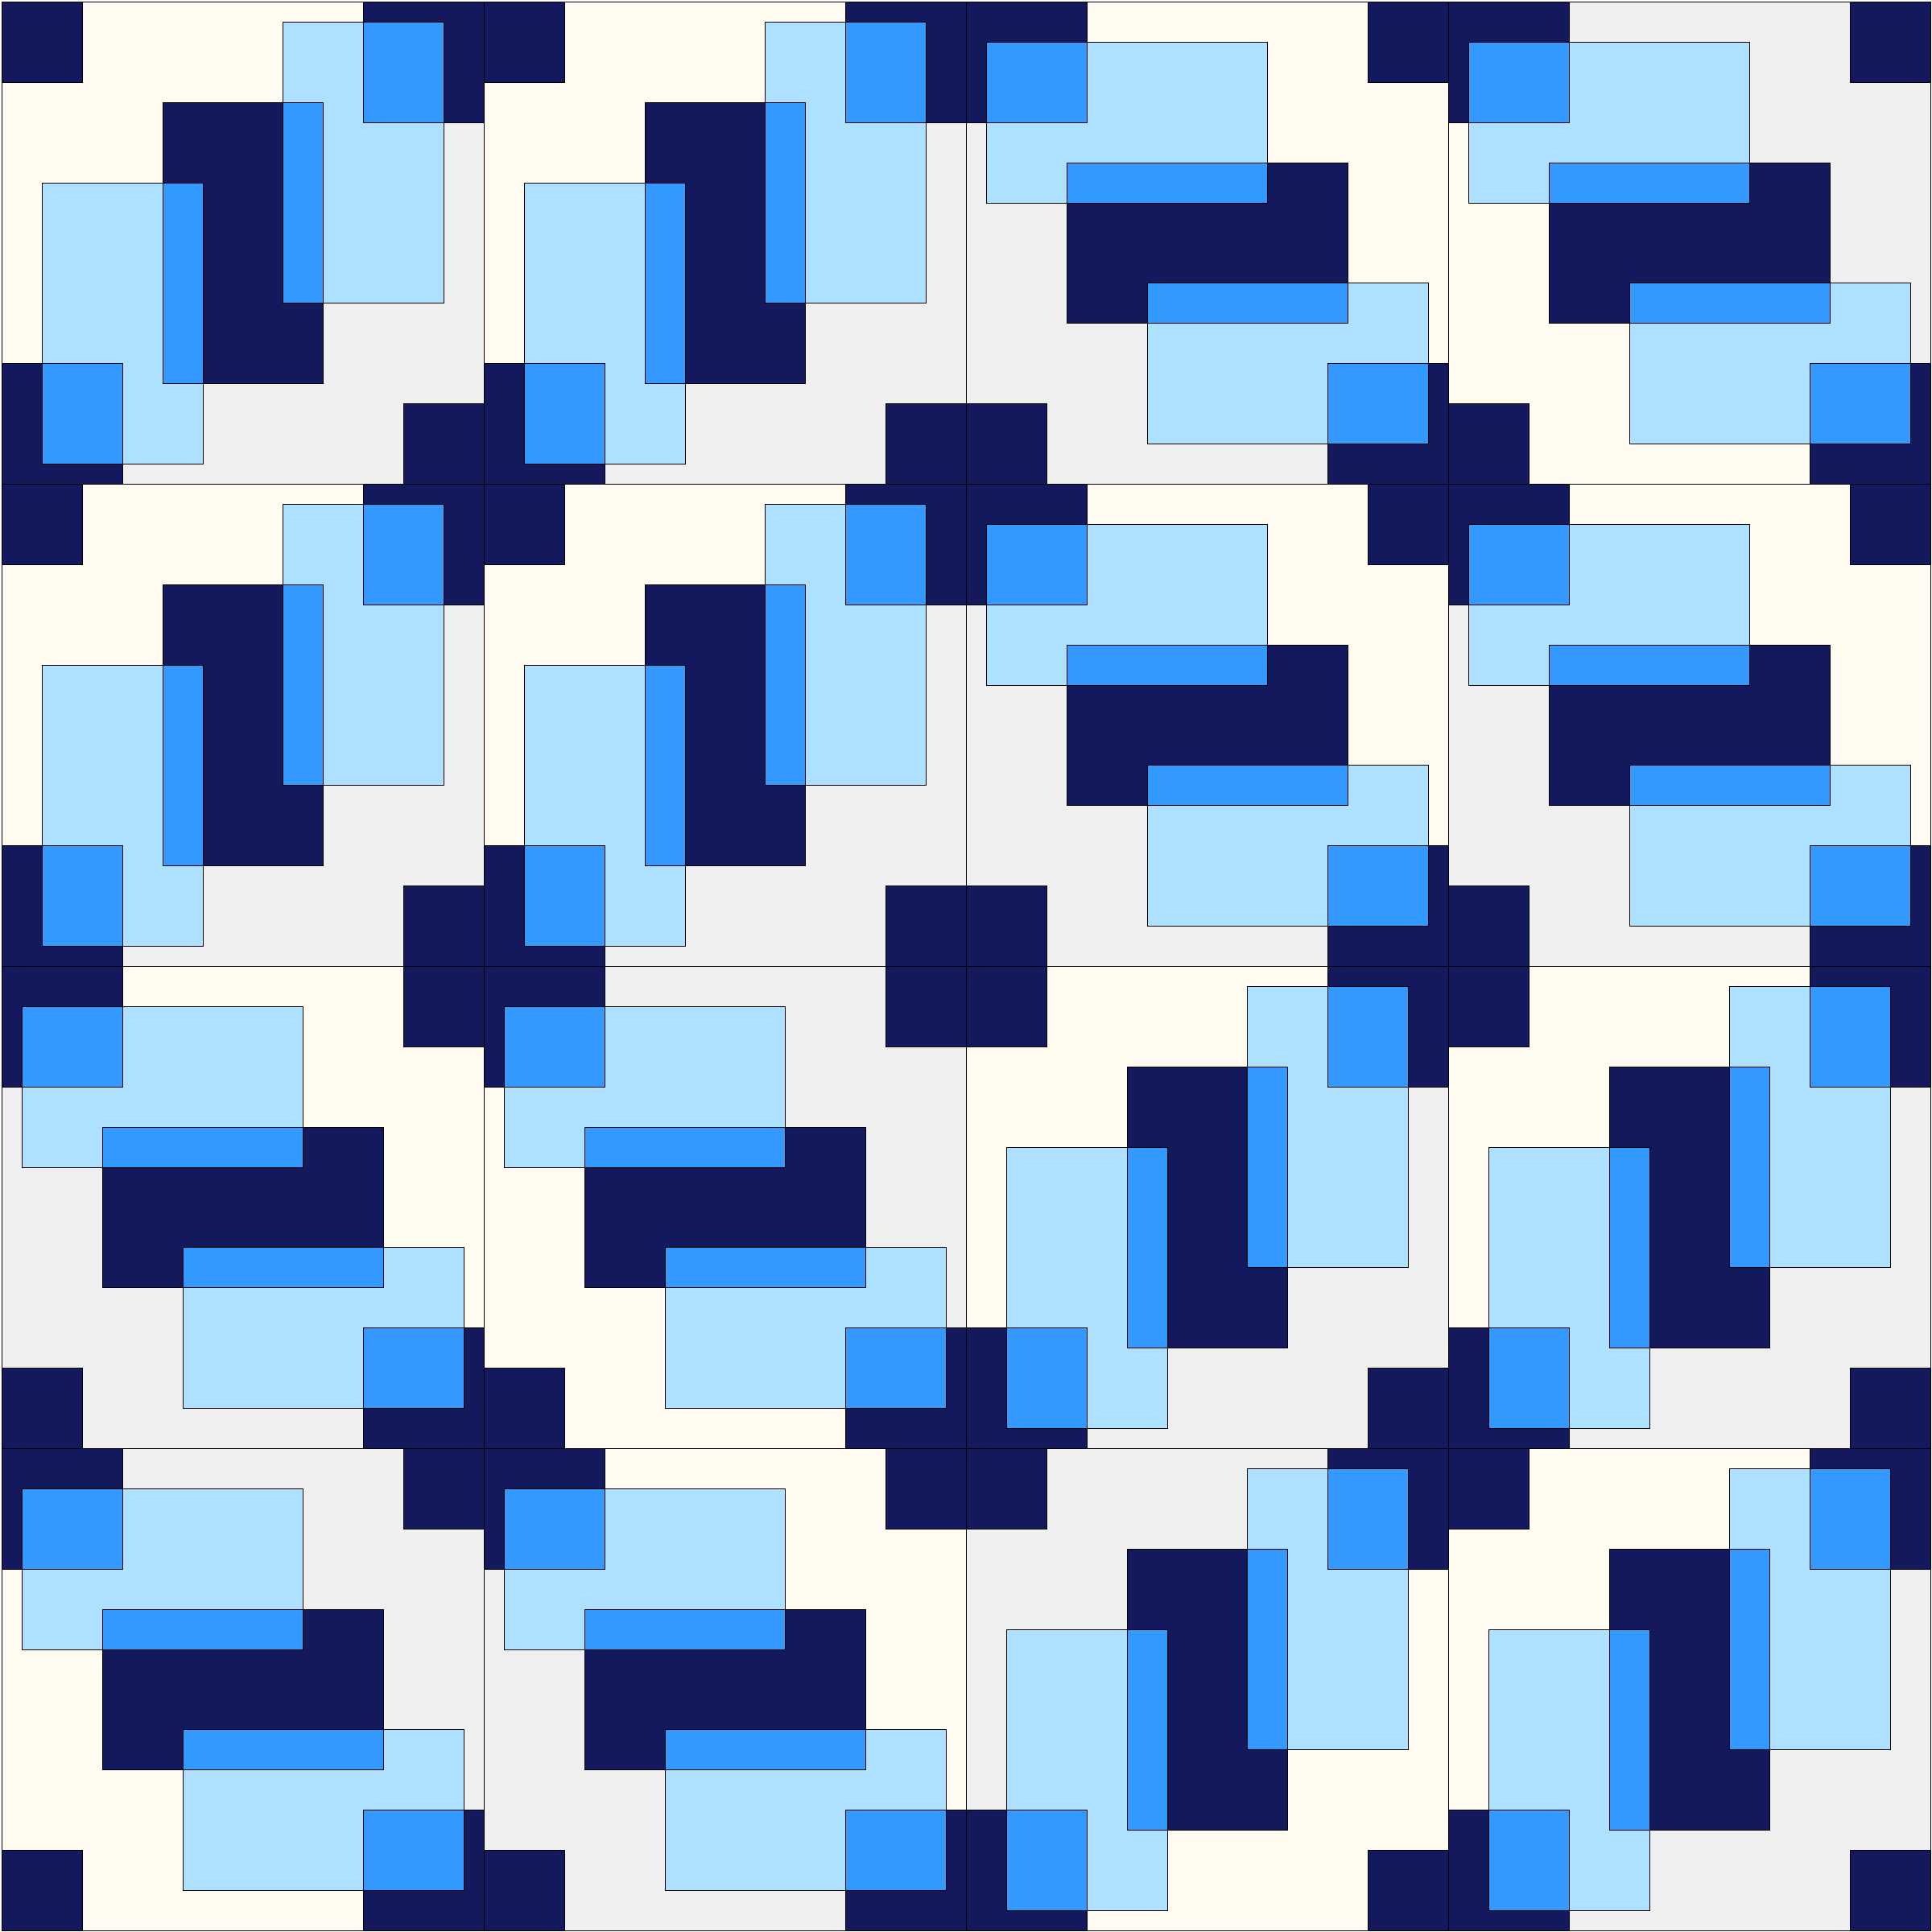
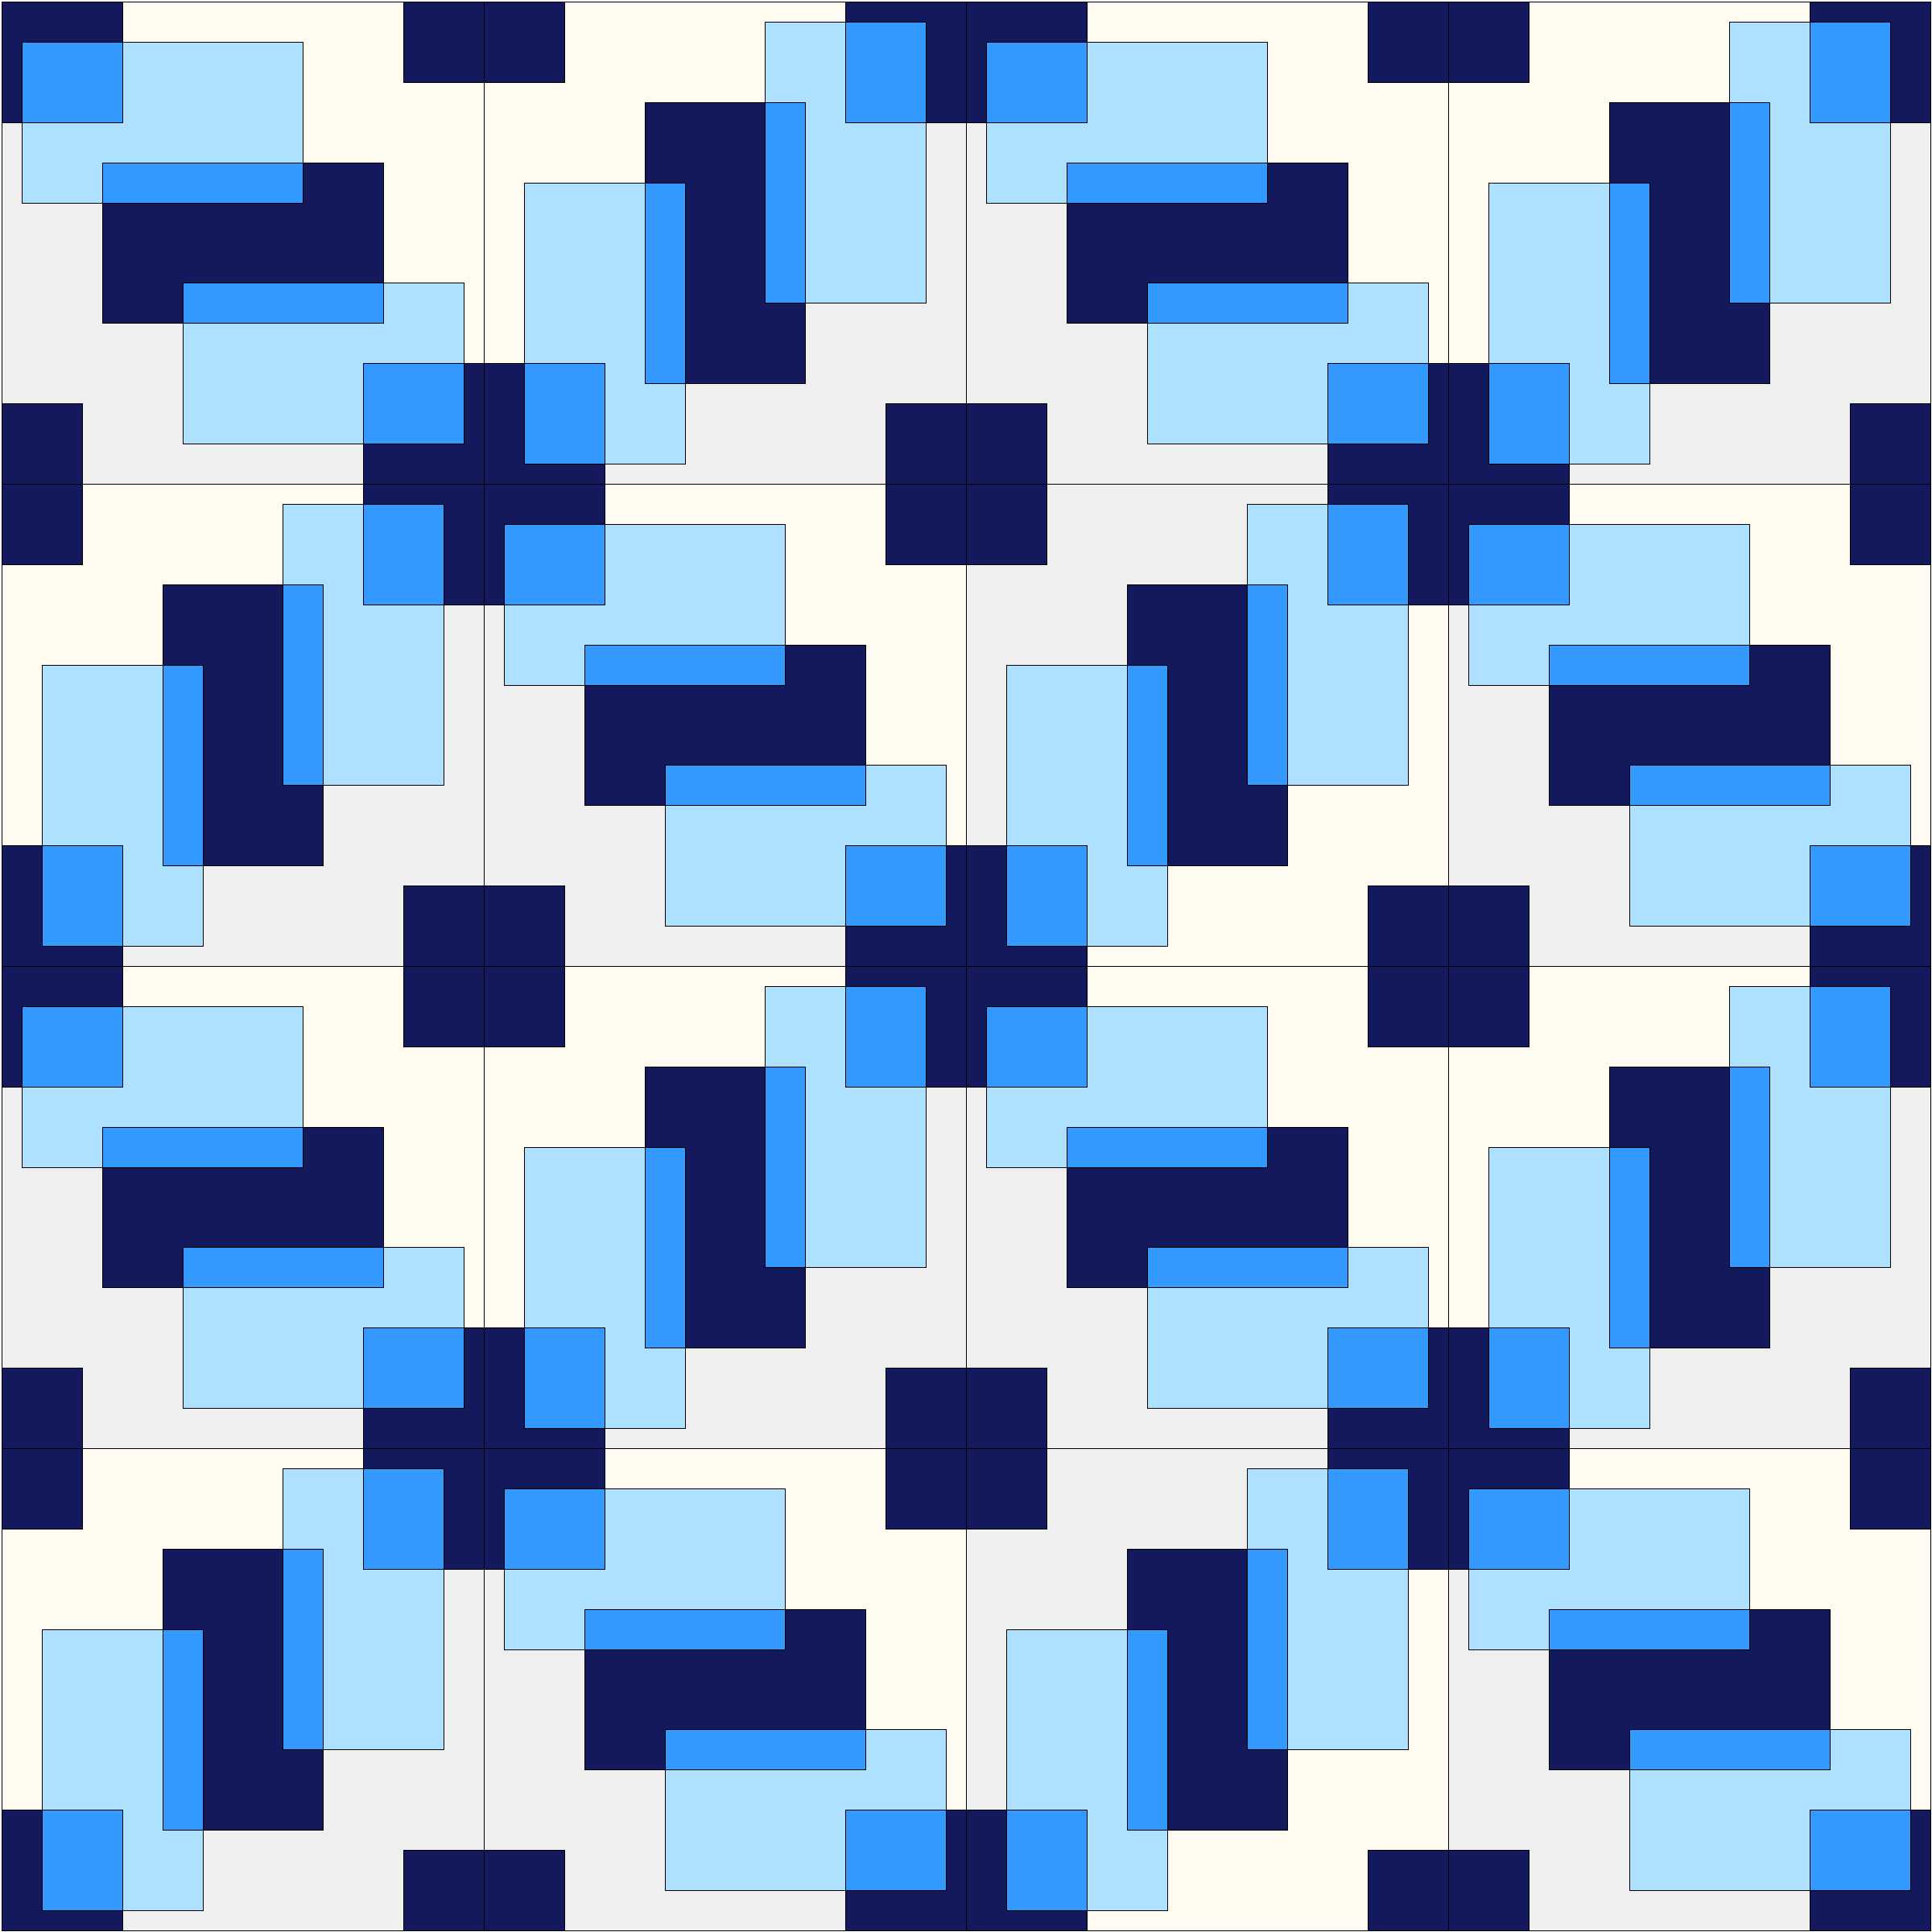
This block is fun to play with when it comes to layout, since by simply rotating the blocks, you can create a number of different visual layout effects. Here are just a few:
Layout 1: All blocks in line
Layout 2: Bull’s Eye
Layout 3: Braid
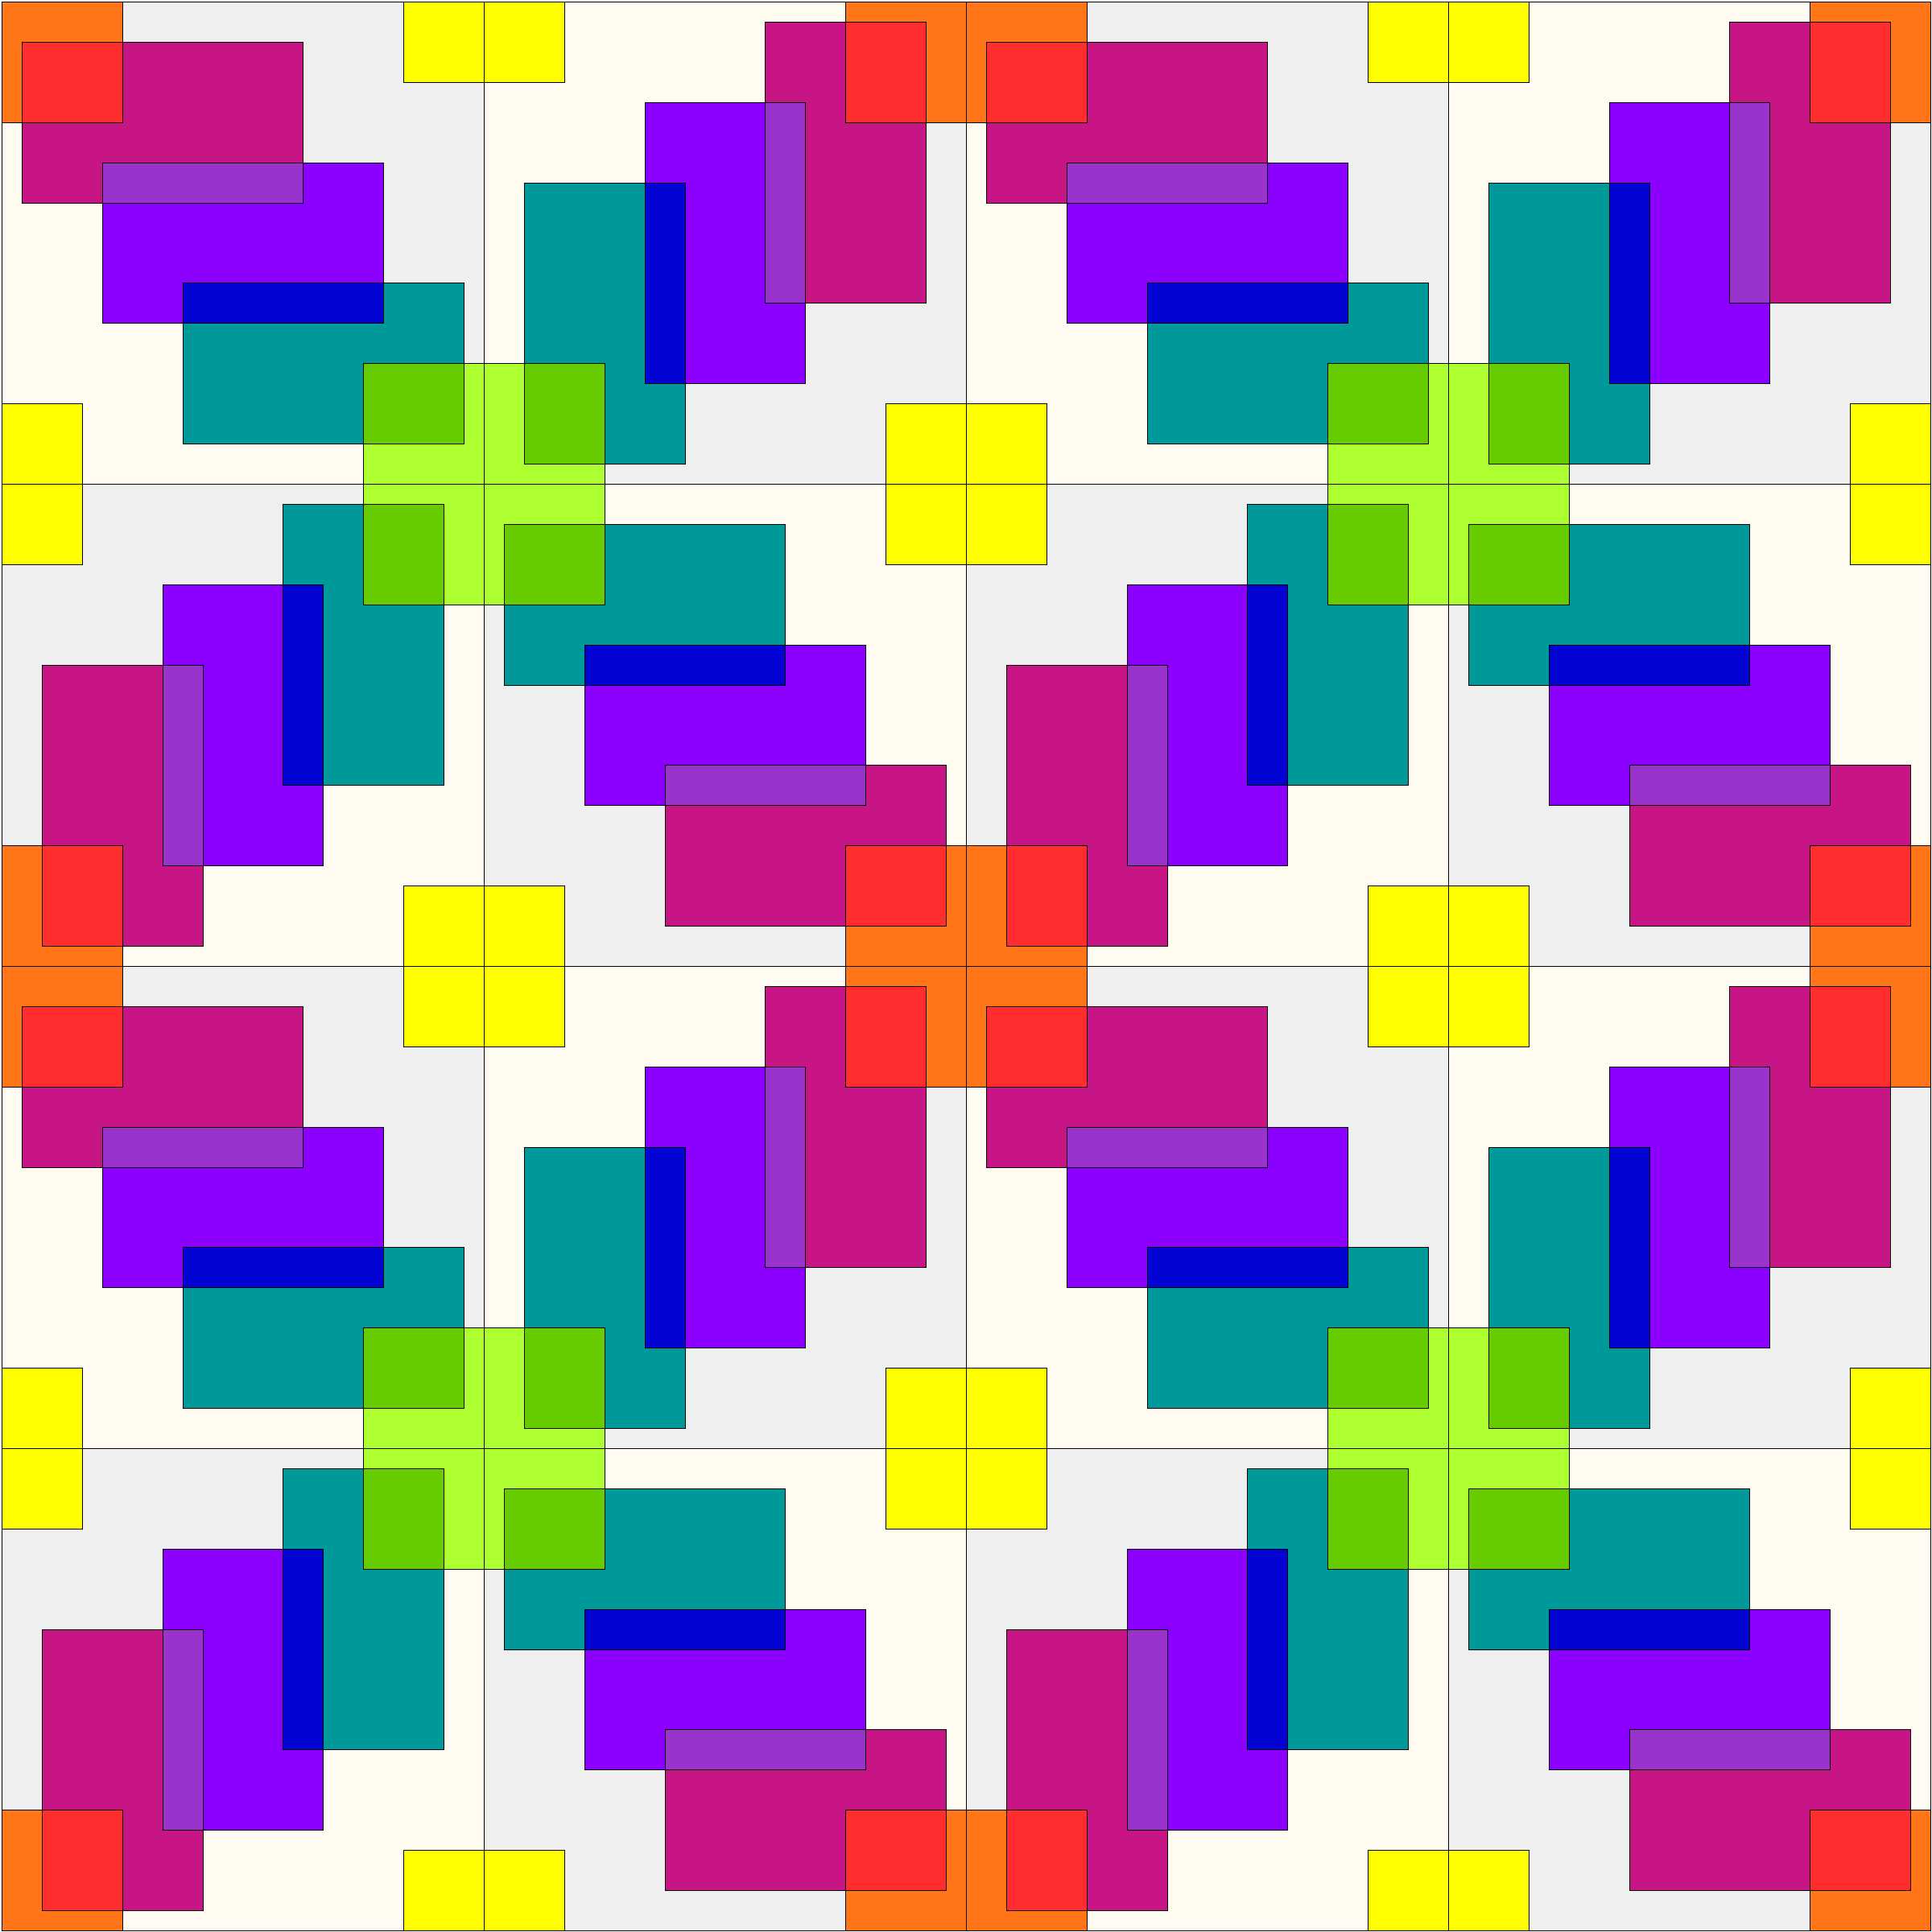
I also couldn’t let a post go without including a peek at a rainbow, so here’s a sample block using color gradient transparency instead of monochromatic transparency. and a resulting layout:
I hope you’ve had fun making your Transparent Play block, and please tag me @nightquilter on social media if you make it–I would love to see!
There are many other wonderful free block tutorials (60+!) posted in this Fabri-Quilt New Block Blog Hop. Here are the others posted today:
Also be sure to visit the others hosts’ pages (Yvonne @Quilting Jetgirl, Cheryl @Meadow Mist Designs, and Terri Ann @Childlike Fascination) for links to all of the blocks posted Monday through Thursday of this week. All of these blocks are being mailed to a host, who is assembling them into charity quilts.
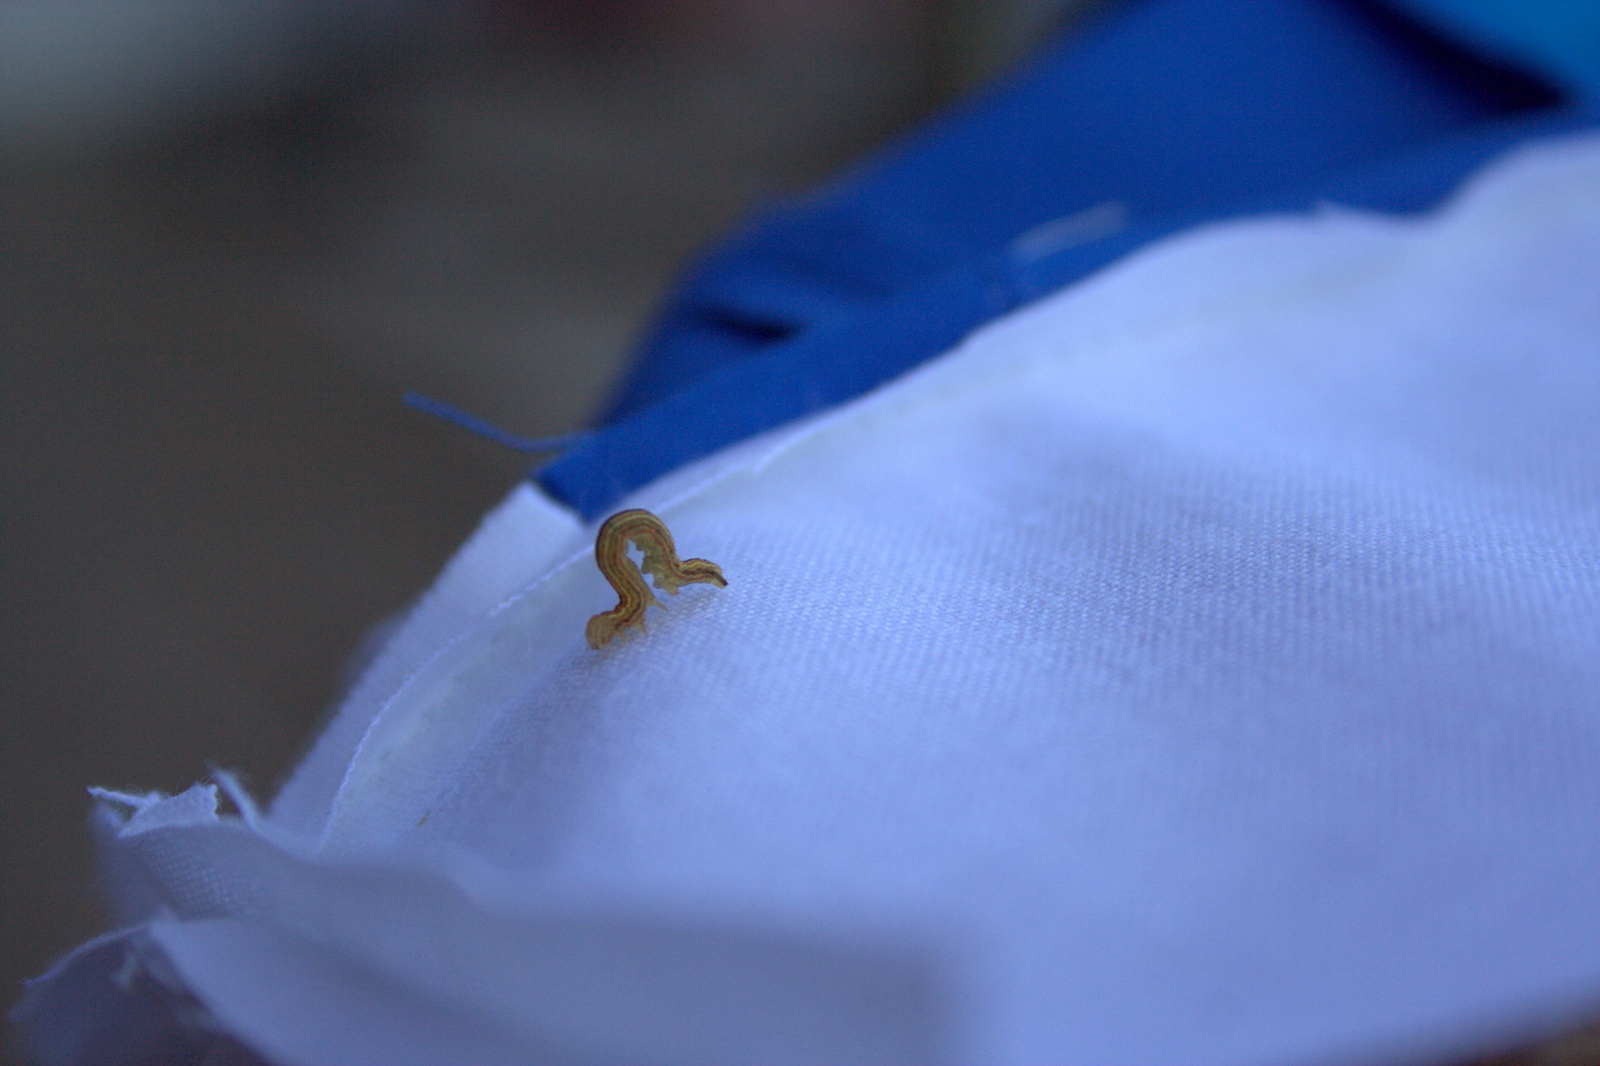
I made an inchworm friend while photographing this block. He was testing out my seams for good measure! (get it!? LOL) Have fun inching your way through the rest of the blog hop!
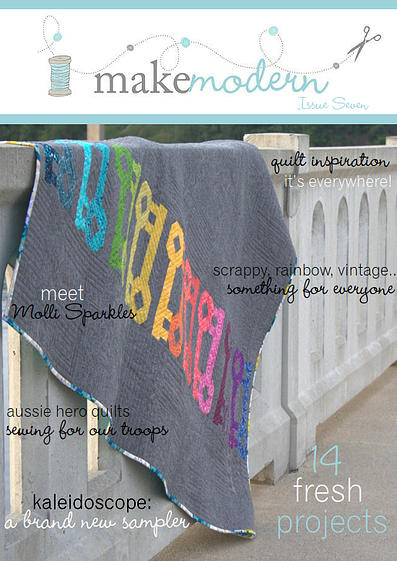
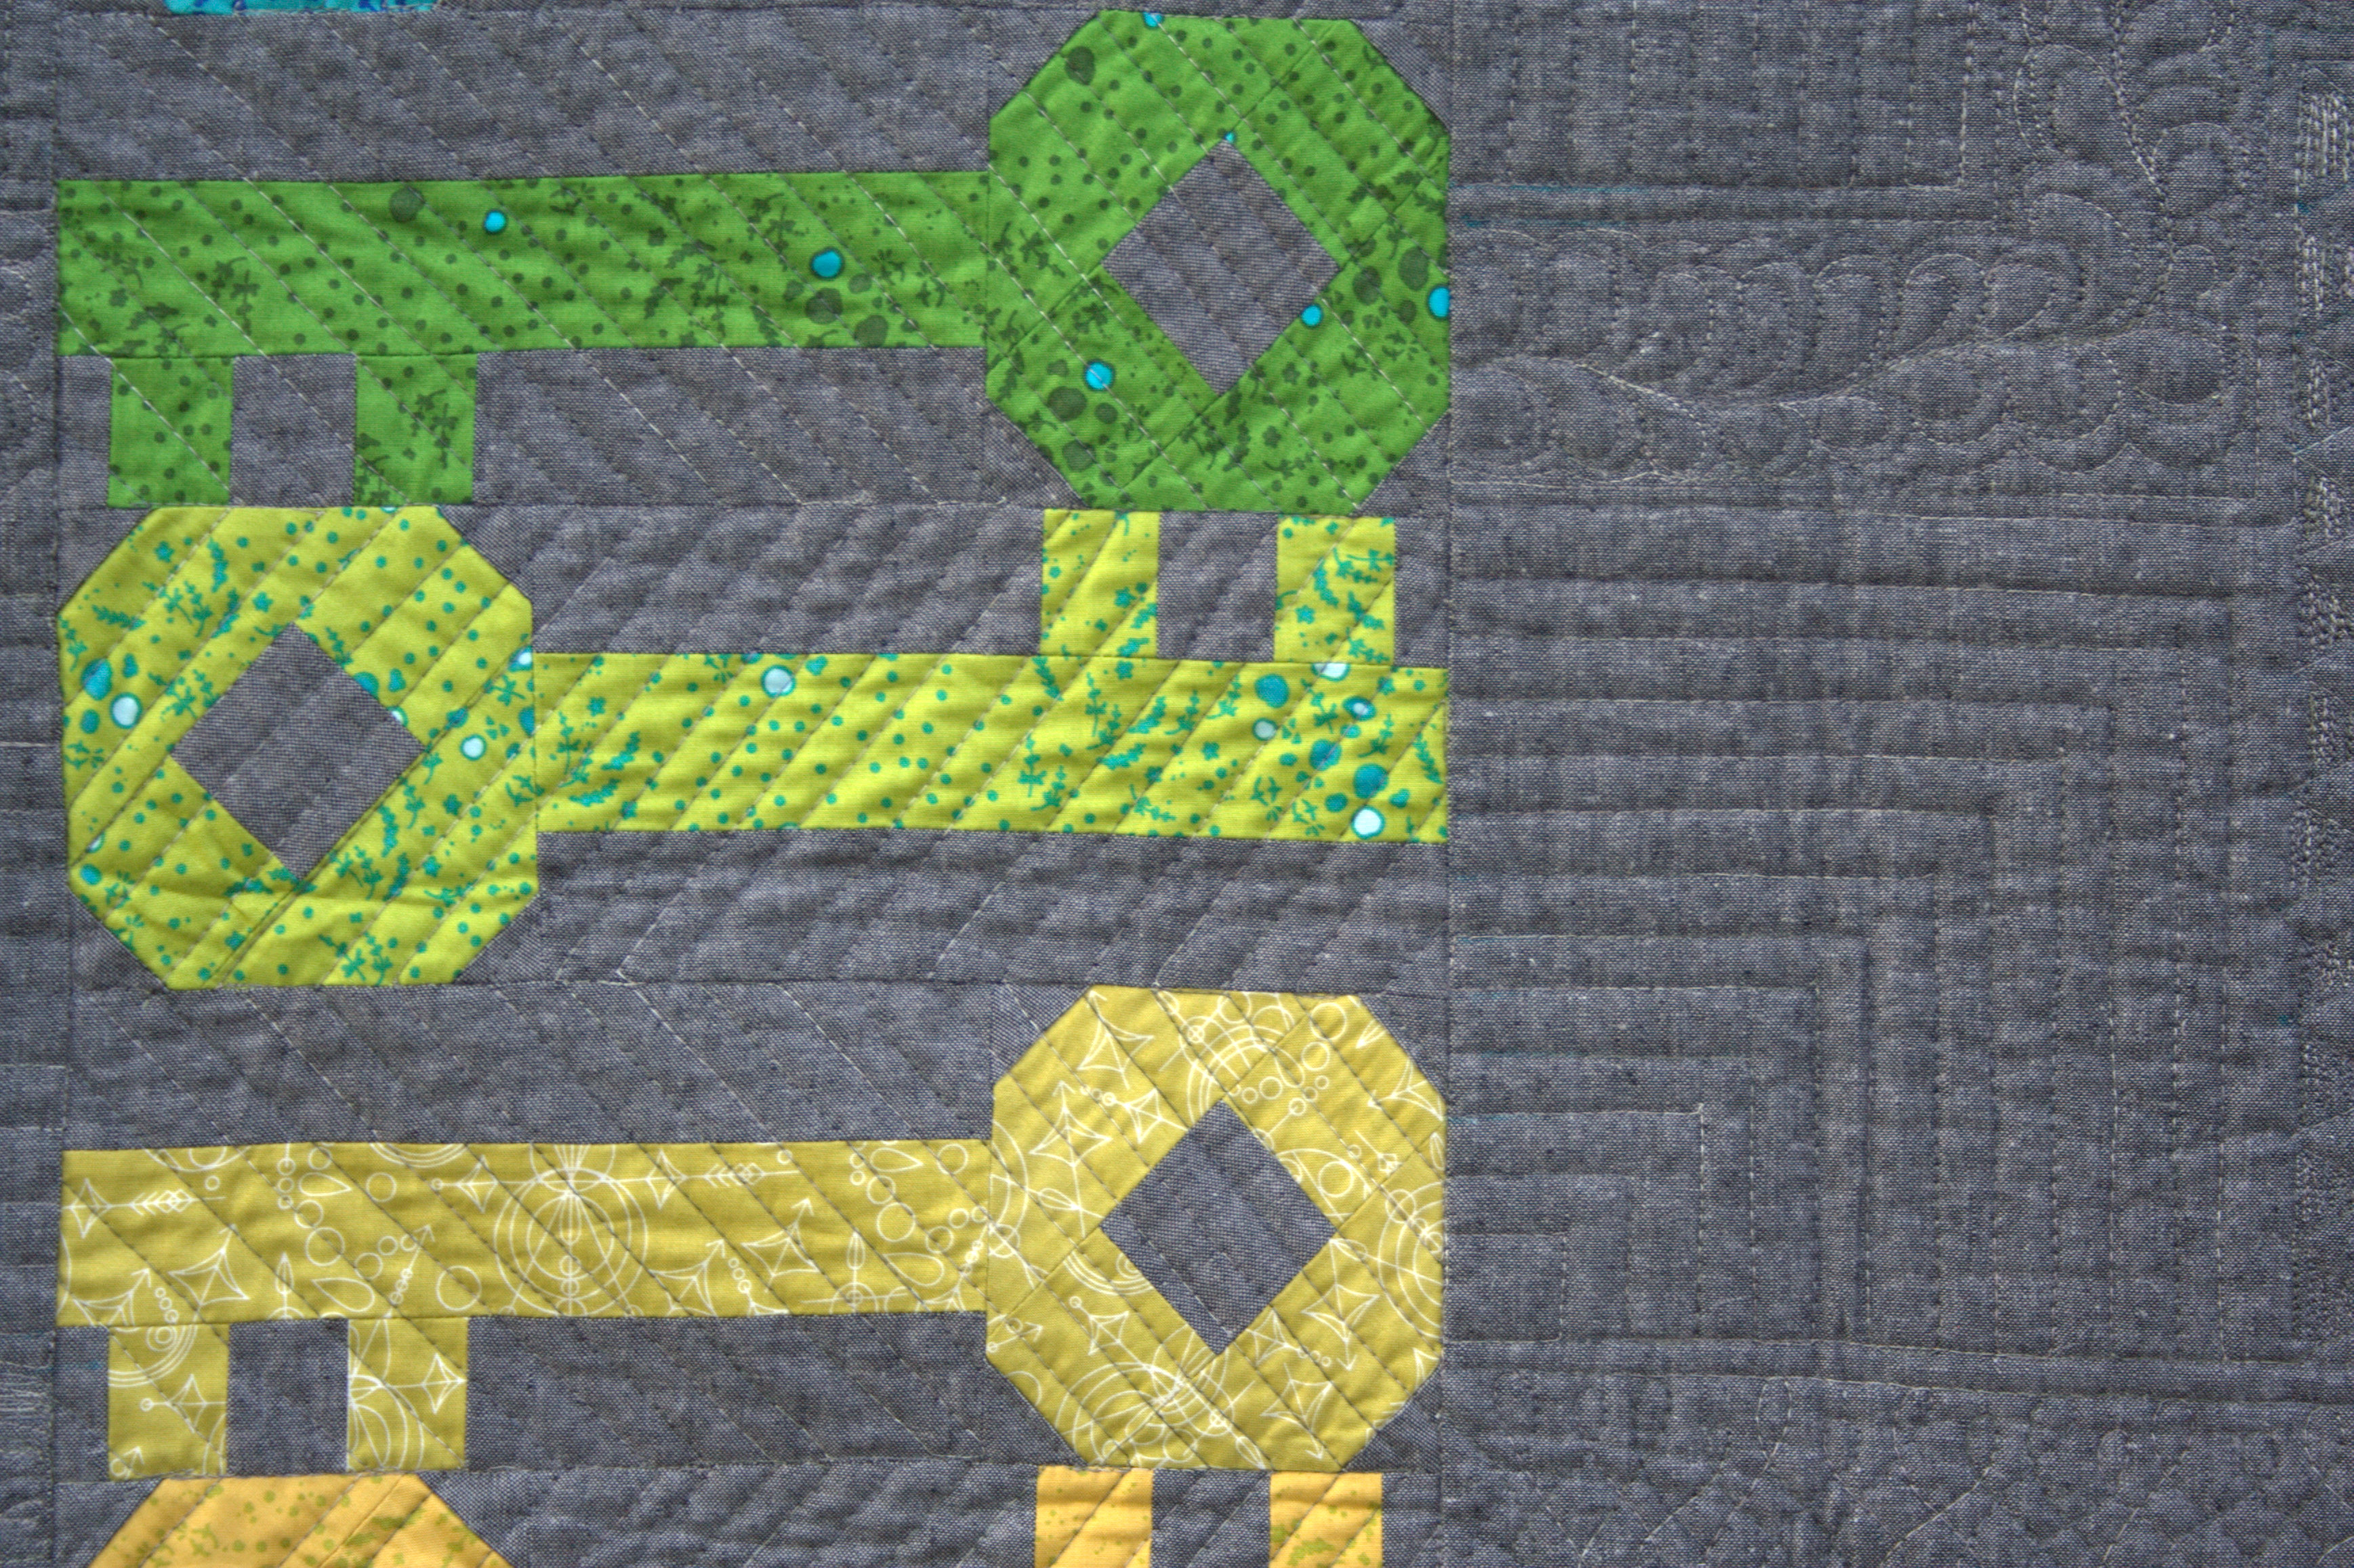
Today I’m so excited to share that my magazine debut (as the covergirl, no less!) is here. My pattern Unlocked appears in this month’s edition of Make Modern magazine, and even graces the cover (can you say excited!?!).
Make Modern is a digital modern quilting magazine, full of great patterns for quilts and smaller sewn items, articles, tips, and features. This issue (Issue 7) has a lovely meet and greet with none other than the most glittery quilter around: Molli Sparkles. Based in Australia, Make Modern was the brainchild of three quilting friends: Jane, Lara, and Kristy. You can read about their philosophy HERE, which I definitely recommend. From the sustainability and accessibility of a digital magazine, to being a positive driving force in the modern quilting world, they’ve got it going on.
You can purchase single issues of the magazine or can choose 3 issue (6 month) or 6 issue (yearly) digital subscriptions. I’m honored to be a part of this publication.
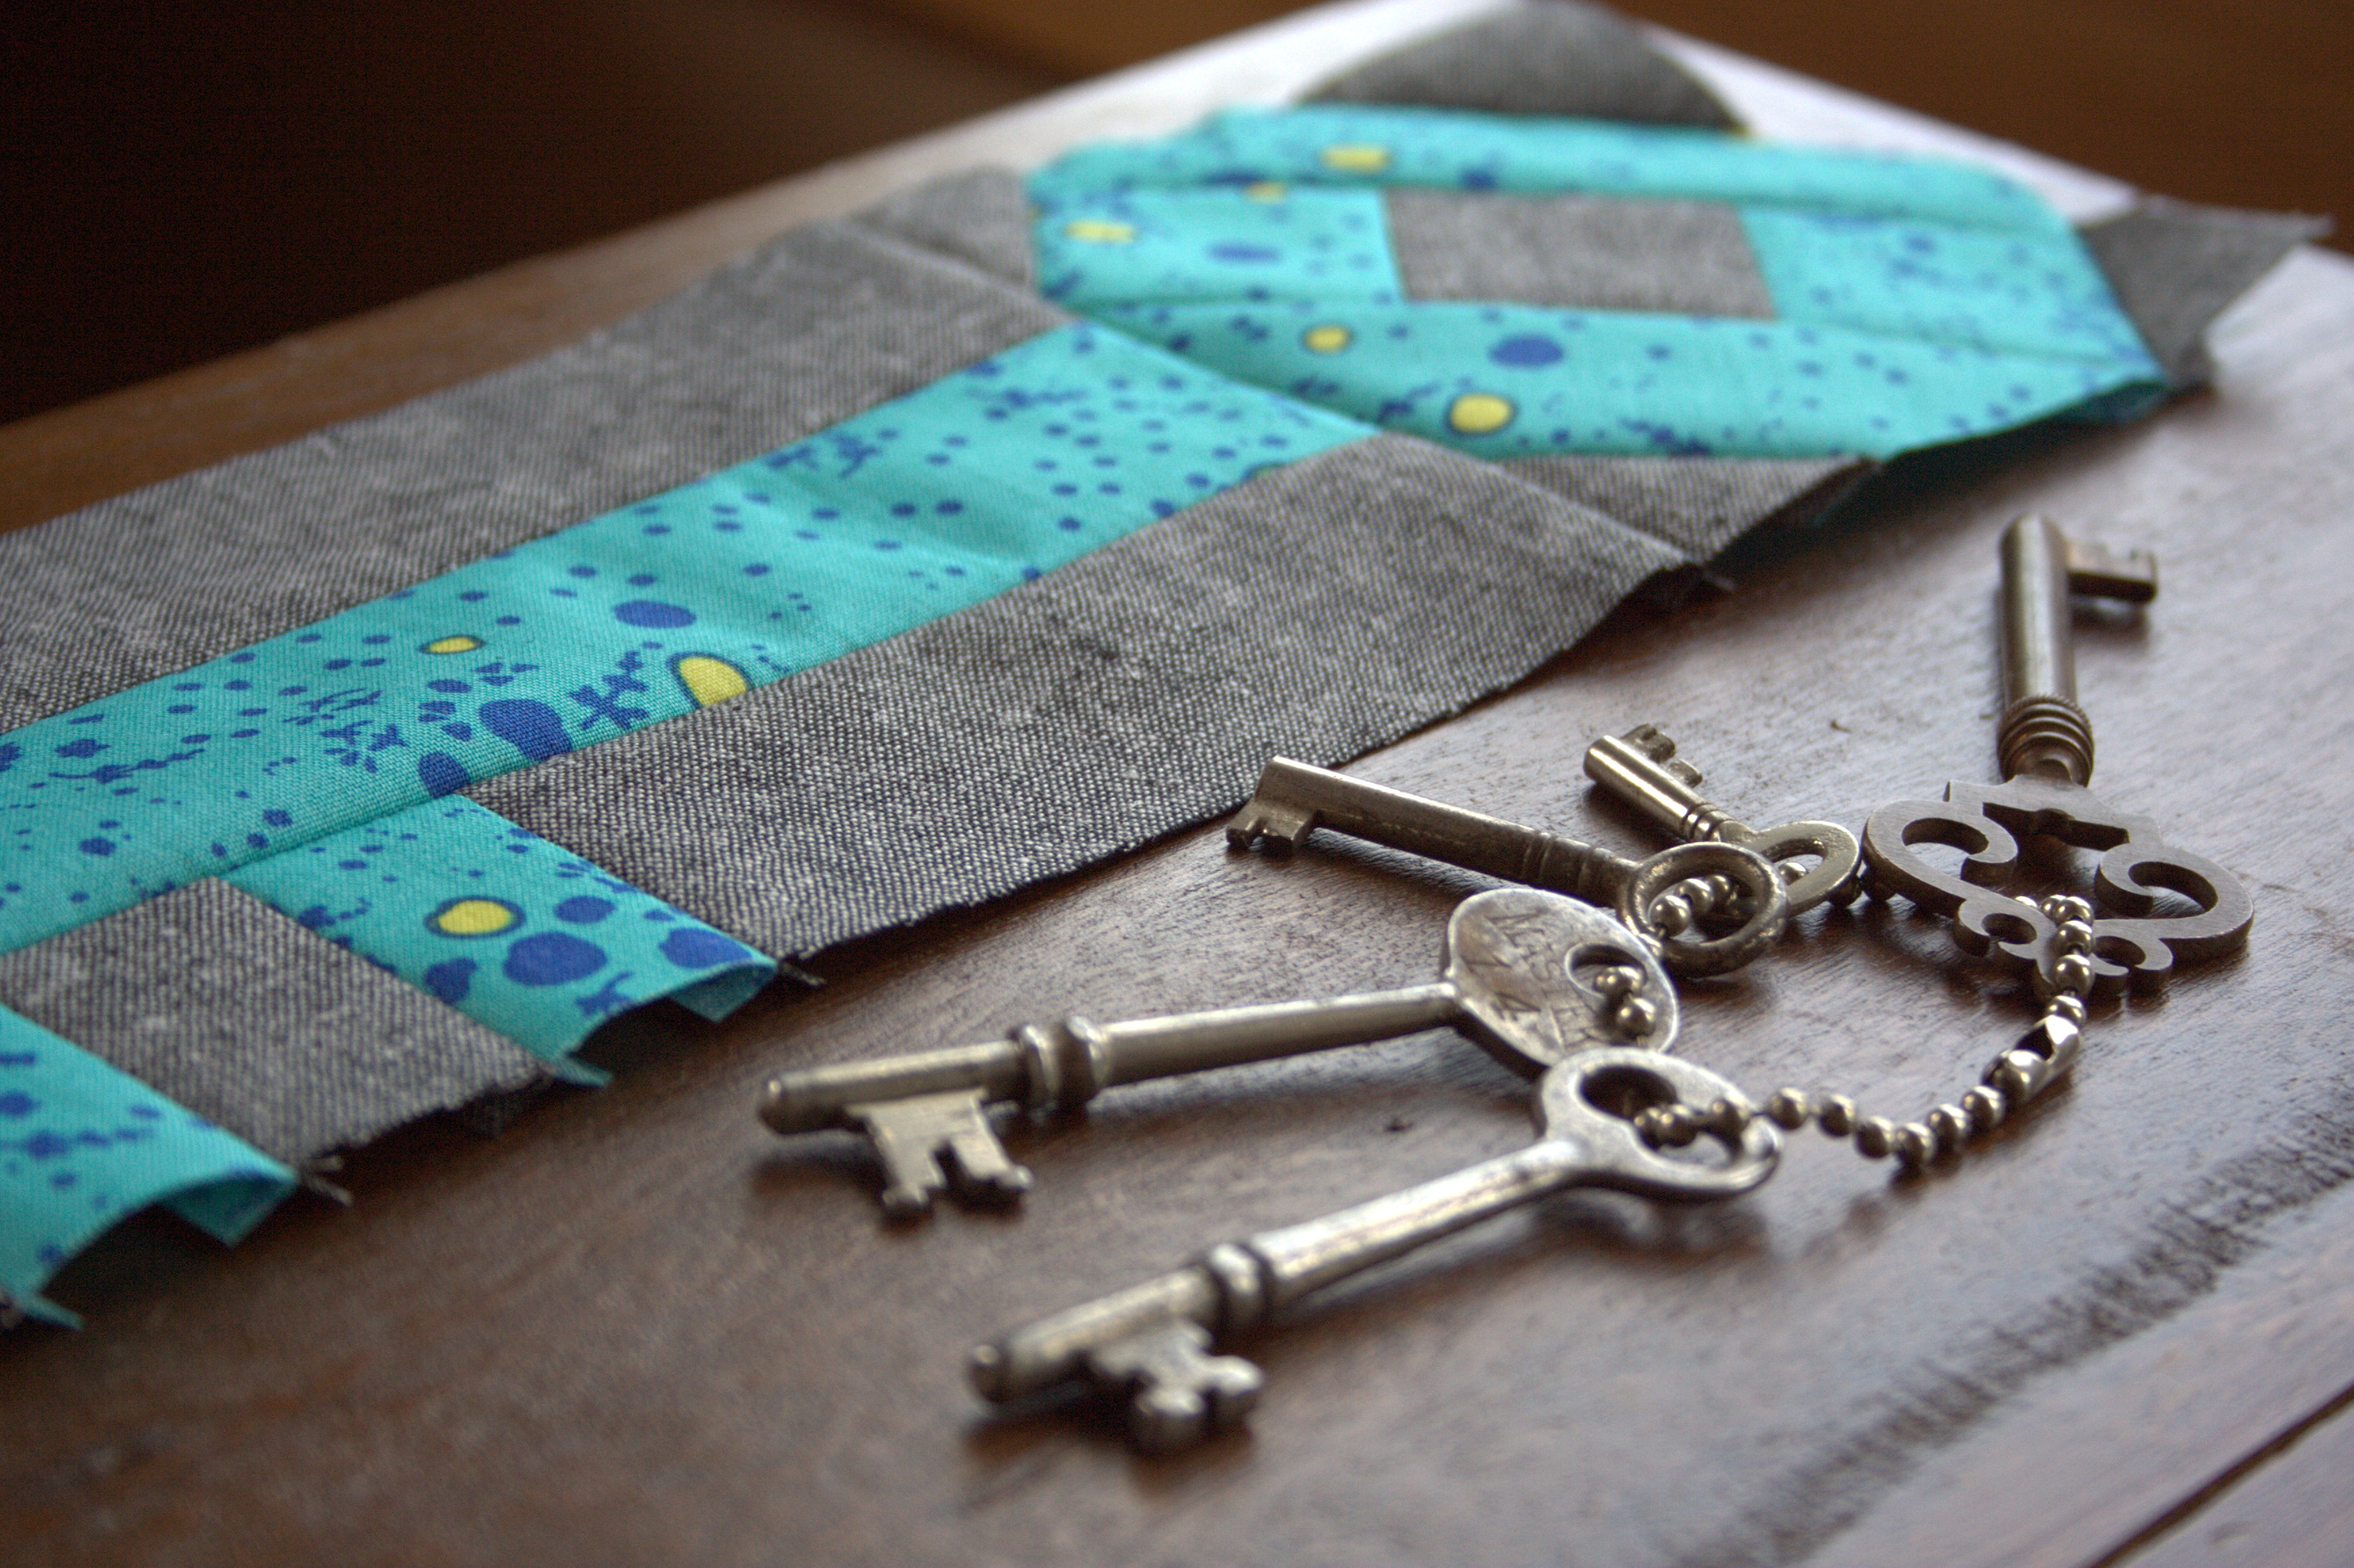
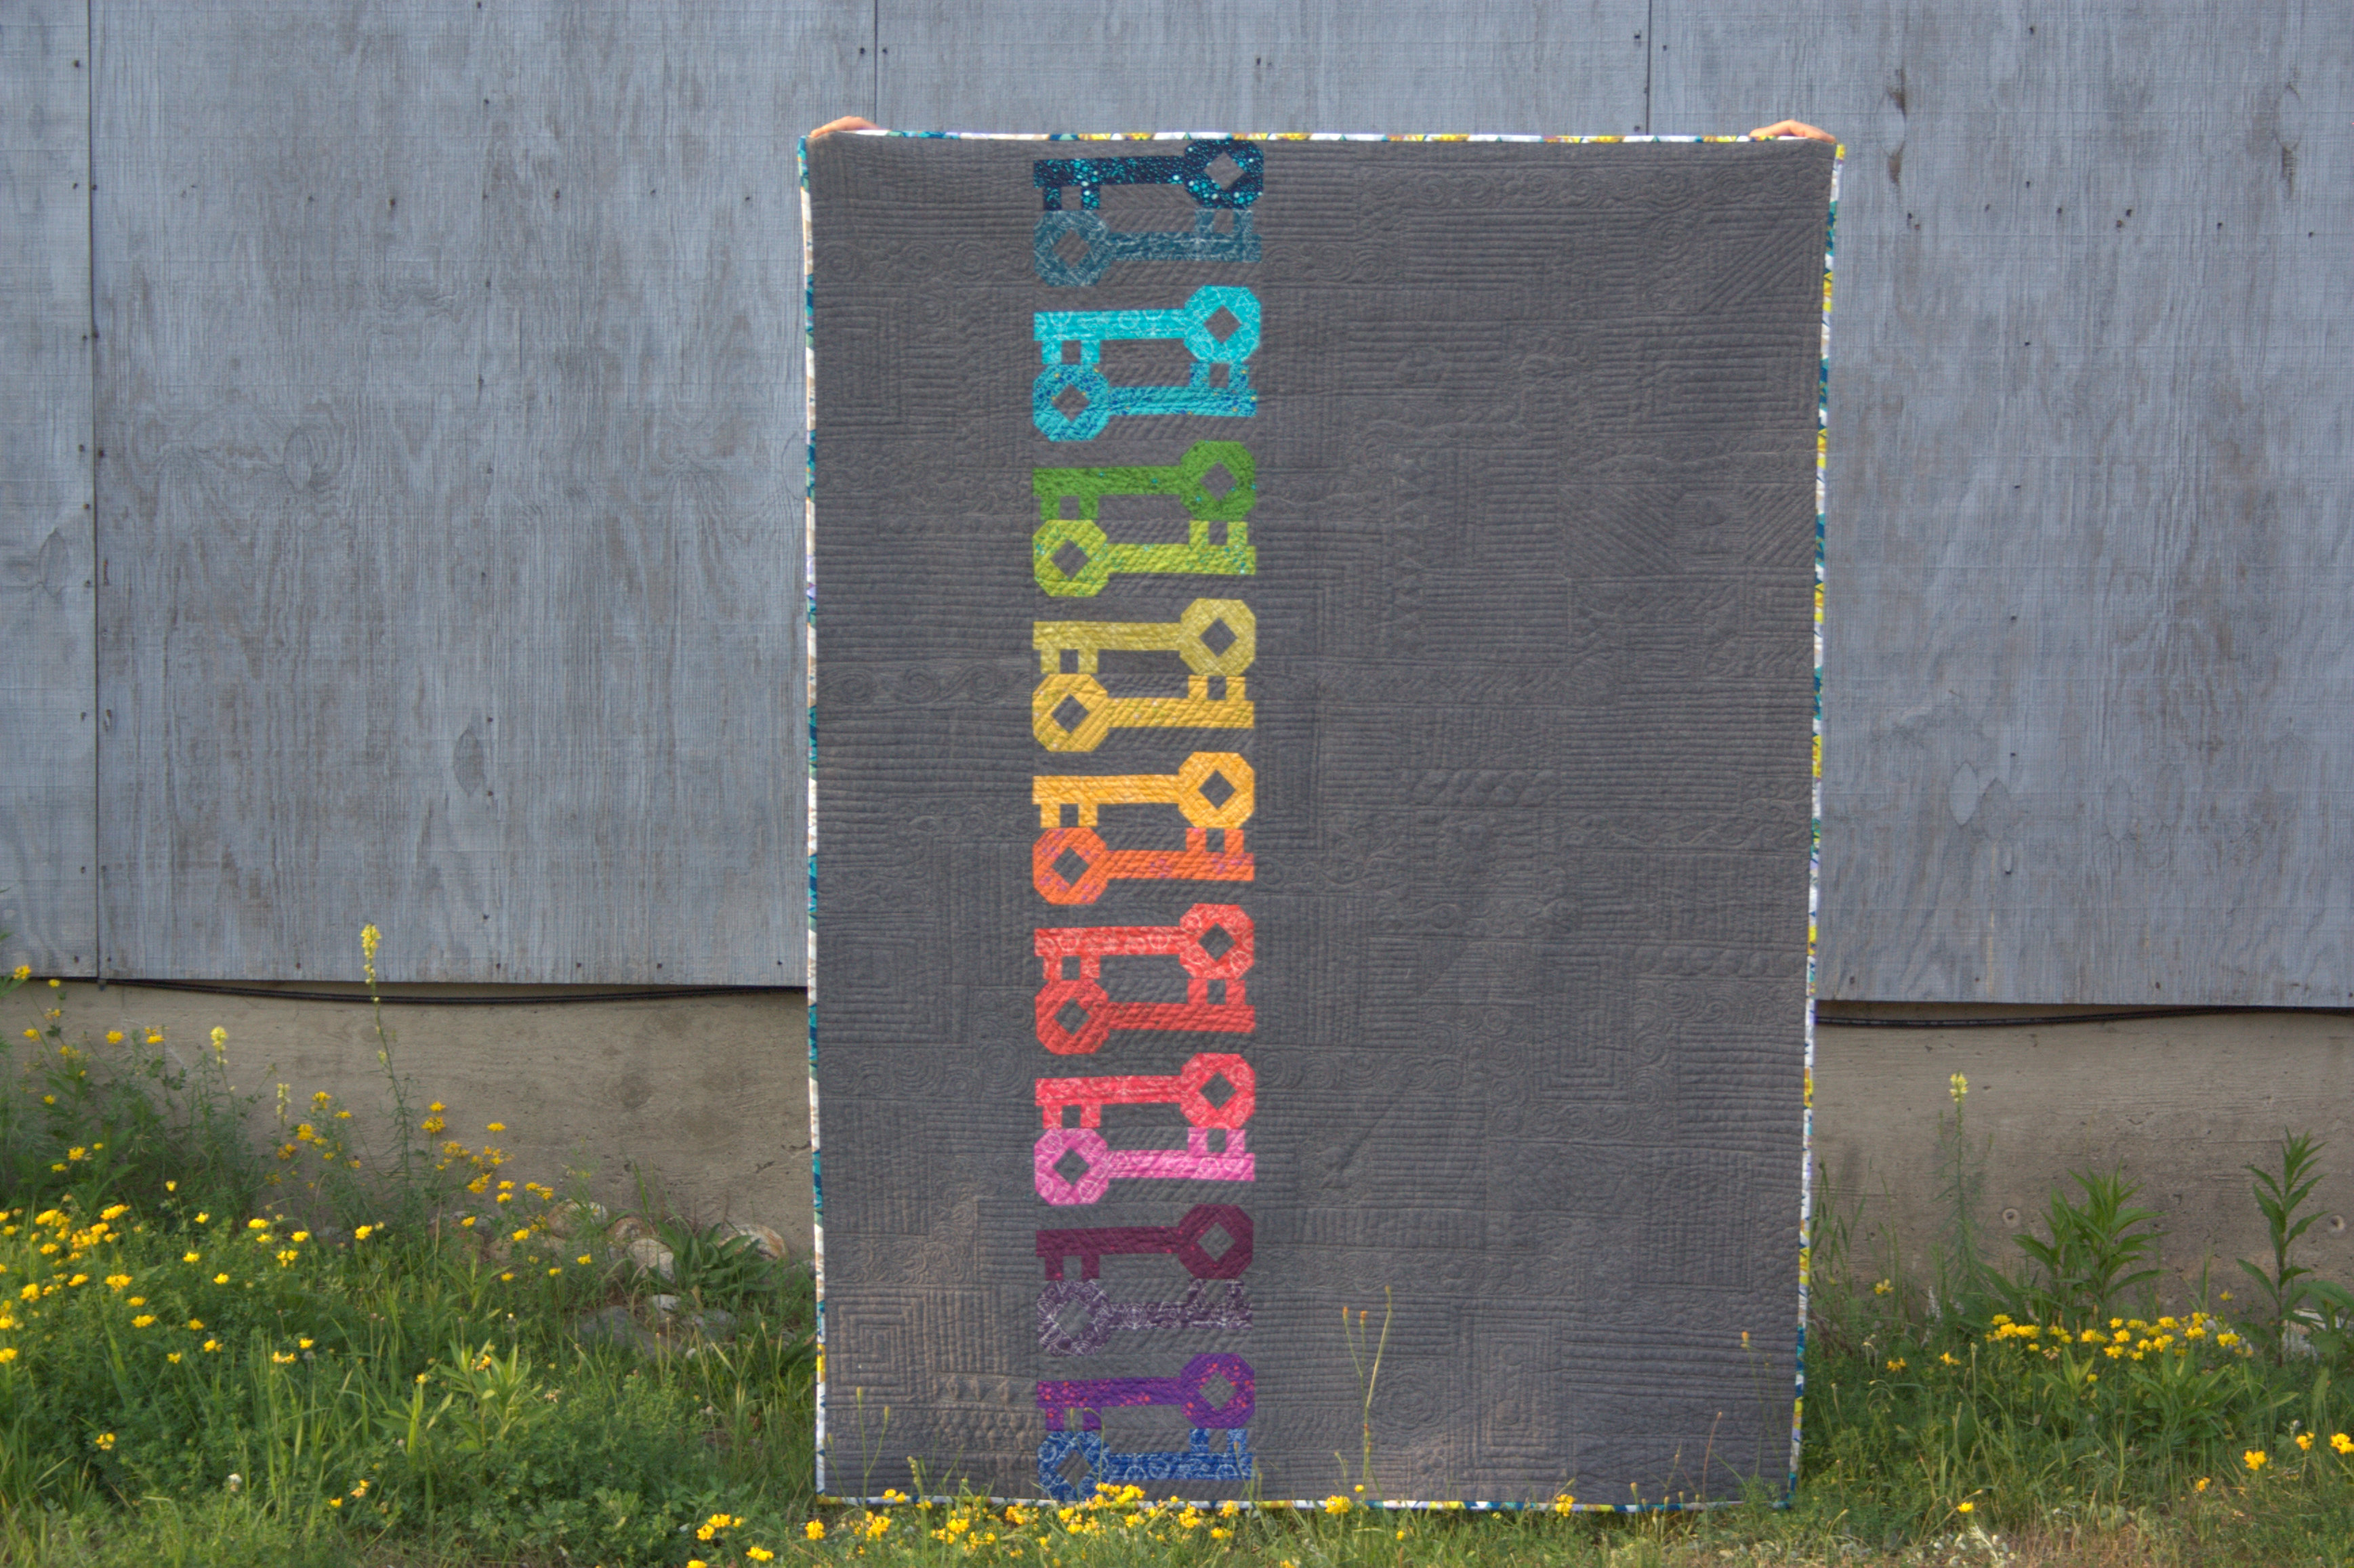
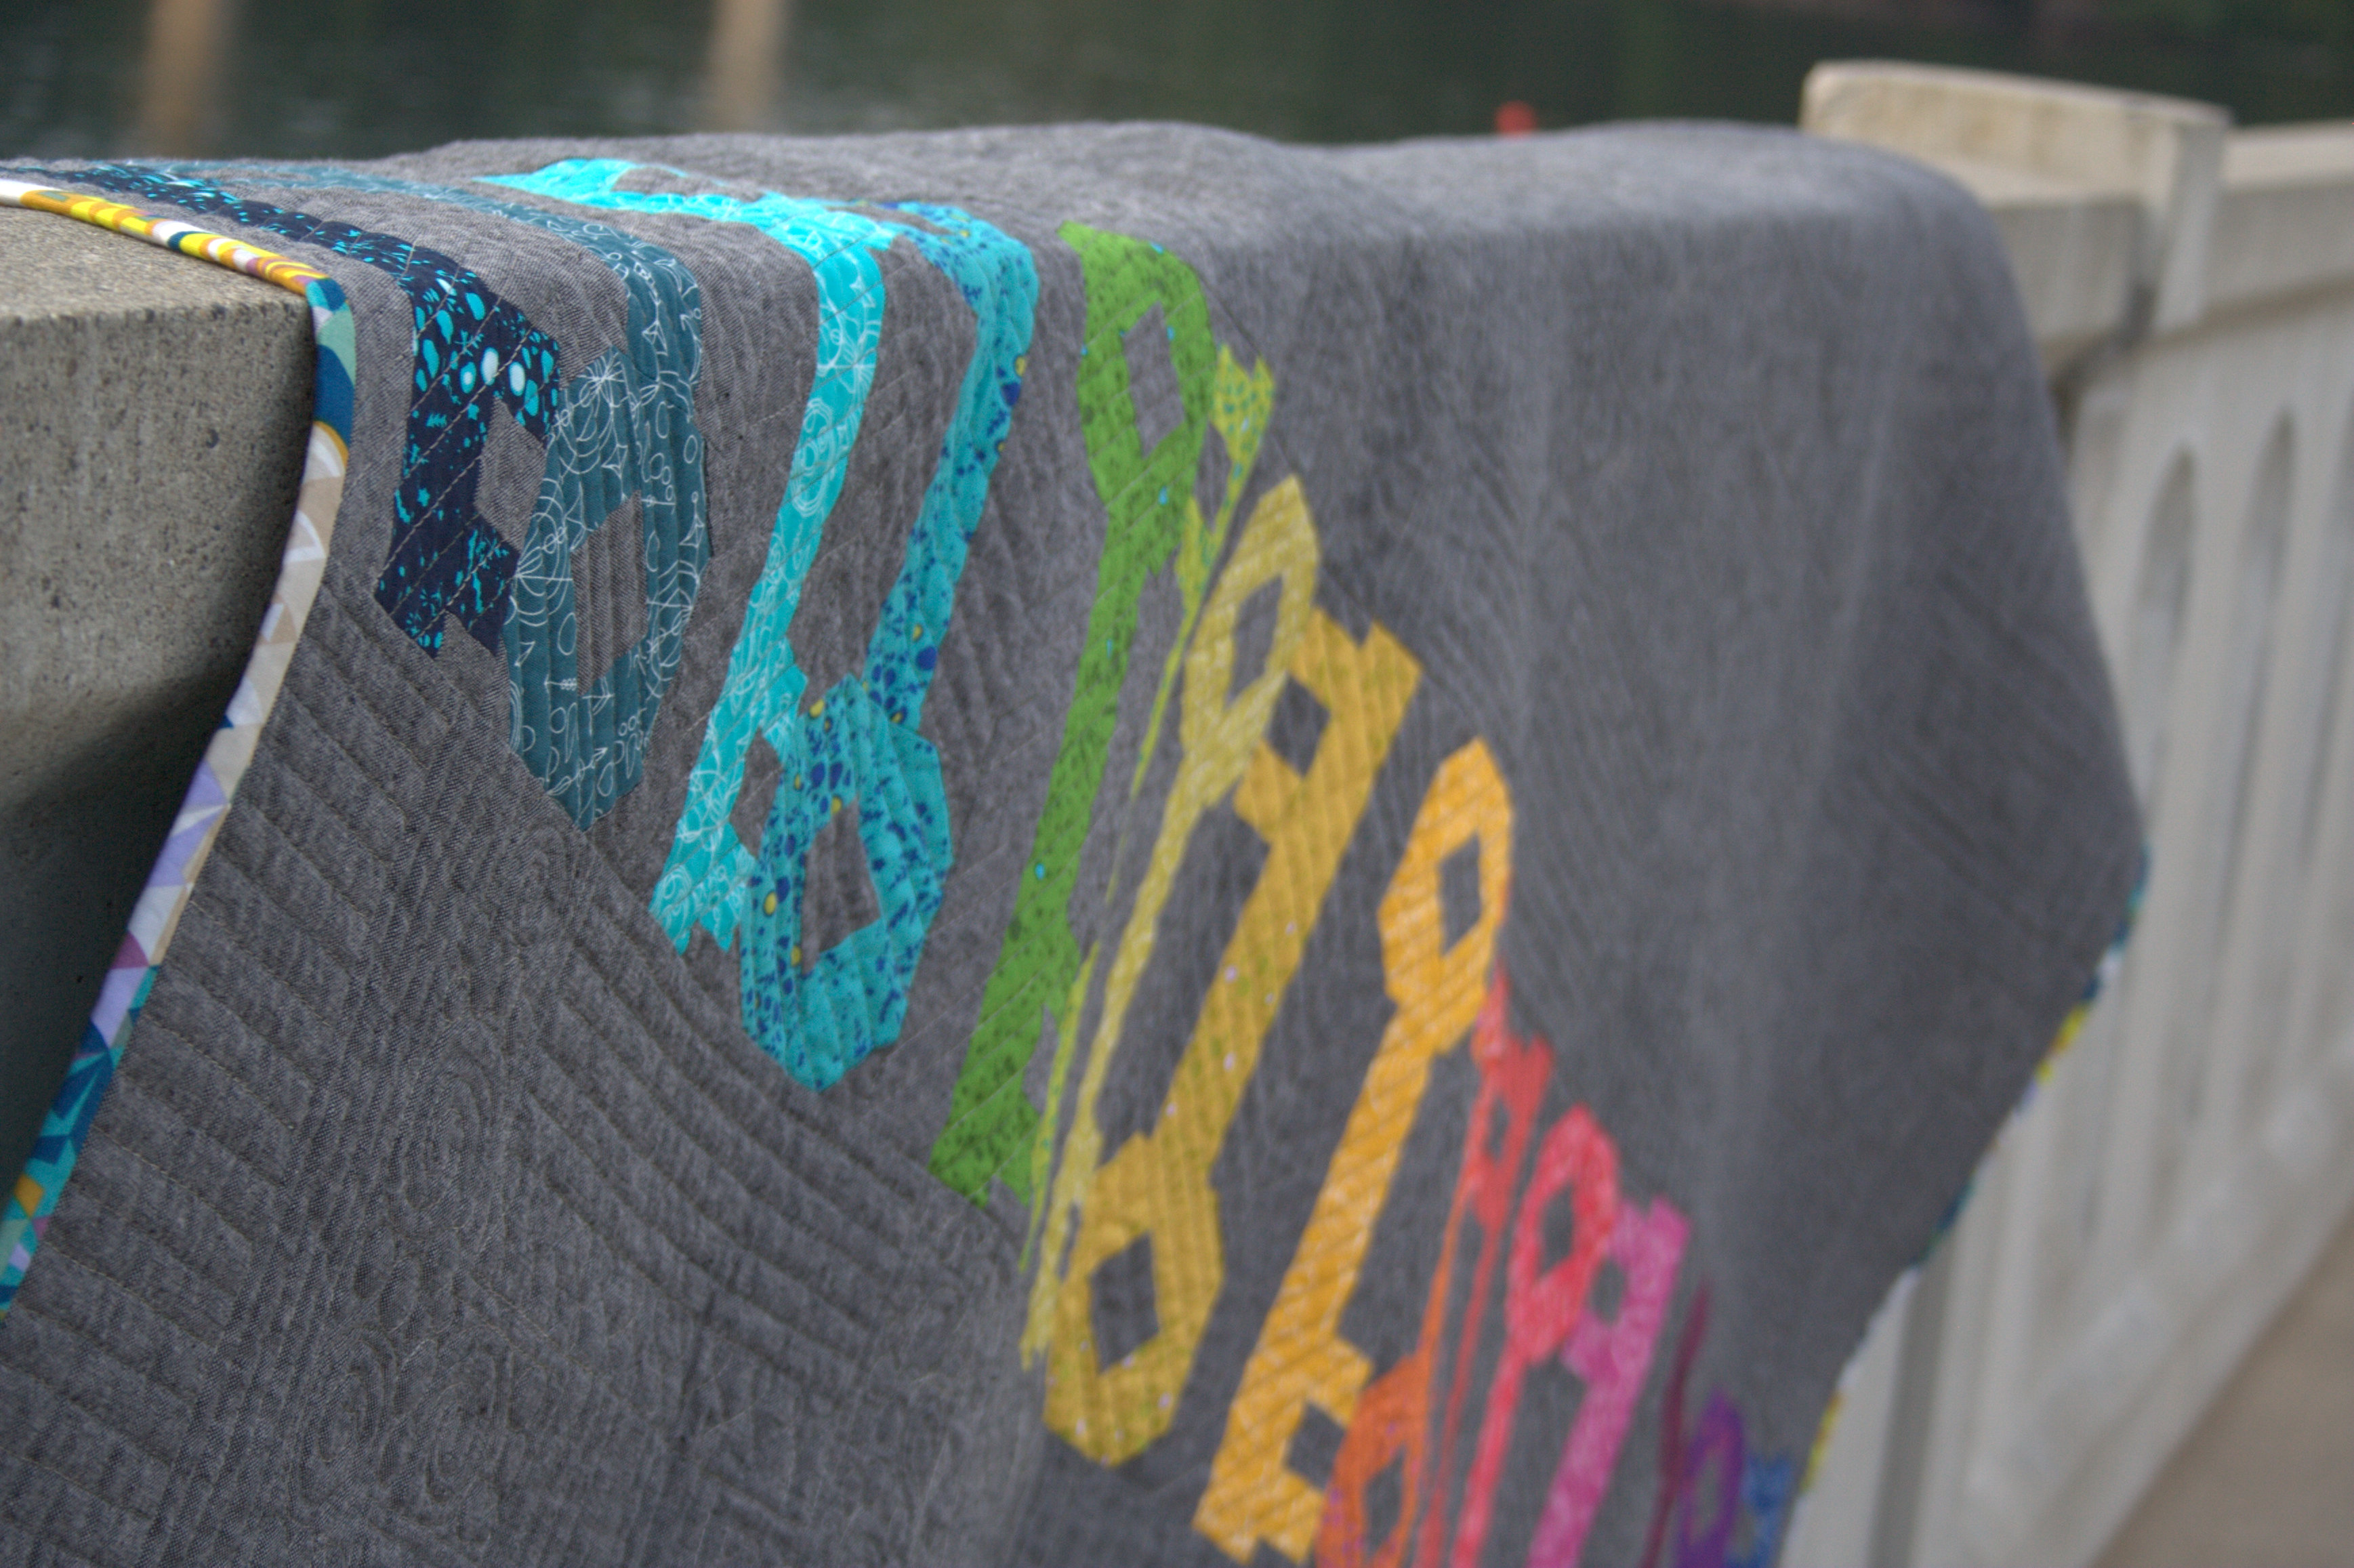
I’ve shown you tiny peeks at my quilt Unlocked, but really nothing that gave away more than the obvious: it features the full Mercury and Grove lines from Alison Glass’s 2015 Sun Prints, on a gorgeous Robert Kaufman Essex Yarn Dyed Linen in Charcoal background. I used my go-to thread panacea Aurifil Dove #2600 for piecing. It’s very scrap-friendly, since each key only needs a fat eighth of fabric. Unlocked is also super versatile since a simple adjustment of the number of keys made and surrounding background results in any sized quilt you want.
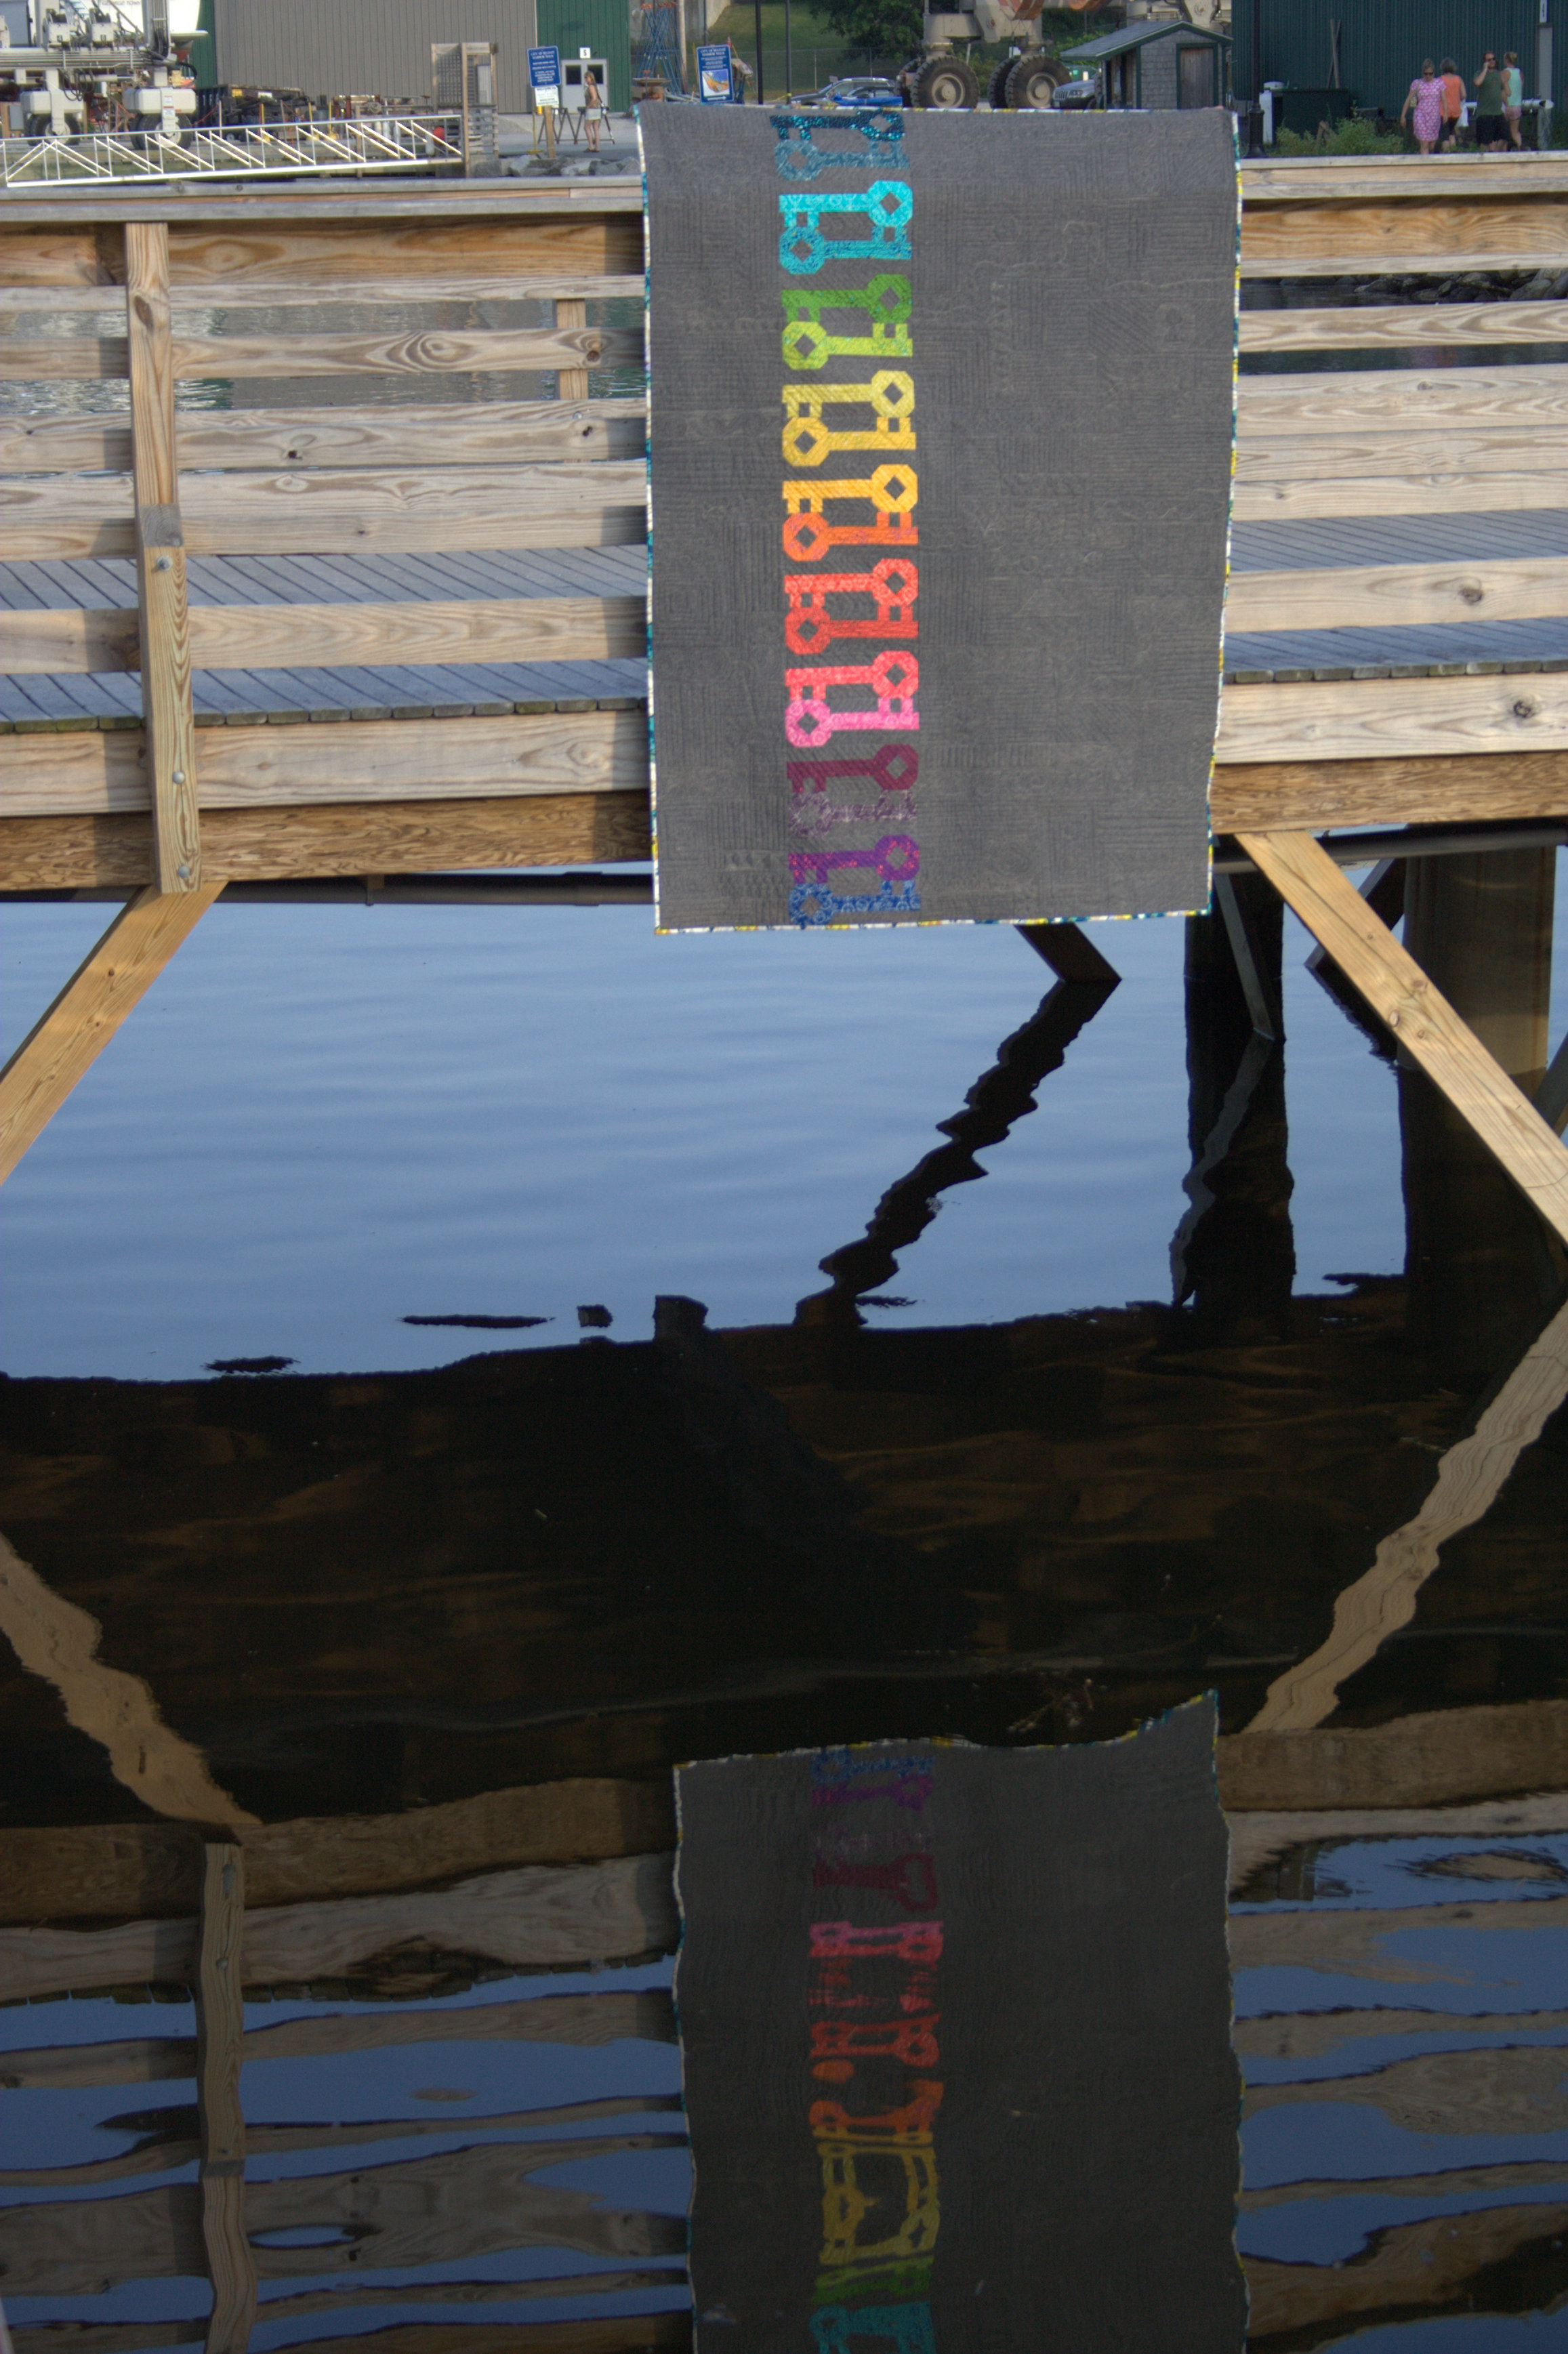
While I really wanted a castle door or giant gate in which to photograph this quilt, a trip to Ireland was not in the budget, so Belfast, Maine had to suffice. I have the world’s best quilt holding husband, who schlepped our kids and a quilt all over town at the whim of me, his crazy quilt-making photo-crazed wife. We got some great shots, though, so I’d say it was well worth it! He really should start a blog “Behind the Quilts”.
Unlocked was longarm quilted by my ever-talented friend Stephanie at Late Night Quilter and it looks amazing. She used the Cityscape Path straight line quilting style designed by Krista Withers and photos don’t even come close to doing it justice. I’m so grateful to Stephanie for quilting this, since I was able to finish the quilt top and mail it off to Stephanie right before giving birth to Finn. Then, she was able to quilt it and get it back to me a couple weeks postpartum so that I could bind it and photograph it in time for the publication deadline. Teamwork at its best!
Head on over to Make Modern and grab your copy of this fabulous modern quilting publication.
I grab a needle and thread once the kids are in bed


 The final layout and block setting I chose/created includes background blocks between the farmer’s wife blocks, so my finished quilt only needs 72 blocks instead of the full 99. This gives me some much needed wiggle room and a whole lot less stress when I’m running “behind”. No worries. This is fun!
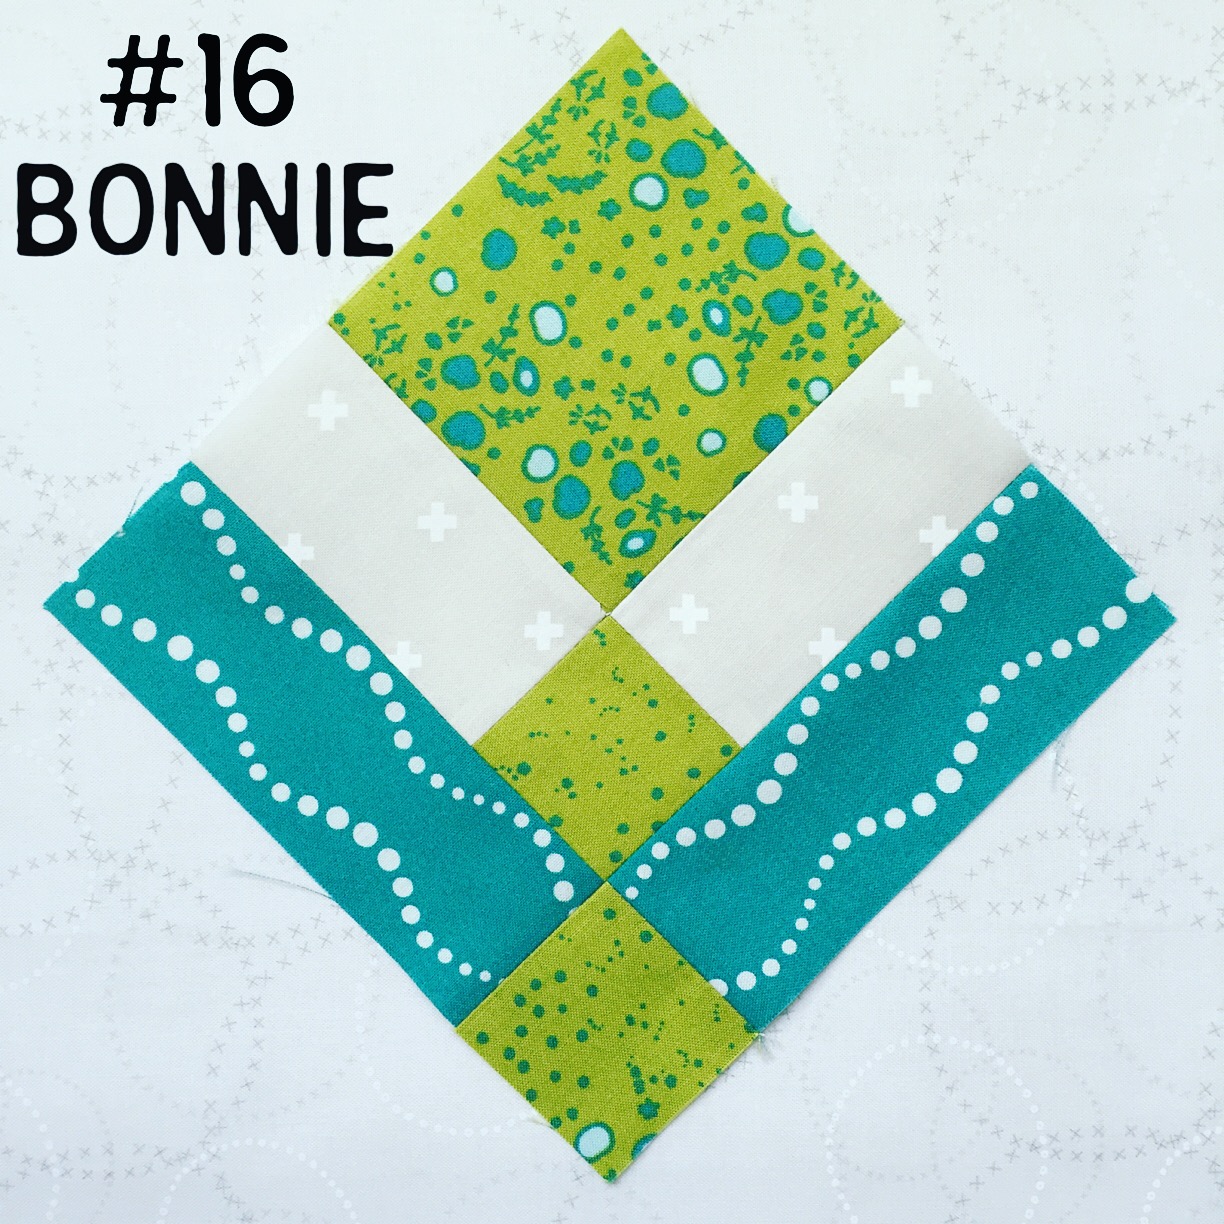
 As you can see, I’ve been inspired by the gorgeous blocks being made by other quilters, especially the fun use of meticulous cutting. While I don’t have many “fussy cut”-able tone on tone fabrics, you can be sure you’ll be seeing more meticulous cutting in future blocks wherever I can make it work. It’s so much fun!