

In my style, I’ve well missed the 2017 Planning Party hosted by Yvonne at Quilting Jetgirl, but I thought I would write a quick post with my 2017 Goals and word for the year, both to share my focus and to hold myself accountable!
I’ve been thinking long and hard about what I want to focus on this year, and I’ve decided that I really need to make my mantra: “Finish What You’ve Started”. I have ample projects that were begun with excitement and then quietly forgotten before reaching completion, and I also branched out into a few other big new endeavors in 2016, such as pursuing quilt photography work and designing for Quilt Theory. I’ve been helping Stephanie with the Quilter’s Planner Instagram account, and that has been extremely fun but also takes time. I also have a few potential teaching opportunities that I’m excited about in the coming year. Combined with being a full time mom of three little ones, keeping house, tending chickens, and in the proper season, gardening and adventuring along the coast, my plate is pretty full as it is. So it seems right to set my engine for steady on and just keep plugging away in the direction I’m going.

That said, I also recognize that there’s no way I could go a full year without trying anything new. For that reason, I also plan to participate in a few Sew Alongs and a Quilt Bee, as I outlined in my last blog post. The relaxed, no-stress mentality will let me fill those block making moments in between my “finishing” so that I can stay fresh and excited about making. I also plan to play along more regularly with the #beesocial prompts, since they stretch my creative spirit more than anything else I’ve encountered. I’m already beginning with Stephanie from Spontaneous Threads’ first prompt for January–Resolution. Watching the video she included as part of her design inspiration prompt reaffirmed the word I selected to guide my year (I definitely recommend clicking over to her post and watching the video. It’s well worth 5 minutes of your time.)
Which brings me to my “one little word”–the one word to guide my year. 2017 will be my “green” year. There are so many influences to my selection of this word, from my lifelong love of nature, my degree in environmental science, to all that’s been happening in the world around us. Sparked initially by Chawne Kimber’s quilt “The One for Eric G”, the first statement quilt I saw that made me hold my breath as my stomach took a nosedive, and made me realize that this amazing craft can be used to inspire positive change (more than just making the world a more beautiful place one stitch at a time), further melded and inspired by the Make Do Quilt challenge posed by Sherri Lynn Wood last year, and always continuously inspired by Hillary from Entropy Always Wins and her focus on using reclaimed textiles in her creations, I have decided on “green” as my word of the year and “finish what you’ve started” as my guiding mantra.
I love how Cheryl from Meadowmist Designs set measurable steps for herself in her goal setting post, so here is my attempt at the same. This year, I will try to:
- Focus on incorporating repurposed textiles into at least three (3) quilt projects;
- Minimize new fabric purchases; focus on using the fabrics that exist in my stash already (not very measurable, but important to state!);
- Experiment with at least six (6) of the #beesewcial prompts to help stretch my creativity and build improv skills;
- Use a purely green color palette (inspired by Patone’s color of the year, Greenery) on all bee and quilt along blocks to help create a visual statement on being “green” and to stretch my design skills by fitting them all together at the end;
- Create a more concrete plan for my social action quilt idea, including:
- a full sketch
- 2-3 sample blocks
- brief description
- Dive further into the “Slow Fashion” movement:
- Overcome my fear of garment sewing by making at least three (3) items of clothing
- {BONUS} hand stitch one garment;
- Complete two (2) quilt photography projects to deepen my repertoire and experience;
- Teach at least three (3) different quilting and quilt photography related classes–spread the love and inspiration for creating beautiful things!
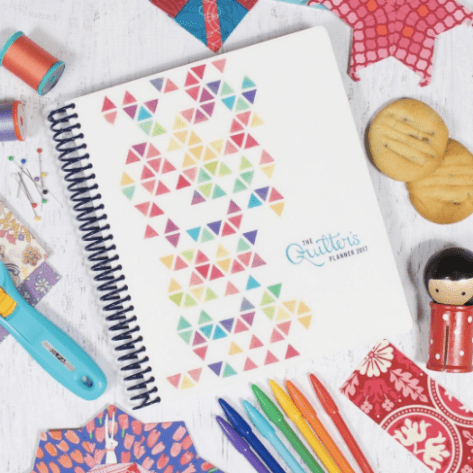
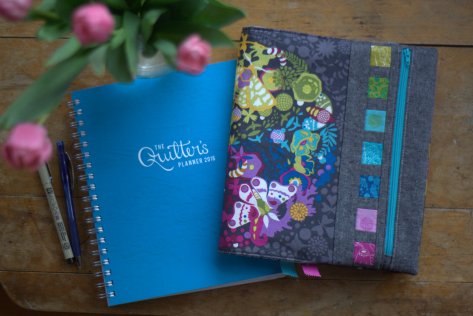
- Use my Quilter’s Planner to set manageable goals and help myself feel successful and motivated–including building up to exercising 5 times per week!
- Stitch daily for 365 days as part of my participation in #1yearofstitches (more on this soon!)
- Finish eight to ten (8-10) works in progress from last year!!!
Phew, I’d better stop there. I think this is a great start to my goals for the year, and I’m curious to see how successful I am at meeting each of these goals. Note that I have not included pattern design in my specific goals this year. Aside from Quilt Theory patterns, two of which I plan to develop and release this year, I am letting pattern writing be more relaxed this year so that I may focus on my other goals. It doesn’t mean it won’t happen, though!
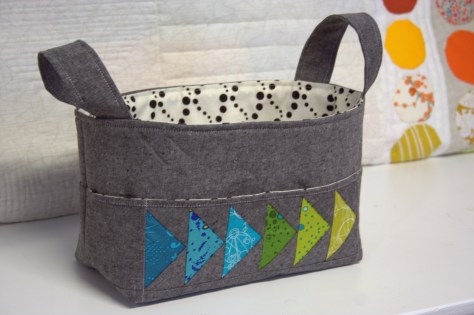
 So far I’m off to a decent start and have made good progress on one WIP (Max’s Eye Spy Picnic Plaid), and have finished another, which I’ll share later this week. (Note that I’ve added quite a few old WIPs to this list since this photo was taken). I’ve begun to play with the #beesewcial prompt, and am incorporating repurposed textiles into it! Baby steps!
I hope your year is off to a great start!
I’ll be linking up with Sew Fresh Quilts’ Let’s Bee Social so that you can all hold me accountable this year!


 I’ll write more about this in another post, but I plan to use a color palette based upon the
 Once again, Cheryl from
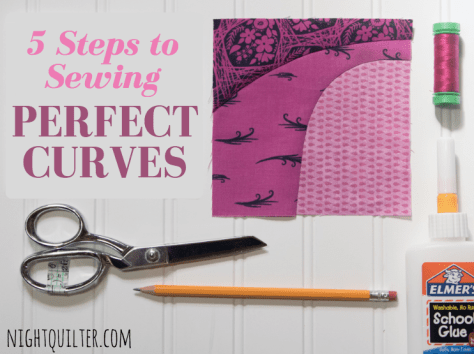
 I was also one of seven quilt designers to launch
  Since I love Instagram so, I would be remiss if I did not share my top viewed posts there as well. This collection is a fun one, including lots of posts about my stress-free stitch-wherever-the-wind-blows
  Technically this is my sixth category, but I can’t let my highlights pass without remembering the completion of the
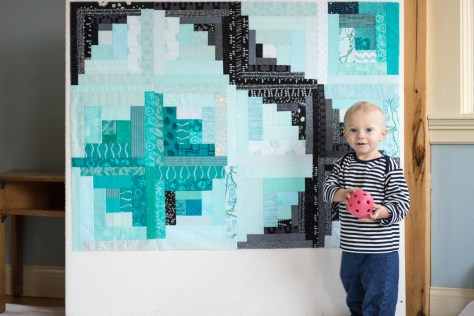 I finished this quilt top two days before Finn’s 18 month milestone, which was the mental deadline I gave myself, so I guess that’s what I get for giving myself such a far-off deadline! But life with kids is busy, this summer was a whirlwind of
  So, Finn! He is as wonderful and cheerful as ever, growing into such a bright soul of a little boy. In these photos he’s wearing a shirt gifted to him at birth by Nancy, one of my quilty friends met through conversations over blog posts–thank you, Nancy!
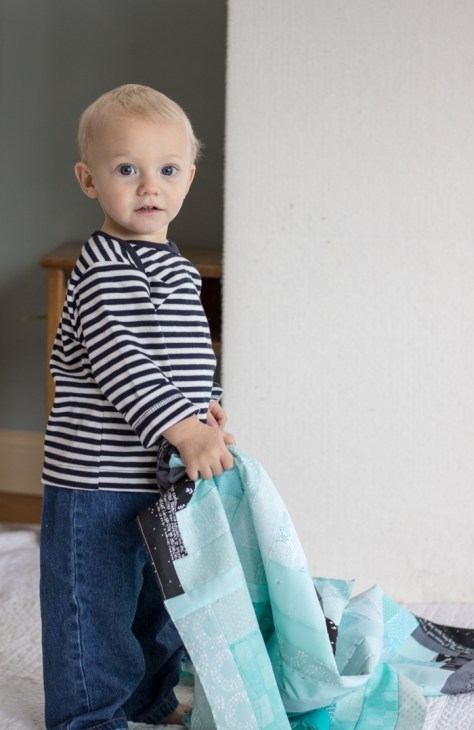 I really wanted to get some photos of Finn wrapped up in his quilt, but he wouldn’t have it. When I tried, he enthusiastically shook his head no and ran off. When I flopped the quilt to the ground, he at first picked it up and looked at me as if to say, “What are you doing, Mama? This doesn’t belong in a pile on the ground!” Even still, this post is full of photos. I know you wouldn’t want it any other way!
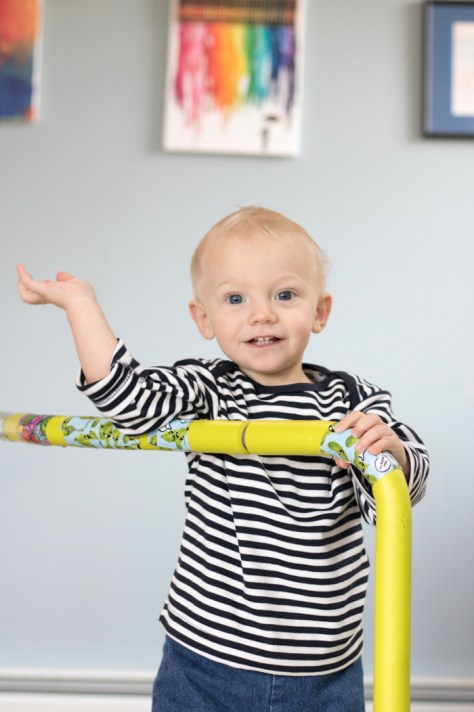 When I asked Finn to put his quilt on his head, he ran off to jump on the trampoline instead, impishly grinning at me the whole way. He loves to jump, loves to run around with his older siblings, playing chase or attempting hide and seek. He loves “shooing” the chickens and exploring the natural world. Finn is so independent, and will often focus on a project (shaking a toy around in a bowl, or putting something in and out of an empty bottle, for example) for quite a while. If you will play with him, Finn would throw and catch a ball for hours.
 He’s so much fun to watch, constantly learning and exploring the world. Finn is starting to talk a bit more, but still primarily communicates with “Daaa” and pointing. His signing is just now starting to take off, which is fantastic since we’ve recently discovered that he has hearing loss, same as his older siblings (and same as me, his mommy, although mine started much later in life).
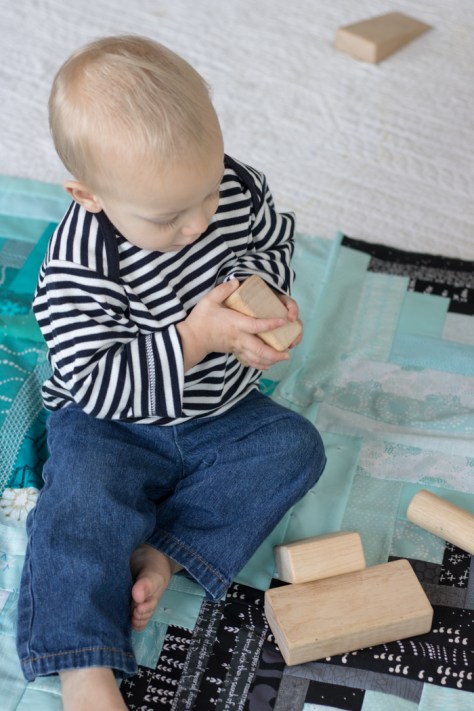
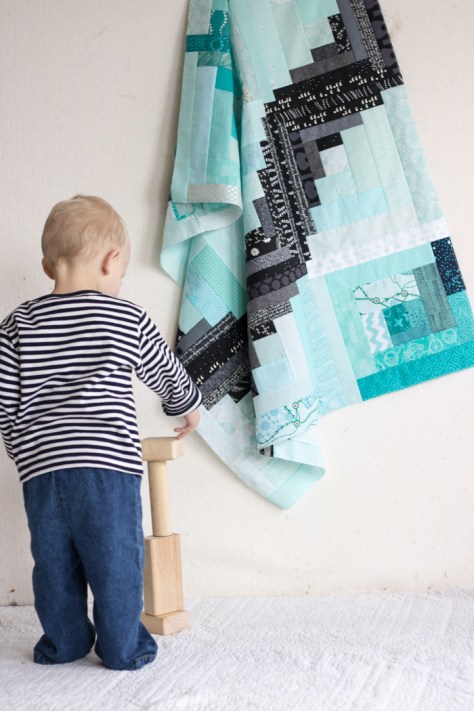 I was finally able to lure him back to his quilt with a block tower. Finn loves to stack blocks and then knock them over! I love to play the game of seeing how tall I can make a tower before he decides it’s smash time. Unlike his big brother who excels in demo, Finn likes to help build just as much as break down the towers.
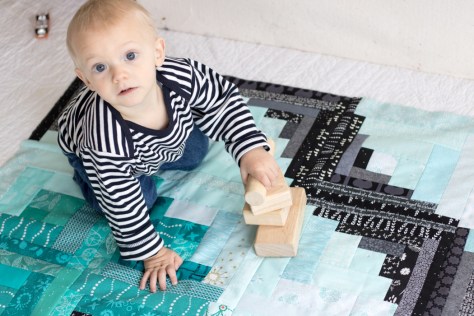
 Once I spread the quilt out on the floor, Finn was all about it. I was able to get some fun photos of him playing with blocks on his quilt with fun little upward grins when he discovered that I was standing on a chair photographing from above.
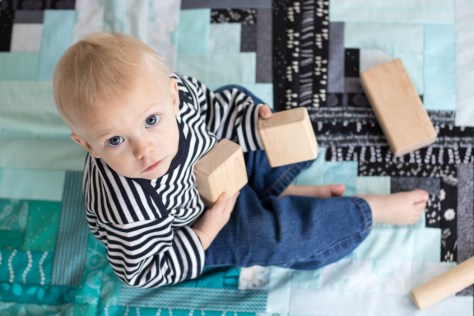
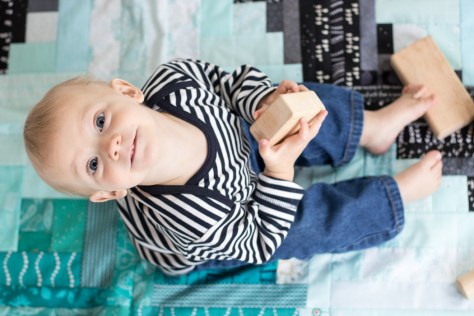
 Such a sweet boy!
 Then of course, as soon as I was off the chair, he wanted to carry it around and climb up on it, too.
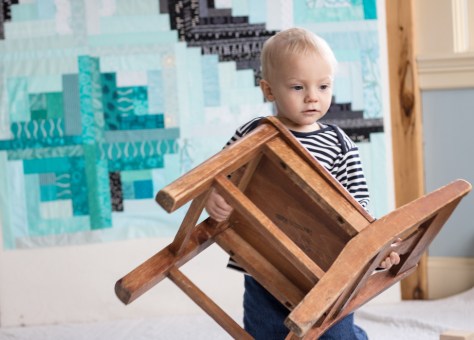
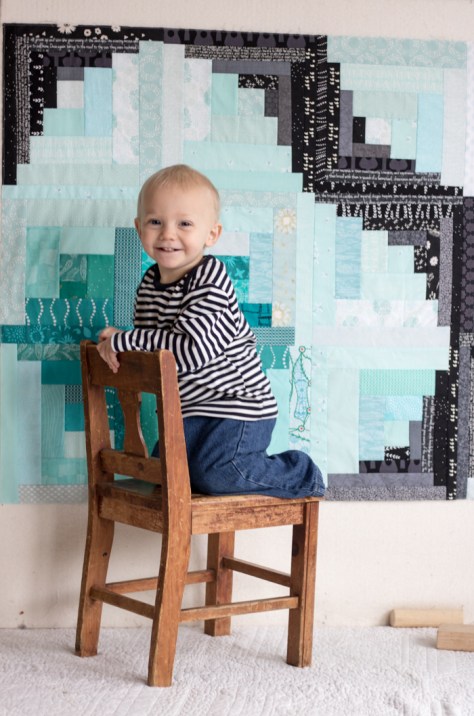 He loves flexing those muscles of his, and boy does he learn fast!
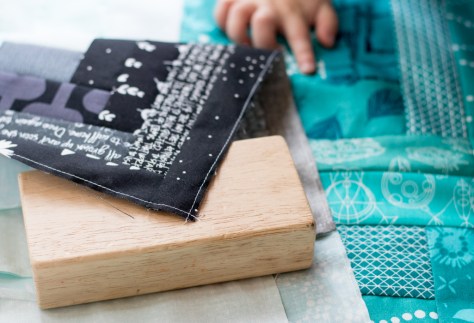 After I sewed all of the milestone quilt blocks together, I did a “victory lap” of stitches around the entire perimeter of the quilt, about 1/8″ from the edge. I saw
 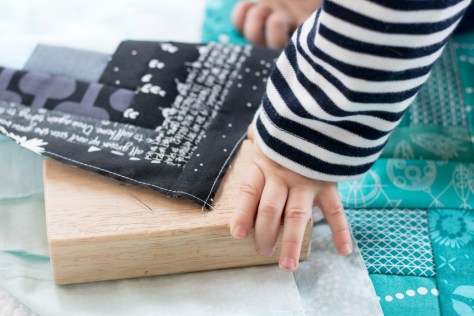 Although Finn didn’t drag the quilt around as much as I thought he might, the victory lap was definitely worth the extra time it took to stitch!
 Now all I need to do is get this layered, basted, quilted, and bound. No biggie, right? I think I’m going to use an all over boxy meander free motion quilting motif with my favorite neutral, Aurifil 2600-Dove in an attempt to keep it simple. I’m looking forward to getting this quilt into the circulation of family use, but am also savoring the journey.
 The block finishes at 6″ square, so my initial thought was to shrink it down to a 3″ square and make an ornament. I love making functional items, and you know how I love to sew teeny tiny ridiculously small things! But then when I sorted through my stash and decided upon the Tula Pink Prince Charming print as the sweater body, I decided the scale would look better with the 6″ size. Now we are going to have a festive mug rug/coaster, which I plan to have out for all of sweater season, which is nice and long here in Maine!
 I love the subtle Cotton + Steel Mustang twinkle trim on the sweater, and the Kona Wasabi arms round it out nicely.
 Hindsight, I should have made the shoulder bits with the greeny-yellow part of the Tula print instead of the blue, since they kind of disappear into the background, but c’est la vie. My husband says he likes it this way, so all is well.
 I plan to do some simple diagonal crosshatch quilting with the walking foot on my Bernina 560, but haven’t yet decided whether to use
  I’ll be sure to share this block in action once I quilt it up and plop some delicious treats or a warm mug of something sweet on top! I borrowed some of the tiny glittery ornaments from the tiny tree my son cut for our kitchen island for my block photo shoot and now there’s glitter EVERYwhere! I hope your holiday season has been glittery and bright so far, too!
 It is such a great feeling to be creating for one of my children again (
 We are in the second week of sewing for the sew along, so hopefully I will have the quilt top completely sewn together by Monday. Time will tell if I actually meet that goal with all of the kids home and lots of family Thanksgiving time on the docket, but I’m hoping to at least be close!
 I put a few contingencies in place to ensure that I love this quilt even though scrappy quilts are not typically my style, and I think they are proving to be quite successful. First, I used a very large ratio of
  I love seeing my favorite designers’ fabrics together, too. The top right block in the photo above combines my favorite Carolyn Friedlander fabric from her first line Architextures (

 We are so excited to announce the kick-off of the very first Quilter’s Planner Instagram Sew-Along, taking place over on the
  This pattern is super versatile and perfect for using up scraps! Make as a holiday gift, a scrap buster, or just a fun project with your quilting friends. The Sew-Along will run now through the middle of December, giving a little extra time for the piecing and quilting steps to allow for family time around the holidays.
 First, I’d like to introduce you to
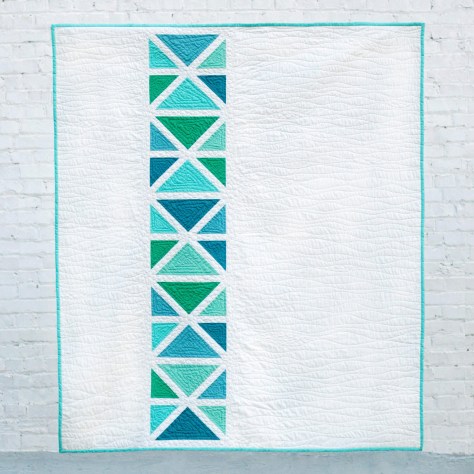
 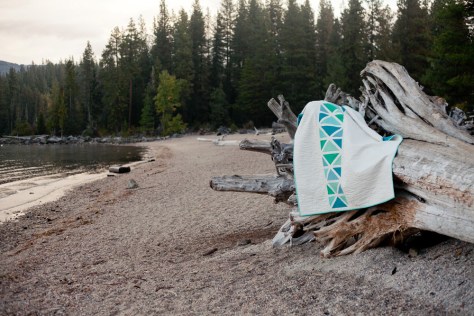 Living in midcoast Maine, an ocean path felt like the perfect inspiration for my quilt. I wanted to embrace the simple beauty of nature while providing a pattern that could be adapted to fit any color scheme, style, or decor.
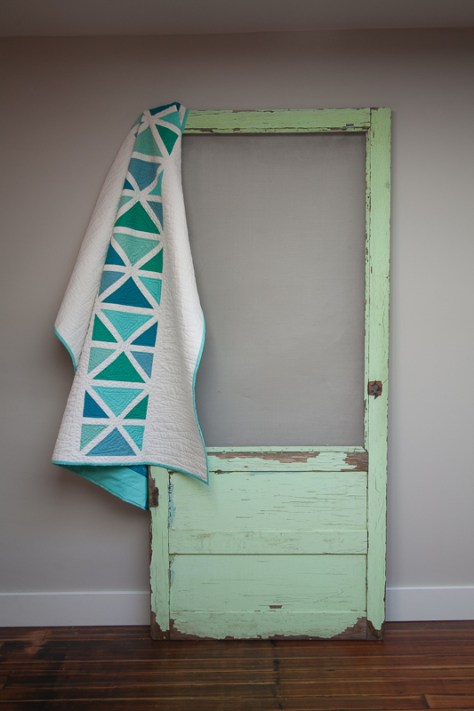 I should note here that the stunning photos included in this post were taken by
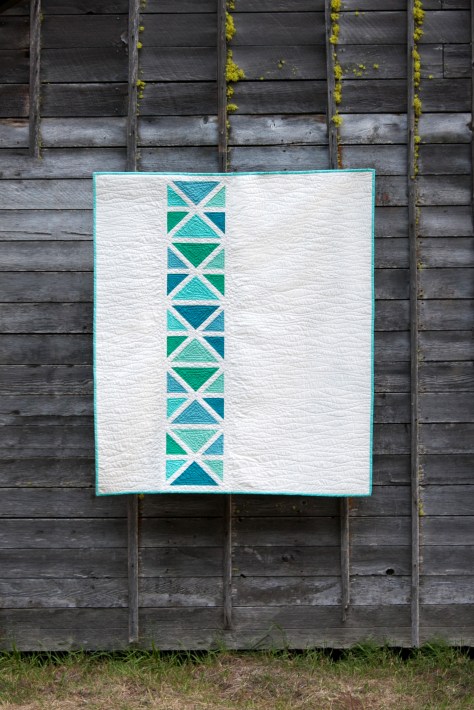 Using simple construction from easily cut triangles and sashing, this quilt comes together in a breeze. Generous negative space provides room for intricate free motion quilting, or you could finish it with simple modern straight line quilting.
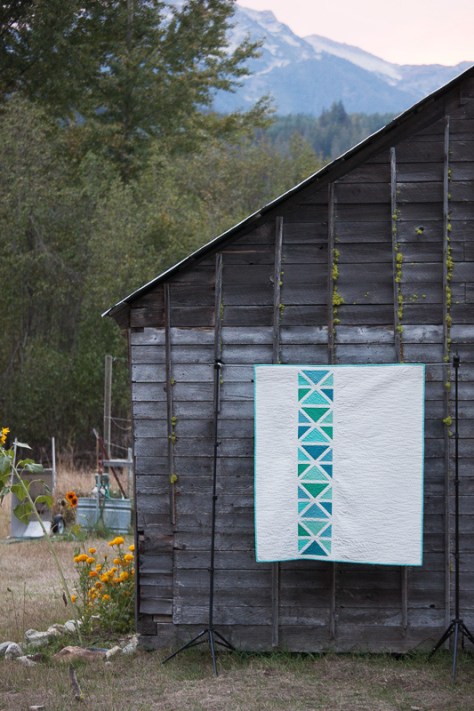 Many thanks to
 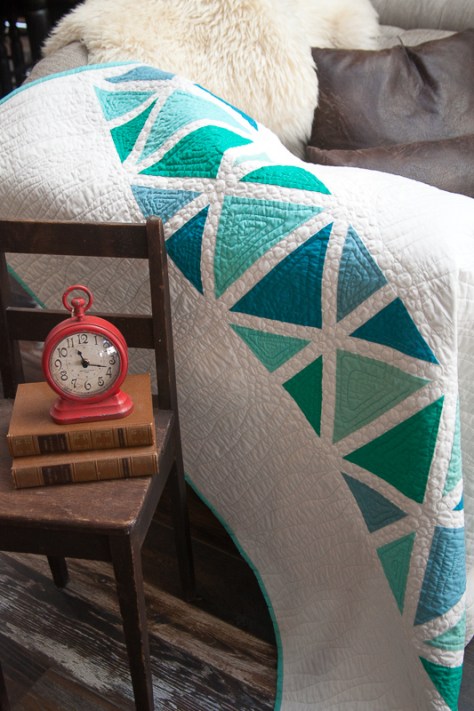 I quilted Ocean Path with echoing, organic triangles within each colored portion using 50wt
 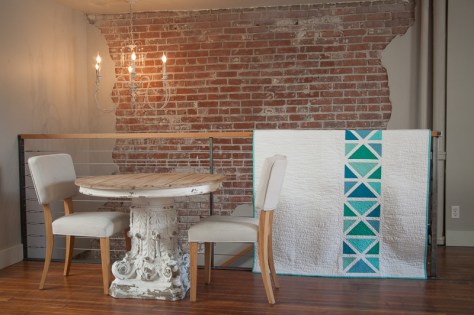 All of the Quilt Theory patterns are simple enough to be printed on 4″x6″ cards or a single page downloadable pdf. At only $3 each, they are perfect for gift giving or collecting, too!

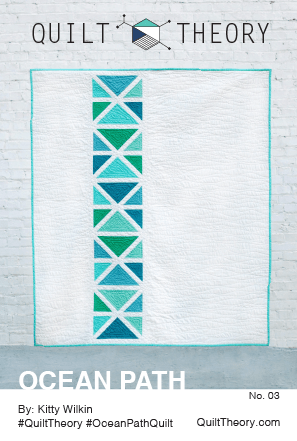 To celebrate the launch of Quilt Theory, I am giving away a copy of my pattern, Ocean Path (printed or PDF, your choice!) along with a PDF of all of the Quilt Theory Coloring Pages. I’m also including
 Each of these Farmer’s Wife blocks manage to pack quite a punch in the little 6 1/2″ space. My method of attack when deciding how to piece each block has been consistent: how can I piece this with as little muss and fuss as possible? With Sylvia, at first I was thinking chain piecing would be the way to go, since it would help minimize the teeny tiny pieces in the inner borders I’d need to cut and sew. Looking at it more closely, I decided that with this block, even chain piecing would require piecing TINY bits, cutting, and then piecing again. Plus, sixteenths of an inch!? No thank you! Finally, I decided that foundation paper piecing was the way to go, since:
 Ready to get sewing? Make sure you have a grasp on how to foundation paper piece, and let’s make Sylvia!
 As soon as I saw this block, I knew that I wanted to meticulously cut the center square. I’m arranging my blocks on point, so be mindful of your own plans before meticulously cutting your fabric! (I call “fussy cutting” meticulous cutting, and you can read why
  Mark the specific piece you want to meticulously cut. I went a little overboard on marking mine for the sake of clarity here. I circled the number but also traced just outside the line of the particular piece, both with bright pink sharpie. Simply circling the number would probably suffice!
 Cut out the center of the piece, creating a window that is exactly the size of the piece you want.
 Draw a 3/8″ seam allowance around the window. I used a green micron pen for this example to ensure the line didn’t get confused with the printed lines on the paper.
 Cut along the line you drew.
 You should how have a planning template to help you cut your fabric for fussy cutting. Notice that I placed my planning template onto the fabric upside down. This is because in foundation paper piecing, we are sewing the block on the reverse side of the template. It did not matter too much for this particular piece, since it’s a square, but always be mindful of directionality of the fabric as well as wrong side-right side. If need be, mark your planning template with “right side up” or “wrong side up” so that your fabric is cut properly!
 Between sewing the fabric on the reverse side of the paper, having the block broken into sometimes odd sections before sewing, and the many pieces involved in most foundation paper piecing patterns, it is in your best interest to color code your paper template before beginning to sew. This way, you can be sure you sew each fabric in the proper place.
 Especially when first getting started with foundation paper piecing, one of the biggest tips I can offer is to be generous with your fabric pieces. It’s better to have to trim a bit more off than to be short and have to rip stitches! For my bright blue squares on Sylvia, I cut the fabric into 1 1/2″ squares, which as you can see includes ample overhang.
 This tip goes for bag-making as well: just because there is a template created for a perfectly rectangular piece, it doesn’t mean you can’t use your rotary cutter and ruler! The outer pieces of Sylvia can be easily cut using a rotary cutter and ruler, which will save time with paper removal at the end. Since these pieces are not easily measured (let’s avoid using sixteenths of an inch if we can help it!) simply cut out the foundation paper piece templates and use them as a guide when rotary cutting. Use the foundation paper piecing method to piece the center portion, then add the D, E, H, and I rectangles using traditional piecing methods. Easy peasy!
 And there you have it. Sylvia, in all her glory.
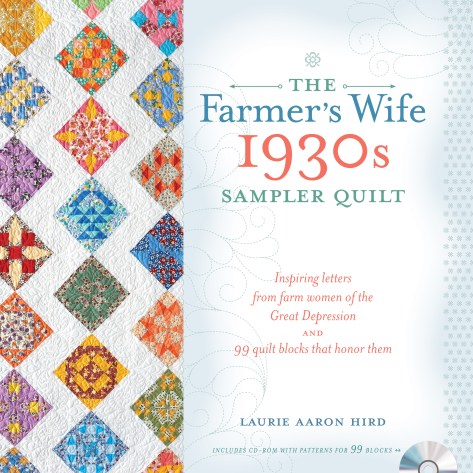

 *Spoiler alert* My tip for her was to know your limits. When every project is a priority with a quickly approaching deadline, it’s difficult to make a prioritized list and keep yourself organized. On normal weeks, the prioritized list I make in my


