There’s nothing like beginning a month with a holiday to help it feel like it’s flying by like a firecracker. Pair that with a week long trip down to celebrate with family, and July has truly snuck up on me!
As I get back into the swing of things on the homestead, unpack, and hopefully dive productively into a few big sewing projects, I thought I’d host a giveaway to help get the second weekend of July (how did that happen!?) off to a fun start.
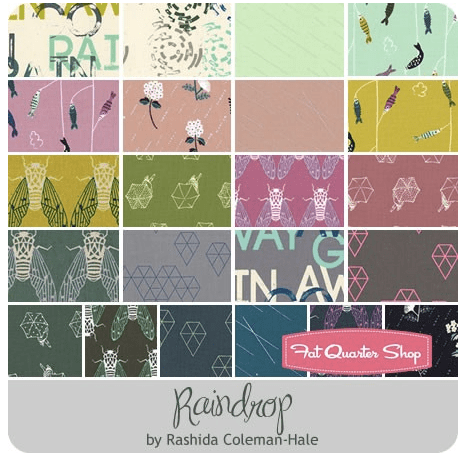
Thanks to the Fat Quarter Shop, one of my lucky readers can enter to win this newly released Raindrop fat quarter bundle by Rashida Coleman-Hale for Cotton + Steel Fabrics. The bundle includes 20 fat quarters and two (2) 24″ x 44″ canvas prints, and seems most fitting to kick off this rainy weekend here in Maine. There are so many great prints in this collection–from the geometric play stash builders to the fabulous cicadas, all inspired by the rainy season in Japan. True to my naturalist heart, I love cicadas. I used to love to collect their exoskeletons from trees when I was a kid, and hook them all over my clothes to surprise the less-bug-loving kids on the block. Ahh, memories!
To enter the giveaway today, tell me what you like to do on rainy days. Leave a comment and make sure I’m able to get ahold of you if you win. For an additional entry, click HERE and sign up for my new Night Quilter email list. You will get occasional emails with highlights, pattern announcements, and special offers. Leave a second comment to let me know you’re signed up! Tell me how you follow Fat Quarter Shop (facebook,twitter, Instagram, their blog Jolly Jabber, etc.) in a third comment for a third entry.
This giveaway is open to US and international participants. The giveaway will be open until Thursday July 14th at 8pm EST when I’ll select the winner randomly with random.org. Good luck, and enjoy your rainy (or sunny if you’re lucky) weekend!This giveaway is now closed! Congratulations, Kendra!
My garden is in a very temporary visual lull at the moment, with the first burst of blooms dying out and the next round not quite flowering yet, but I have a good stockpile of photographs from earlier this year for color inspiration posts in the meantime. This week features a few of my garden beauty favorites, with color palettes made using Play Crafts’ Palette Builder 2.1. I hope you find inspiration from the detailed intricacies provided by Mother Nature, by the color bursts and combinations found naturally all around us, or by the gorgeous matching quilting solids and Aurifil threads listed beneath each palette!
Corresponding solids from left to right: Kona Dahlia, Kona Violet, Bella Berrylicious, Bella Boysenberry, Kona Thistle, Bella Prairie Green
Corresponding Aurifil thread from left to right: 2520 – Violet
5003 – Wine 2535 – Magenta 4030 – Plum 2510 – Lt Lilac 2850 – Med Juniper
Ahhhh! Peonies are long gone at this point in the year, but their full beauty lives on in these photographs (and my memory). I did not get dahlias in the ground in time this year; otherwise I would be eagerly awaiting their blooms to step into the vacant space left by the passing of the peonies. Time will tell which bloom will steal my heart next. It’s fun how more or less the same flowers bloom each year, since our garden is a perennial garden, yet it is always a surprise when a flower first begins to bloom.
Corresponding solids from left to right: Bella Bunny Hill Blue, Bella Petal Pink, Bella Boysenberry, Kona Bordeaux, Kona Azalea, Kona Herb
Corresponding Aurifil thread from left to right: 2600 – Dove
2445 – Victorian Rose 4030 – Plum 1103 – Burgundy 2530 – Blossom Pink 5019 – Military Green
One of my favorite aspects of our garden is the wide variety of subspecies that are planted of each flower. There are least ten different species of Columbine, from daintily elegant to full and regal. You can see one of the other species featured in a past color inspiration post here. I don’t remember seeing this red species before this year, but it must have been there, hiding amidst the other copious blooms. I fully enjoyed it this year, and love the rich color palette that results.
In looking through my color inspiration posts, there is a definite trend toward pinks, maroons, orange/golds, greens, and earthy tones. I suppose that’s to be expected when the majority of the photos come from the garden around me. I was thinking it might be fun to have a color scavenger hunt, though, and specifically seek some of the colors more rarely found in nature. I’m taking suggestions for color themes–the harder the better (I love a challenge)! What color should I search for first? Blue? Purple? White? I’d love to hear your thoughts!
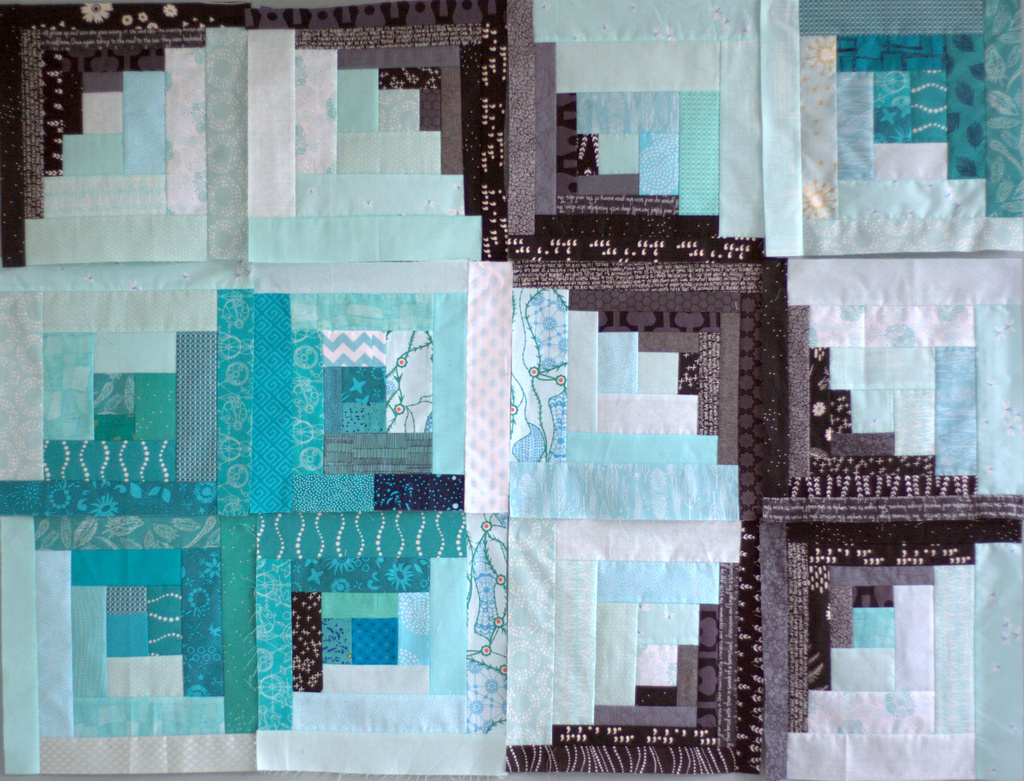
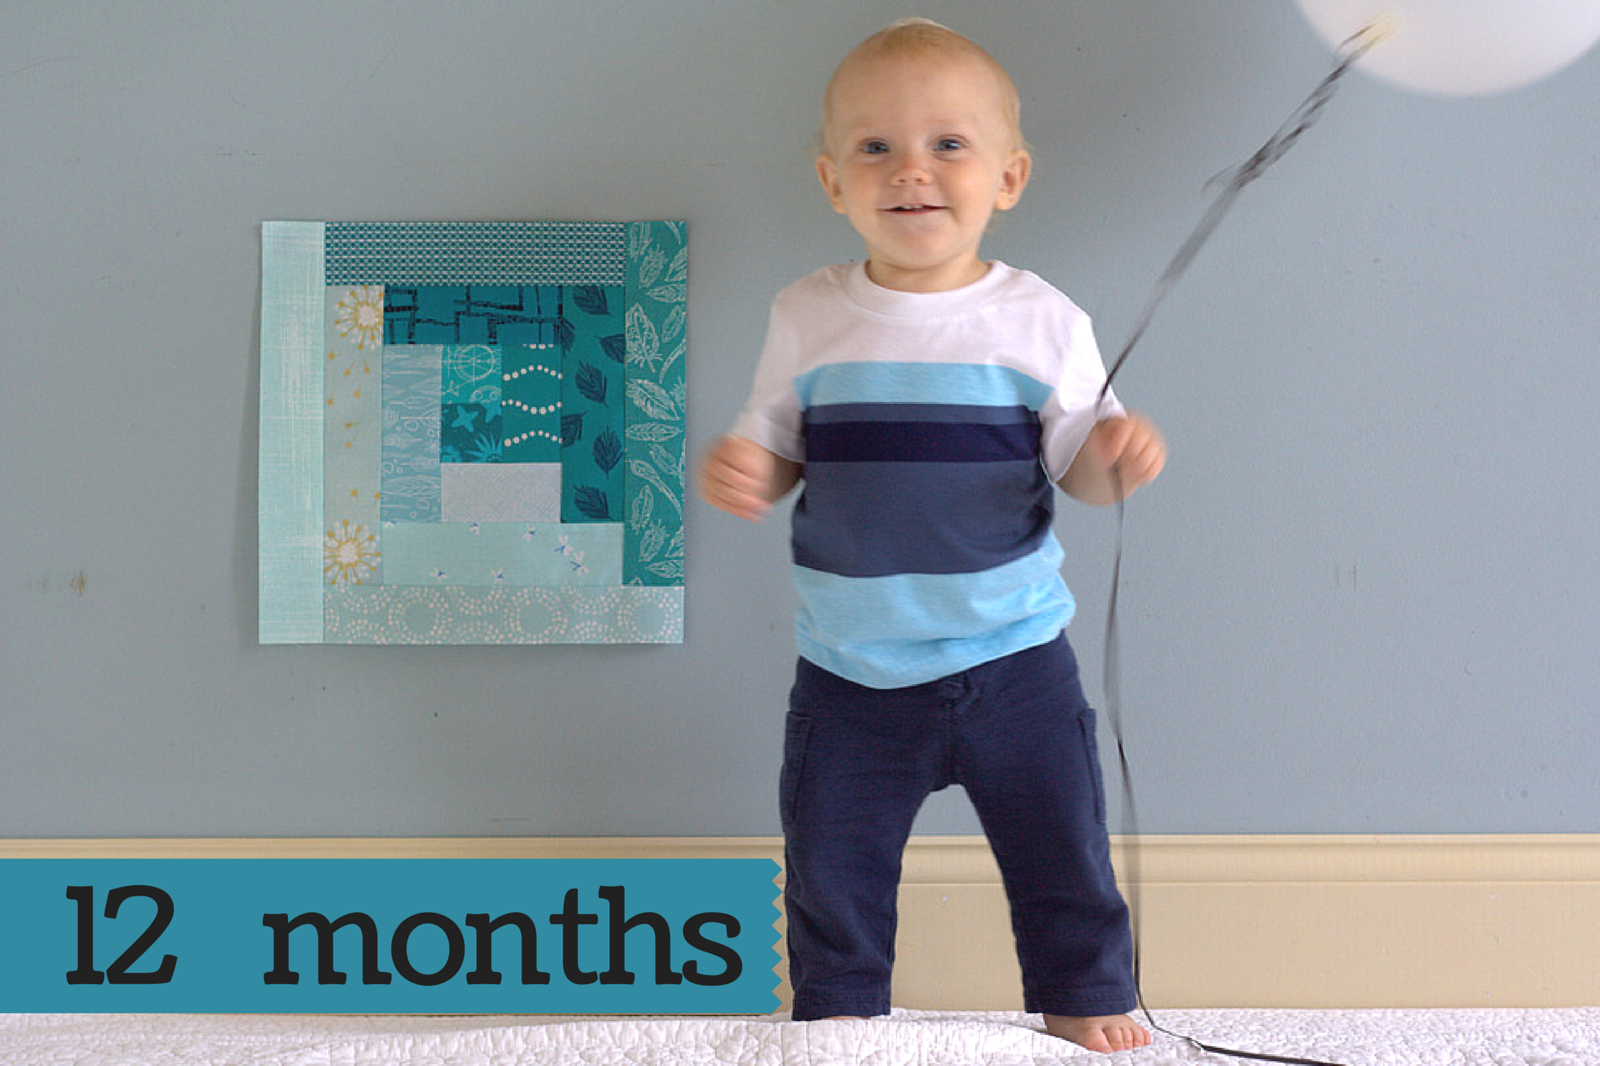
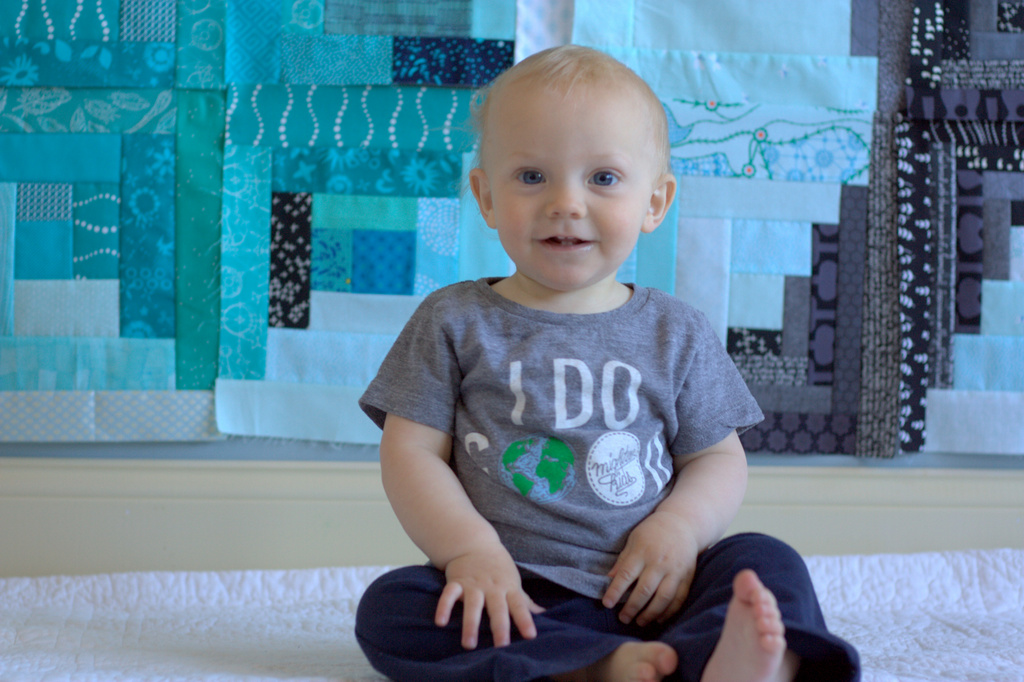
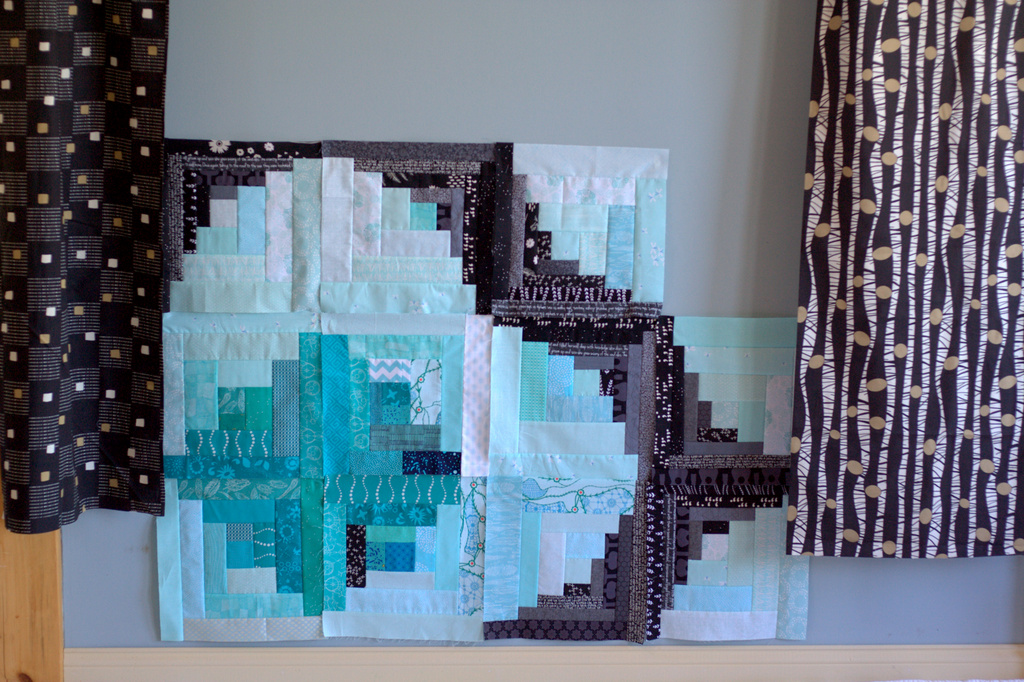
And just like that, all of the blocks for Finn’s milestone quilt are finished and my baby is officially one year old. They say “babies don’t keep” but somehow it feels like the past year flew by especially quickly. I won’t even try to pretend I won’t miss this project dearly now that it’s mostly finished. I do still need to piece the top and quilt it, so no worries–you haven’t seen the last of Finn and his quilt!
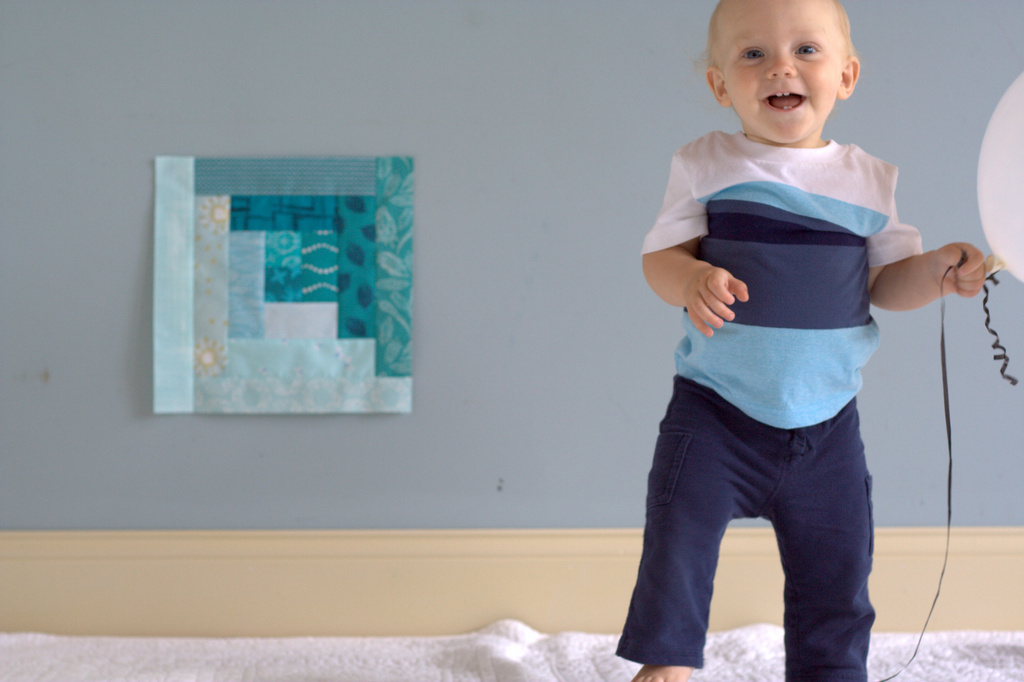
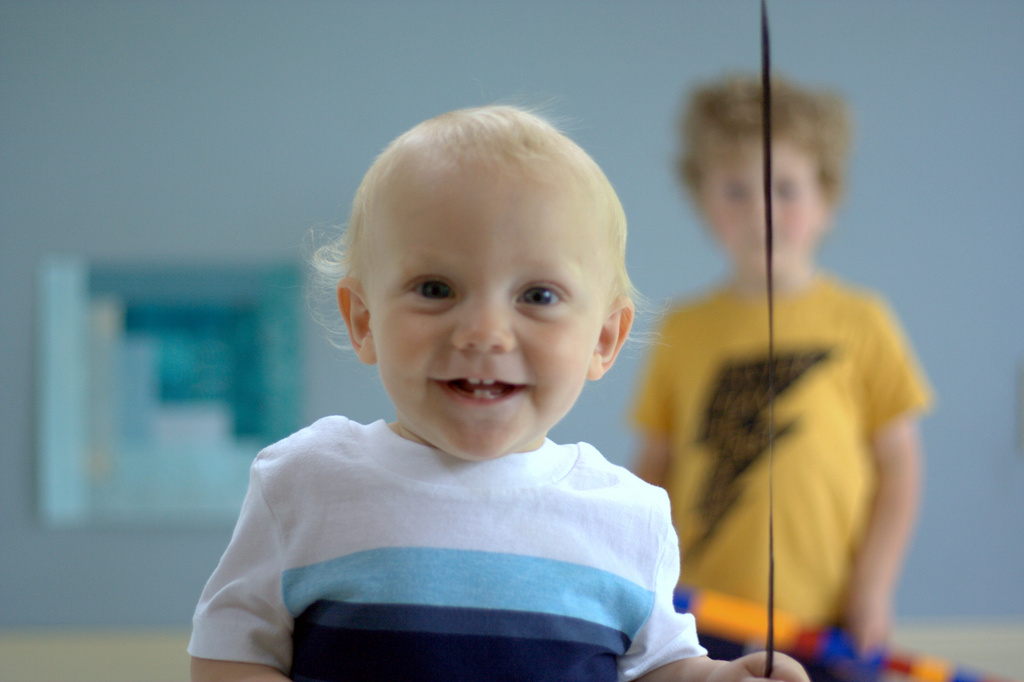
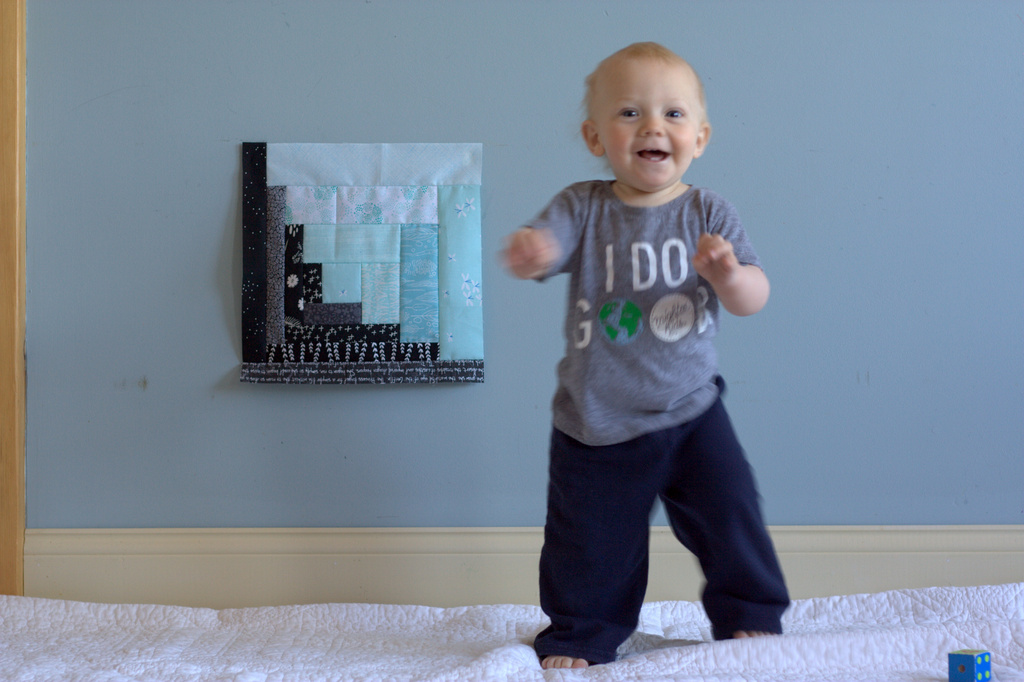
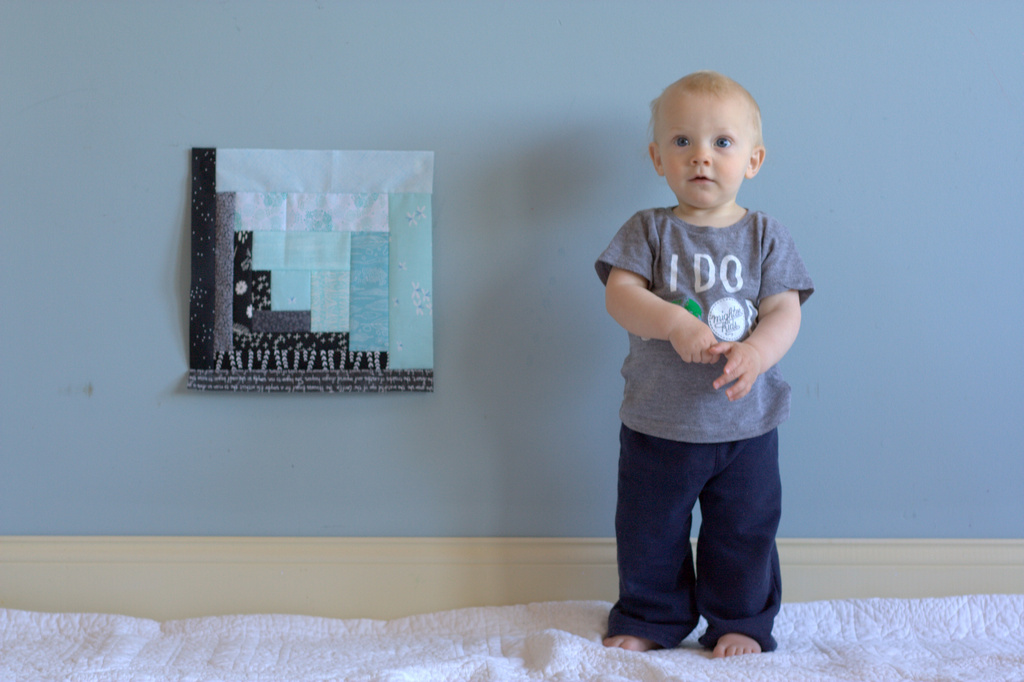
Within the past week, Finn has fully mastered walking and now prefers it over crawling. He joyfully walks circles around the house, his wobbly steps getting stronger and smoother by the day. This joy of walking certainly made this photo shoot the most difficult yet! I got one, only one, photograph of Finn relatively near his final quilt block, and while it’s not as clear as I’d like, it’s staying.
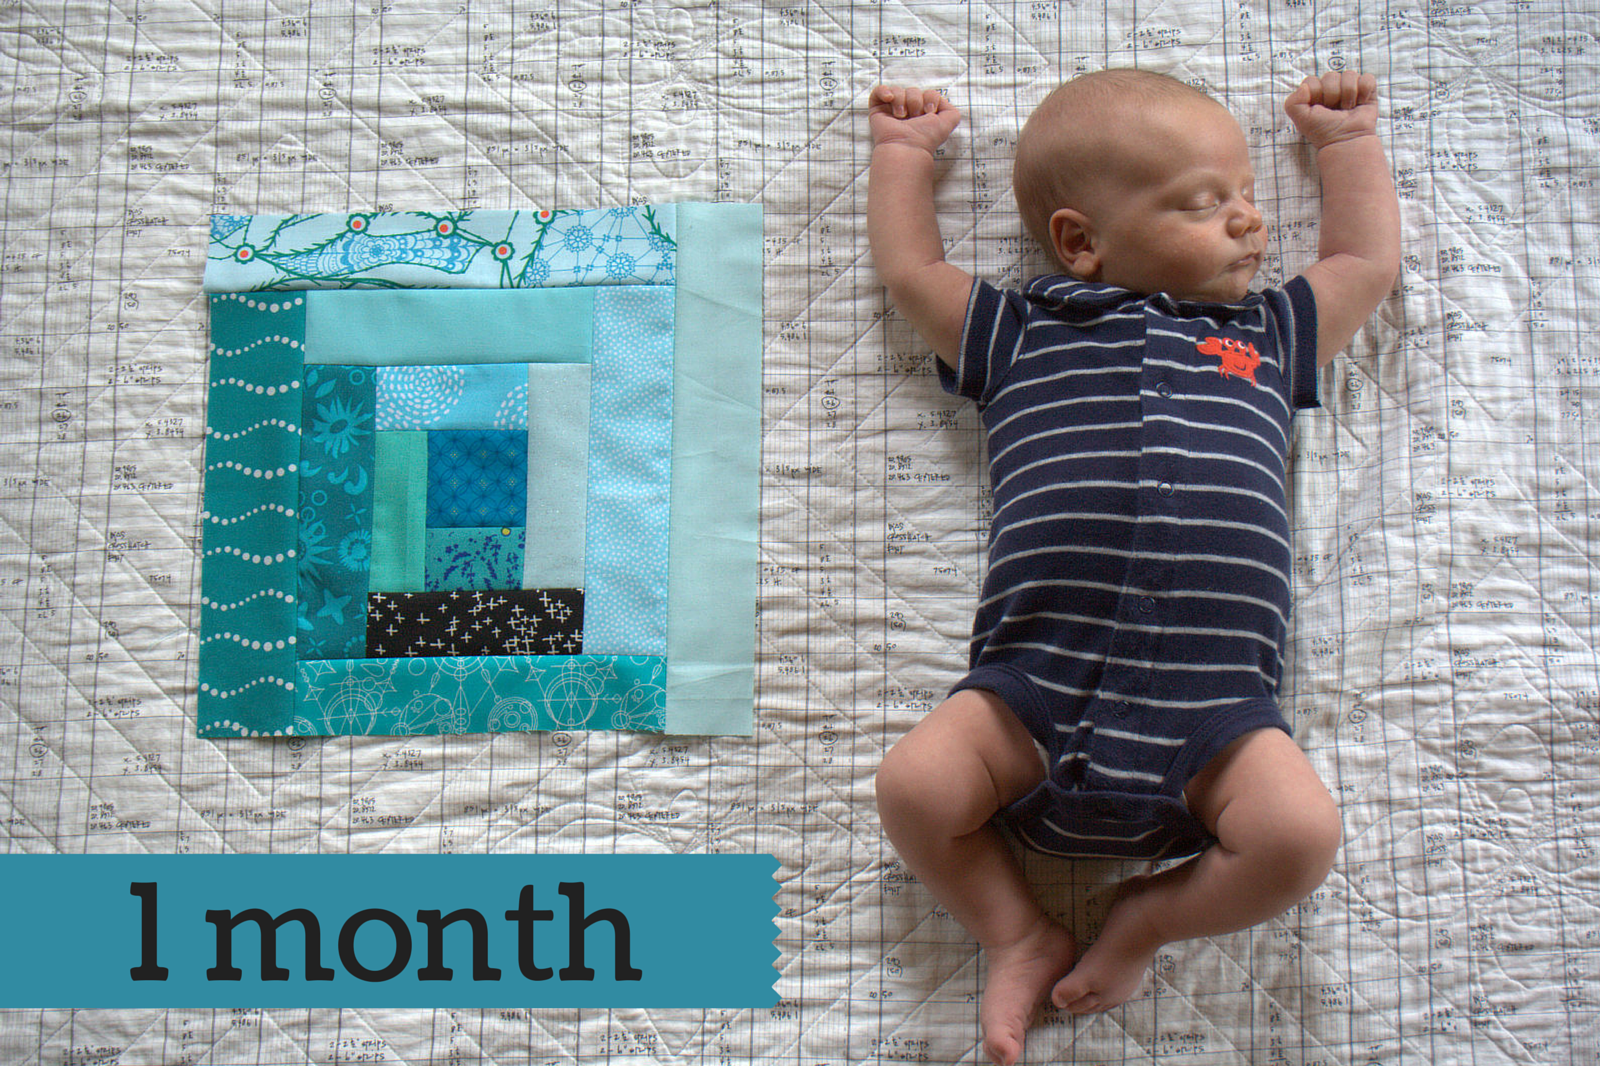
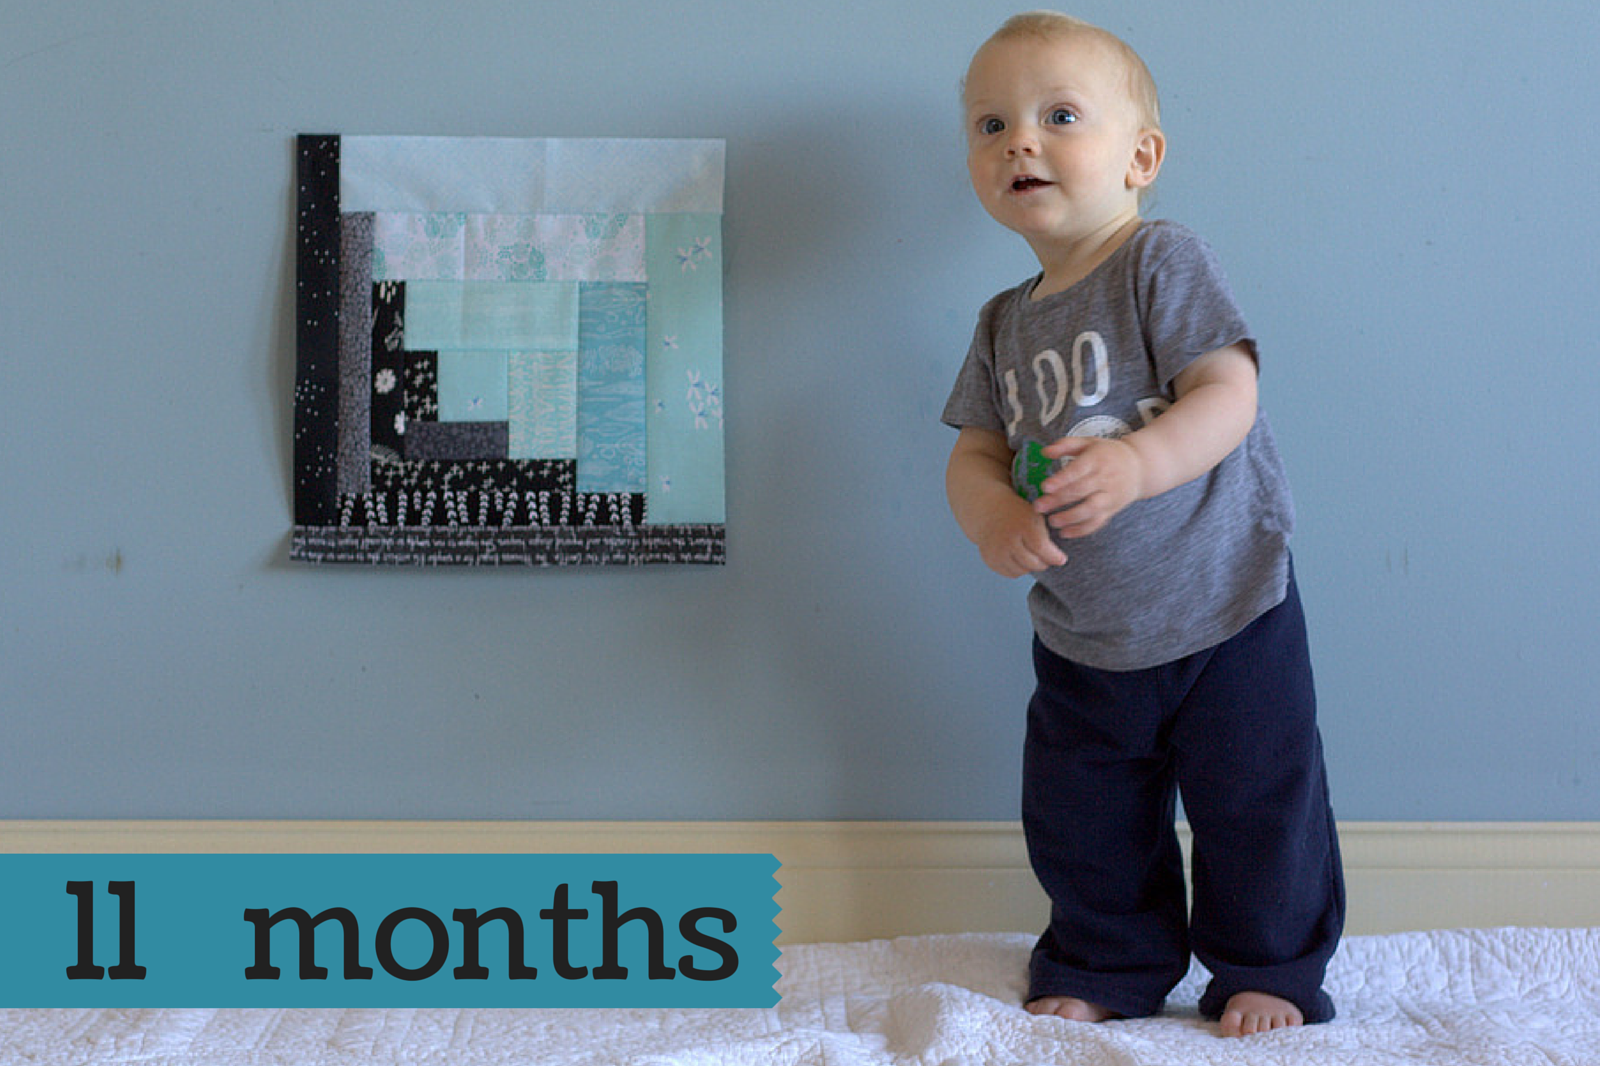
Twelve months is 12 months, and not even mommy’s most sincere and pleading attempts will keep a newfound walker from walk, walk, walking! Just as a reminder, here is Finn with his very first milestone quilt block, 11 long months ago:
Isn’t it absolutely mind-blowing how much babies grow and learn in such a short time!? Life is an amazing thing.
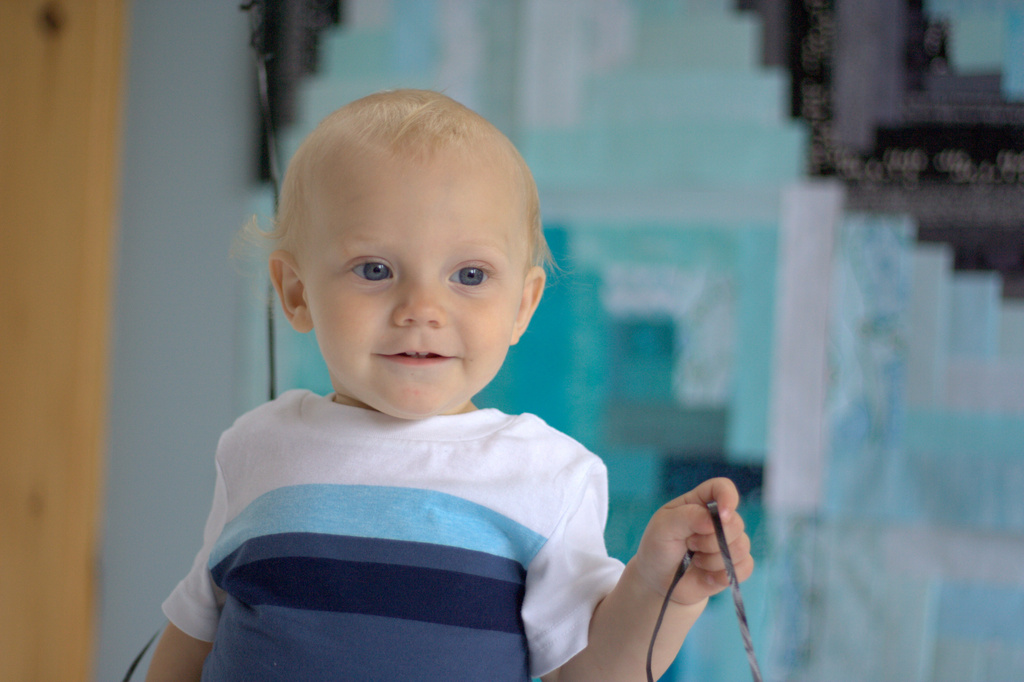
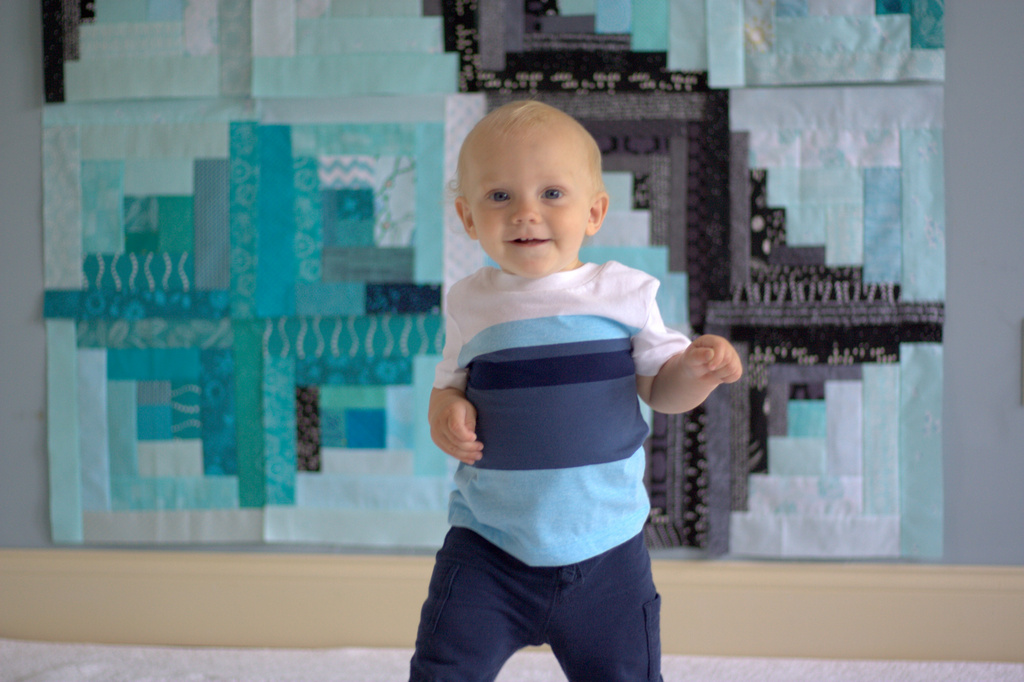
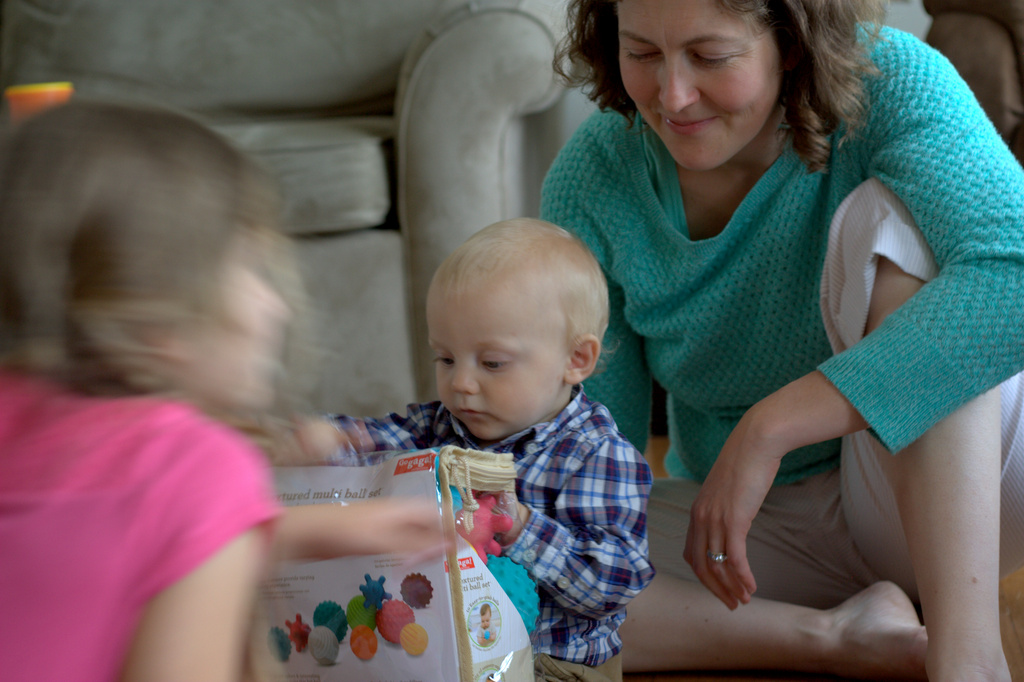
My big kids brought home a couple of balloons from their cousin’s first birthday this weekend (we had a full family birthday weekend with both Finn and cousin Reagan born 26 hours apart), and they have become the favorite toy for all three kids. (Safety note: Yes, I know that balloons are not technically safe for babies, so I will reassure you here that I only allow Finn to play with the balloon when I am directly supervising him!) I figured giving Finn something fun to hold was my best bet at having him stand still for even a moment.
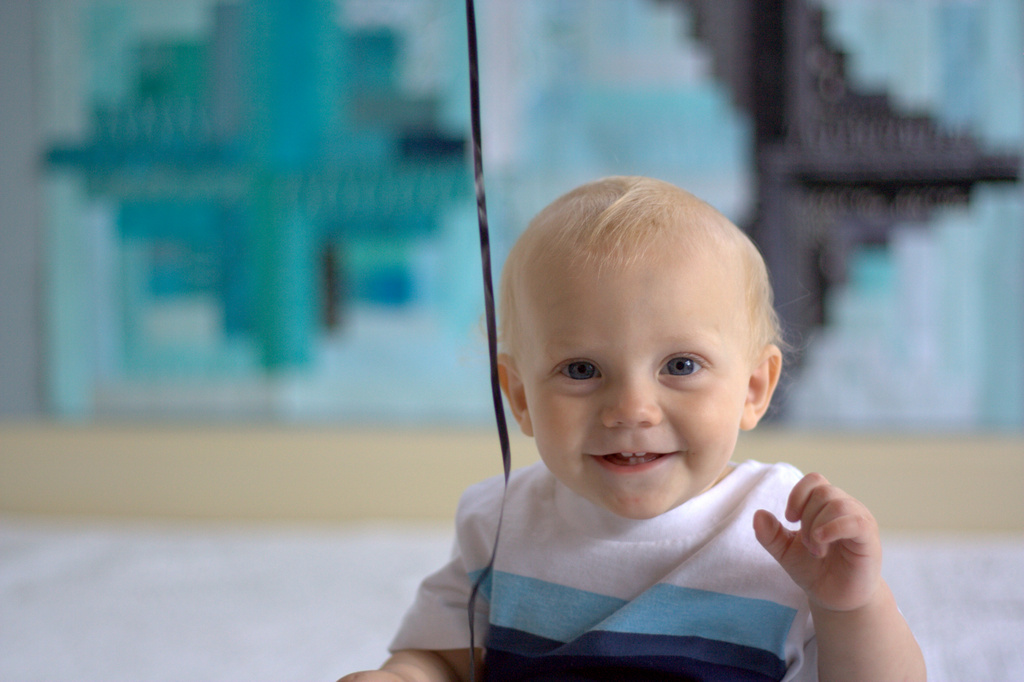
Even still, Finn would rather walk around than stand still, despite my best efforts. C’est al vie. Such is life with a brand new walker!
Add an eager almost-four-year old big brother helper, and the majority of my photos looked like this:
or, more accurately, like this:
This is part of what I have loved about this project, though. It has given me an opportunity to sit down, reflect, and write about life in the current moment. By documenting each month of my baby’s life, I’m also documenting our life as a family. With our busy lives, how often do we take a moment to write about our day? I have loved that this project has given me the motivation to write, reflect, and document the joyful milestones in Finn’s first year.
Finn continues to have a sweet and joyful disposition, complete with his newfound ability to express frustration and flop himself face down, crying, on the floor. Overall, though, he is a happy boy and a super helper. He loves to help me unload the dishwasher, taking out each utensil and holding it up for me (as long as I’m quick enough to take it within a second or two). When he does that, I always say “Thank you!” and now it sounds like he says, “Thank you!” right back. This morning while I was getting dressed, he joyfully opened my dresser drawer and started taking out folded clothes, tossing them on the floor one at a time and saying “thank you” after each one! Oh, the innocence of babes!
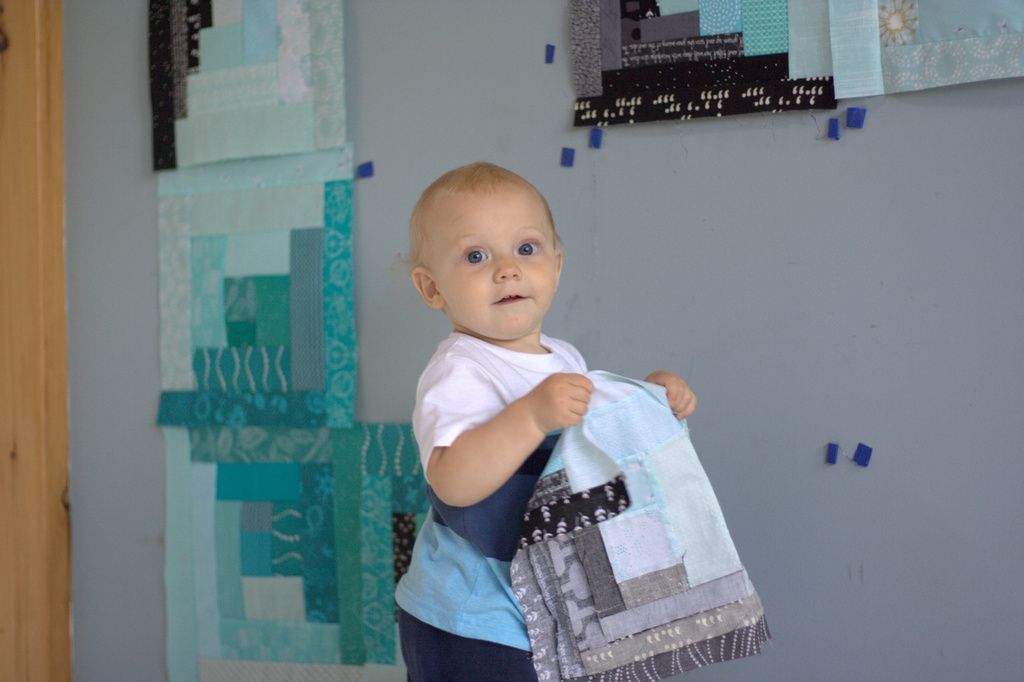
Finn has helped take these blocks off the wall for the very last time. Next up is squaring up the blocks and sewing the quilt top together. I’m going to give myself a month in which to do it, since it feels like an attainable goal. Setting realistic goals is still something I’m continuously working on, and something this project has helped with greatly. As much as I may have itched at times to make extra blocks, or up the ante to two blocks per month, I’m SO glad that I stuck with my original plan of one block per month, since deadlines have a funny way of sneaking up on me. Sure, it took an entire year, but all of the blocks for Finn’s quilt have been made! A finished quilt is just around the corner.
For those of you new to this project, you can see the full quilt layout plan, HERE in the 3 month post. The blocks are all completely finished now, and just as planned! You can see the full progression of Finn and his quilt’s growth HERE or by clicking the “Milestone Quilt” tab at the top of my blog. Thank you for joining me on this journey! I’m not considering the journey over just yet, since I will check in with quilt finishing progress, too, with Finn’s help of course!
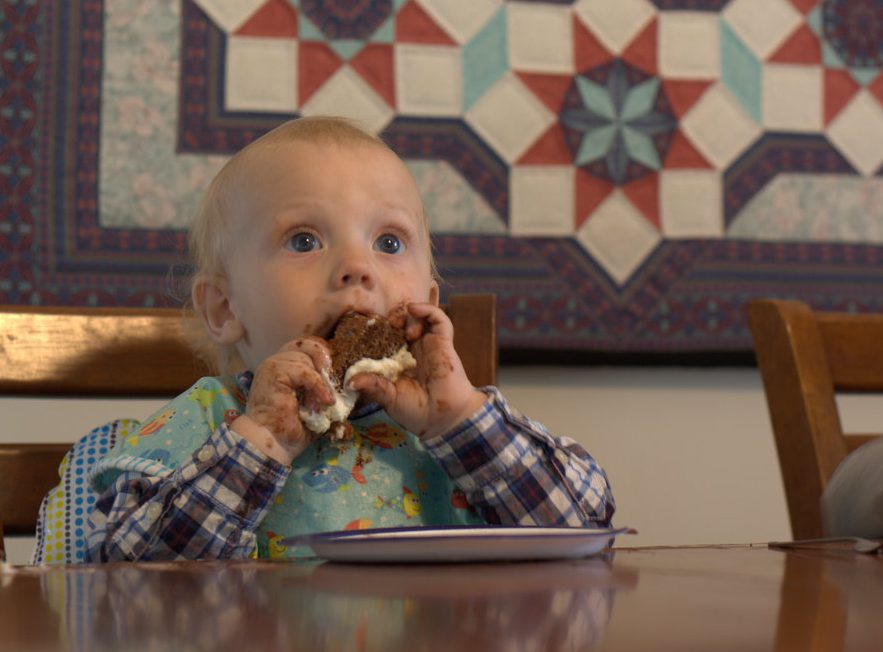
I’ll end this post with a few peeks from Finn’s first birthday party. He had such a great time!
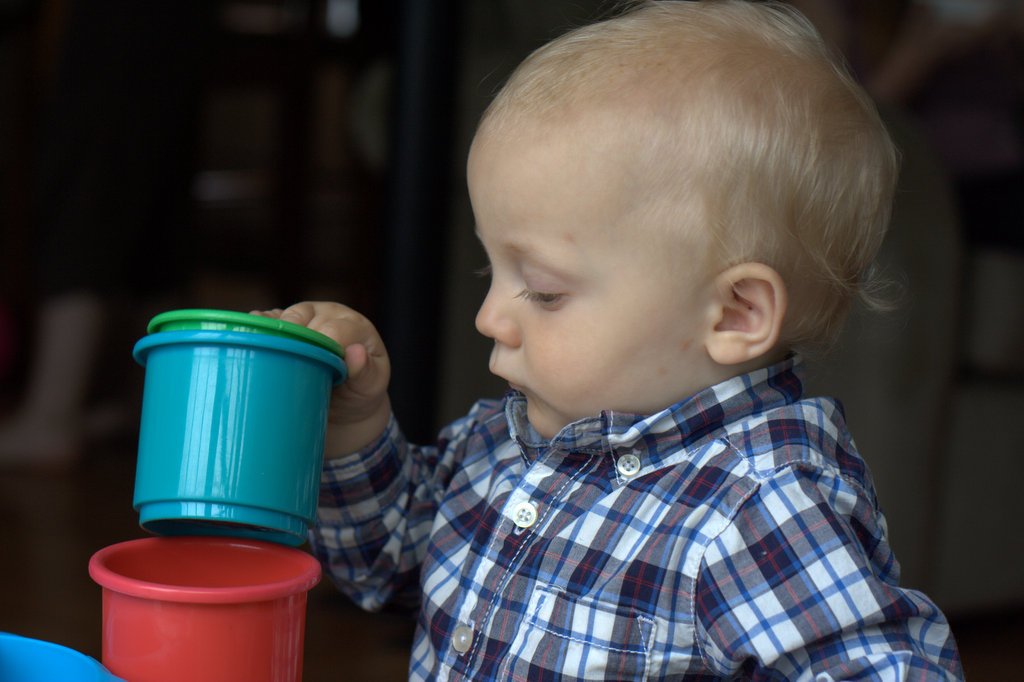
Cheerful boy + good light = sweet shot!Figuring out those stacking cups!Those eyes!The big sibling blur during gift opening. Big siblings are great gift helpers!Birthday cake!“Oh yes, I am eating it all!”
Here’s to many more years of growth, joy, and family fun!
**Note: I wrote this post four (4) weeks ago and between other scheduled tutorials and family sickness, it has yet to be posted. I’m finally scheduling it to post so that it goes up no matter what goes down on the homestead. Spring is in full swing here in Maine, now, so just pretend it is a month ago while reading this!**
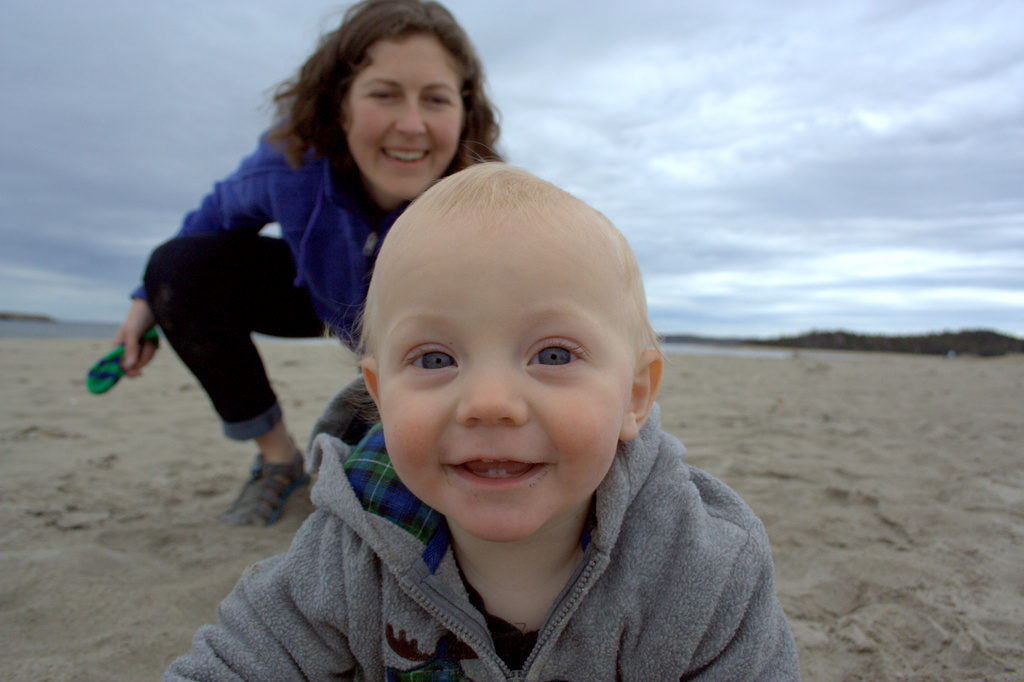
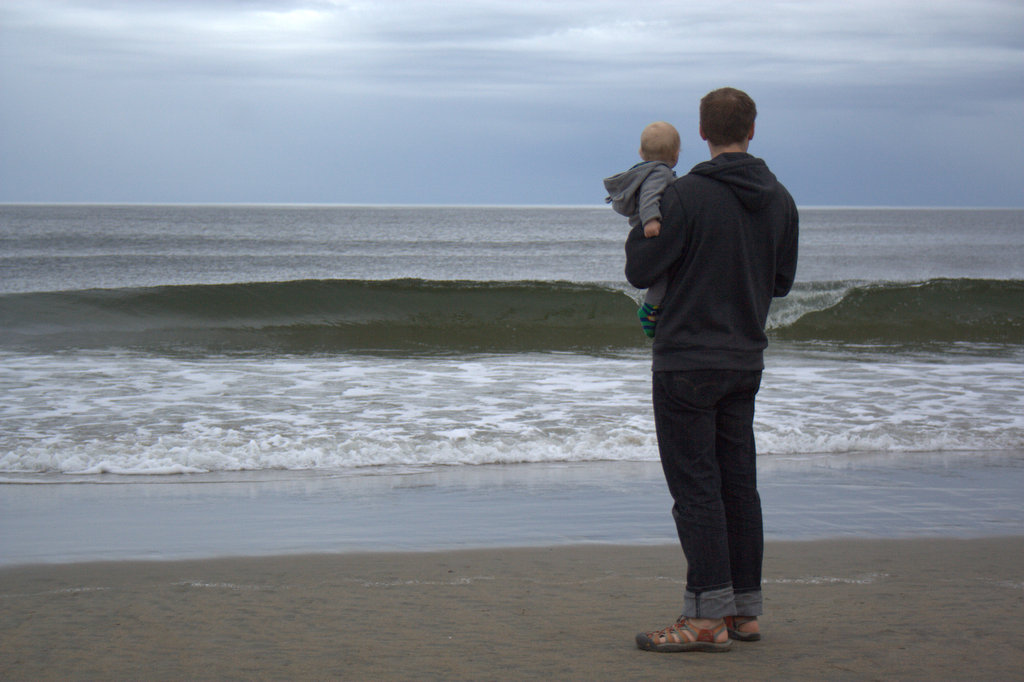
Warm, sunny, peeks-at-summer days are popping up here and there, intermingled with some below freezing nights and a bout of snow a couple of days ago. Ahh, spring in Maine! We were able to escape on one last grand adventure as a family of three before my big kids returned from their vacation two weeks ago, and today’s color inspiration comes from our adventures at Popham Beach in Phippsburg, Maine. It’s a bit of a drive away at just over 2 hours, but somehow the stars aligned and Finn slept the entire drive down, making our day joyful and smooth. And such, “beaching it” is the theme of the week; color palettes were created using Play Crafts’ Palette Builder 2.1.
Corresponding solids from left to right: Kona Pewter, Bella Bunny Hill Blue, Bella Prairie Green, Bella Pistachio, Kona Parchment, Bella Etchings Charcoal
Corresponding Aurifil thread from left to right: 2606 – Mist
2560 – Iris 5010 – Beige 5016 – Olive Green 2326 – Sand 1140 – Bark
As soon as we began along the path to the beach, I was drawn to the sea grasses that grew along the dunes. Such perfect little spikes of green popping up through the fine sand, it’s amazing to think that they alone hold the shifting sands in place during the strongest storms. Yet another reminder of Mother Nature’s simple complexity. The soft greens of the grasses and beige tones of the sand give a quiet feel to this palette.
This grass-covered dune was gorgeous as a whole, too, and I was happy to see a nice solid fence and signage clearly explaining the importance of looking without touching (or walking).
Corresponding solids from left to right: Bella Peacoat, Kona Pewter, Kona Medium Grey, Bella Nautical Blue, Kona Spice, Kona Latte
Corresponding Aurifil thread from left to right: 2785 – V Dk Navy
2605 – Grey 1126 – Blue Grey 1310 – Med Blue Grey 4012 – Copper Brown 5010 – Beige
Great color combinations can be found in the most unexpected of places, like this old, rusty lobster trap that was washed up on the beach and almost entirely covered by sand. I am wishing I took a photo of this from further away, since you might not notice the intricacies of texture and color unless you take a closer look. Lovely rust! I actually have a quilt in the wayyyy beginning phases of planning using a rusty color palette like this. It might become a reality in a year or two!
Here are a couple more photos from our expedition, just for fun:
Check out that amazing driftwood!!
Here’s to another color inspiration post next week, featuring some of the gorgeous spring flowers that are finally filling our gardens! Enjoy your week!
Remember that mini mini quilt craze that spread like wildfire among quilty bloggers about eight months ago? Yeah, me too. The fun news is that with the recent feature in Make Modern magazine, the mini mini quilt spark is being fanned back into life with a Mini Mini Quilt Challenge. You can see a fun inspiration gallery of mini mini quilts in the recent issue of Make Modern (Issue 11), including a couple made by yours truly, and there’s a community wide challenge running now through June 20th to help inspire more mini mini madness. Read more about the challenge here, or check out the hashtag #MMminimini to see what creative mini mini quilts have been created thus far (and add your own to the pool!).
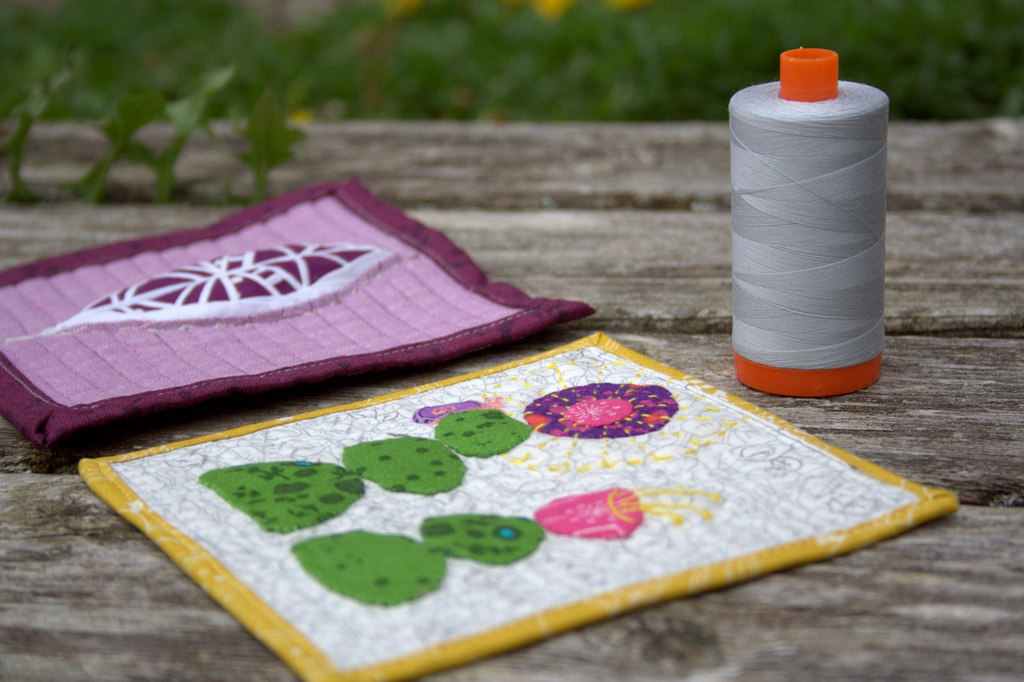
I’d like to say the mini mini quilts I’m sharing today are newly inspired and whipped up in response to this fun challenge, but no. I’ll be honest. I began both of these many, many months ago, and they were worked on at a snail’s pace, off and on. I’m almost embarrassed to share these finishes, since they have taken me so ridiculously long to finally finish. But I know that you understand, and that you would want to see the finished mini mini quilts even if it took over 8 months (gah!) for me to finally buckle down and finish them. So, without further delay, my latest mini mini quilt finishes:
Slow Growth
This mini mini quilt was made for Allison at Campbell Soup Diary (you can see the amazingly wonderful mini minis she made me here and here). When we first decided to exchange mini minis, she offered this as guidance: “As for colors that I like… AG grove in grass green is THE perfect shade! I tend towards pinks, purples, oranges, yellows, but generally stay away from blues unless it’s a really nice royal. Turquoise is great, but red is the one color that is almost always left out of my color palette. (don’t ask me why, but I even avoid it in my garden and my wardrobe) If given the choice between straight lines and wonky, I prefer straight. I love natural and soft shapes, but I also realize that that cannot easily be pieced.”
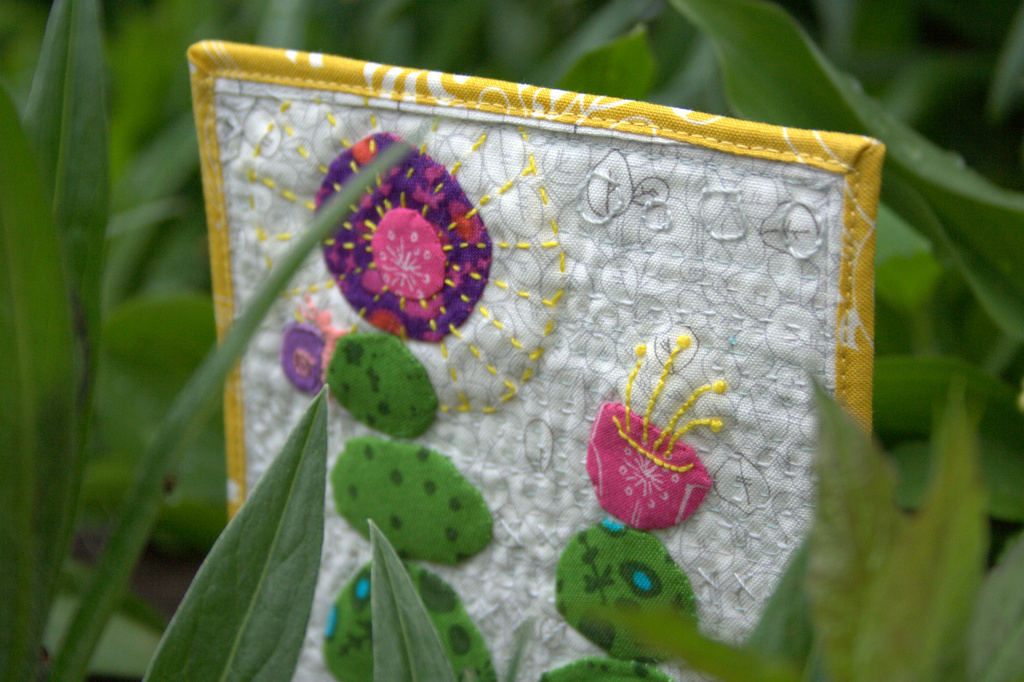
For some reason, I latched onto the AG grove in grass green (of course), paired with the favorite colors of pinks, purples, oranges, yellows. I wanted to create something with natural and soft shapes, so immediately thought of needle-turn applique. The rest of this mini mini just sort of happened as I stitched. The mod leaves and flowers are needle-turn appliqued, and then I used 12 wt Aurifil thread to embroider details on the flowers.
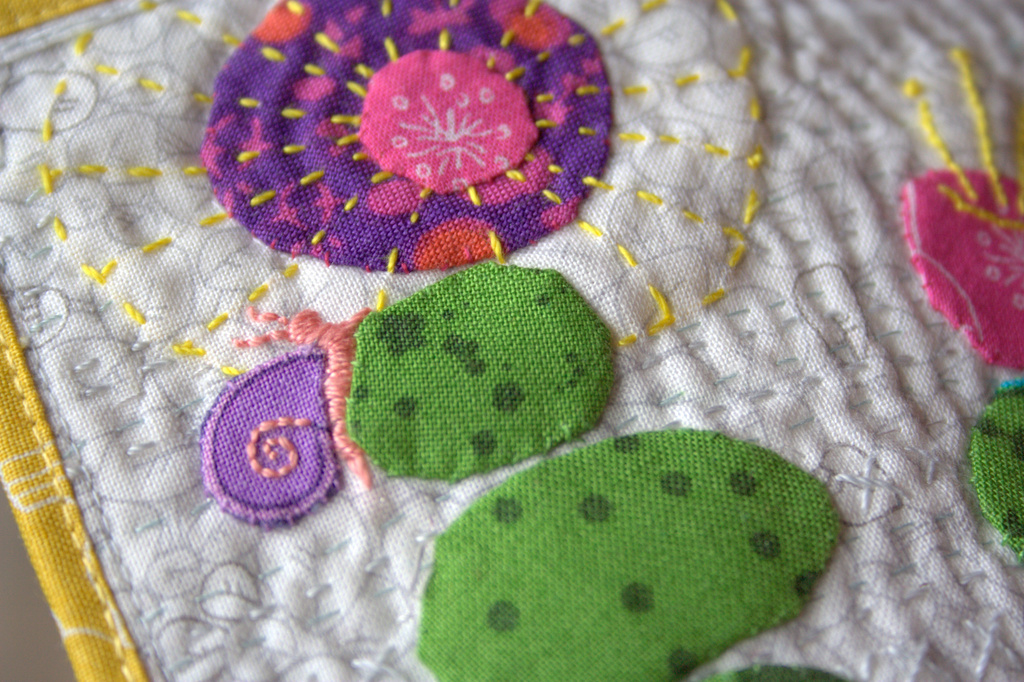
The snail was not initially intended to be part of this mini mini, but in fact was the result of a mini mini travesty: my three year old son found my little scissors and in playing around, cut a small hole right in the mini mini quilt!! After taking many deep breaths, probably yelling at least once and emphatically saying that it was NOT ok to cut mommy’s sewing, I decided to make lemonade out of lemons and needle-turn a little patch over the hole. With a bit of embroidery embellishment, a little slow growing snail was born. It ends up this snail was the perfect symbol of this project, and ultimately inspired its name: Slow Growth.
I densely hand quilted this mini mini with a variety of weights of Aurifil 2600-Dove (50wt, 28wt, and 12 wt), essentially hand-matchstick-quilting the 5″x5″ quilt. I improv-ed the quilting and included a few rows of X’s and one of little bubbly O’s for interest. I used a super thin binding for this (1″ strip to start, single fold), and although finicky to sew on, I really like the feel and aesthetic of the skinny binding. Even if it took ages, there are many positive, grateful, creatively generous thoughts stitched into this mini mini, Allison! I hope you like it!
Too Tiny
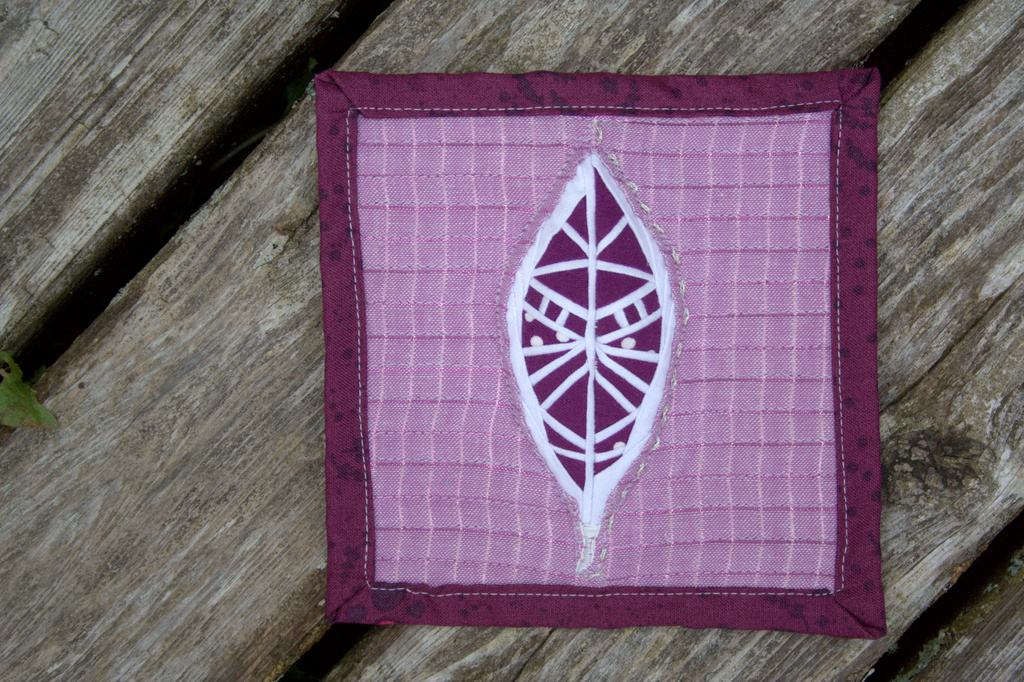
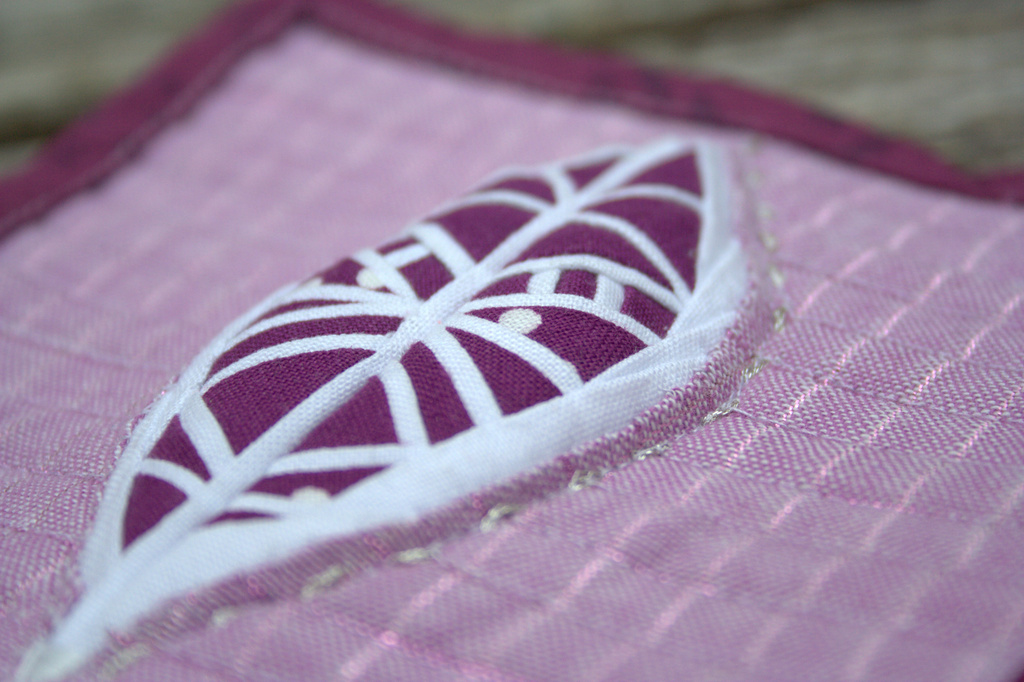
This next mini mini quilt was an experiment in how small can you go, and I determined that I reached my tiny threshold, at least with this foundation paper pieced pattern. The intended recipient of this mini mini is a big fan of the color purple, and I also knew I wanted to make her a feather mini mini. I wanted it to be unique, though, so I designed my own teeny foundation paper pieced pattern of a geometric feather.
I absolutely love tiny stitching, mostly because of the giggles that reflexively bubble over while I’m piecing the ridiculously tiny pieces. This tiny feather was no different, until it came time to sew the two sides together. The seam was crazy thick; so thick, I had to hand crank my sewing machine to get the needle through it without breaking (I broke a needle trying the first time). With a seam that thick, you can guess how great my chances of pressing it flat might be–slim to none! My solution? I stuffed actual wool batt behind the feather and then quilted around it as best as I could. It’s not exactly trapunto; it’s more a stuffed feather!
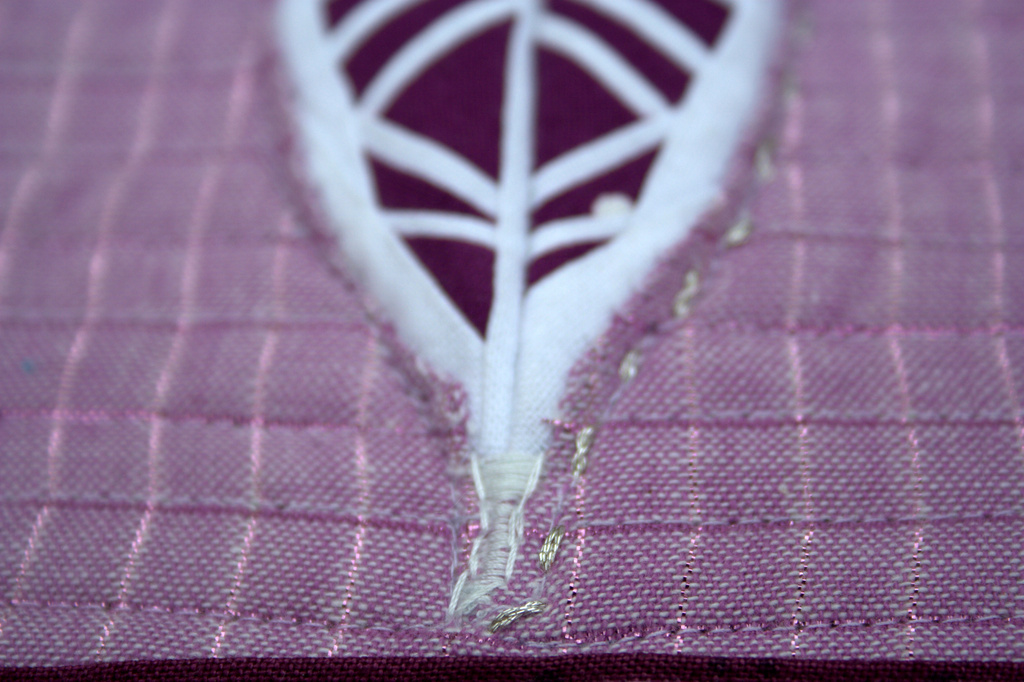
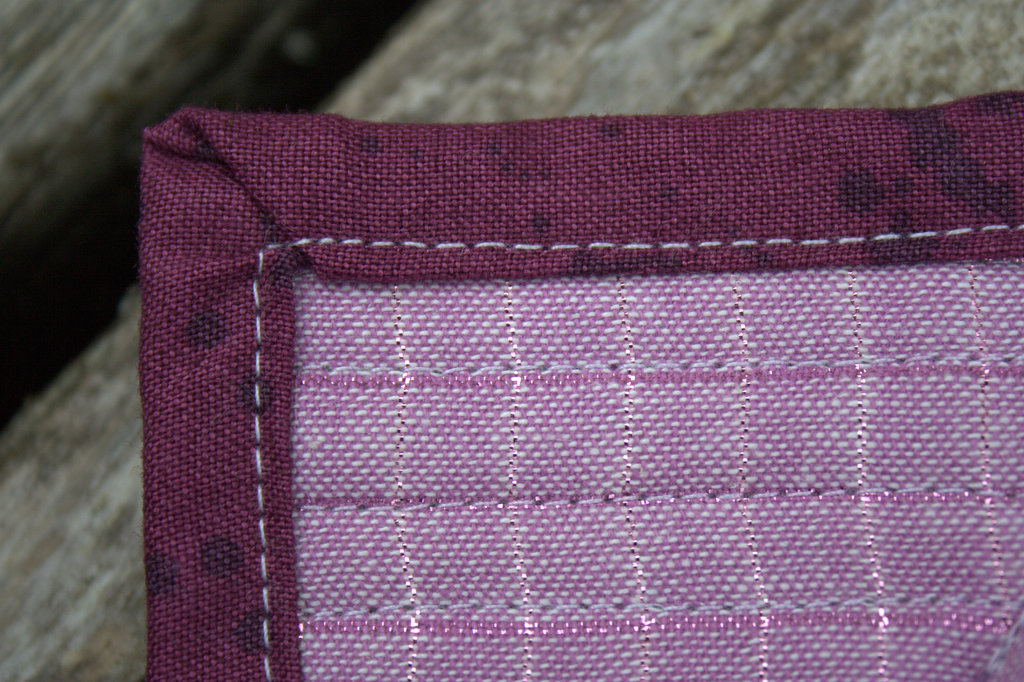
My reverse needle-turn applique skills have room for improvement, and the shaft of the feather didn’t work as well as I had hoped. I decided to embroider over it with 12wt Aurifil to try to give it a more intentional look, and I’m much happier with the result. The Anna Maria Horner loominous fabric was the perfect background, and I machine quilted horizontal lines with 50wt Aurifil 2560-Iris.
I used the backing as binding and folded over a larger portion on this mini mini quilt, since I felt it needed a stronger frame due to the visual weight of the 3-dimensional feather. Mini mini quilts certainly keep me humble, since every little stitch is visible, and the wobbles and less-than-perfect corners are part of the charm.
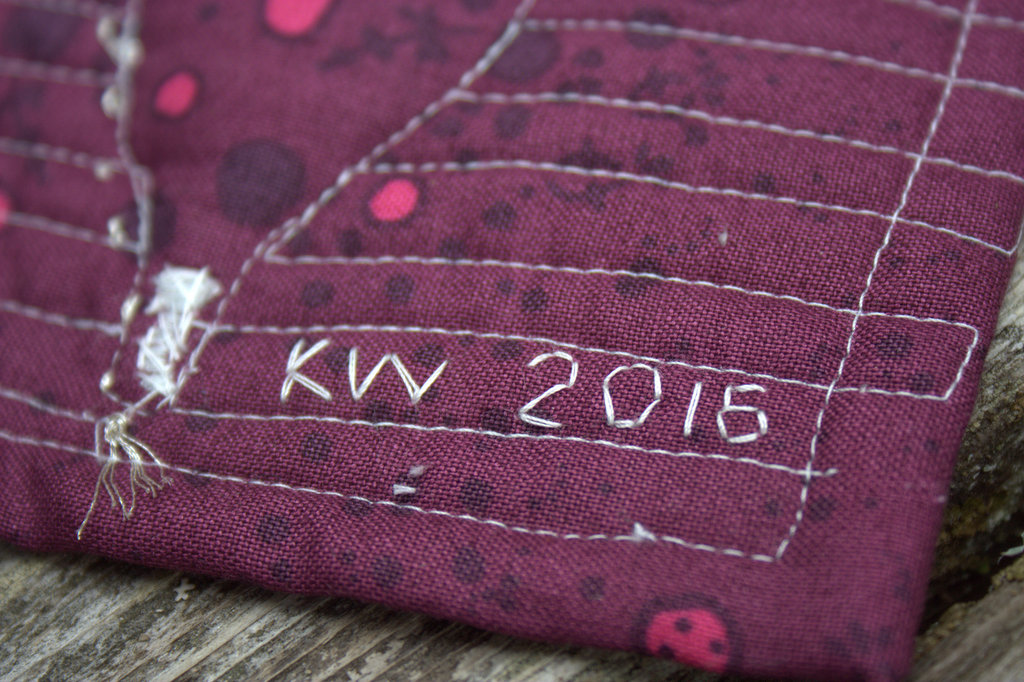
I signed the back with quick embroidered initials and date, since I feel strongly about signing all creations, no matter how small.
Both of these mini minis are going in the mail today. Once I finish a bit more of the projects on my to-do list, I am sure to revisit the mini mini quilt making scene. I still have one more promised mini mini quilt that is in progress for a friend who has already sent one in return (ages ago), and my very first mini mini swap for which I need to redo the binding. I think I agreed to swap with at least two others, but we left it open and relaxed and since I have not received a mini mini in return, I don’t feel *quite* so bad letting the creation of my mini mini quilt slide. All in good time, right?
Have you made a mini mini quilt yet? If you feel so inspired, I encourage you to post a photo on Instagram with #MMminimini to join the fun (and enter to win prizes!). I’d also love to see it, so tag me @nightquilter so that I can see your tiny beauty!
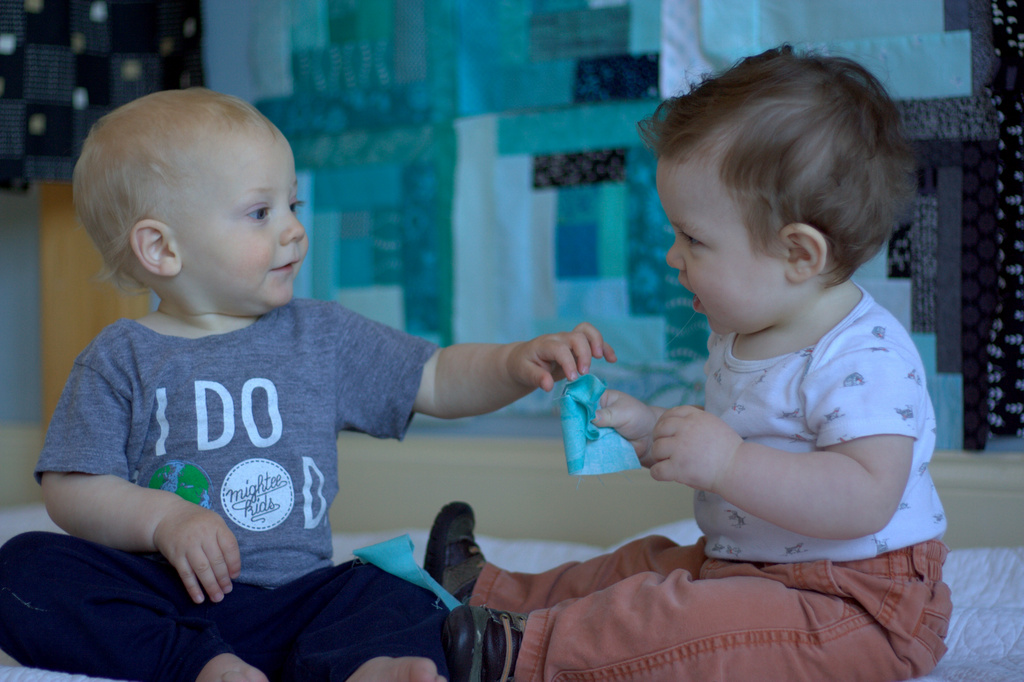
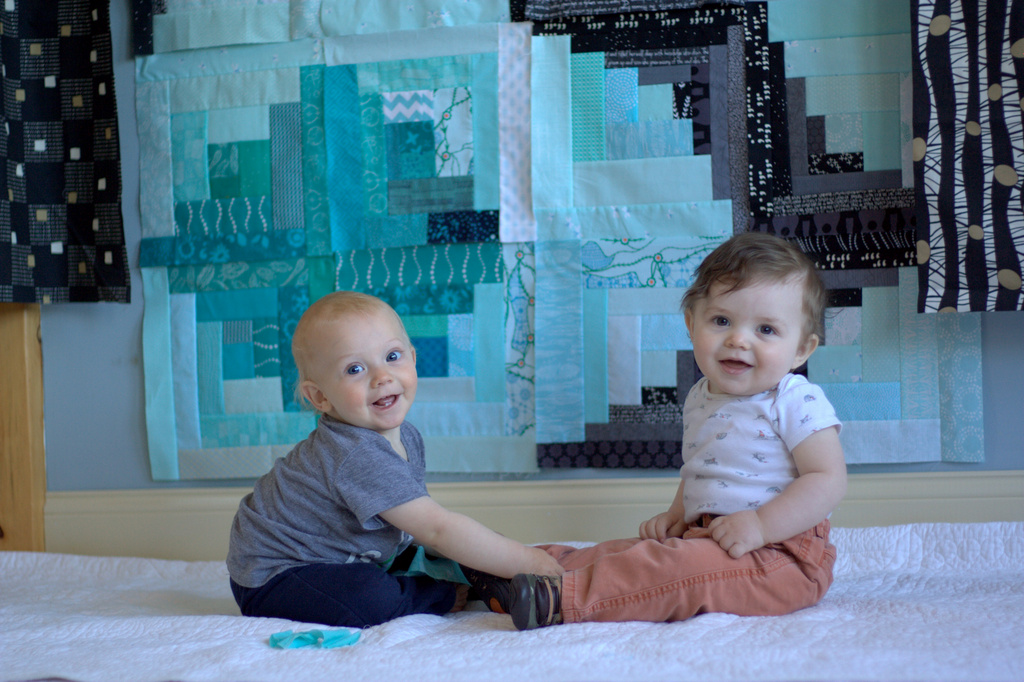
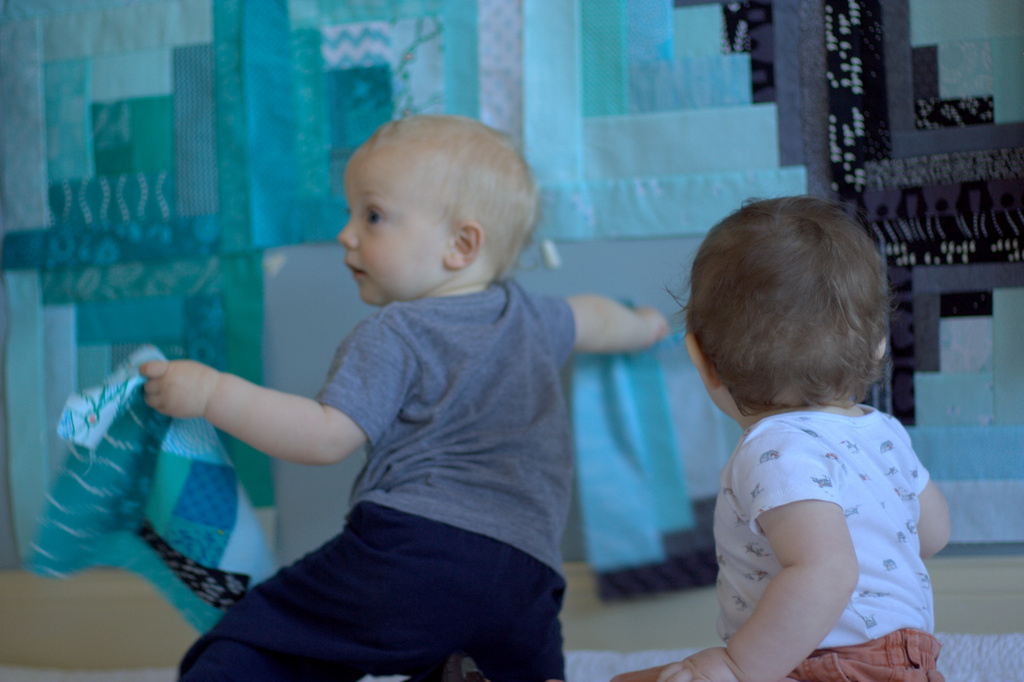
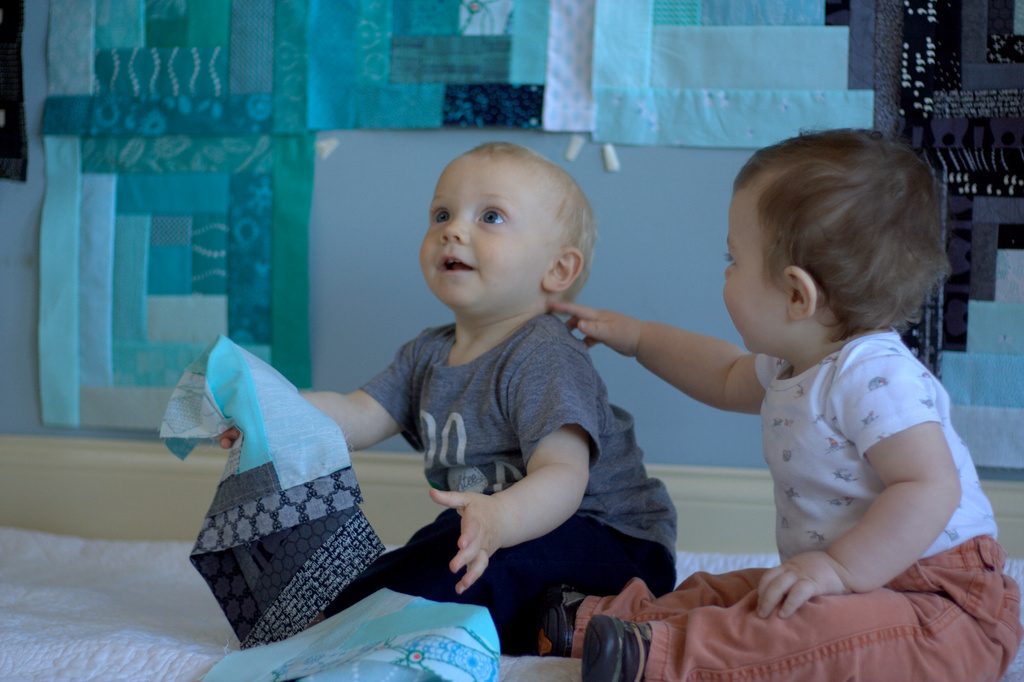
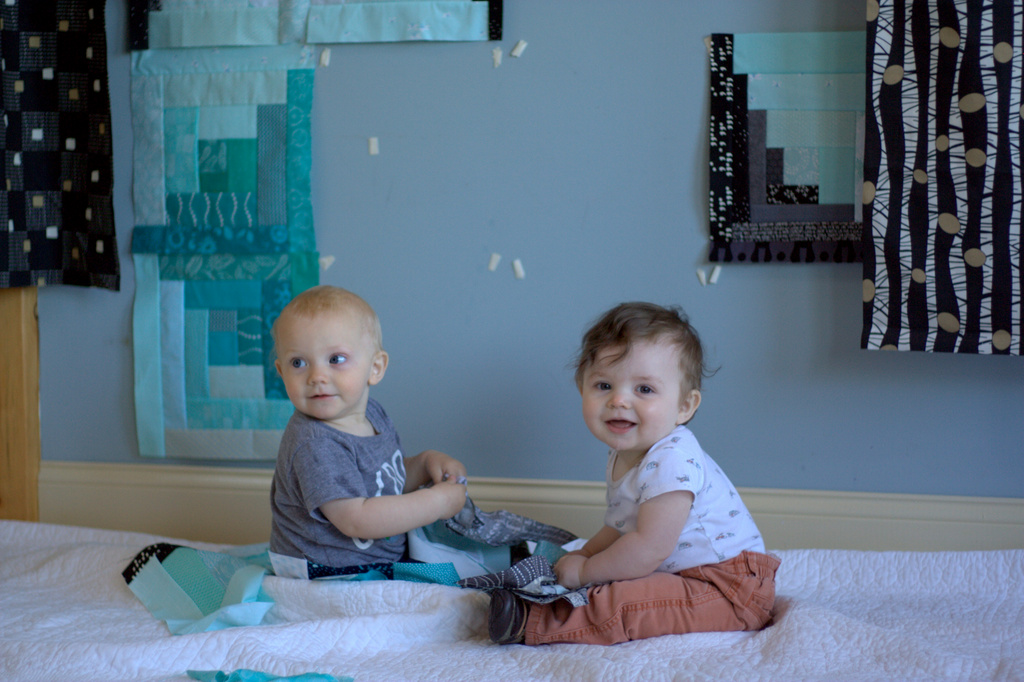
I’ve been here every day, experiencing every moment, yet still it’s hard to believe my baby is nearly a year old. Finn is walking more and more, beginning to talk a bit (he clear as day said “yes” when I asked him if he wanted more milk last night, and “mama” is a regular), he’s learned how to tell me when he doesn’t like something, and his wonder of the world around him only grows. I know that he has a lot more growing and developing to do, but his milestone quilt is nearly finished. I had to laugh to myself a bit a few weeks ago when Finn threw his first fit. You know the kind, where he gets his hands on something he really shouldn’t have (in this case, a pony bead that he surely would try to eat), you take it away, trying to distract him with something else, but still he whines, arches his back and makes it known that he is NOT happy. My first thought was, “Awww cute! Finn learned how to throw a fit!” True tale sign he’s my third child. While it’s still a bit cute when he throws a fit, I’m sure it will get old long before he outgrows it. But still, he’s such a blessing. Looking at these photos, you’d never think he’d be capable of throwing a fit. Now that walking and moving is old hat for Finn, this photo shoot was quite a feat. Just about as soon as I set him down standing, he’d start to walk toward me. Adorably cute, yes, but jolting movement doesn’t bode well for clear photos. Still I managed to get a few good ones, and of course I’ll be sharing them here. This month, we had some friends over during his photo shoot (which actually happened this morning!), so his friend Ronin joined him for the photos. Ronin is a few months younger than Finn, but it was fun to see them interact. Here I was asking and signing to Finn, “Where’s your friend?” I’m trying to sign all the time to Finn and it’s slowly starting to show. He finally signed “more” while eating eggs the other morning, and I think is beginning to sign “milk” and perhaps “all done”. He seems much more interested in verbal communication, and it sounds to me like he says: mama, milk, more, Maddie, Max, water, yes, and perhaps a few more. The development of a human brain blows my mind. Once again, the highlight of the day was ripping the blocks off the wall. Here Ronin looks on as Finn takes the first block down, and turns to check with Emily (Ronin’s mom) to make sure it’s ok.
How happy do they look!?
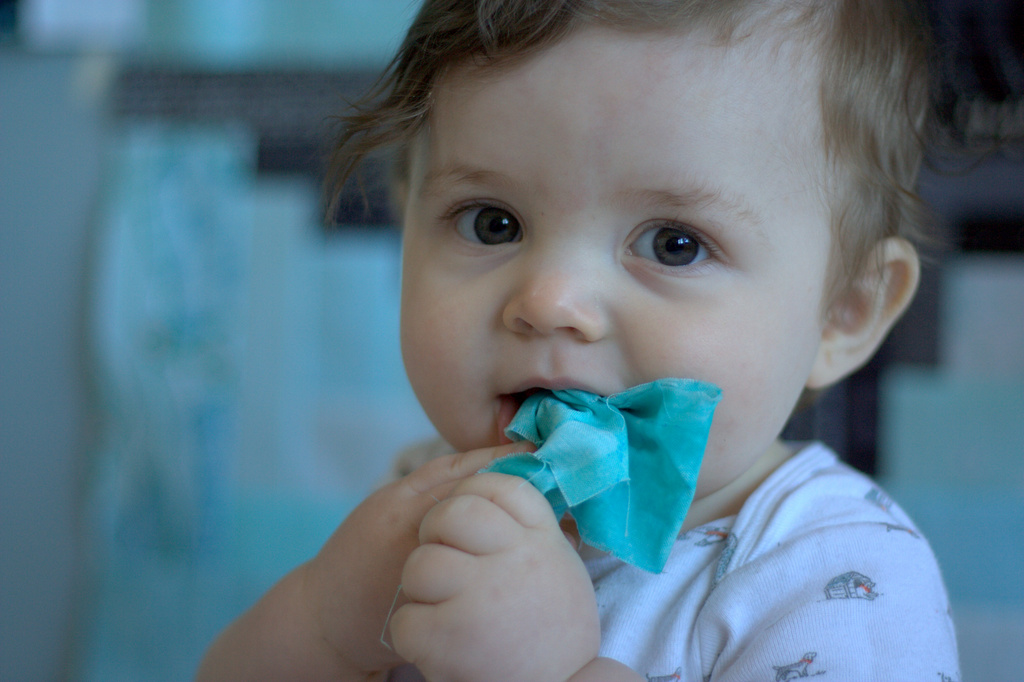
Once I gave them the go ahead, it was a quilt block grabbing, tasting, throwing free-for-all. Ronin especially enjoyed the tactile-oral quality control job. Such adorable kids.
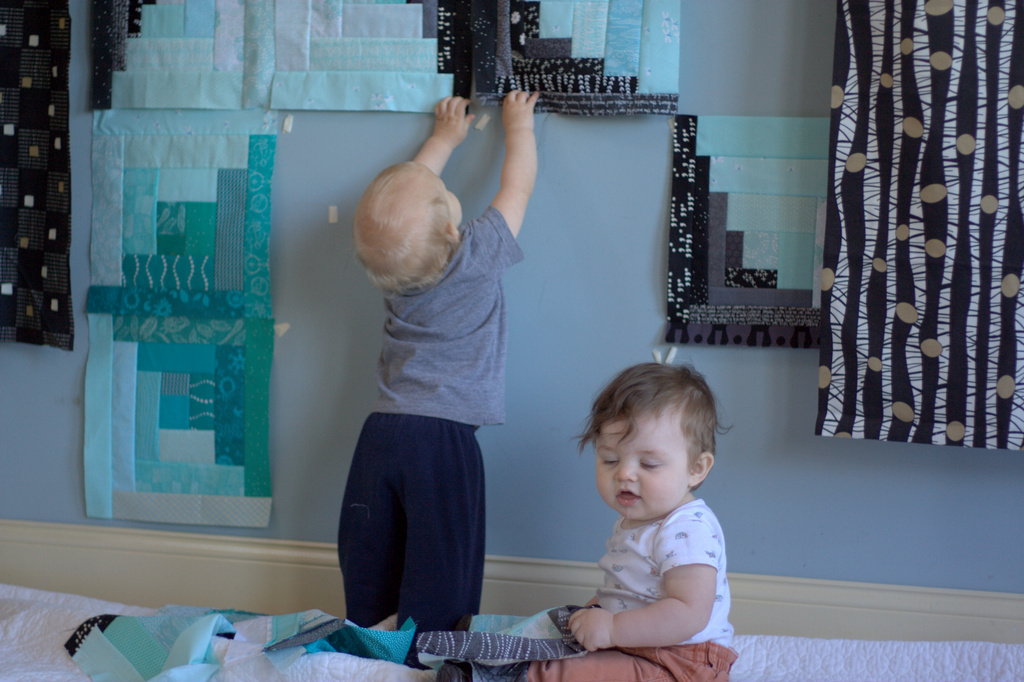
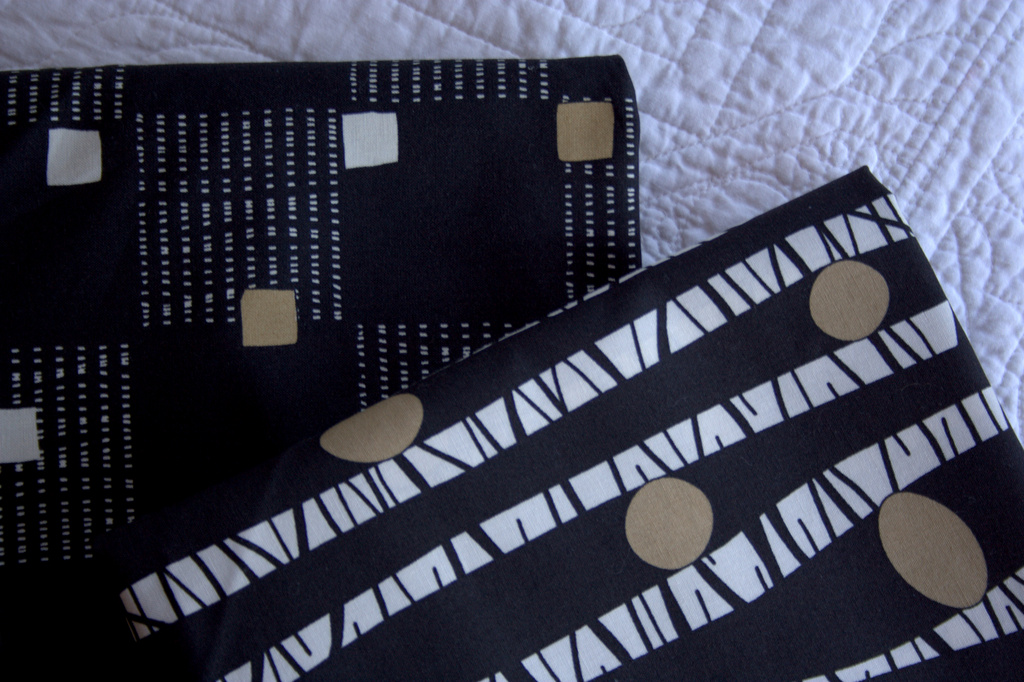
As you may have noticed in some of the photos above, I recently found potential backings for Finn’s milestone quilt. While doing a bit of quilt shop hopping during Maine’s April quilt shop hop, I spotted two prints that stuck with me at Mainely Sewing. After walking through the shop, I found myself coming back to these two.
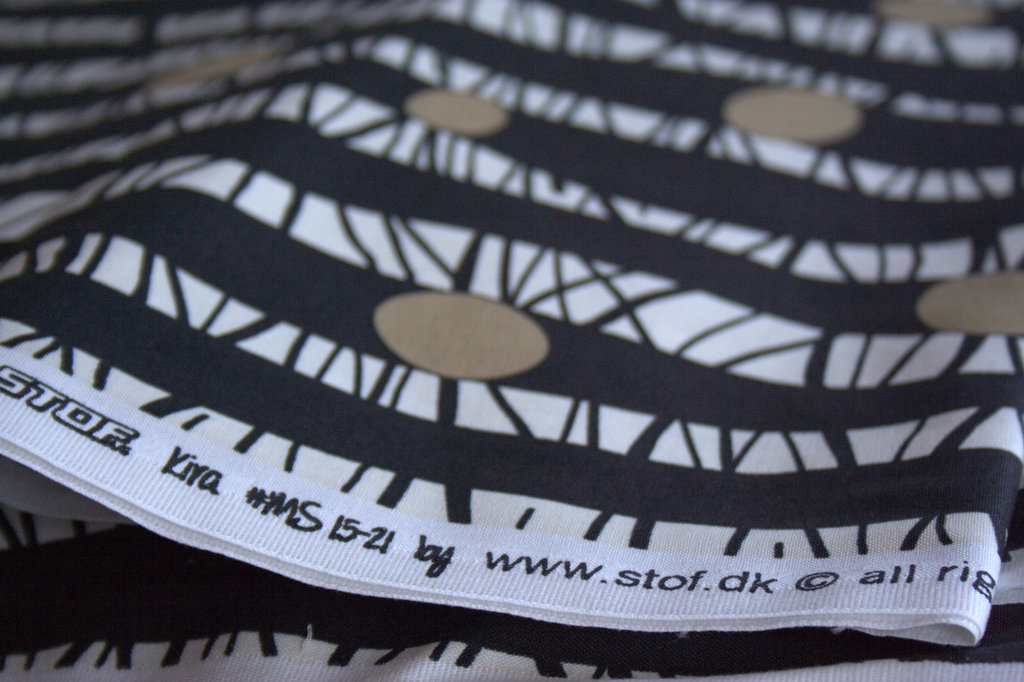
They are by Stof Fabrics, which is a fabric company unfamiliar to me before now. The fabric feels sturdy and smooth, and based in Denmark, I anticipate high quality. After much deliberation, I bought a couple yards of each print, just in case. I haven’t seen them elsewhere, so I thought it was a wise purchase.
To be honest, the print that looks like birch trees was the one I thought I’d use for the backing, until seeing them hanging next to the quilt. Looking at the photo above, I’m leaning strongly toward the print on the left. I love the pops of gold in both of them, since some of the fabrics I used in the quilt blocks for the front have gold details, and the square geometric pattern reflects the log cabin structure. I can see this quilt coming together, and it’s such a fun sight!
I deliberated over which photo of Finn to use for his 11 month block photo, since this one of him carefully standing is pretty adorable, but I ultimately chose the one with him leaning over, peeking out into the kitchen where Emily and Max were talking.
This photo seems relevant to his stage of life right now–wanting to get into the mix, discover everything, and communicate and run with the big kids. He’s getting awfully tall, too! One more month before he’s a one-year-old! I’ll check in again next month to share the celebration.
For those of you new to this project, you can see the full quilt layout plan, HERE in the 3 month post. You can see the full progression of Finn and his quilt’s growth so far HERE or by clicking the “Milestone Quilt” tab at the top of my blog. Thank you for joining me on this journey!
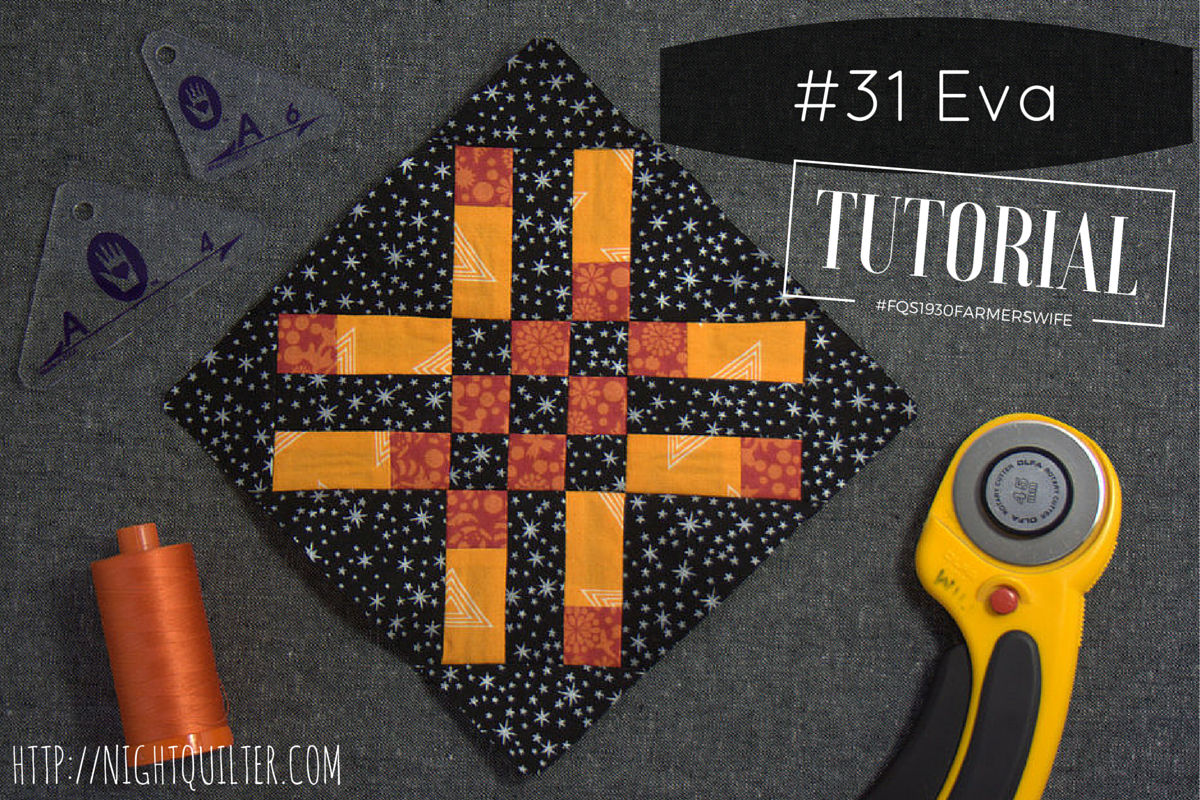
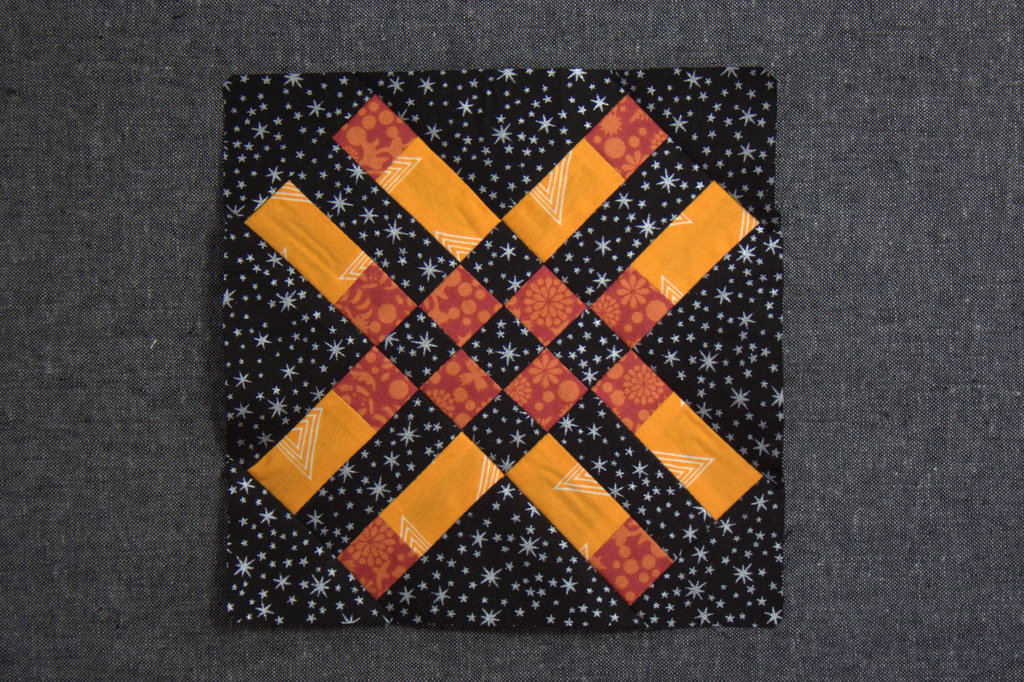
As with Autumn, a first look at block 31 Eva may cause you to balk: 37 pieces in one 6″ block, and many of them are tiny squares!? But with a creative look at the block construction, Eva can come together smoothly and without too many teeny pieces. This sew along continues to show me that there is nearly always a faster and easier way to approach block construction than purely cutting out all of the pieces and sewing them together. With a few shortcuts and piecing tricks, Eva comes together quite smoothly. In this tutorial, I’ll show you how to use strip piecing to save a bit of time and create larger, more manageable pieces, and fill in the gaps using Marti Michell templates (Set A) or rotary cutting to help make putting Eva together smooth and enjoyable.
Note: Exact measurements for the pieces needed to construct this block will not be provided in this tutorial in order to protect copy write. It is a prerequisite of making this block that you have a copy of the book, The Farmer’s Wife 1930s Sampler Quilt: Inspiring Letters from Farm Women of the Great Depression and 99 Quilt Blocks That Honor Them. All measurements can be found in this book and its associated media. That said, even if you aren’t sewing along with us, I think you will find some really helpful tips in this tutorial that will help you look at all block construction more creatively!
Reflection on the Letter – Two Little Sparrows
The letters in this book continue to move me in their honesty and relevance in my life today. It’s amazing how similar the worries of today are to those of the farmer’s wives back in the 1930s. Losing sleep over financial stability seems to me to be part of the human condition. Especially at our current stage of life, growing a young family, recently having bought our first home, and working hard as a one-income family of five so that I may be a full time mom raising our children, my husband and I unfortunately do not escape the worries of making ends meet. Mrs. P. G.’s dream of two sparrows drawing nearer together when faced with the winds of adversity really resonated with me, and gives me renewed hope that “every little thing, is going to be alright” (thanks, Bob Marley, and Mrs. P. G.).
Tutorial
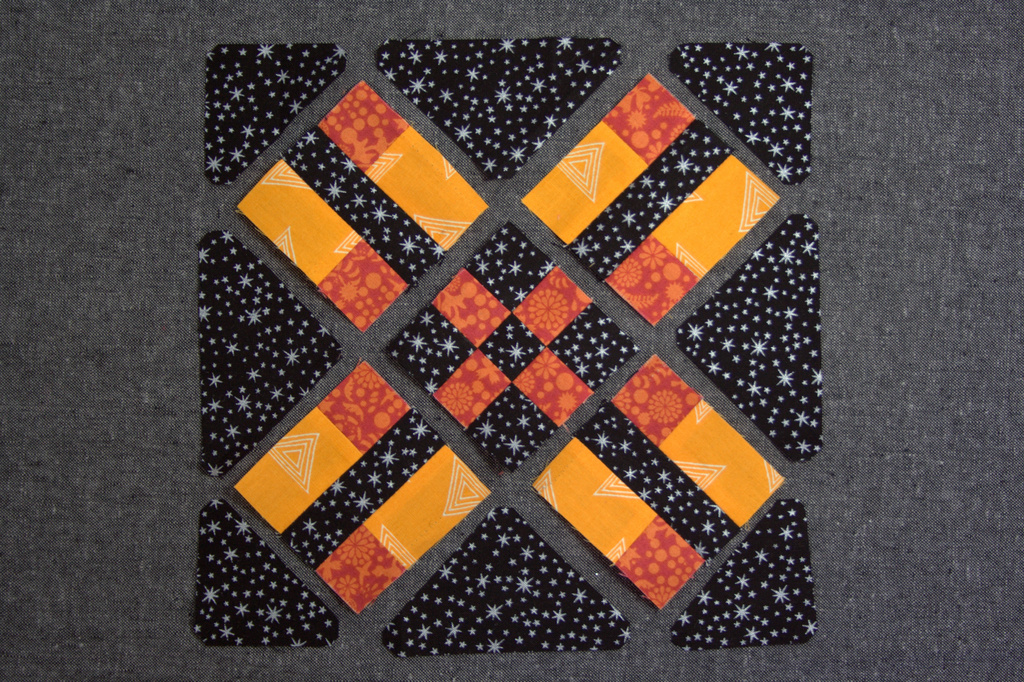
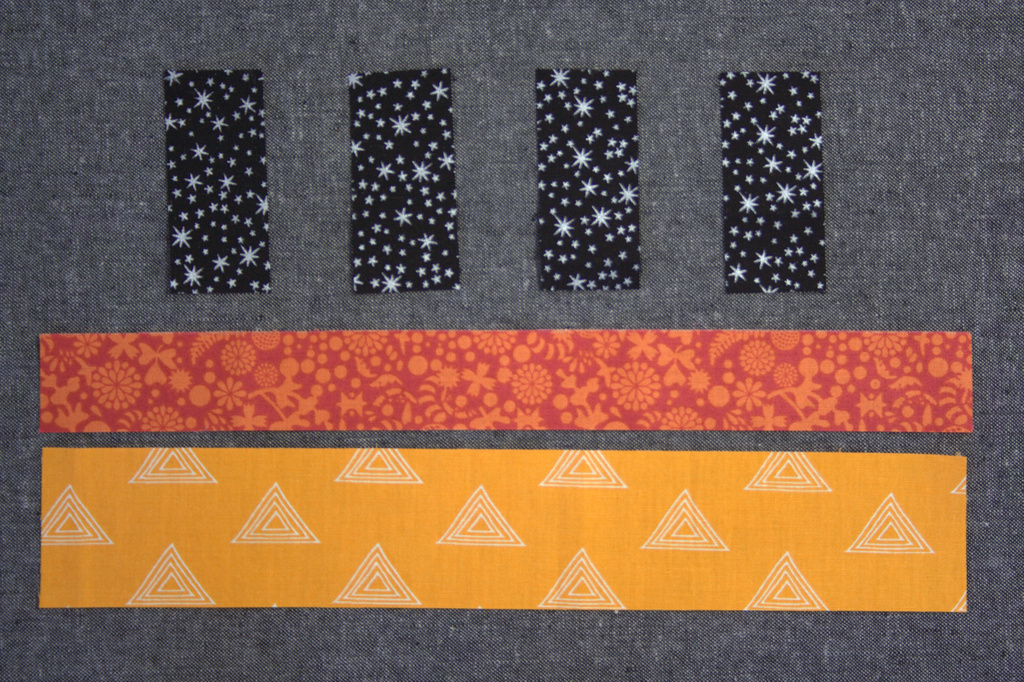
For this block, I specifically chose fabrics with small or nondirectional prints, so that I could quickly strip piece the components without worrying about fussy cutting or directionality. Note that I am arranging my final layout on-point, but for the purposes of being consistent with the diagram in the book, this tutorial pieces the block squared. If you plan to set your blocks on-point, be sure to account for that with any directional fabric placement.
When broken into more manageable pieces, this block is composed of the center 9-patch, two pairs of mirror image blocks, and 8 surrounding triangles, cut with templates and/or a rotary cutter. I first made the blocks using strip piecing to speed up the creation of the components, and then sewed them all together. Let’s break it down.
Making the Center 9-Patch
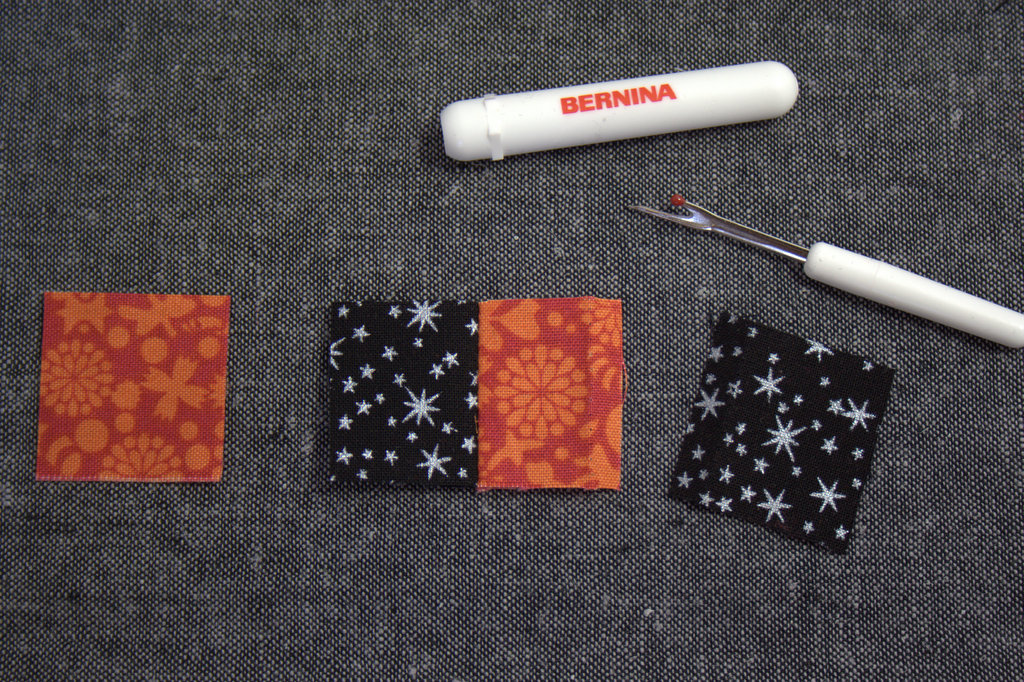
In the book, the cream and yellow fabrics were used to make the #31E 9-patch. Choose your coordinating fabrics (I used black and orange and will refer to the fabrics as black and orange throughout).
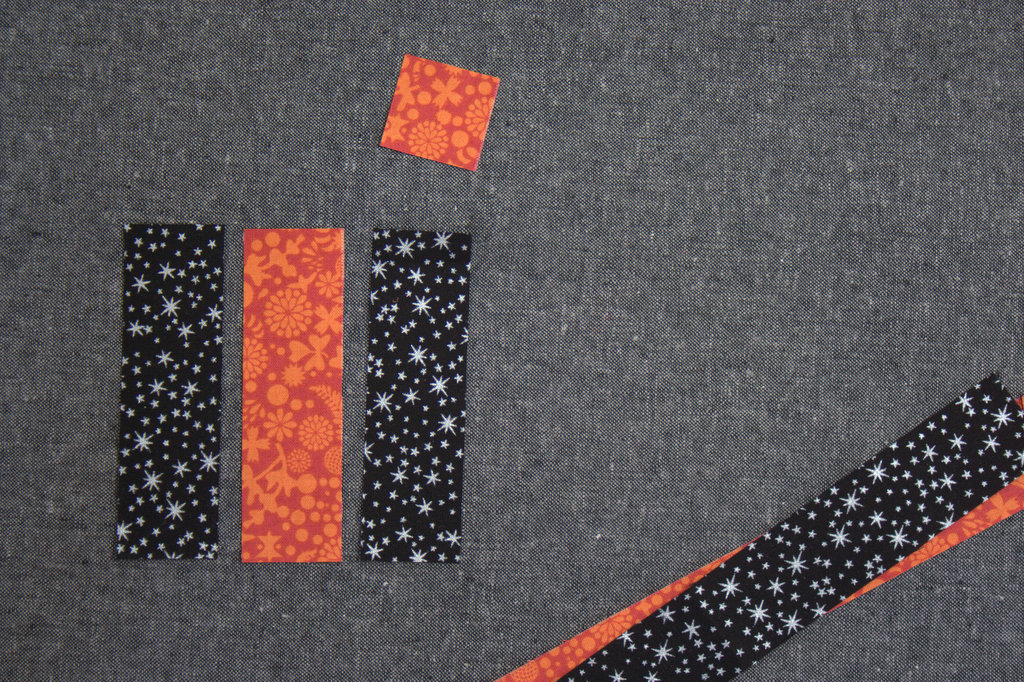
Cut one (1) 1 3/16″ x 19″ long strip of your cream equivalent fabric (I used black). Subcut two (2) 4″ long pieces. Set the remainder of the strip aside.
Cut one (1) 1 3/16″ x 16 1/2″ long strip of your yellow equivalent fabric (I used orange). Subcut one (1) 4″ long piece and one (1) 1 3/16″ square. Set the remainder of the strip aside.
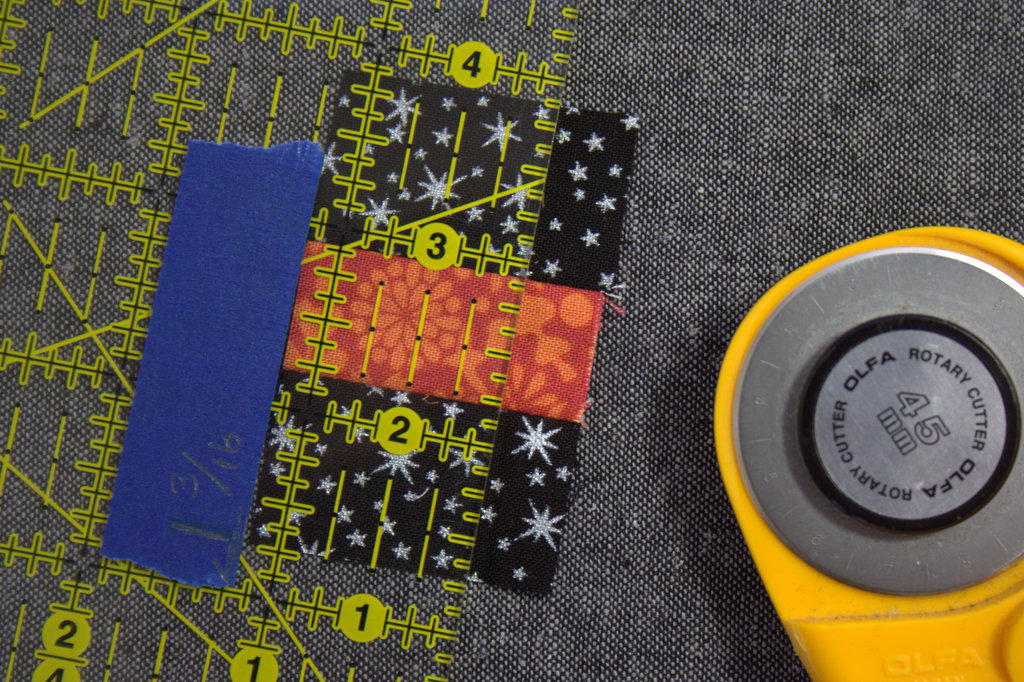
*Measurement tip: 3/16″ is halfway between 1/8″ and 1/4″. Since the 1 3/16″ measure was used so often in cutting for this block, I marked it with painter’s tape on my ruler to help avoid confusion.
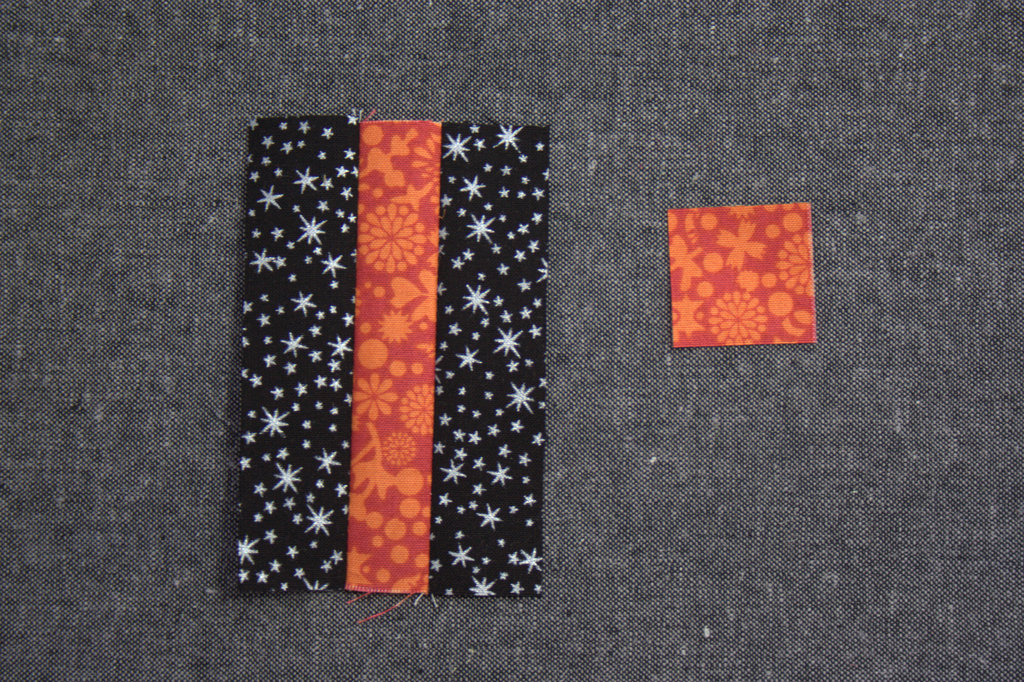
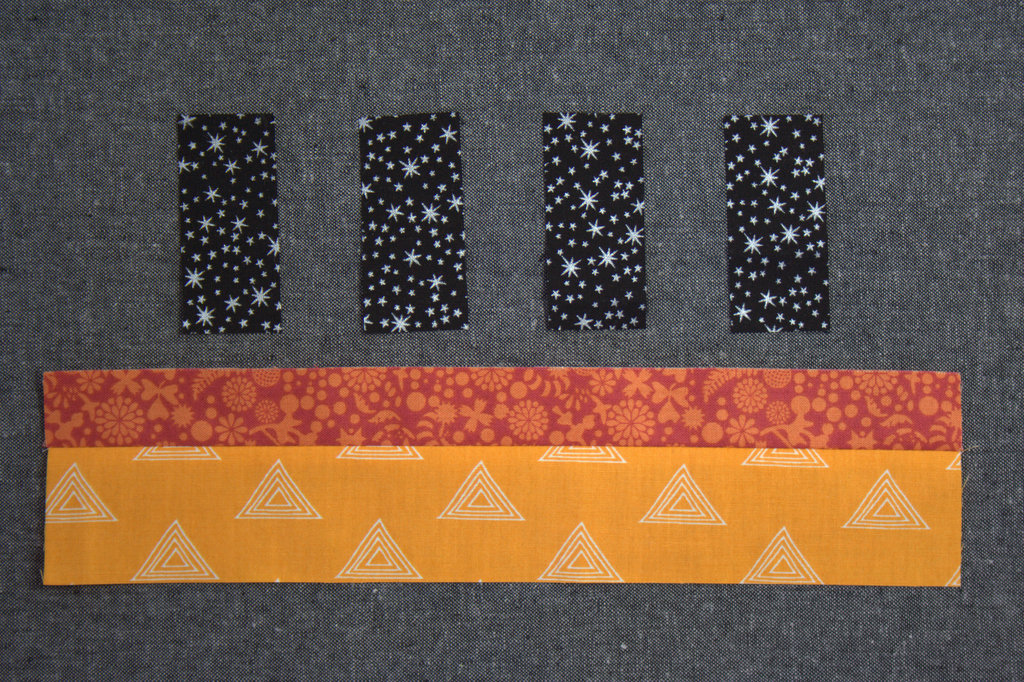
Sew black strips to orange center as shown. I prefer to press my seams open for ease of matching seams and reduction of bulk. Feel free to press open or toward the darker fabric.
Ruler marked with 1 3/16″ measure.
Cut into three (3) 1 3/16″ wide strips as shown.
Next, carefully unsew one of the black squares. Sew the orange 1 3/16″ square to the other side to make the center strip for the 9-patch.
This is a great time to use a leaders and enders project to help smoothly sew these tiny pieces without the fabric getting bunched in the machine. If you don’t have a leaders and enders project in progress, sew through a scrap piece of fabric before sewing the tiny squares together. This will help your stitches stay smooth despite the tiny fabric size!
You now will have your three strips for your 9-patch.
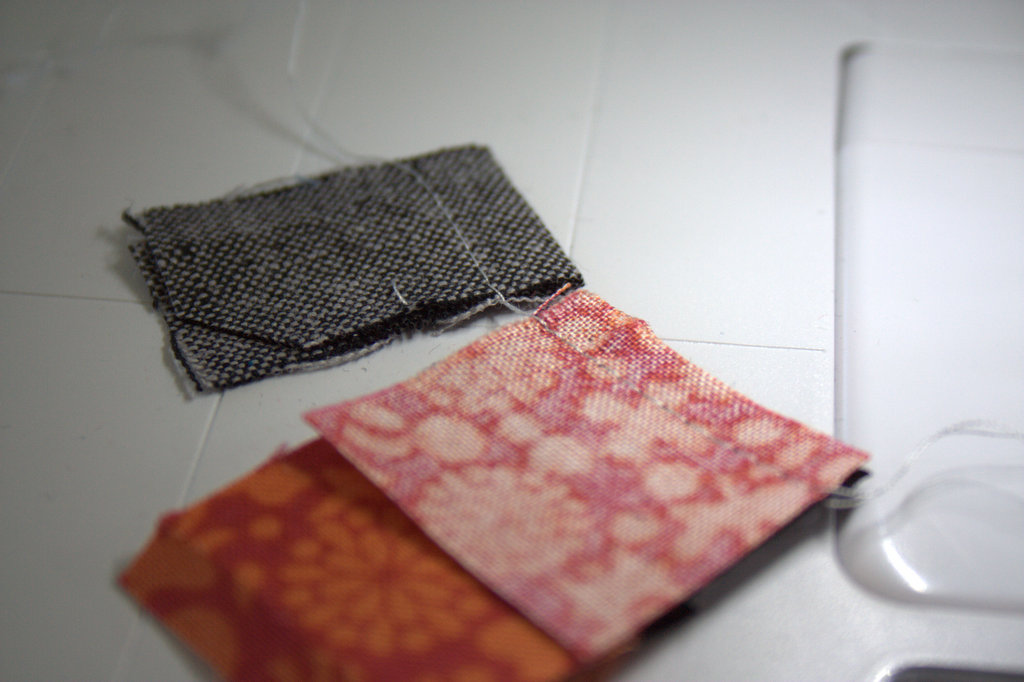
Carefully sew them together, pinning just after each seam join. Press seams open. Above shows my block, front and back. Note how nicely the pressed-open seams sit! Set your 9-patch aside.
Making the Mirror Image Blocks
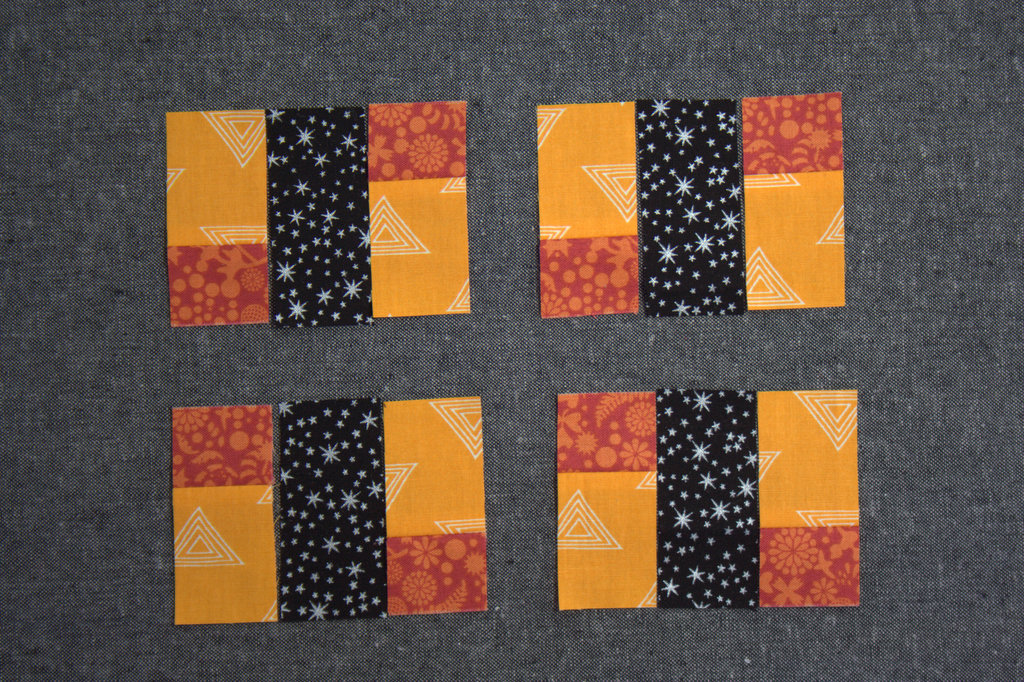
In the book, the cream, yellow, and blue fabrics were used to make the remaining blocks, each comprised of a #31C and two #31D-#31E units. (I used black, orange, and yellow-orange fabrics and will refer to them as such throughout).
Cut one (1) 1 7/8″ x 11″ piece from your blue-equivalent fabric (I used yellow-orange). Retrieve the fabric strips set aside during the 9-patch construction, and subcut one (1) 1 3/16″ x 11″ strip from the orange. From the black strip, subcut four (4) 1 3/16″x 2 5/16″ pieces. If you have the Marti Michell template set A, the A-3 template is exactly 2 5/16″ and can be used to easily cut the pieces.
Sew the orange to the light orange as shown. Press seams open. Subcut the strip set into eight (8) 1 3/16″ segments. Using a ruler marked with painter’s tape as shown previously in this tutorial will help this step go quickly.
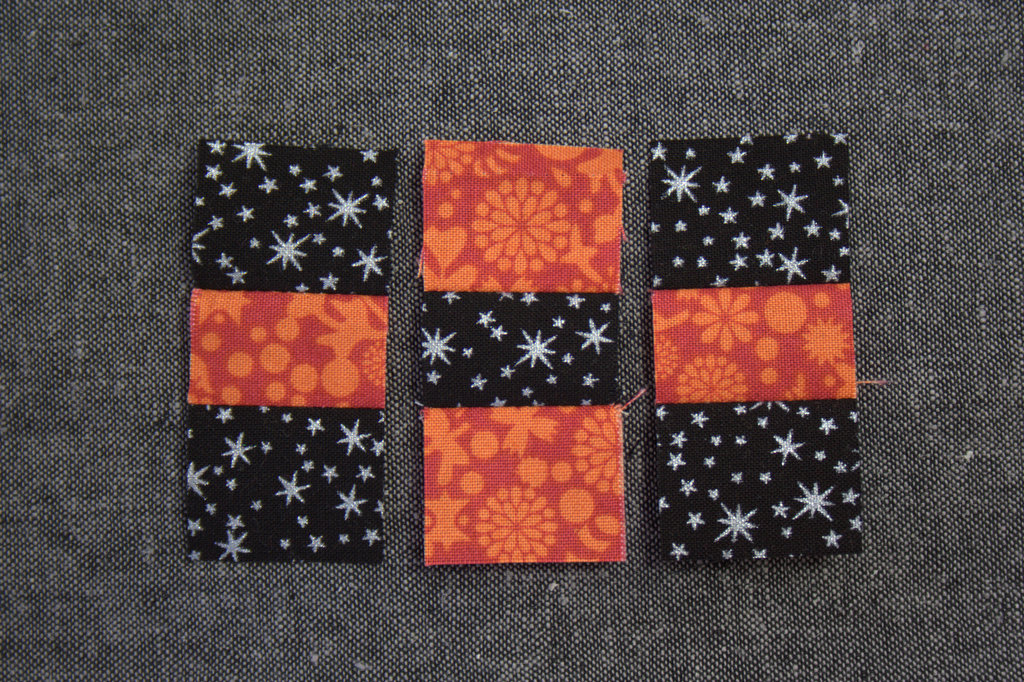
**MIRROR IMAGE ALERT** At first glance the blocks above may look the same, but notice that they are actually mirror images. The two on top are mirror images of the two on the bottom. Carefully arrange your pieces as shown above, paying very close attention to the direction of the orange bits: orange bit facing down on the left and up on the right for the top two; orange bit facing up on the left and down on the right for the bottom two.
Very carefully sew the blocks together, pausing midway to double check the alignment before sewing the second strip onto each center. Press seams open. Set these four blocks aside.
Cutting the Triangles
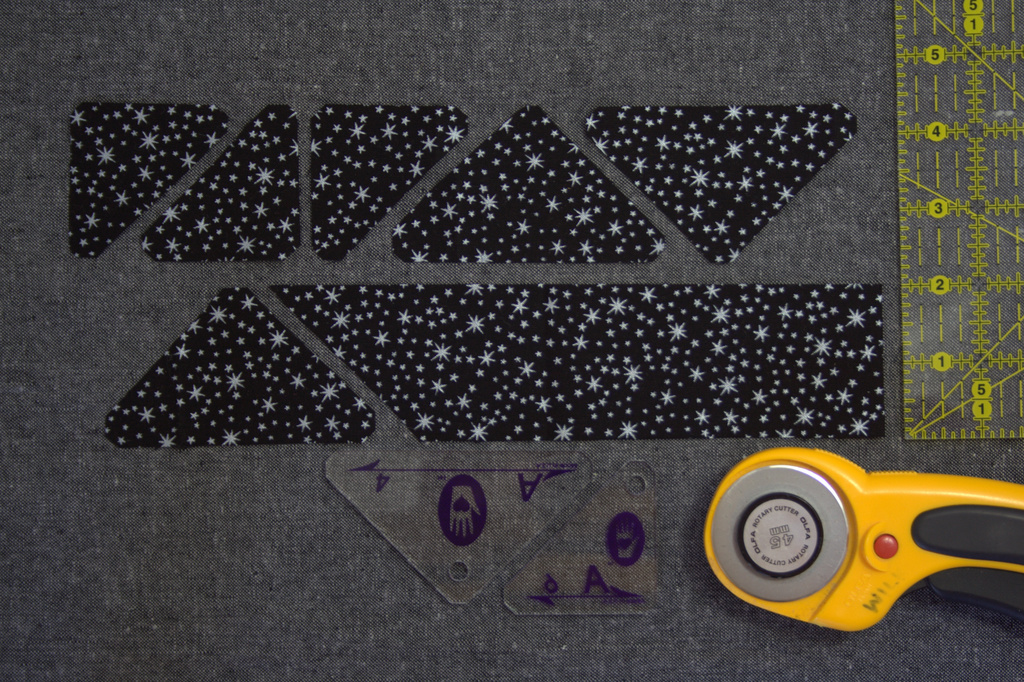
In the book, the cream fabric was used to make all of the triangles that comprise the background of this block. I used black fabric.
Cut a 2″ x 18″ strip of black fabric. Using Marti Michell templates A-4 and A-6 or the templates provided in the media associated with the book, cut four (4) #31A and four (4) #31B pieces. The photo above demonstrates how to efficiently cut the pieces from the 2″ strip. One more #31A (the large triangle) and one more #31B (the smaller right triangle) remain to be cut in the photo above.
Assembling the Block
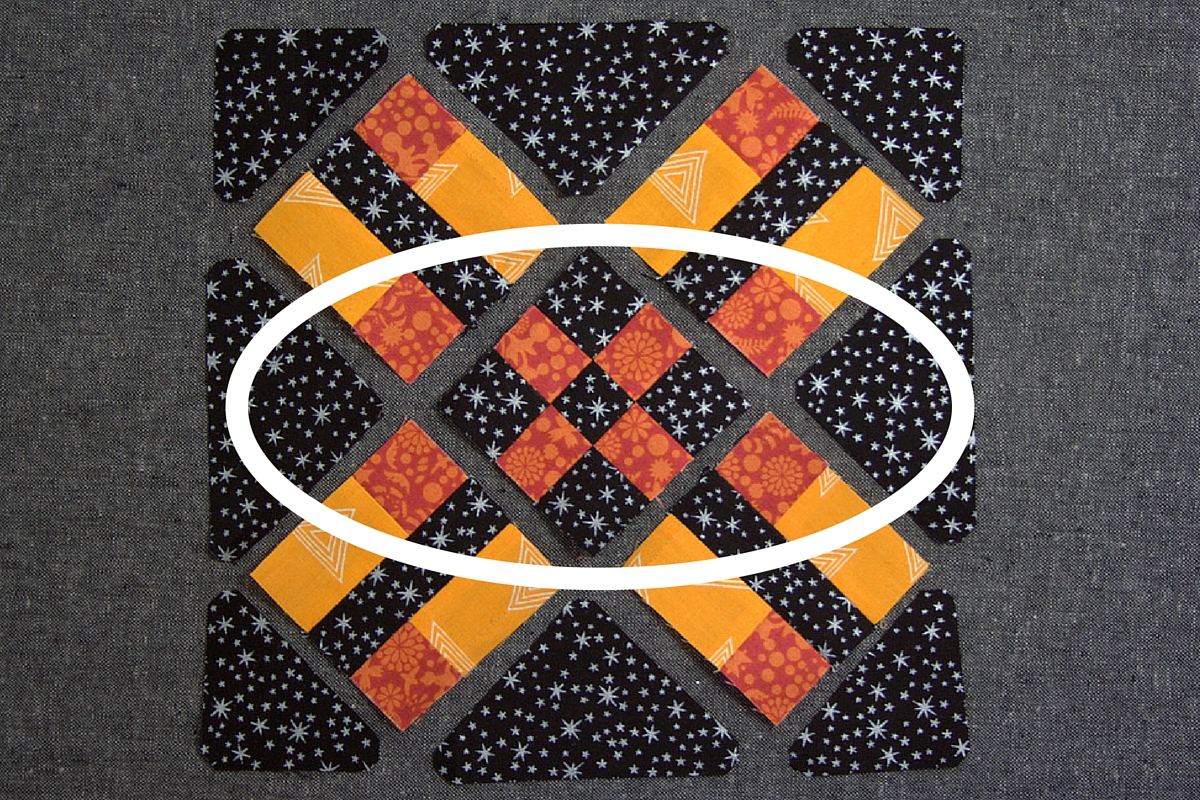
Now you have all of the components necessary for piecing Eva! Grab all of your blocks and triangles and let’s lay them out. Here is where the mirror image blocks can get easily mixed up. Take your time, cross referencing with the picture in the book or the photo above to make sure that all of your pieces are heading in the proper direction.
*Note:The orange squares all converge in a horizontal strip in the center of the block. If an oval is drawn horizontally across the center, it should contain all orange squares.
Once you are sure you have your layout correct, I suggest that you take a photo with your phone for reference. Refer to it before each step, since it’s much easier to take a second look than to rip stitches to resew (ask me how I know! I began assembling the block before realizing that two of my orange bits were facing the wrong direction. Hello, bff seam ripper!)
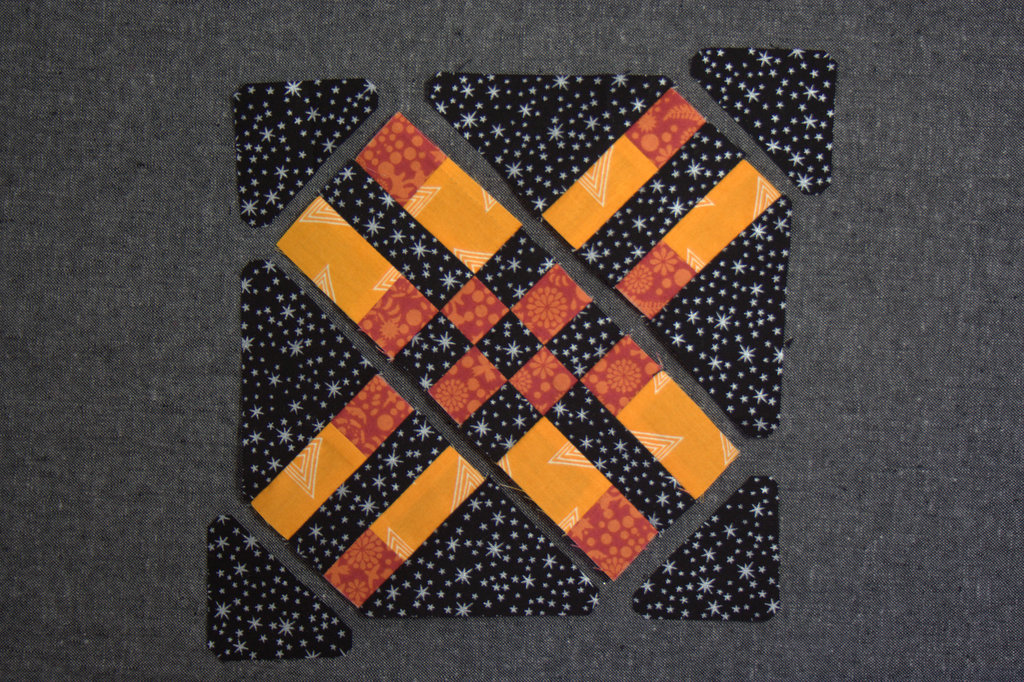
We will assemble this block in diagonal strips. Begin by sewing the large #31A triangles to either sides of the top right and bottom left mirror image blocks, and the top left and bottom right mirror image blocks to the center 9-patch. Press seams open.
Next, sew the #31B triangles onto each unit.
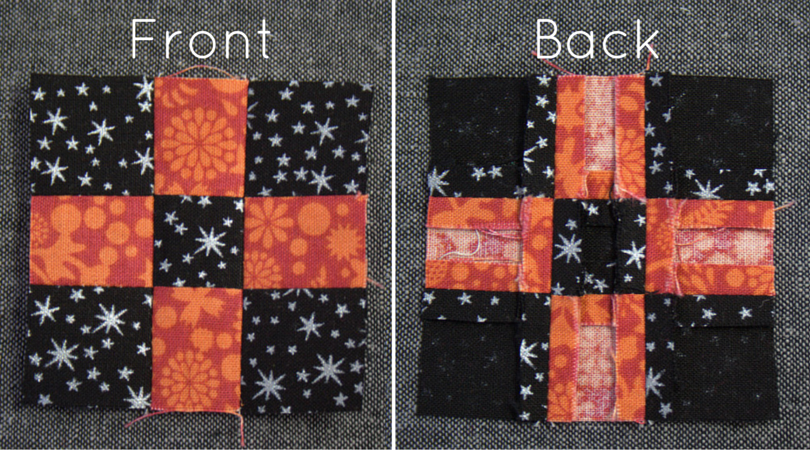
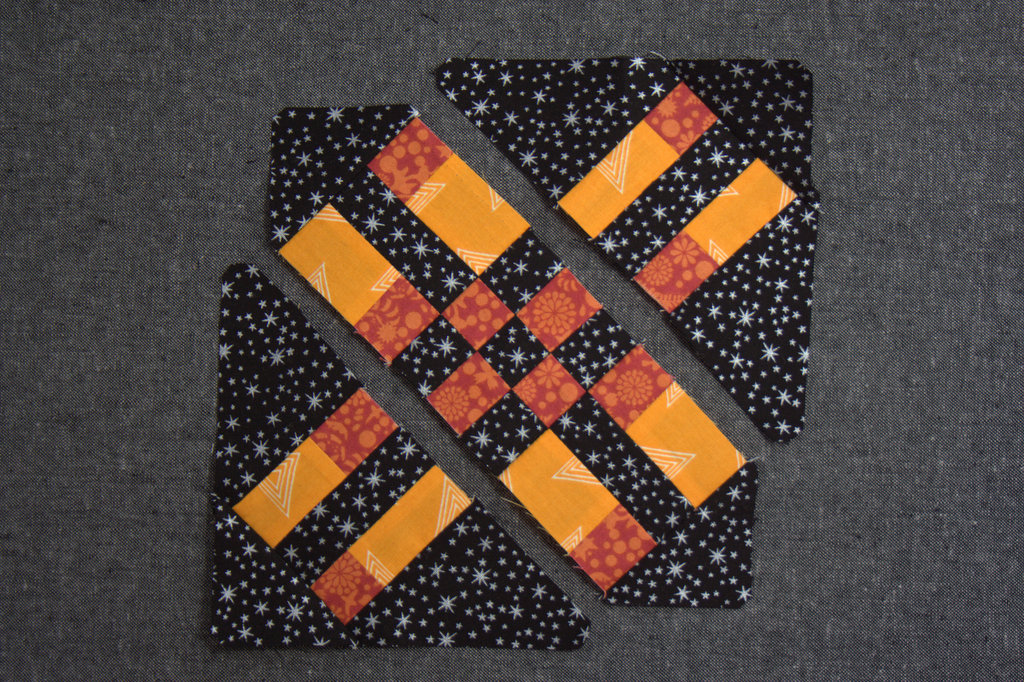
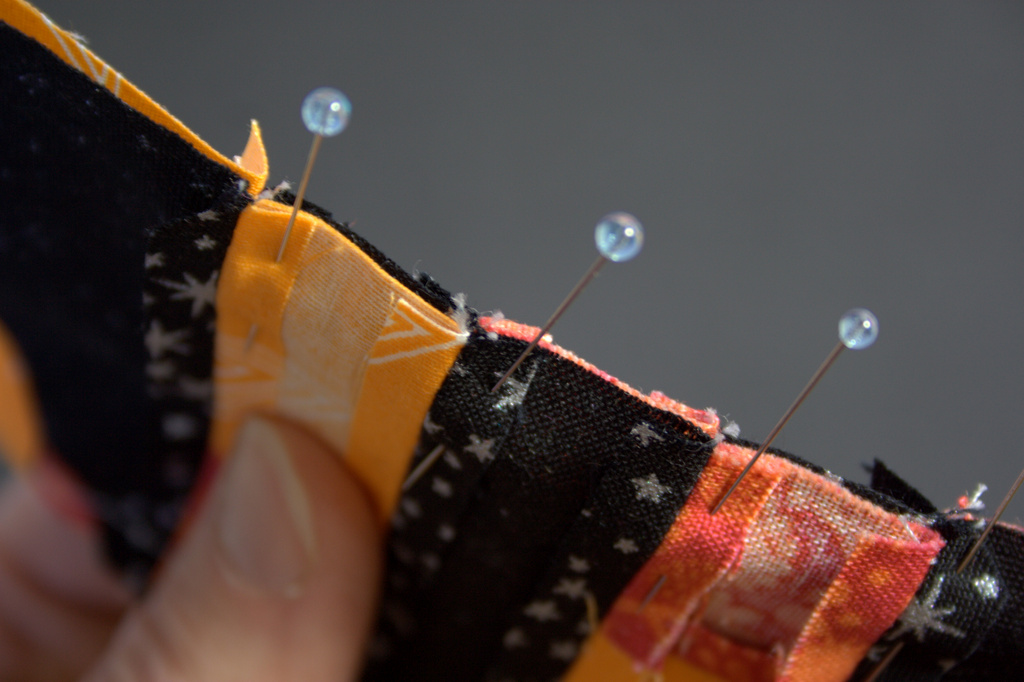
Finally, sew the top right and bottom left units to the center strip. I find it helpful to pin just after each seam match for perfectly matched seams. Between the pressed-open seams and the pin *just* after each seam, my block comes together just how I like it!
Viola! There you have Eva, easy peasy! I love the look of this block set squared, but since my quilt blocks will be set on point, I decided to have her orange strip head uphill, since optimism makes the world a brighter place, and the letter encourages sticking together in the face of the winds of adversity. Chin up, here we go!
Thank you so much for joining me today and I hope you found this tutorial helpful!
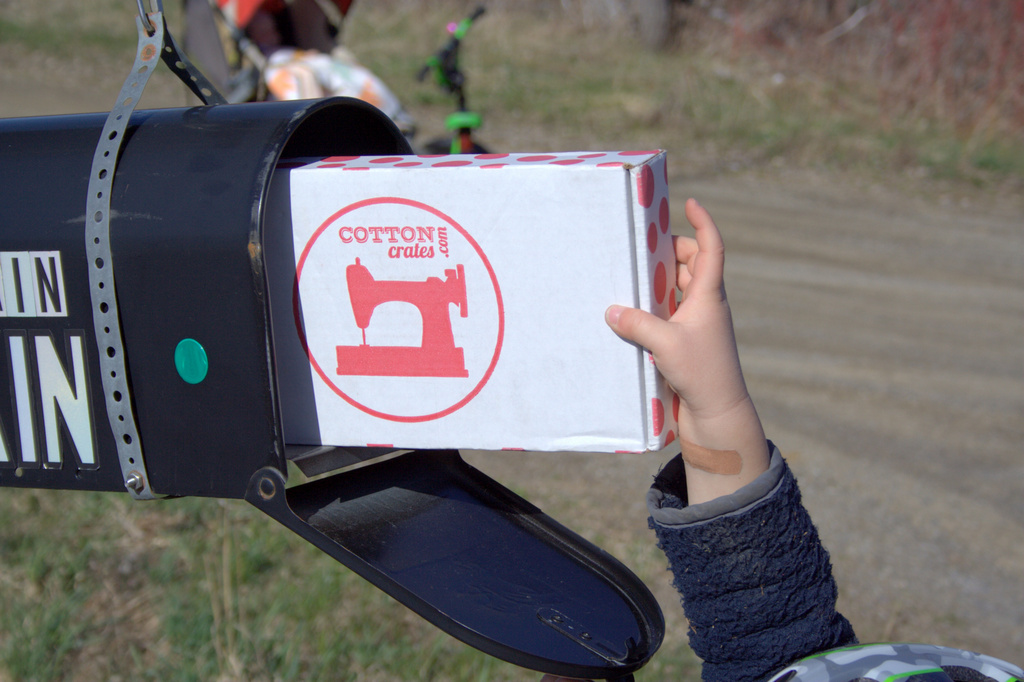
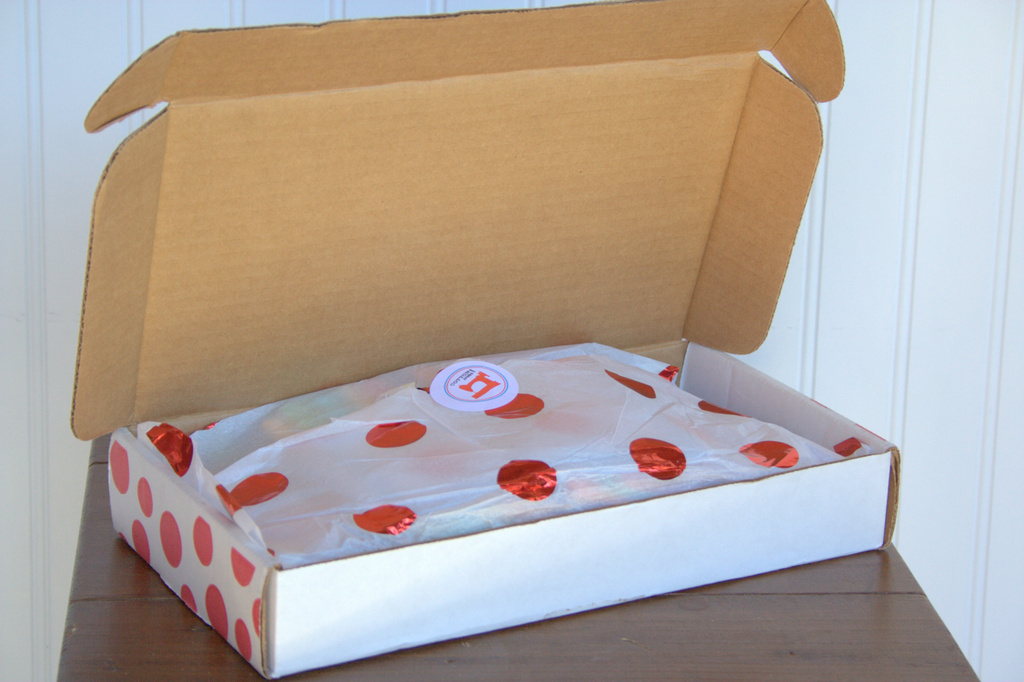
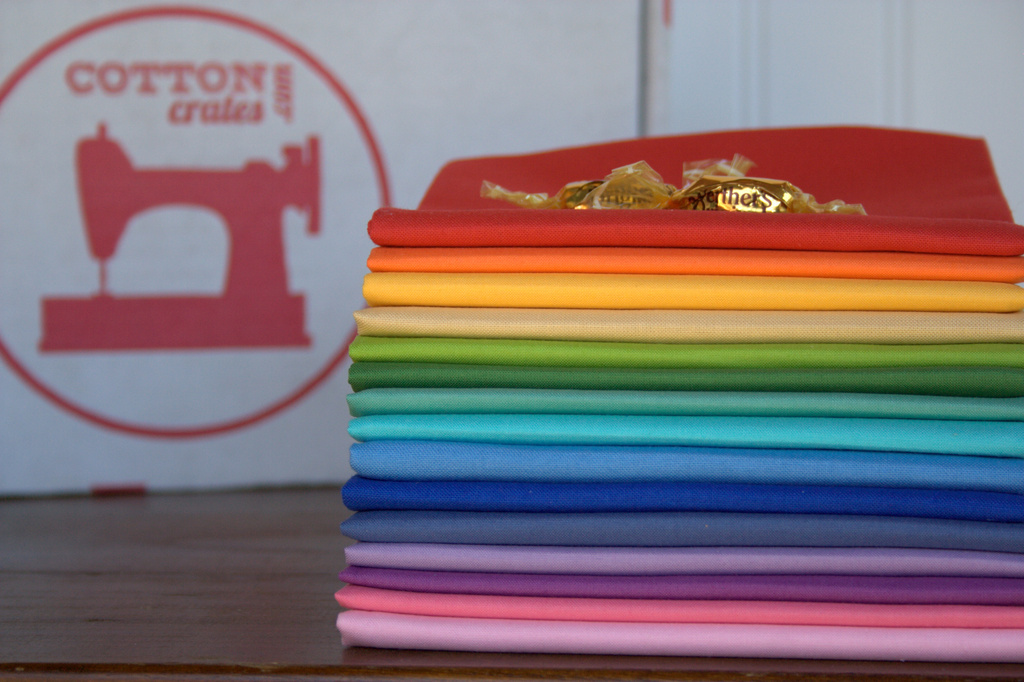
Subscription services are all the rage these days, and who doesn’t love to receive packages in the mail? You can get boxes of stylish clothing in just your size (StitchFix), food ready to prepare healthy meals (Hello Fresh), science experiments ready for parents and kids to build together (TinkerCrate), wine curated to your tastes (Club W), and now fabric and sewing supplies, all mailed to your doorstep each month (Note, I’m not affiliates of any of these subscription boxes, simply stating one of many examples in each case). In the recent months, I’ve seen more and more fabric and sewing notions subscription boxes arise, so when Cotton Crates contacted me asking if I was interested in trying out a box in exchange for writing an honest review on my blog, I was intrigued. When they mentioned that the month’s box would contain 15 fat quarters of bright Riley Blake solids, I was sold. Full disclosure: Cotton Crates provided compensation in the form of product, a subscription box with fabric. All opinions expressed are my own. My excitement and heart eyes are also my own.
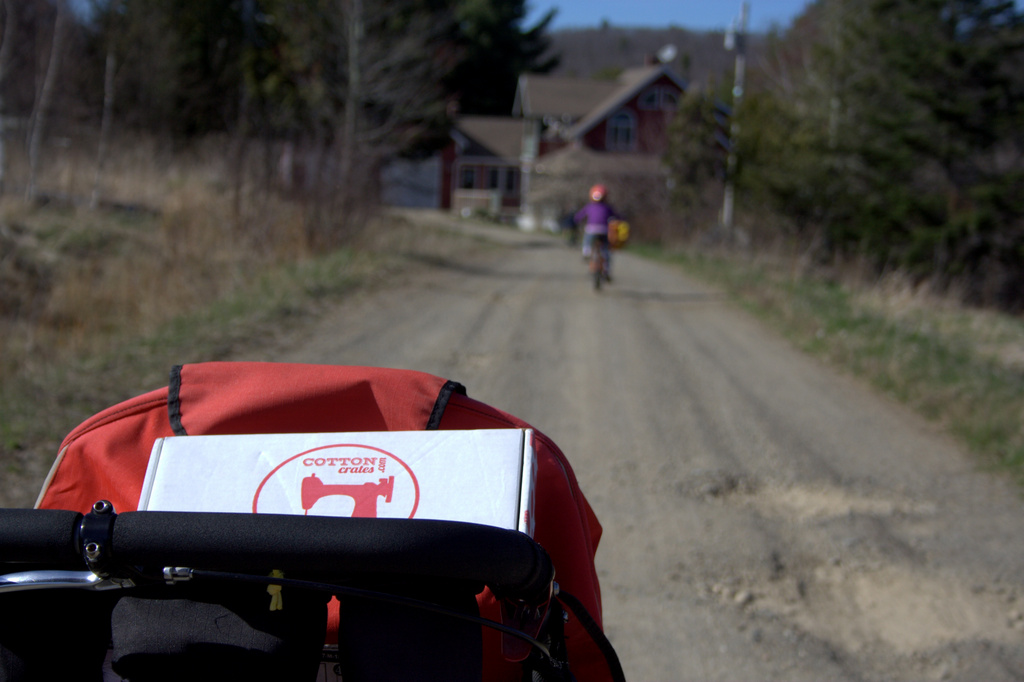
Let me tell you about my Cotton Crates experience. There’s something that comes from having a mystery box arriving in the mail that has a different feel than when fabric you specifically selected and purchased is delivered. Yes, any online fabric purchases arrive in your mailbox, but the cotton crates box held a bit of mystery that made the whole experience more exciting. My kids take turns getting the mail, and on this particular day it was my son Max’s turn. As soon as he opened the mailbox and saw the package he excitedly said, “Is it for me!?” I had to contain my glee when I said, “No, this one is for Mommy.”
During the walk back to the house along our driveway, I was excitedly anticipating what I might see inside the box. Sure, I knew pretty specifically what it would contain, but still that excitement was there–specifically what colors would be included? What would it look like? Cotton Crates gives clues on social media (Instagram | Facebook) during the month to give you an idea of what types of fabric are included each month, but once you order it, it’s easy to keep it a surprise. Solids are such a versatile stash builder, since projects using all solids shine, and solids can also be a great compliment to the right print. In my humble opinion, one can never have too many solids in a stash.
Opening the box was like opening a present, tissue paper, sticker, candy, and all.
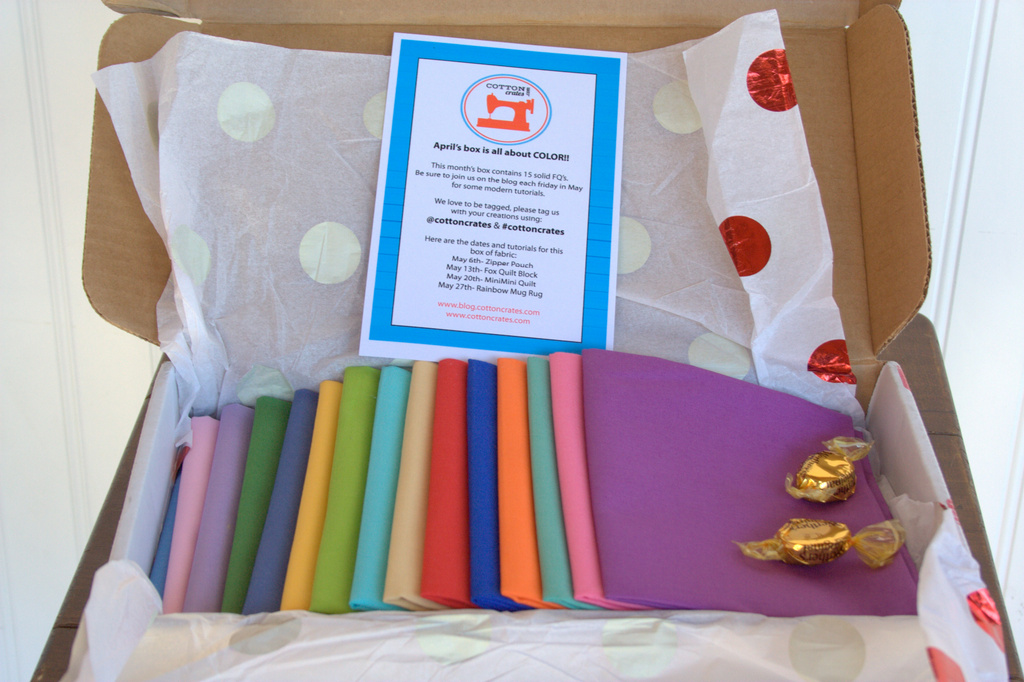
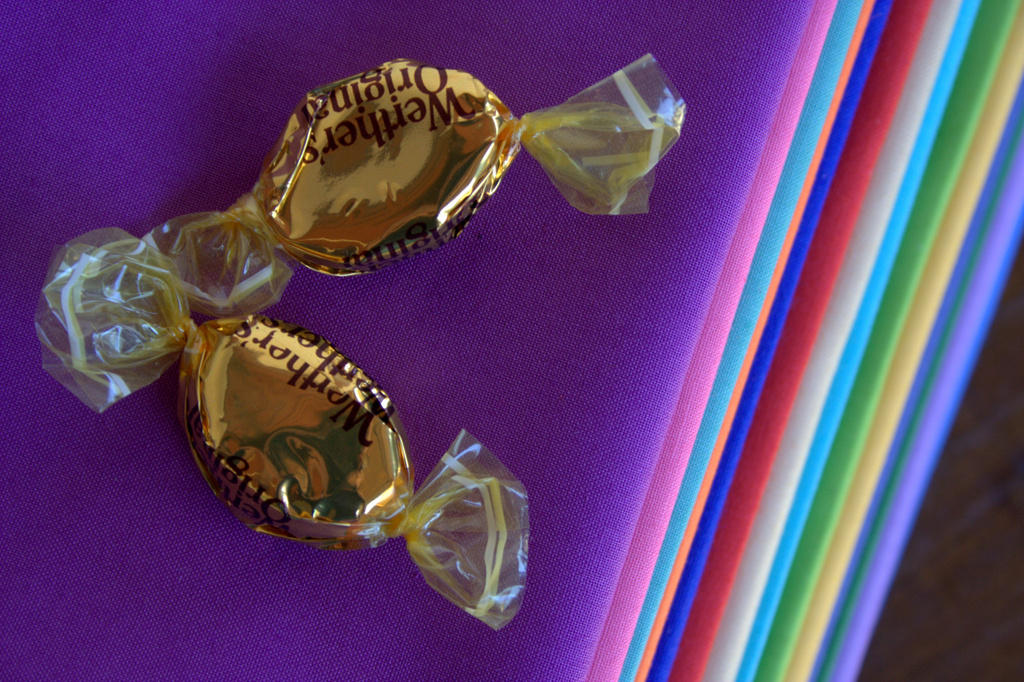
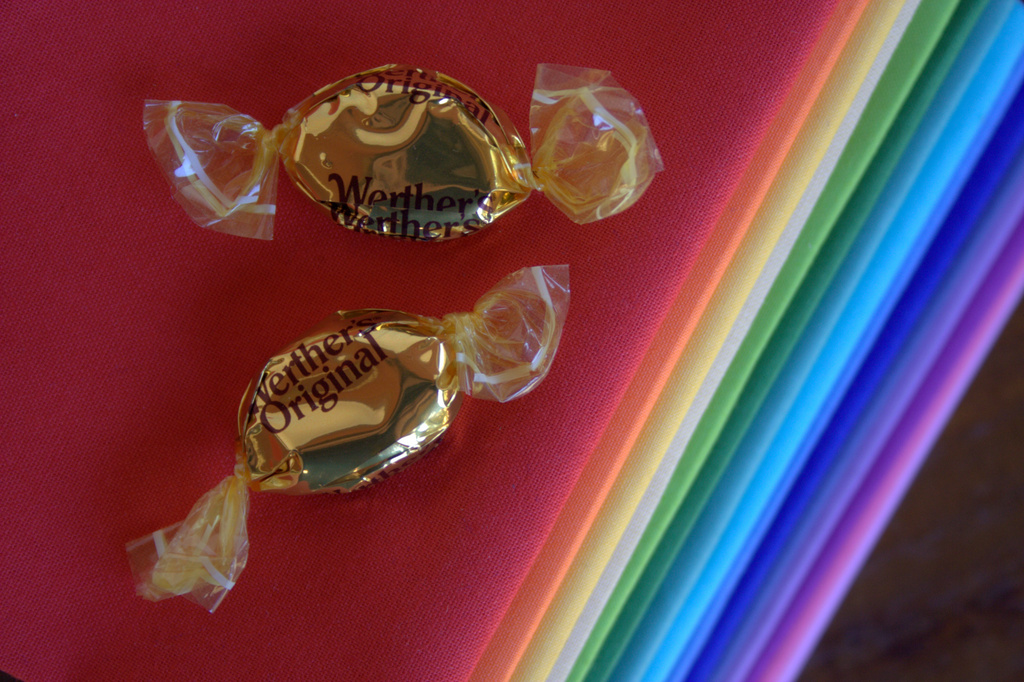
I love that Cotton Crates includes a card with a schedule of inspiration blog posts with projects you can make using the month’s box. You essentially have fabric and projects all in one box, with some candies, too, unless your kids grab them first!
I captured the beauty of the fabrics, and then, true to my style, immediately put them into rainbow order.
Sigh… ahh, much better!
I do have a thing for rainbows.
Now, how about some details? You can head over the the Cotton Crates website to read all about the subscription process, see or order previous boxes, and visit the blog for project ideas. Basically, the longer the time you subscribe, the cheaper the price you pay per box. For example, if you subscribe for one month, you pay $38 for the 12 (or in this case 15 solids) fat quarters, but if you subscribe for a full year, you only pay $34, which is a bit over $2.80 per fat quarter. I can definitely see the fun in fabric subscription services, and it is a great option for building a stash.
Many thanks to Cotton Crates for the opportunity to try out their subscription box!
I’m linking up with Molli’s Sunday Stash since my solids rainbow grew in a beautiful way this week.
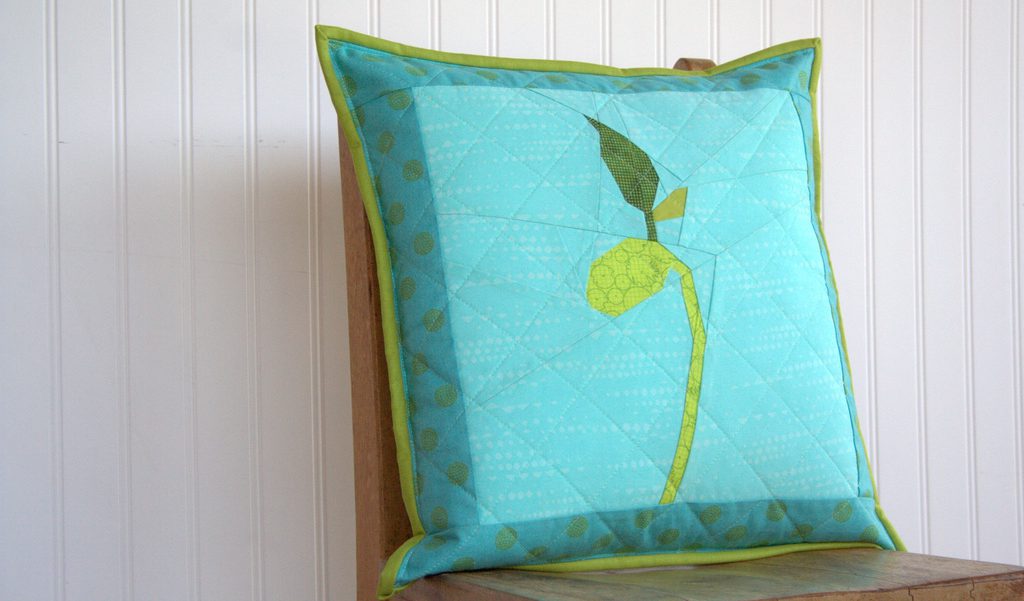
Today I am excited to release my newest foundation paper pieced (FPP) pattern, Bean Sprout. Today is arbor day, so for now I’m thinking of it as more of a tree sprout, but regardless of which species you’re growing, this block pattern is ready to roll!
To me, the bean sprout is the epitome of spring, new life, and the wonder of discovery. I have watched my children’s excitement over the first sprout of newly planted seeds, and wanted to capture that fresh promise. This block is perfect for the gardeners among you, and I can see it as a focal block in a quilt, or even turned into pillows, tote bags, wall hangings, or table runners.
You may remember my first iteration of this Bean Sprout block, which I turned into a pillow and donated to my daughter’s school for their annual fundraiser auction/raffle. Since then, I made a few tiny tweaks to the pattern to make it a bit more versatile, easier to piece, and clearer to follow. The block finishes at 8″x12″, but can easily be made into a 12″x12″ finished block by adding two side strips, which is explained in the pattern.
The pattern includes clear piecing diagrams, sewing tips, and templates for the 8″x12″ finished block, with various shading to help with accurate fabric placement. Quarter inch seam allowances are included on all pattern pieces to help ensure easy piecing, and a 1″ reference square is on every printable page so that scale can be confirmed. Full foundation paper piecing instructions are not included in the pattern, but I have a thorough paper piecing tutorial HERE. Lee Heinrich from Freshly Pieced also has a fabulous tutorial on the Bernina We All Sew blog HERE, which will ensure you will never miss corners again. Knowing all of the information in these two tutorials will help demystify FPP, or at the very least will GREATLY reduce seam ripping.
Sew up the bean sprout block to bring spring no matter the weather!!
Bean Sprout is available for sale in my Payhip shop, at an introductory price of $2.50 through the weekend. Tuesday morning EST, it will go up to its standard price of $5.00.
I pushed spring into summer with my latest version of the block, using Cotton + Steel teals and coral that remind me of watermelon. I wanted to show the versatility of the color possibilities with this true-to-life block. While my brain initially goes to the greens and blues true to real life bean sprouts and summer sky, there are many other combinations that could work well to make the block shine! (For the avid gardeners among you, yes, I know the seedling shown is a brussel sprout plant, not a bean!)
There’s not much more exciting than seeing what others create with my patterns, so if you make this block, please use the tag #beansproutblock on social media and tag me @nightquilter. Sending an email would also work! Enjoy, spread the word, and go grow some quilts!
Those who know me know I love color, the brighter and bolder the better! I also love quilt photography and fun styling of process photos, and continuously aim to improve the clarity and aesthetic pull of my photographs. So when Angie at Gnome Angel announced a fun little challenge called the Colour Block Challenge (yes, colour with a ‘u’!) that includes bright color and fun photo styling, I immediately wanted to play. With a to-do list a mile long and only wee bits of time in which to complete it, I wasn’t sure I’d be able to squeeze in making a block for it though. Then, Angie gave me just the gentle nudge I needed–she tagged me on Instagram saying she was personally challenging me, since she knew how much I would LOVE to play. Then and there, I knew I was going to make time to play and participate no matter what–don’t you love when quilting friends really know you and help encourage you to have some extra fun!?
I read through Angie’s fabulous tutorial on how to make awesome color (er,… colour) flat lay photos, selected fabrics that I felt complimented the block well but also would lend themselves to some fun color scavenger hunts around the house, and went wild.
I took a full Finn nap-time (a serendipitously long one at that!) to make a new Farmer’s Wife block with the colour challenge in mind. This was doubly great, since I’ve been wanting to make more Farmer’s Wife blocks, but they always seem to drop to the bottom of my list. This project has jump-started my desire to catch up with some blocks, AND has reminded me how much I love foundation paper piecing (FPP)! I plan to FPP more of my future Farmer’s Wife blocks, since I was able to make the entire block during the span of one nap time. Knowing that I can accomplish something like making an entire block during one nap helps me feel like I’m set up for success and ready to dive in. Everyone loves a finish, even if it’s a single block!
Once my block was complete, I wandered the house in search of colorfully turquoise objects. As Angie suggests, I gathered a lot and generally laid them out around the block on a big white foam board.
I think I spent more time rearranging the items than making the block, and remembering where they all went when I was done was another interesting challenge. I honestly had such a fun time laying this out. I already have another idea I want to try, which almost ALWAYS happens when I divert from my project to-do list to play, but I have to get one deadlined tutorial finished before I play more with this idea. I have a feeling my kids will love helping me with these photo flat lays, too. I made this one while the big kids were away on their grand adventure with my parents, so they didn’t get to help this time around. Just one more reason to make the time to play juuuuuust one more time *wink* (we all know I’m not finished with these color block flat lays!)
The challenge is being held on Instagram, so here was my final entry (above). Looking at it again, my camera photos look brighter than the one I took with my phone. Note taken for next time! You have two more days to post your entries, so if you are on Instagram, I definitely recommend you play, or at least check out the hashtag #colourblockchallenge to feast your eyes upon a gorgeous world of quilty color (you can view the tag online, even if you don’t have a smart phone or an Instagram account).
Since I love close up detail photos, here is a little tour of the silly items I found for this challenge. Who knew that we had so many turquoise bits and bobs around the house!?
Zippers and frogs, and pencils, oh my!
Checking the kids’ bookshelf was a great tip by Angie. Sandra Boyton’s Hippos Go Berserk is a must read, especially when you love turquoise, math, and silliness (like I do!).
This smiley shark had as much fun as I did, I think! Legos are an immediate win, and the little bobbin minders that Sarah from Sarah Goer Quilts sent me a few months ago kicked off my color hunt. No turquoise lay would be complete without an Elsa shoe, too, glittering in the background.
So much fun! Thank you, Angie, for the push to play. I had SO much fun with this!
I grab a needle and thread once the kids are in bed


 Thanks to the Fat Quarter Shop, one of my lucky readers can enter to win this newly released Raindrop fat quarter bundle by Rashida Coleman-Hale for Cotton + Steel Fabrics. The bundle includes 20 fat quarters and two (2) 24″ x 44″ canvas prints, and seems most fitting to kick off this rainy weekend here in Maine. There are so many great prints in this collection–from the geometric play stash builders to the fabulous cicadas, all inspired by the rainy season in Japan. True to my naturalist heart, I love cicadas. I used to love to collect their exoskeletons from trees when I was a kid, and hook them all over my clothes to surprise the less-bug-loving kids on the block. Ahh, memories!
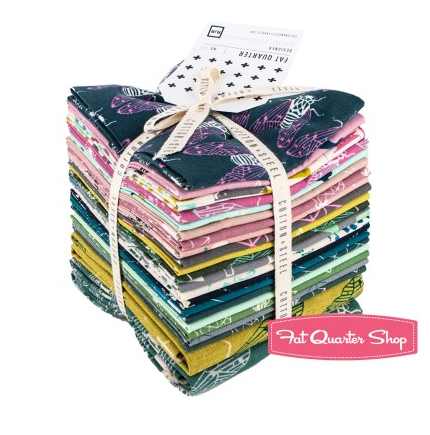 To enter the giveaway today, tell me what you like to do on rainy days. Leave a comment and make sure I’m able to get ahold of you if you win. For an additional entry, click HERE and sign up for my new Night Quilter email list. You will get occasional emails with highlights, pattern announcements, and special offers. Leave a second comment to let me know you’re signed up! Tell me how you follow Fat Quarter Shop (facebook,twitter, Instagram, their blog Jolly Jabber, etc.) in a third comment for a third entry.
 Corresponding solids from left to right:
 Corresponding solids from left to right:


 Corresponding solids from left to right:
 This grass-covered dune was gorgeous as a whole, too, and I was happy to see a nice solid fence and signage clearly explaining the importance of looking without touching (or walking).
 Corresponding solids from left to right:
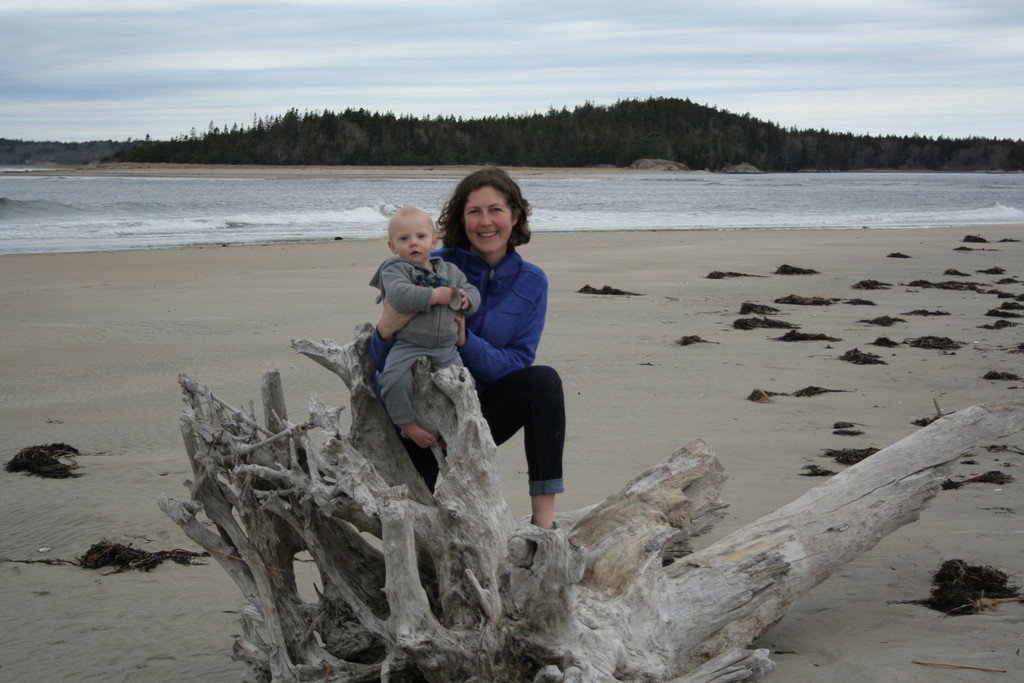


 The pattern includes clear piecing diagrams, sewing tips, and templates for the 8″x12″ finished block, with various shading to help with accurate fabric placement. Quarter inch seam allowances are included on all pattern pieces to help ensure easy piecing, and a 1″ reference square is on every printable page so that scale can be confirmed. Full foundation paper piecing instructions are not included in the pattern, but I have a thorough paper piecing tutorial
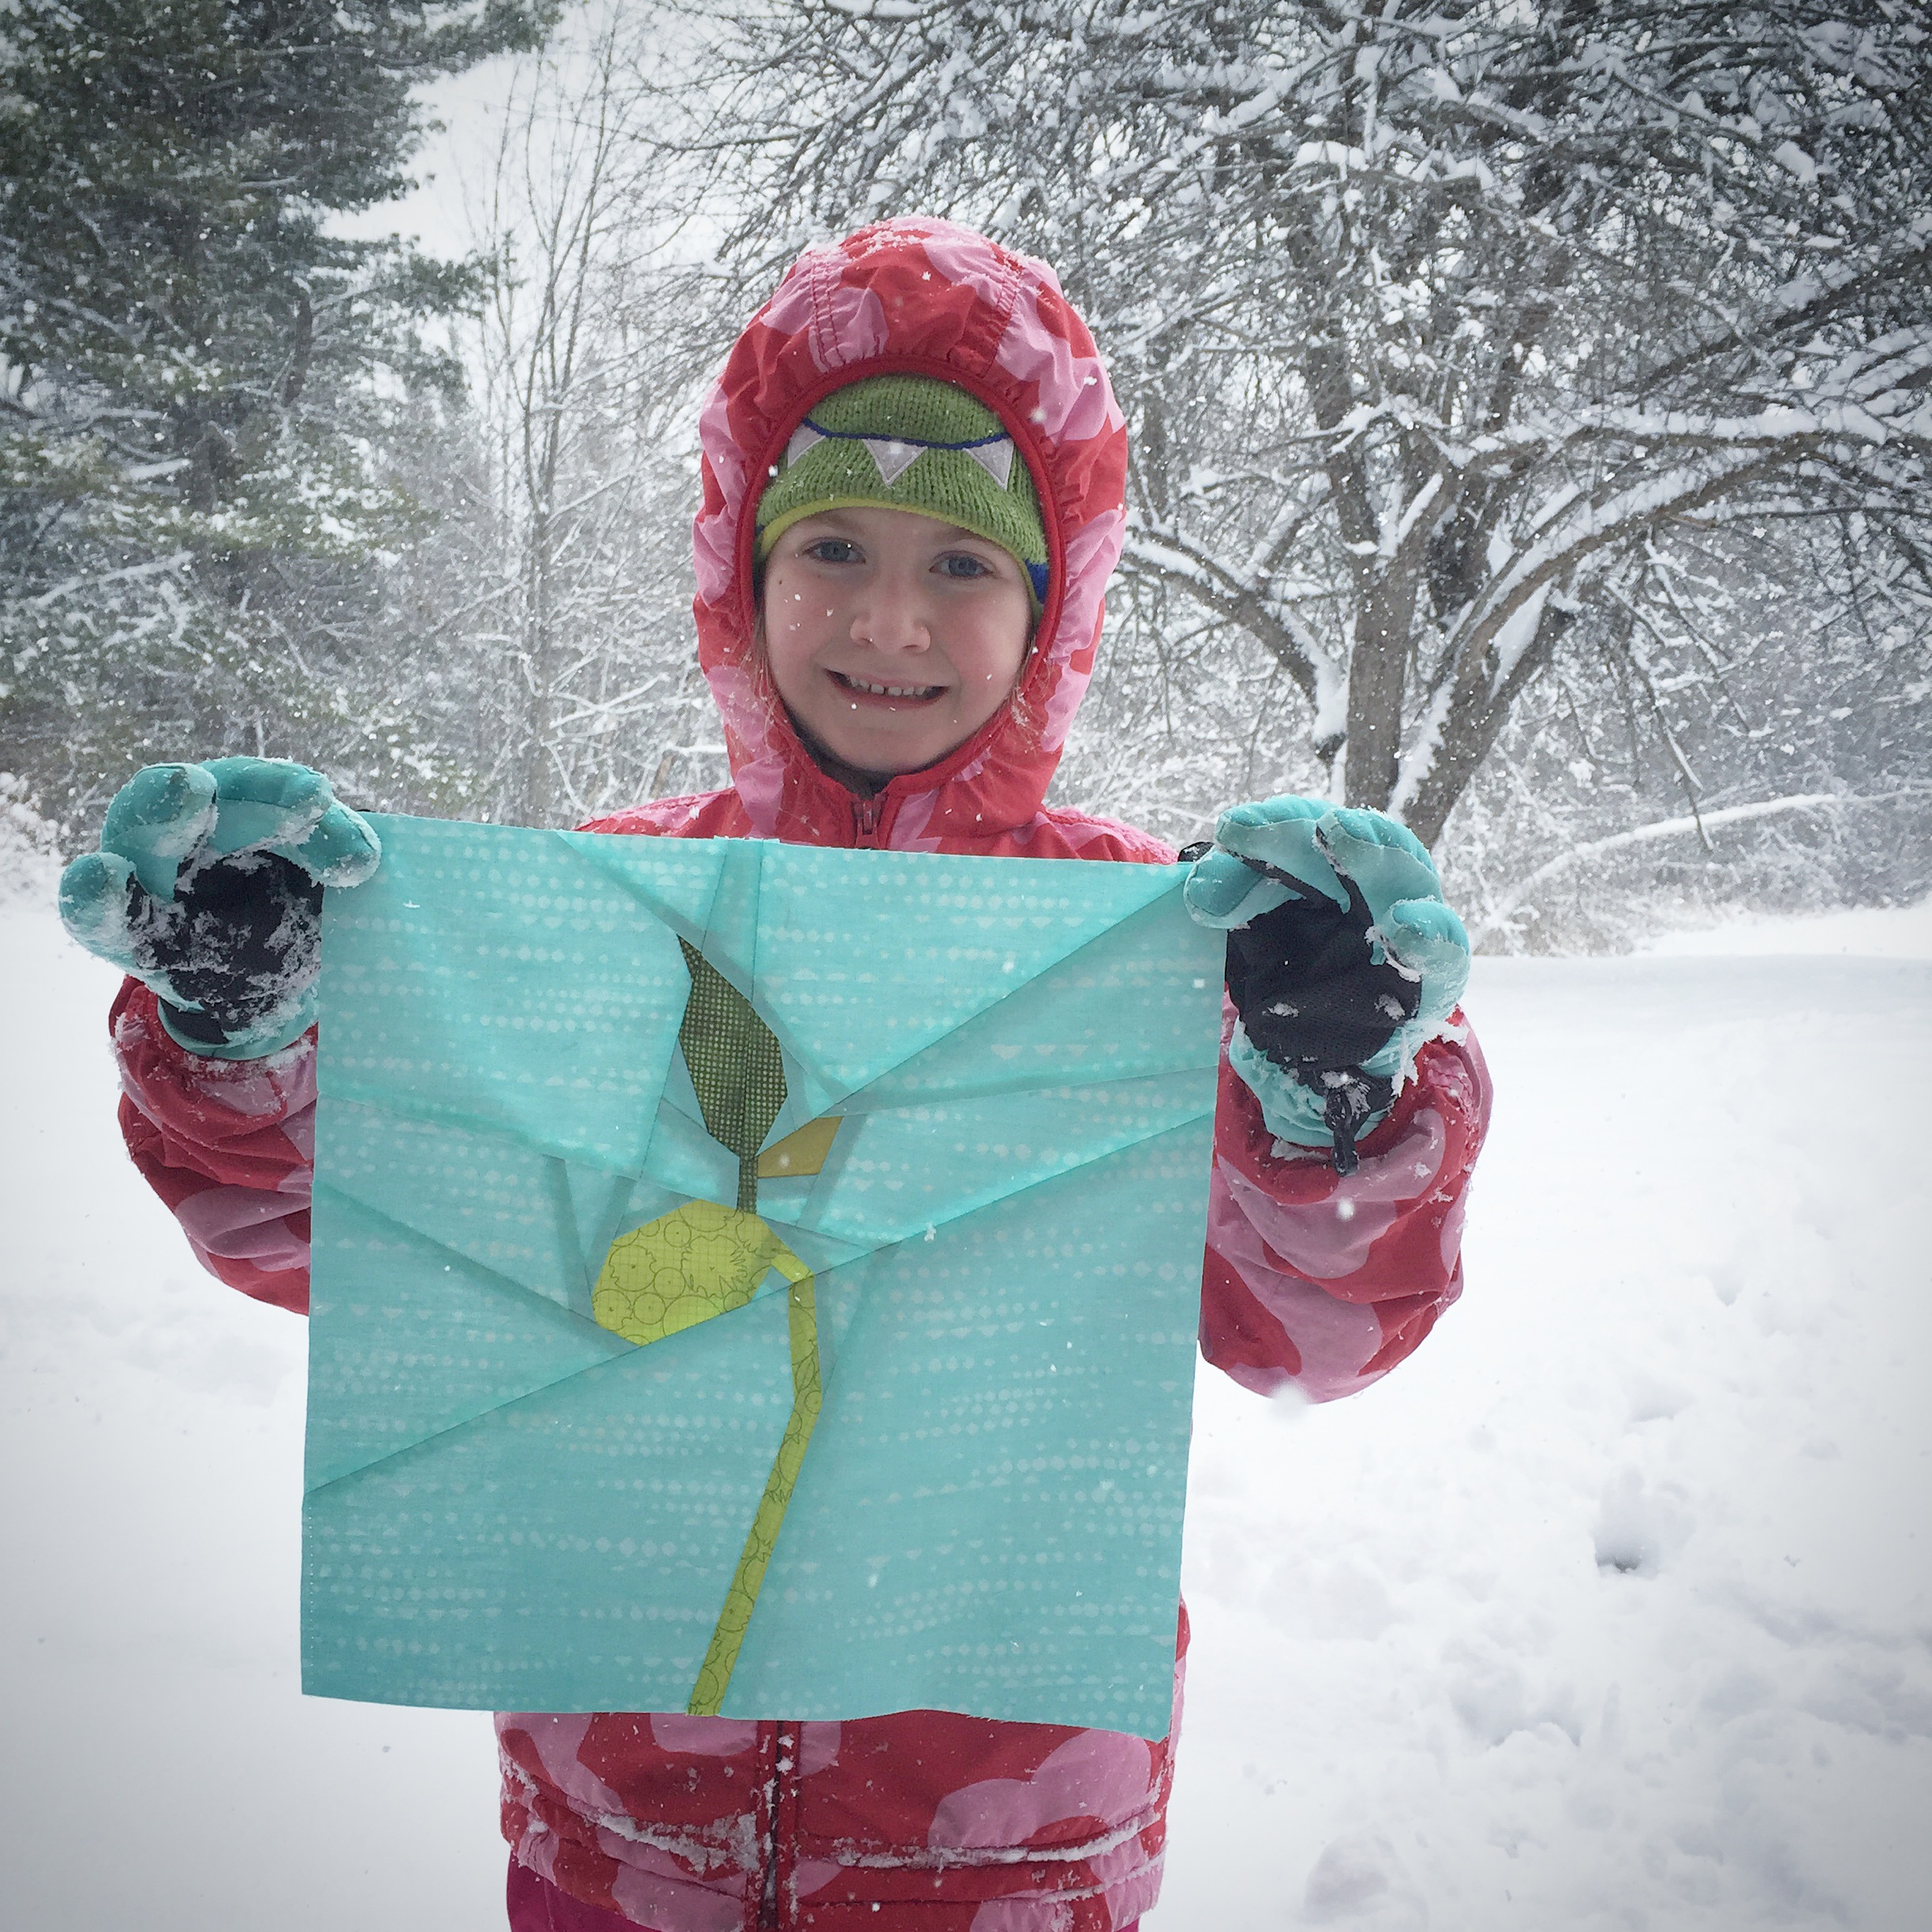


 Once my block was complete, I wandered the house in search of colorfully turquoise objects. As Angie suggests, I gathered a lot and generally laid them out around the block on a big white foam board.
 I arranged and rearranged, and rearranged some more. Without sharing all her secrets (
 I think I spent more time rearranging the items than making the block, and remembering where they all went when I was done was another interesting challenge. I honestly had such a fun time laying this out. I already have another idea I want to try, which almost ALWAYS happens when I divert from my project to-do list to play, but I have to get one deadlined tutorial finished before I play more with this idea. I have a feeling my kids will love helping me with these photo flat lays, too. I made this one while the big kids were away on their grand adventure with my parents, so they didn’t get to help this time around. Just one more reason to make the time to play juuuuuust one more time *wink* (we all know I’m not finished with these color block flat lays!)
 The challenge is being held on Instagram, so
  Zippers and frogs, and pencils, oh my!
 Checking the kids’ bookshelf was a great tip by Angie. Sandra Boyton’s Hippos Go Berserk is a must read, especially when you love turquoise, math, and silliness (like I do!).
 This smiley shark had as much fun as I did, I think! Legos are an immediate win, and the little bobbin minders that