We’ve all heard it many times: it is better to give than to receive. Especially with handmade gifts of love, I fully agree with this sentiment. That doesn’t mean I don’t love to receive handmade gifts–don’t get me wrong, I absolutely love handmade gifts! But seeing someone using and loving and enjoying a quilt that I stitched full of love especially for them, warms my heart and reminds me of yet another reason I quilt. Quilting allows me to give the gift of love in a warm snuggly form that can literally wrap around the recipient, and that will hopefully last a lifetime.
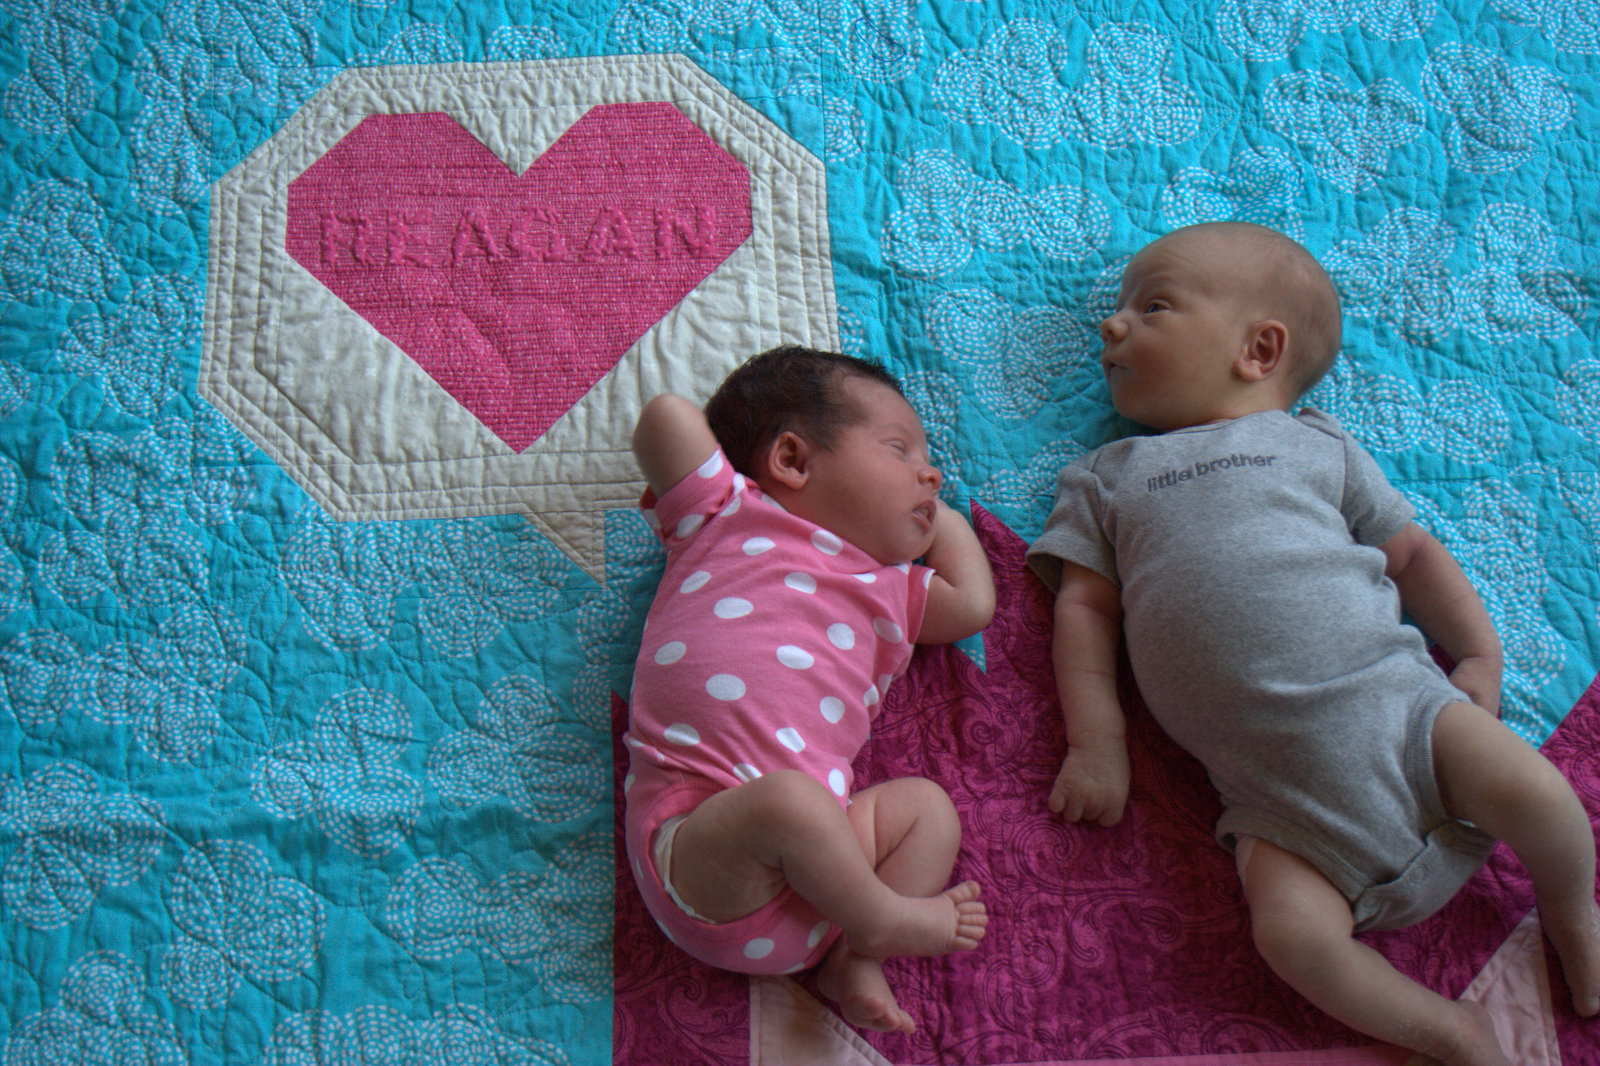
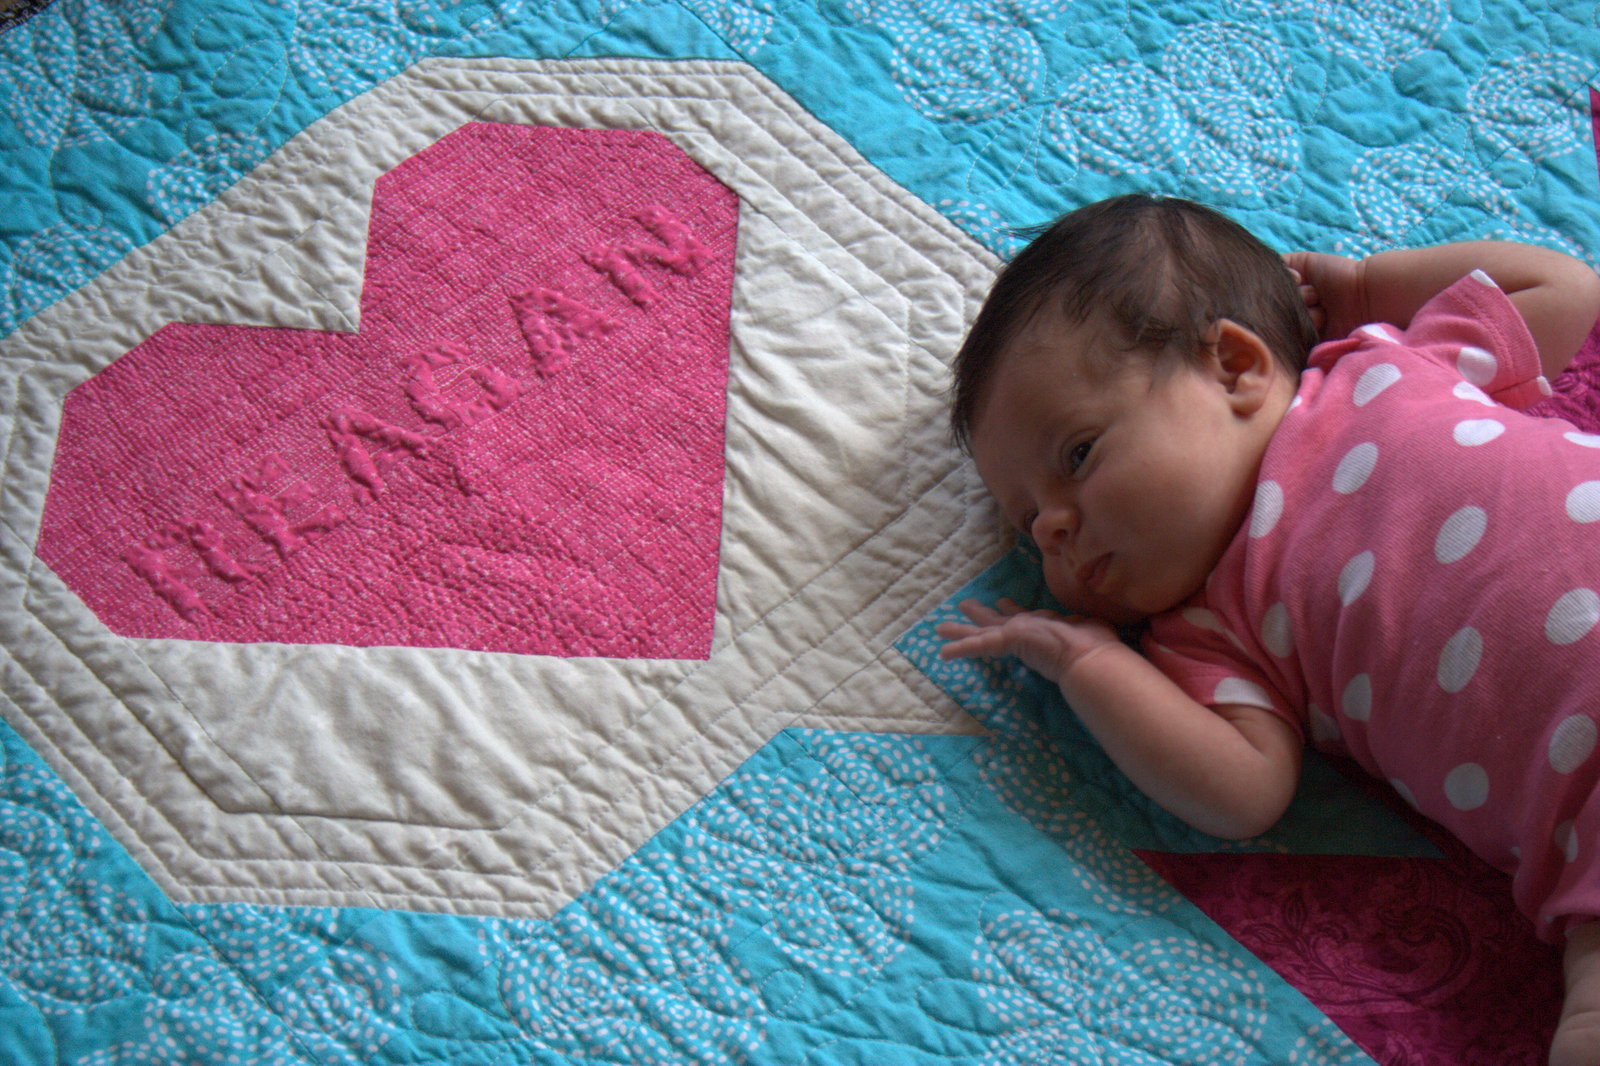
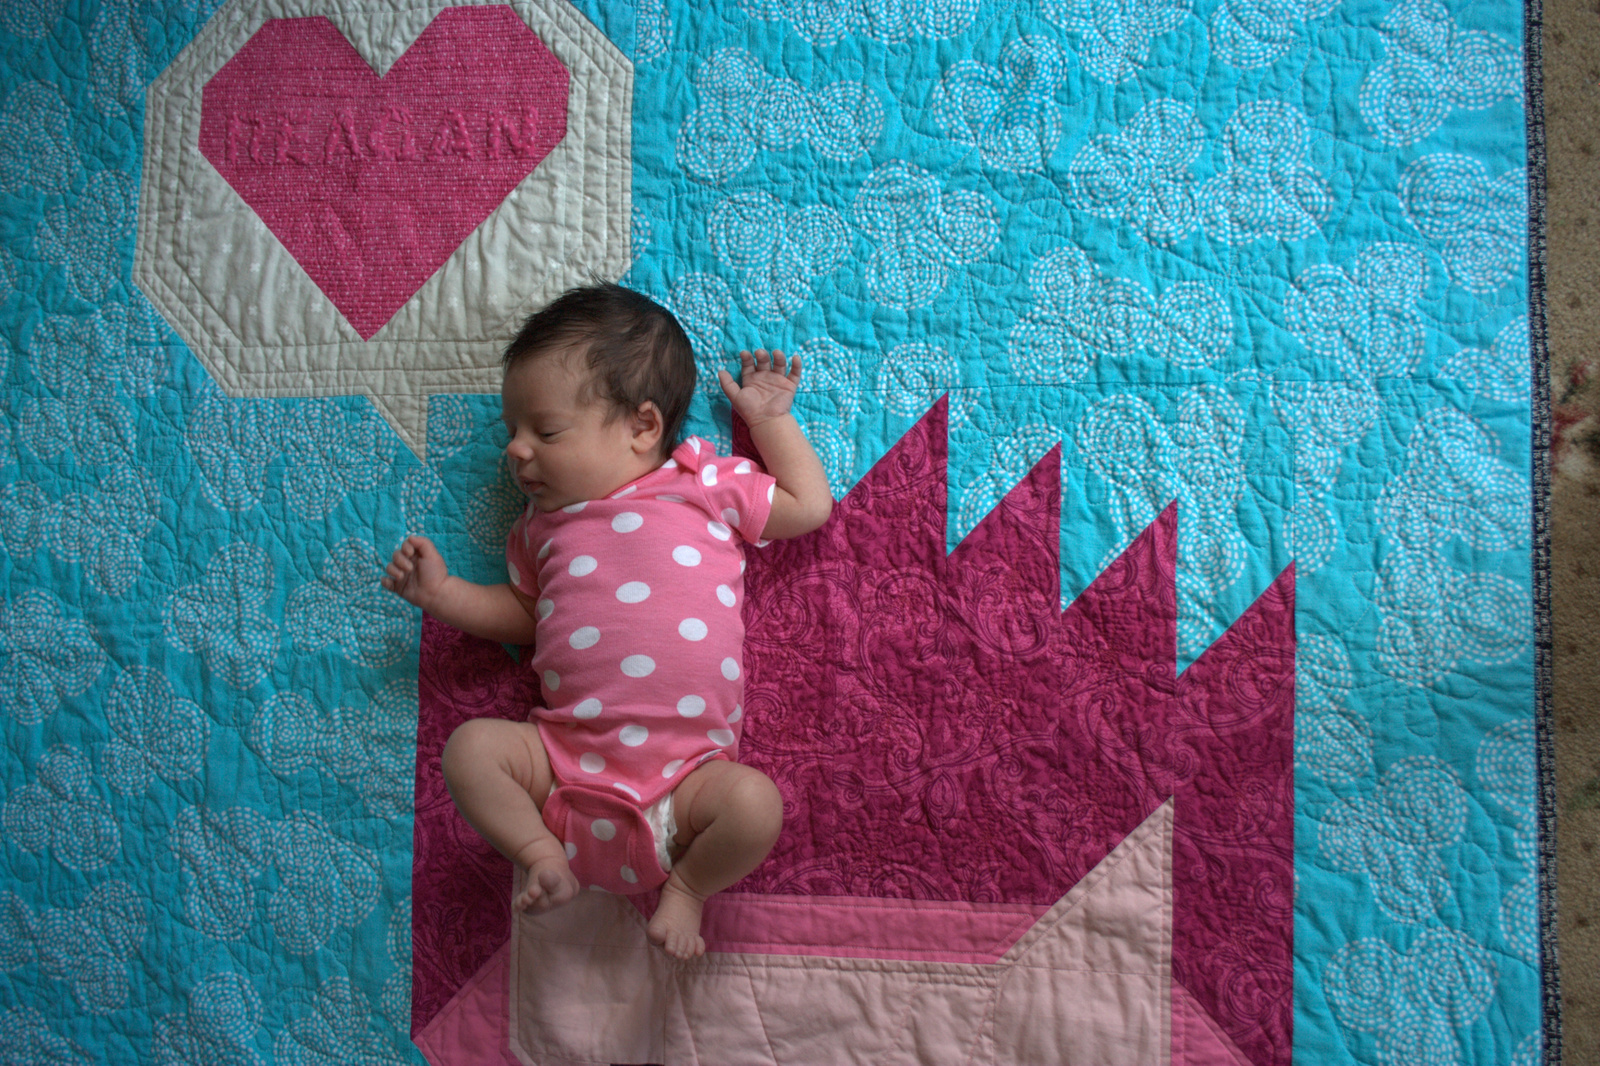
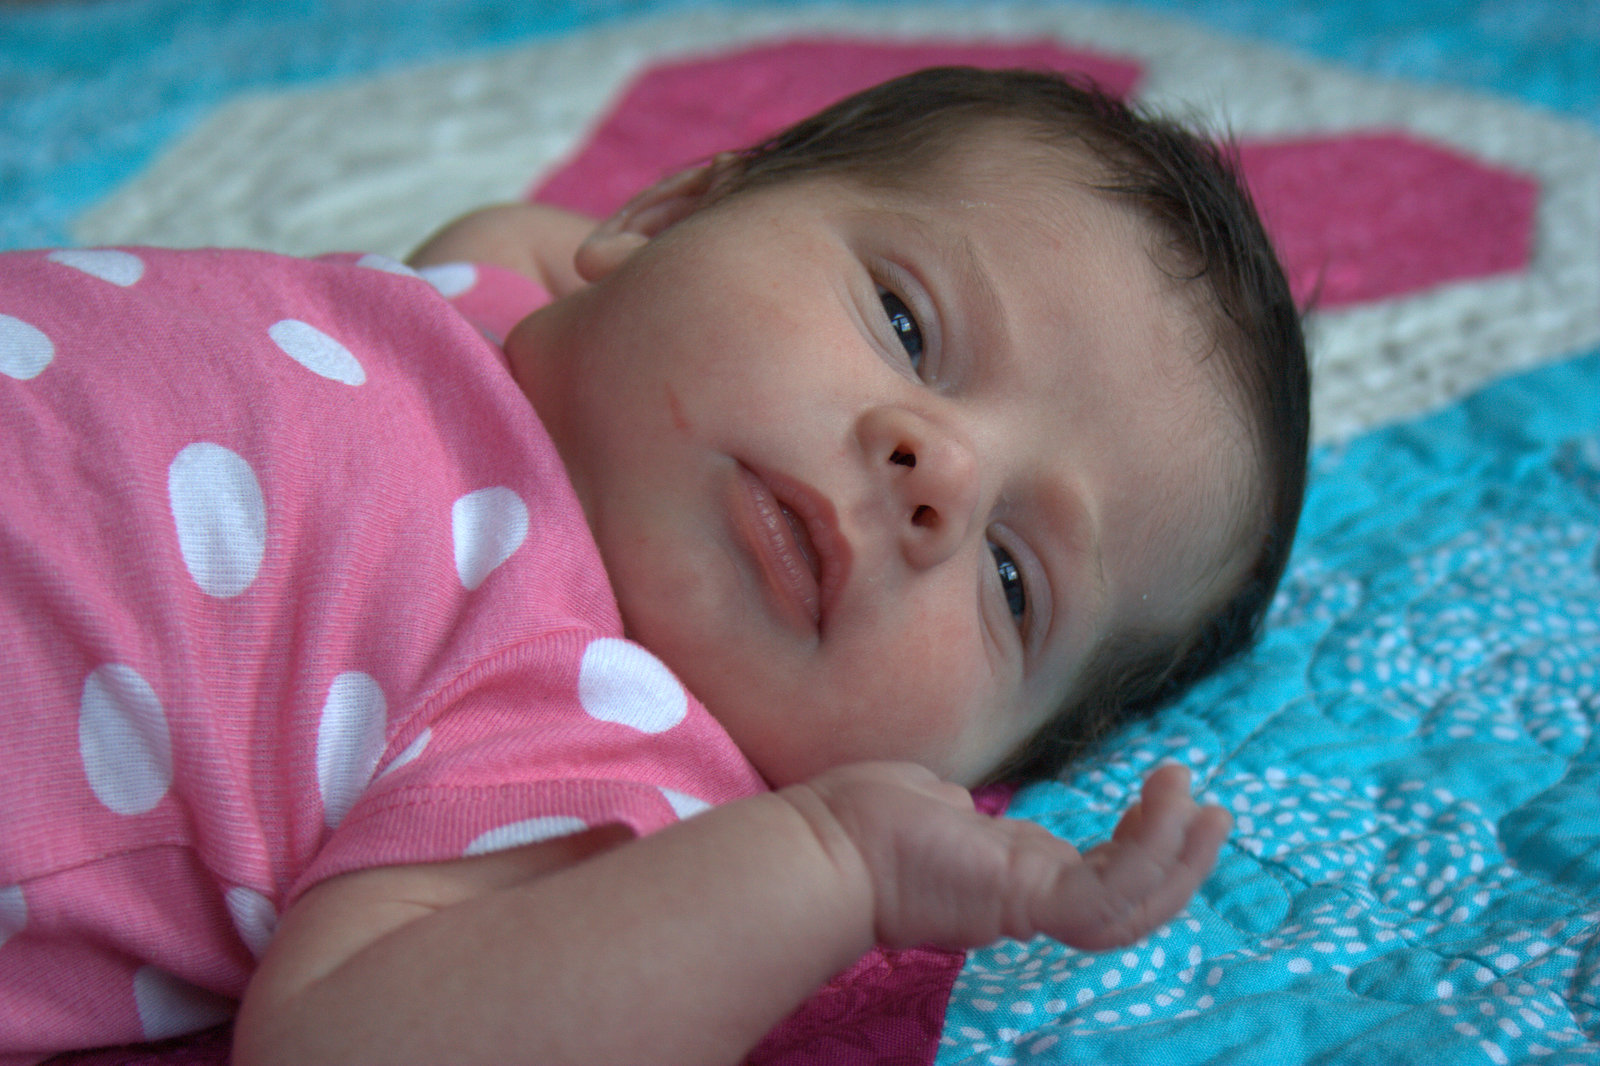
I realized recently that I had yet to share photos of baby Reagan on her Pinkalicious Hazel Hedgehog quilt and thought it was high time I rectified that!
Take, for instance, a baby quilt. I know a few grown adults who still have–or even sleep with–a handmade blanket or quilt that was given to them at birth. There’s just something about a baby blanket that is especially comforting.
Quilts are also infinitely useful to babies and their doting, toting mamas. Babies spend a lot of time on the floor (quilt!), need diaper changes (quilt!), need to stay warm (quilt!), need tummy time (quilt!),… the list of uses goes on and on, and evolves as the child grows (think superhero capes, club forts, and picnics galore).
I absolutely love seeing babies on the quilts I’ve made for them. It reaffirms all of the time, effort, money, and LOVE that I’ve put into the creation of the quilt and inspires me to create even more. I’m looking forward to seeing Reagan grow with her quilt, and her cousin Finn is sure to join her on it whenever the opportunity arises!
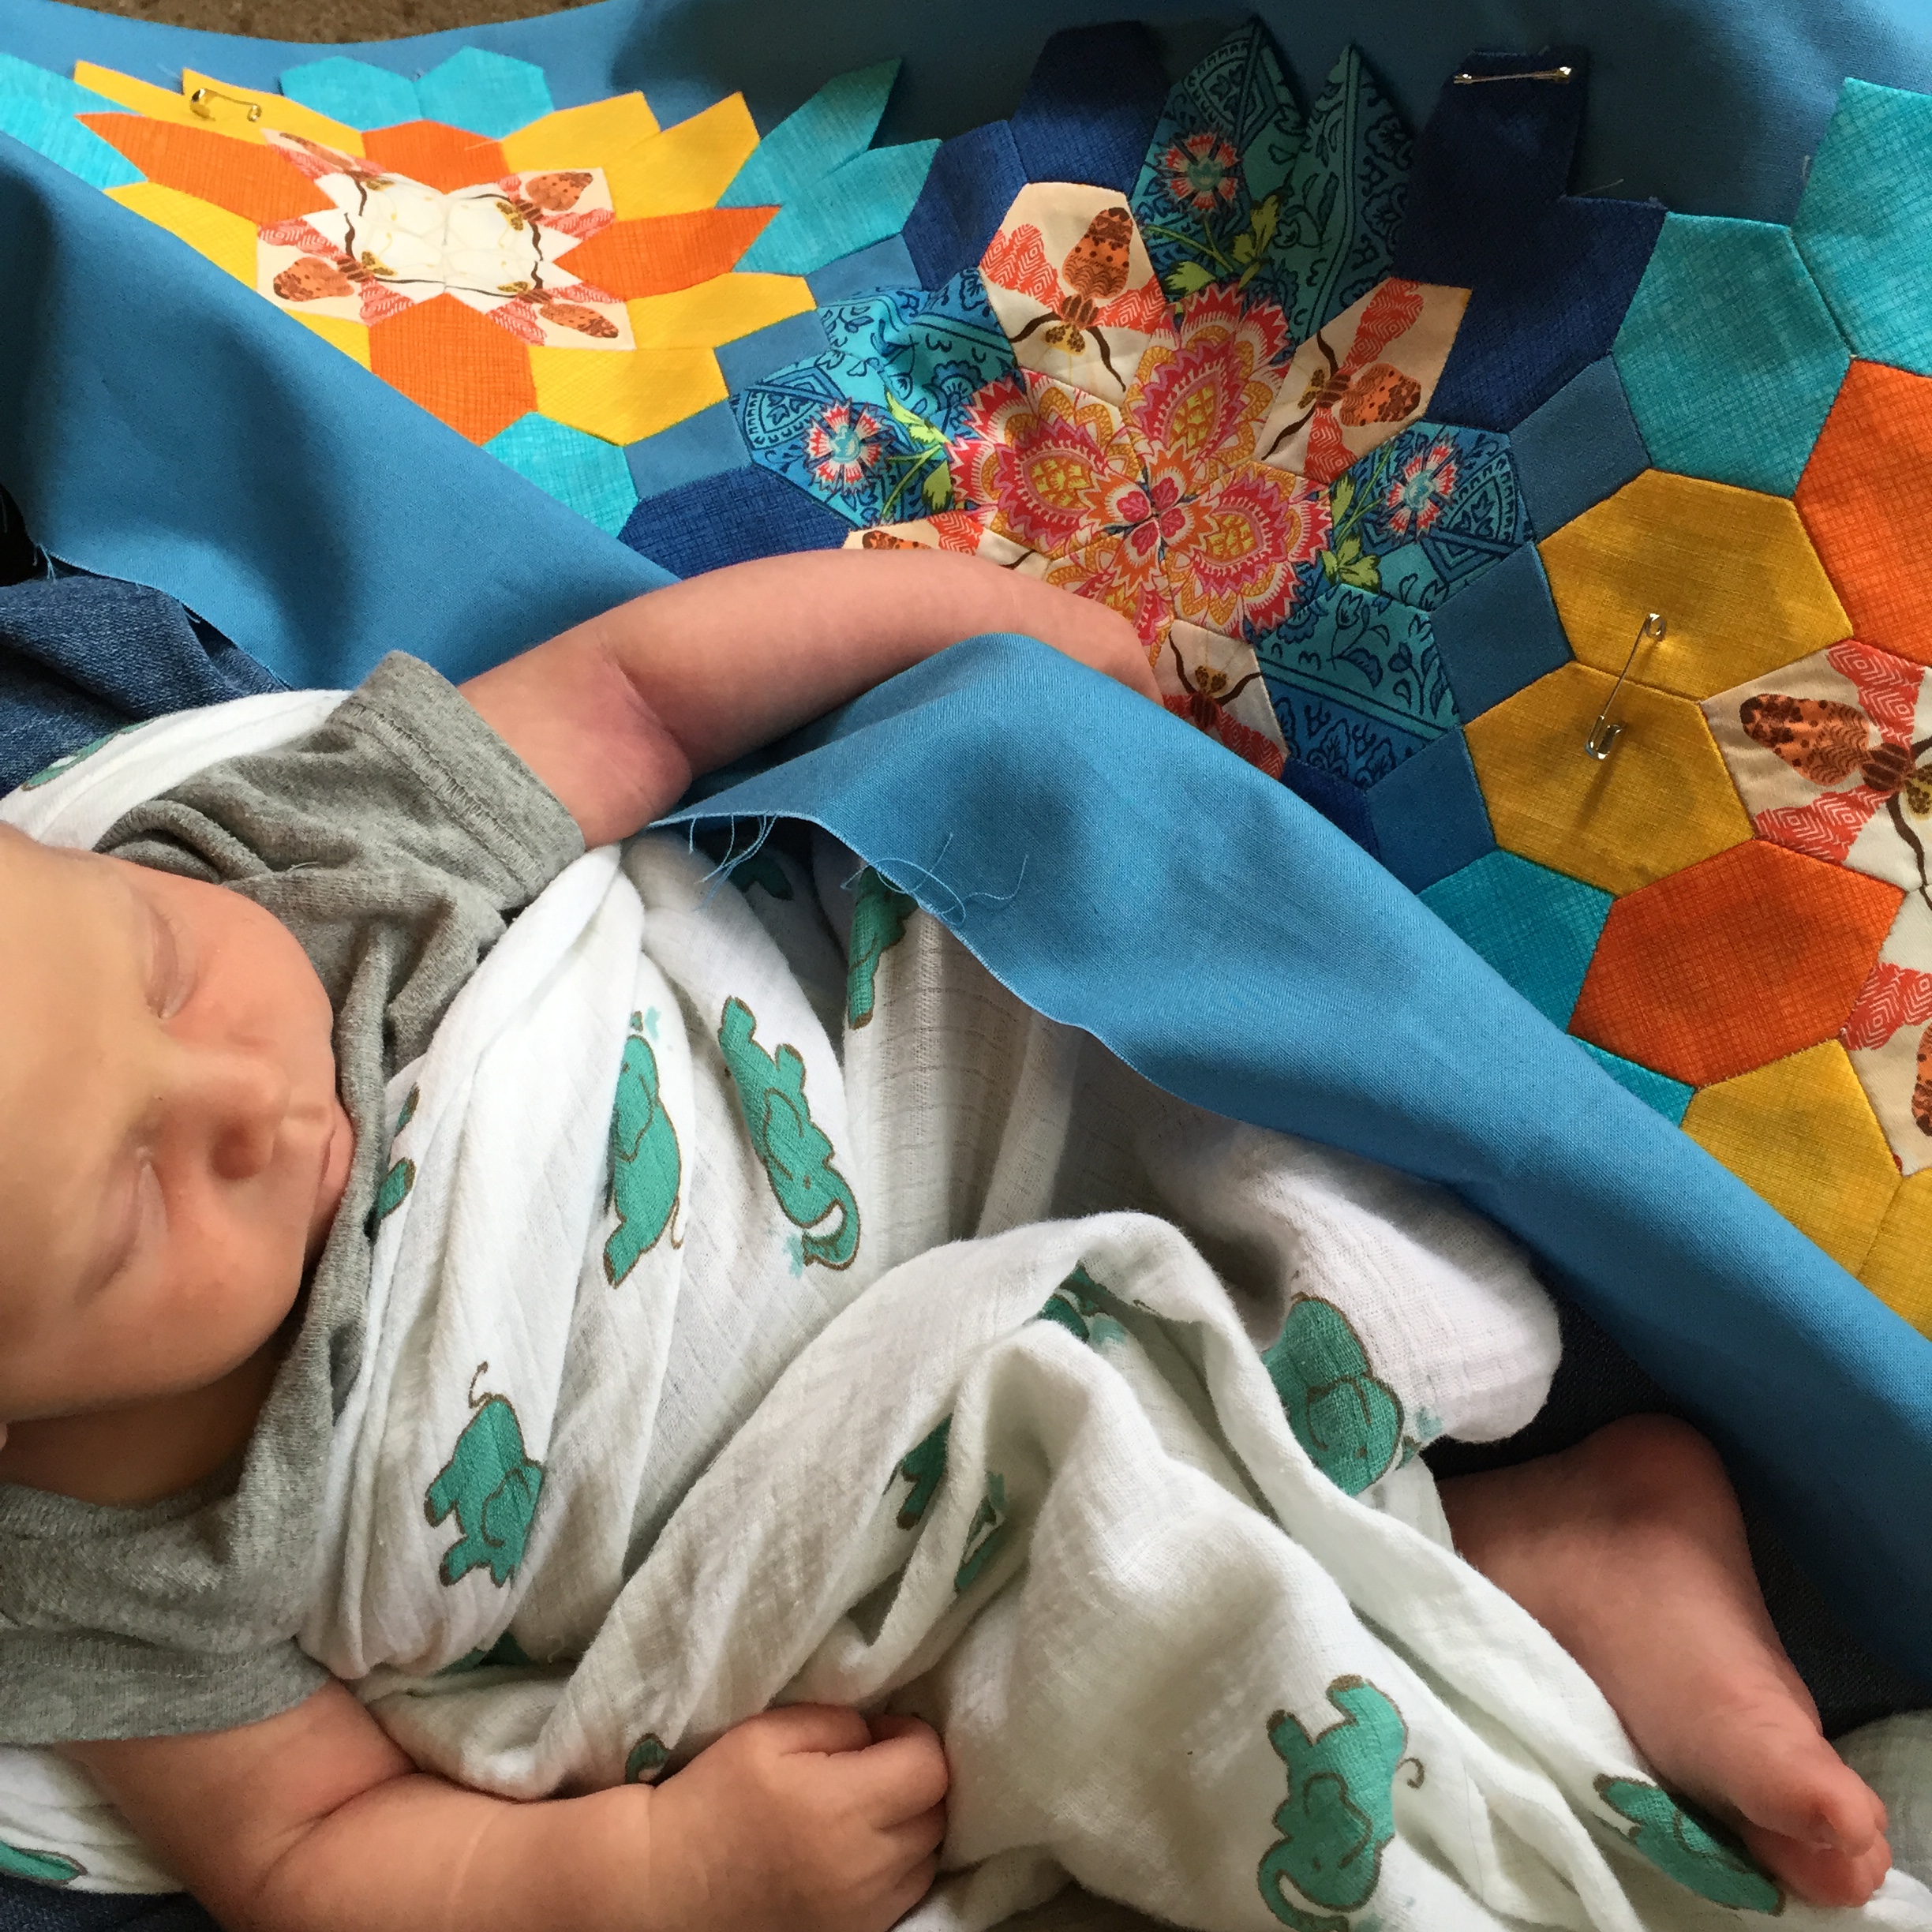
Cousins Reagan and Finn, born one day apart (Reagan is older!), sharing some time on Reagan’s Pinkalicious Hazel Hedgehog quilt at less than a week old.
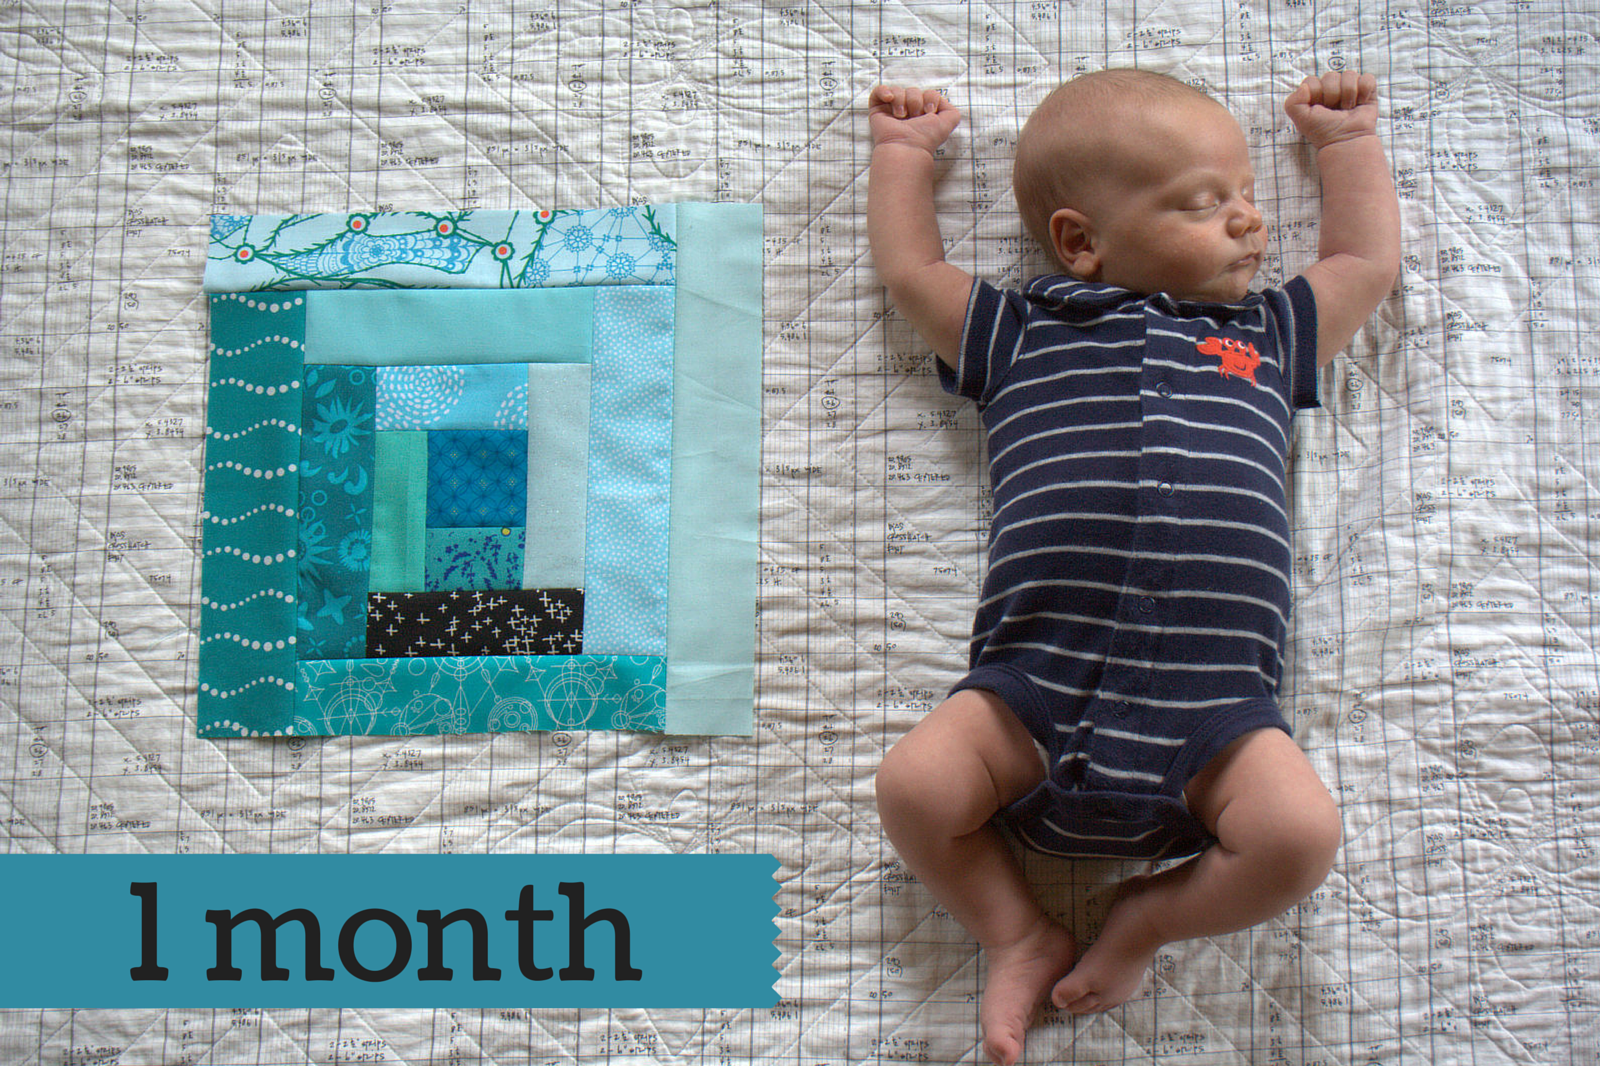
It all started as a joke. Sitting around the breakfast table on the morning of Finn’s one month “birthday”, I jokingly said to my husband, “So what stuffed animal should we use in Finn’s one month photo shoot? What outfit should he wear?” I know that it’s all the rage to buy those monthly milestone stickers and find a cute stuffie and a big chair in which to take photos of your baby each month, but Finn is the third child. I didn’t make it past 4 months with Max, my second, and didn’t even plan to attempt this time around. We take lots of pictures day to day, so the memories will be made.
My husband, joking right back, said, “Didn’t you whip up a quilt block for his one month photos?” But instead of laughing and enjoying a mutual “poor third child” joke, I gaped. What a great idea! Now this idea of a quilt block per month was stuck in my head. How long could it really take to sew up a quick simple block? There was no turning back.
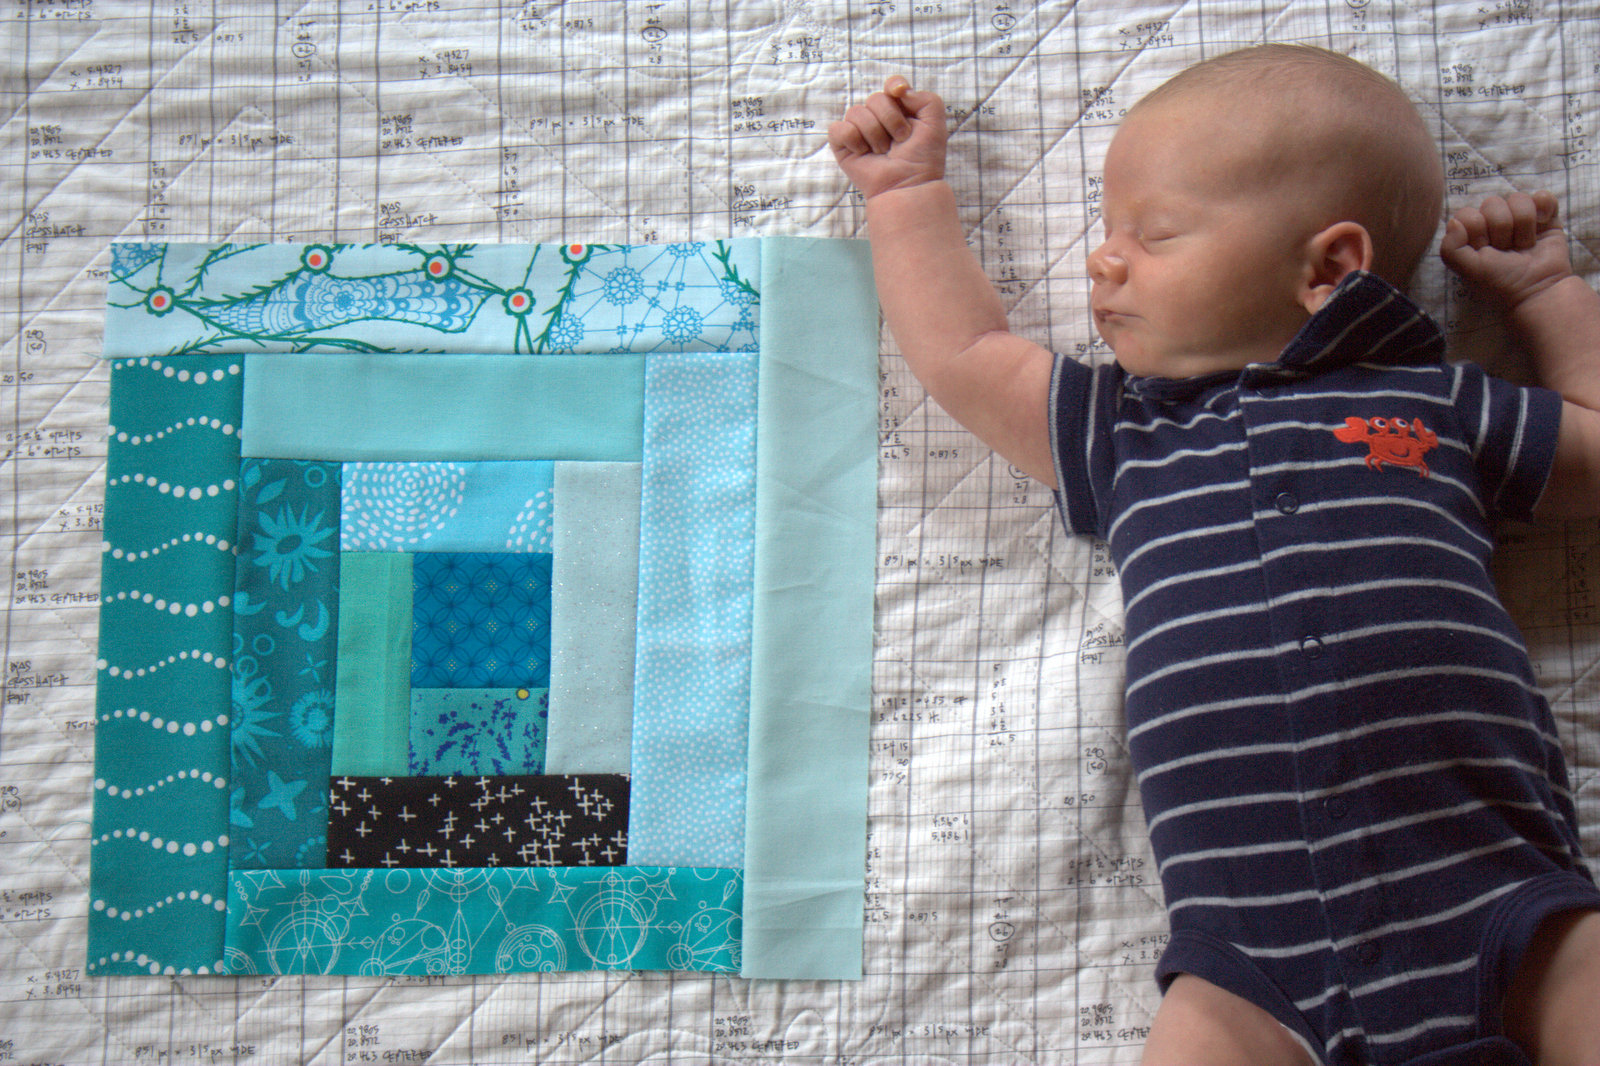
Recently, I’ve been thinking a lot about the importance of making time to sew, and how a simple 20 minutes per day can add up to progress. I decided to put this to the test, set a timer for 20 minutes, and use whatever block resulted from my timer sewing endeavor. I opted for a simple log cabin block, inspired by the recent log cabin blocks made by Kim at My Go-Go Life and the epic log cabin quilts made by Luke Haynes. It was also the perfect choice since I could use scraps and just sew whatever strips fit without too much thought.
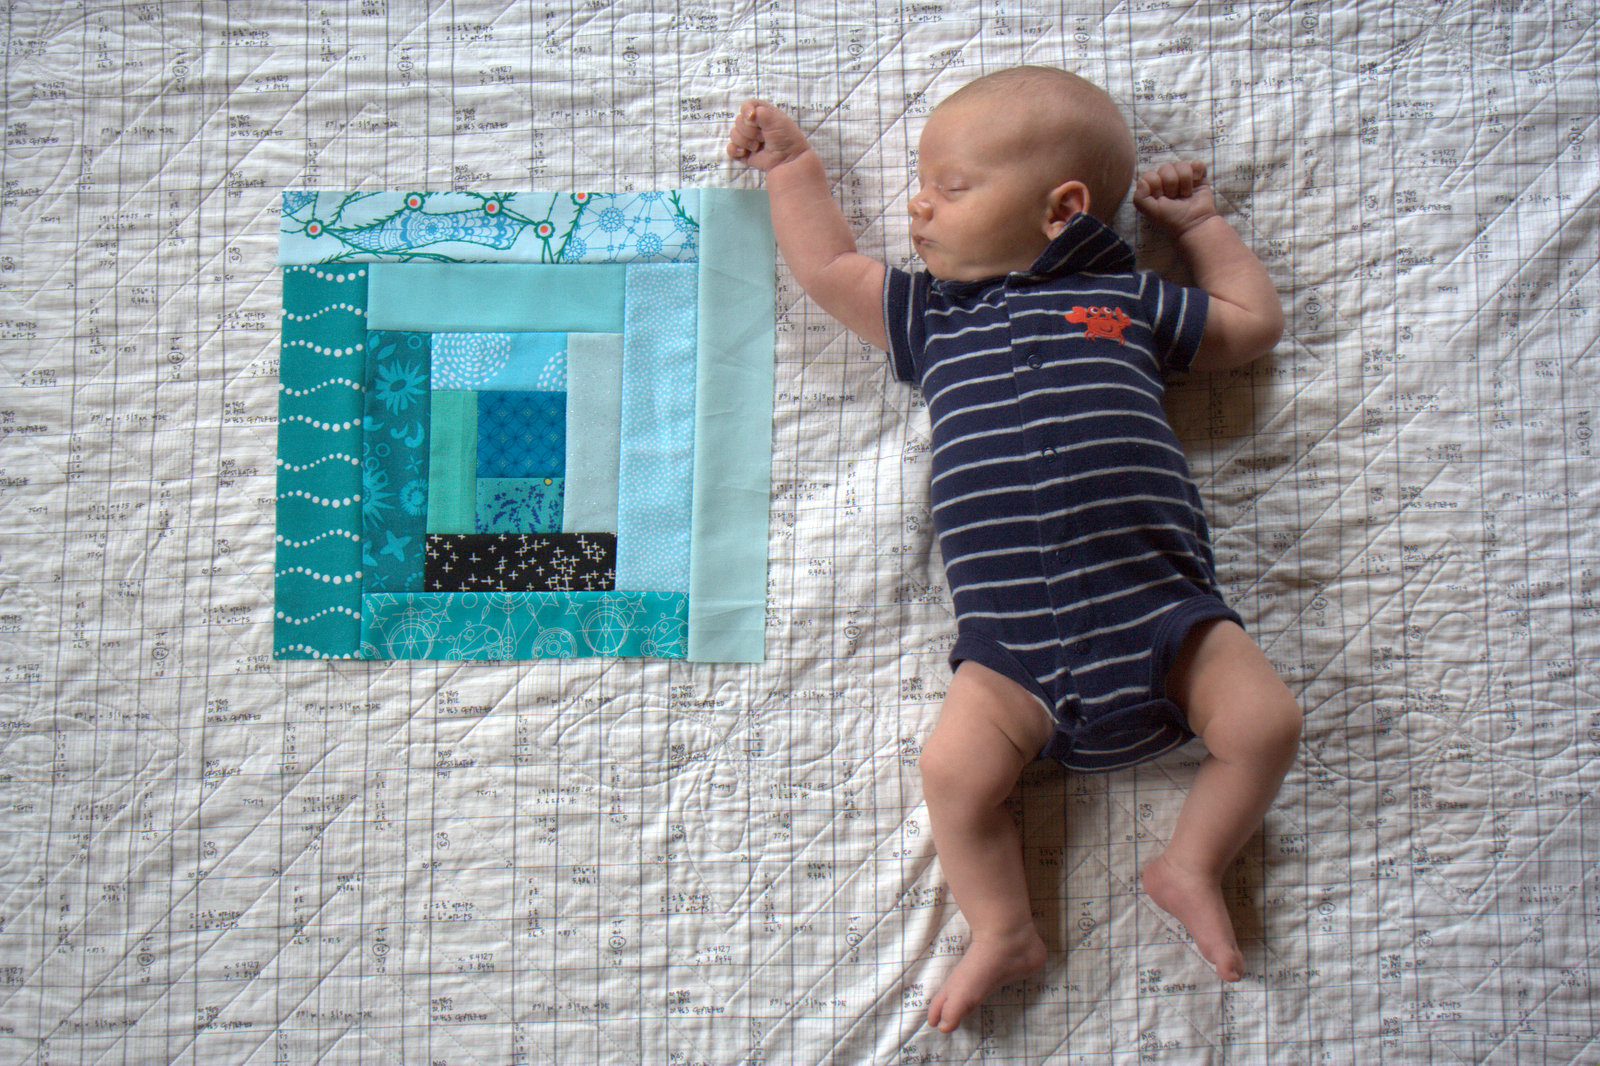
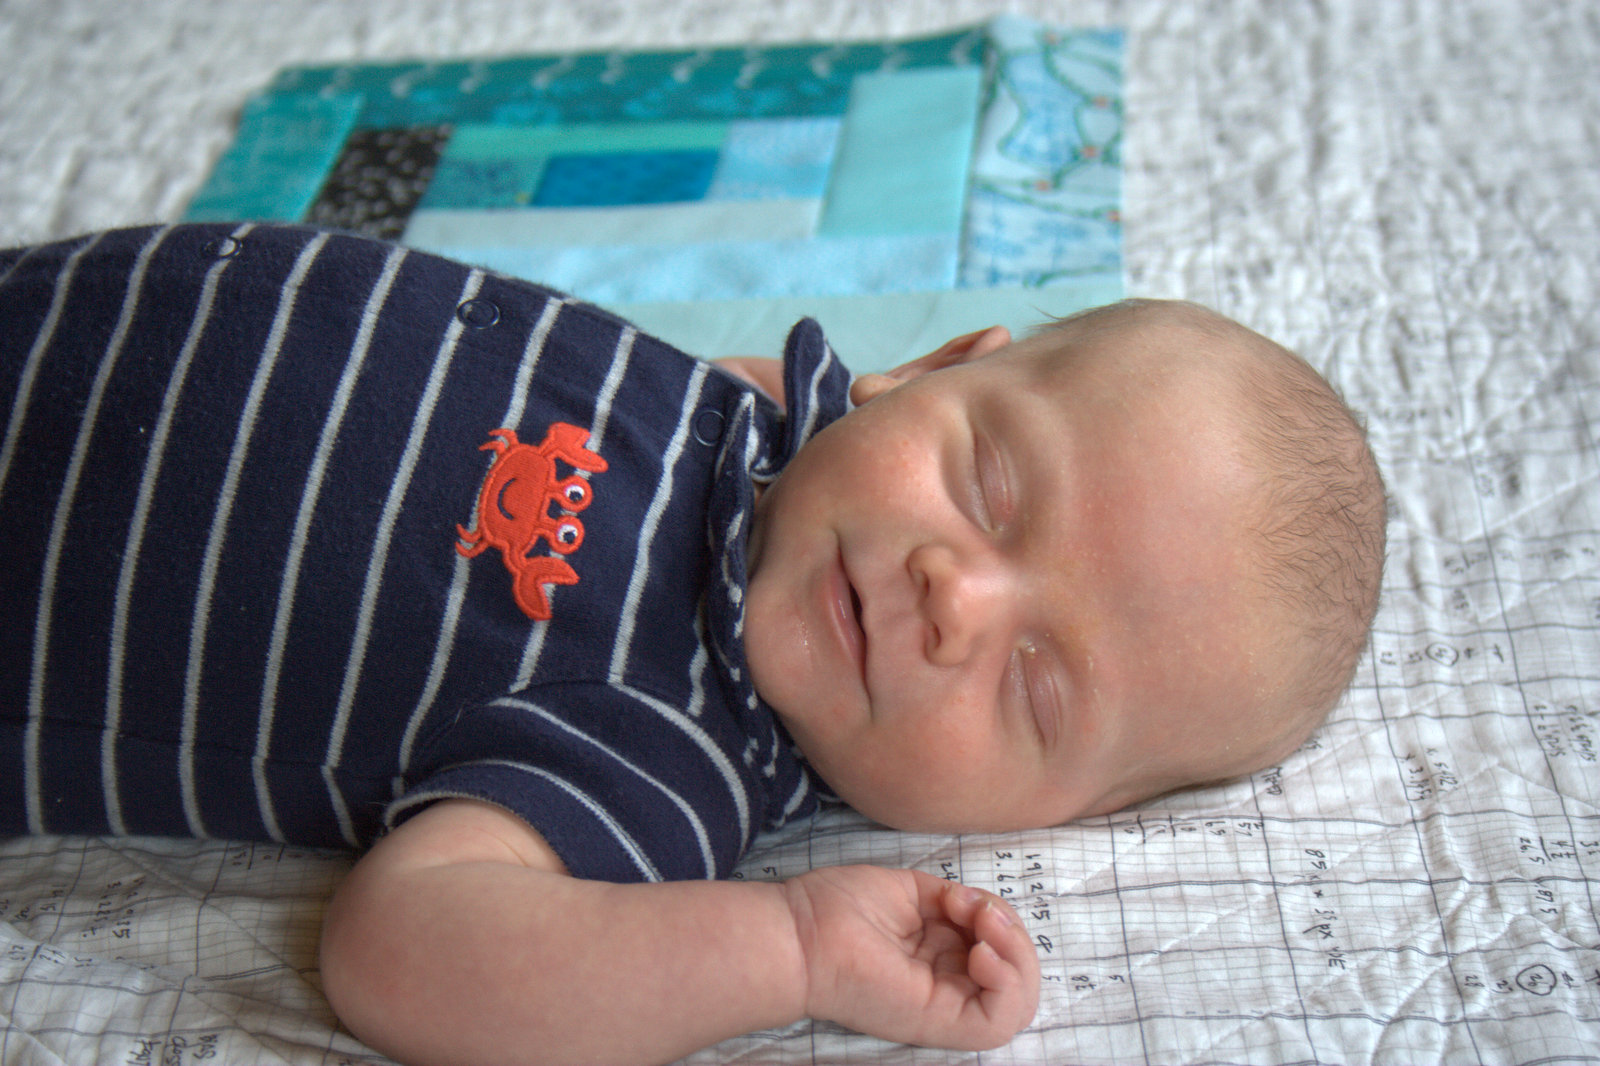
Ta da! The project was a slam dunk (get it? Finn is slam dunking… kind of?). I had to pause the 20 minute timer once for a baby nursing break, and I ultimately decided to hit snooze and sew for 30 minutes, since I had the opportunity, but it worked! Making the goal to sit down and sew for 20 minutes got me at my machine and resulted in a 12+” block.
My friends Stephanie at Late Night Quilter and Mandy at Mandalei Quilts and I are going to try out a goal of sewing (or making other sewing-related progress) at least 20 minutes each day. We are all busy moms with full plates, but setting a small, attainable goal will help us make sewing progress, too, without stress. We will be sure to post about our experiences on our blogs as well as on Instagram using hashtag #sewtake20. My first #sewtake20 trial run was a success and resulted in a great start to a new project, documenting how a quilt can grow along with my baby with only 20 minutes per month.
They are both getting soooo big!
I’m linking up with Freshly Pieced’s Work in Progress Wednesday, and will be posting more about my #sewtake20 progress on Instagram. If you feel like you need a little boost to get sewing daily, feel free to set a timer for yourself. Tag #sewtake20 so that Stephanie, Mandy, and I can see your progress and cheer you on!
July came in with a literal bang, and here we are already a week into it! I’m squeaking by with my July goal setting post for A Lovely Year of Finishes (ALYoF) just in the nick of time. This month I have a super fun but secret project to finish. I have a pattern coming out in the September issue of Make Modern eMagazine, and my goal for July is to finish it all up! I need to trim, bind, and photograph the quilt, and need to finish proofreading the pattern write up.
I can only show you tiny peeks until the issue comes out, but you can count on a full reveal come September.
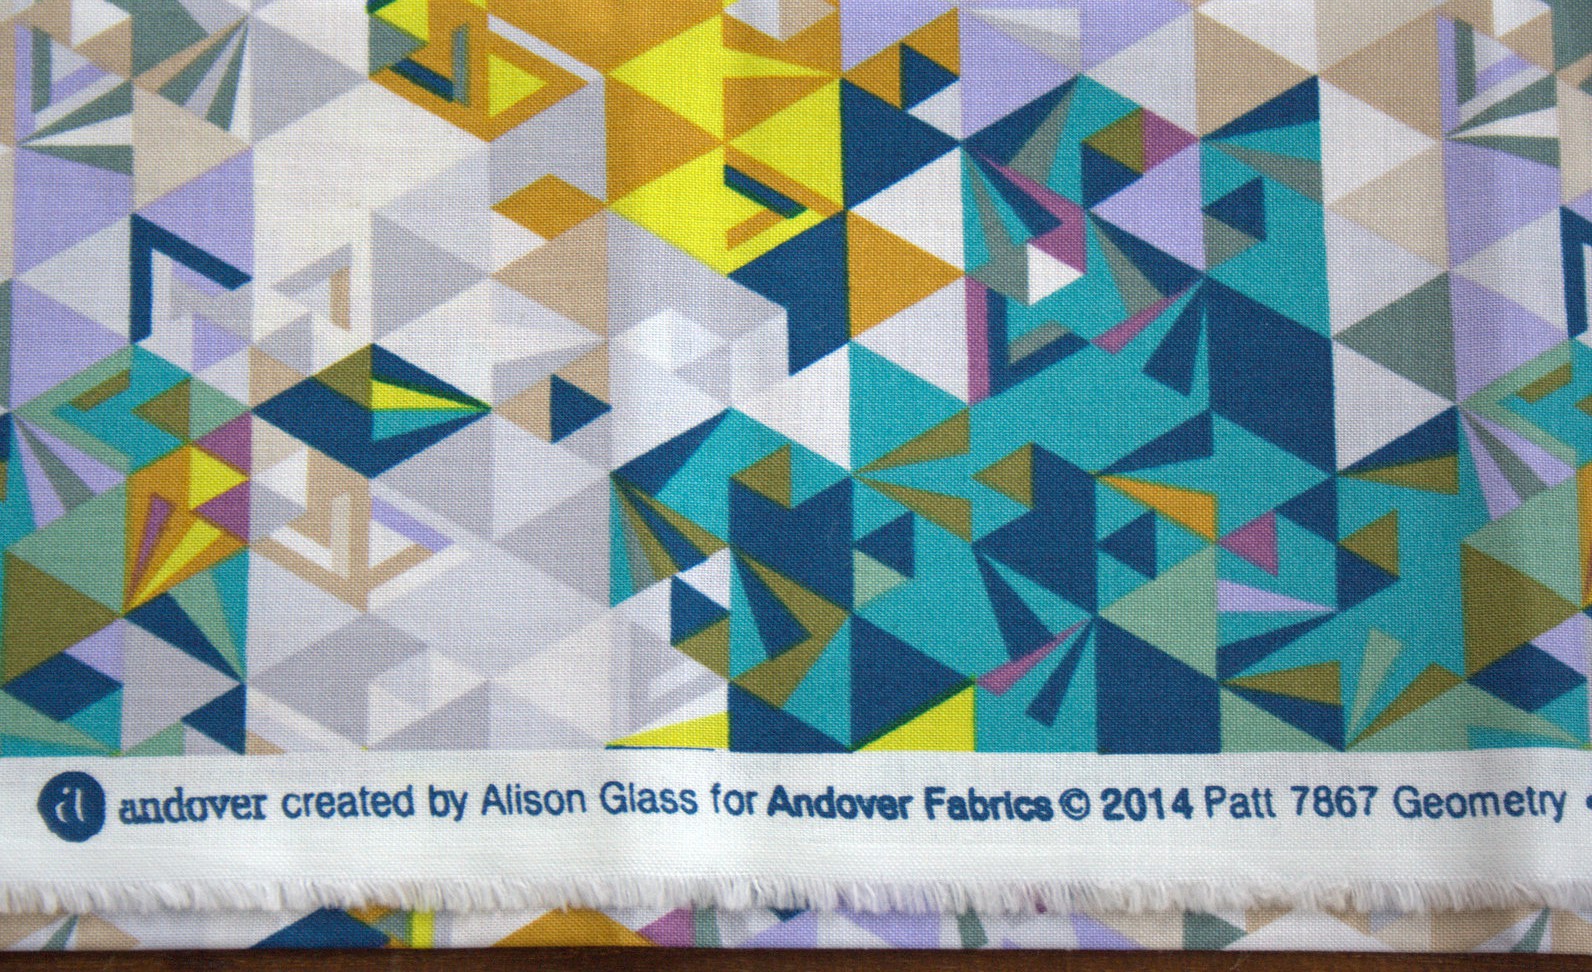
I plan to bind the quilt with this Alison Glass Geometry print from her Ex Libris line. The fabric designer aficionados among you probably noticed that the quilt includes the 2015 Sun Prints by Alison Glass… surprised? 🙂
I’m confident that I’ll meet this goal, since, well, I have to! The deadline is a week away. For this reason, I considered choosing a different project as my July goal, but ultimately opted not to. ALYoF emphasizes the selection of ONE goal per month, which really helps me prioritize my project progress. Finishing this quilt submission is my biggest goal, so it is a perfect choice for ALYoF.
As a mom of a newborn, and newly a mom of three, my progress is made in very small bits. I have learned that if I set lofty, time consuming goals, I set myself up for failure or at the very least, a stressful anxious push to complete the goals in time. On the other hand, when I set small, attainable goals, I’m motivated to complete them without stress, and then feel good that I’ve actually accomplished something, which then motivates me to create more. Just because I complete my ALYoF goal before the end of the month doesn’t mean I can’t then work on other projects. It’s a win-win of positive, fun quilty progress without stress.
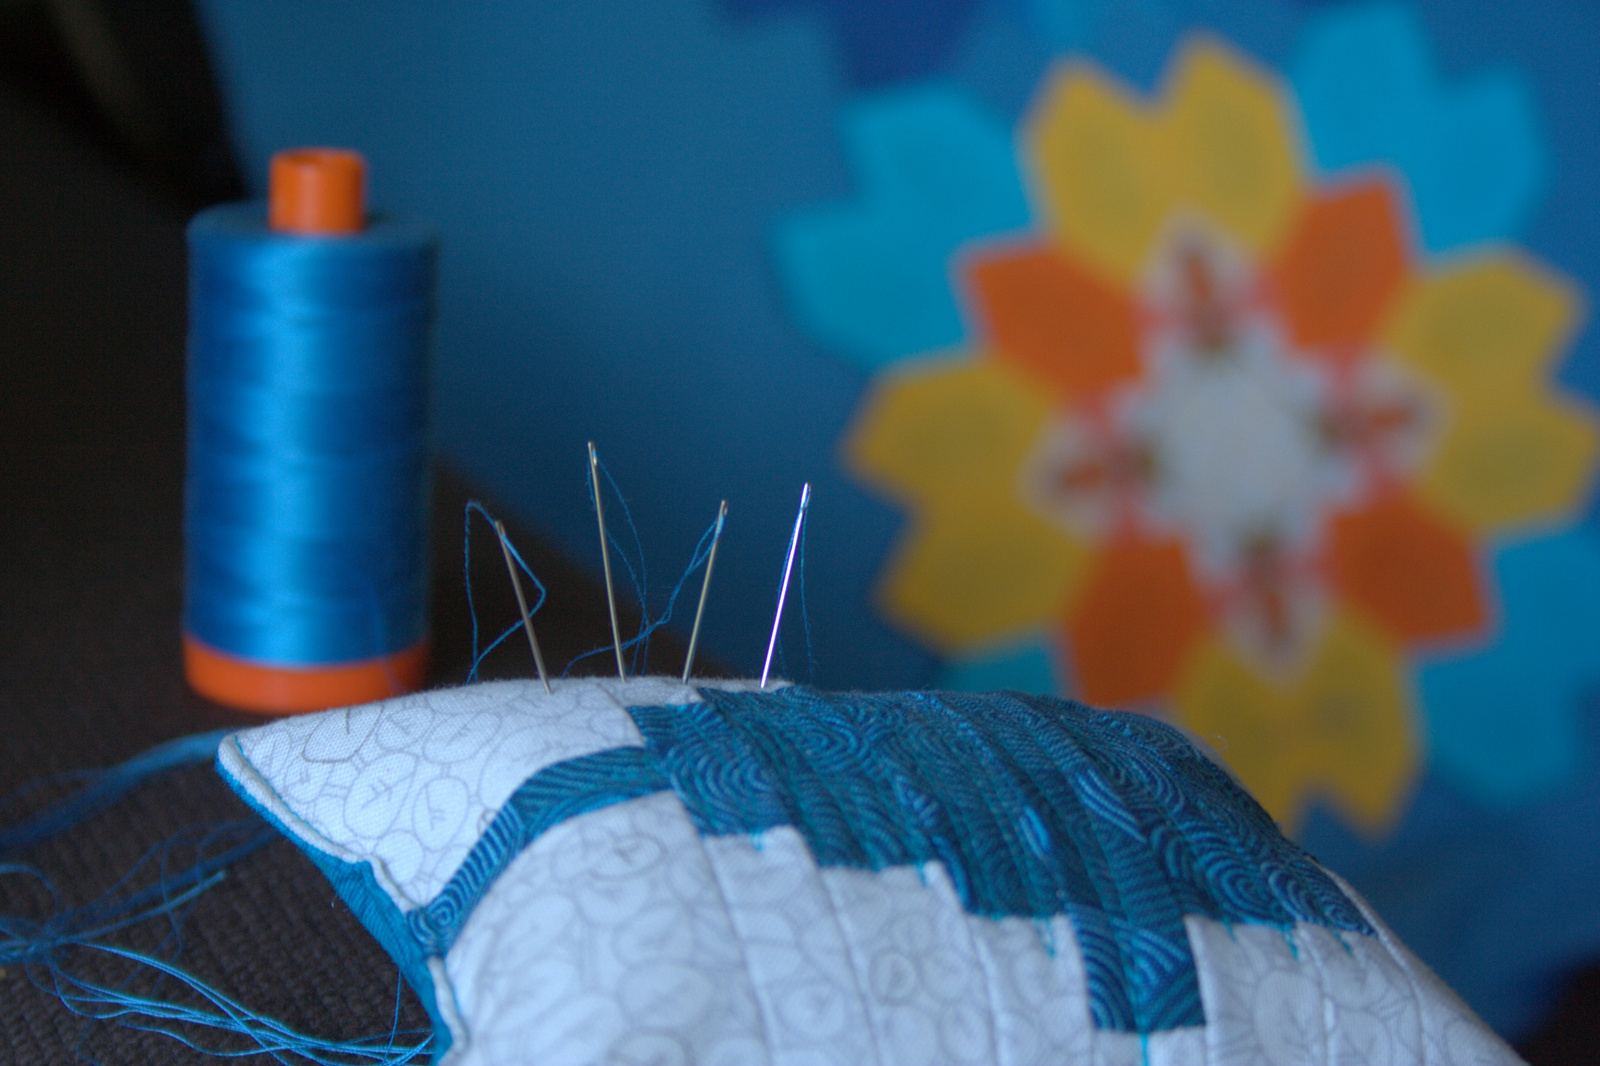
Recently I’ve been doing a lot of hand stitching, between finishing the piecing of my English Paper Pieced table runner, and stitching the pieced Lucy Boston blocks down to the border fabric to complete my table runner quilt top. During the past weeks, I learned two tricks that have helped streamline the process, and I’d like to share them with you today. I’ll call it “hand stitching preparedness” since it seems pretty logical, even if both tips were revelations to me.
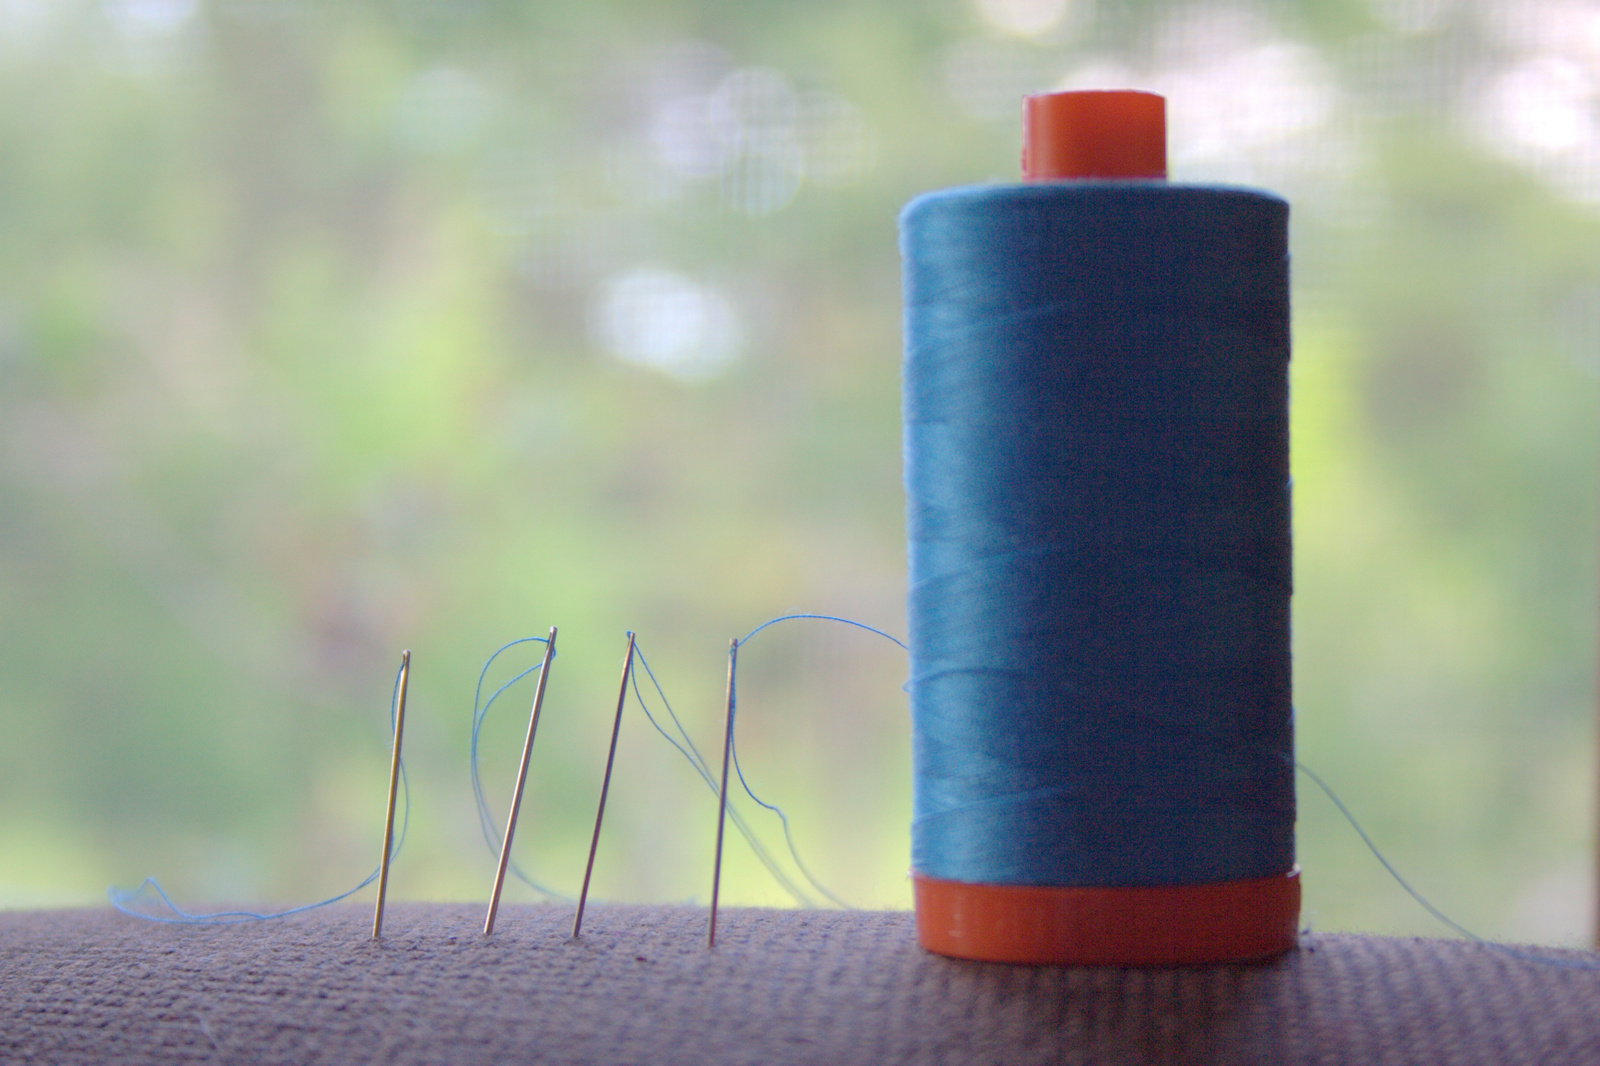
The first tip came in the form of an Instagram post by Carole Lyles Shaw (@carole_lylesshaw), a simple photo of a few pre-threaded and knotted needles stuck into the arm of the couch to help streamline her binding while watching a game on TV. I saw this and a lightbulb went off in my brain: duh!!
Before sitting down with your hand stitching, whether it be EPP, hand applique, or quilt binding, pre-thread and knot a few needles and have them ready and waiting within reach.
You can keep them in a pincushion nearby (photo above)…
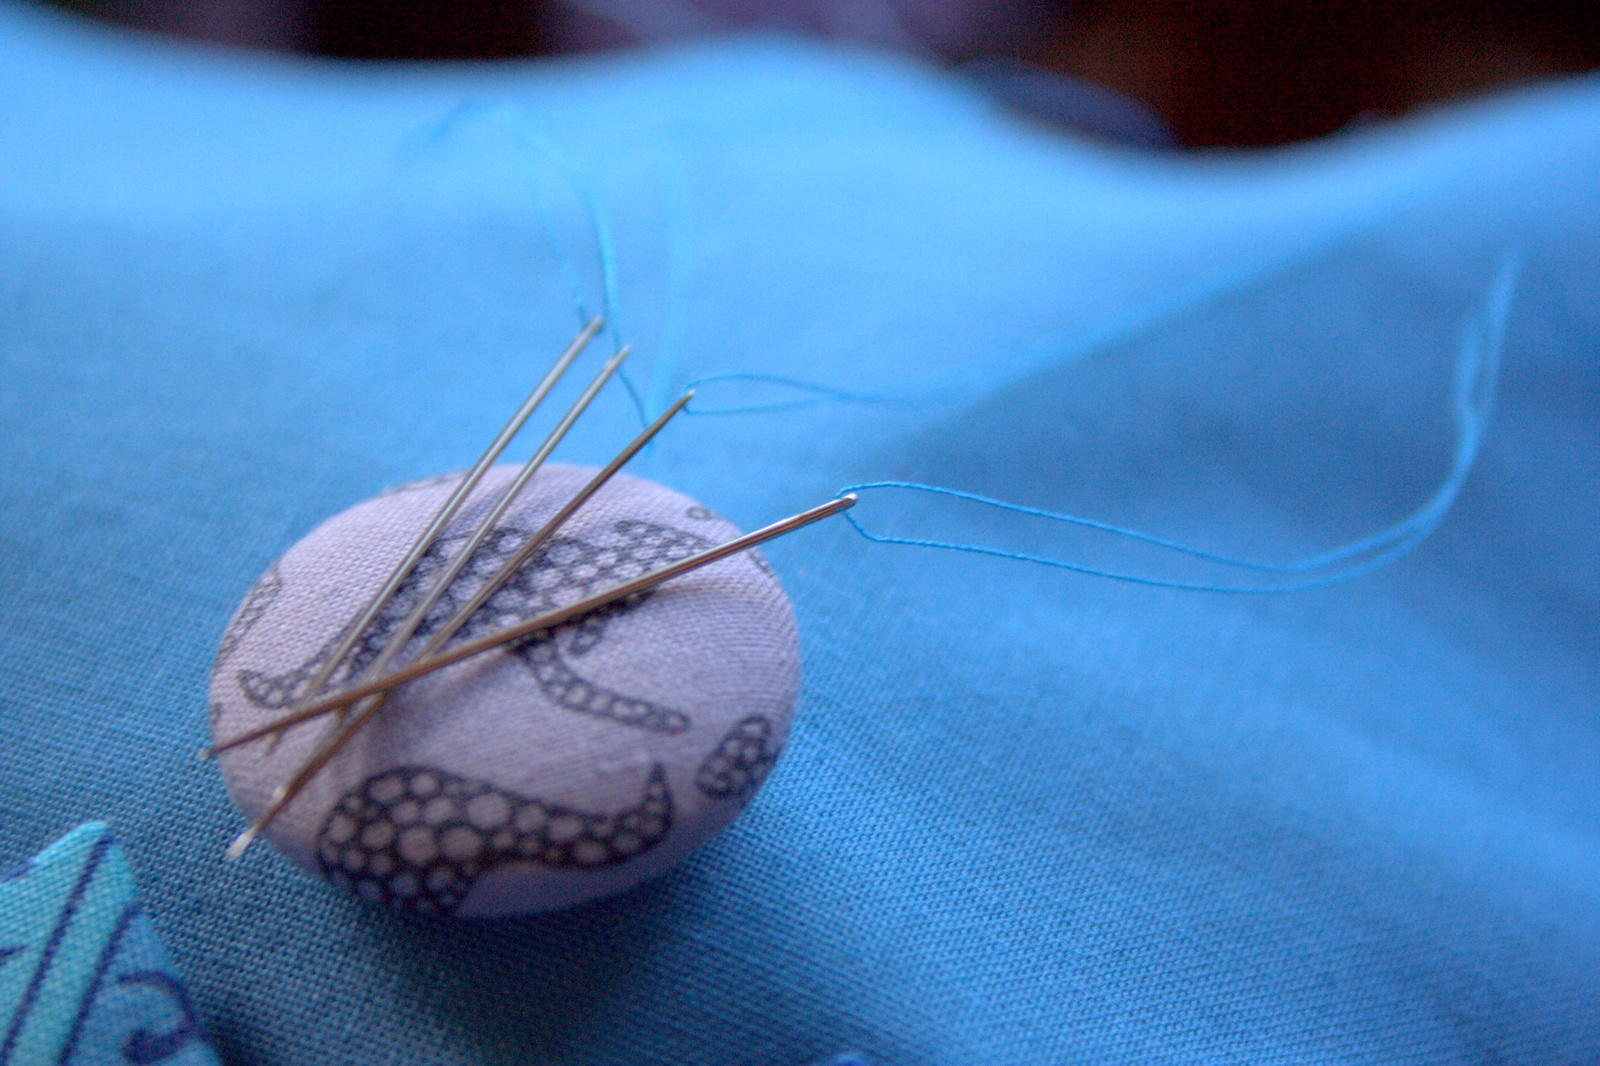
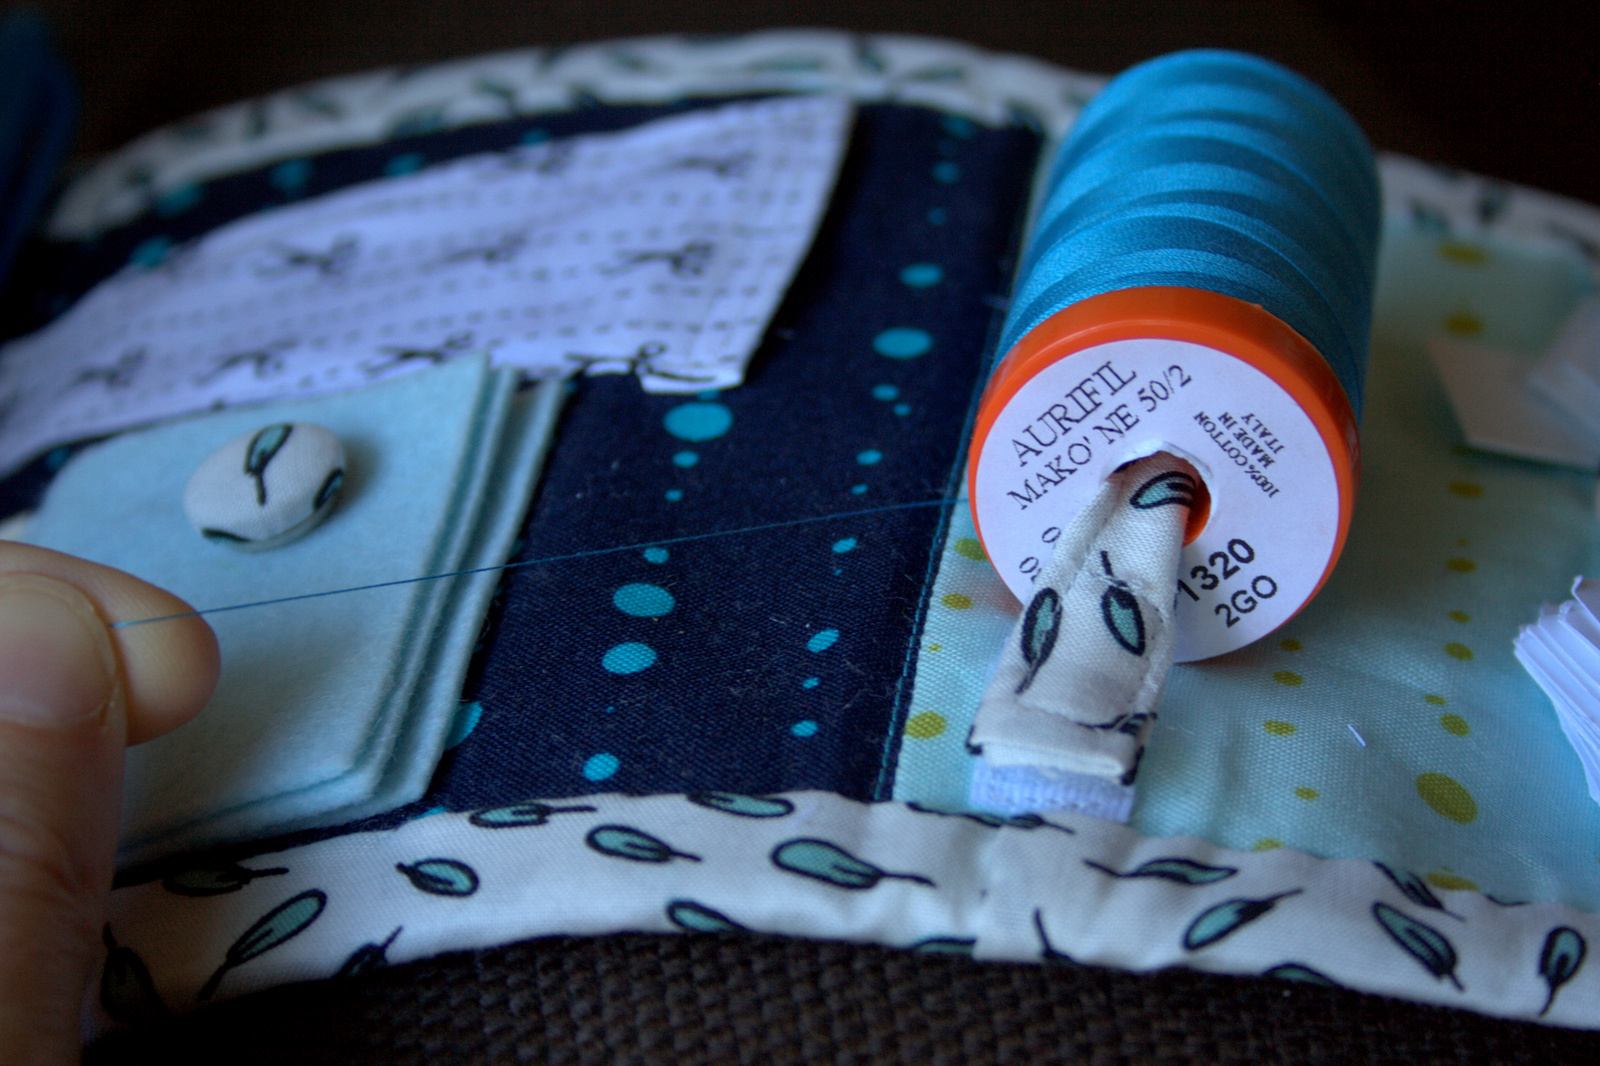
or you can keep them on a needle minder on your actual work…
or you can just stick them into the arm of the couch right next to you.
This tip came in particularly handy since I was doing my hand stitching with my sleeping baby in my lap and my scissors, thread, and other sewing tools way up high on top of the bookcase, out of reach of my curious and busy 3 year old. Talk about a game changer! I was able to finish stitching down the blocks without waking my babe or having to juggle a sleeping baby, scissors, and sewing needles to cut new threads as I progressed.
Stunning needlebook made by @mara_makes… isn’t that thread holder awesome!?
One additional bit of advice I’ll add to this tip is to lay your threads out neatly and separately when cutting them to pre-thread your needles. If you cut them and lay them on top of each other, they *may* make a tangled mess before you can thread the needles successfully.
Ask me how I know this 😉
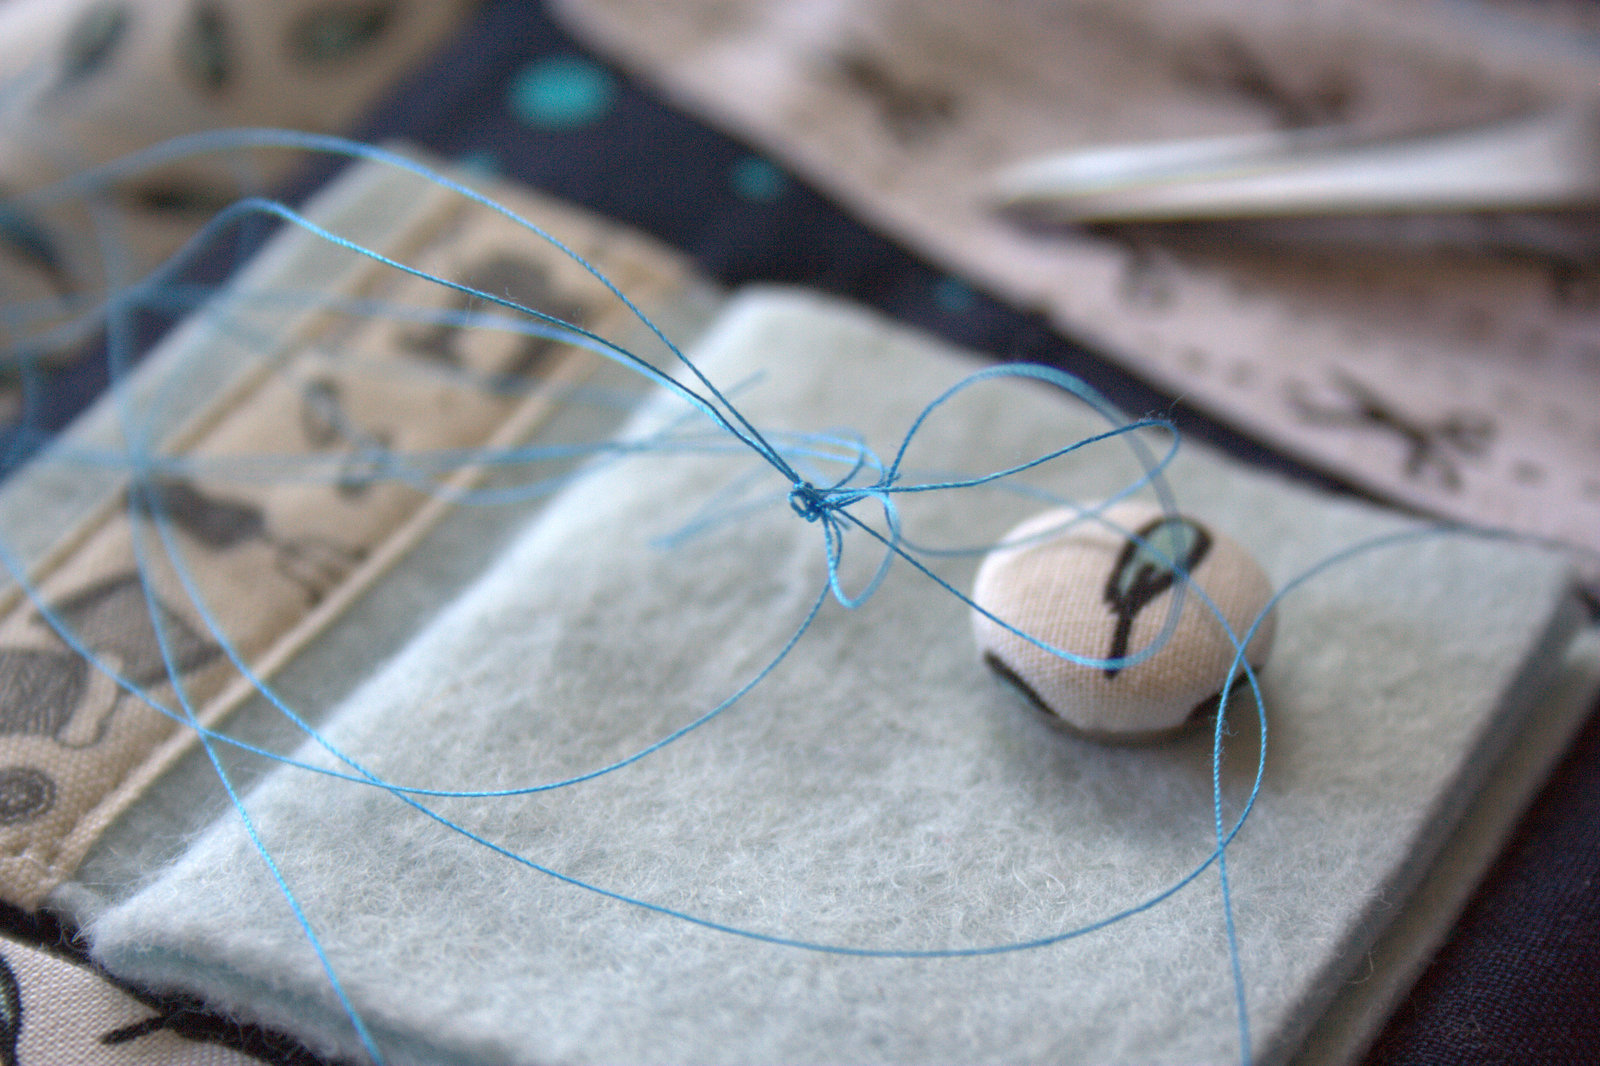
And finally, learning how to tie a quilter’s knot has saved me a lot of time with my recent hand stitching. That’s one of the downfalls of being a primarily self-taught sewist: you miss the simple basic tricks that well versed quilters take for granted. My friend Stephanie at Late Night Quilter posted this video tutorial a couple weeks ago, and I’ve made dozens of quilter’s knots since.
I did it! 17 days after Finn’s birth, I finally turned on the sewing machine and did some machine stitching. That sure beats the six weeks I waited after Max was born before realizing that I could make progress in tiny baby steps. Beginning is the hardest part, so hopefully now that I’ve begun, I will be able to sew for 10-20 minutes per day (or more likely, night). Of course I began a new project while I was at it.
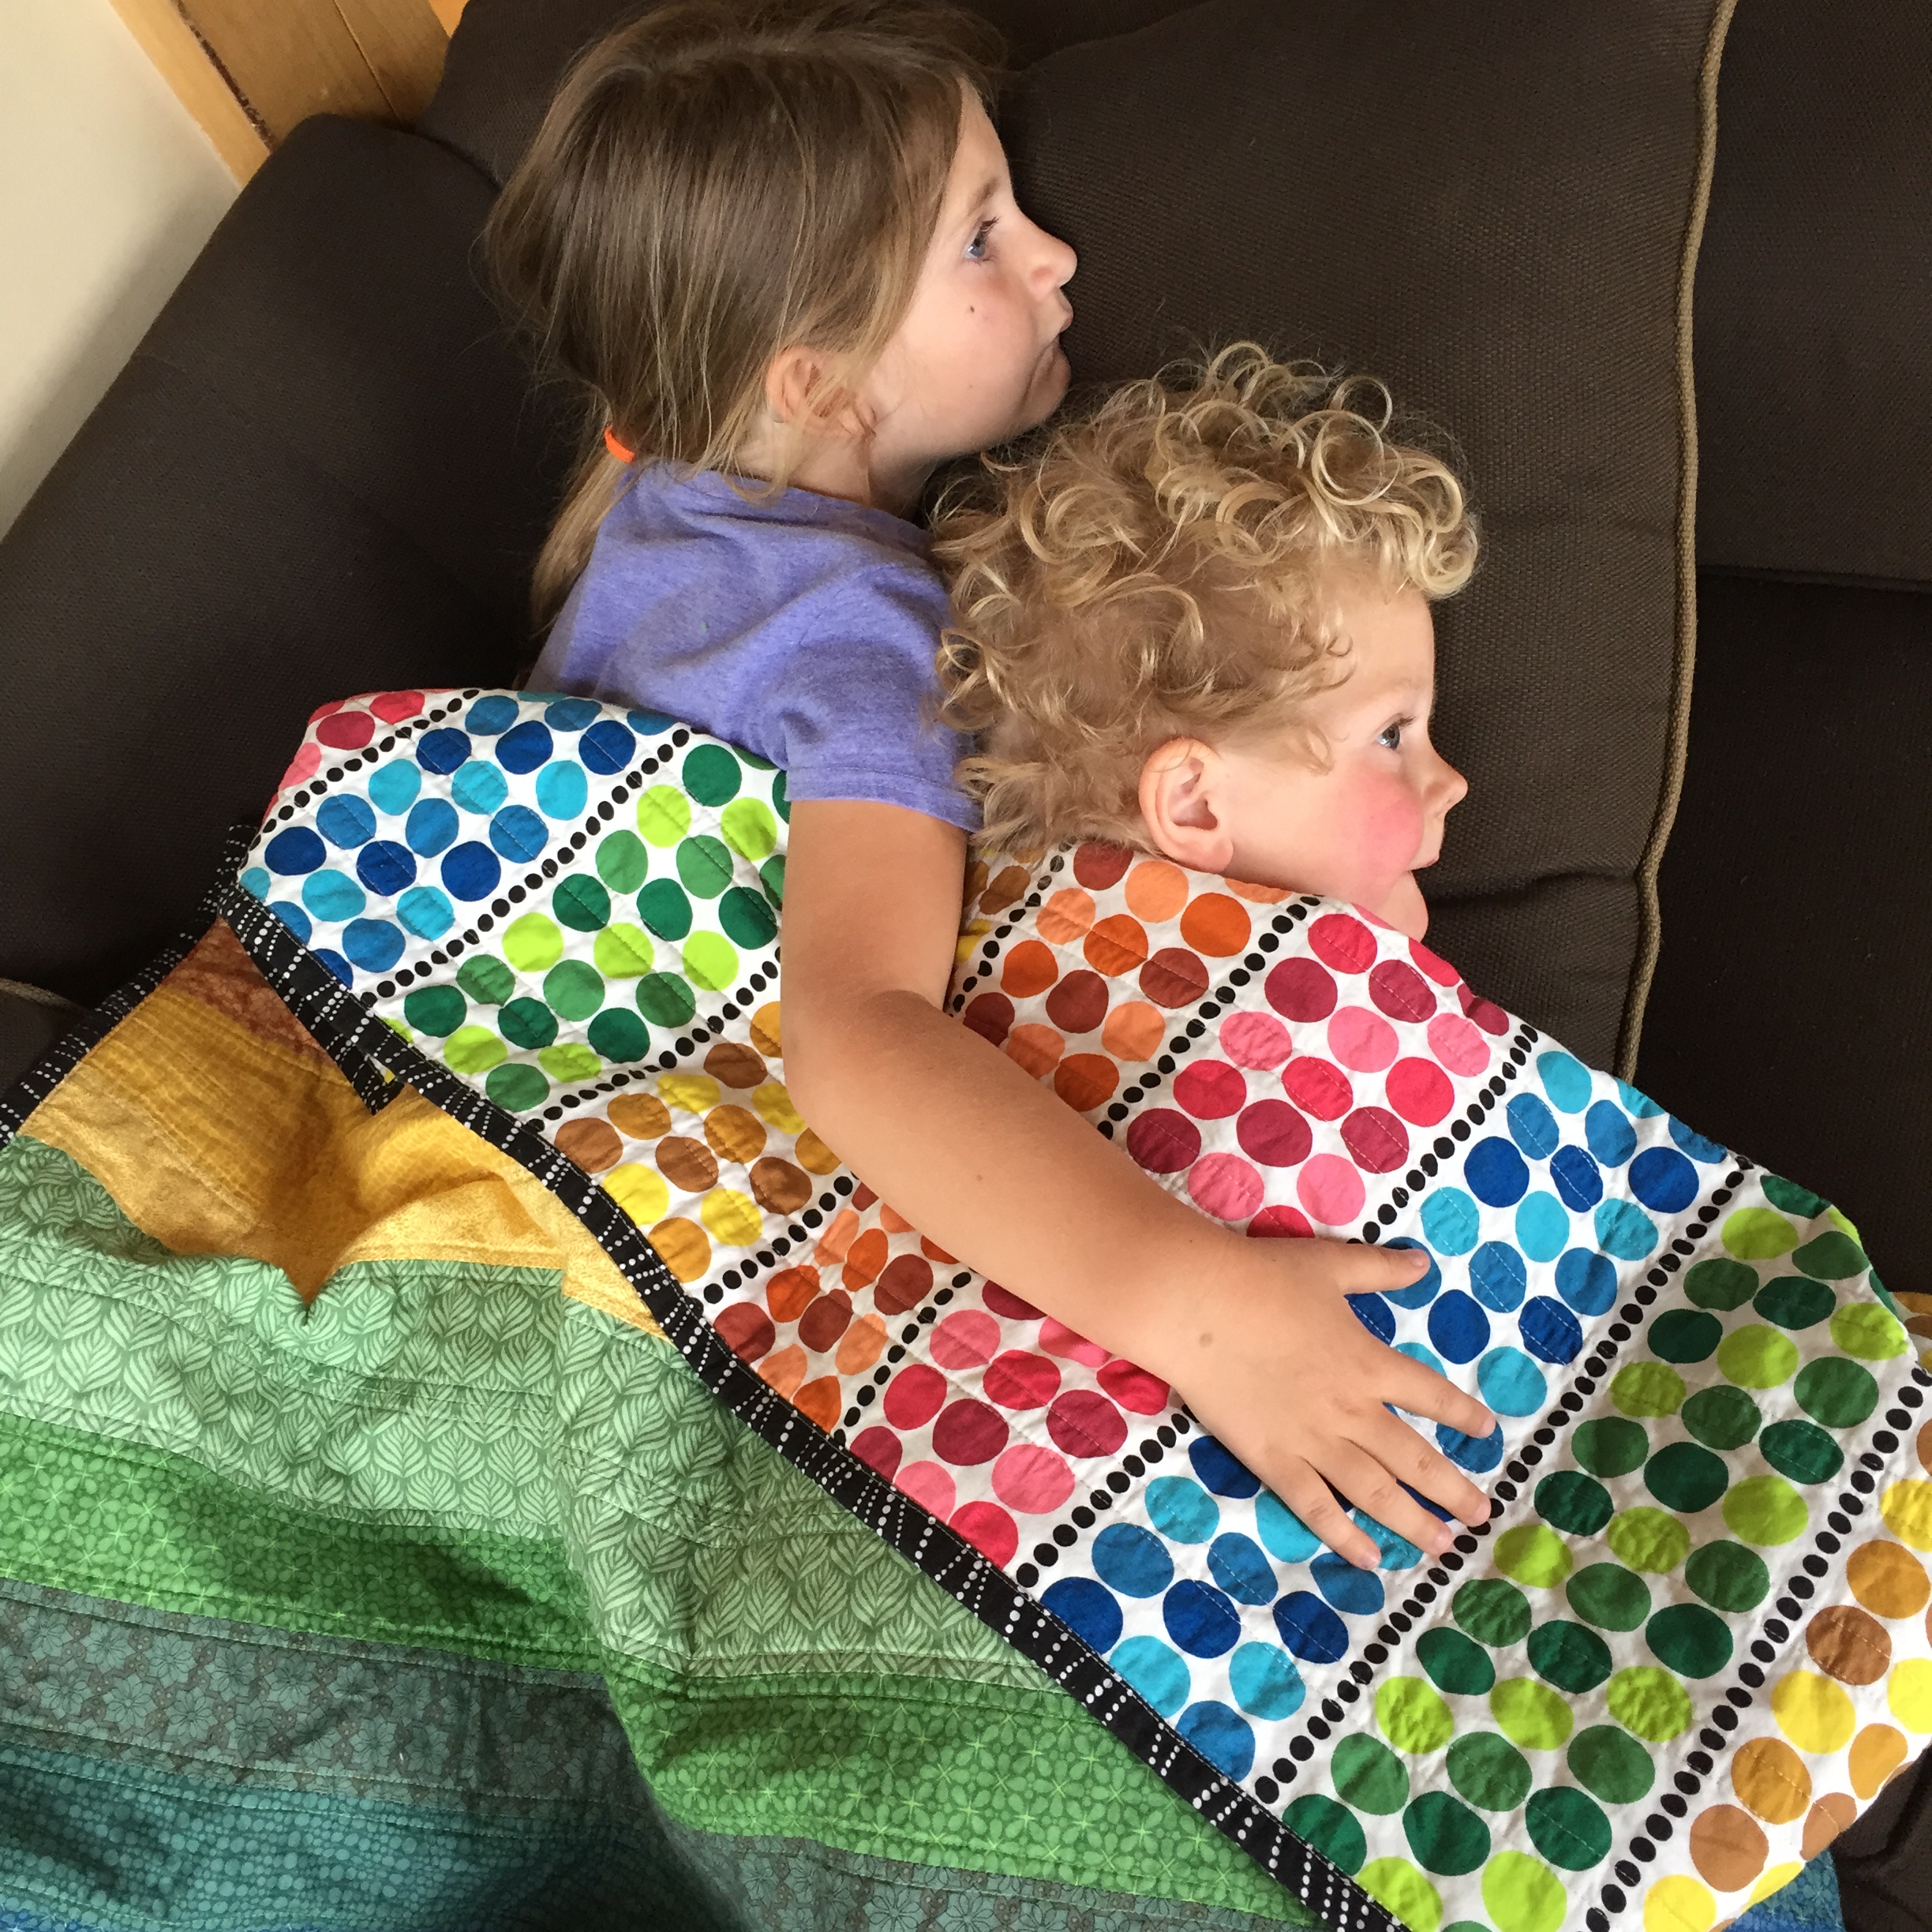
After seeing my kiddos curled up under Maddie’s Rainbow Jellyroll Quilt, I decided that my boys really need quilts of their own. I knew I wanted to keep it simple and use a rainbow of color (why not? I love rainbows; kids love rainbows; my stash is a rainbow… perfect!), and inspiration struck in the form of a sneak peek Instagram post of a mini quilt made by Kim at _glass_half_full.
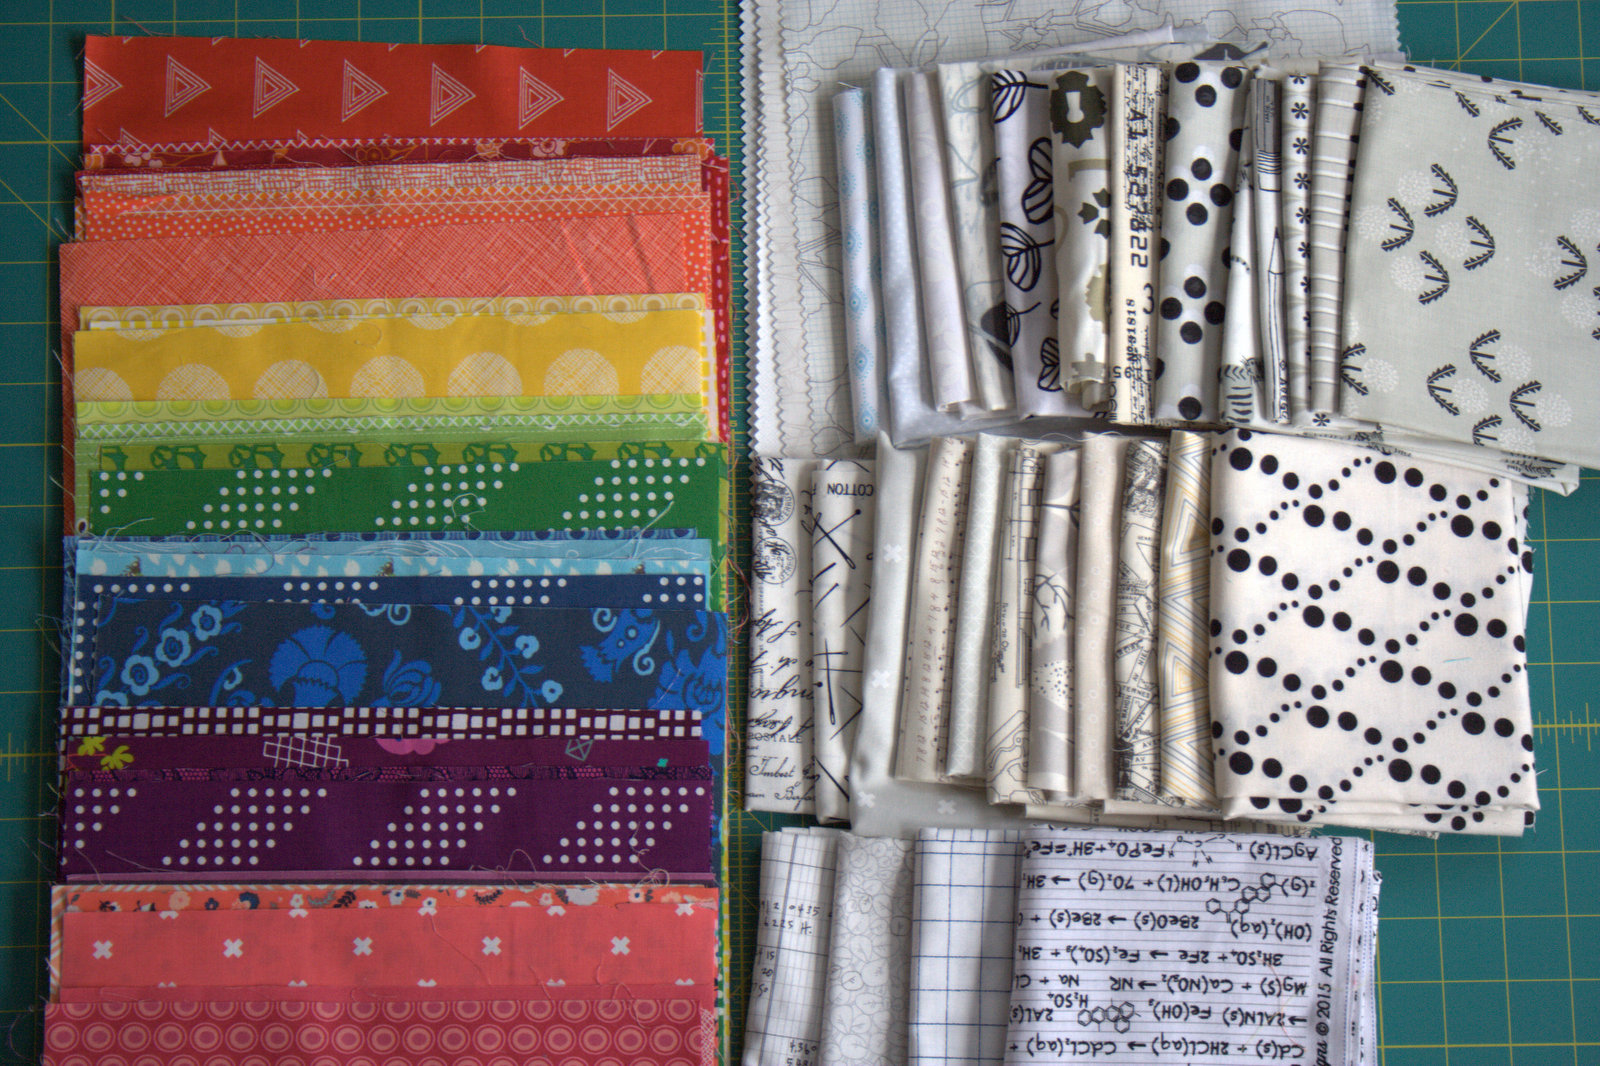
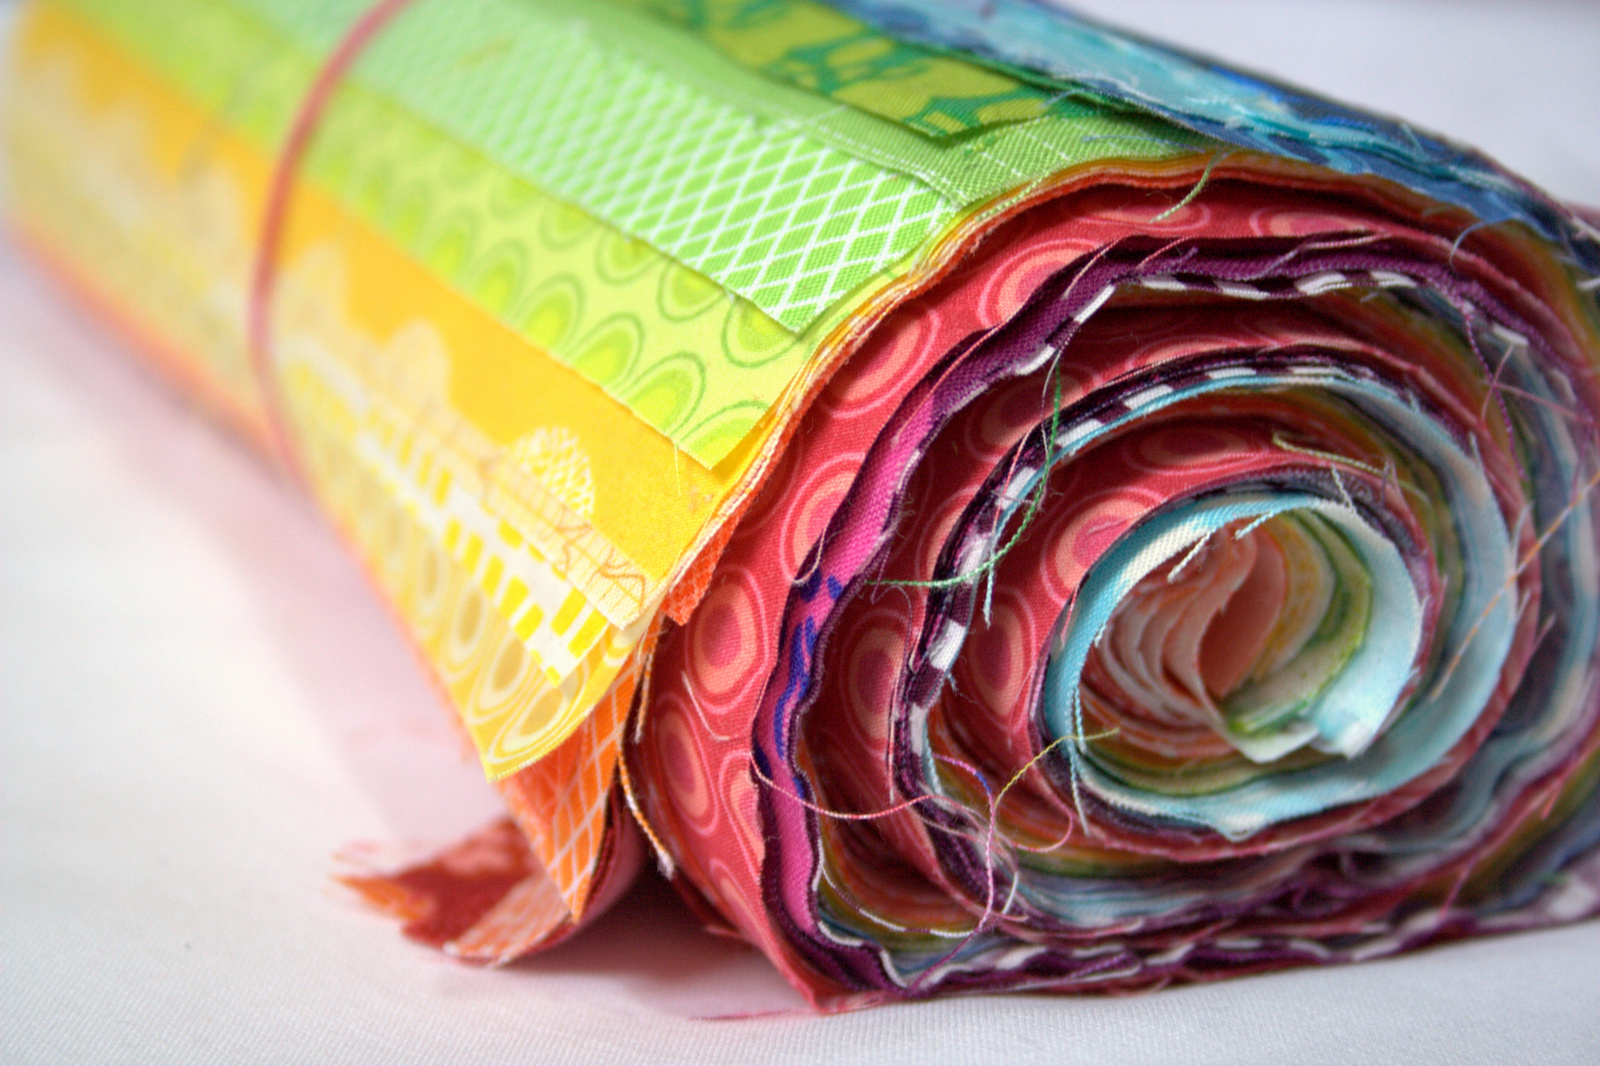
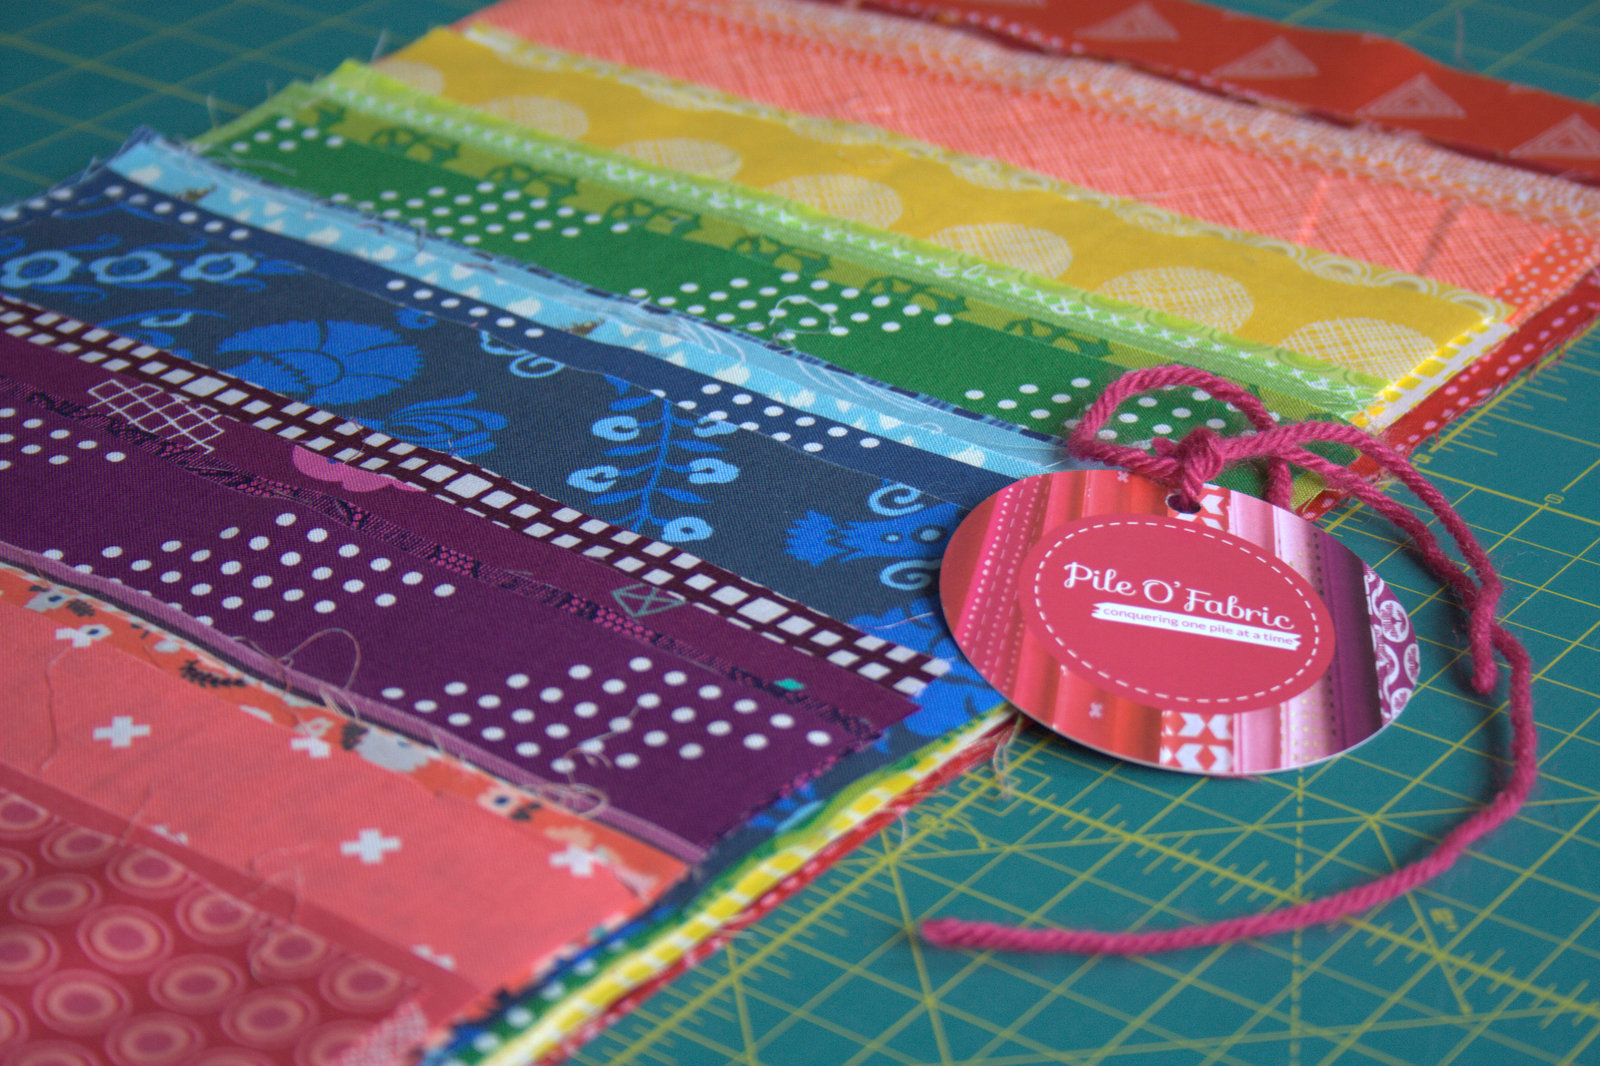
I sketched out some ideas for enlarging the quilt, decided on a 7×7 grid of 9″ blocks for a 63″ square finished quilt size, and then came the fun part: fabric pull! I pulled out all of my low volumes for the background, and decided to put the gorgeous rainbow fat eighths bundle I won from Pile O’ Fabric back in April to good use.
Typically when there’s a bundle or collection of fabrics, I’ll like most of them, but not all. This bundle is an exception, as are many of Alyssa’s bundles at Pile O’ Fabric. I honestly love every. single. print. in this bundle. It’s a collection of 35 fat eighths, five (5) each of red, orange, yellow, green, blue, purple, and pink. They are mostly the color-heavy “basics” that read as one color in particular. It’s ideal for a rainbow quilt, and I’m excited to add these fabrics to my stash.
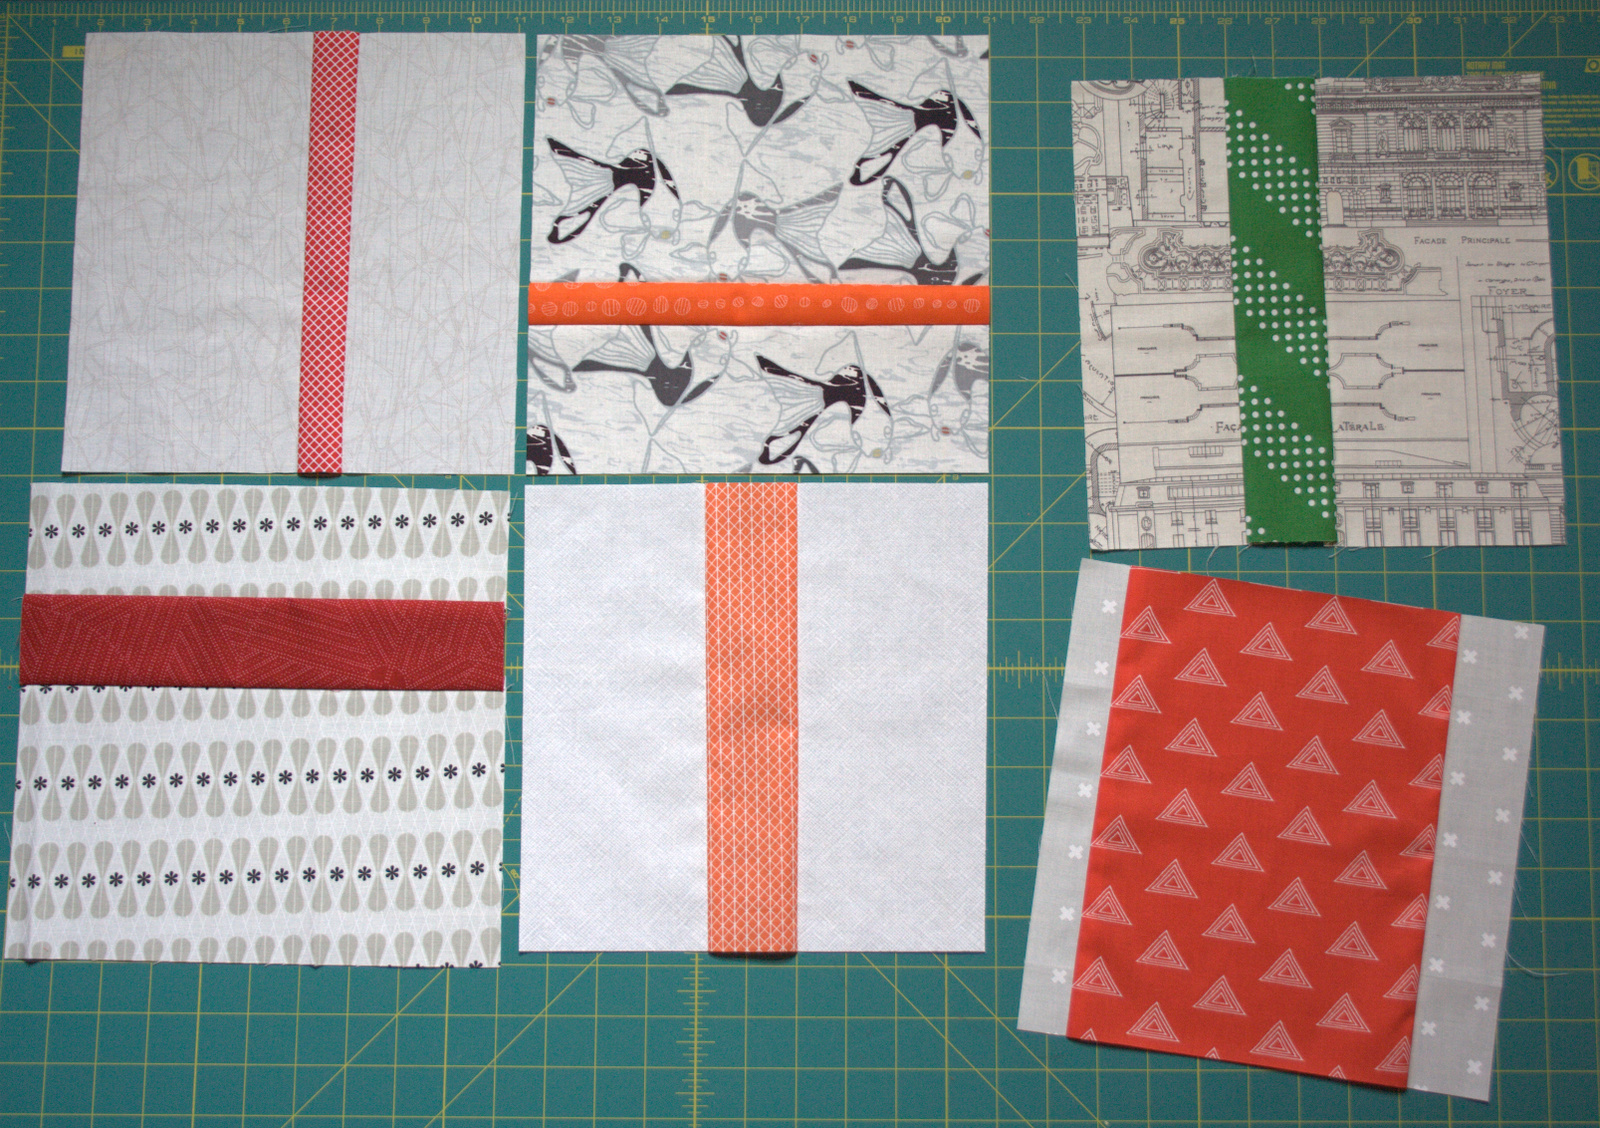
The blocks sew up very quickly; I’ve already made 6 of the necessary 49 blocks. It doesn’t look like much yet, but I am hoping that as more blocks are added and you can see the design better, it will start to be a bit more exciting. A quilt like this might be best seen either super close so that the fabric details are there, or complete and in full so that the overall aesthetic is there.
I haven’t yet squared up the bottom left red block, since I haven’t decided if the diagonal path of the low volume print will drive me nuts or not, and whether I should re-stitch it with the print parallel to the red strip. What would you do? I’m trying really hard not to micromanage the piecing of this quilt, and to let the somewhat scrappy randomness evolve on its own.
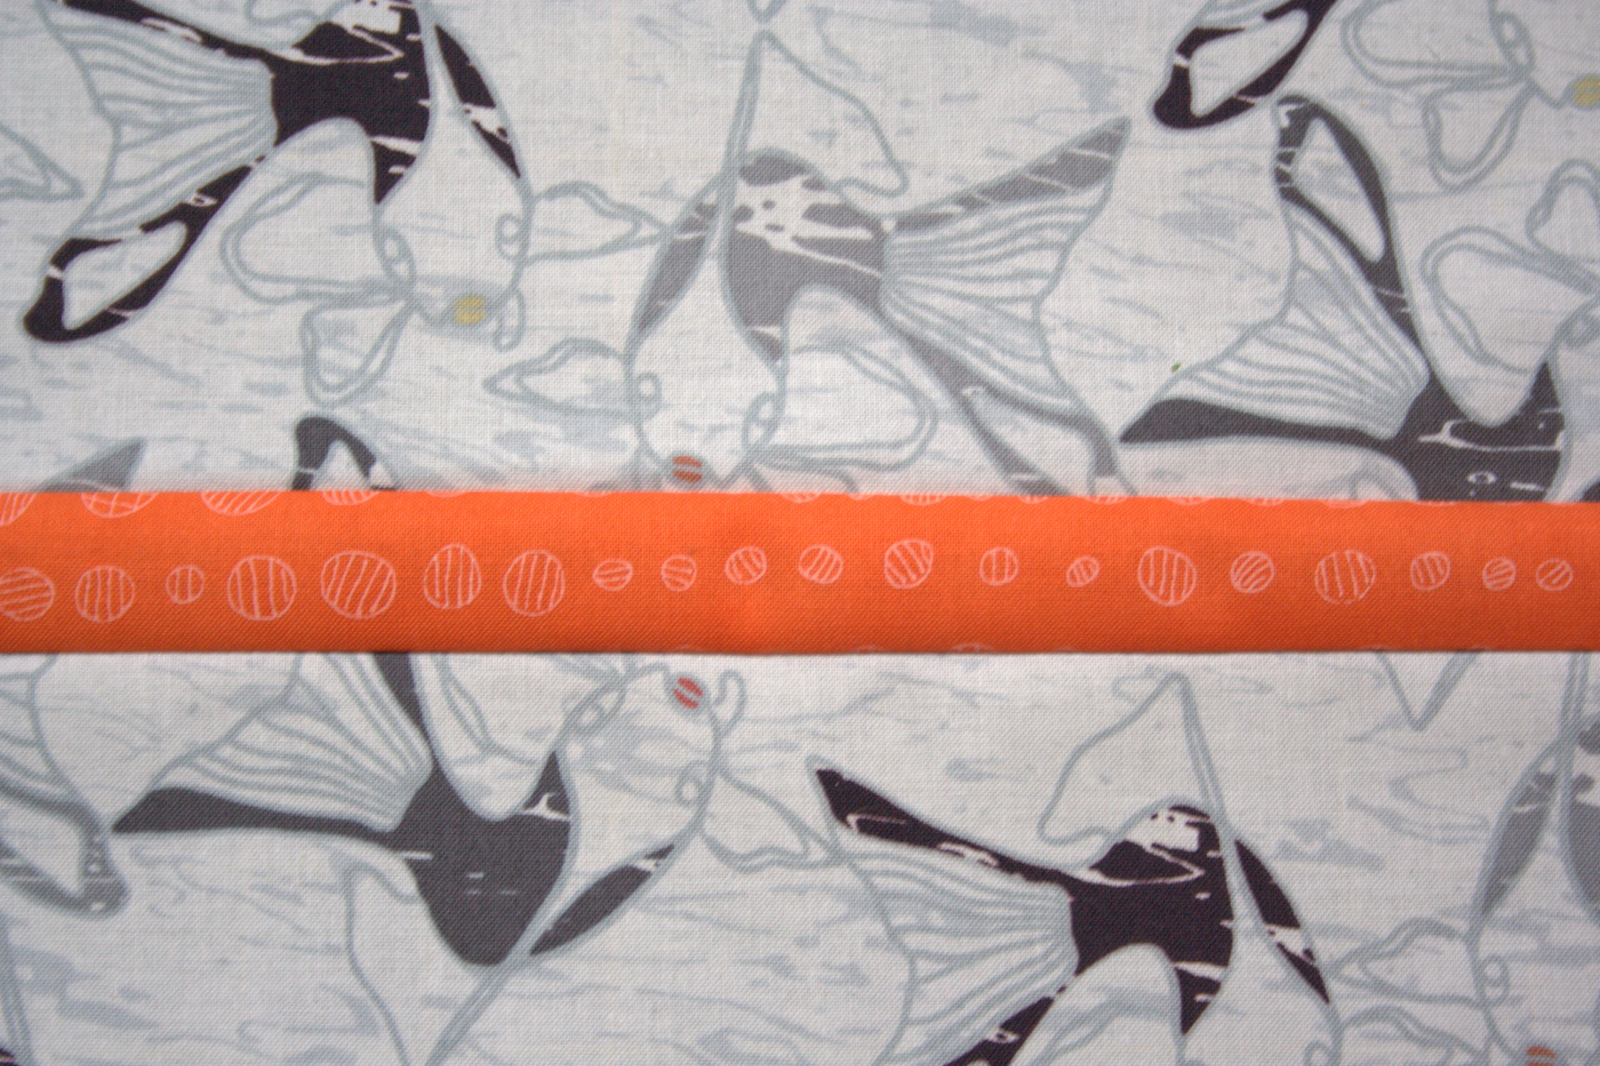
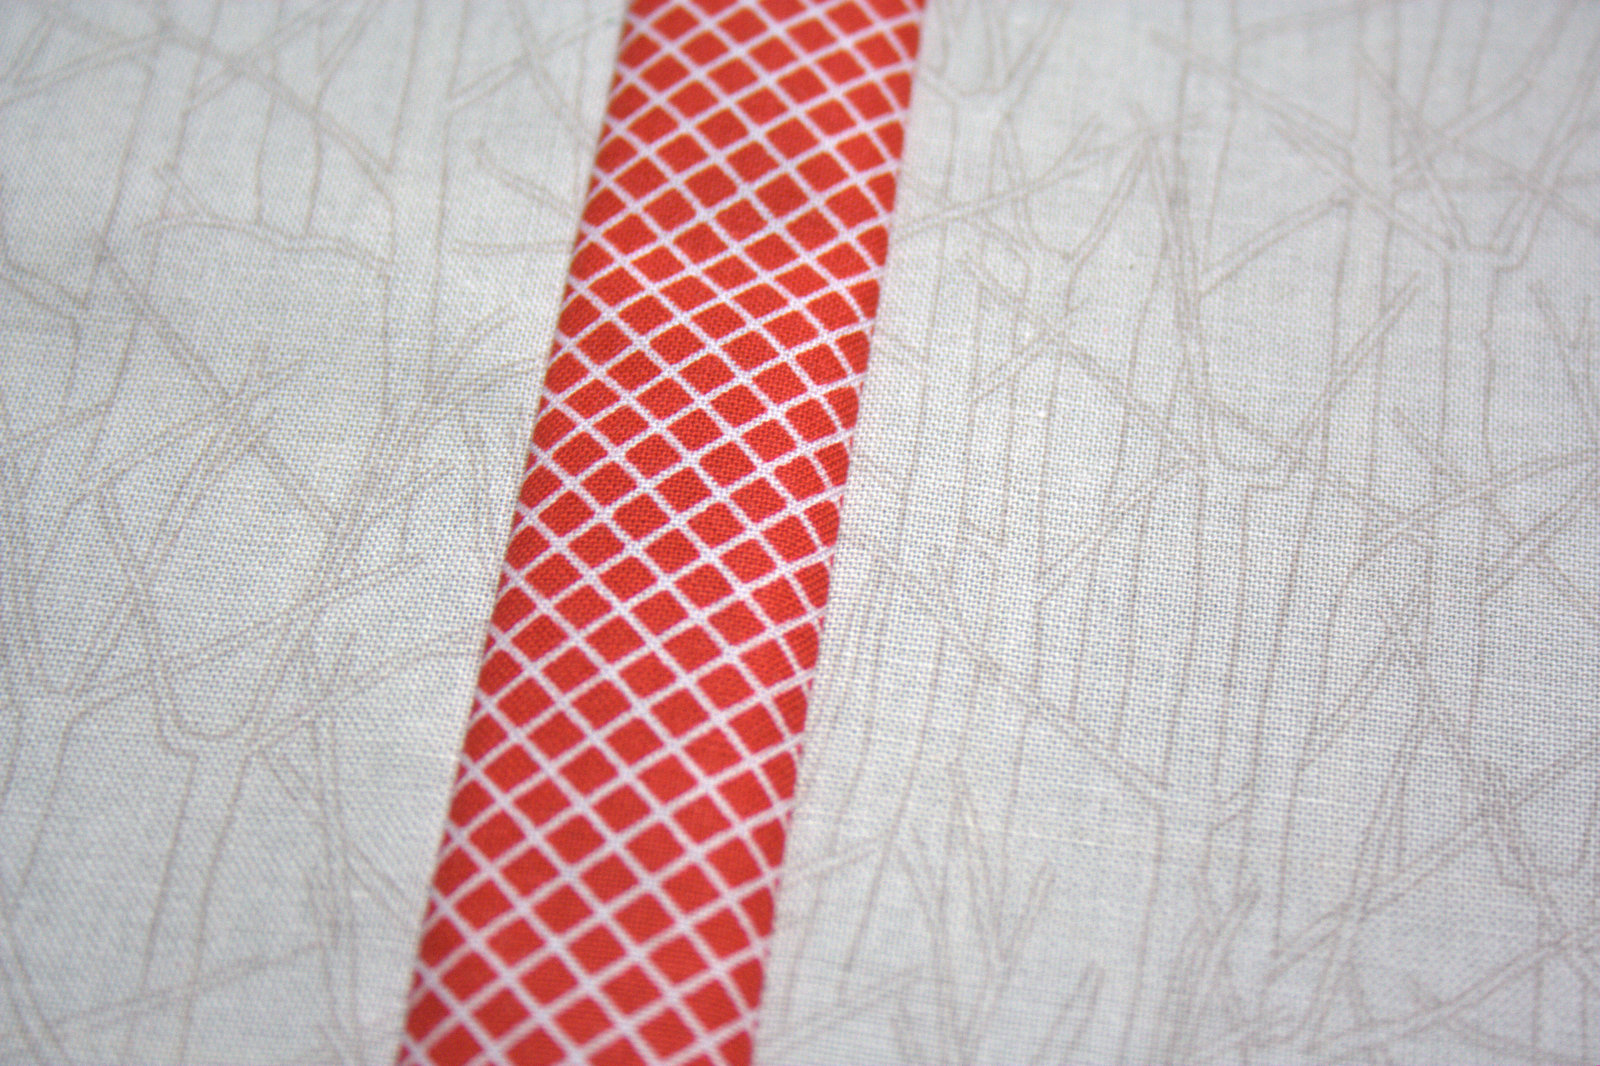
Koi and carrotRed crosshatch and botanics
Baby steps. Even they will result, one day, in a baby quilt. 🙂
I’m linking up with Molli’s Sunday Stash, since I’m finally sharing this gorgeous rainbow fat eighths bundle, as well as Monday Makers & Design Wall.
Over the past week, little reminders of why I love to quilt have been popping up here and there. First, the birth of my son. There’s nothing like new life to inspire an overflowing heart and endless inspiration. I just want to stitch my love into a million timeless quilts so that my family can be wrapped in a tangible sign of my love, always. Family, babies, love–what beautiful things!
Then, days later, Amy from Stitchery Dickory Dock announced her new book, For Keeps. In her words, here’s what For Keeps is all about:
What is it all about? Well, quilting, yes, but so much more than that. It’s about building relationships, about preserving priceless memories, and sparking unforgettable family time. It’s about making beautiful things, and infusing our patchwork with even more meaning and functionality. After all, isn’t that what quilts are all about? They’re a joy to make, a joy to give, and a joy to use.
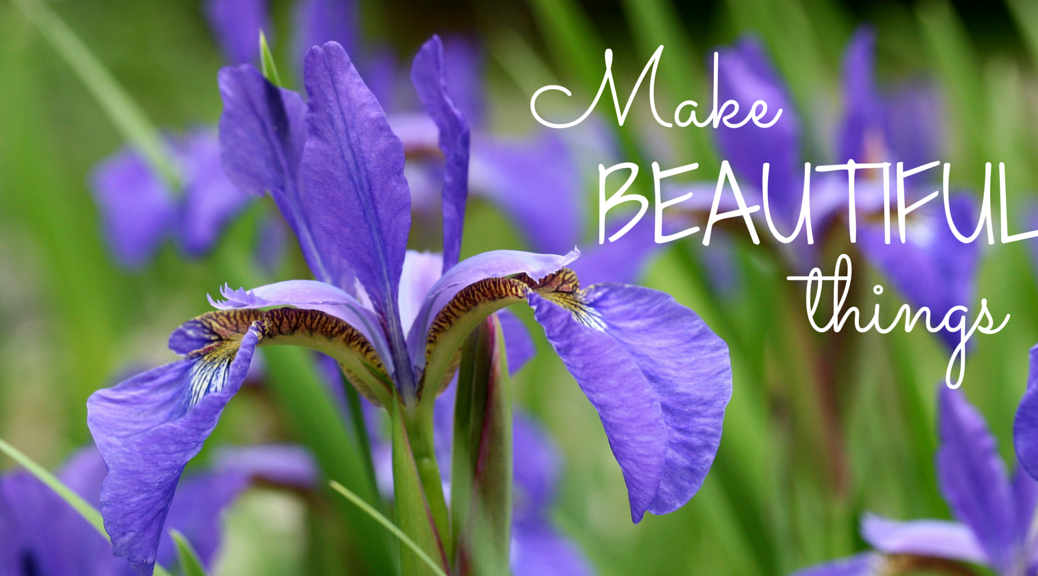
It’s about making beautiful things.
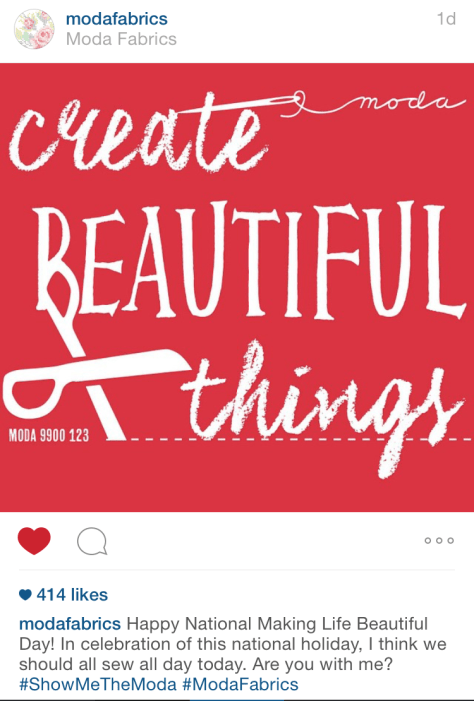
This line gets me every time. I’ll tell you why in a minute… but first, the next sign: yesterday, Moda Fabrics posted a graphic on Instagram sharing that it was National Making Life Beautiful Day.
Create beautiful things.
All of these little signs, popping up here and there all within the first weeks of June remind me strongly of the one who first inspired me to quilt: Grammy June.
On one of the last days before she died, while she and I were looking through her photo album of finished quilts, I kept saying, “Wow, that’s beautiful!”… “Oooh, beautiful!”… “That’s so beautiful!”. Finally, in her matter of fact way, she turned to me and said, “Well I only make beautiful things.” I wish you could hear her say it. It was just so… true. And so very much like her. She told it like it was like no one else I know, both the good and the bad.
I remember one time, shortly after my second child was born and I was over at a family gathering, just feeling soooo tired and sleep deprived and needed to the brink of my capabilities. I said, “I just need a break,” and Grammy June, in all her tactful truthfulness, replied, “Well you don’t get one.” She was right, but her matter of fact manner stopped me in my tracks. I think I actually laughed. After all, at times like that you can either laugh or you can cry.
Grammy June was an extremely talented traditional quilter. She pieced and quilted by hand, piecing with her Singer featherweight during her final years. I still find myself thinking things like, “I wonder what needle Grammy June would use for this” and for a split second feeling excitement at showing her a new skill or completed quilt. I am sure she would be proud, and I like to think she’s smiling down from heaven, saying “Of course you did” whenever I successfully complete a new quilting technique or create a new pattern. I do know she provides inspiration daily, through her creations and simple advice, which still echoes in my mind regularly. Her one simple statement, “I only make beautiful things” has become my mantra.
I aim to make beautiful things, daily. To create just a little bit each day: an act of love, a creative outlet, and a little stitch into the quilts of time. I’m missing June, but Finn was born the day before her birthday and within a week I’ve been reminded of her multiple times through her very own words:
…make beautiful things.
I quilt. I make beautiful things. I am continuing her legacy, building relationships, preserving memories, and sparking unforgettable family time. This is just one of the many reasons why I quilt, but it’s a big one.
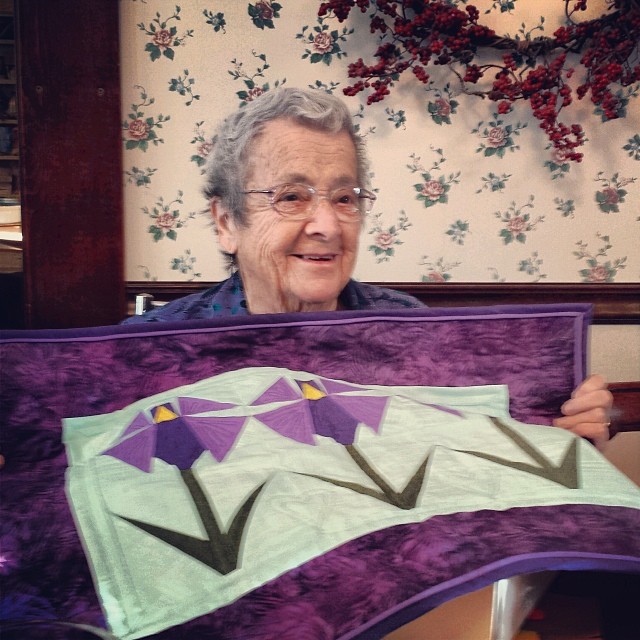
A few months before her death, I completed a quilted wall hanging for Grammy June. She had made countless quilts for every family member, but I had never heard of her receiving a quilt. I knew that had to change, but I also knew I didn’t have much time. A wall hanging it was, in her favorite color purple, with my first-ever paper pieced Irises, my first-ever flanged binding, and my first-ever free motion quilting. It seemed fitting, and Grammy June loved it. It was far from perfect, but she saw the love and the effort and that’s what matters. That’s why quilts matter.
Grammy June opening her quilt.
In sum of this reflective post, I will echo Amy’s words and invite you to refocus your heart when it comes to your sewing. Take a moment to pause, amidst your busy lives, bursting sewing rooms, and piles of unfinished projects, to take a quick look at why it is that you sew, and for whom you sew. If you feel so inclined, take the #ForKeepsPledge and spread the quilty love.
At the very least, go ahead and make something beautiful! xoxo
No, I have not yet had my baby. I know I’m getting into the window where I should just automatically say, “Here, visit this site: http://haveyouhadthatbabyyet.com” and be done with it. He will come when he’s ready. I’m thinking I’m ready now, so whenever he’s ready, I’m game!
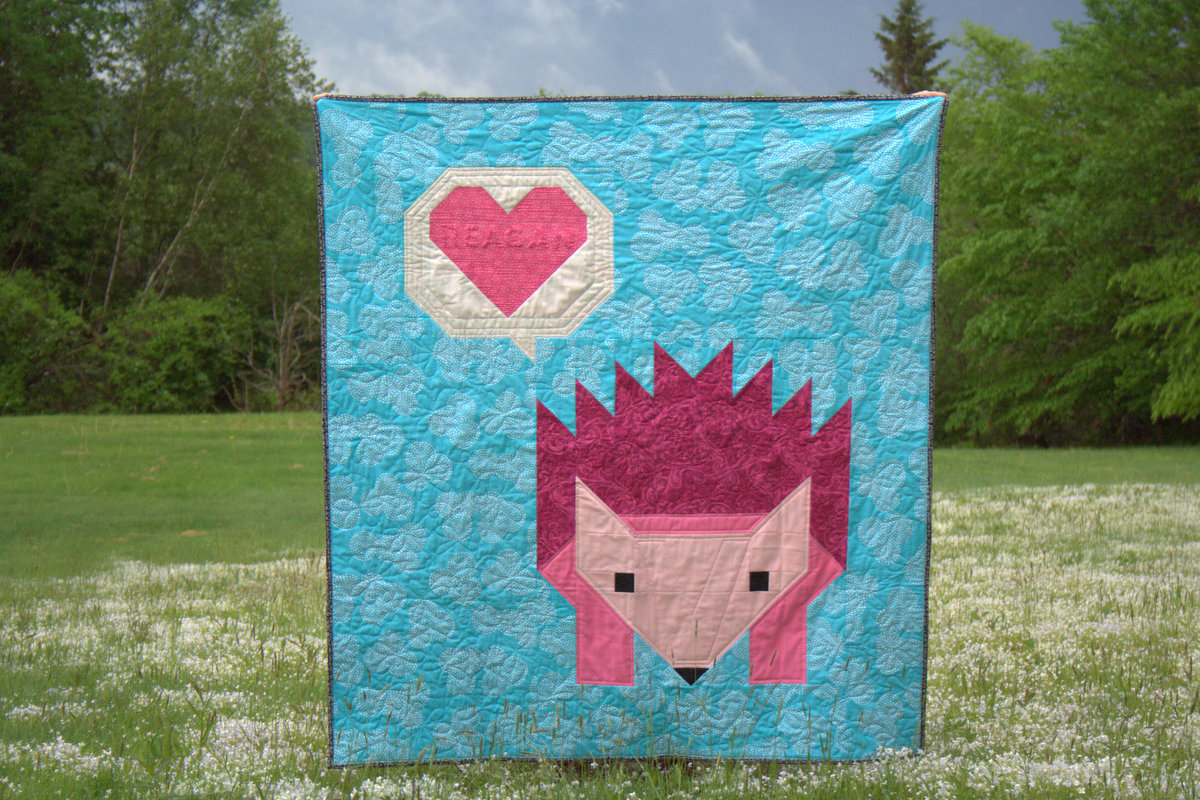
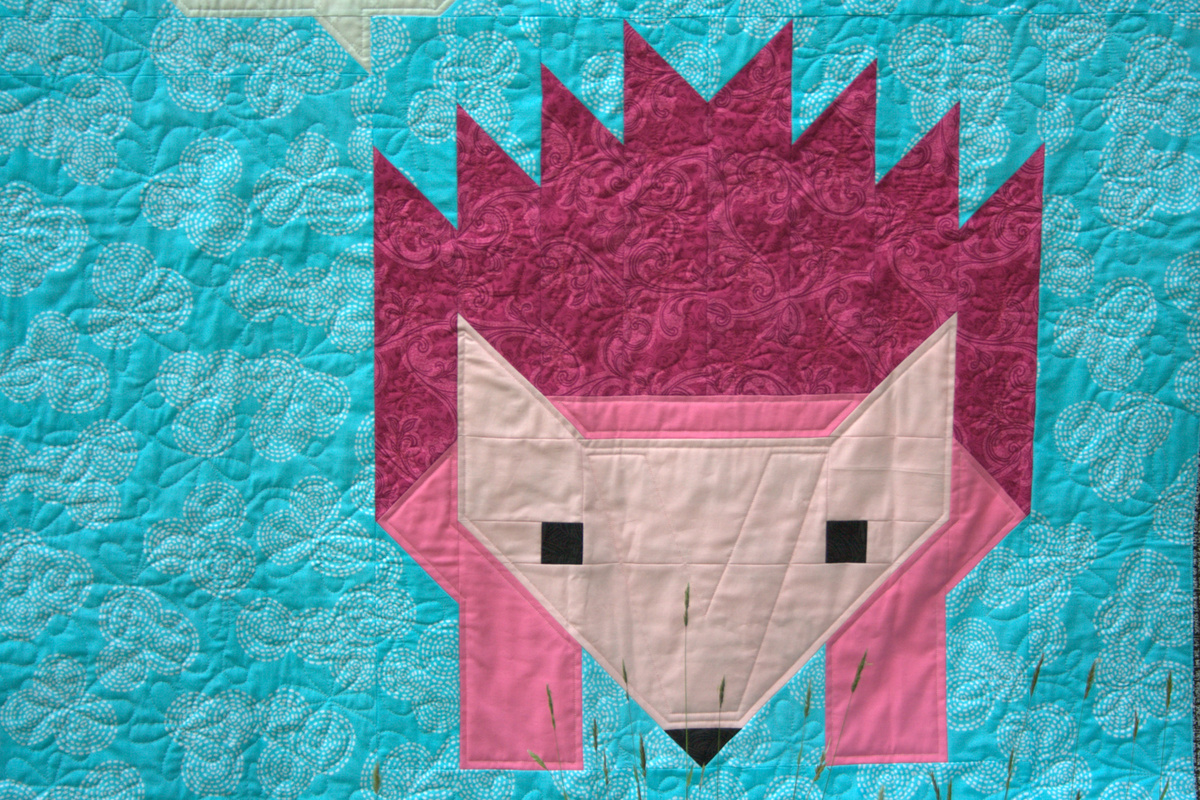
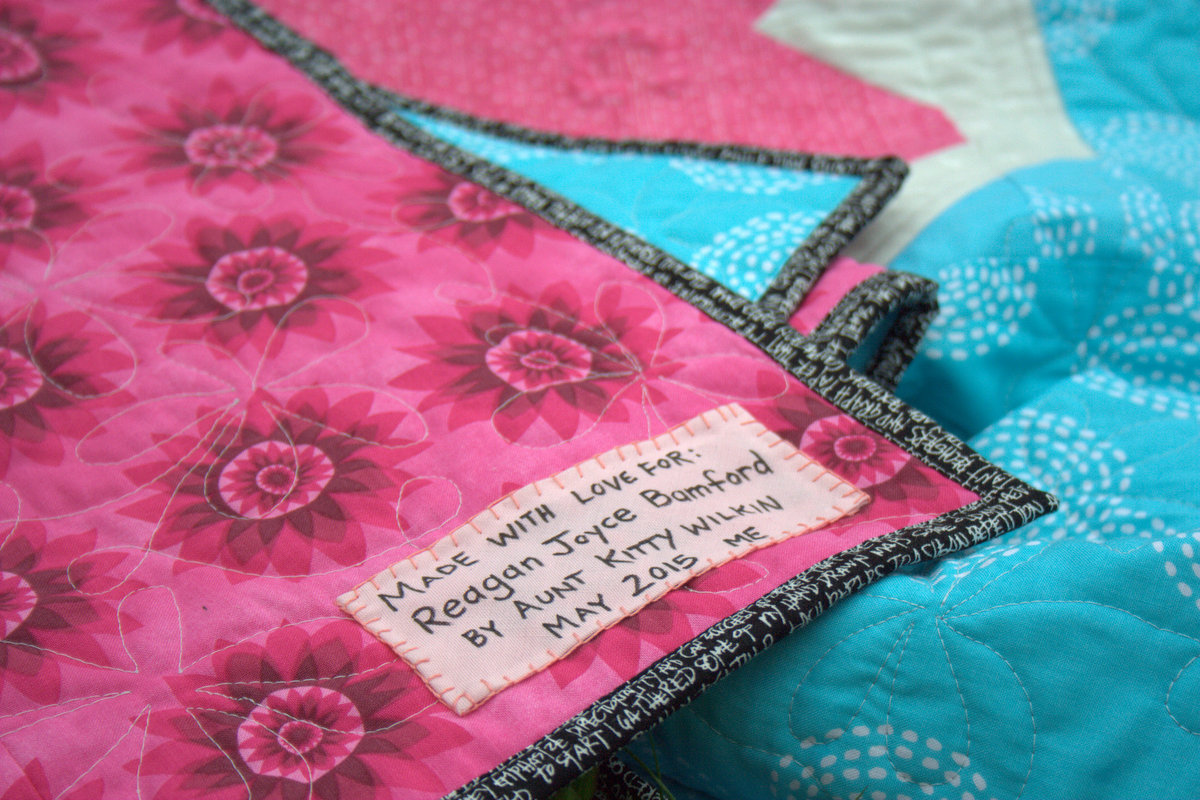
In the meantime, I can share some of my finishes with you! In these past few weeks, I have been nesting in all sorts of ways, trying to wrap up big projects before our home is graced with the presence of a newborn. One of my big finishes was the Pinkalicious Hazel Hedgehog Baby Quilt I made for my sister-in-law’s first baby, Reagan. She’s due June 14th but is actually showing more progress toward that end than I am! I am excited that I finished her quilt before baby time.
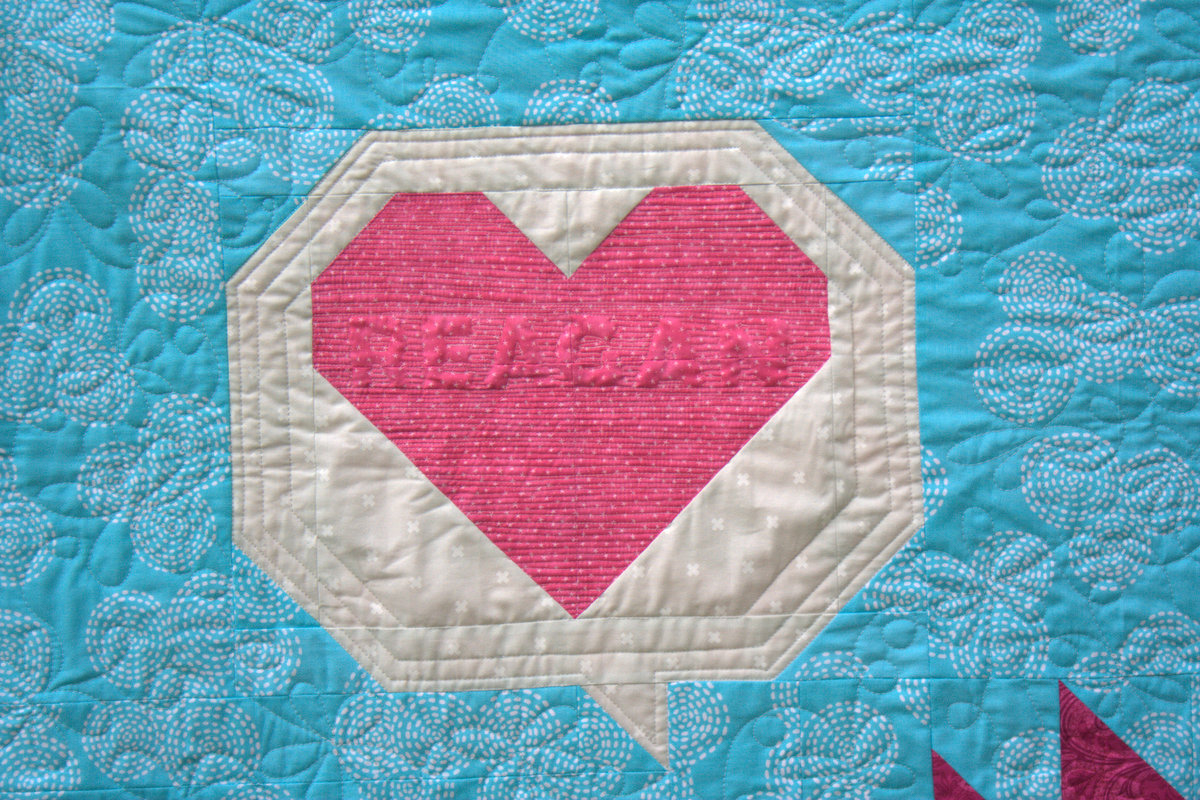
As you’ve seen in a previous post, I used matchstick quilting to relief quilt the baby’s name into the heart. I used Aurifil 50wt variegated Bubblegum-3660 to match the background fabric, since I wanted the name to be subtle.
I opted for an all-over flower and swirl free motion quilting (FMQ) pattern in the background, using 50 wt Aurifil 2600 – Dove. I used matching 40wt thread (Aurifil 1100 – Red Plum) to quilt a similar but more linear flower/daisy chain type pattern in her hair. For Hazel’s face and body, I used 40 wt Aurifil 2423 – Baby Pink with a more subtle, outlining features approach with my walking foot. I’m super happy with how all of the quilting turned out!
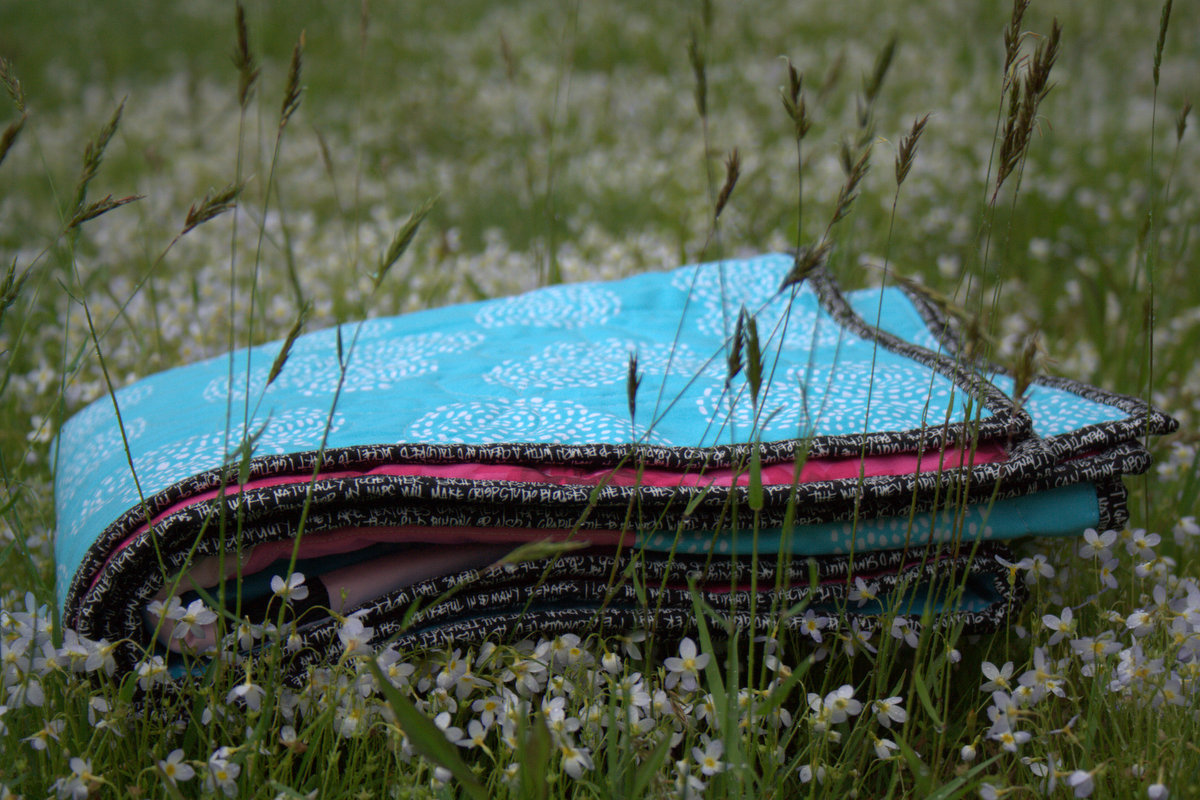
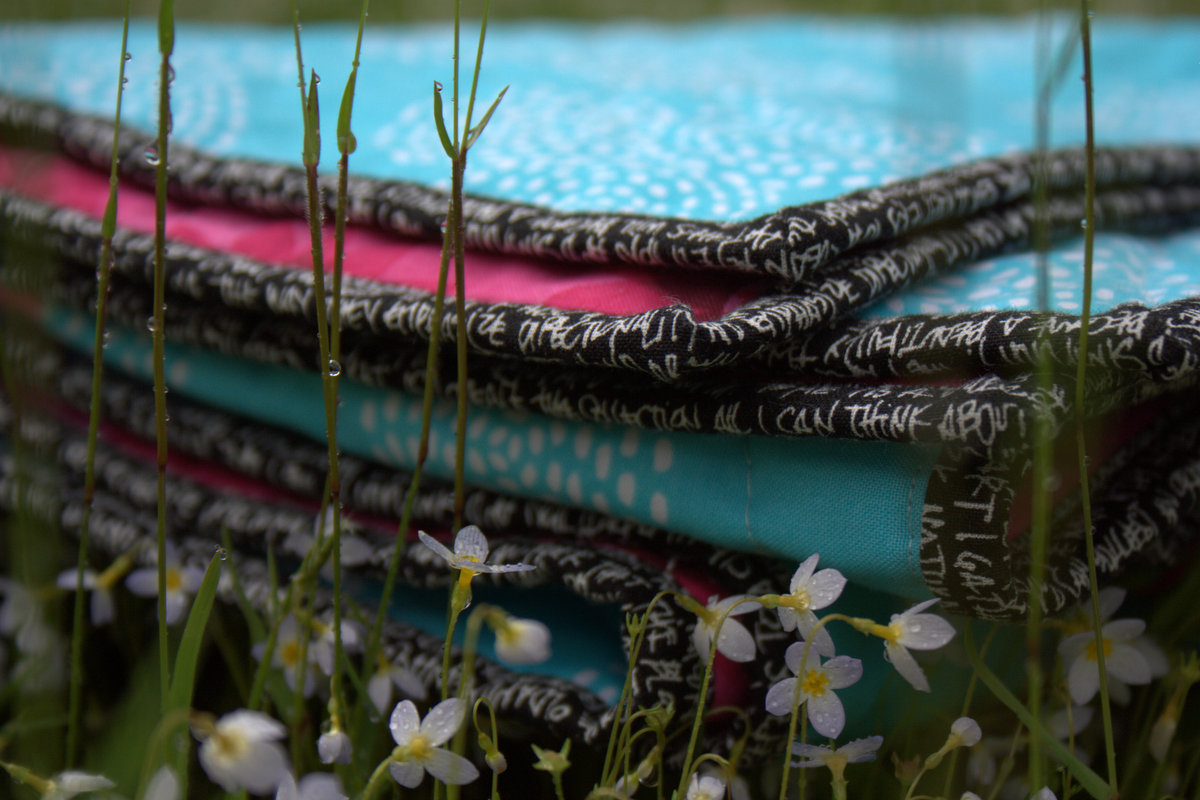
I love the look of this quilt folded, since turquoise and magenta trimmed with black is SO aesthetically appealing to me. (One day, I really will finish this quilt for myself so that I can enjoy this color combination daily.)
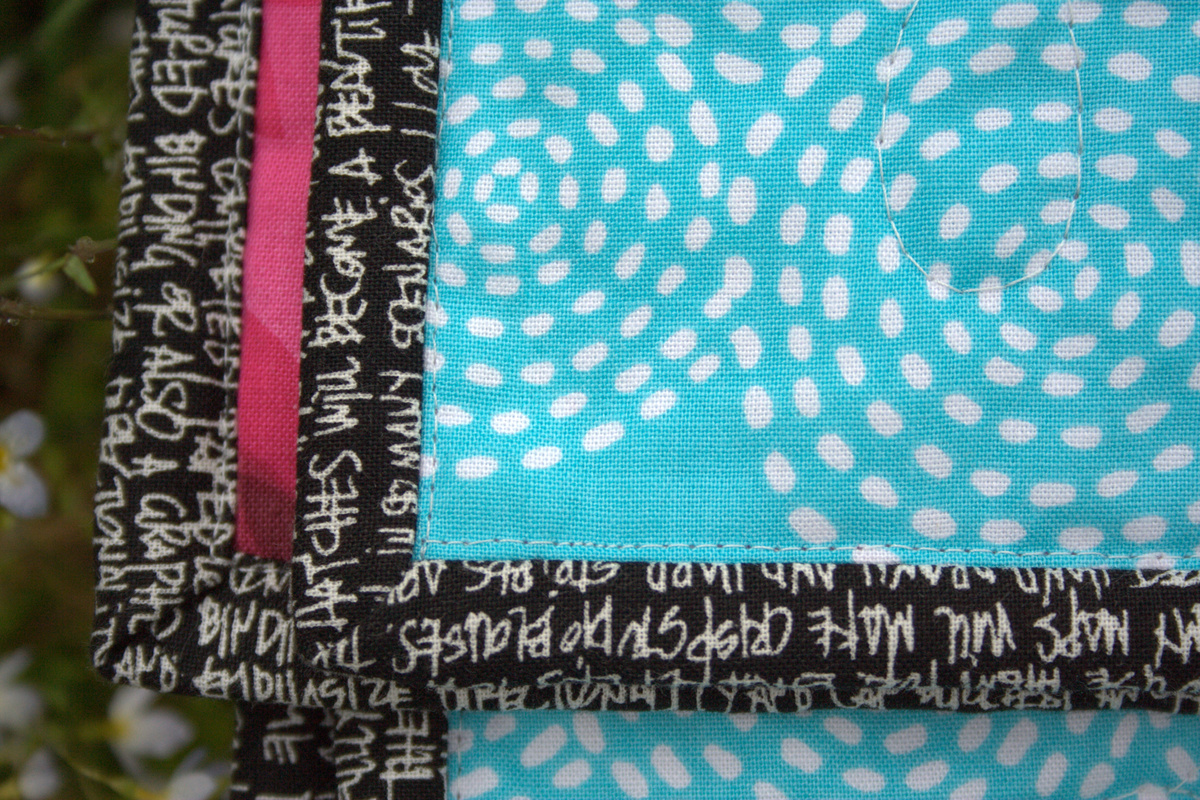
I bound the quilt with Architextures Words in Black (Carolyn Friedlander for Robert Kaufman Fabrics). My thought is that the black frames the quilt really well, and the white words will help it hide dust and dirt much better than a solid black would.
I bound the quilt using Cluck Cluck Sew’s Machine Binding method, since I’m hoping that this quilt sees a LOT of action and washes in its lifetime. I love how neatly the machine binding squares up the front of the quilt, and you really can’t beat its ease.
I hand stitched the label onto the back using my first attempt at blanket stitch. Admittedly, it was a lot tougher to keep even and secure than I anticipated, but I’m hoping that with practice, that will all improve. I realized while writing this label that I will be an Aunt for the first time once baby Reagan is born! So exciting!
Pinkalicious Hazel Hedgehog Baby Quilt
Completed May 2015 Pattern: Giant Hazel Hedgehog pattern by Elizabeth Hartman, speech bubble heart and layout is of my own design.
Size: 48″ x 52″
Fabric: Front: Background: Michael Miller Stitch Circles in Aqua; Heart: Pink Star fabric, Starlet by Blank Quilting; Speech bubble: Cotton + Steel Basics by Rashida Coleman Hale; Hazel’s Face & Body: two shades of Kona pinks–I didn’t write down the names back when I bought them!; Hazel’s hair: Back: Calypso by Ro Gregg for Paintbrush Studio Binding: Architextures Words in Black by Carolyn Friedlander for Robert Kaufman Fabrics
Batting: 100% cotton Soft n’ Crafty batting
Thread: Aurifil 50wt 2600 – Dove for piecing, quilting background and speech bubble, and sewing down binding; Aurifil 50wt variegated 3660 – Bubblegum for matchstick quilting the heart; Aurifil 40 wt 1100 – Red Plum for quilting Hazel’s hair; and, Aurifil 50 wt 2423 – Baby Pink for quilting Hazel’s face and body.
Time: Planning: 1 hr 30 min (includes designing speech bubble heart)
Cutting & Pressing: 3 hours
Piecing the top: 5 hours 30 min
Piecing the back: 30 minutes
Squaring, layering, and basting: 40 min
Quilting: 6 hours 20 min
Finishing (making binding, squaring quilt, burying threads): 45 min
Binding: 1 hour 45 min Total: Approx. 20 hours
I’m linking up with Crazy Mom Quilts Finish it up Friday, and hoping that another little bundle decides he’s finished and ready to make his way to the outside world before next Friday!
The Bloggers Quilt Festival is underway over at Amy’s Creative Side, and now is when you (and I!) get to browse the wonderful entries and vote for our top three favorites in each category. I love seeing familiar quilts from some of my favorite blogging friends, but also like to discover new quilters whose quilts inspire me. It’s a quilt show that you can enjoy at your leisure, all from the comfort of your own home (you can browse and vote in your jammies–I won’t tell anyone!)
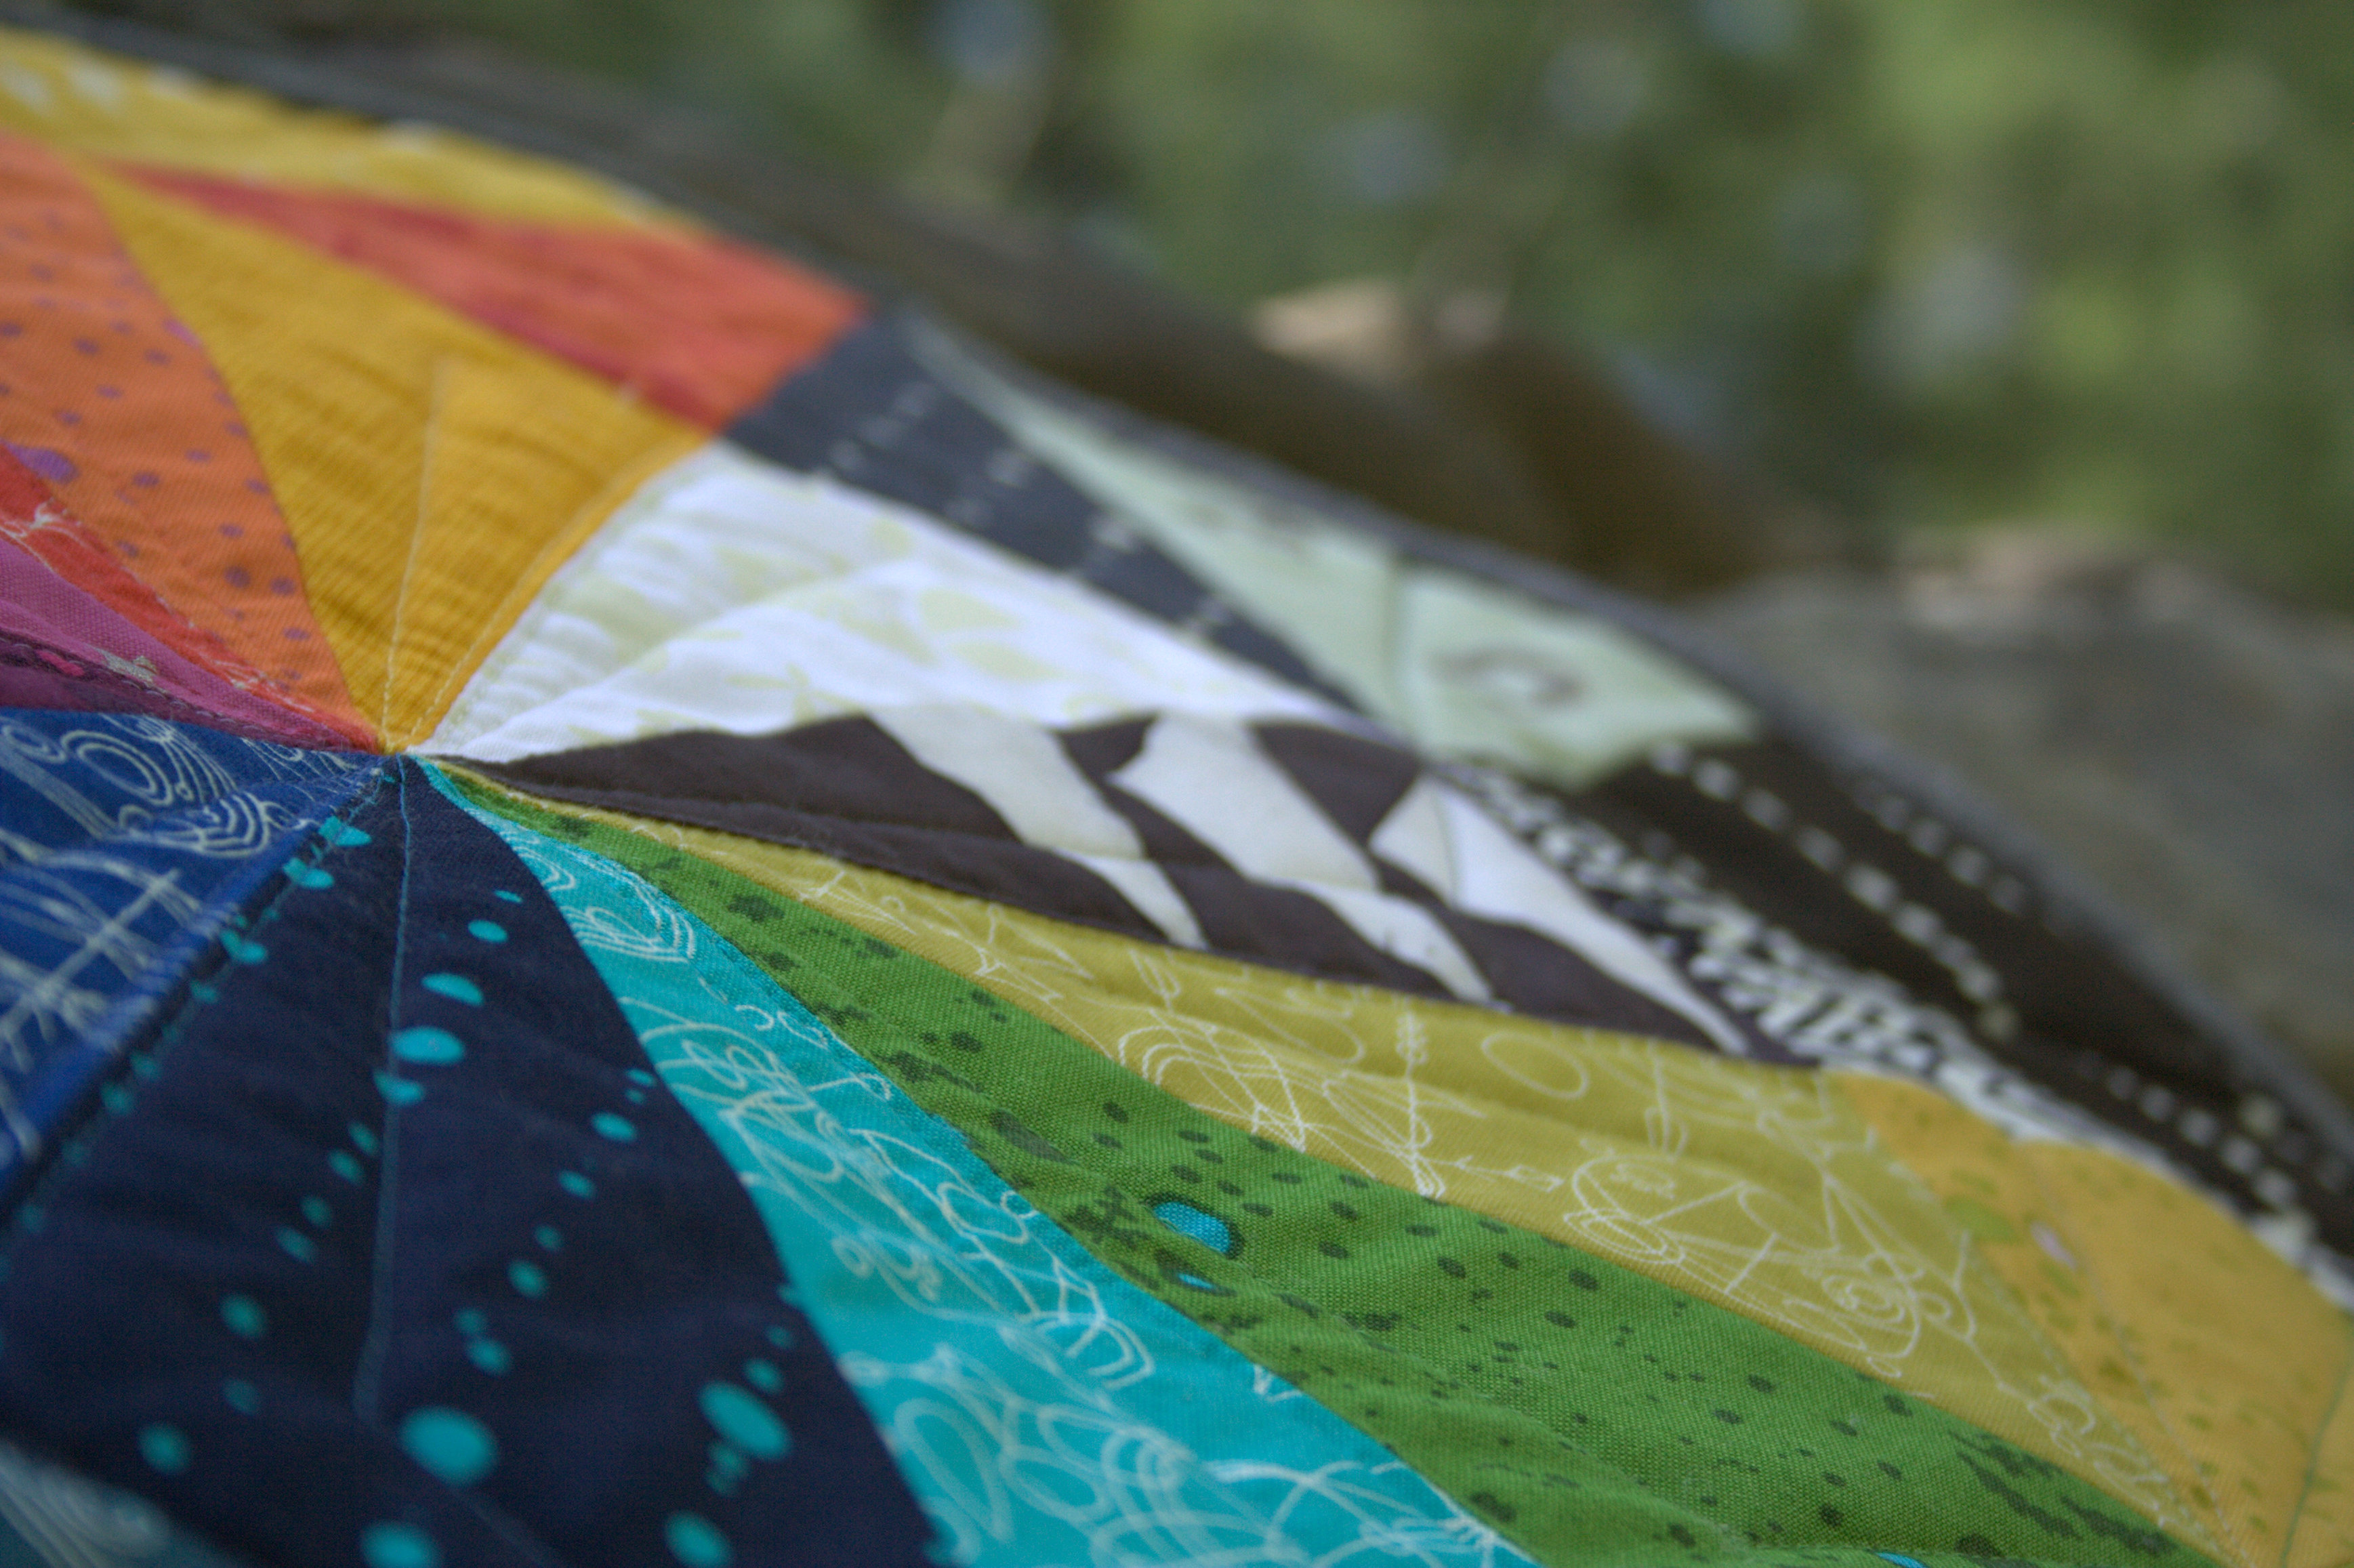
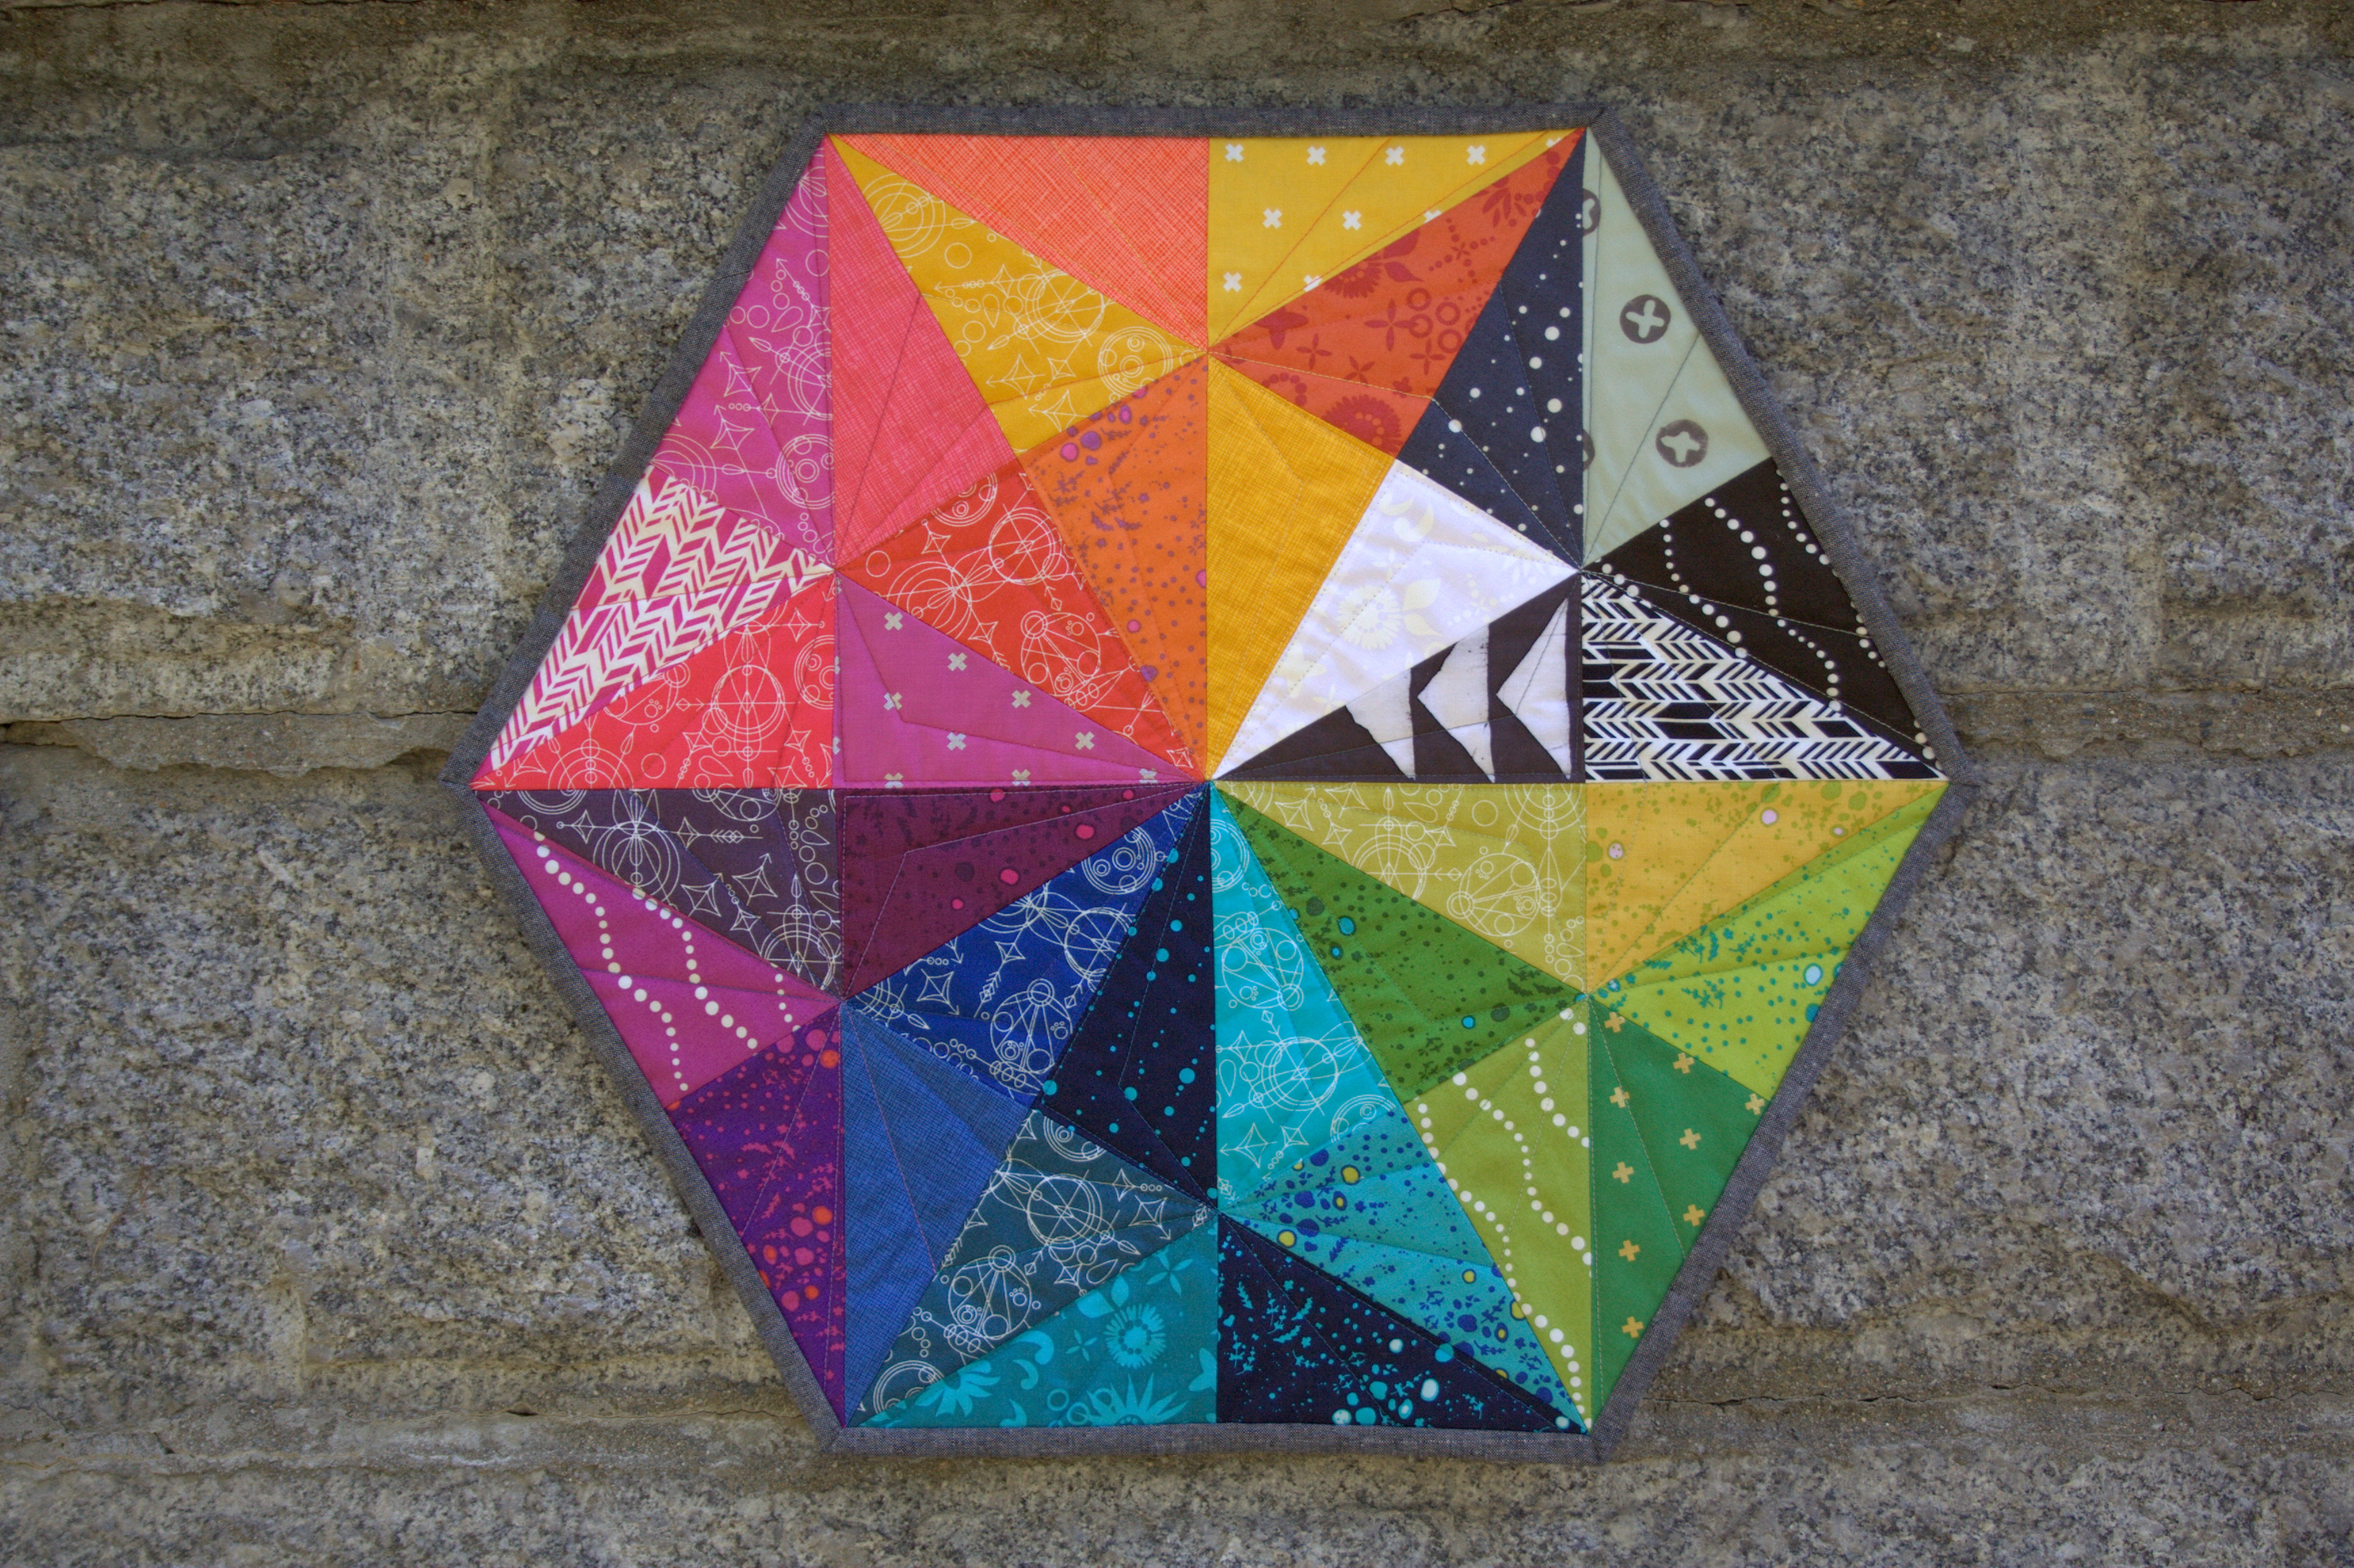
As I shared in my previous Bloggers Quilt Festival post, this is the first year I’ve entered a quilt. My Alison Glass Prismatic Medallion quilt is in the ROYGBIV category!
If you love this cheerful mini as much as I do, I invite you to visit the ROYGBIV category and vote! To vote for your favorites, simply click the heart in the top-right corner of the photo. Here are links to all of the categories, as well as the prizes offered by the generous sponsors.
The Mini Quilt Category is for quilts measuring no more than 80″ around. The favorite quilt in this category will win six new patterns and a four-pack of Aurifil 50wt threads fromSassafras Lane Designs!
The Small Quilt Category is for quilts measuring 81″ – 240″ around. The favorite quilt in this category will win a $50 Gift Certificate from Quilter’s Way!
The Large Quilt Category is for quilts measuring 241″+ around. The favorite quilt in this category will win a $20 Gift Certificate from Stitchin’ Heaven!
The Appliqué Quilt Category is for hand or machine appliquéd quilts. The favorite quilt in this category will win a Fat Eighth bundle of new fabric and notions gift pack from Moda Fabrics!
The Art Quilt Category is for your artistic quilts. The favorite quilt in this category will win a Fat Eighth bundle of new fabric and notions gift pack from Moda Fabrics!
The Hand Quilted Category is for quilts, quilted by hand. The favorite quilt in this category will win a $30 Gift Certificate from Fabricworm!
The Modern Quilts Category is for your modern quilts. The favorite quilt in this category will win a $30 Gift Certificate to Fat Quarter Shop from Sewtopia!
Enjoy browsing all of these wonderful quilts. I know I have been having a tough time choosing only three top favorites! The good news is, I *think* you can vote every day, so I’ve been visiting daily to give a variety of my favorite quilts some voting love. Voting is open until May 29th.
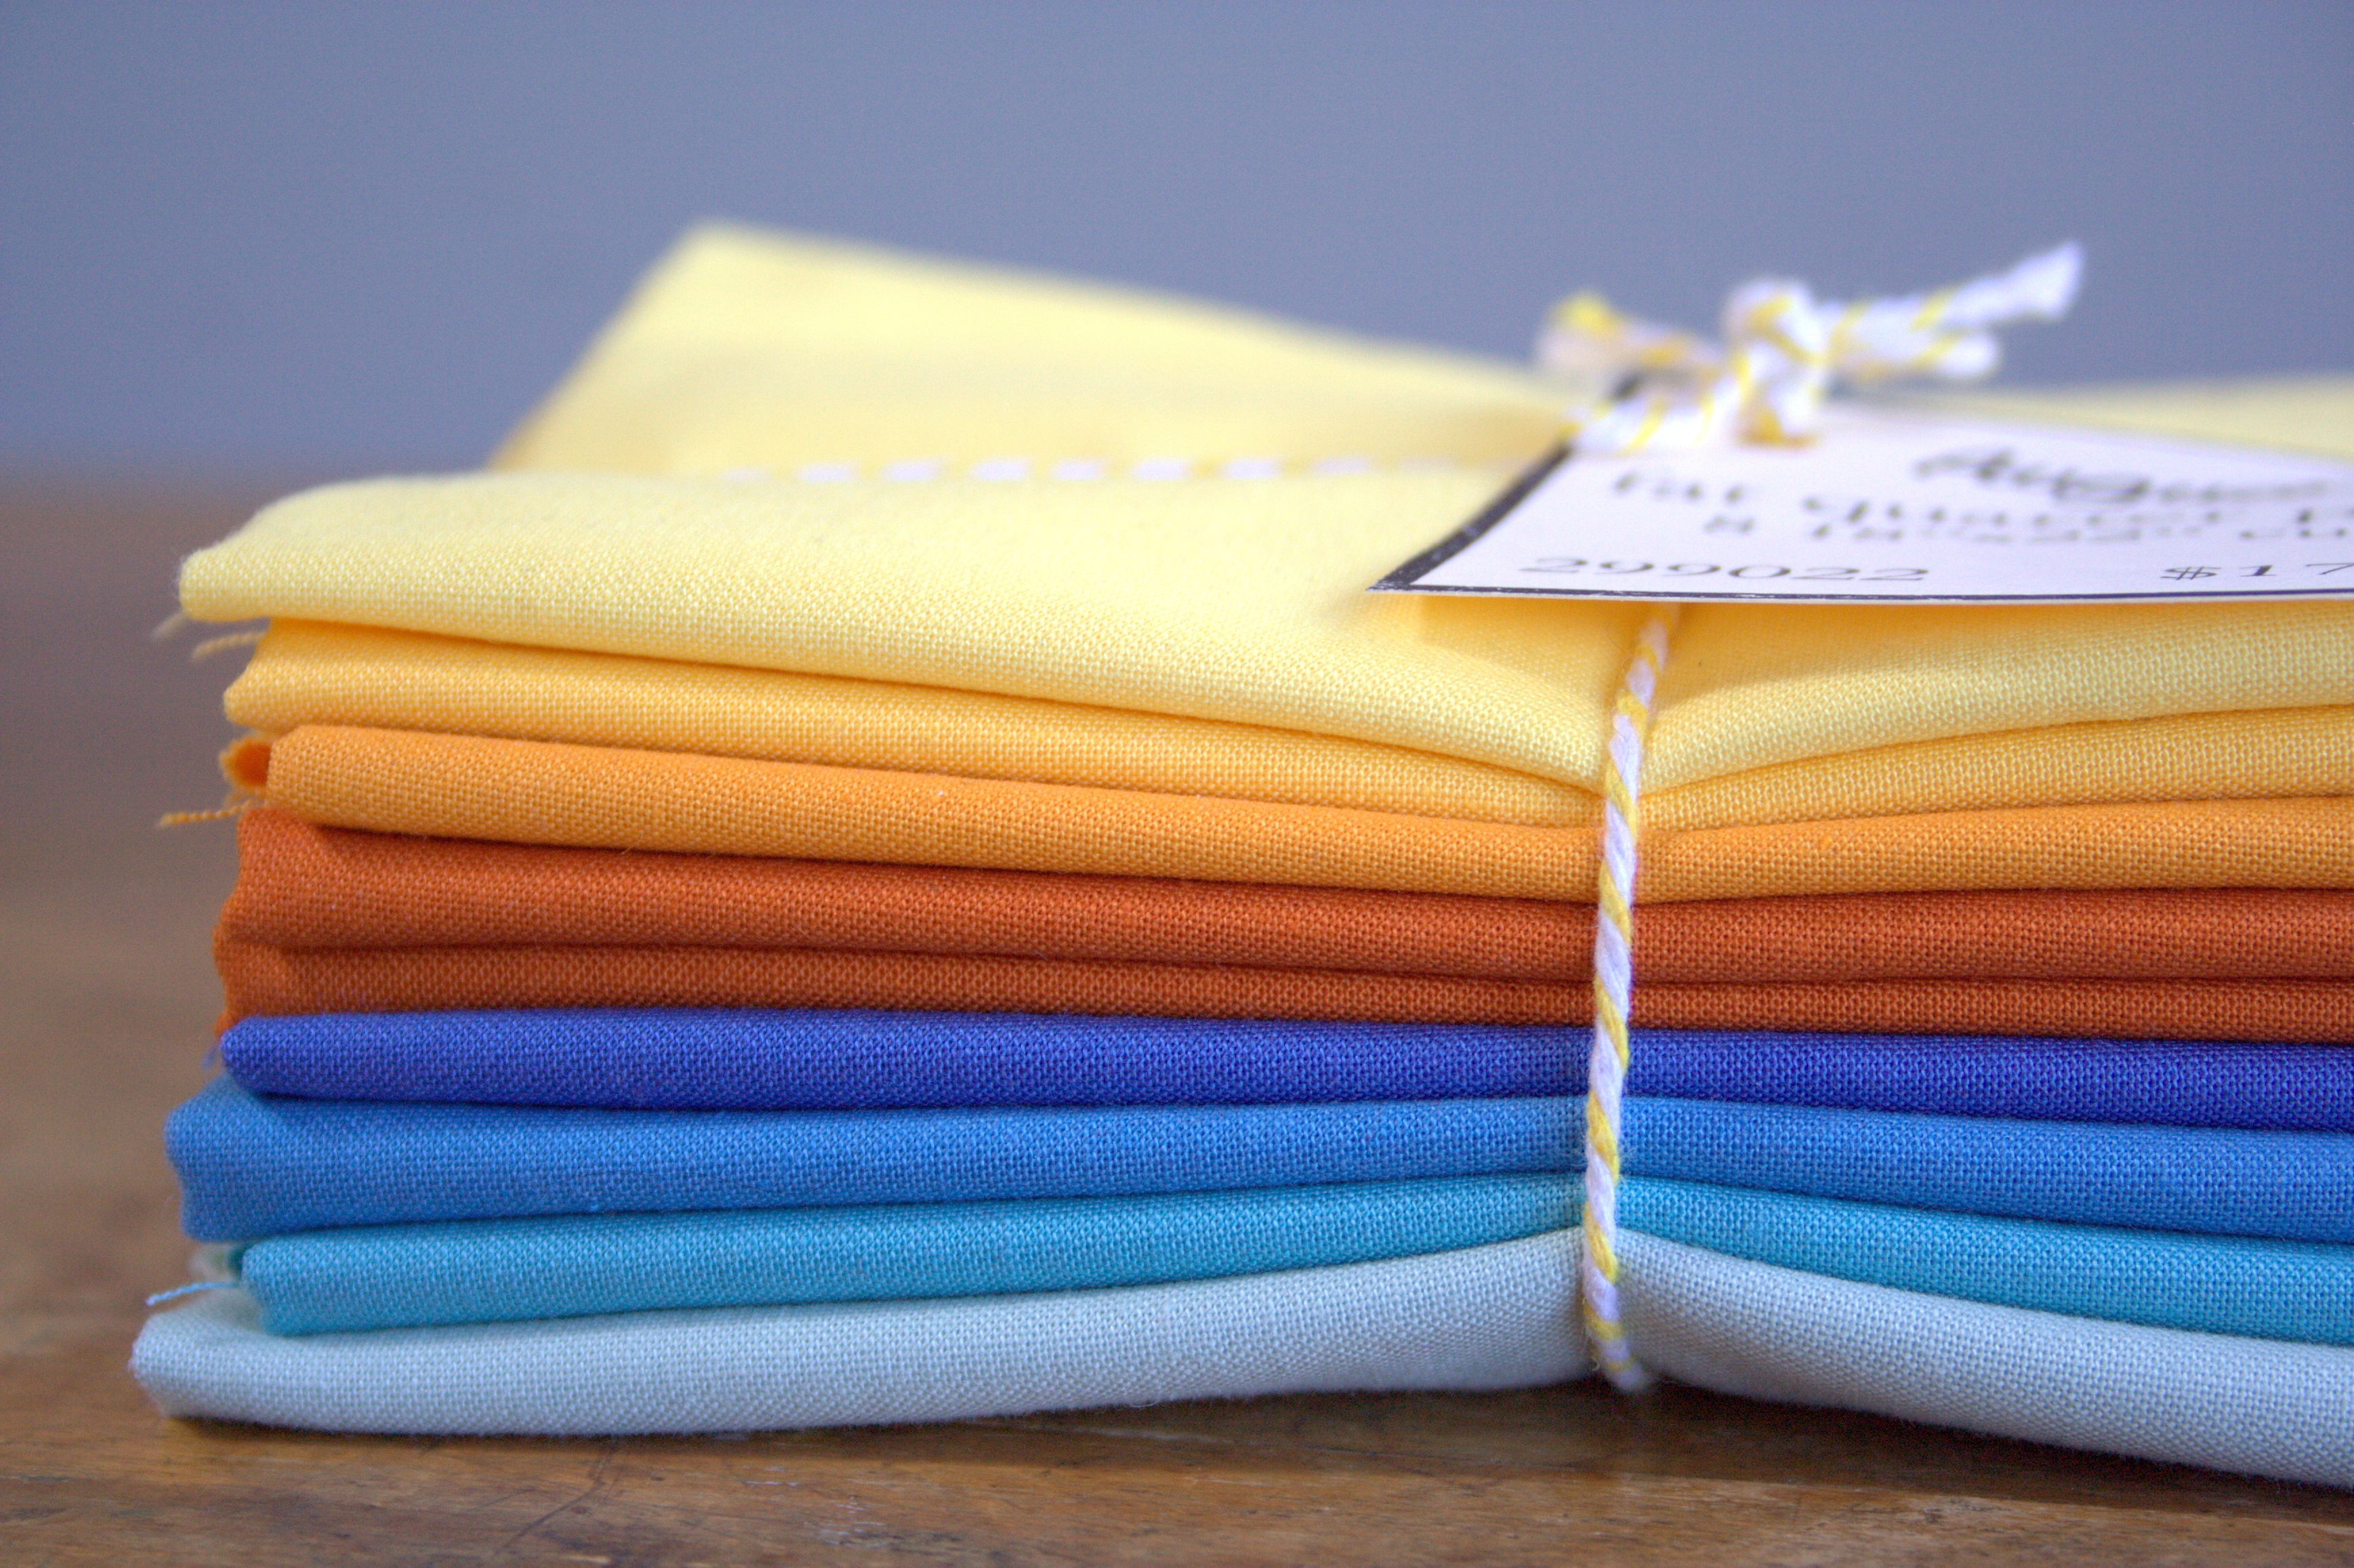
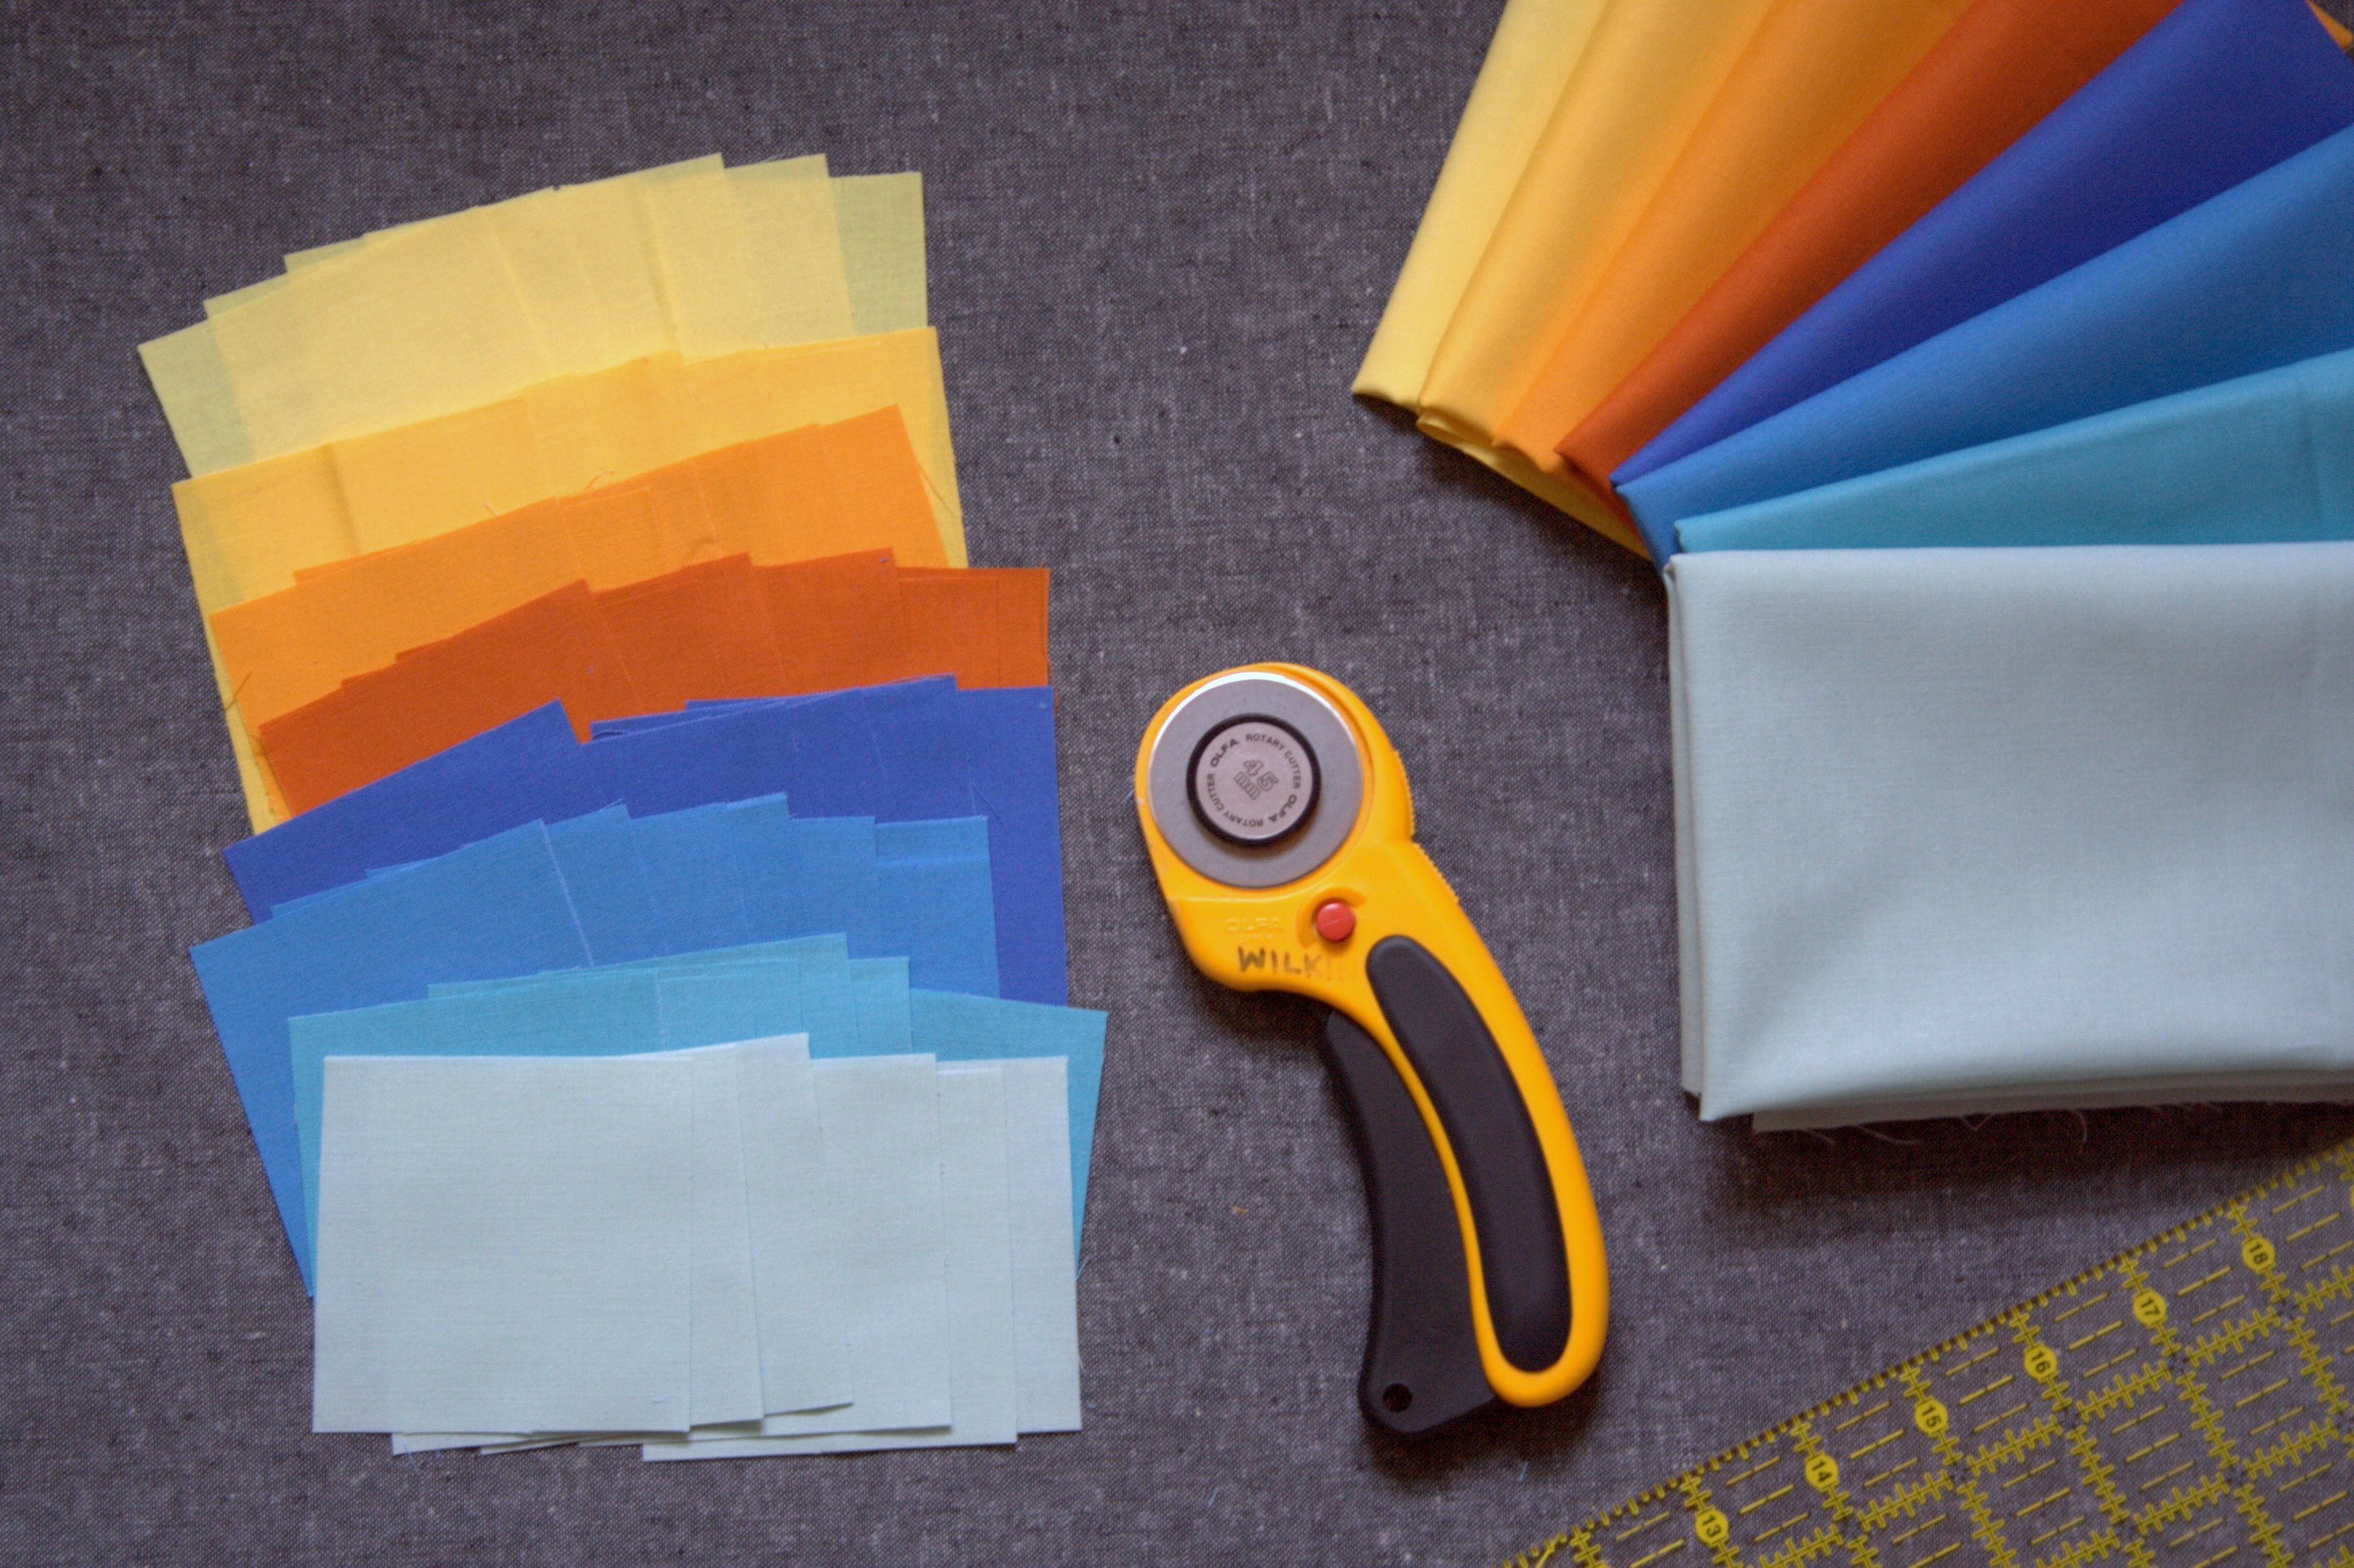
Today I cut into a gorgeous bundle of Bella Solids that just screams summer. I’m beginning a new project, since my baby boy has yet to make his arrival and I amazingly have completed my other big pre-baby sewing project goals. Plus, Memorial Day, the unofficial start of summer, is a perfect day to begin a summer project, right? My plan is to make a set of six (6) placemats, since we have a surprising lack of quilted home accessories.
I bought this bundle of Moda Bella Solids, called “August”, at Fiddlehead Artisan Supply when I went in to choose the bundle I gave away for the Sew Mama Sew Giveaway Day. The hot days of summer were still teasing us, and I couldn’t resist the summery feel of these colors together. (For those of you who want to get your hands on this bundle, too, the coupon code nightquilter15% will get you 15% off all online orders from Fiddlehead between now and June 21st!)
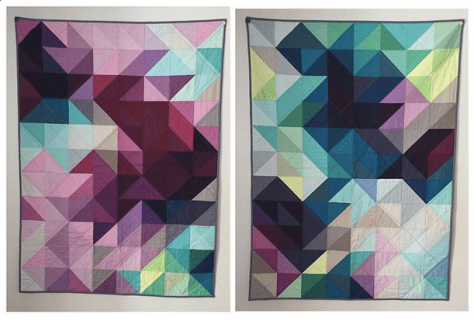
I’m hoping to make these placemats using a prismatic half square triangle (HST) style inspired by these quilts by Nydia Kehnle:
These two quilts by Nydia Kehnle are inspiration for my placemat design.
Nydia’s advice for making quilts like this was to use MANY different colors to allow a smooth gradation. I know that since the fabric bundle I’m using has only eight colors, my placemats will have a more jumpy color transition, but I’m hoping that they still look cool. I love the transitions of yellows and blues, and hope the jump between the two can be smooth or at least look intentionally jumpy. Time will tell!
I’ve only cut one strip from each fat quarter to start, and plan to pair up HSTs and try a test layout before cutting the fabric for all six placemats.
I’m hoping this will be a good project to continue after my baby is born, too, since I can do it in little bits. Cut a little, sleep, snuggle, nurse, pair a little, sleep, snuggle, nurse, sew a little, sleep, snuggle, nurse, cut a little, sleep snuggle, nurse, repeat.
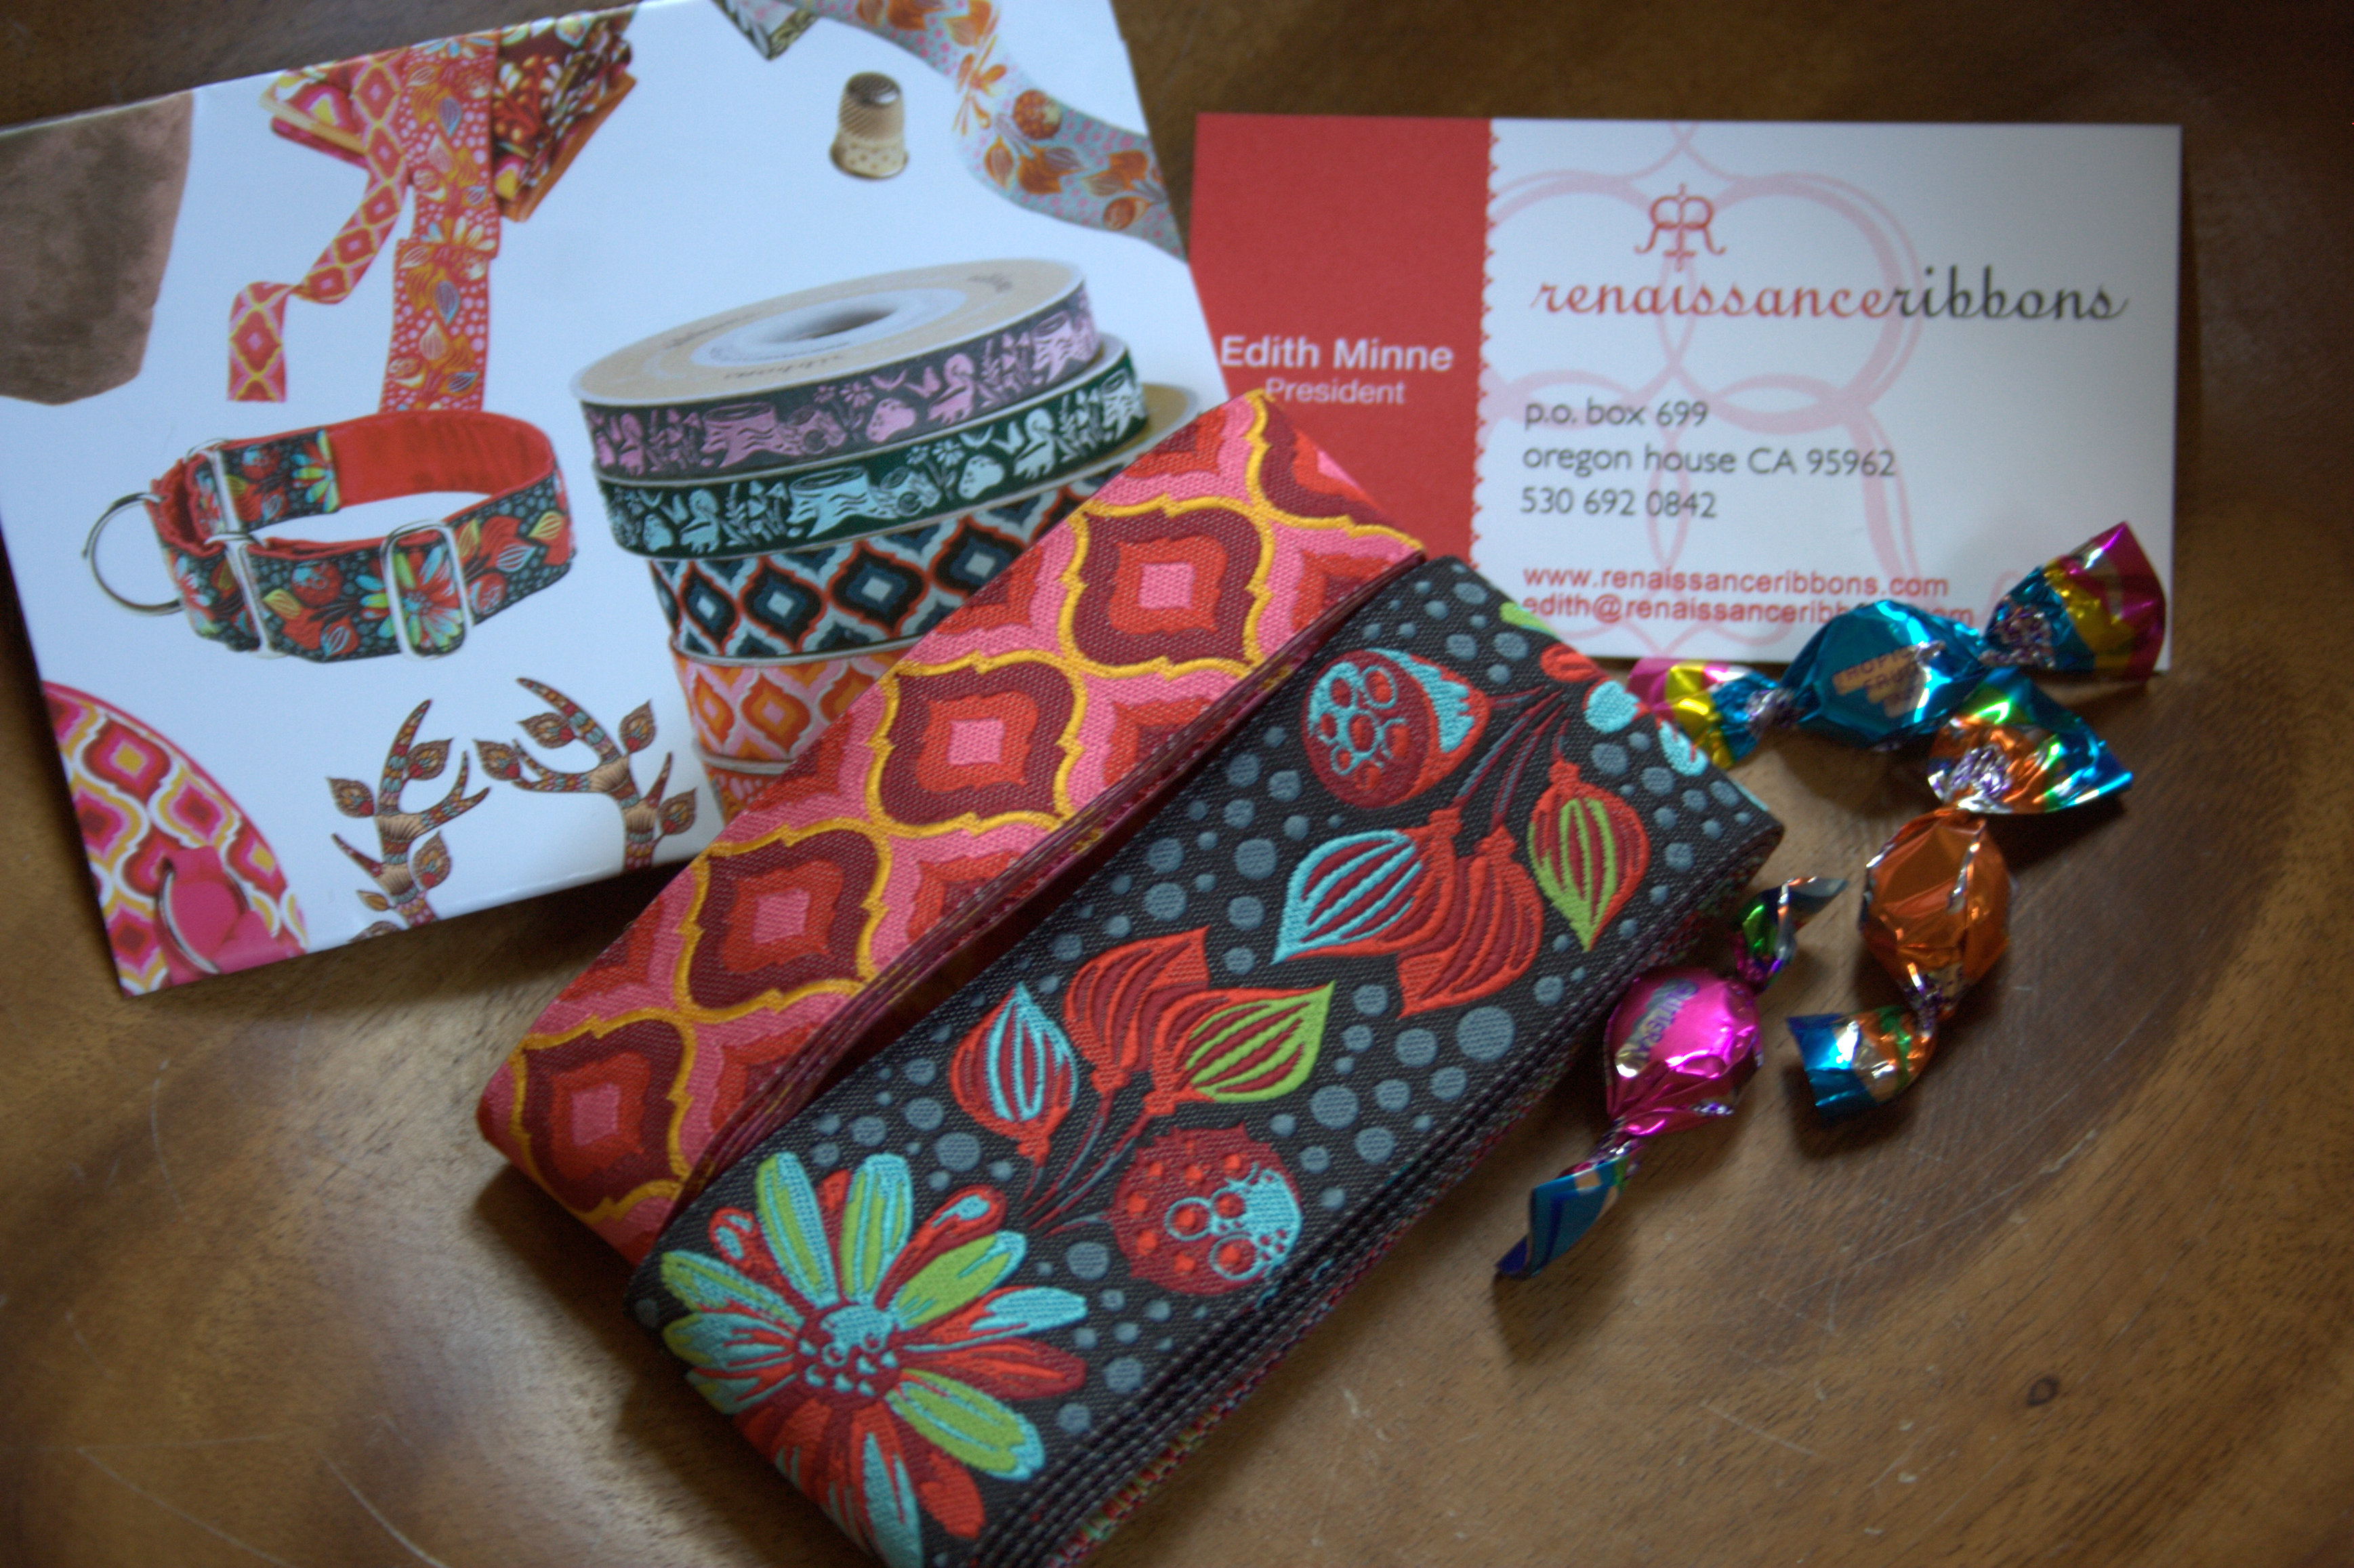
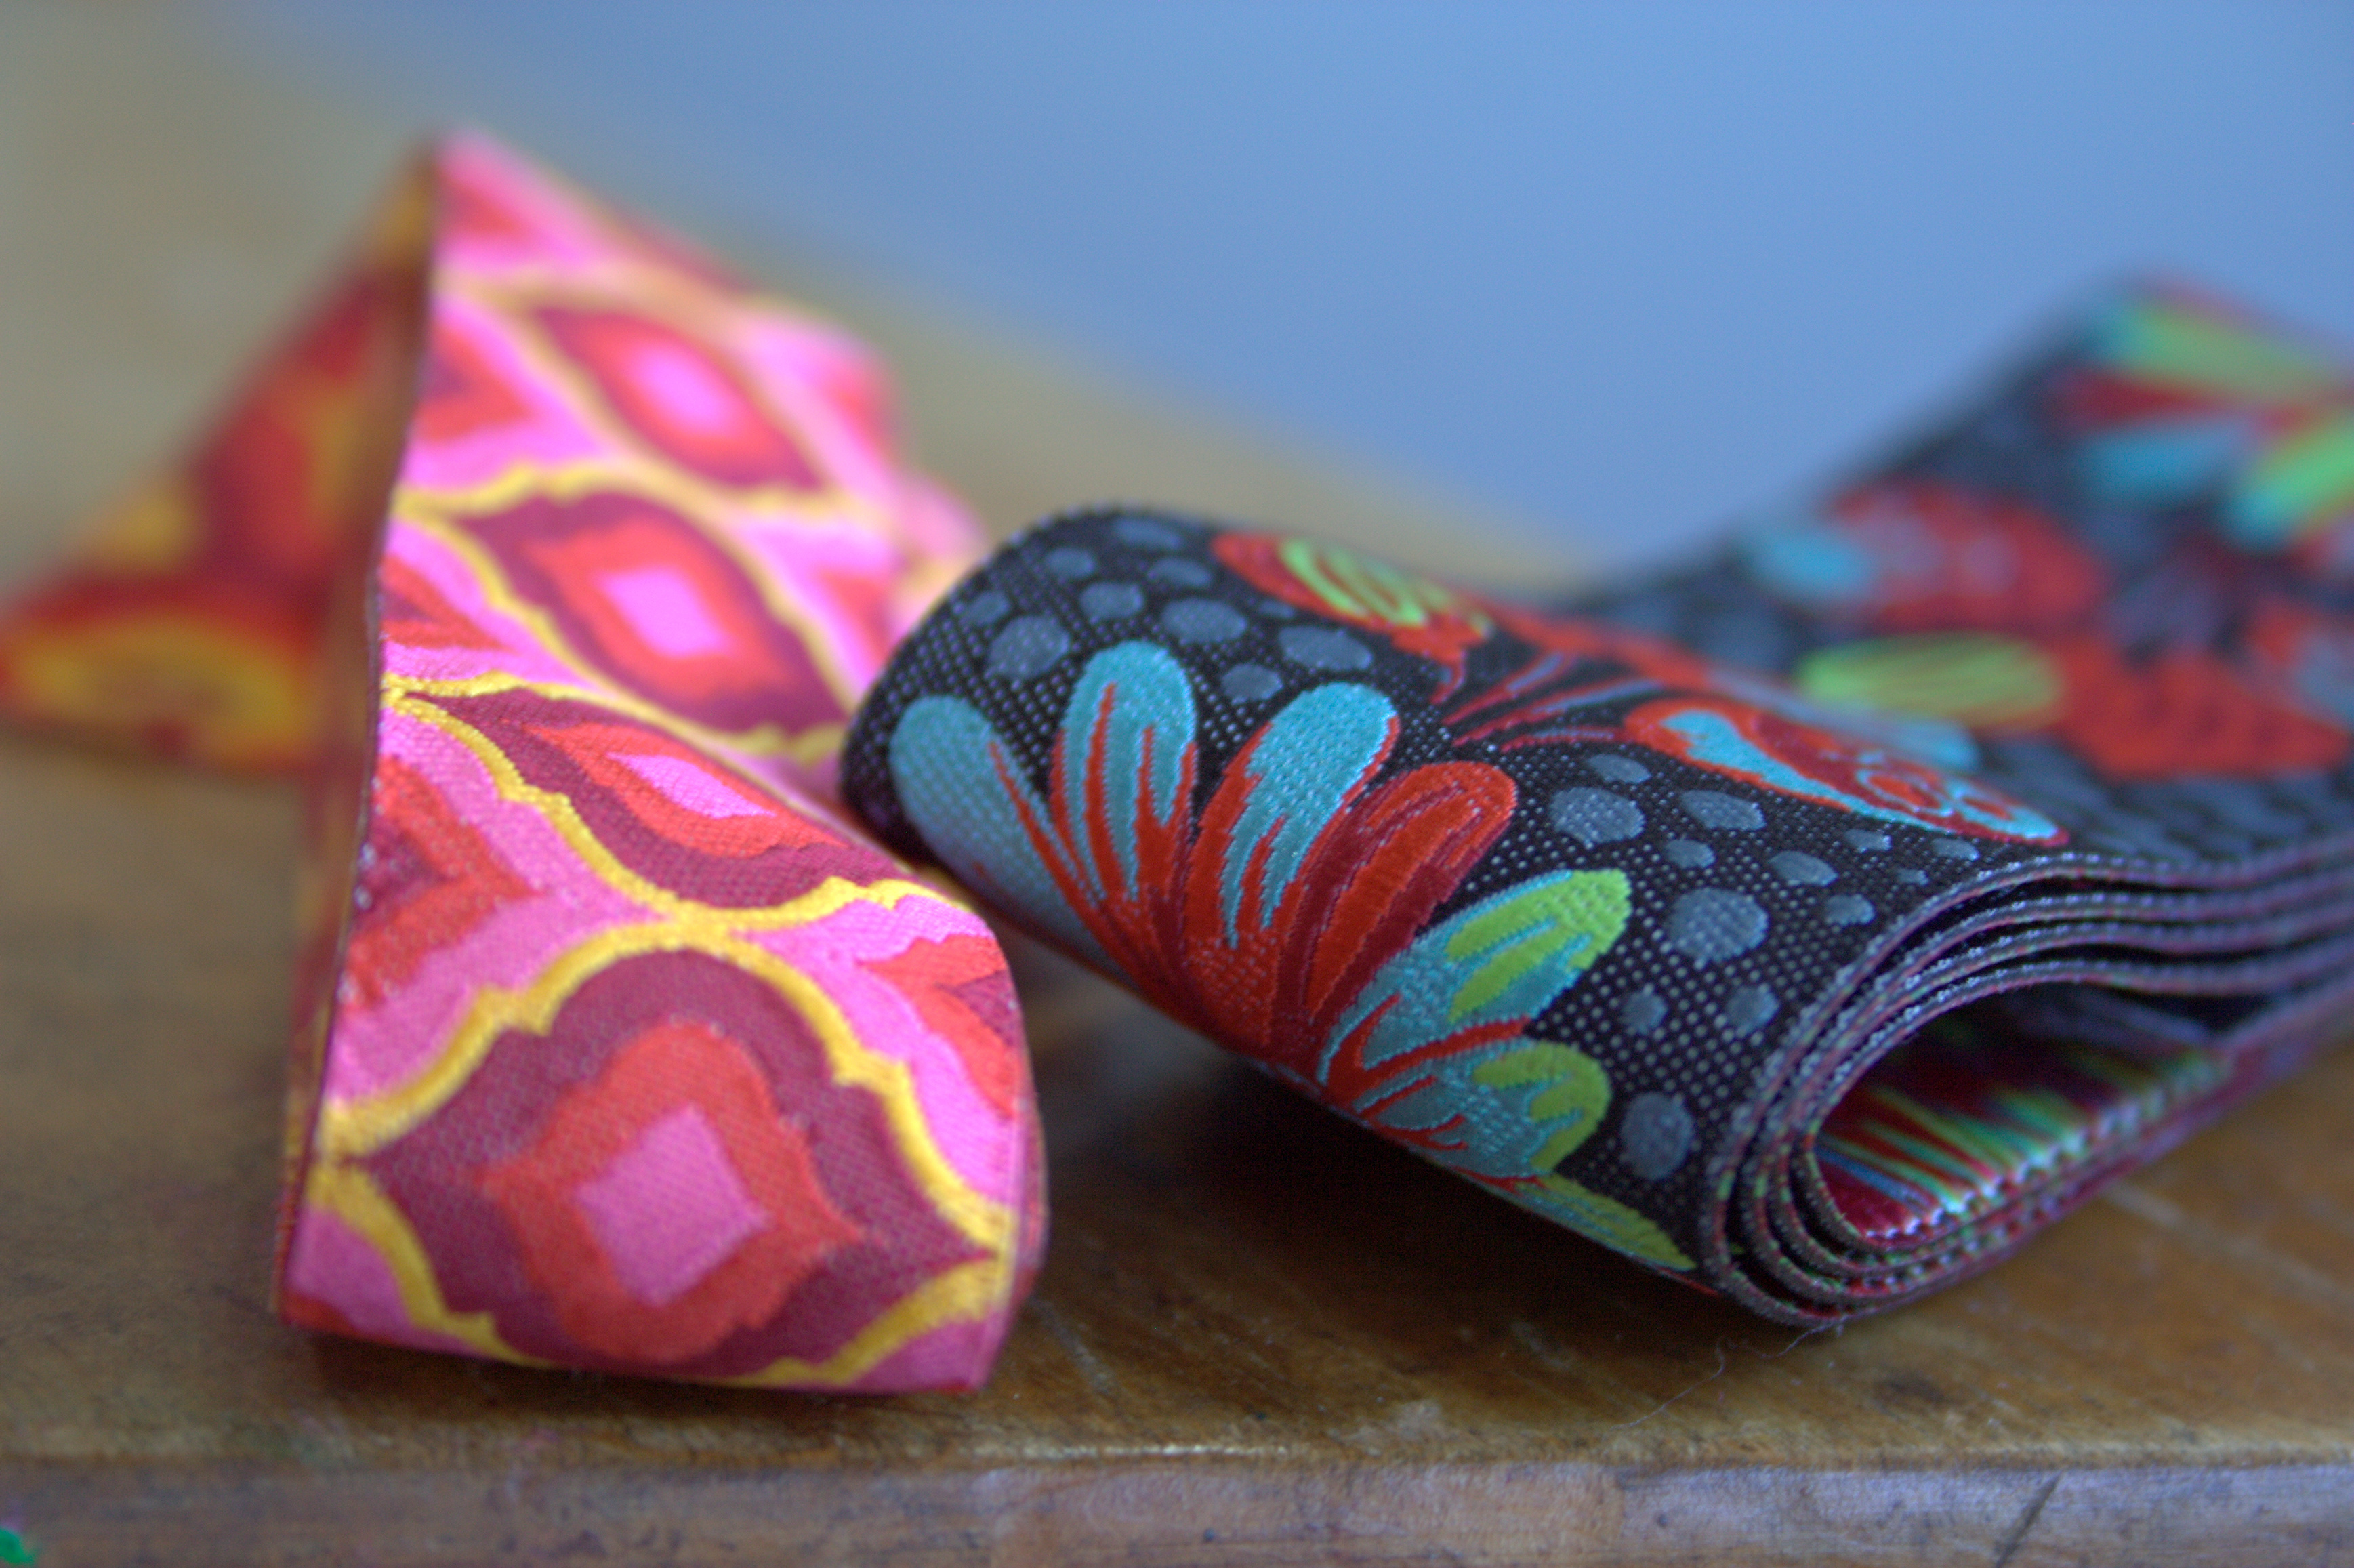
Over the past few months, I’ve been growing my stash here and there but haven’t had a chance to adequately photograph everything so that I can share it with you. Now that I’ve actually completed all of my pre-baby sewing goals (and still no baby), it’s time to remedy that, and what better way to start than with some winnings! Around my early April birthday this year, I was lucky enough (literally!) to win a few giveaways. One of them was an Instagram giveaway by Renaissance Ribbons, from which I won some of the new Tula Pink ribbons.
I’ve worked with Renaissance ribbons only two times before (I made a zipped pouch, and a thread catcher and pin cushion), and they are SO gorgeous and easy to work with! The colors are bright and bold, you can pin the ribbons during sewing and not a single sign of the pin hole remains once the pin is removed, and they are wonderfully thick and sturdy, not to mention the wide variety of patterns and designs, some of which coordinate with fabric designers’ fabric lines. What’s not to love?
I don’t have a specific project idea in mind yet; what would you make with these gorgeous ribbons?


 Quilts are also infinitely useful to babies and their doting, toting mamas. Babies spend a lot of time on the floor (quilt!), need diaper changes (quilt!), need to stay warm (quilt!), need tummy time (quilt!),… the list of uses goes on and on, and evolves as the child grows (think superhero capes, club forts, and picnics galore).
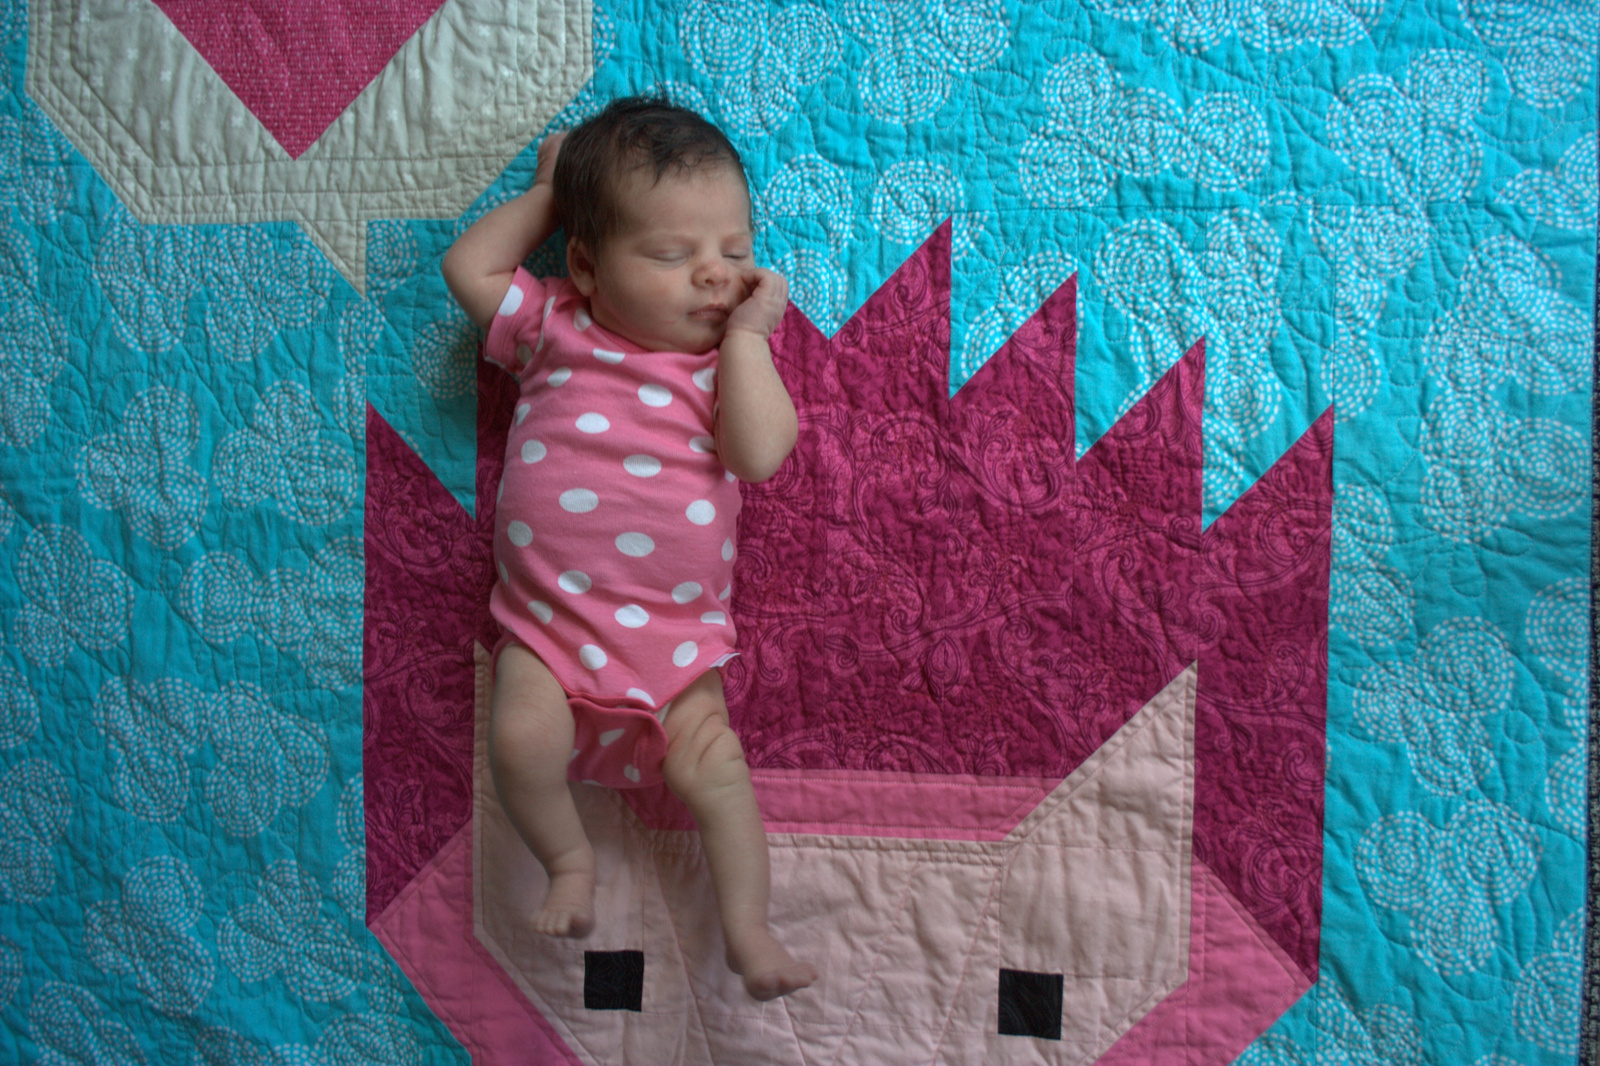
 I absolutely love seeing babies on the quilts I’ve made for them. It reaffirms all of the time, effort, money, and LOVE that I’ve put into the creation of the quilt and inspires me to create even more. I’m looking forward to seeing Reagan grow with her quilt, and her cousin Finn is sure to join her on it whenever the opportunity arises!