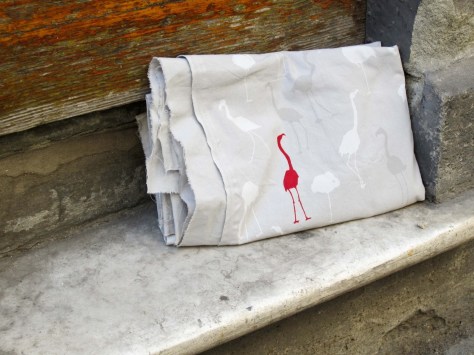
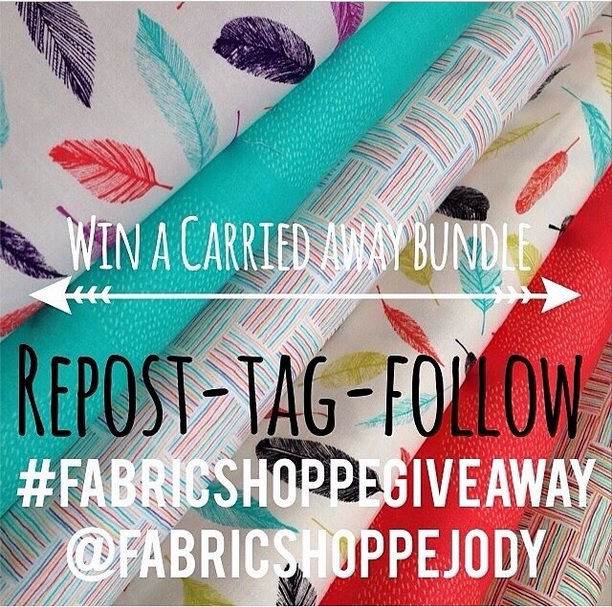
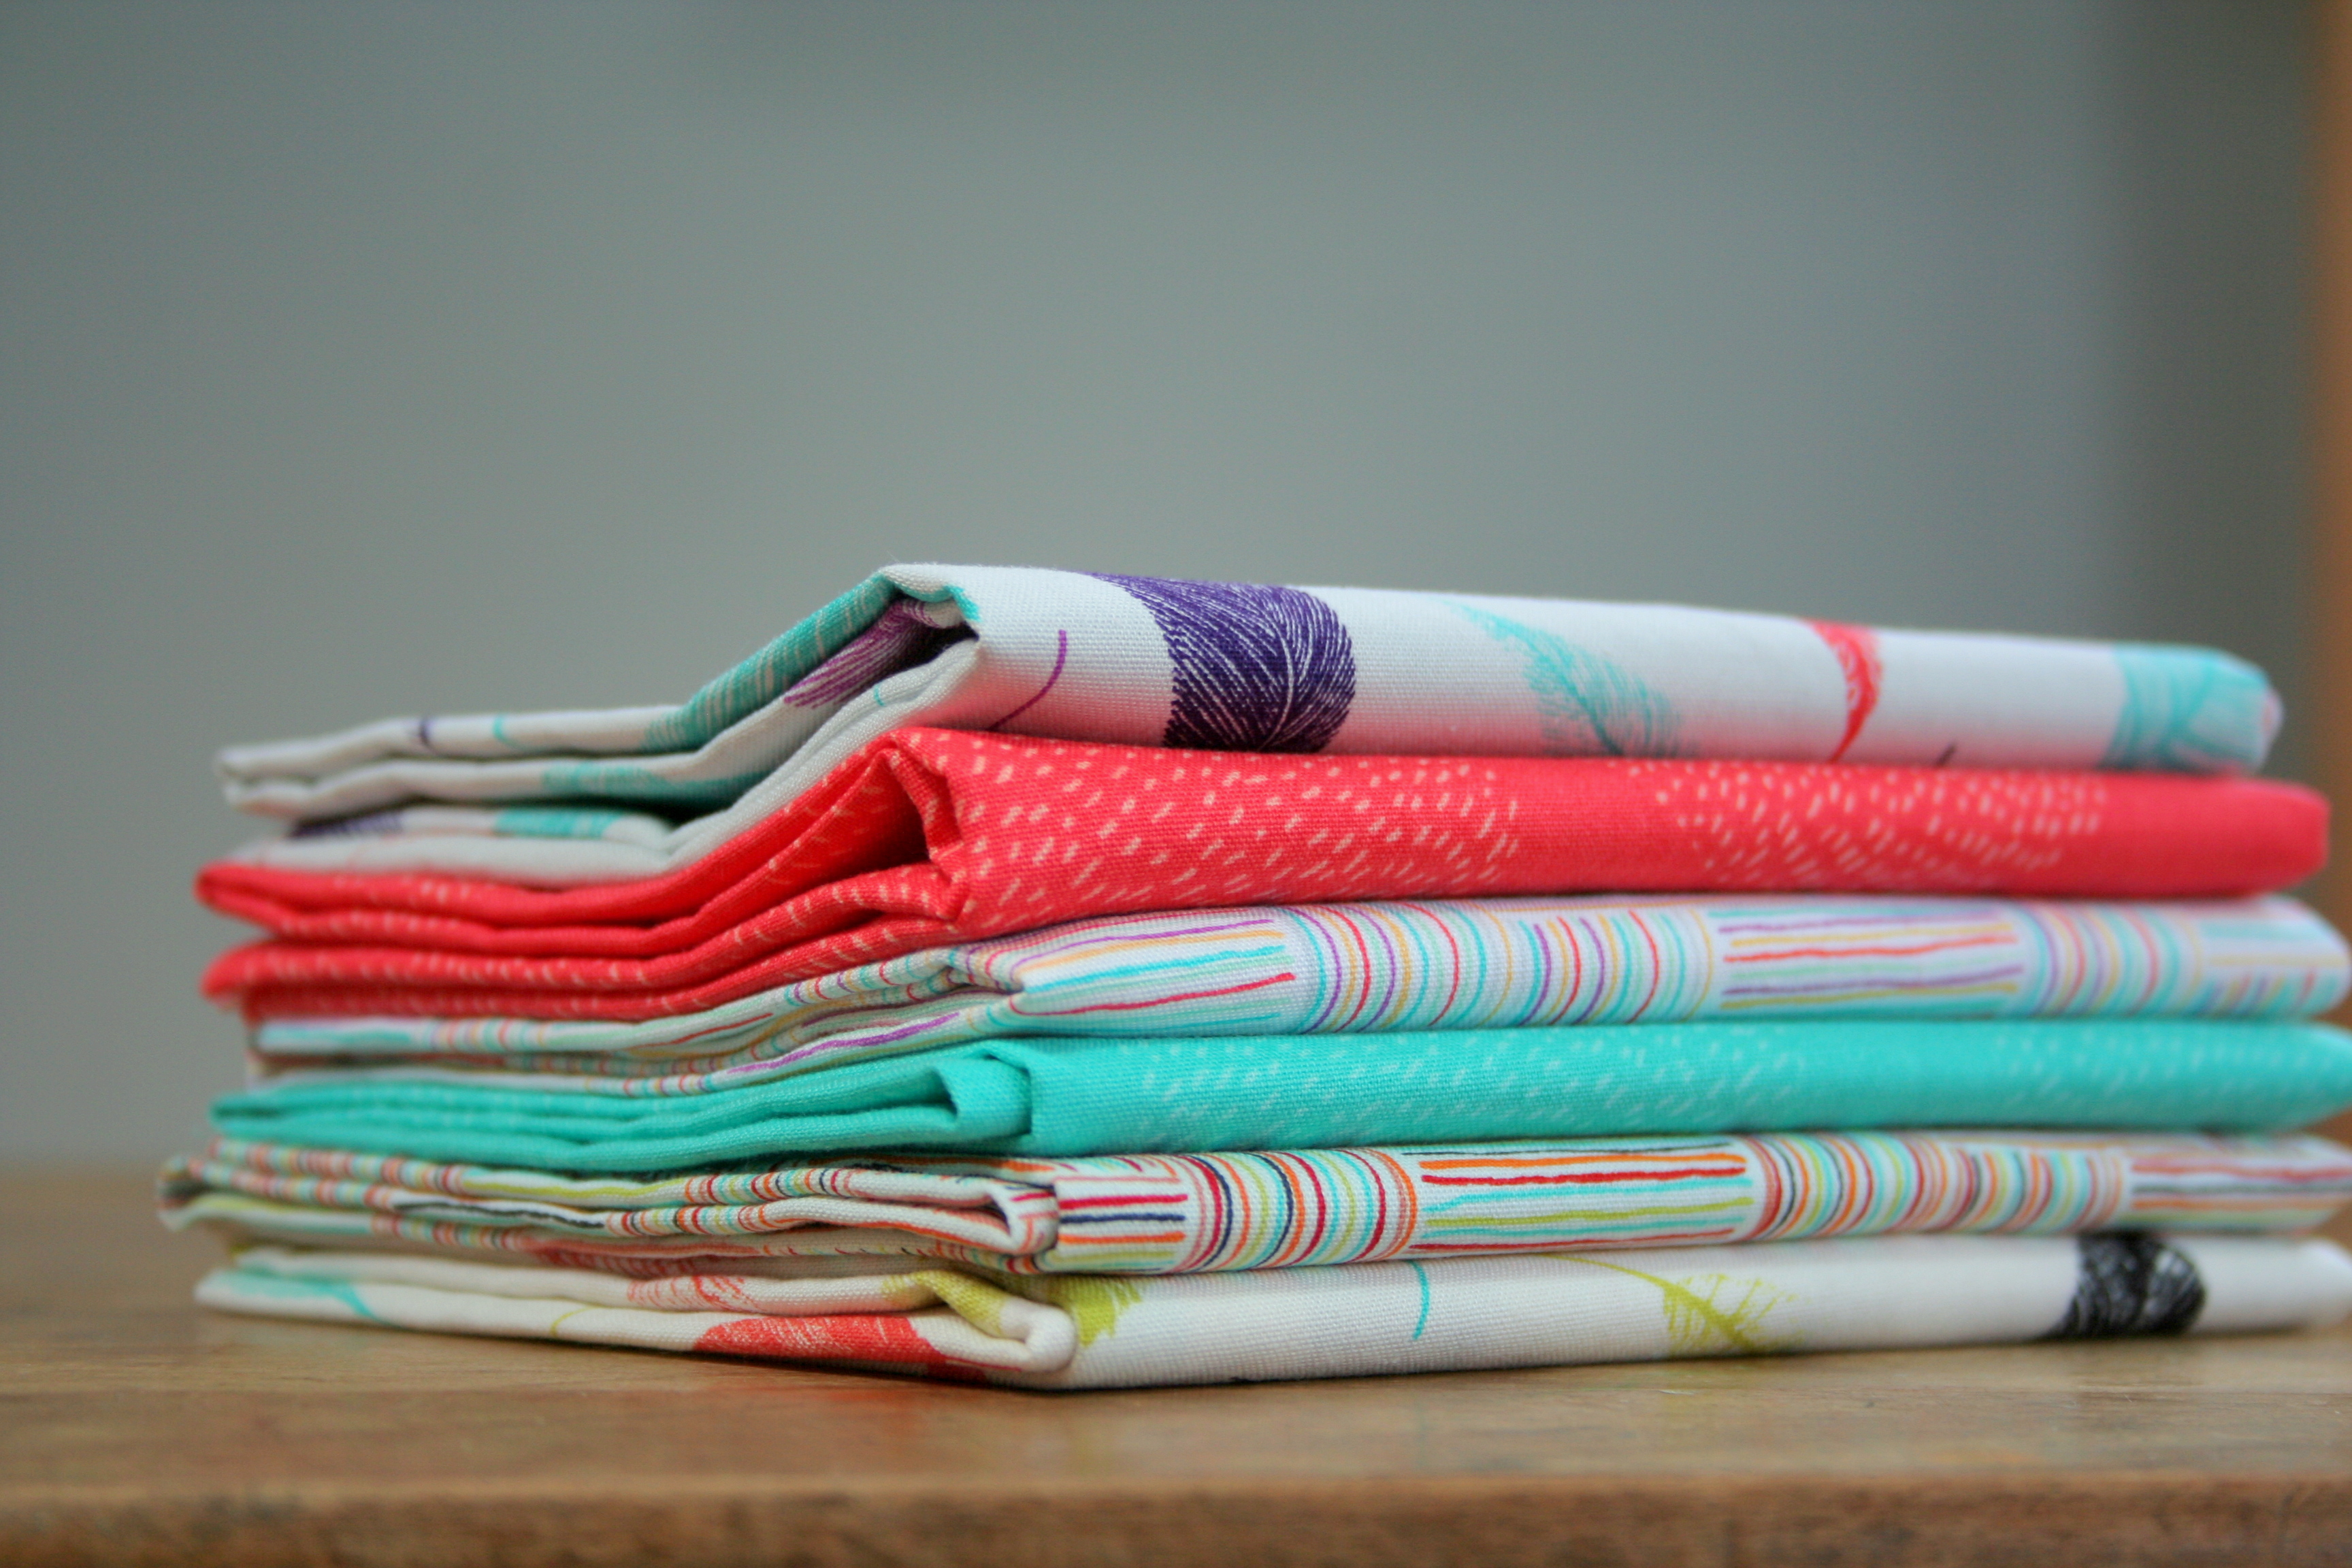
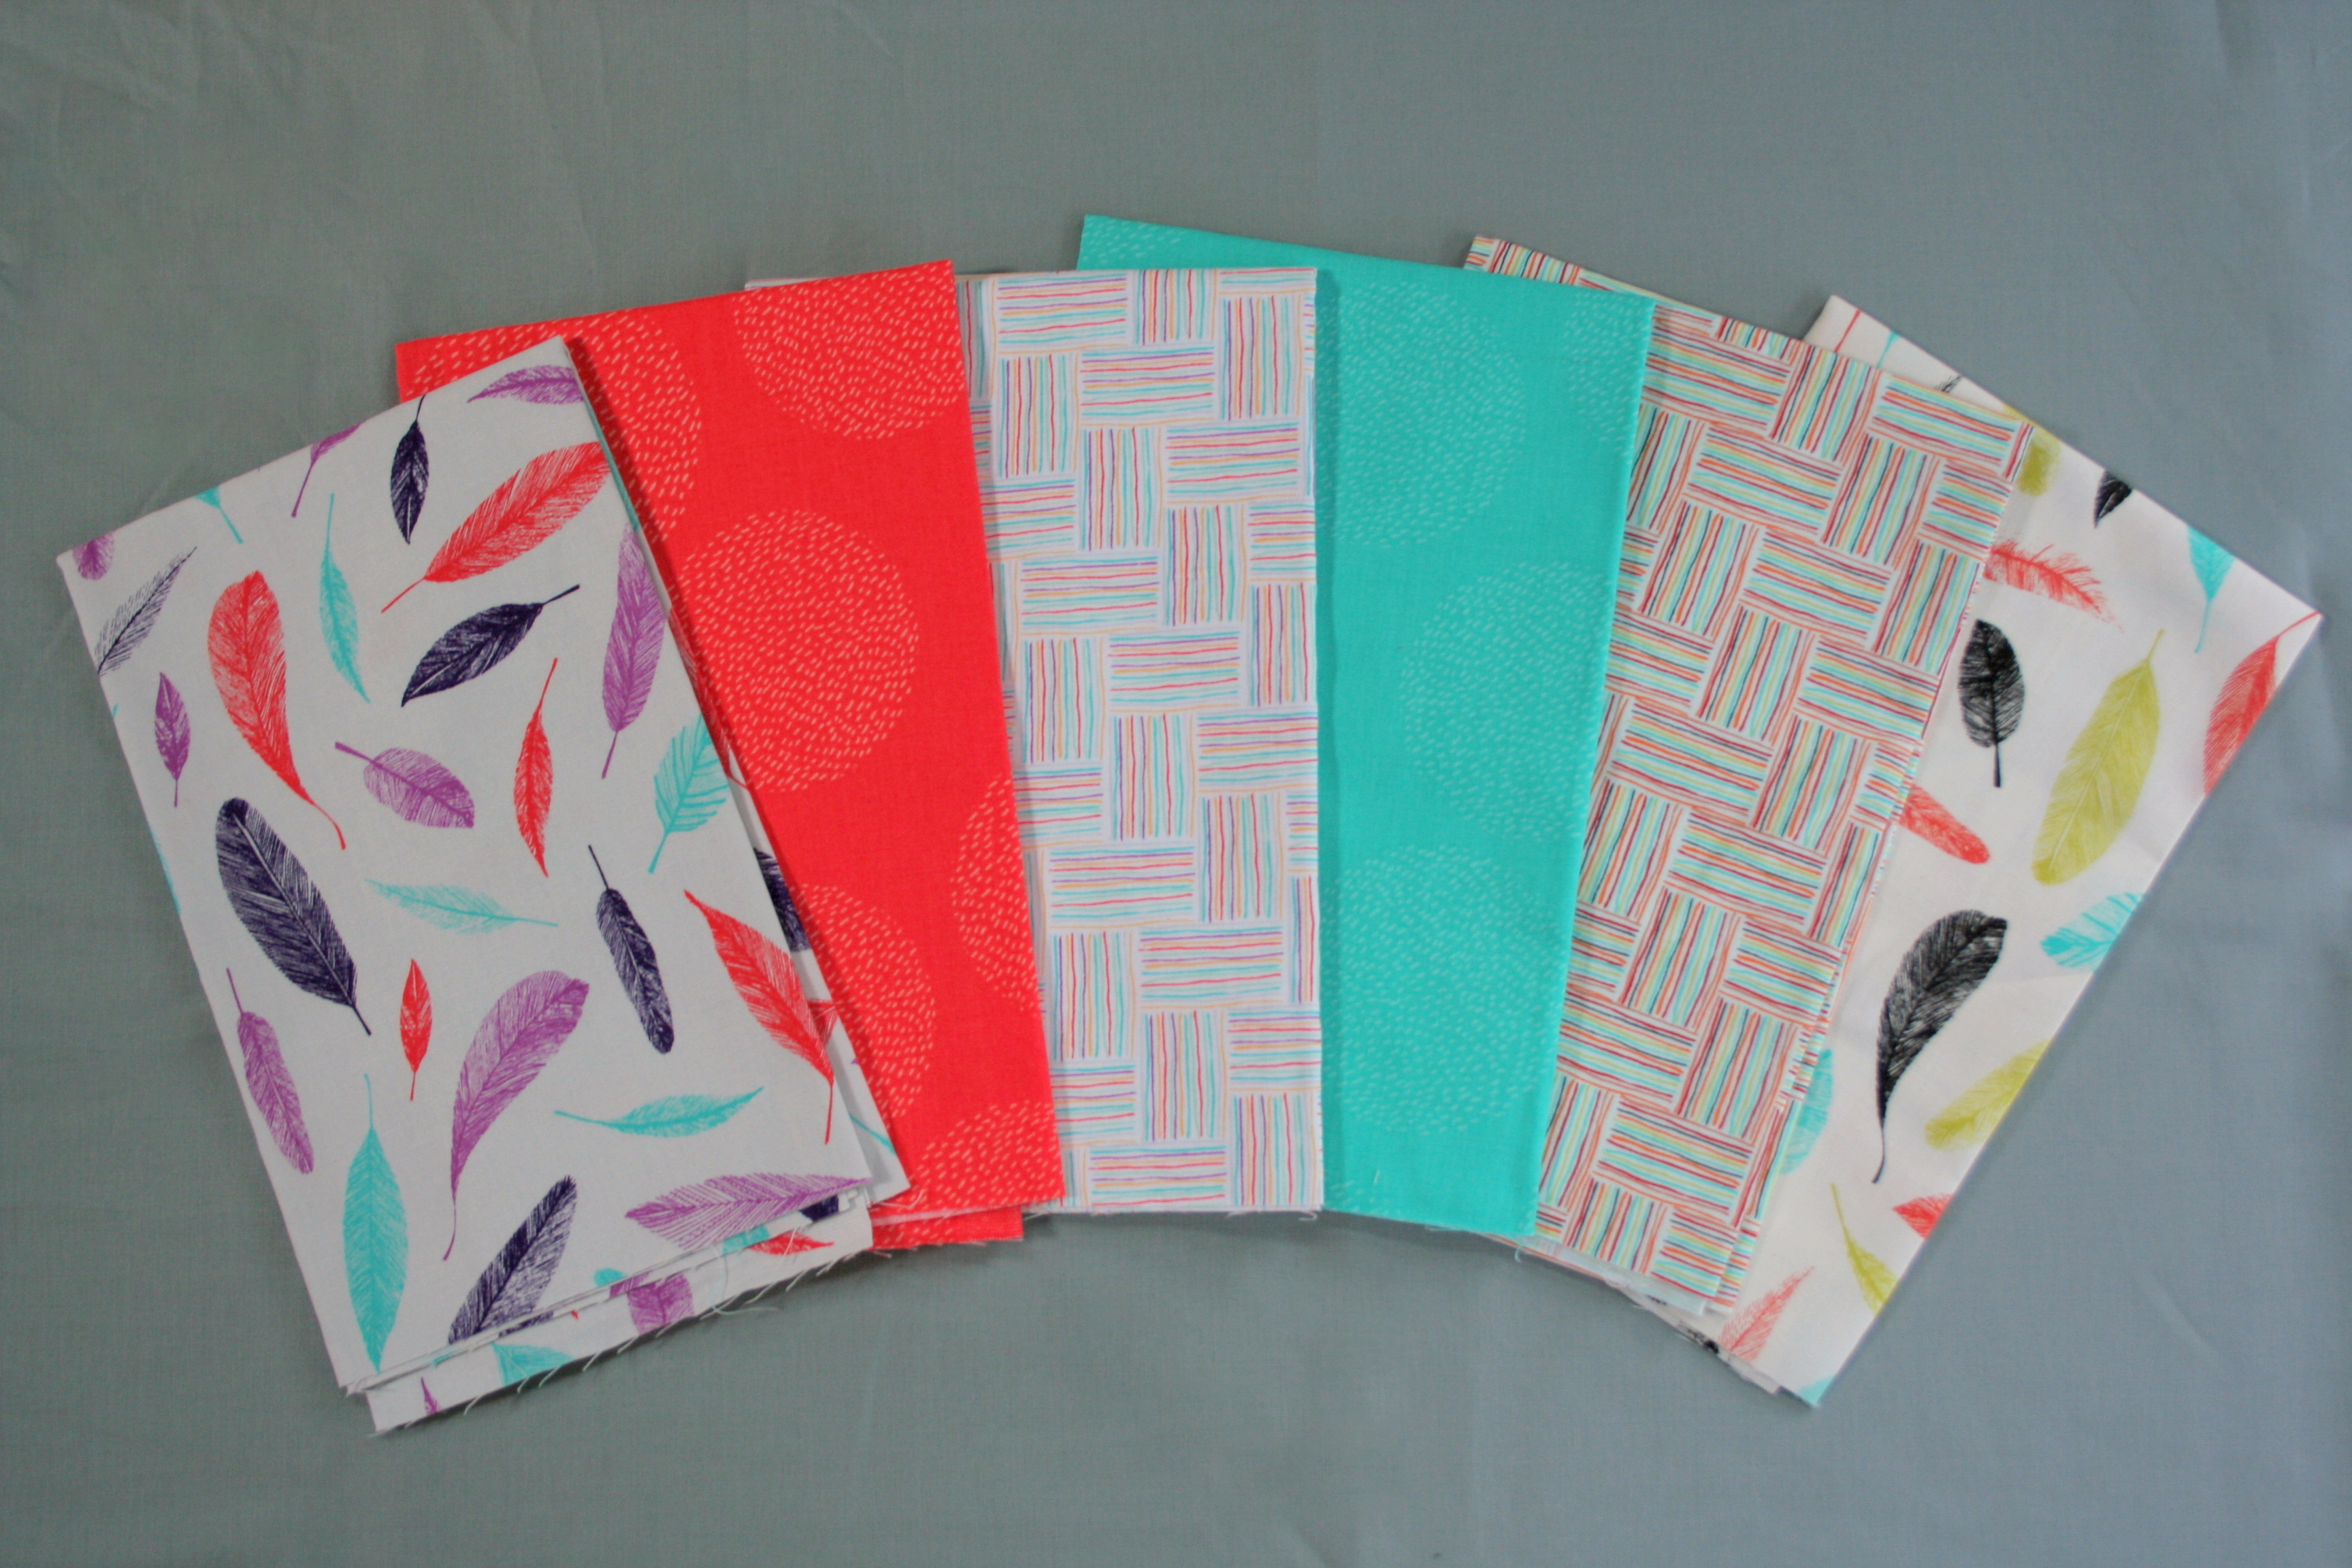
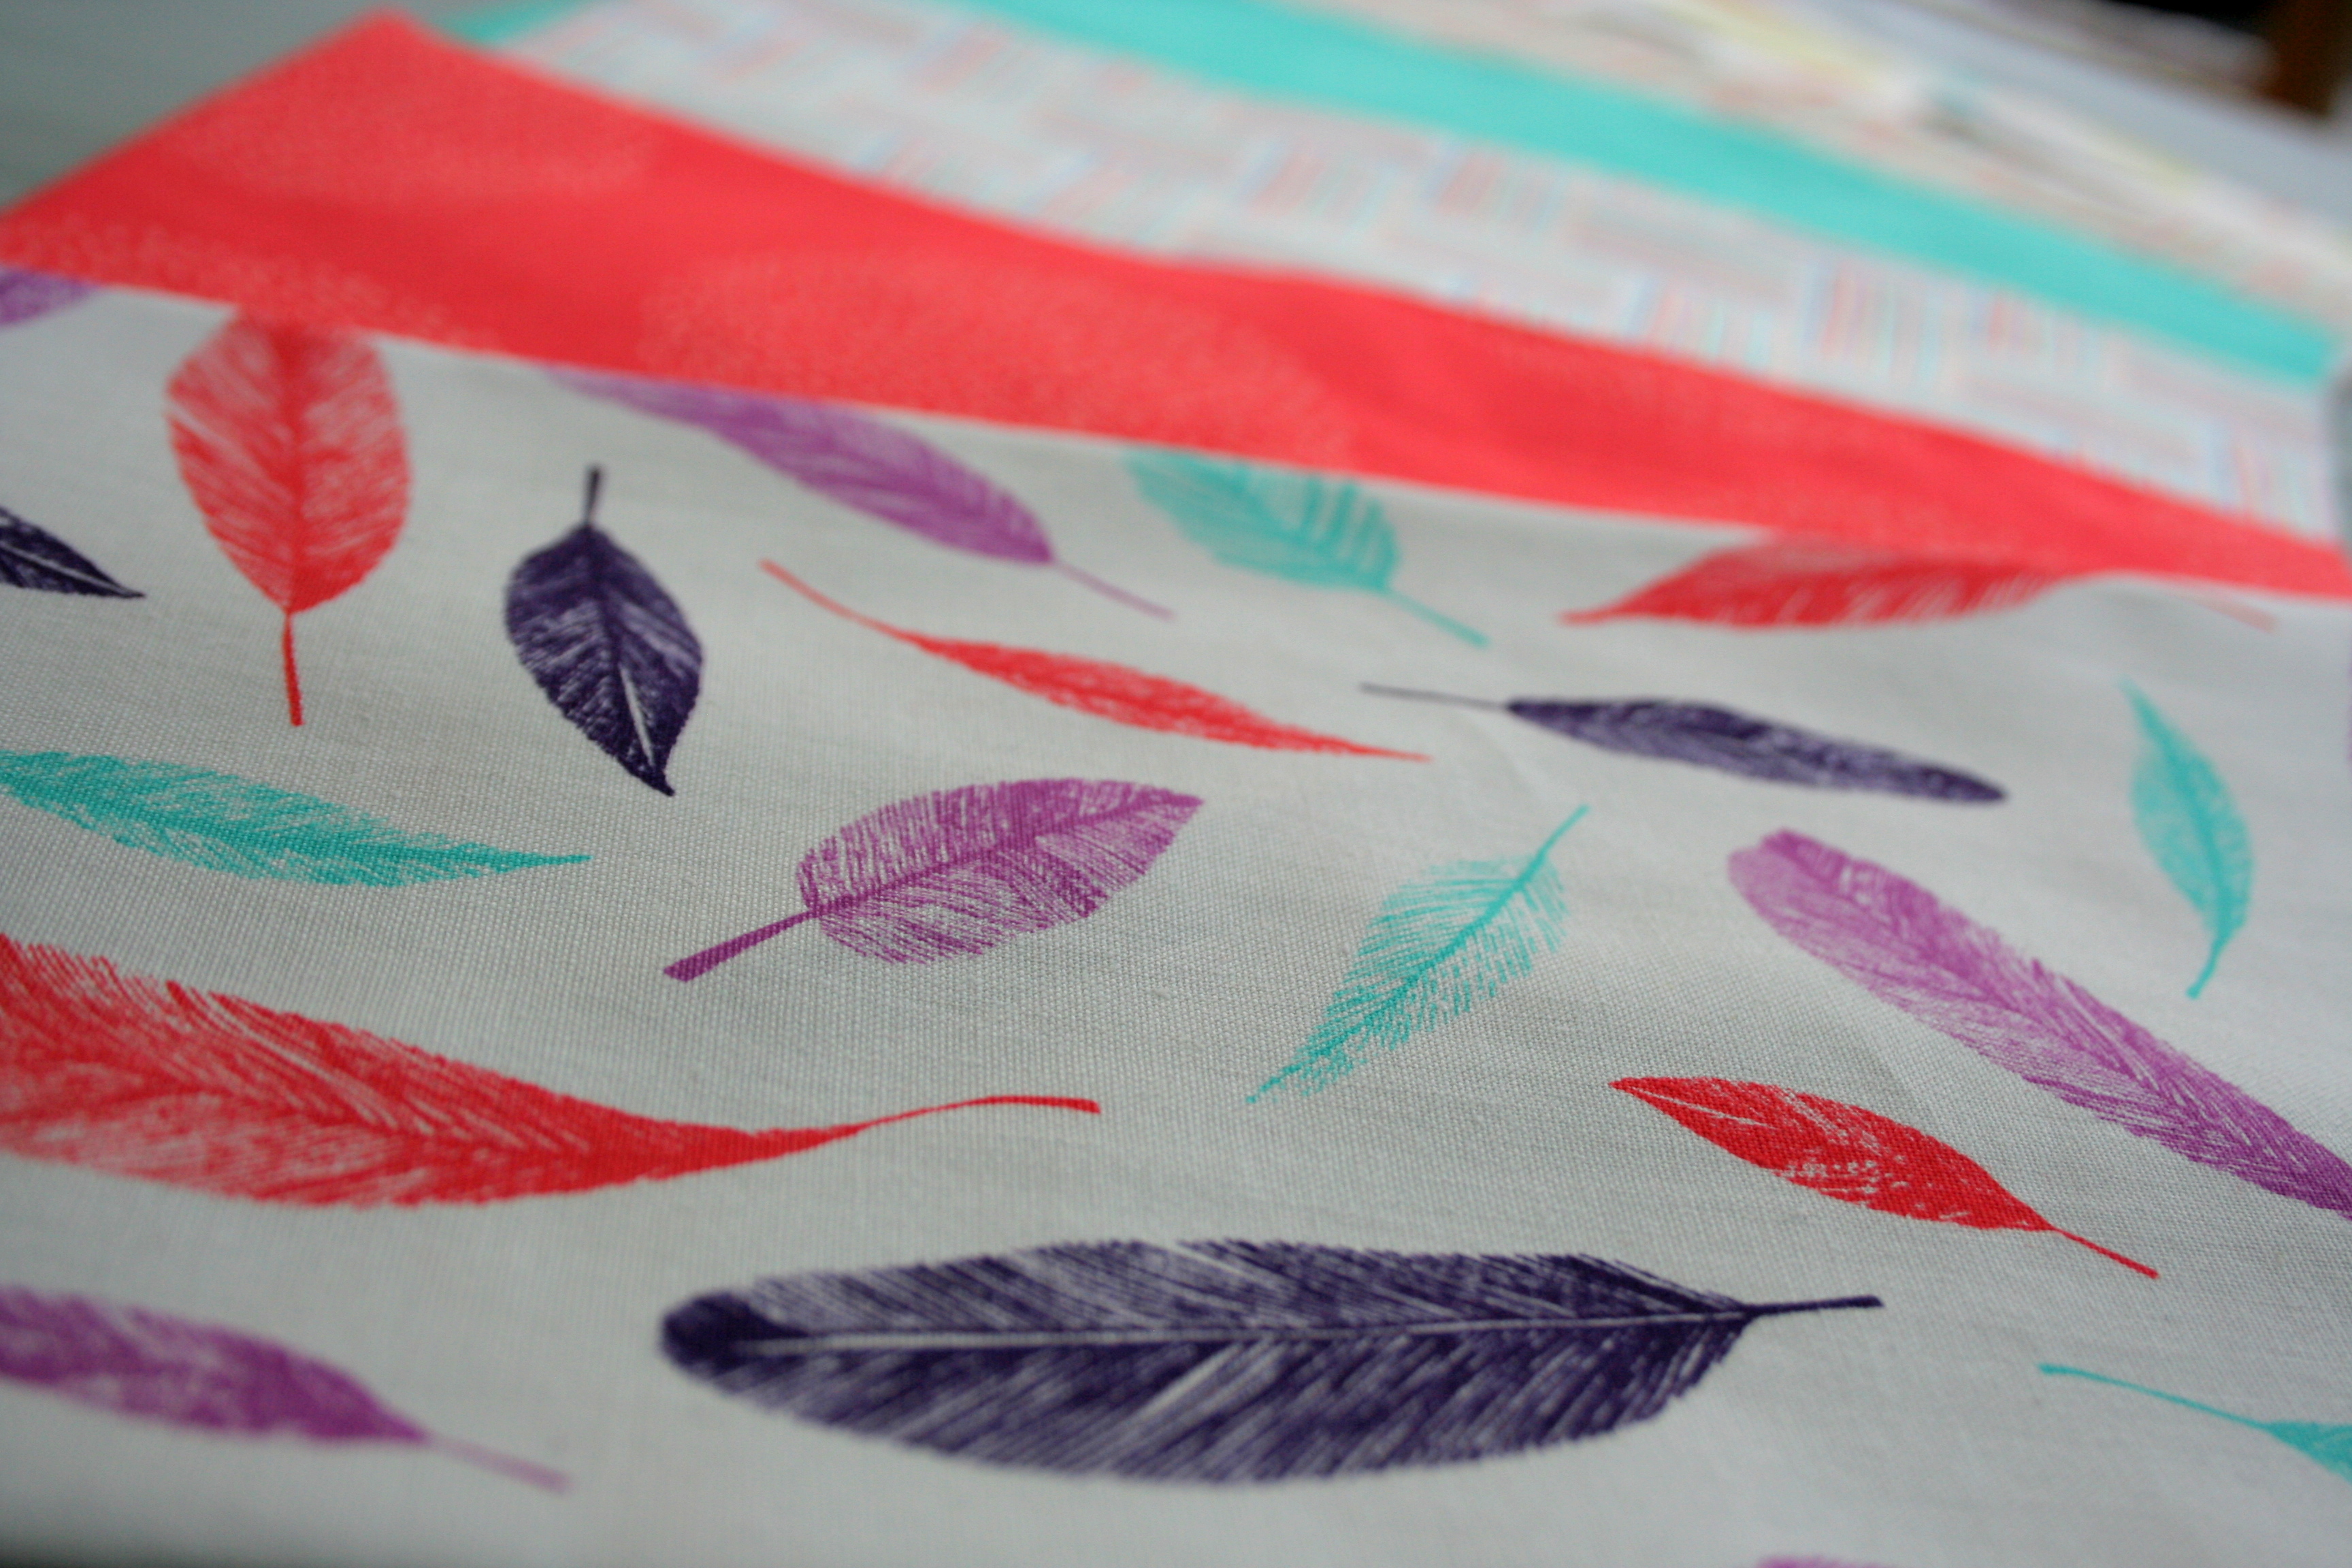
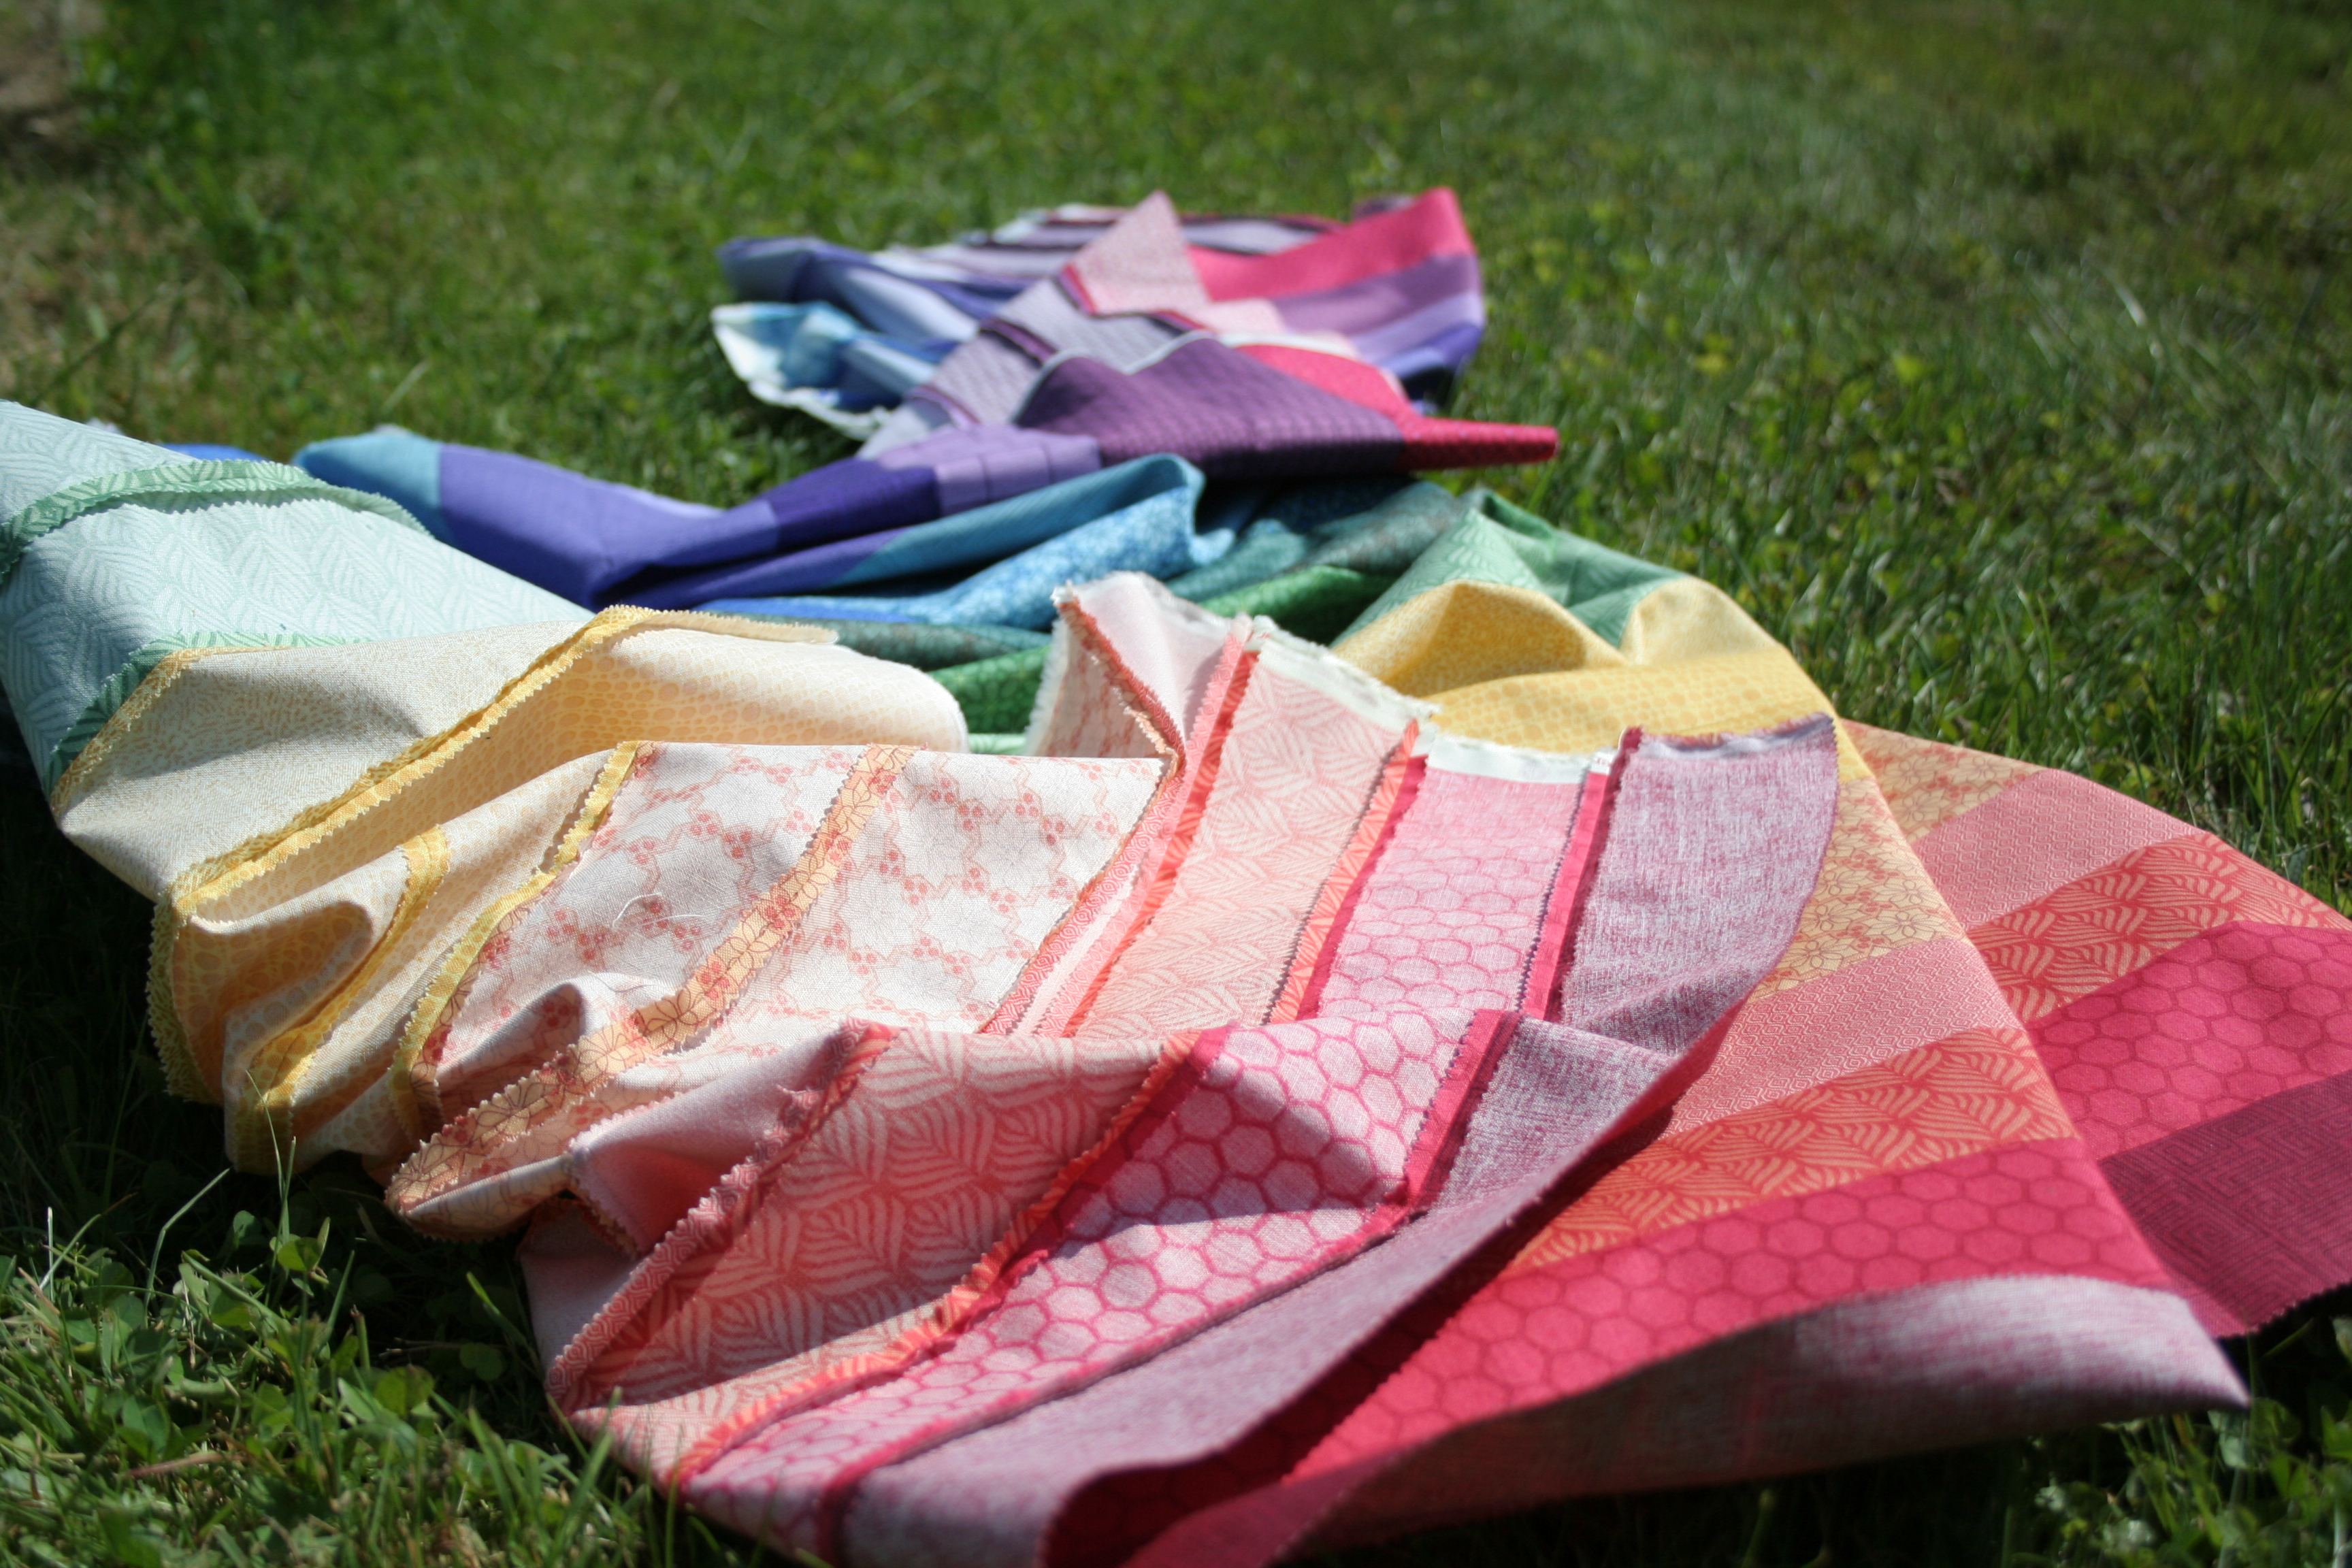
I don’t always enter giveaways on Instagram since I don’t want my feed to be swamped with reposts, but every once in a while there’s one so gorgeous that I just can’t help but enter. A couple weeks ago, I reposted, tagged, and followed @fabricshoppejody in the hopes of winning this lovely Carried Away bundle. And I actually won! Carried Away was designed by Zoe Ingram for Robert Kaufman Fabrics and features some of my favorite colors, not to mention feathers!
Thus, my fabric stash grew a little bit last week when the lovely bundle arrived in the mail. Thank you so much to Jody from the Fabric Shoppe for this awesome giveaway, and for adding the very first feather fabric to my stash–I know, hard to believe I haven’t bought any feather fabric yet!
This weekend, we finally had a somewhat sunny day on which I attempted to capture its beauty.
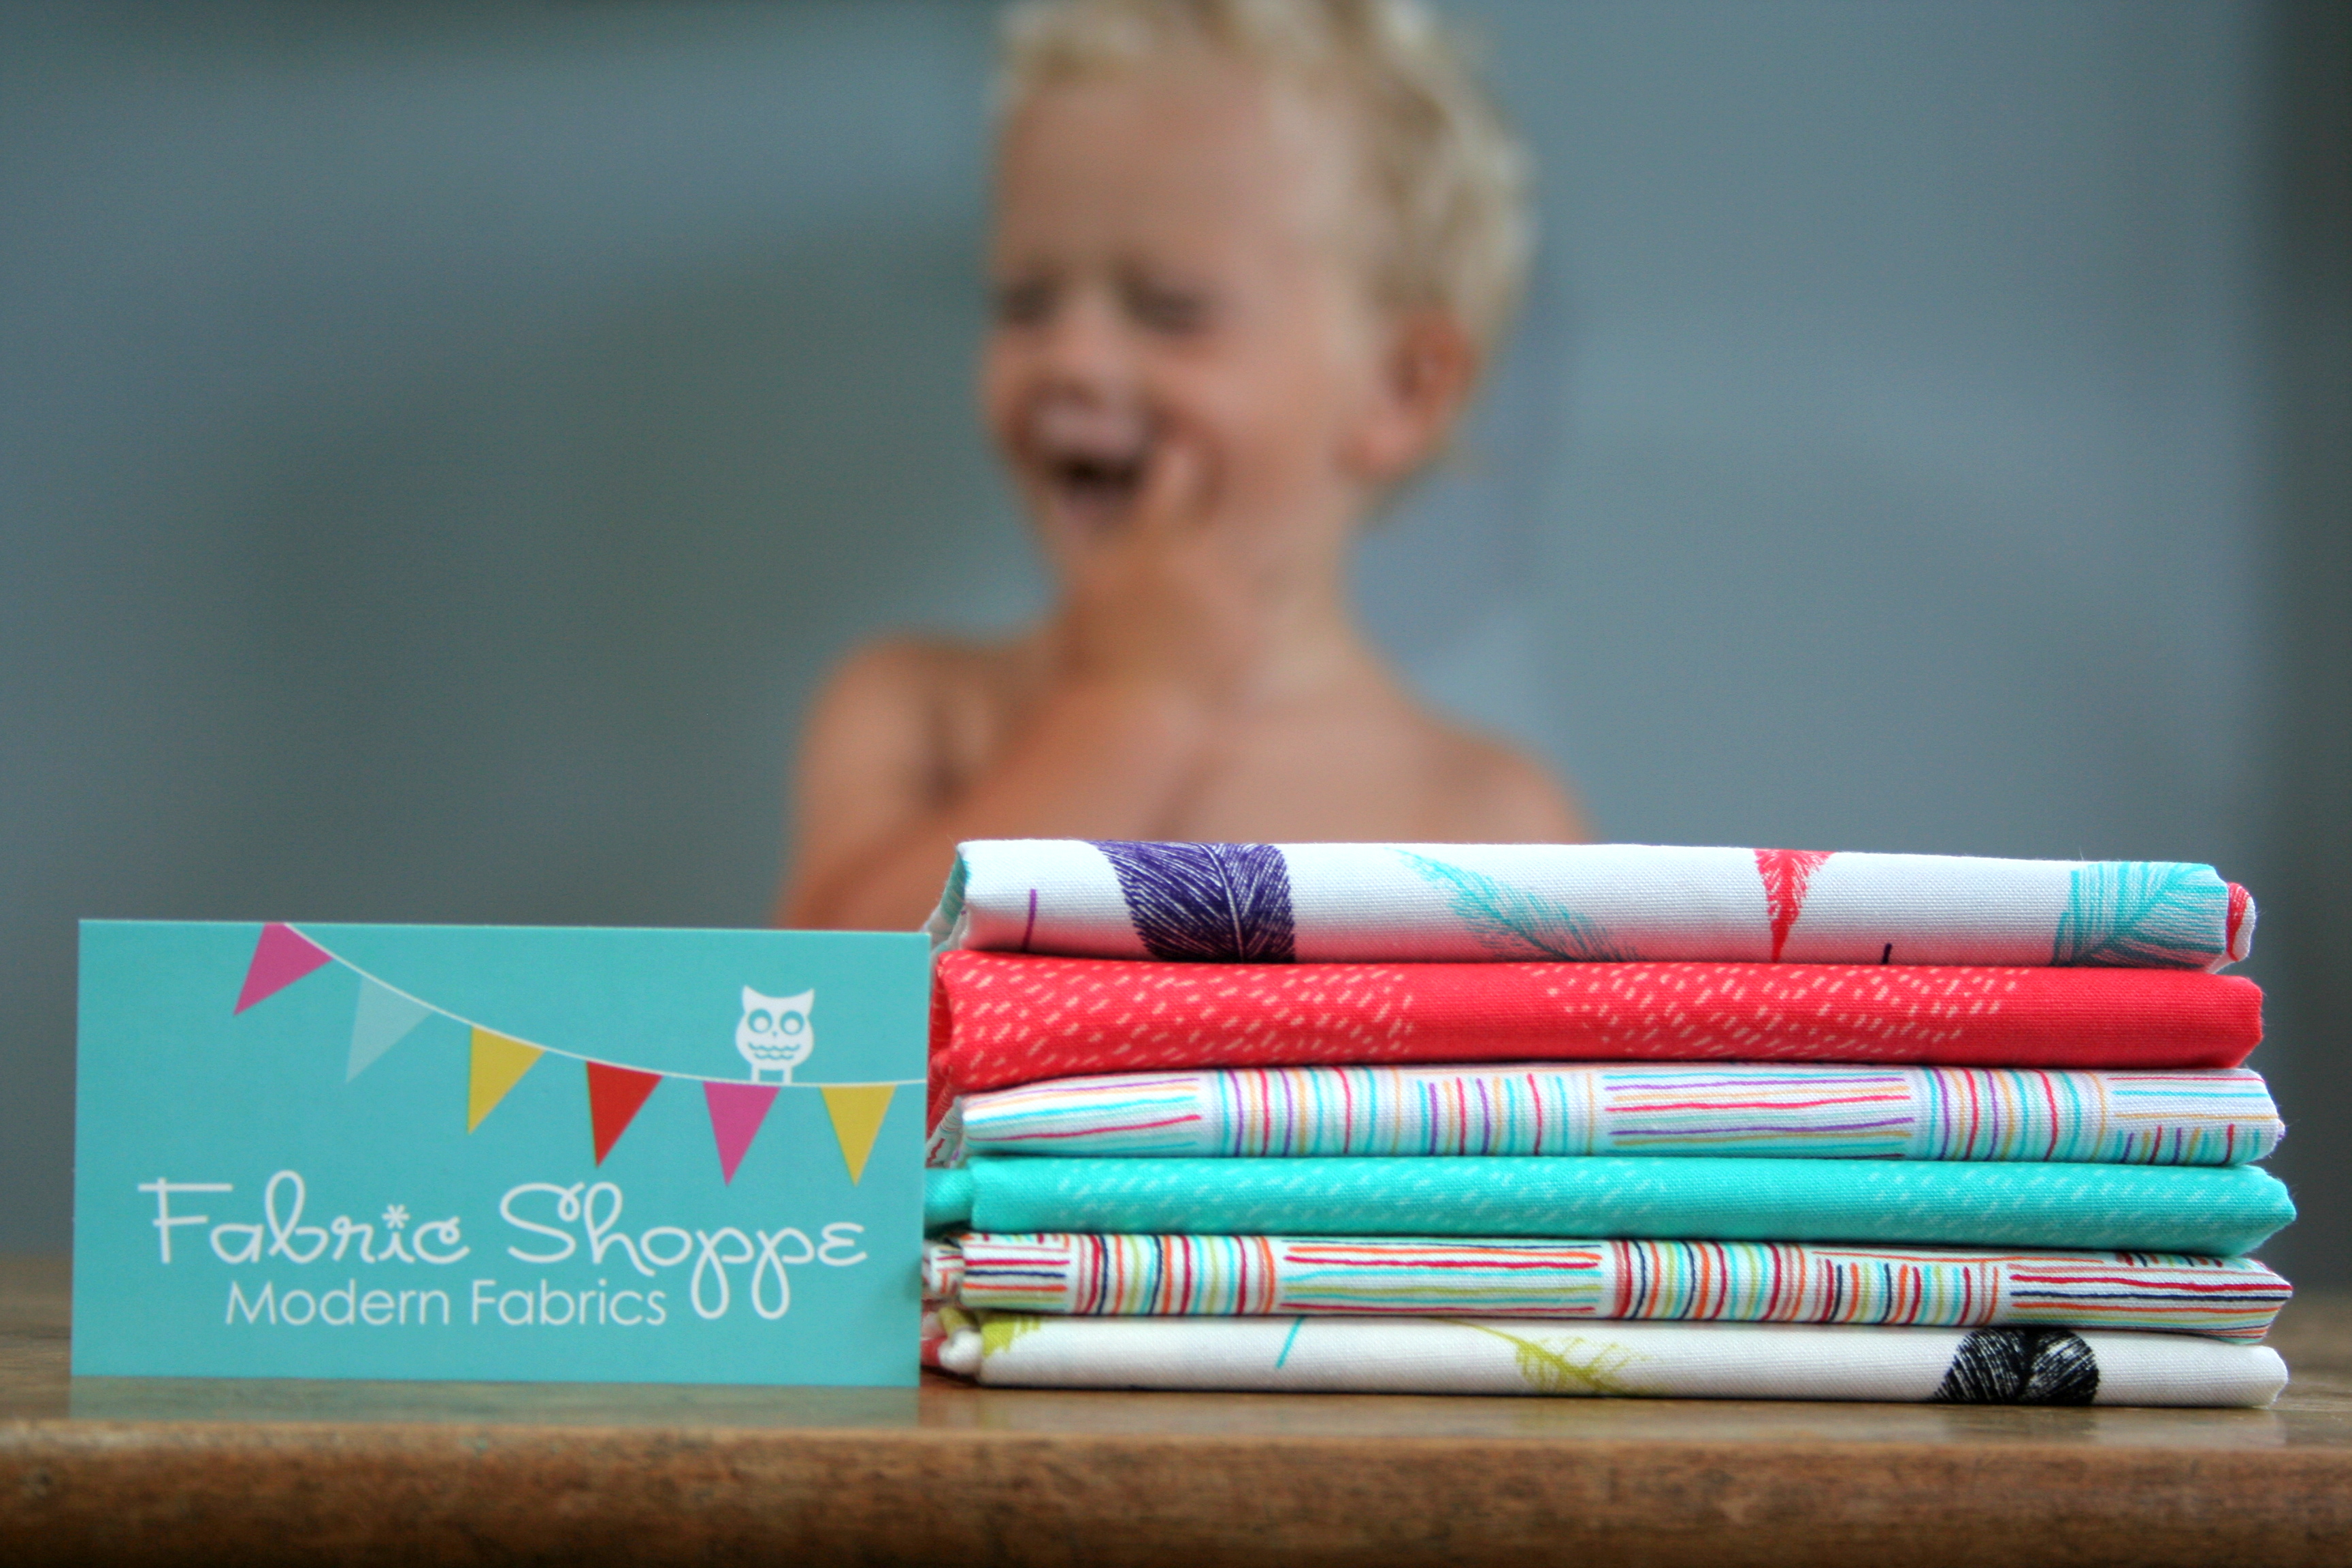
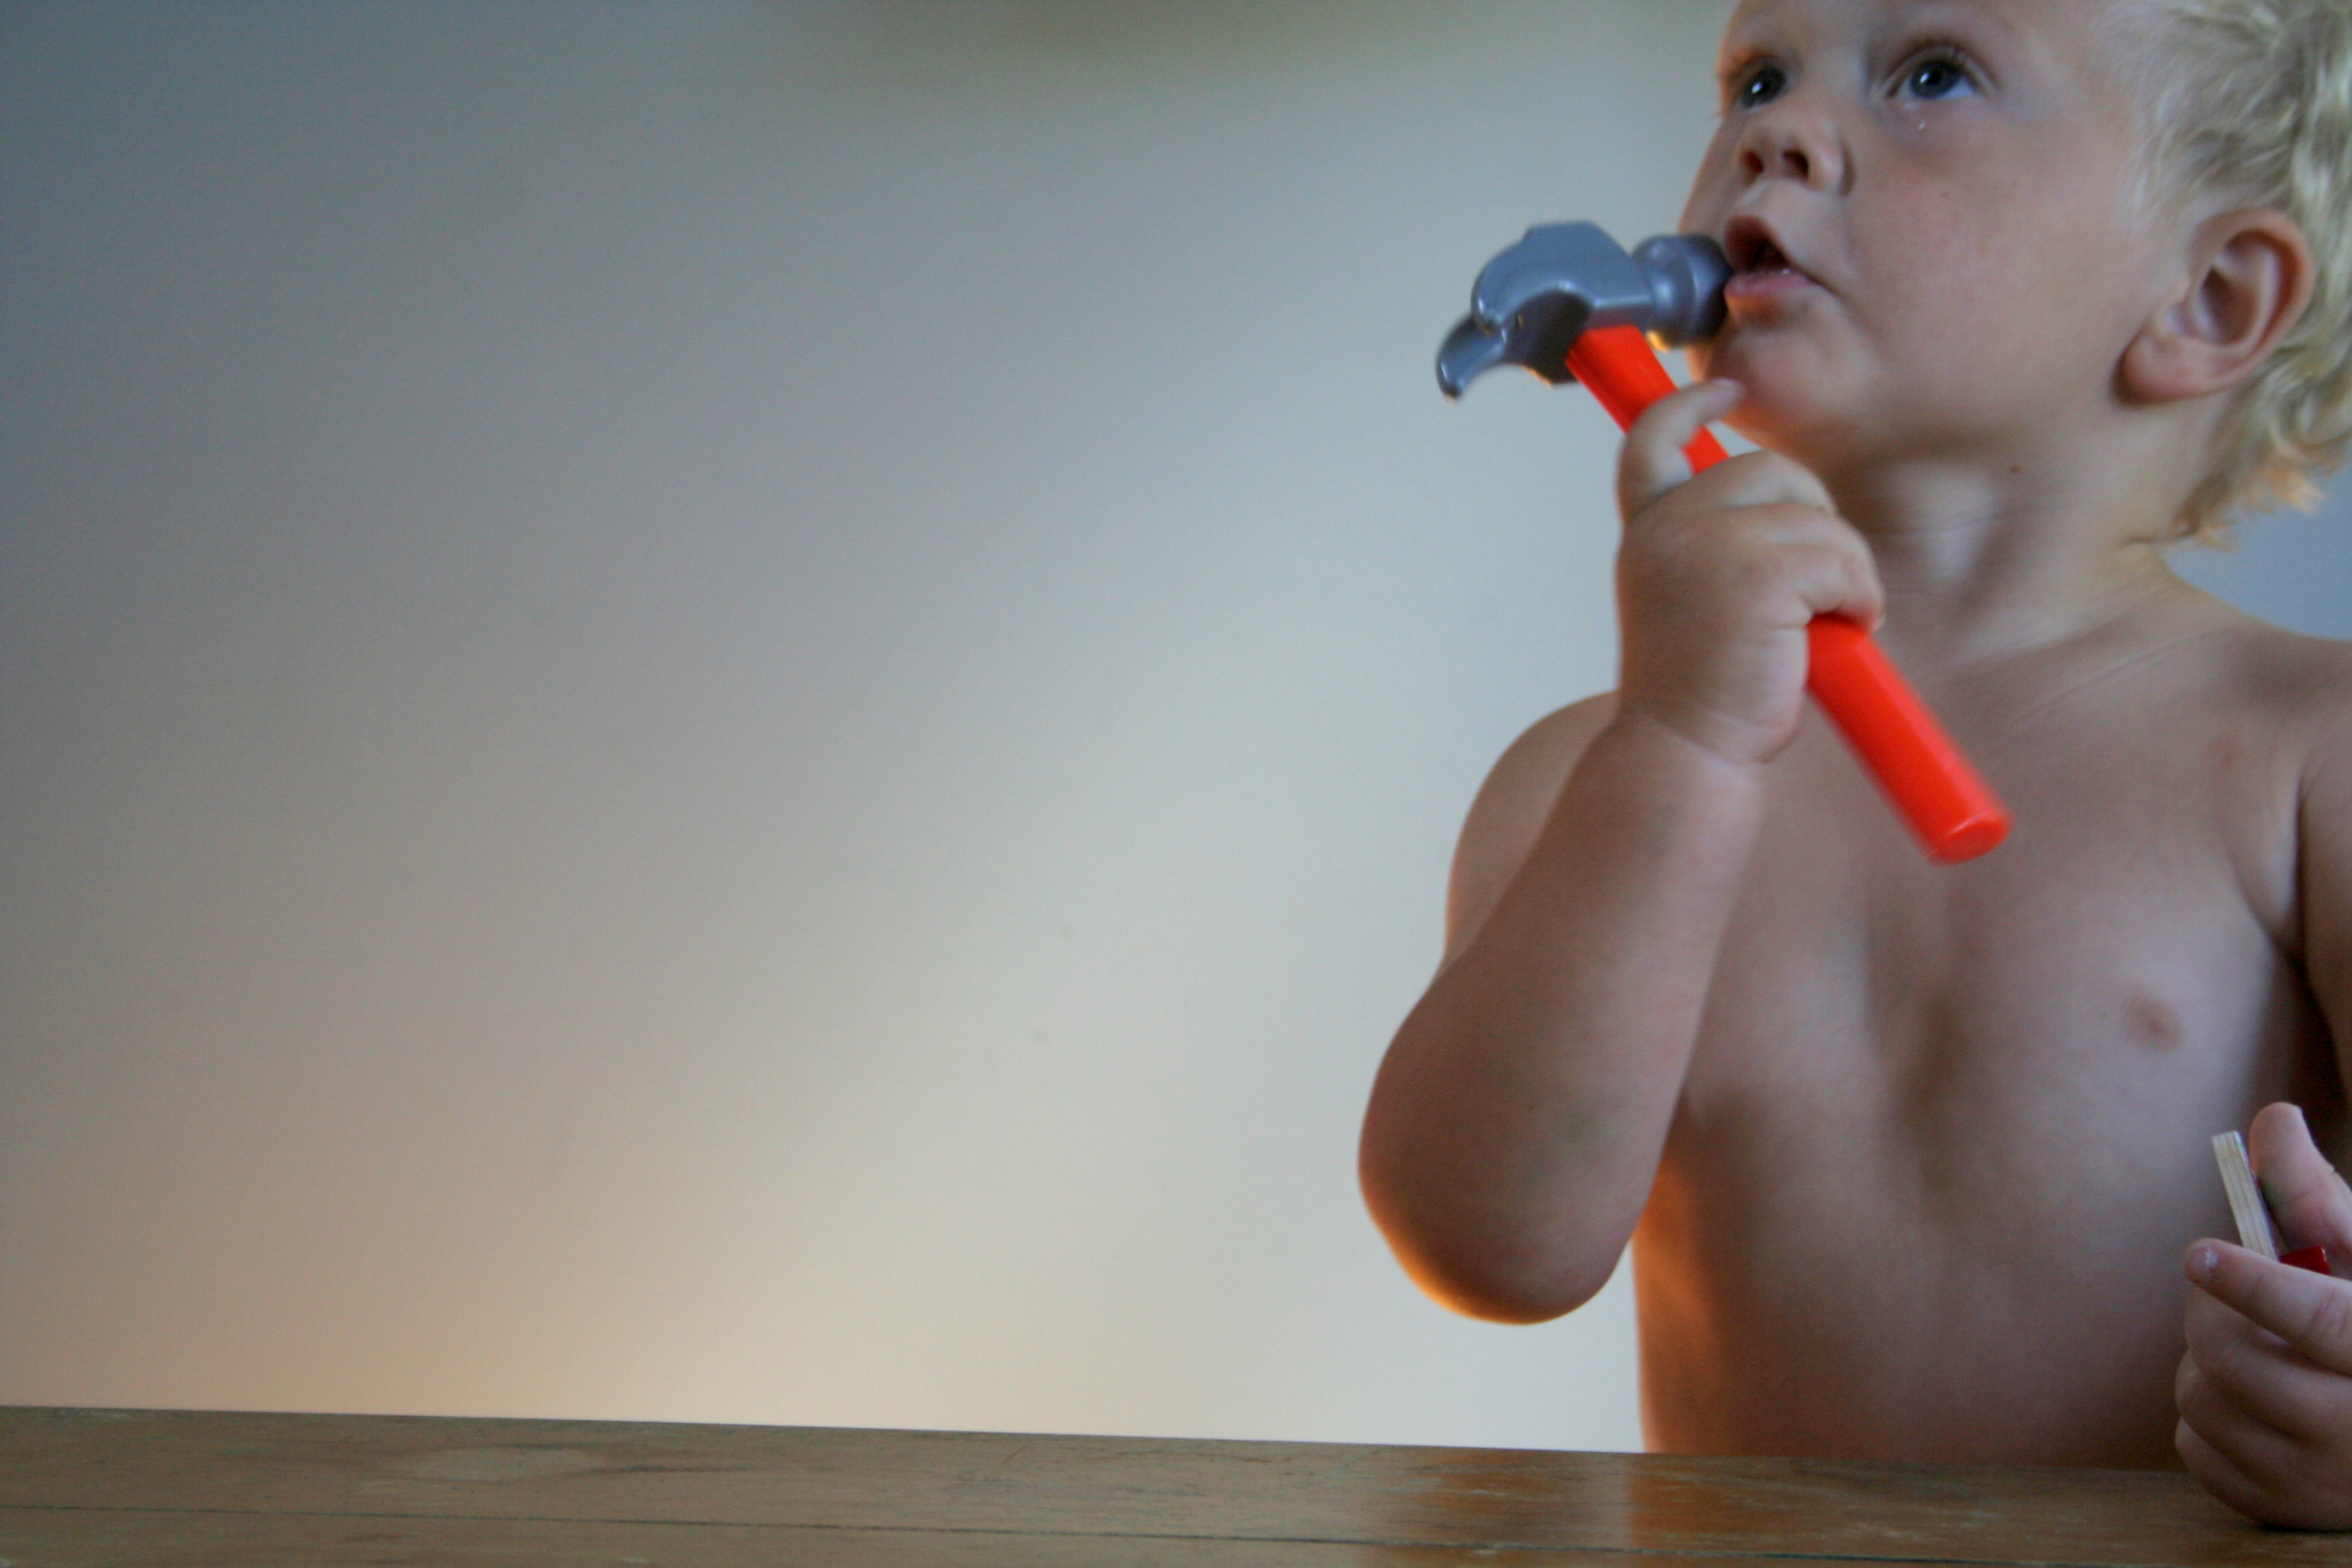
Of course I had my usual helpers around, and my son wanted to be in the thick of the action more than usual.
I just love the feather prints and I’m trying to decide what to make out of this bundle. I’m dreaming of finally attempting a Sew Together Bag, but I’m also terrified. Four zippers?! How many pockets?! A BAG!? I’ve only really attempted quilts and one extremely basic, somewhat flimsy shoulder bag. We shall see. Either way, I’m super excited to add this bundle to my slowly growing stash.
What would you make with this bundle?
I’ll leave you with one last photo of my little helper, since he’s awfully cute. Then again, I’m biased.
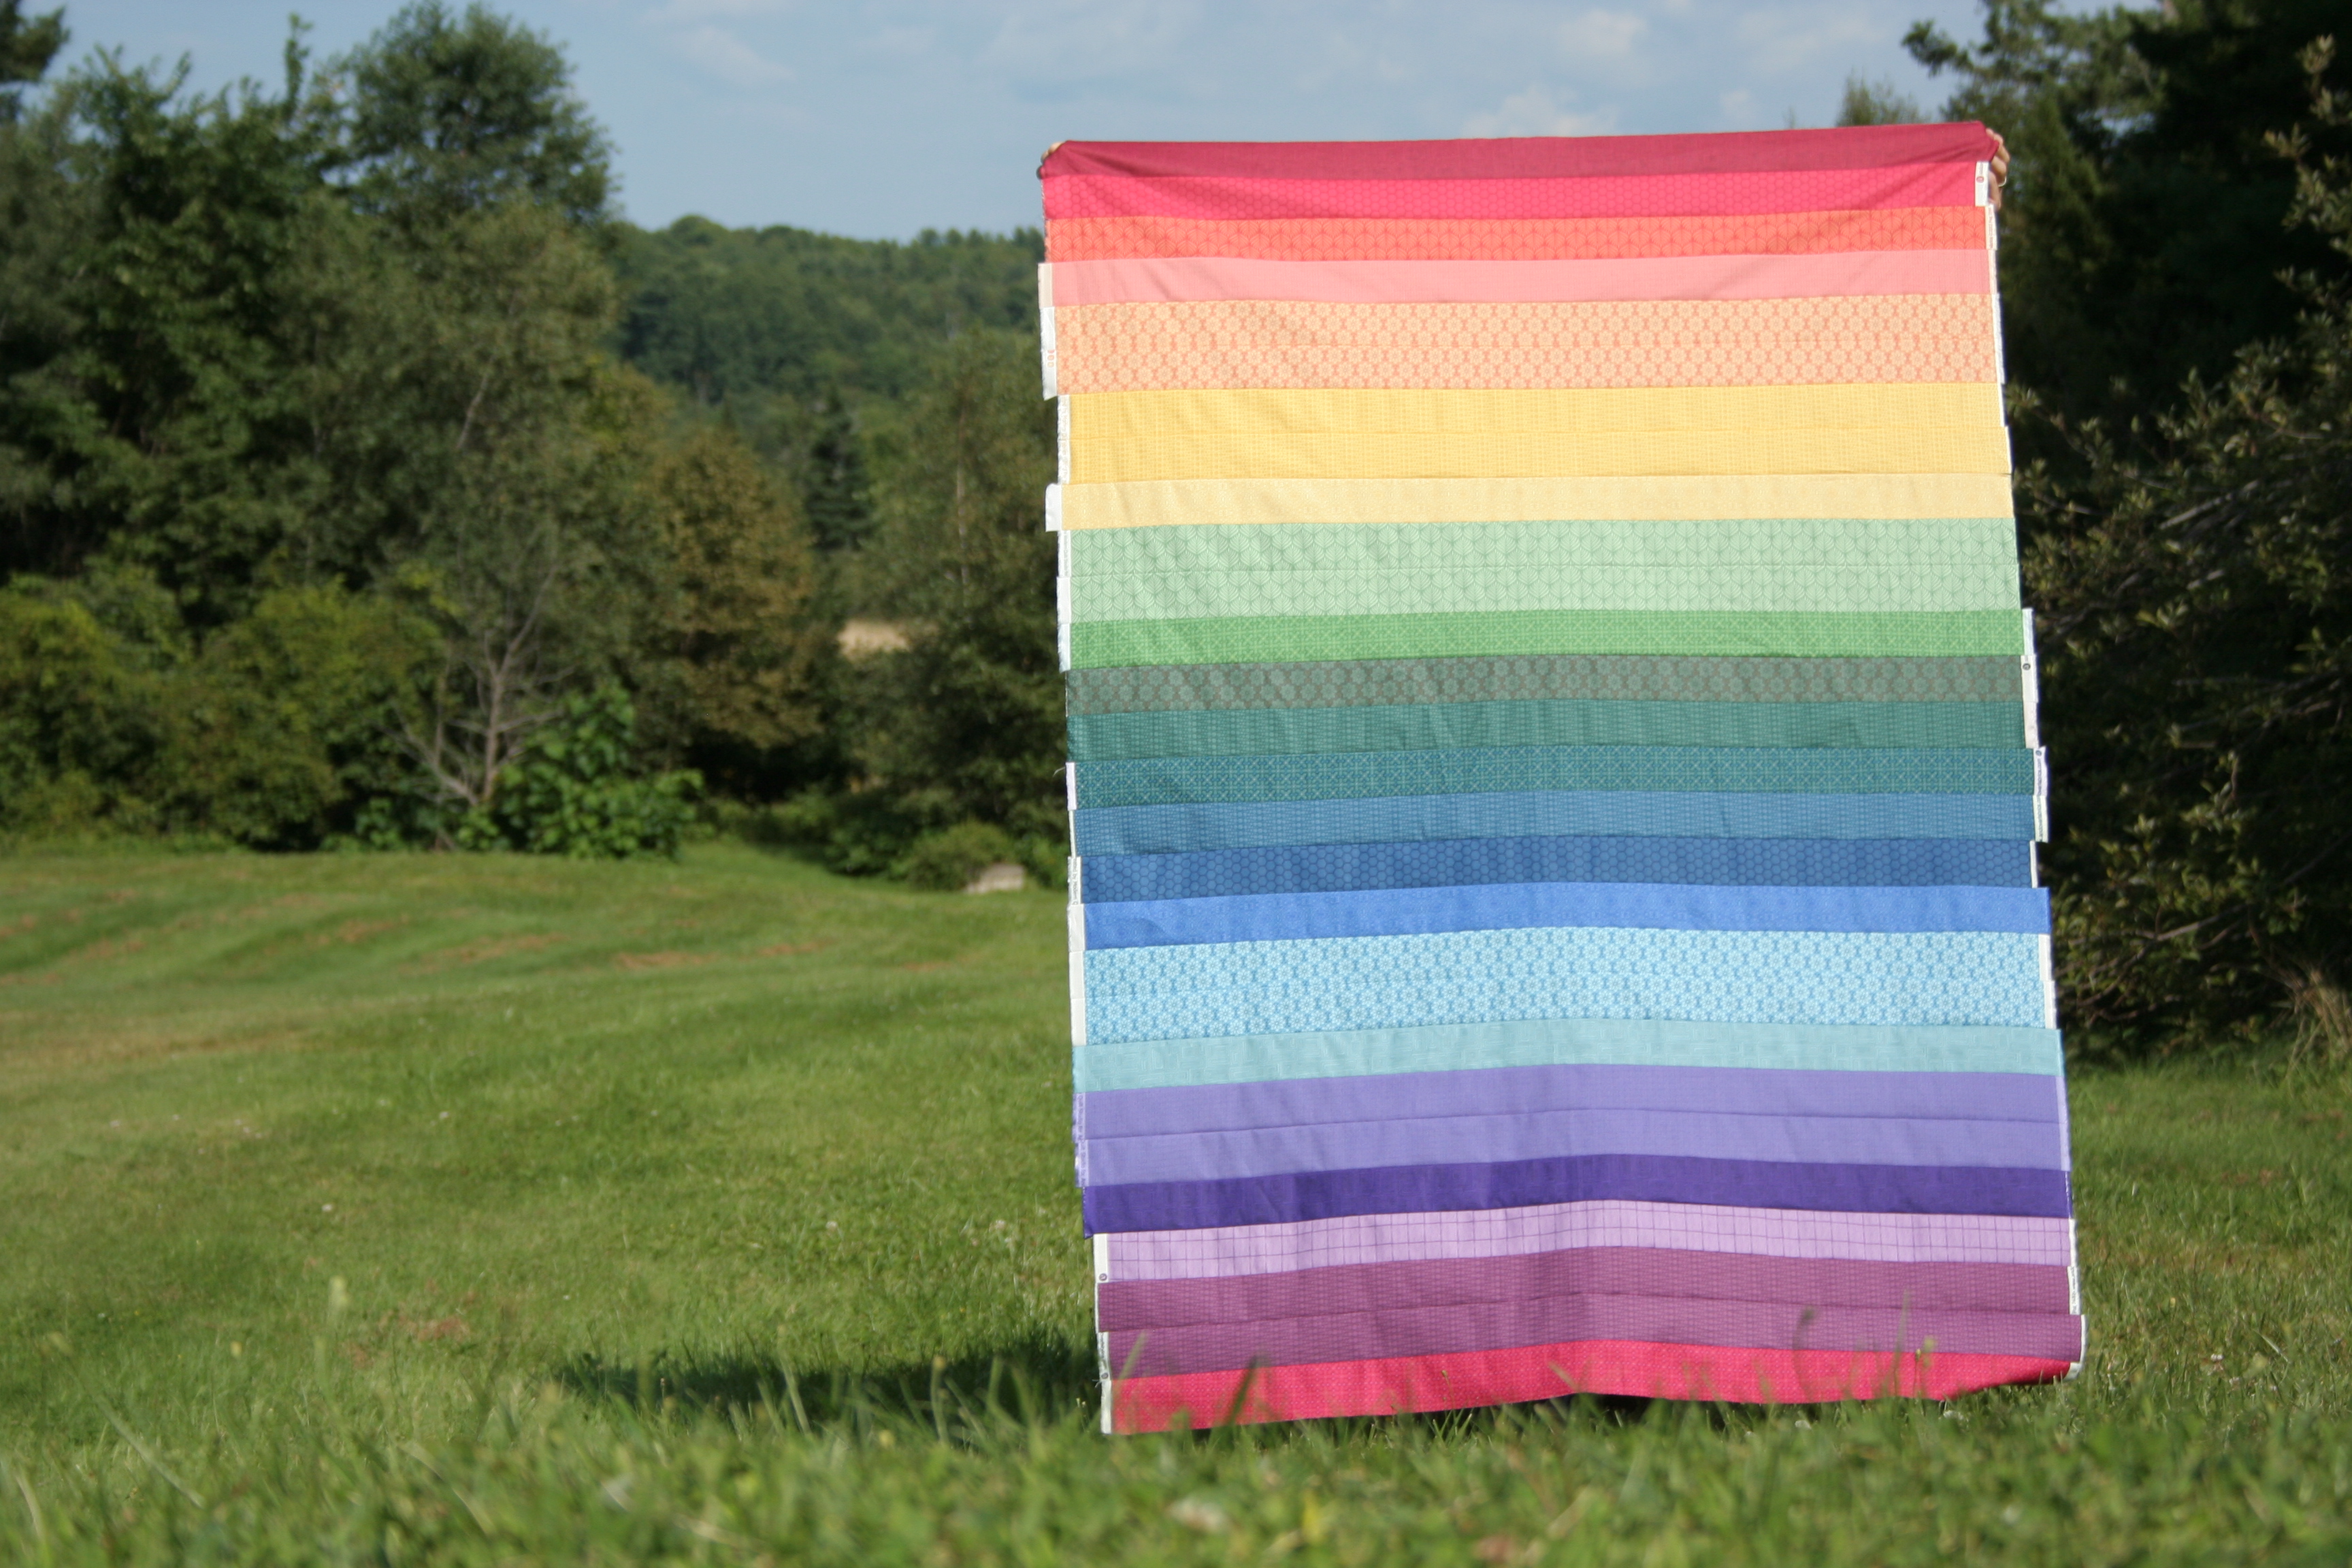
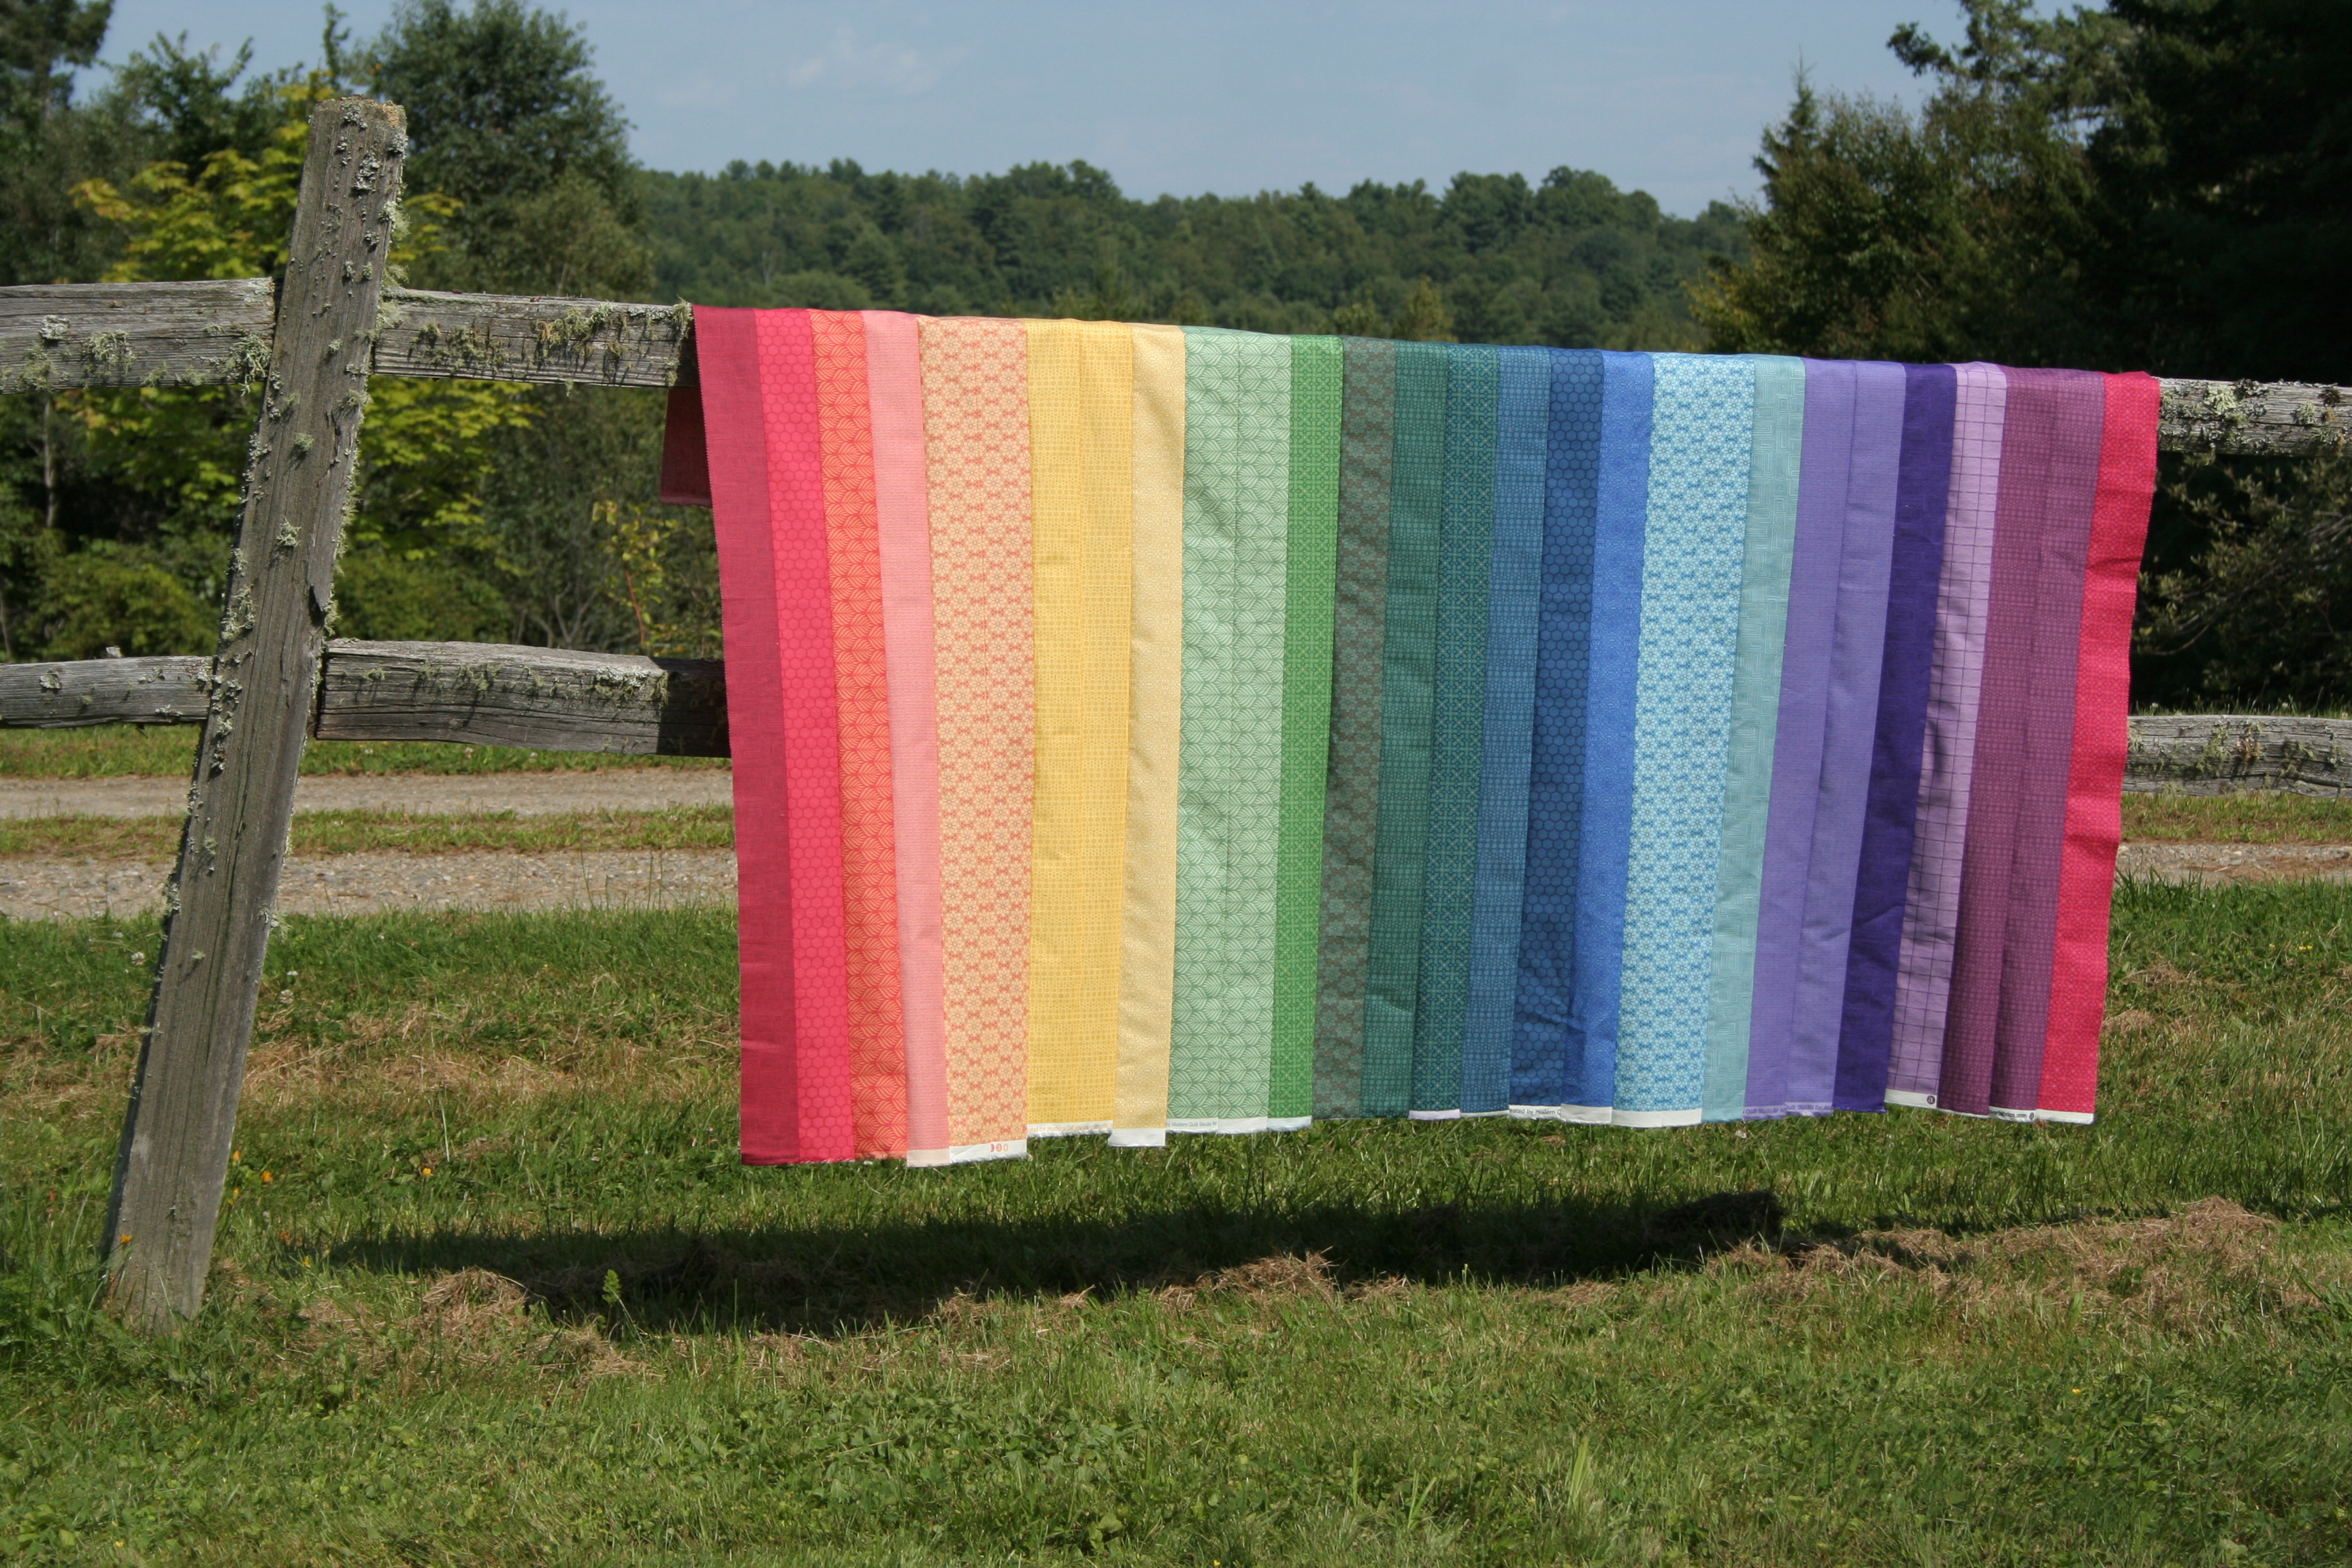
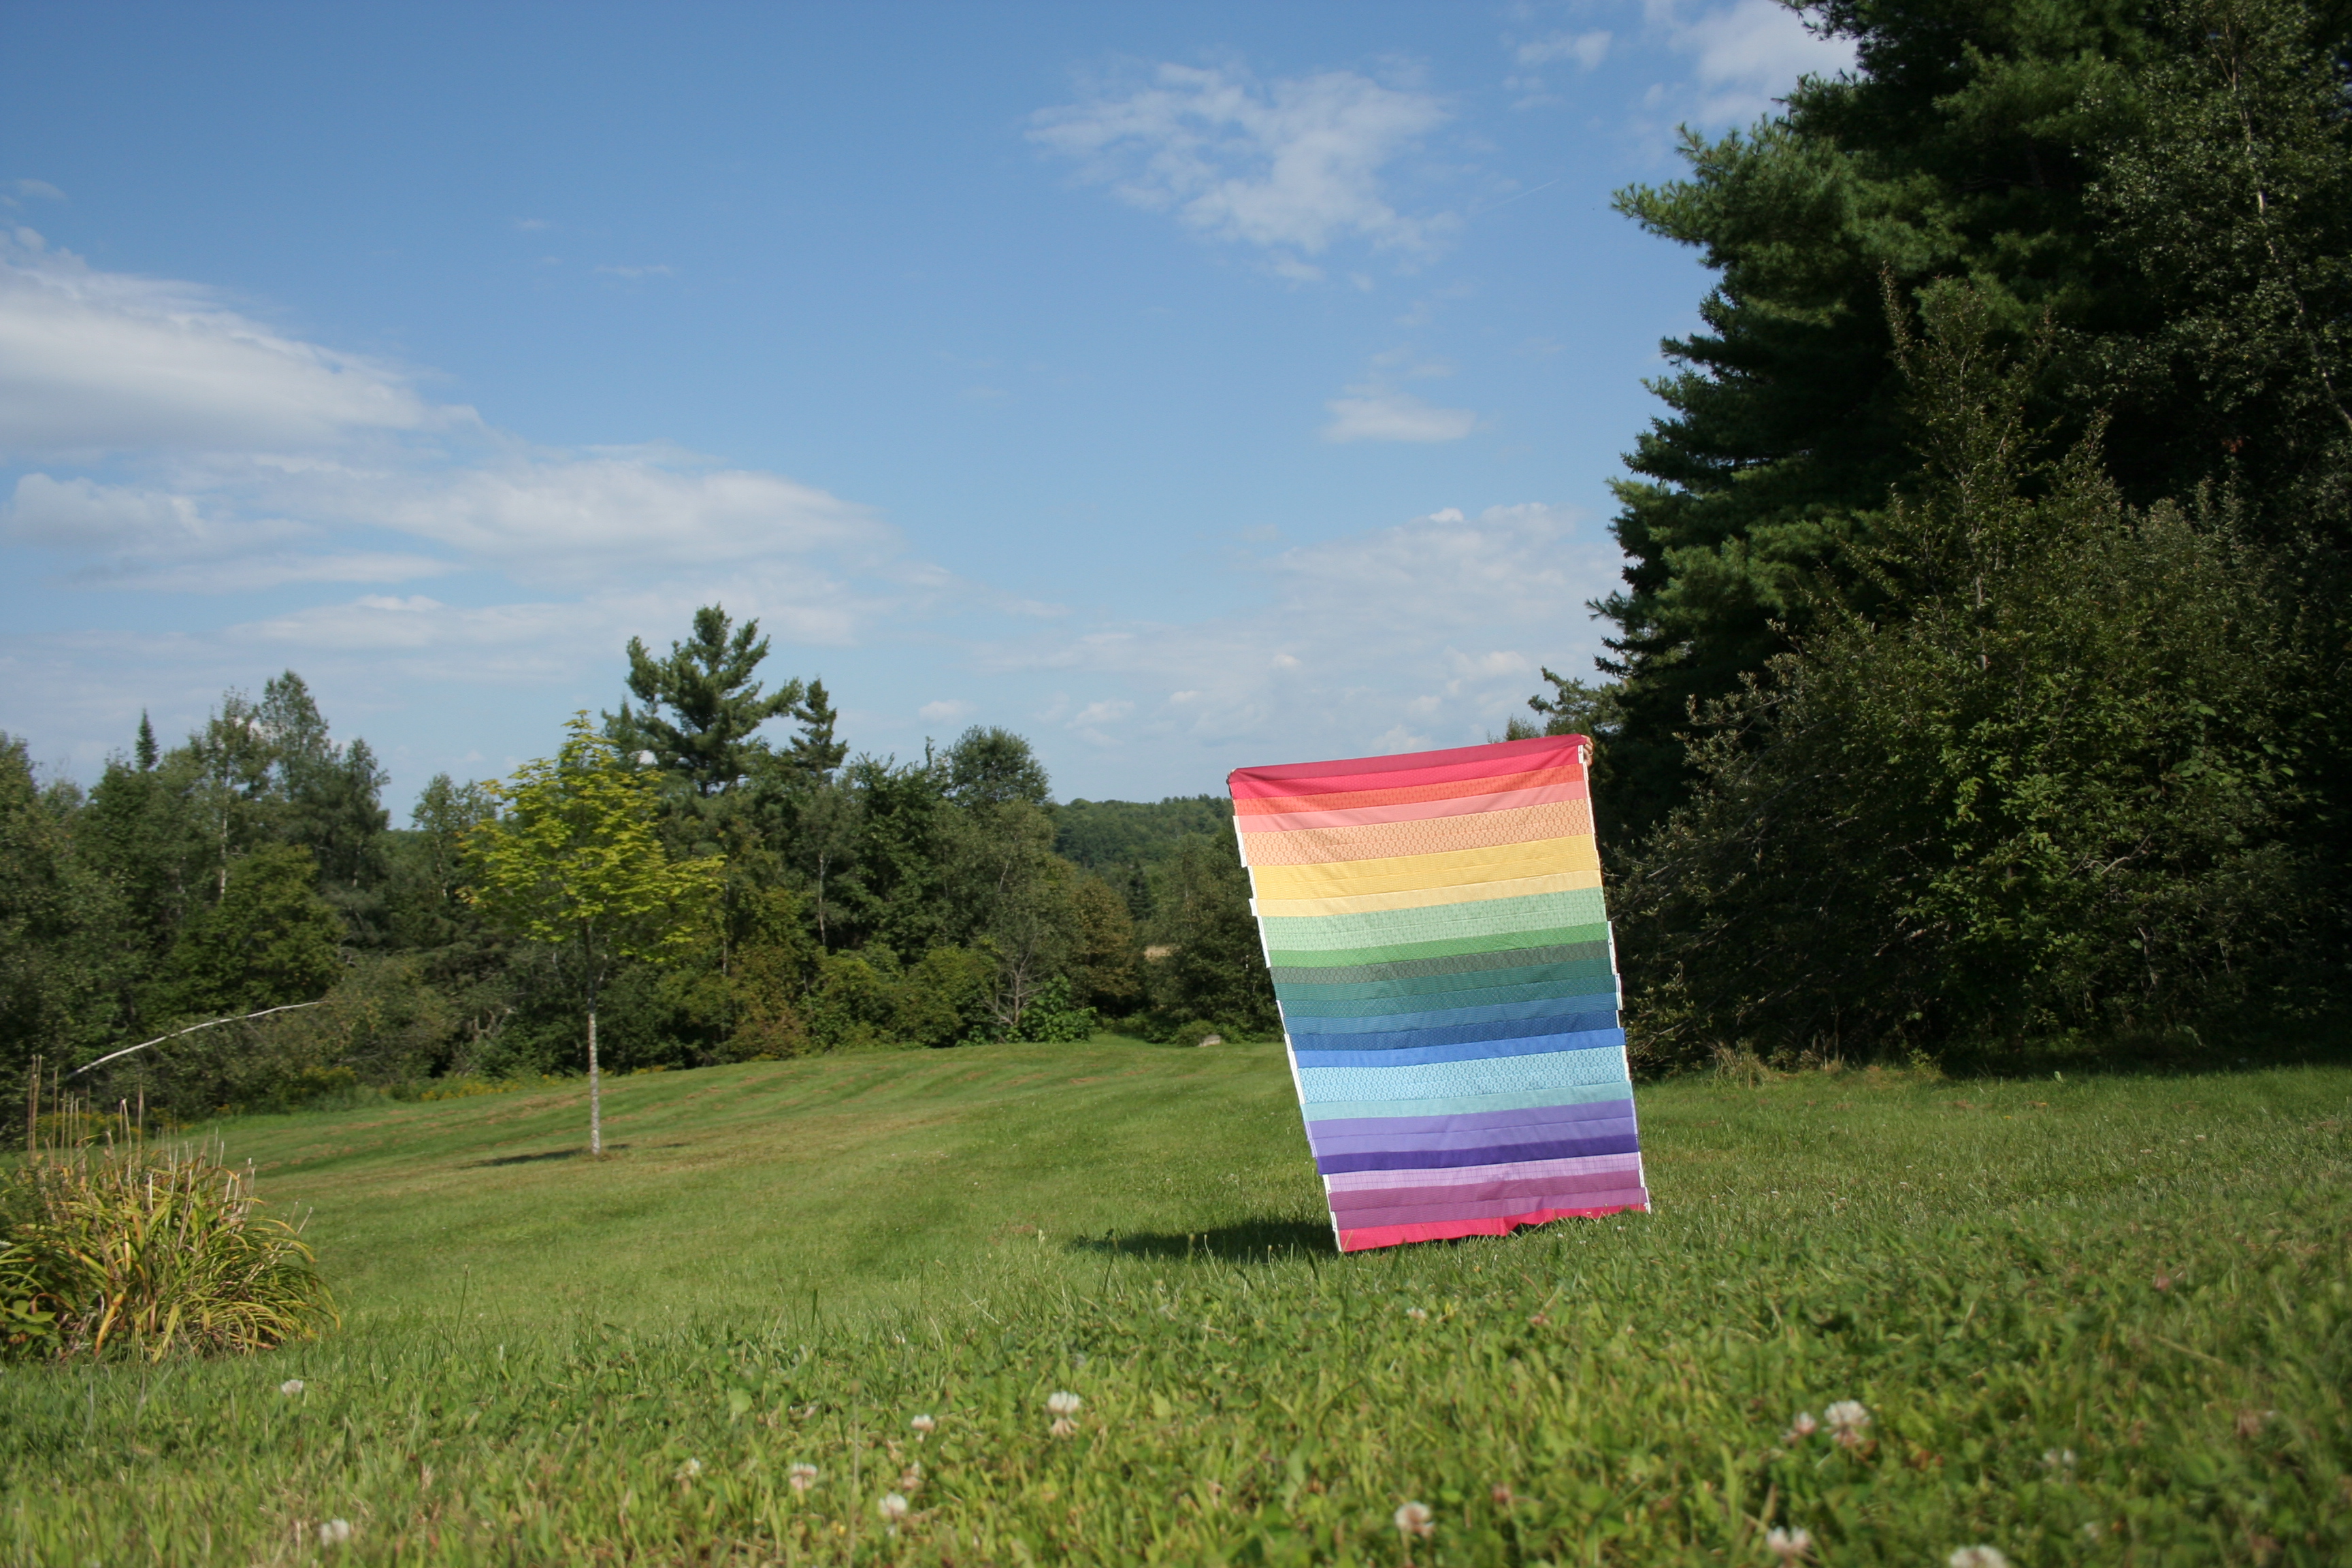
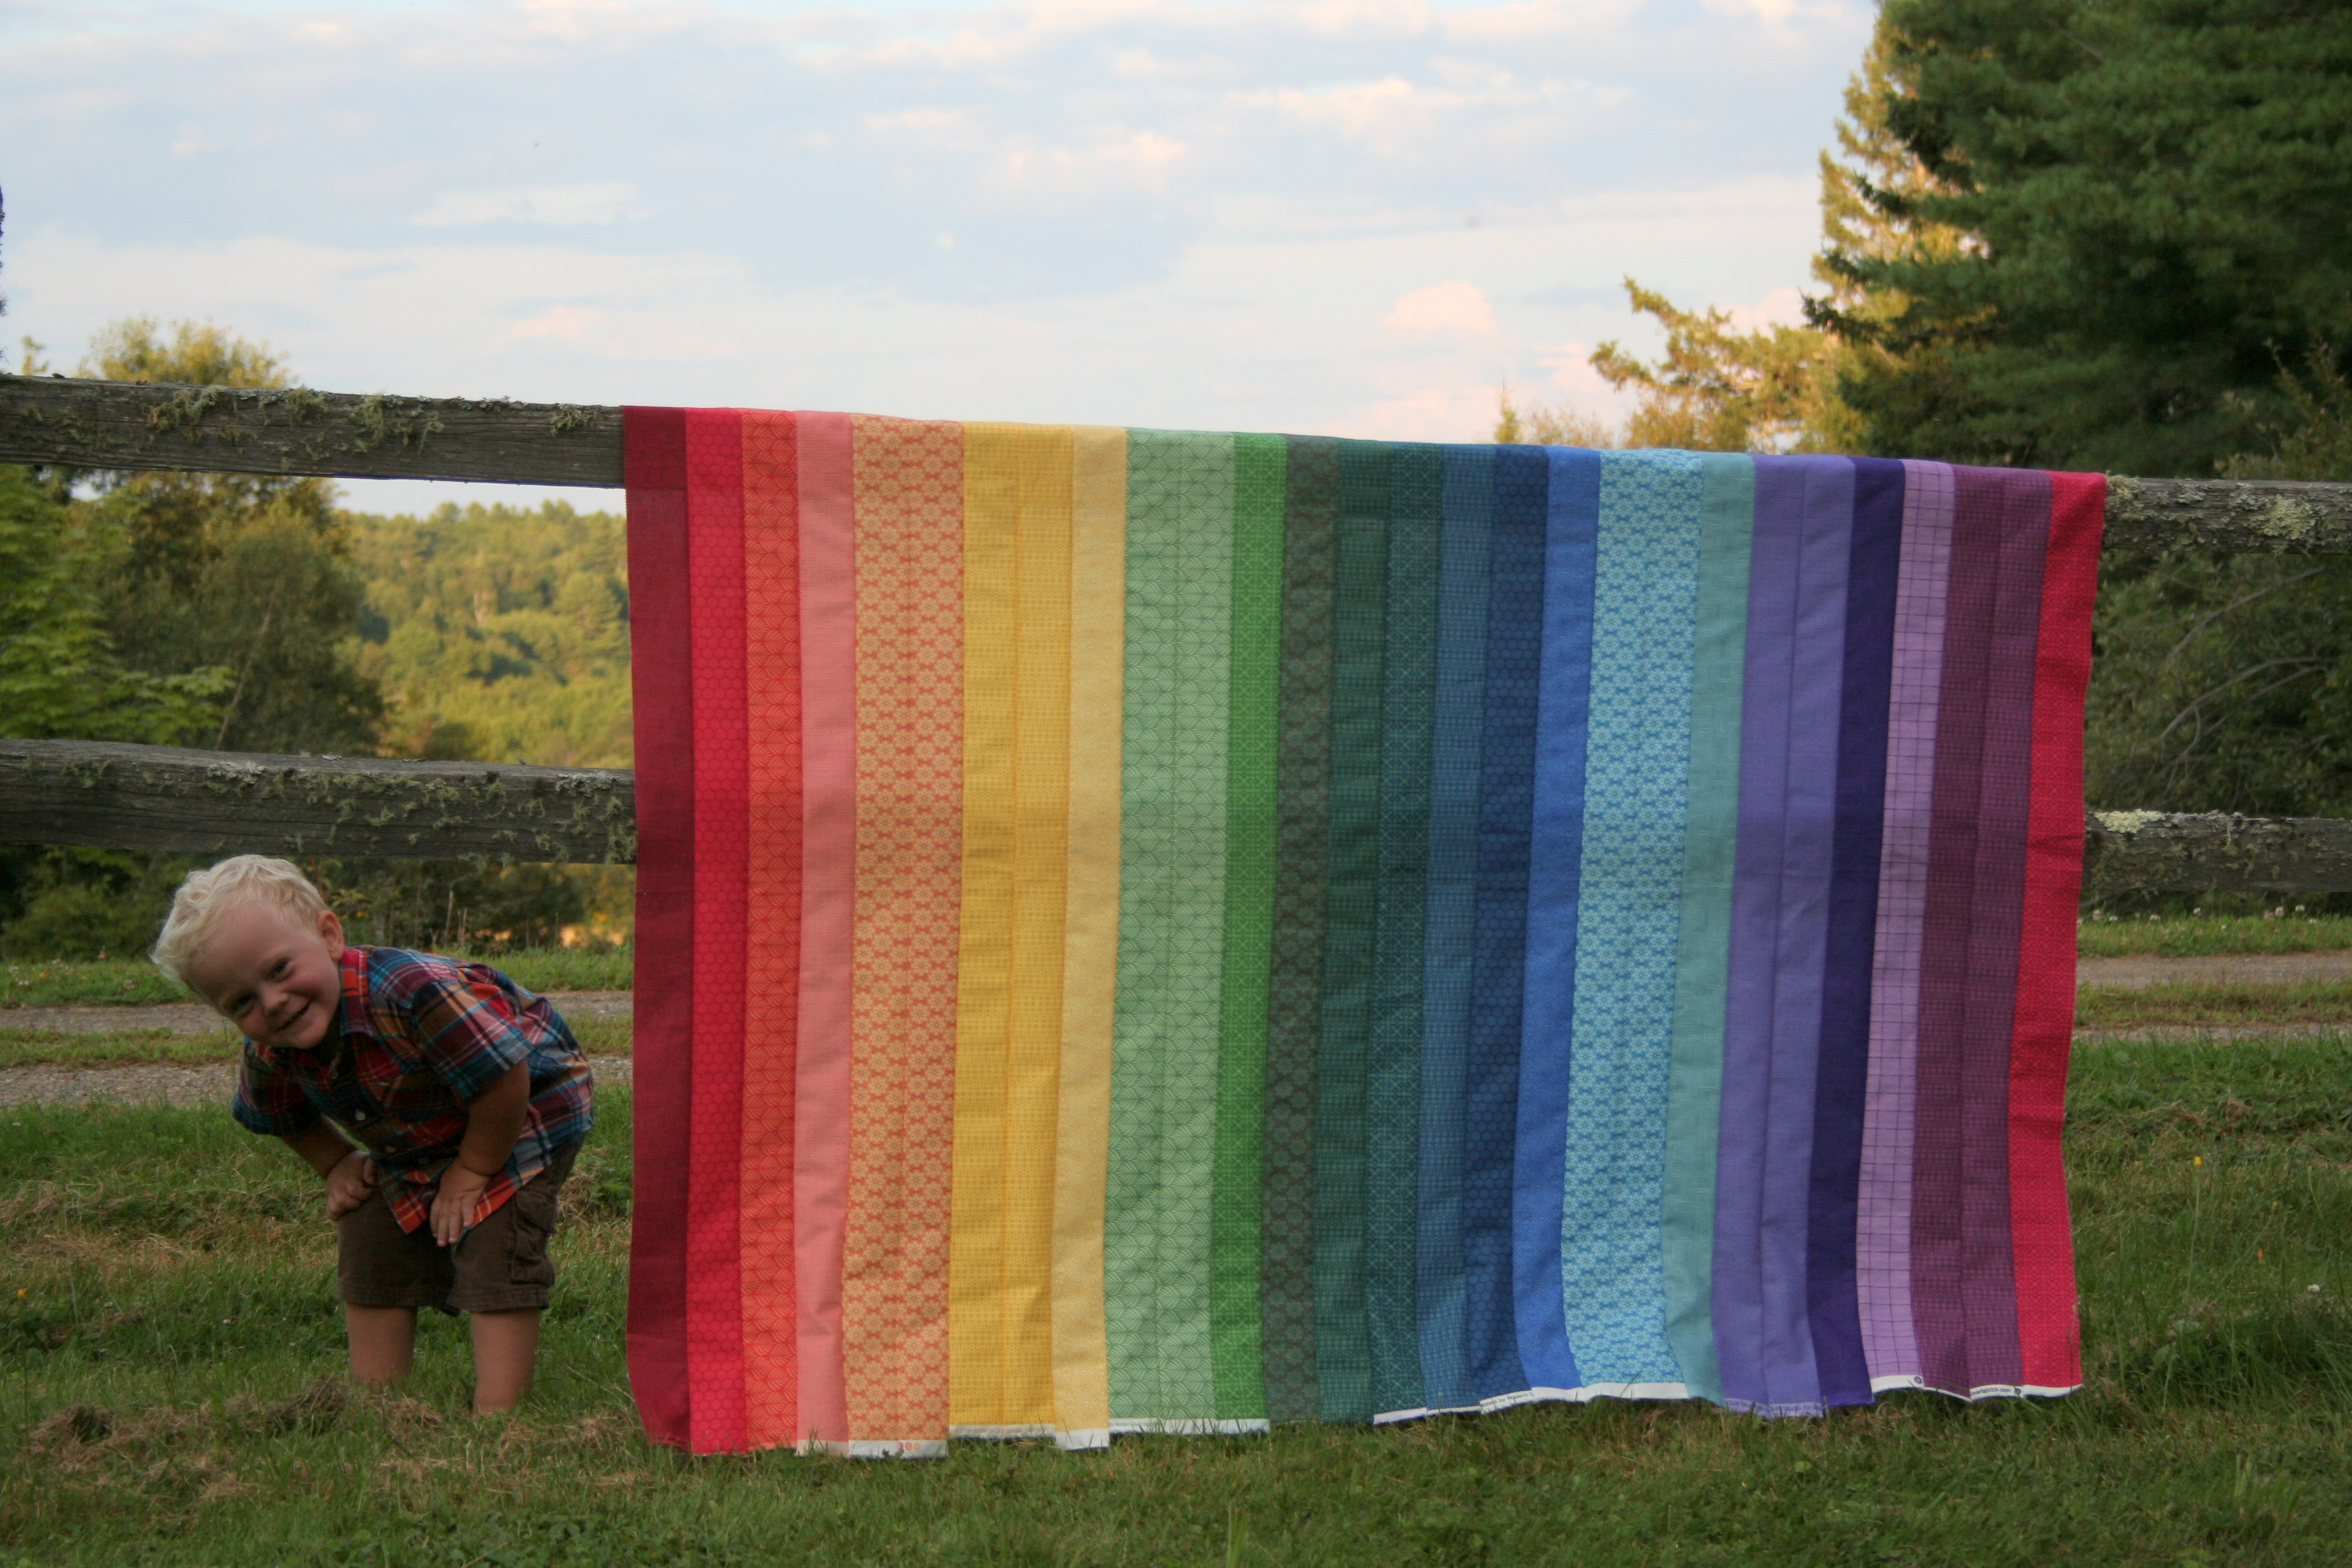
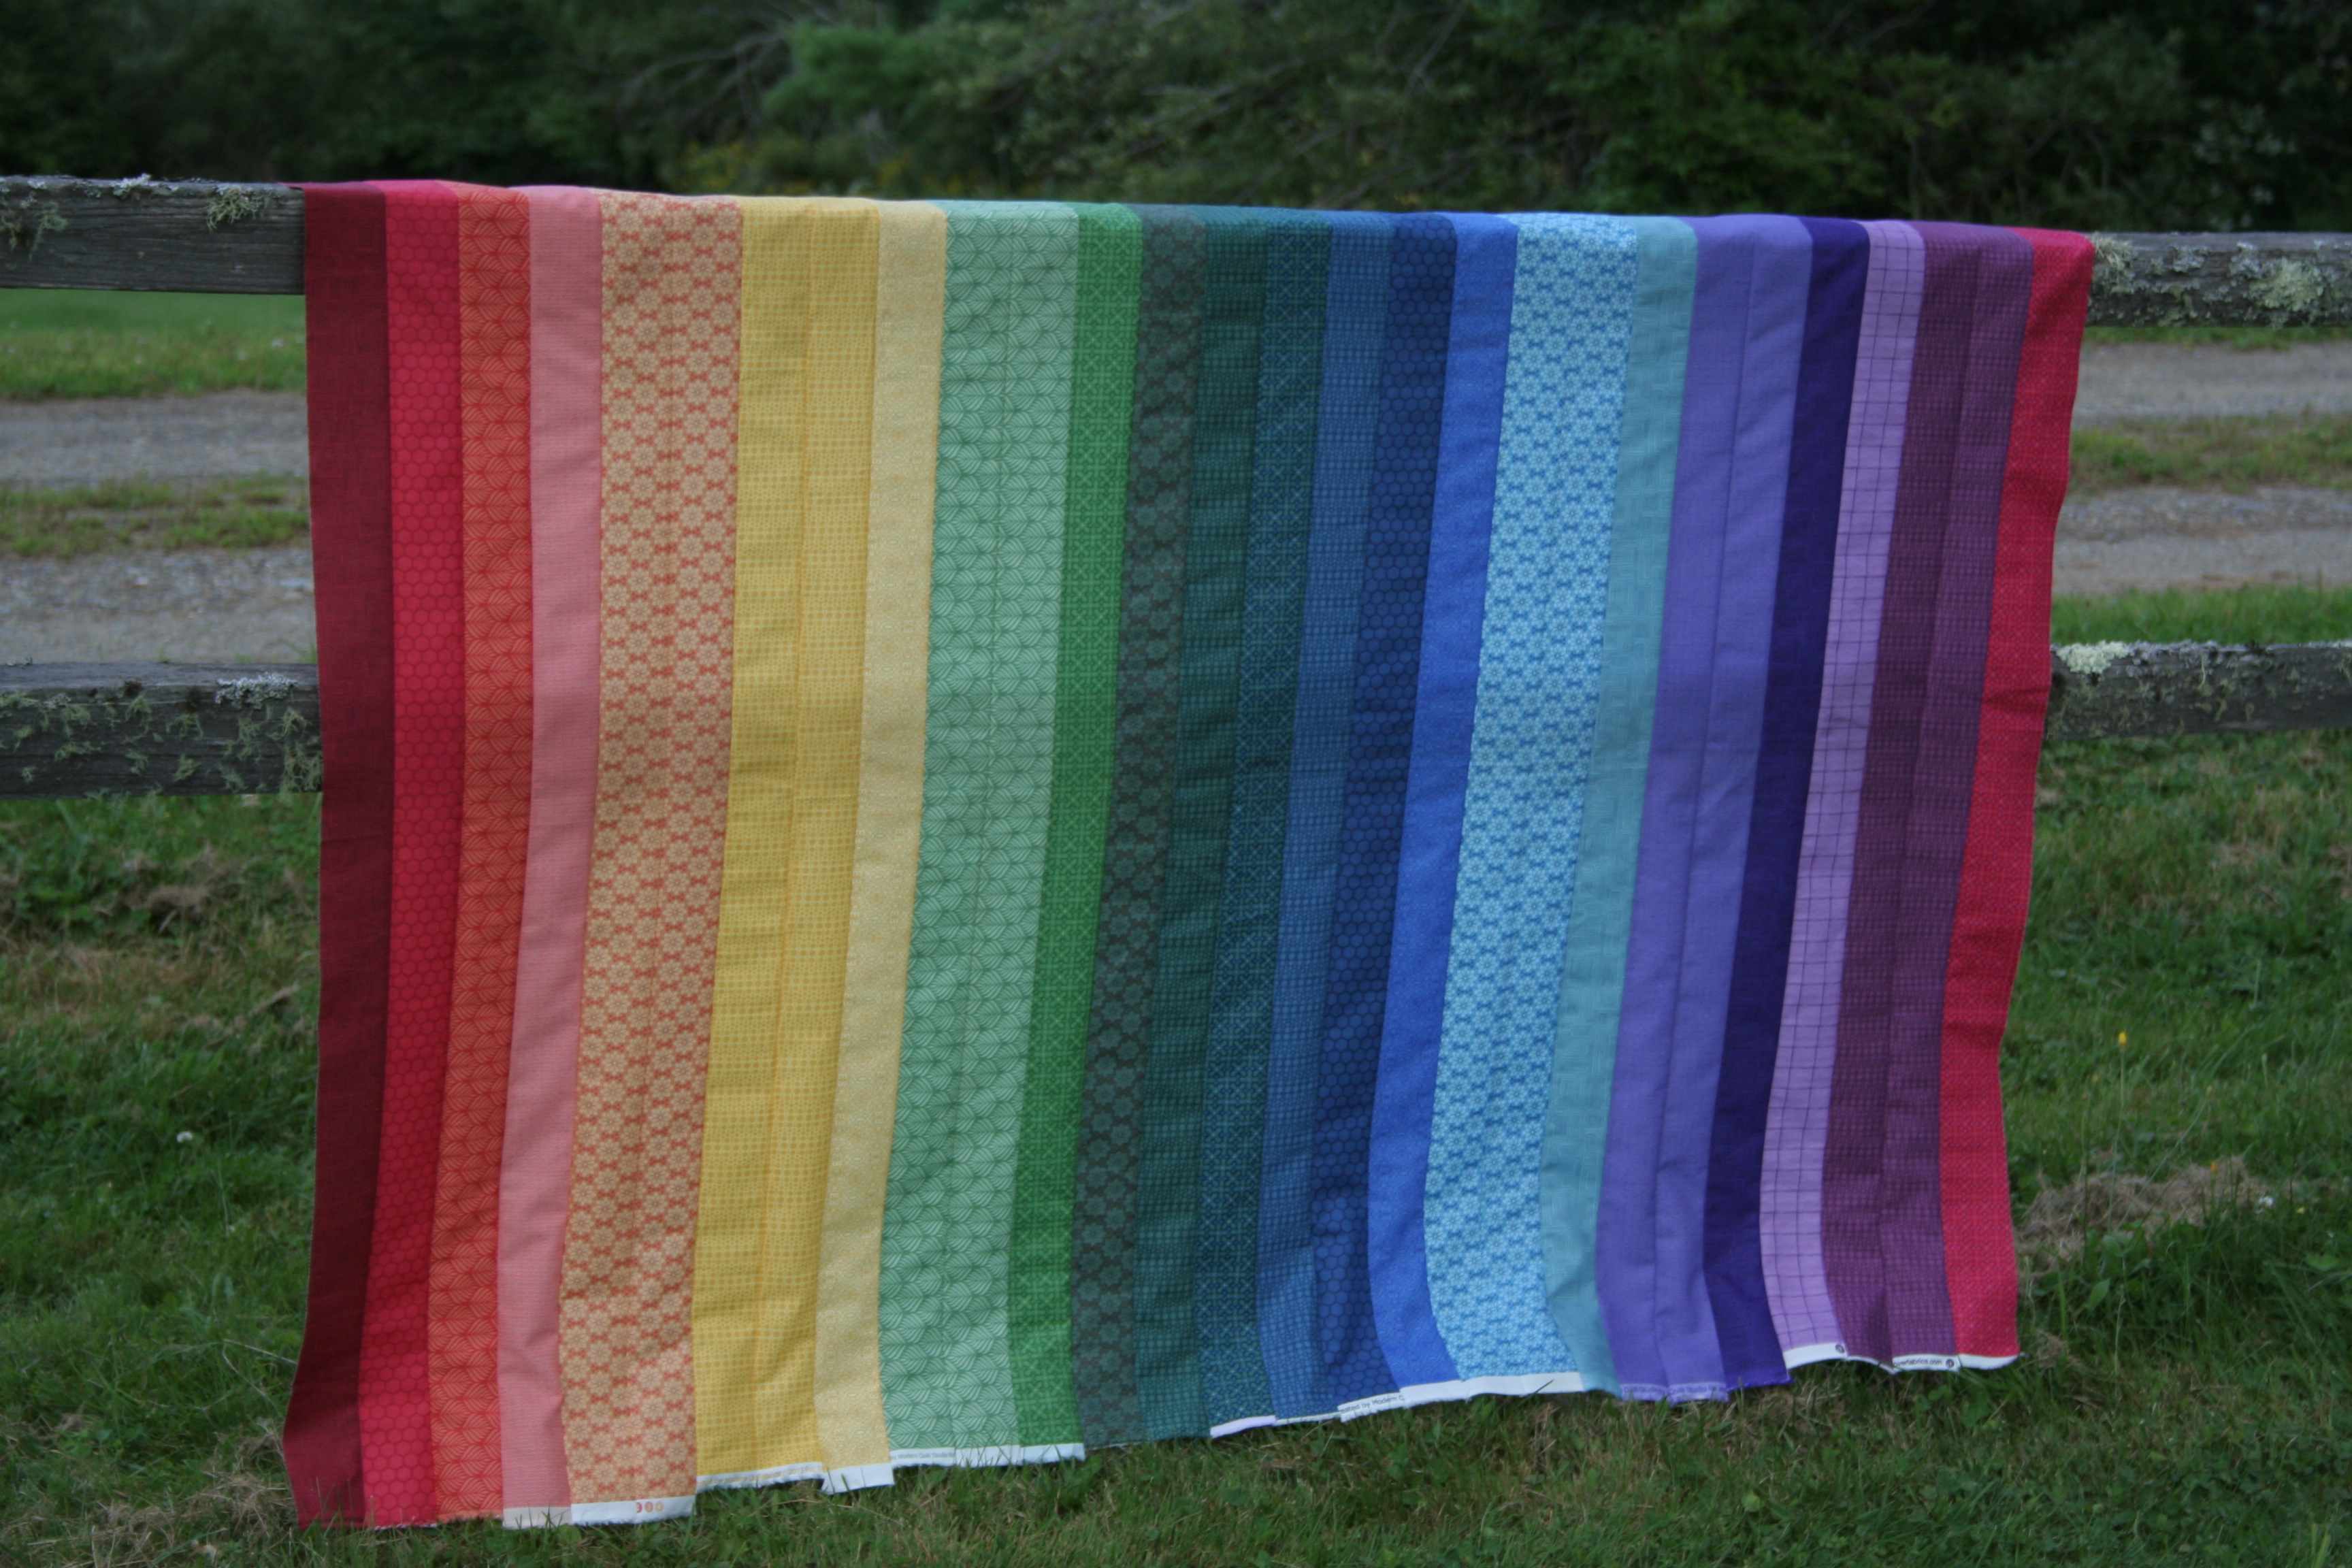
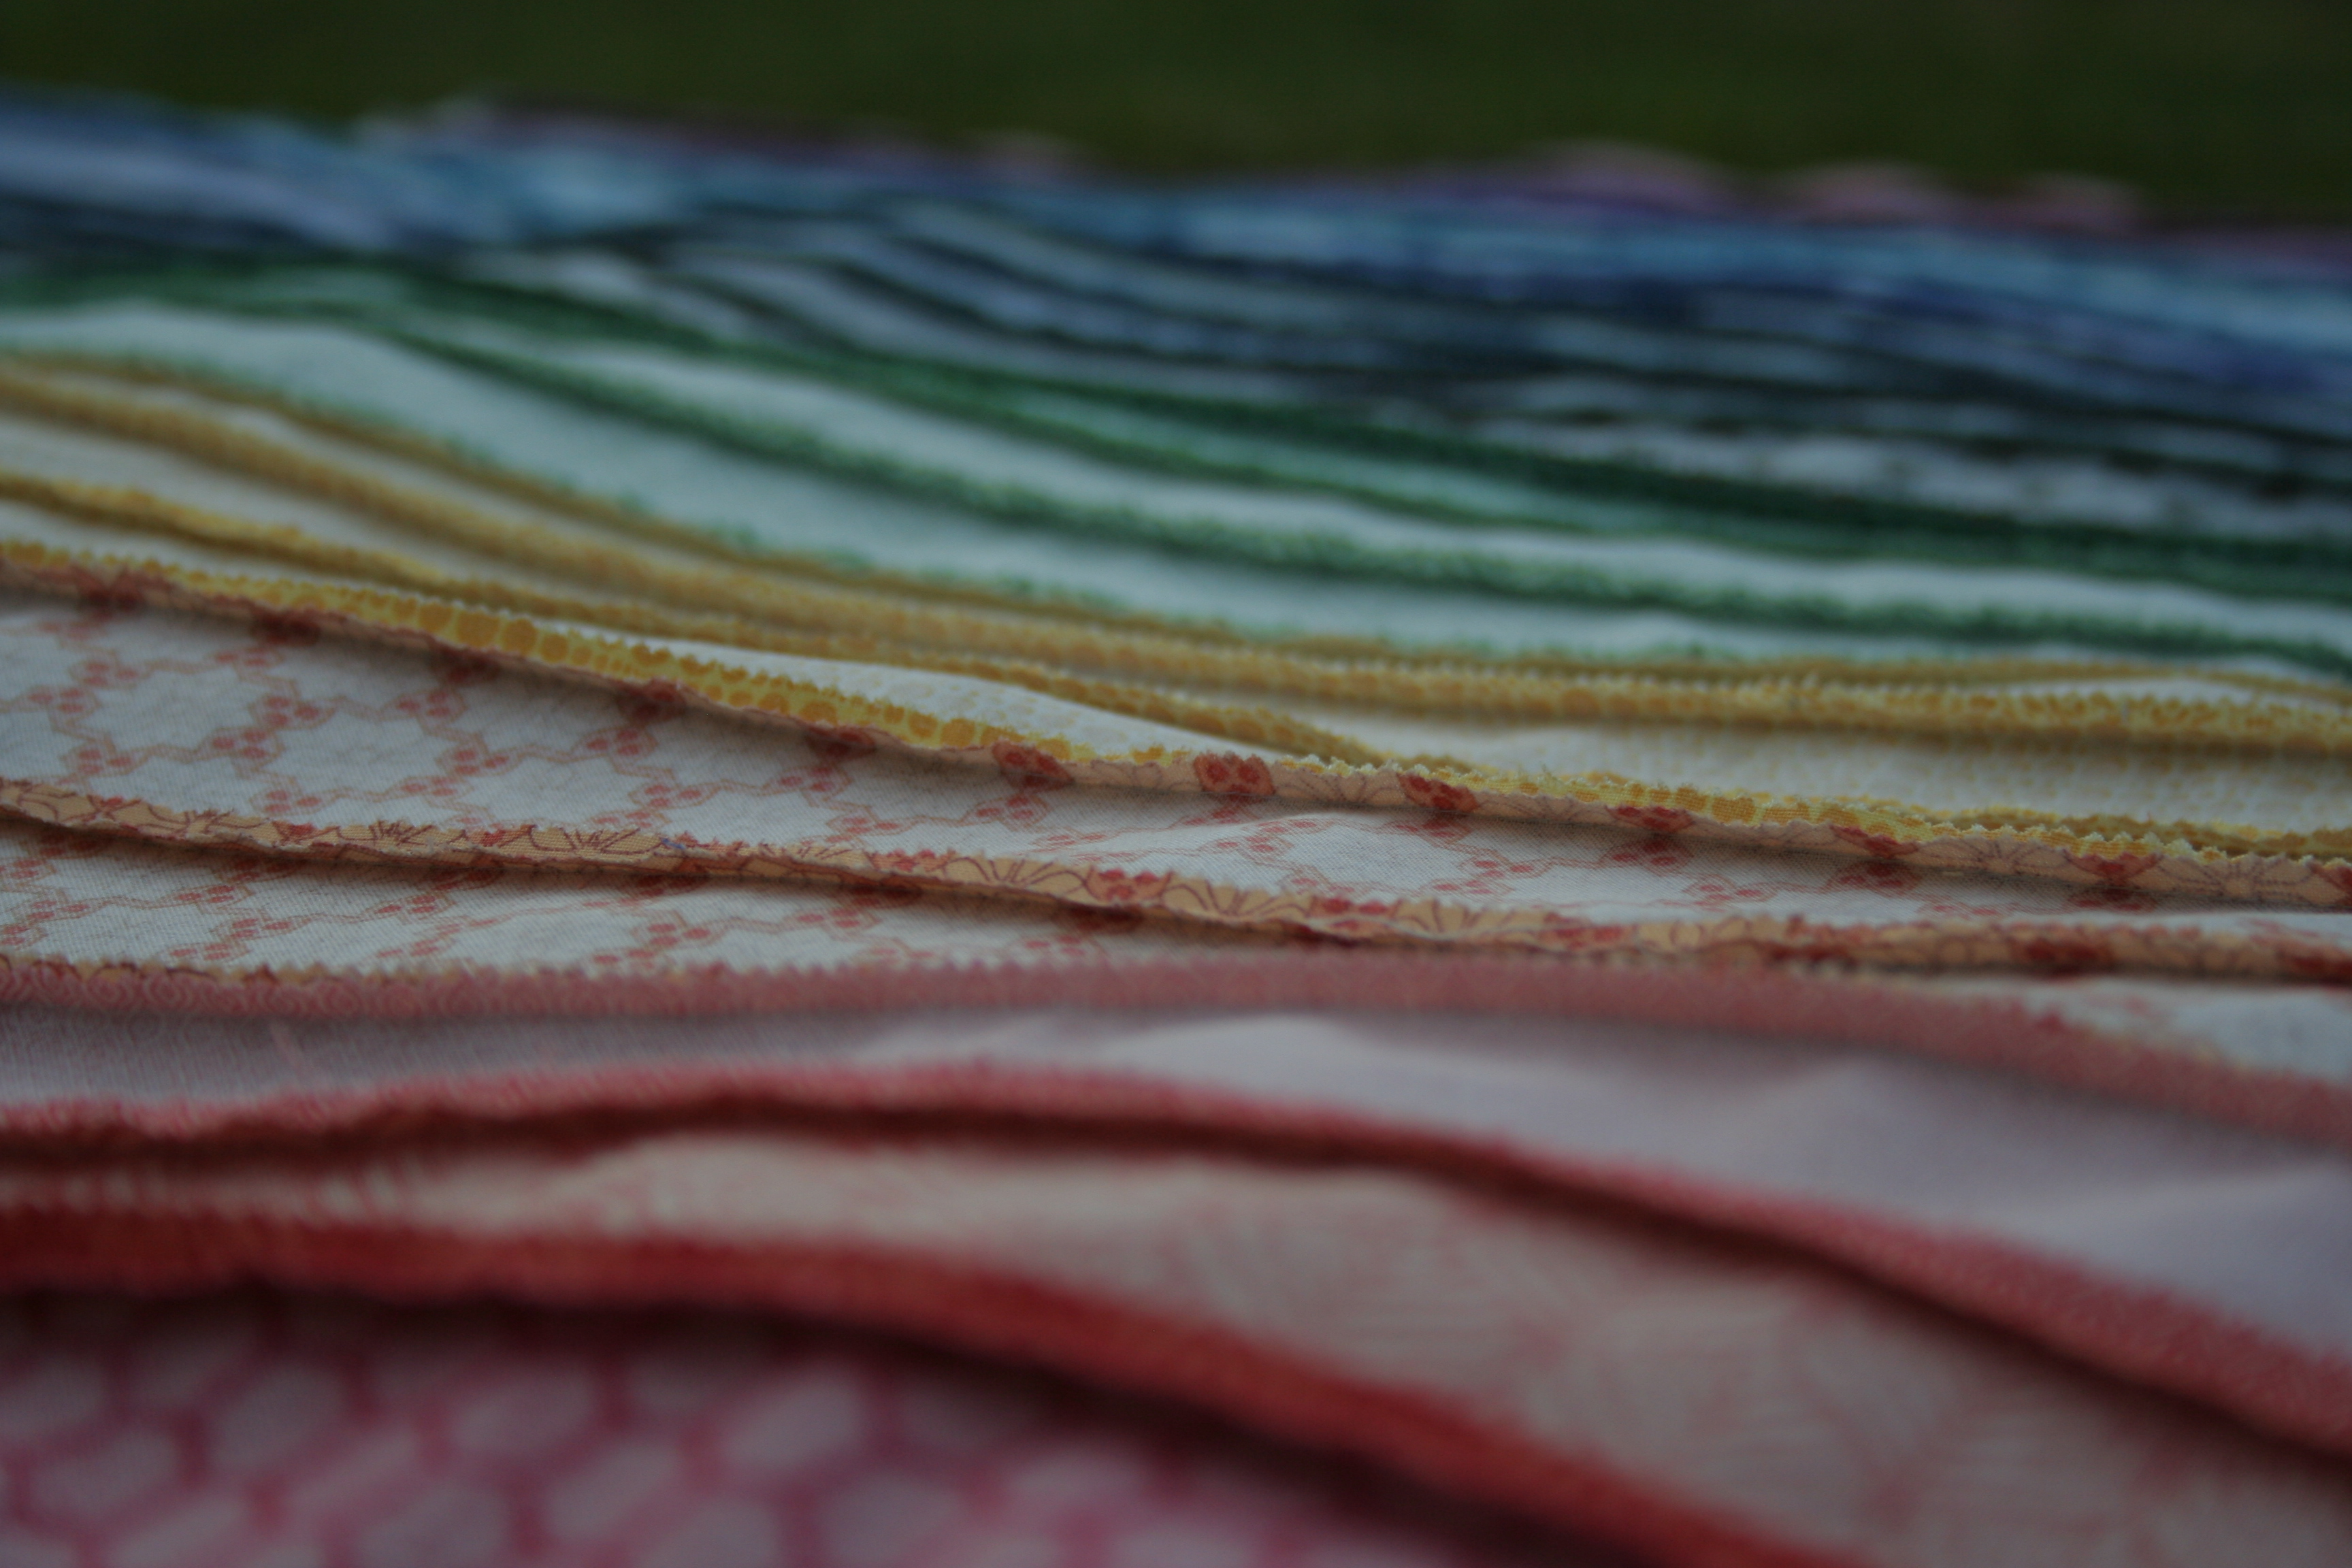
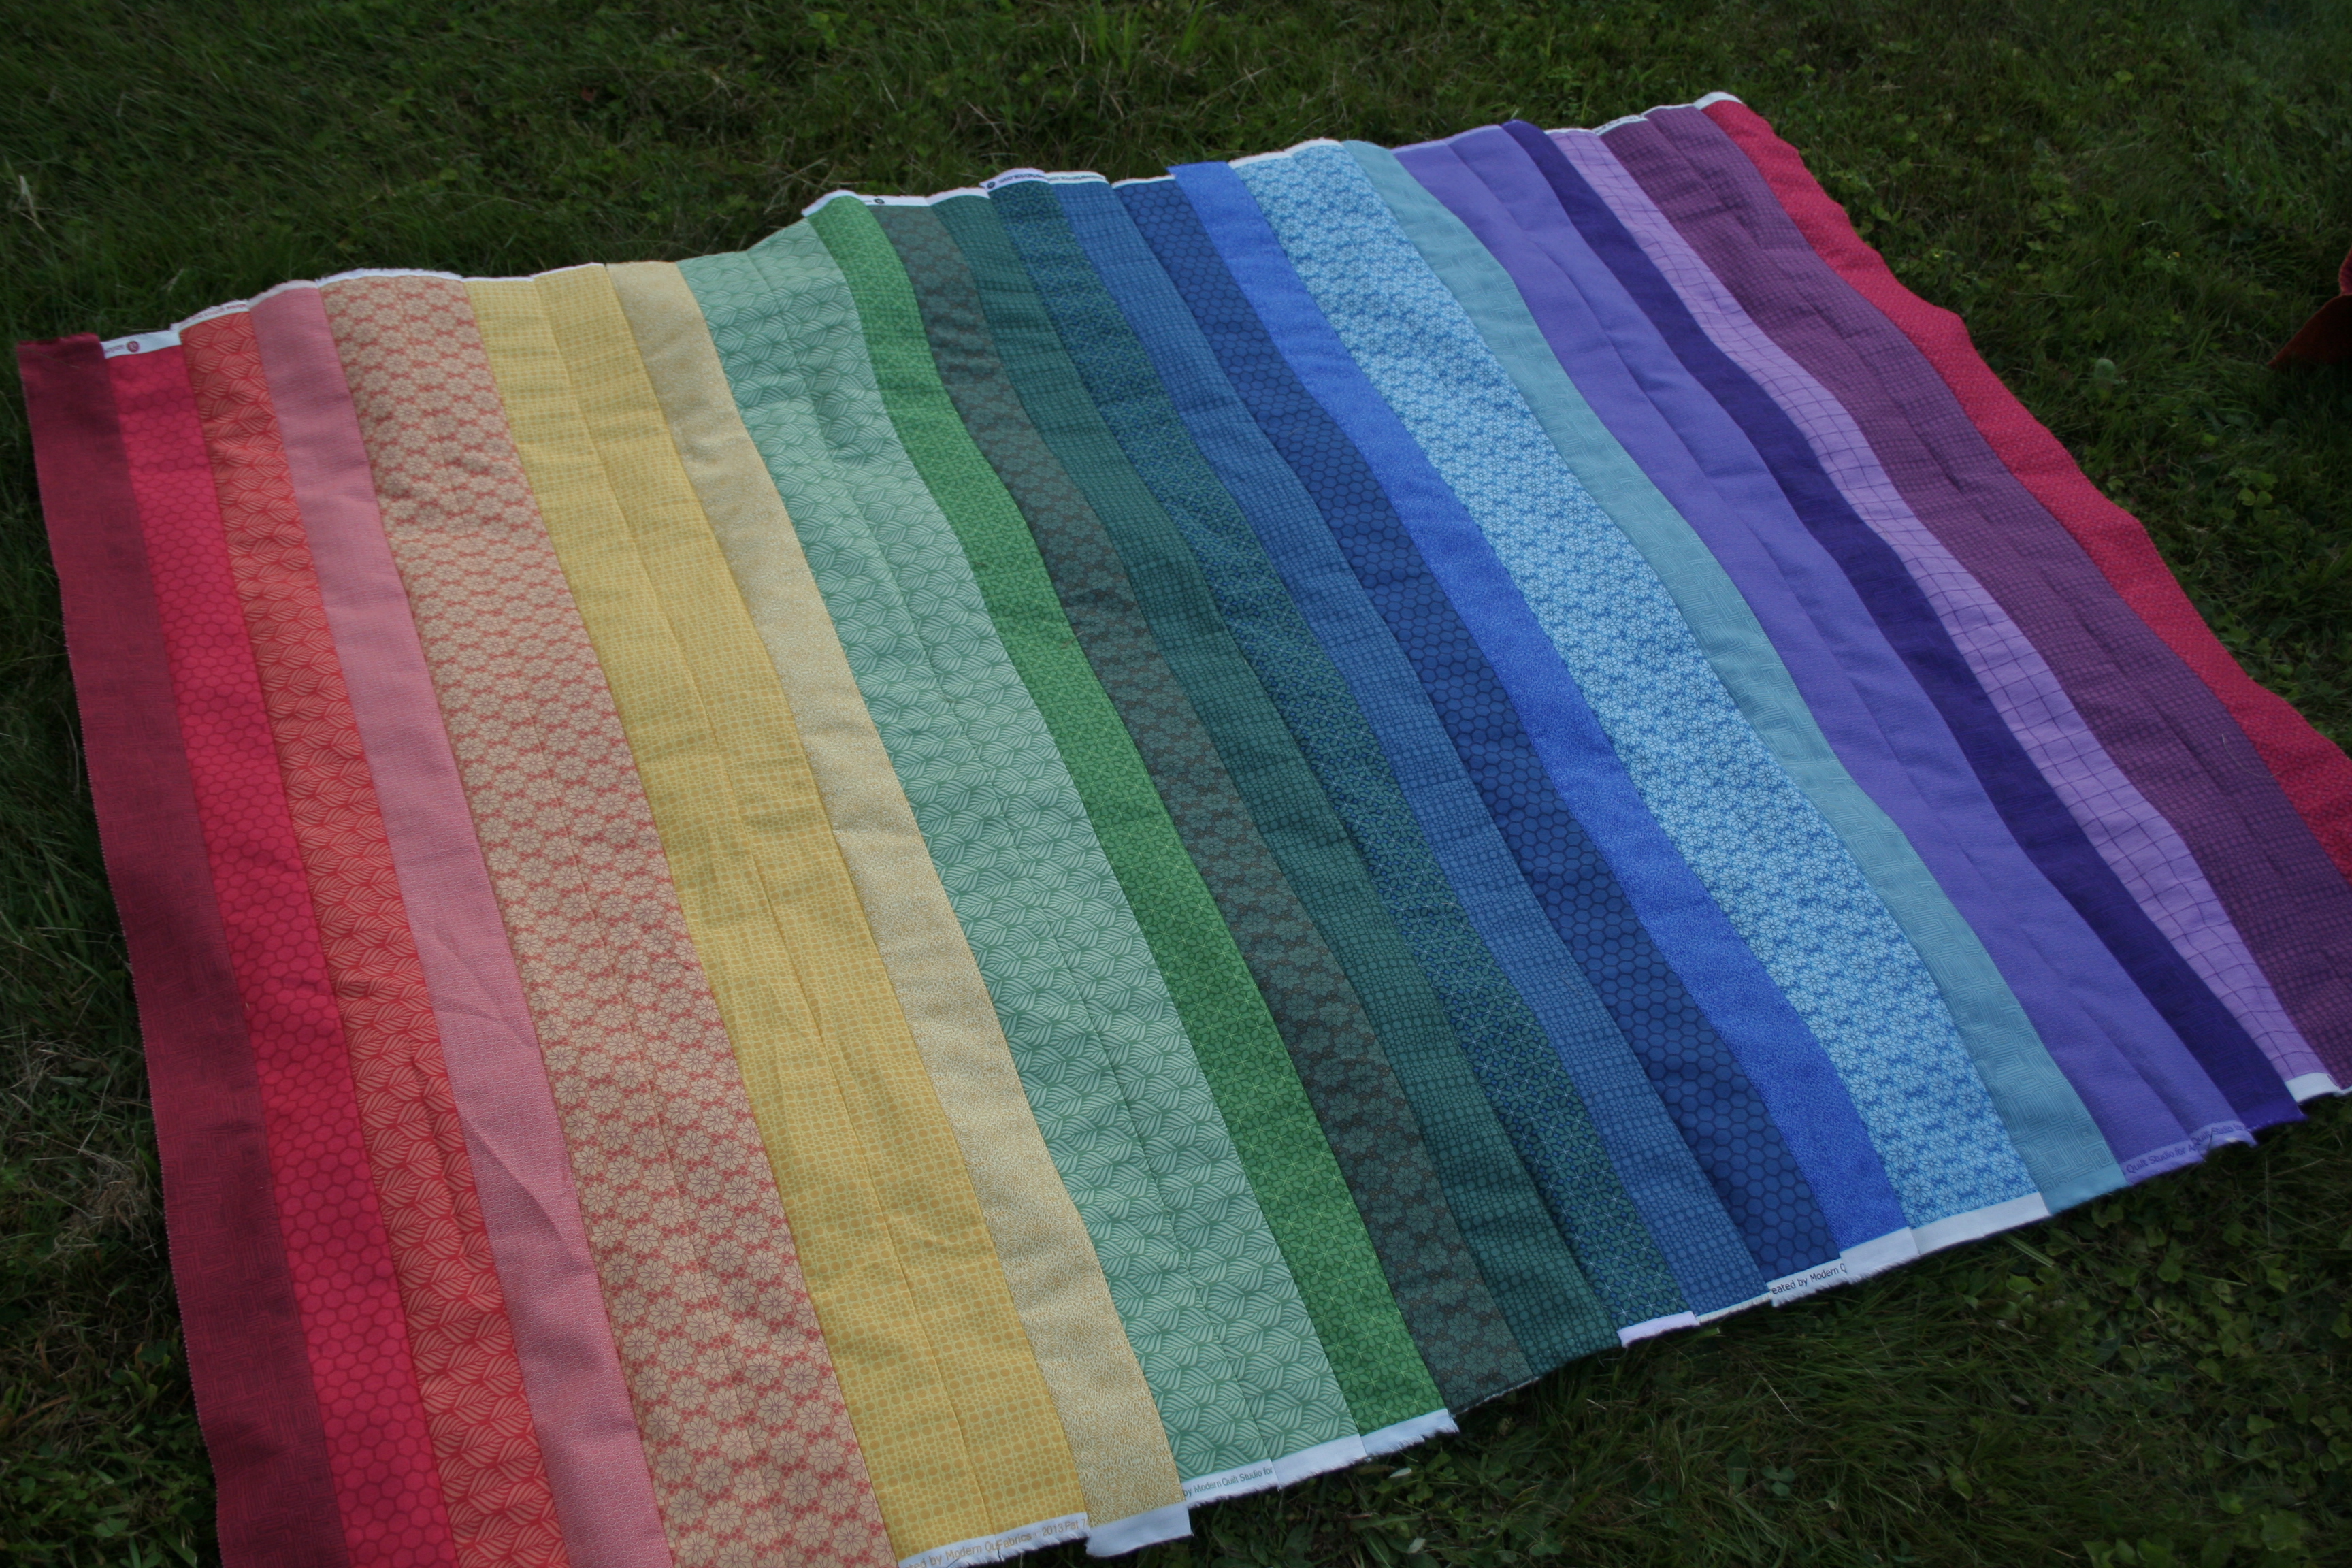
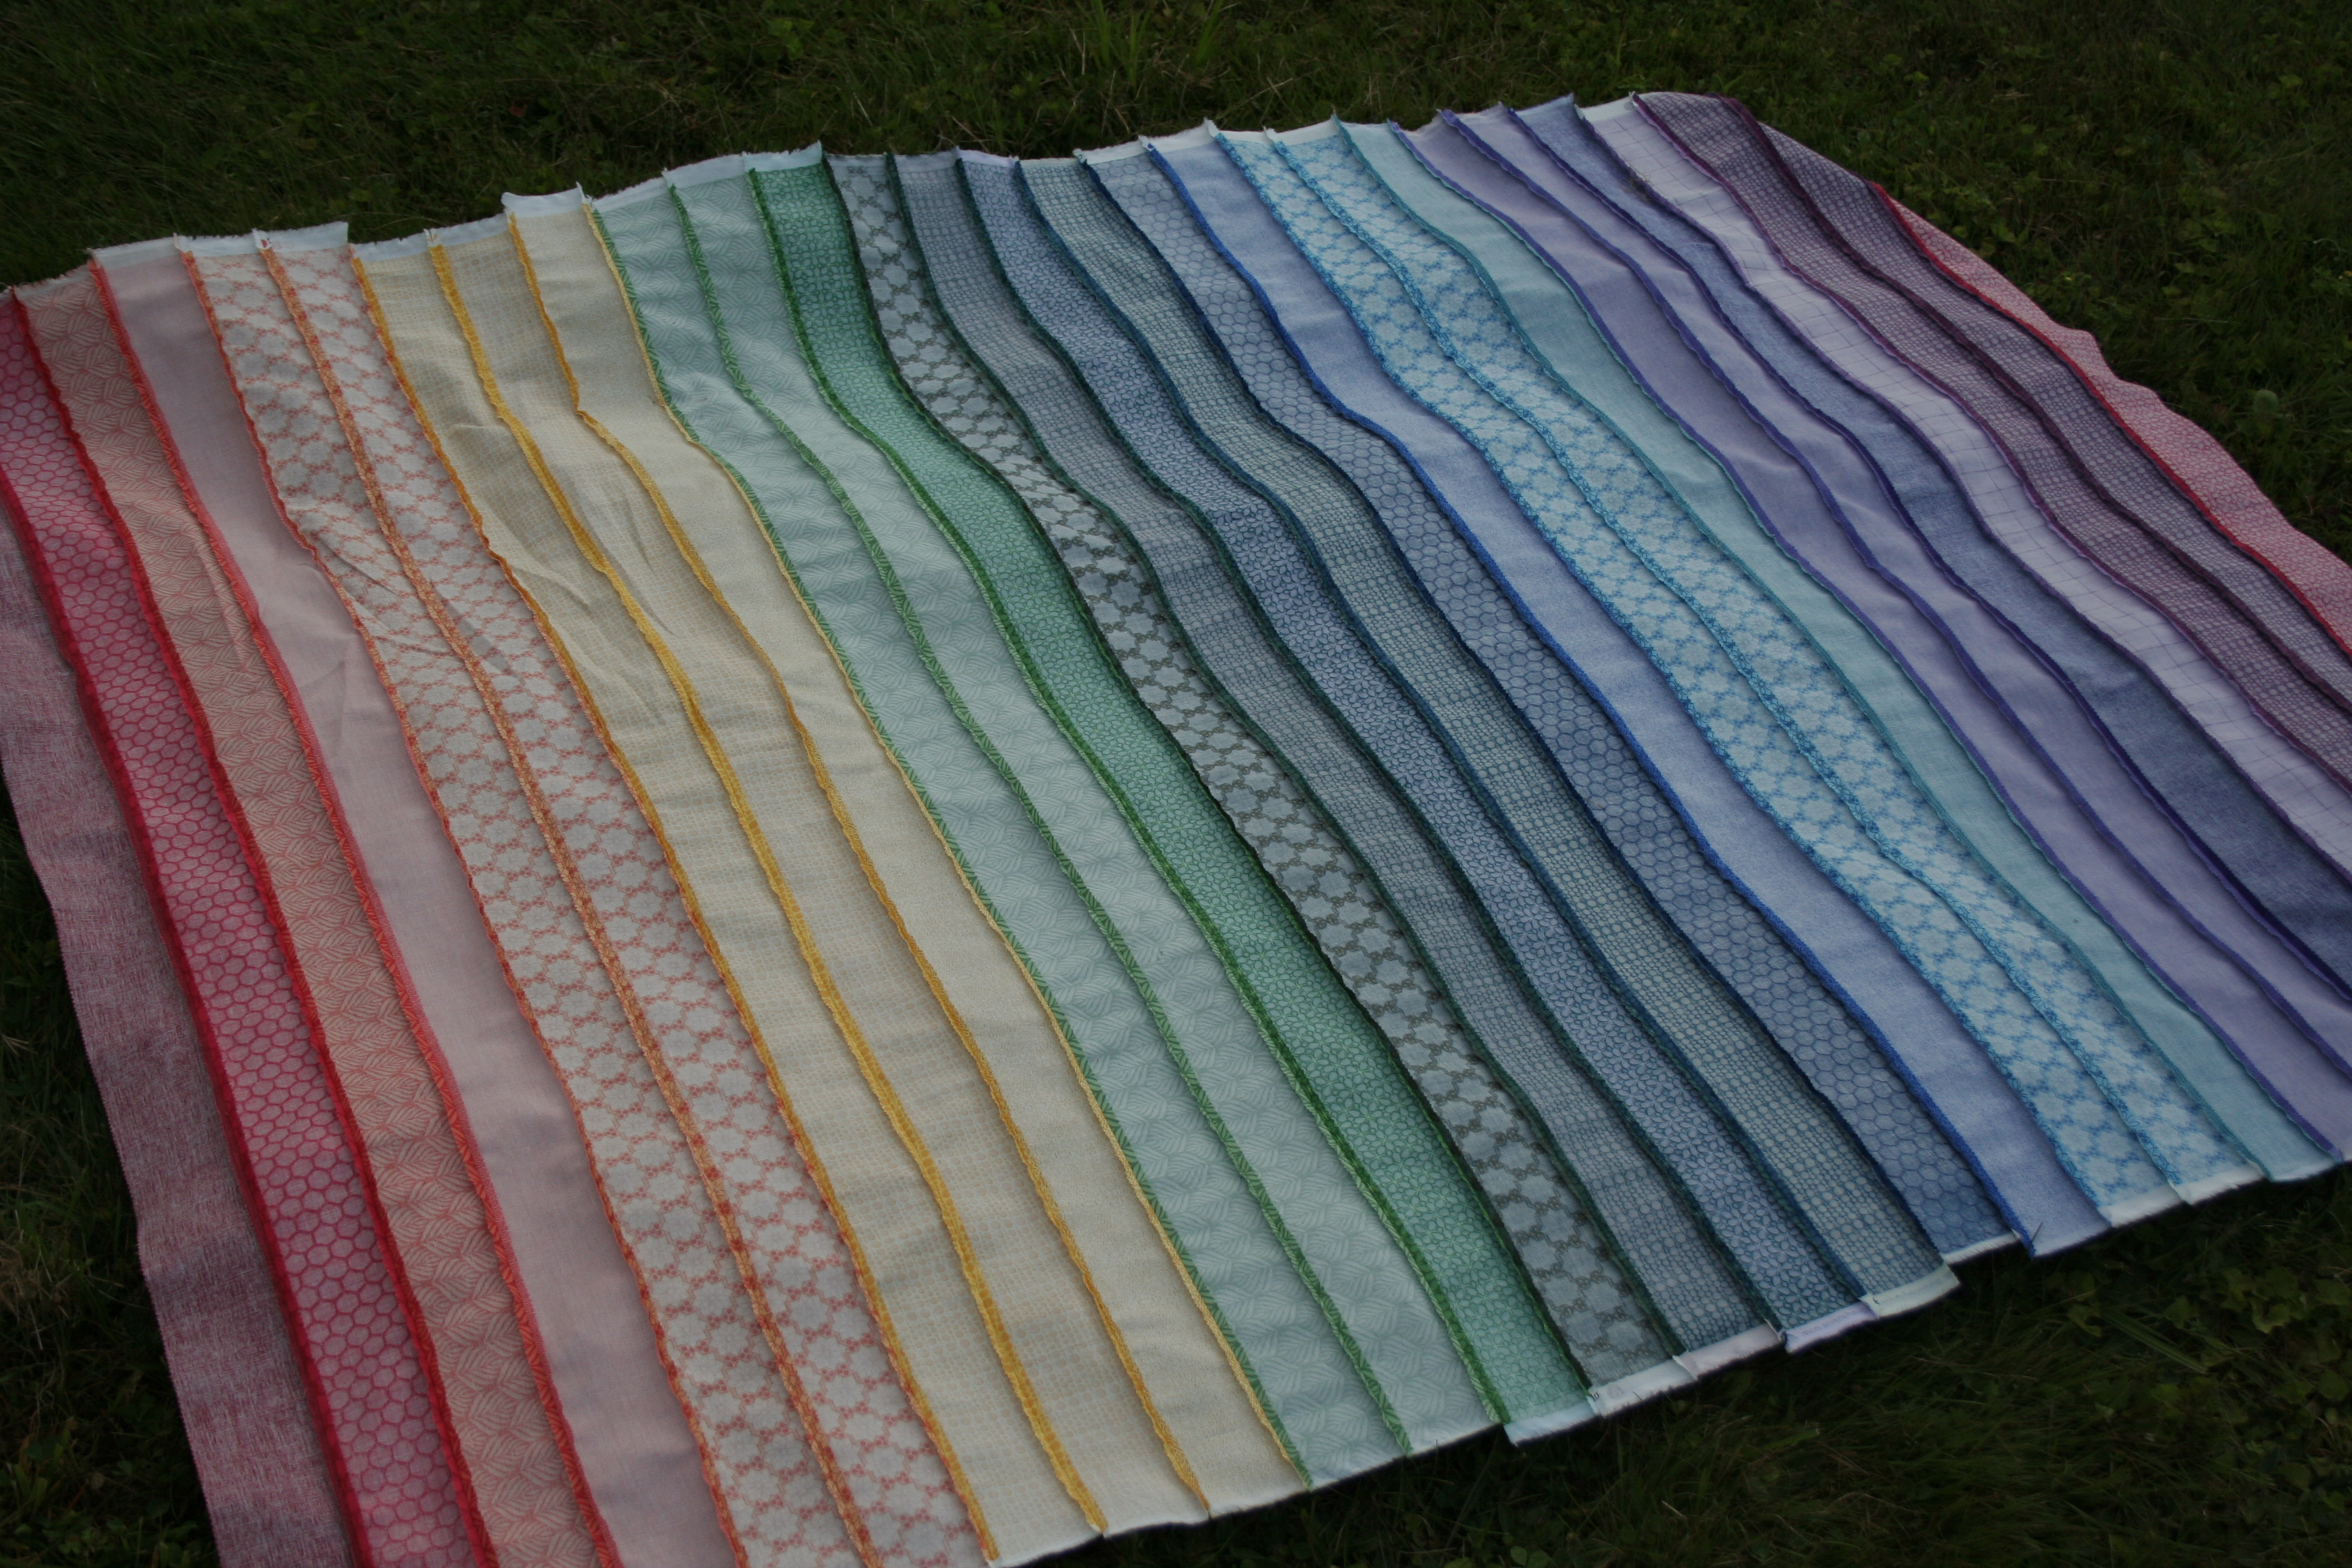
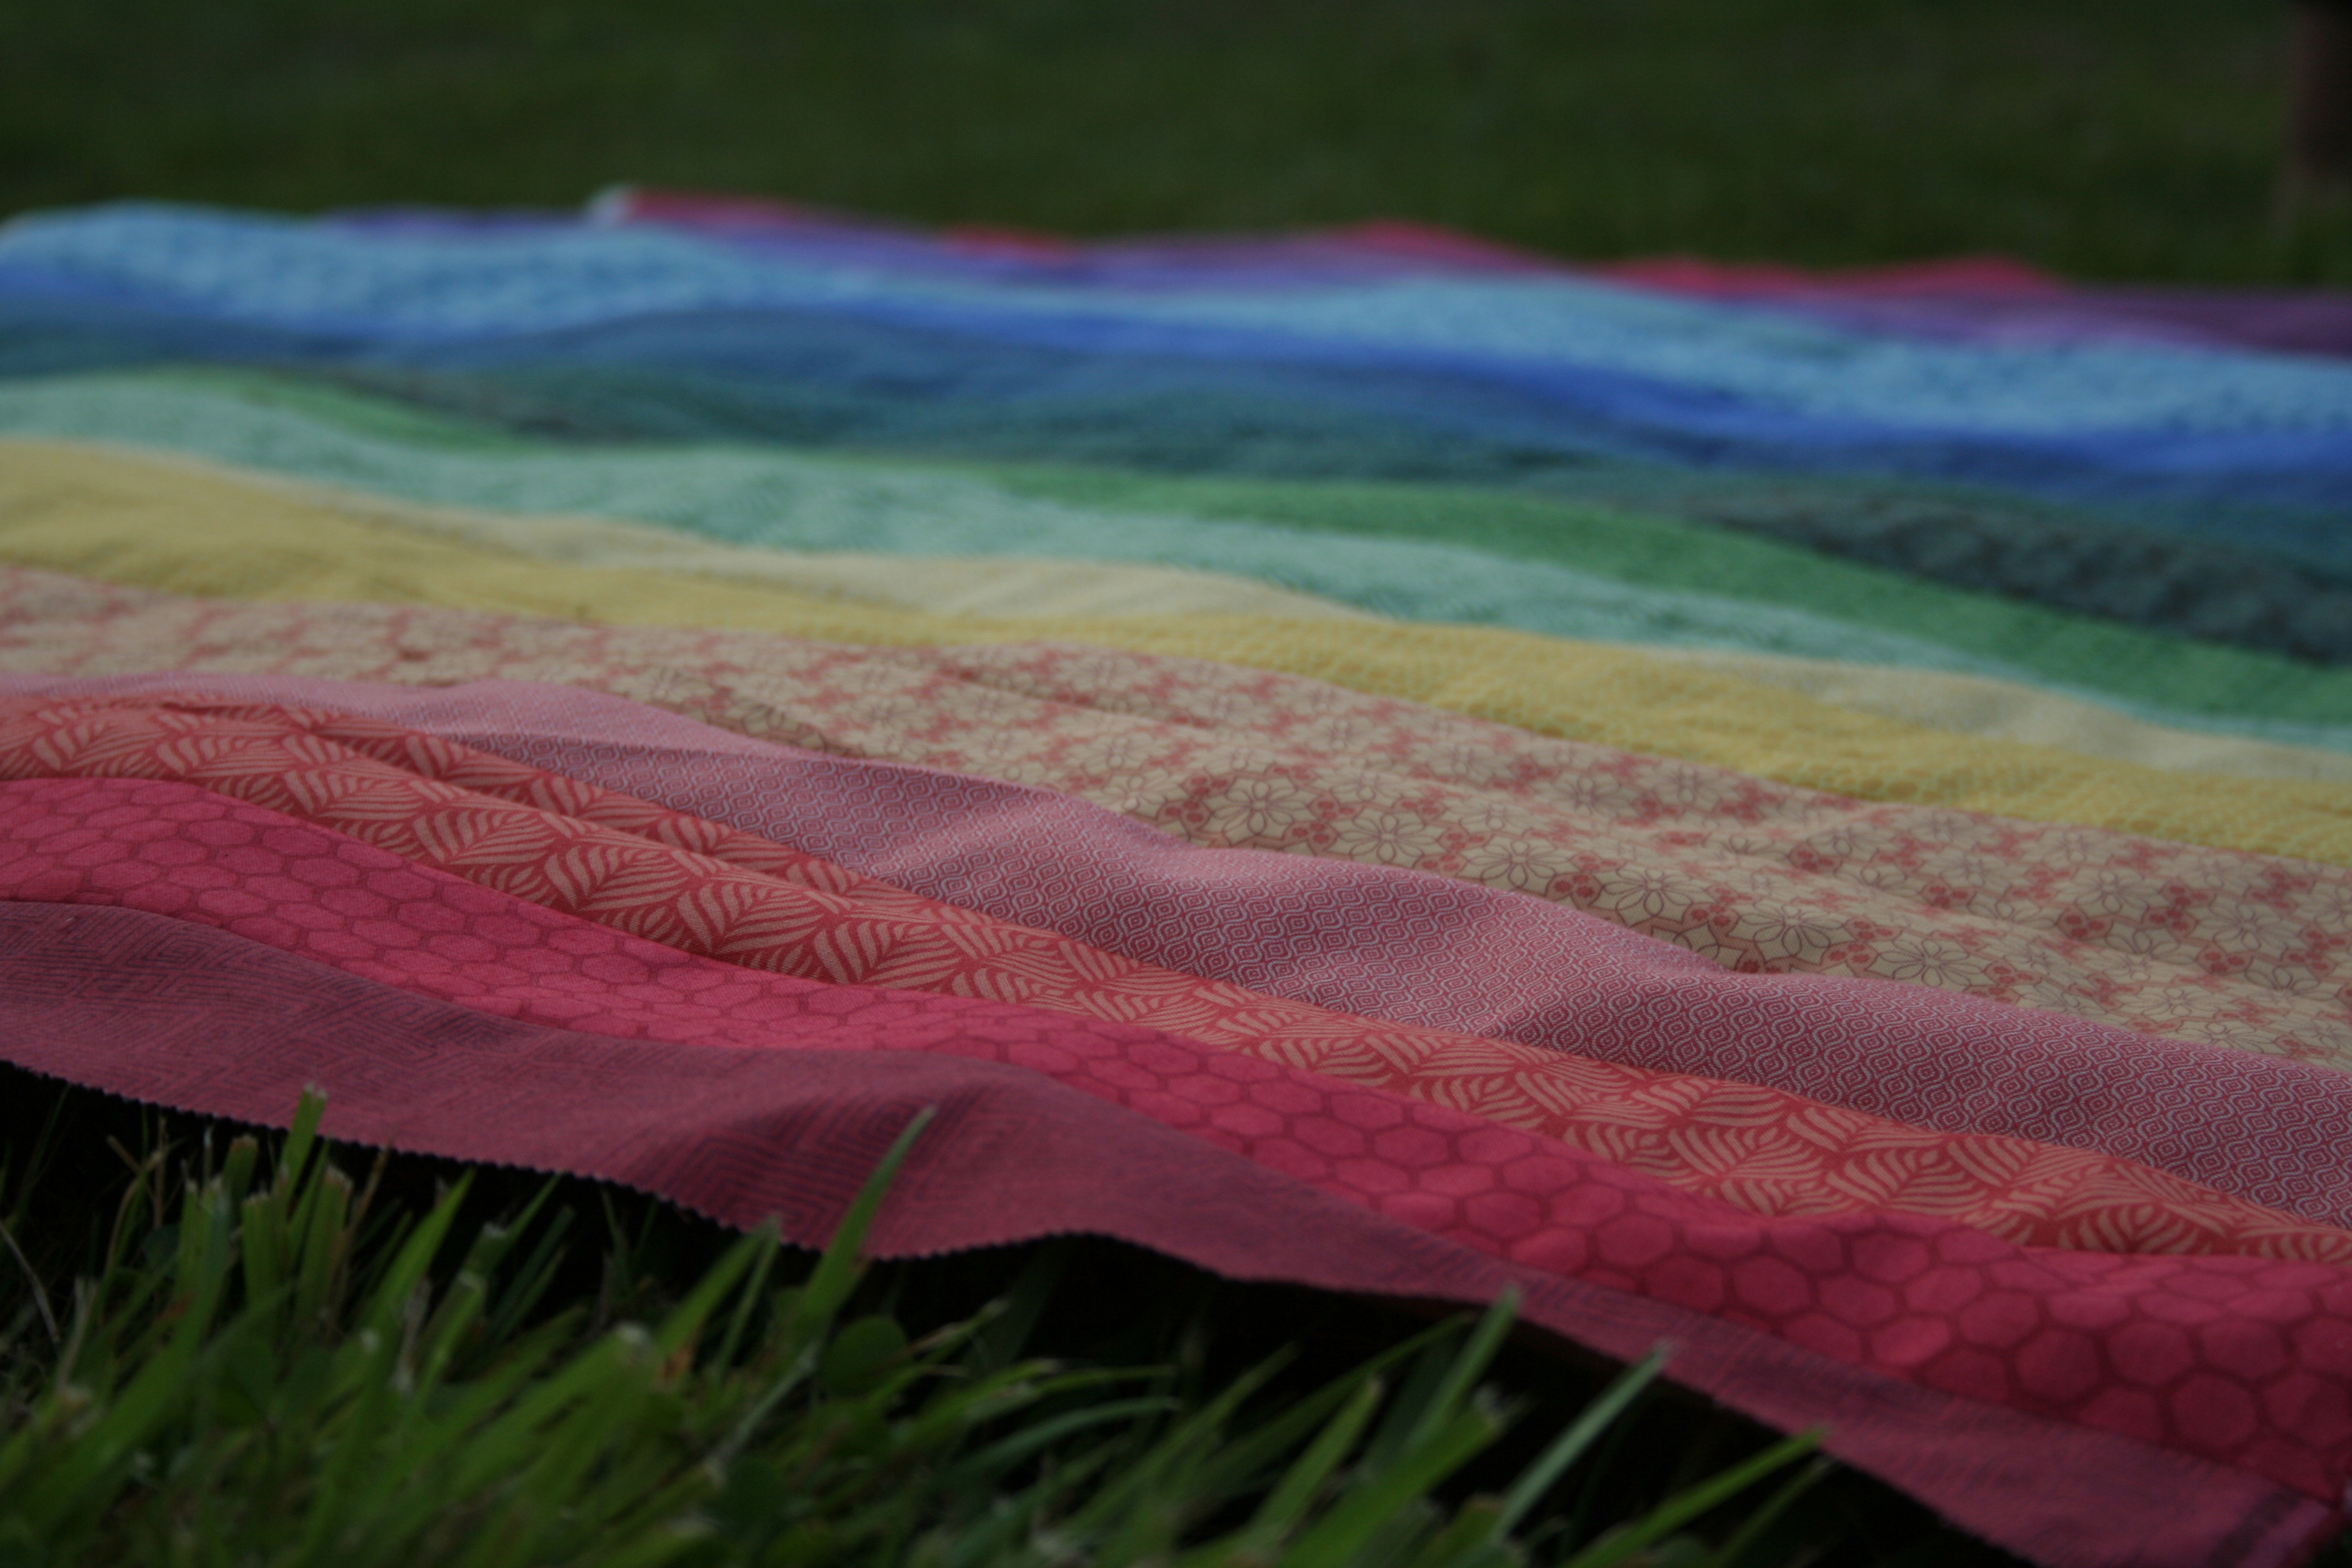
Maddie’s rainbow jellyroll quilt top is finally complete! It only took me a bit over three hours to sew together, but with a fairly large summer sewing hiatus in the middle. I decided to focus on completing this quilt over a month ago, and sewed the first jellyroll strips into pairs. This past weekend I was graced with a rare chunk of uninterrupted sewing time, during which I finished sewing all of the strips together. This quilt is made entirely of strips from an Andover Fabrics Color Collection Jellyroll. Easy peasy! Go ahead and get a cup of tea or coffee (and a snack) because here comes a deluge of rainbow photographs!
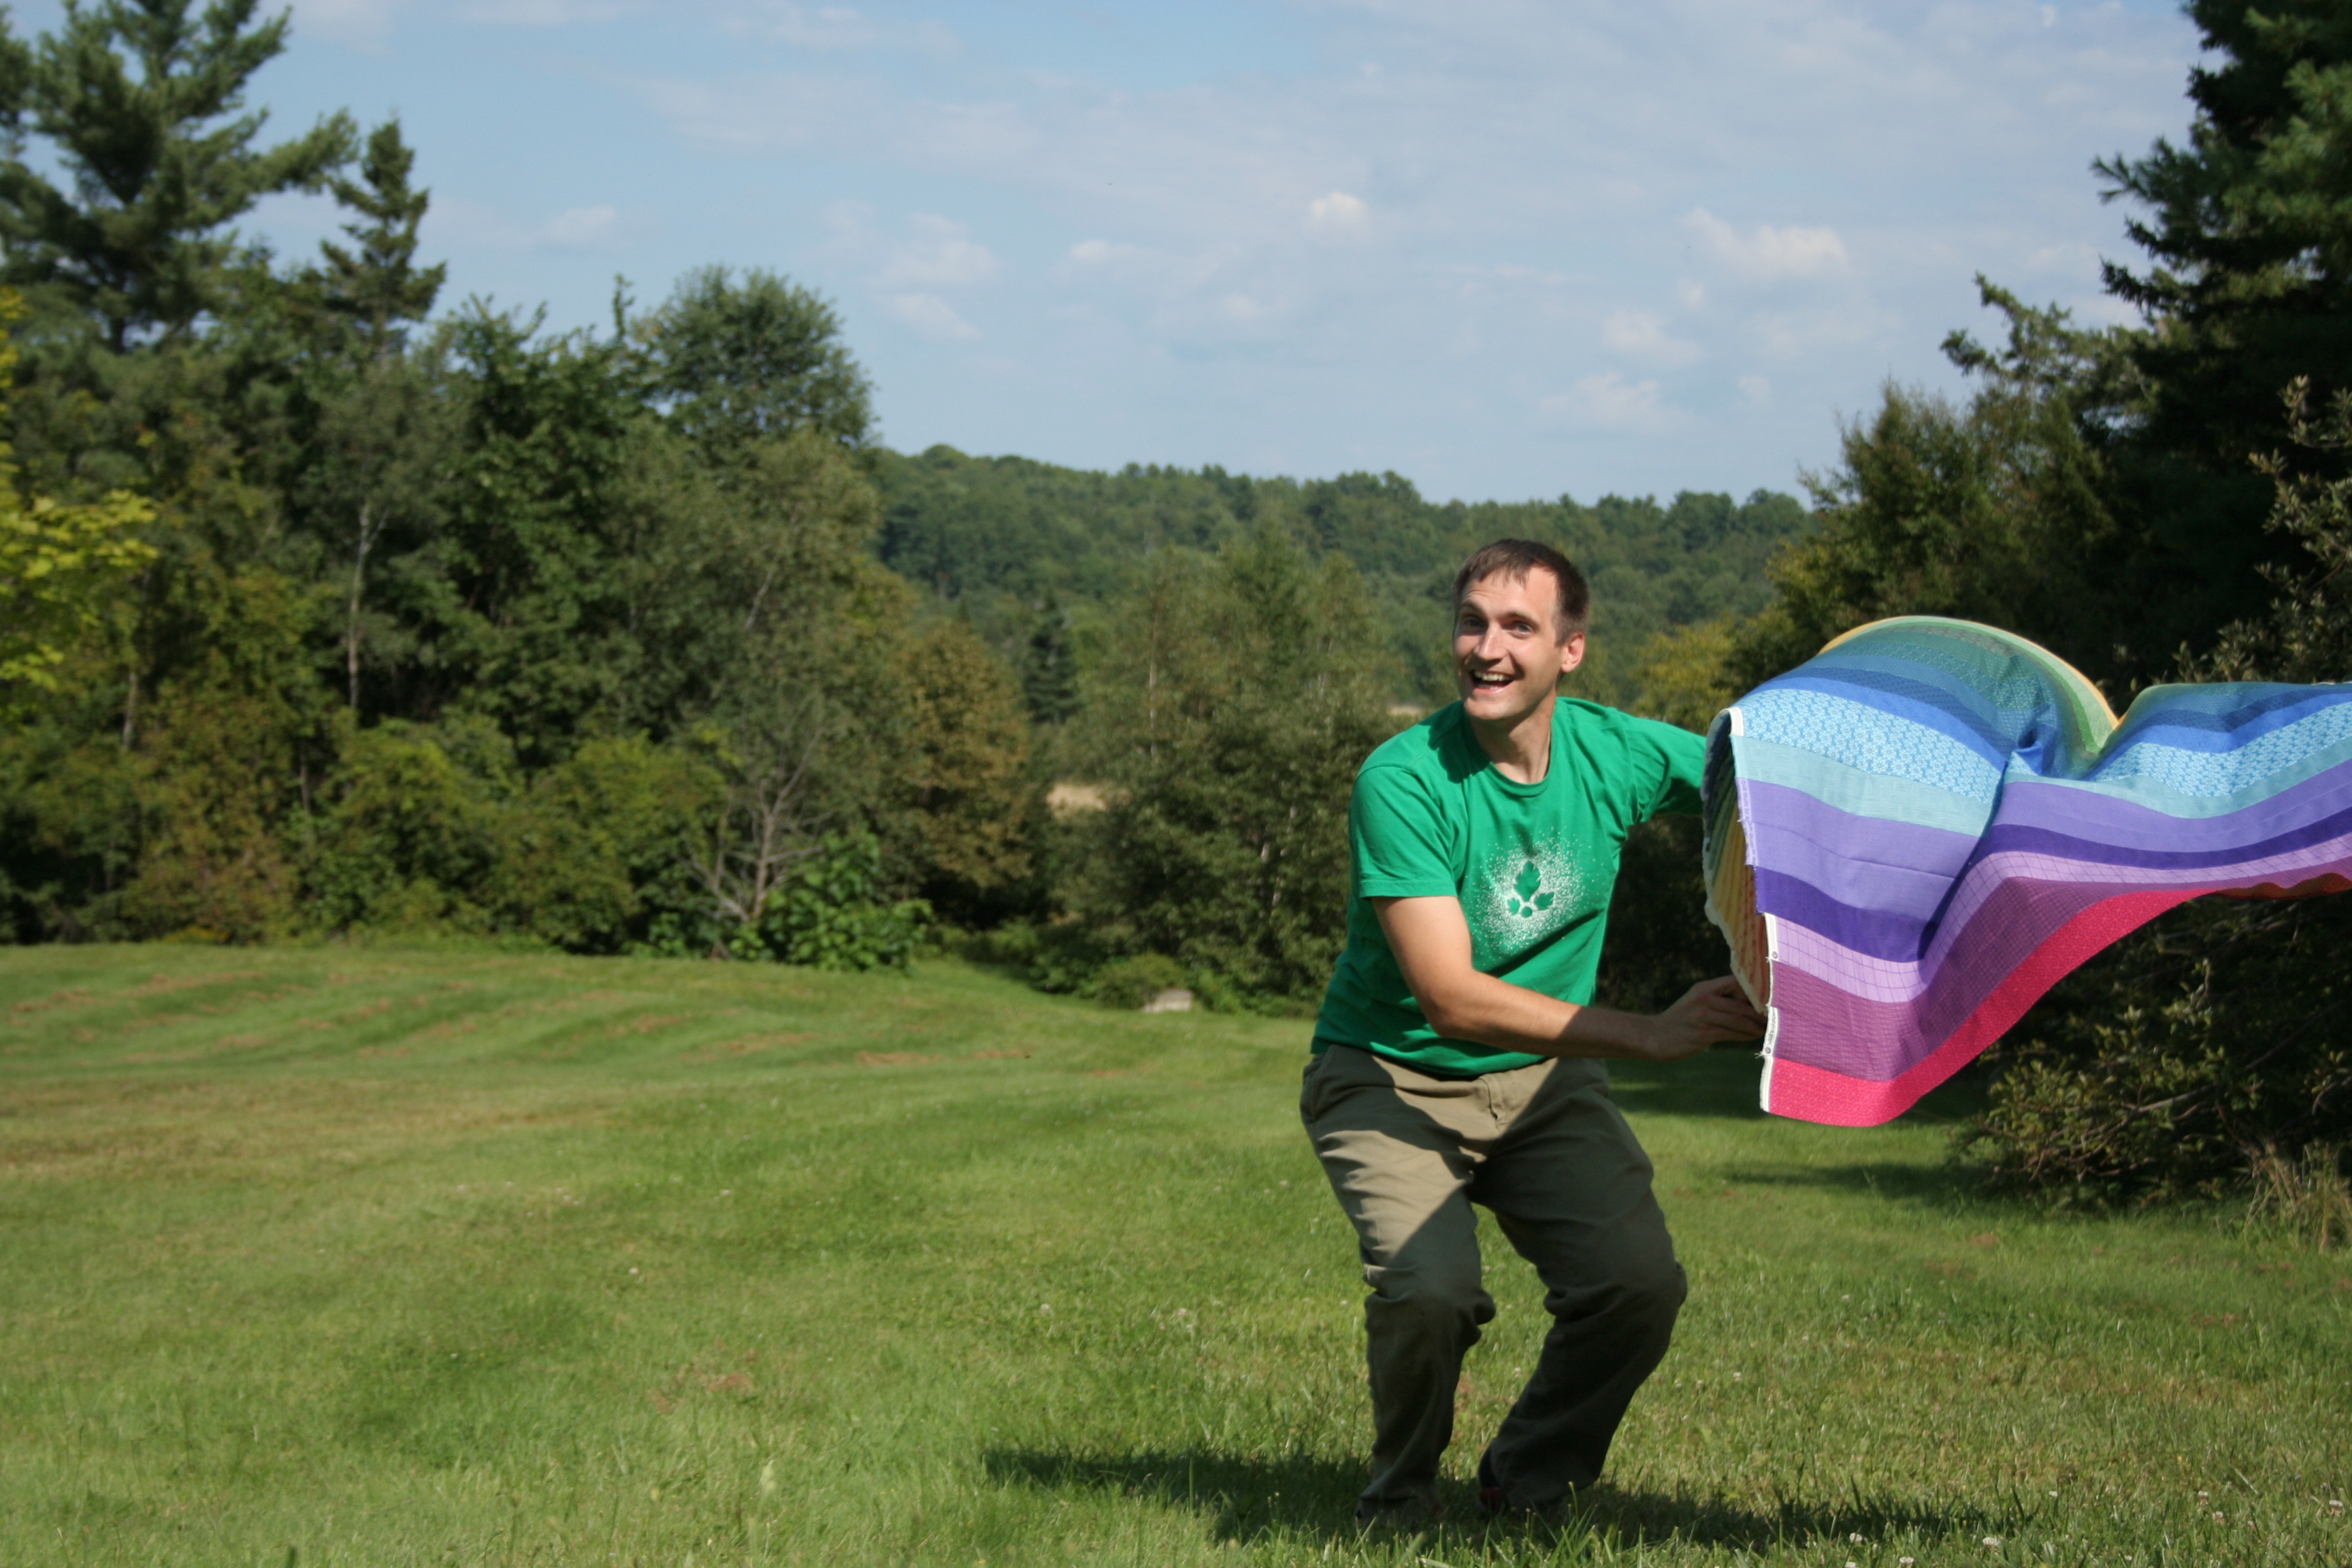
I was so excited to finally finish something, I immediately dragged my husband outside for a photo shoot upon completing this top. It was a bright sunny day with a decently brisk breeze, but I just couldn’t wait. Here’s Maddie’s gorgeous rainbow on a sunny, bright blue sky day:
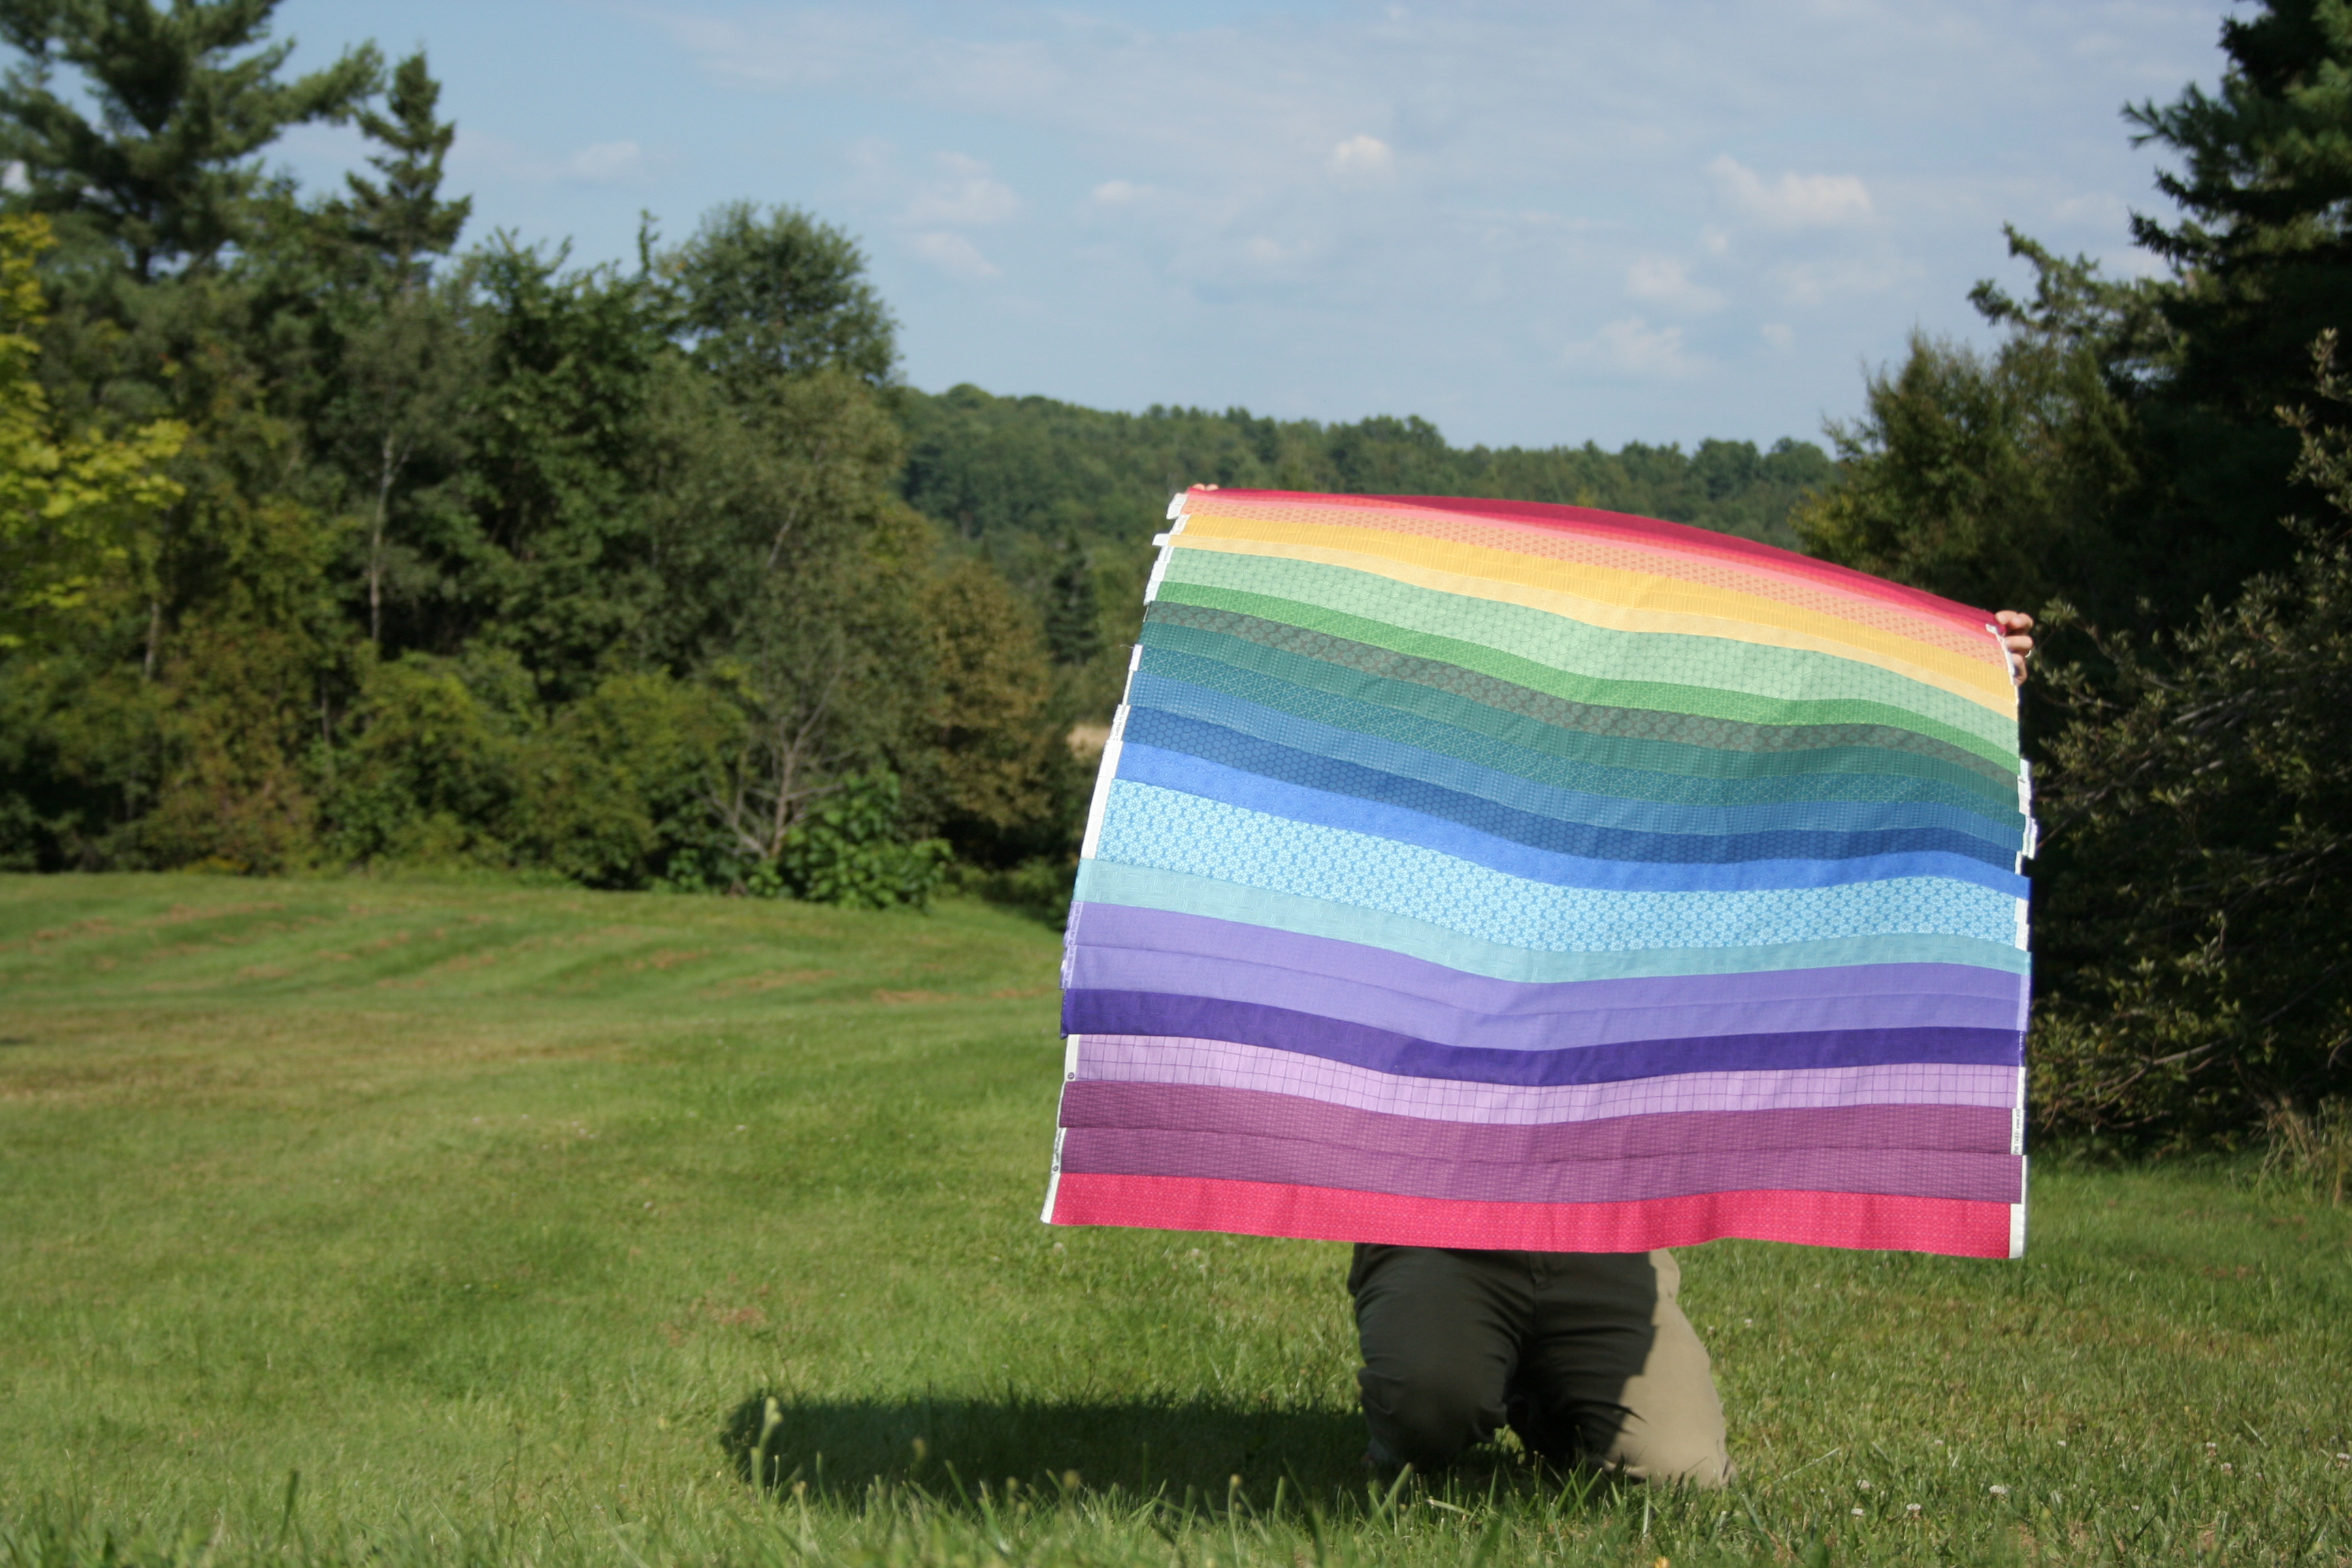
Blowing in the breeze.Sun shining through to the back as the quilt turns momentarily into a kite. I love the look of the back of a freshly pieced quilt, especially with the illumination of the sun!Quilt top-turned-kite in its resting place: crumpled on the ground next to the fence.Rainbow from afar.
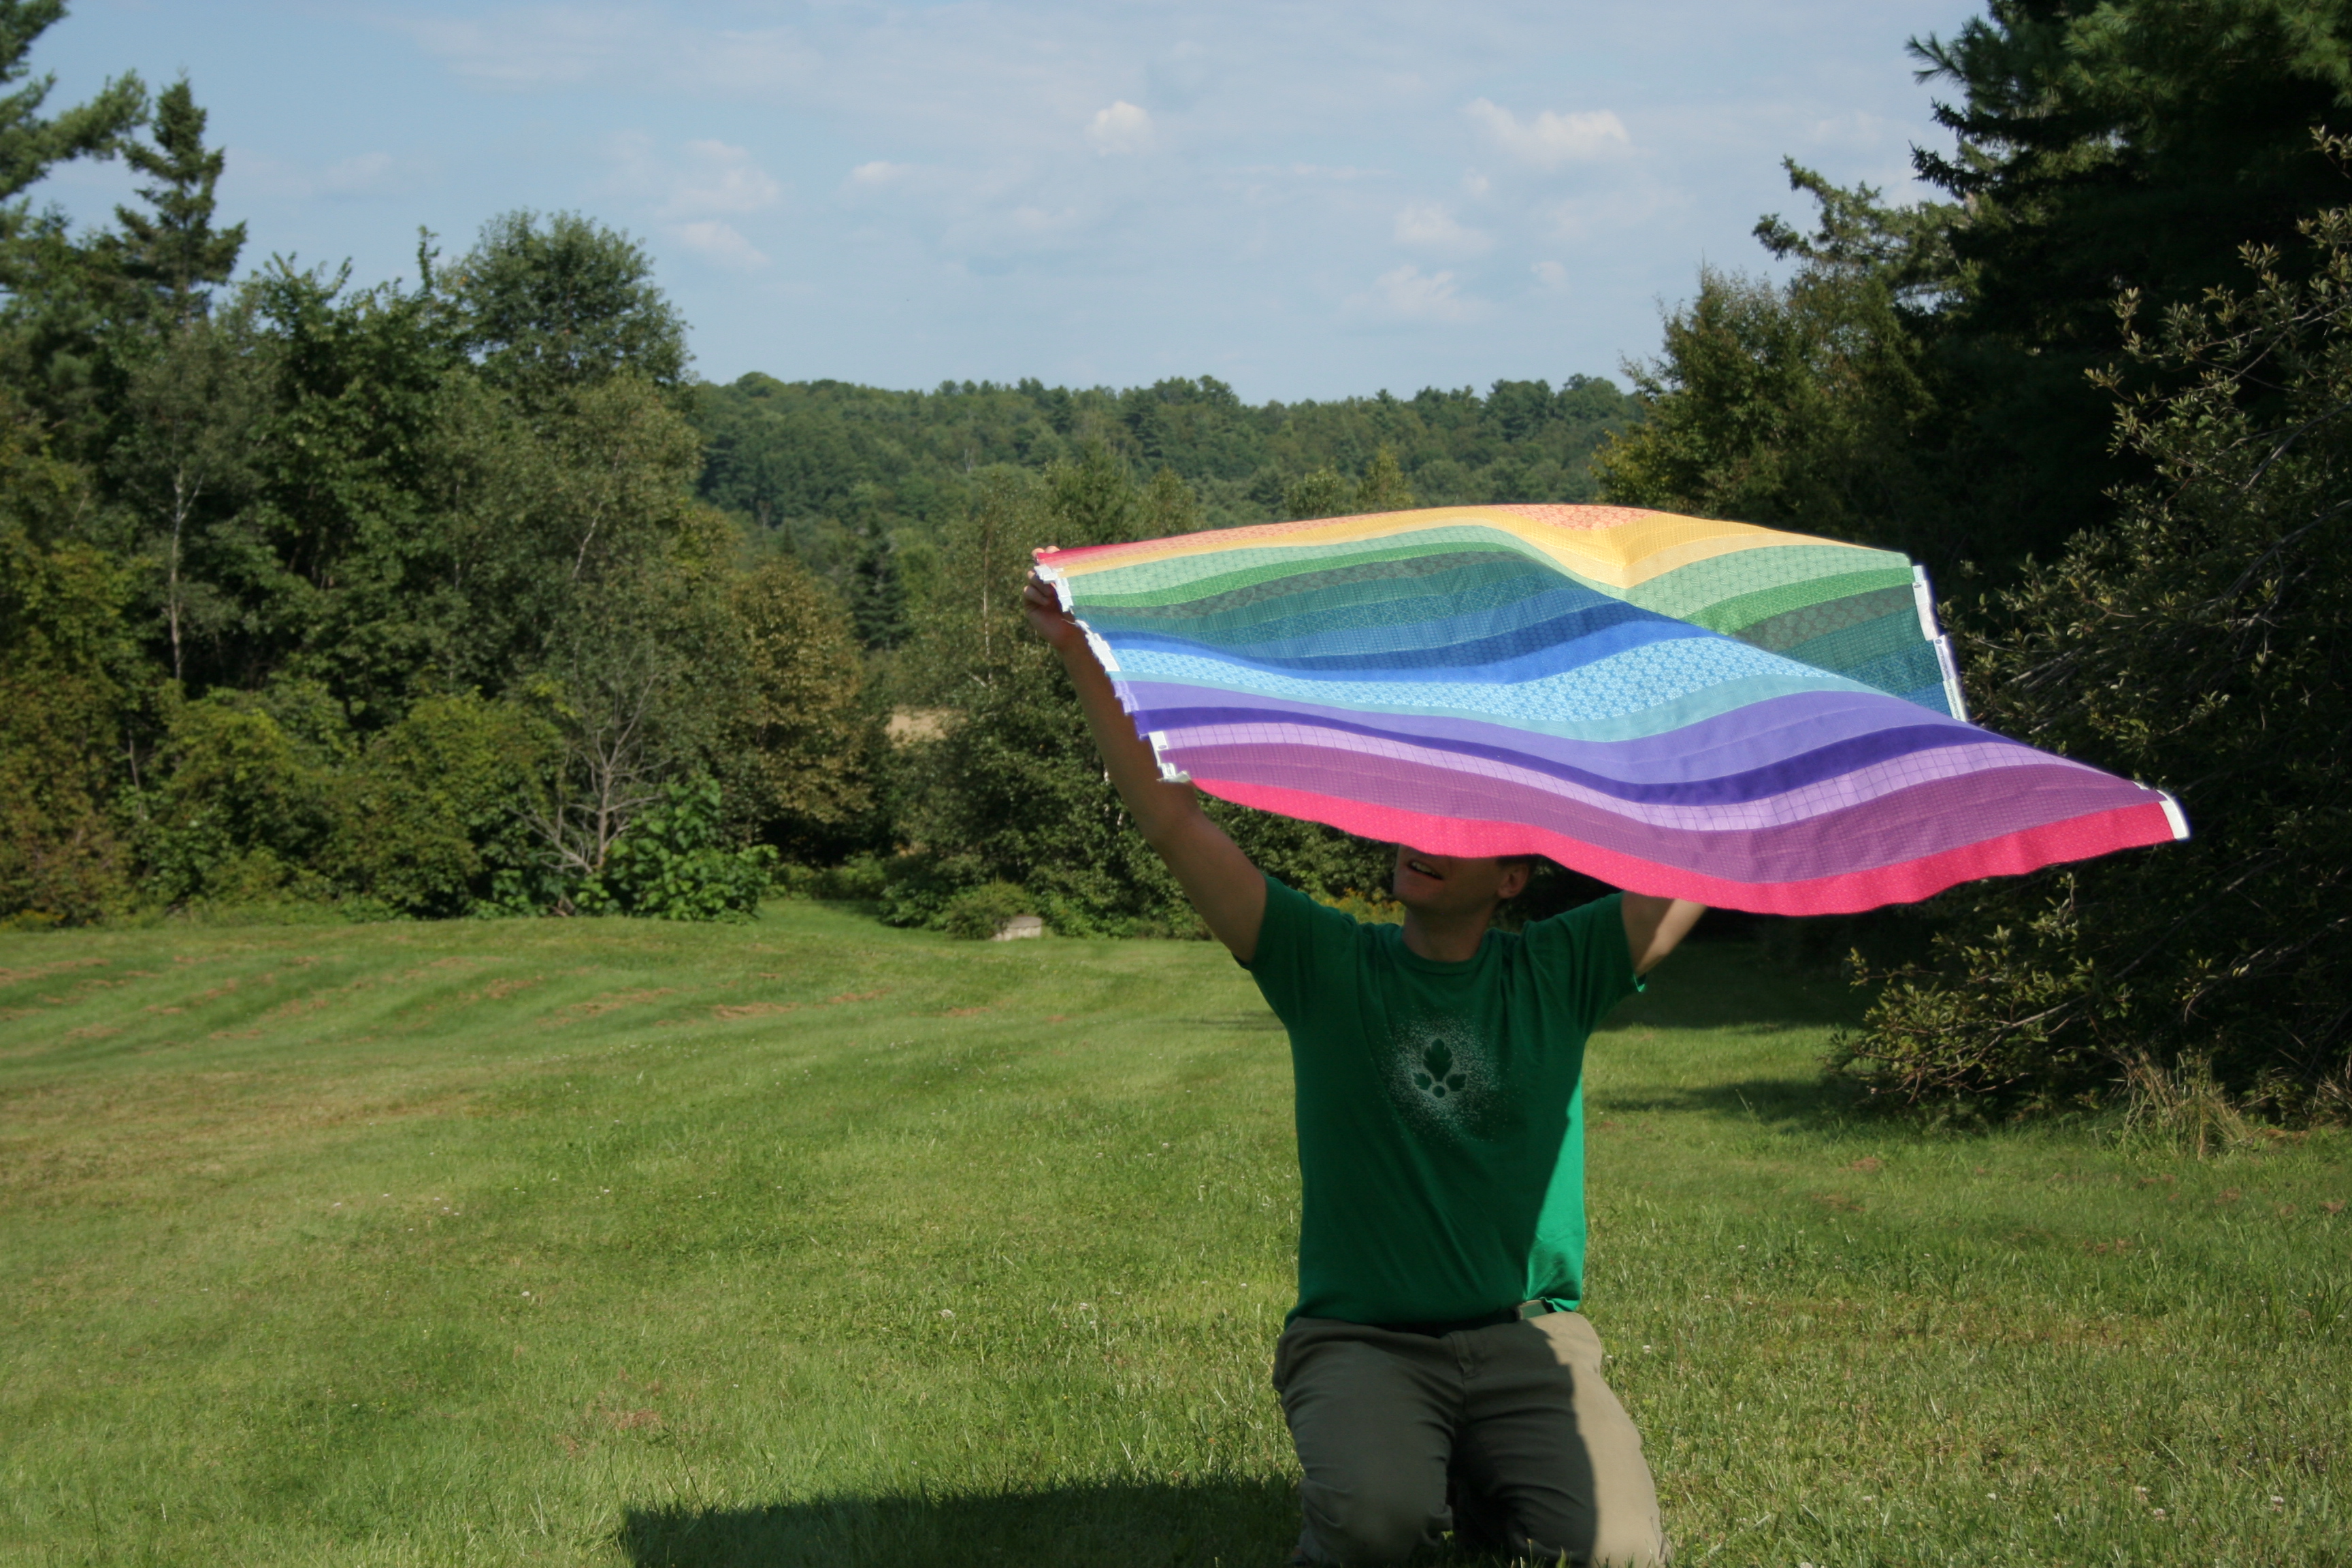
My husband Garrett was quite patient as I dragged him around the yard, trying to find a spot where the lighting was decent and the photos were not too washed out from the bright sun. The wind didn’t always agree with our plan, but it made for some fun outtakes:
You would jump up and pretend you’re a bull fighter, too, right?
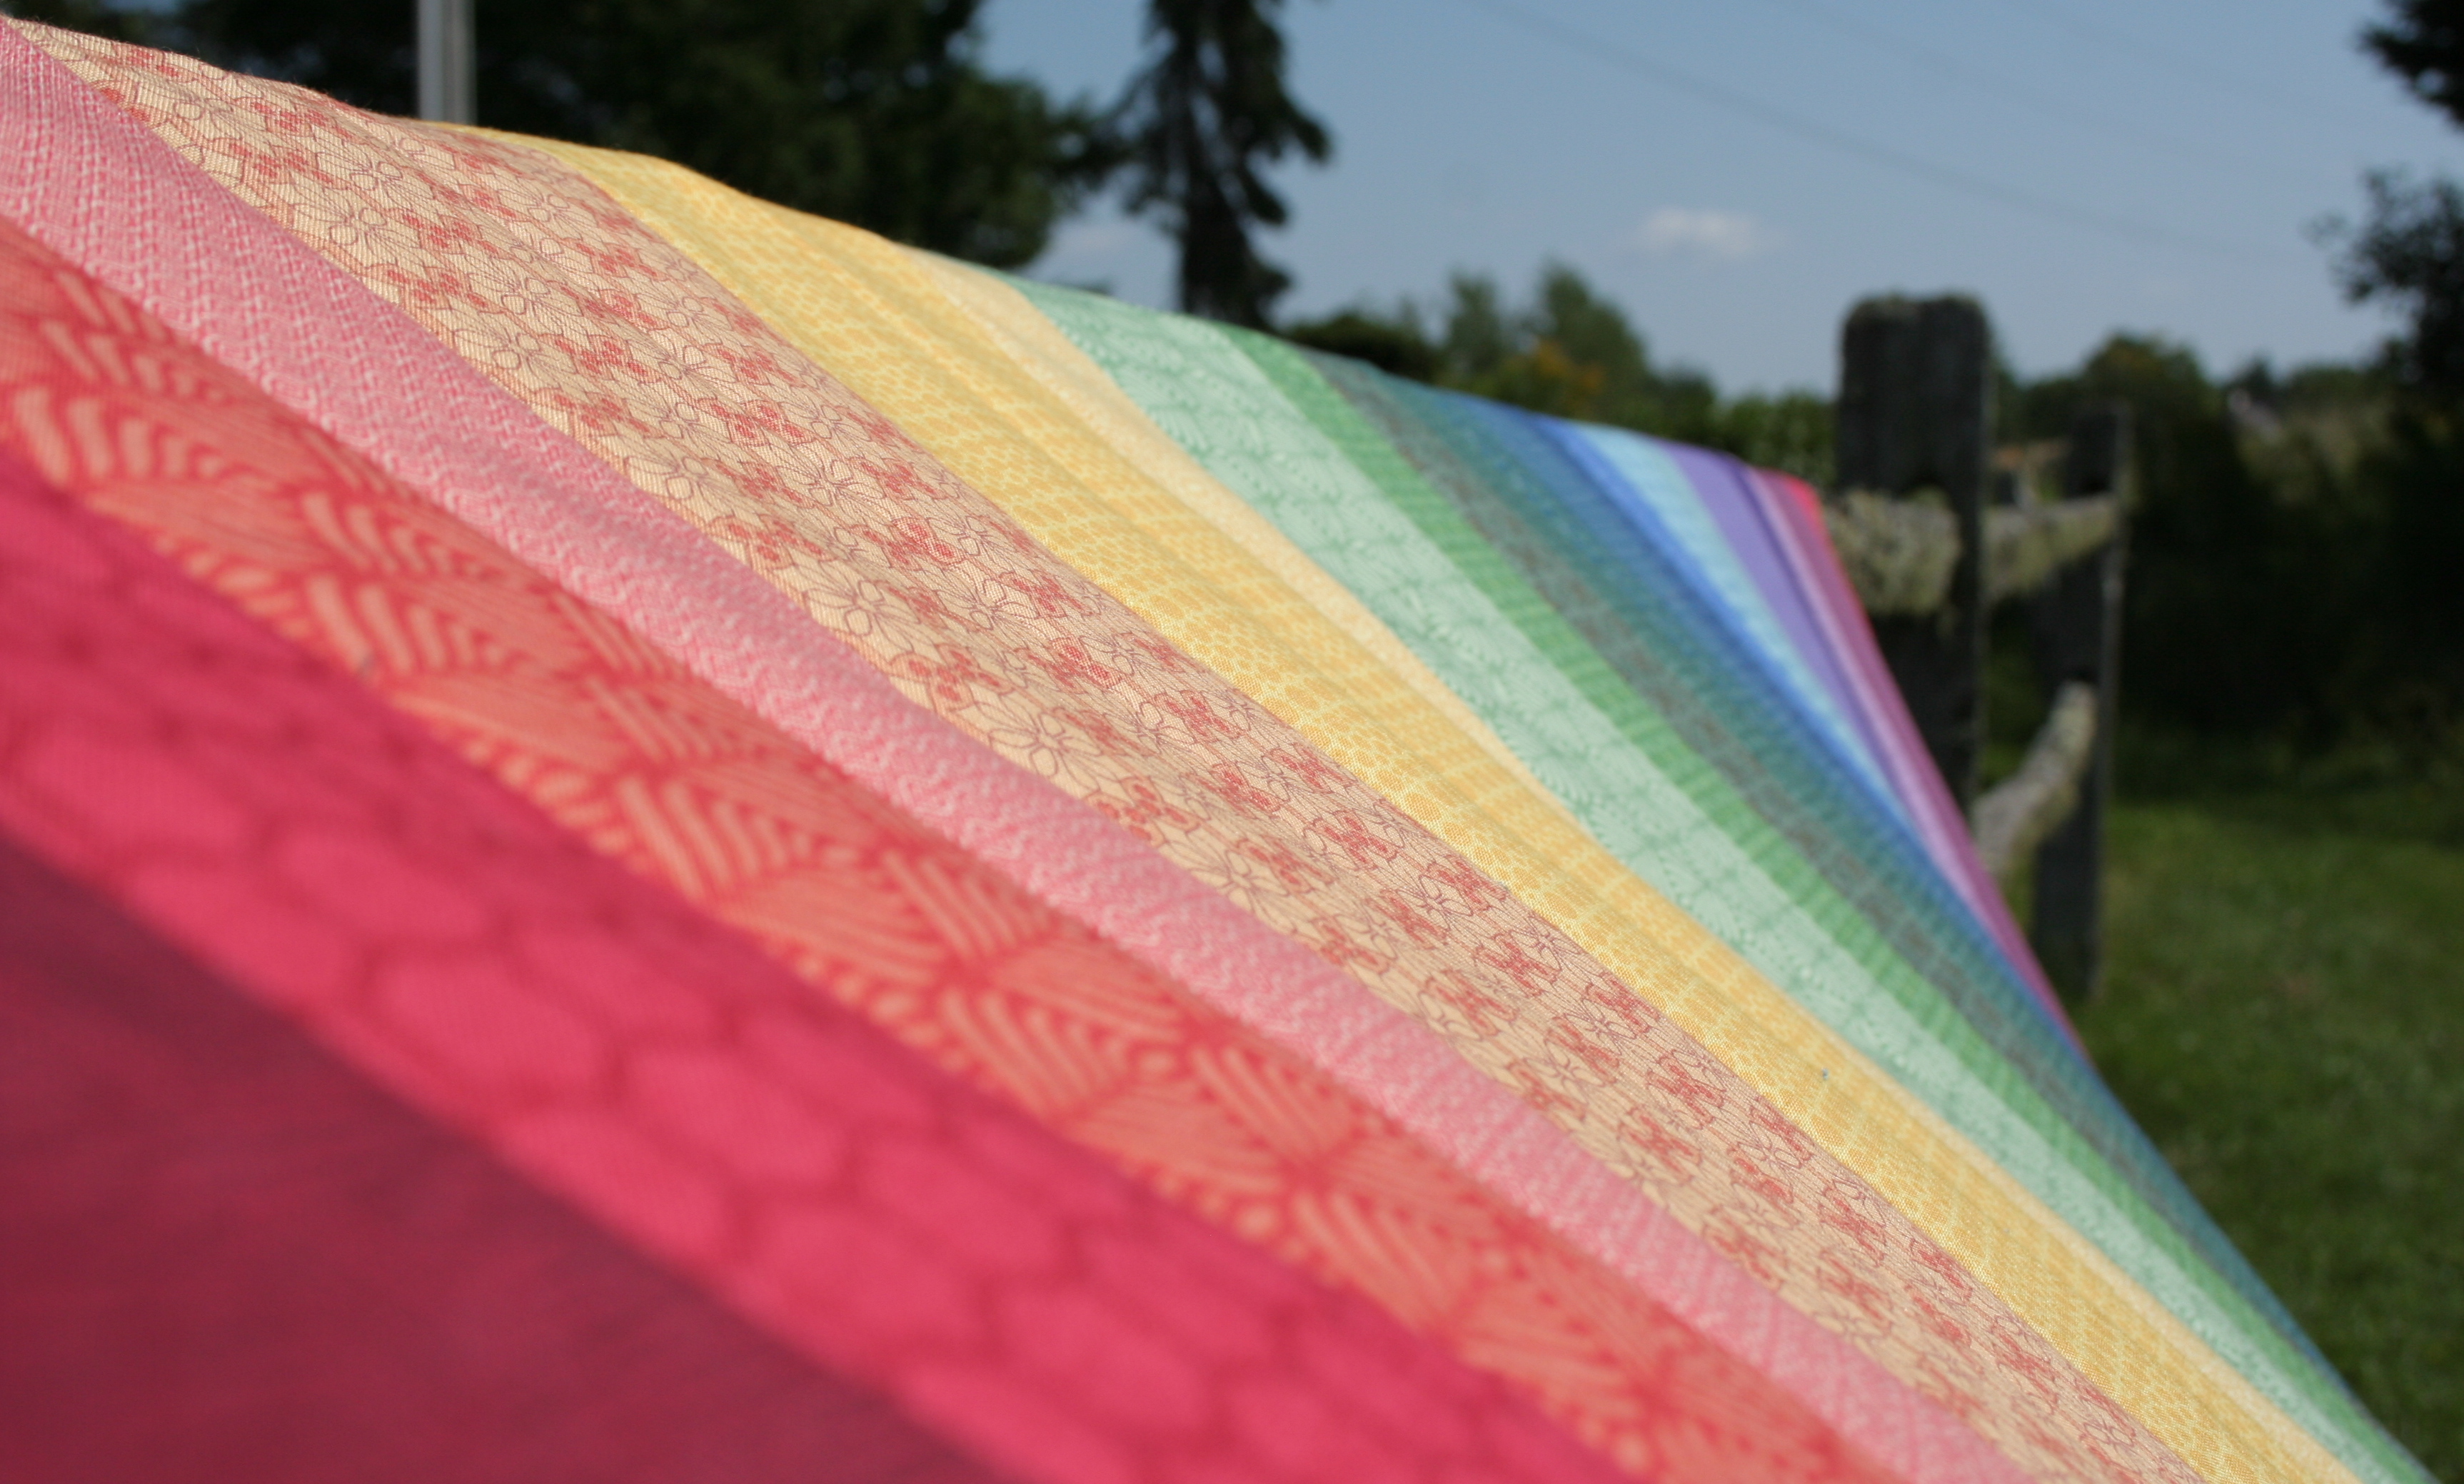
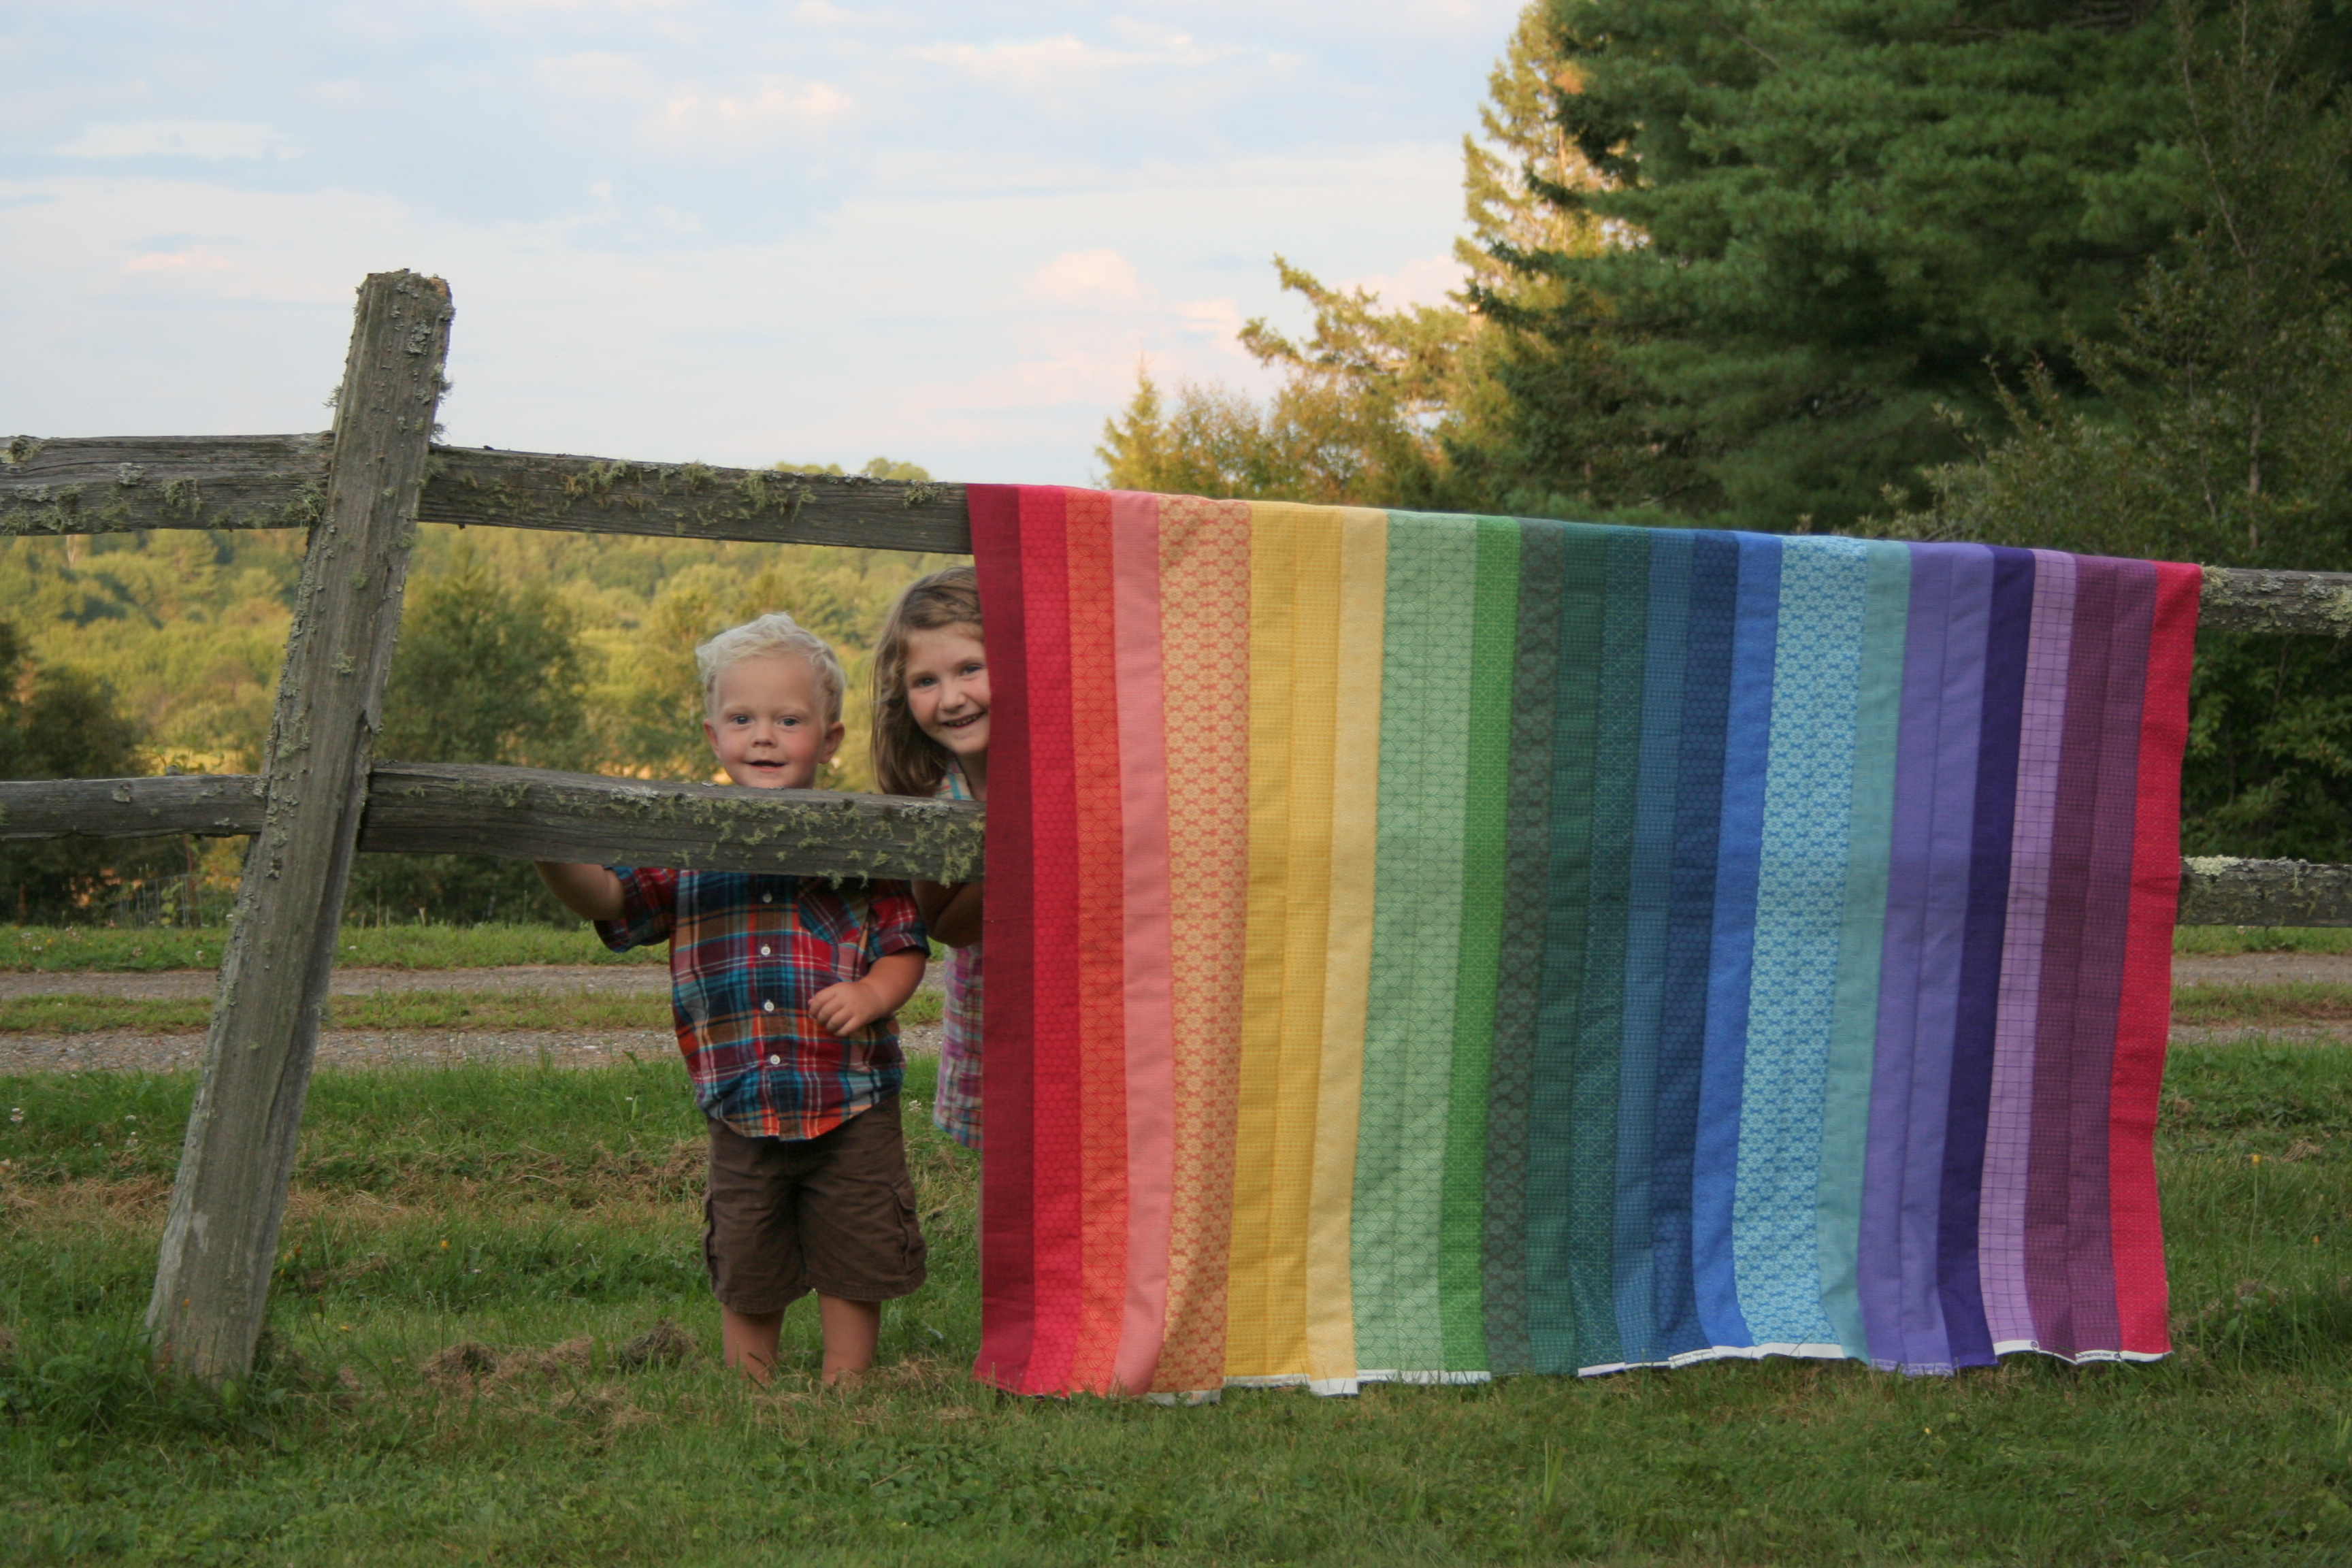
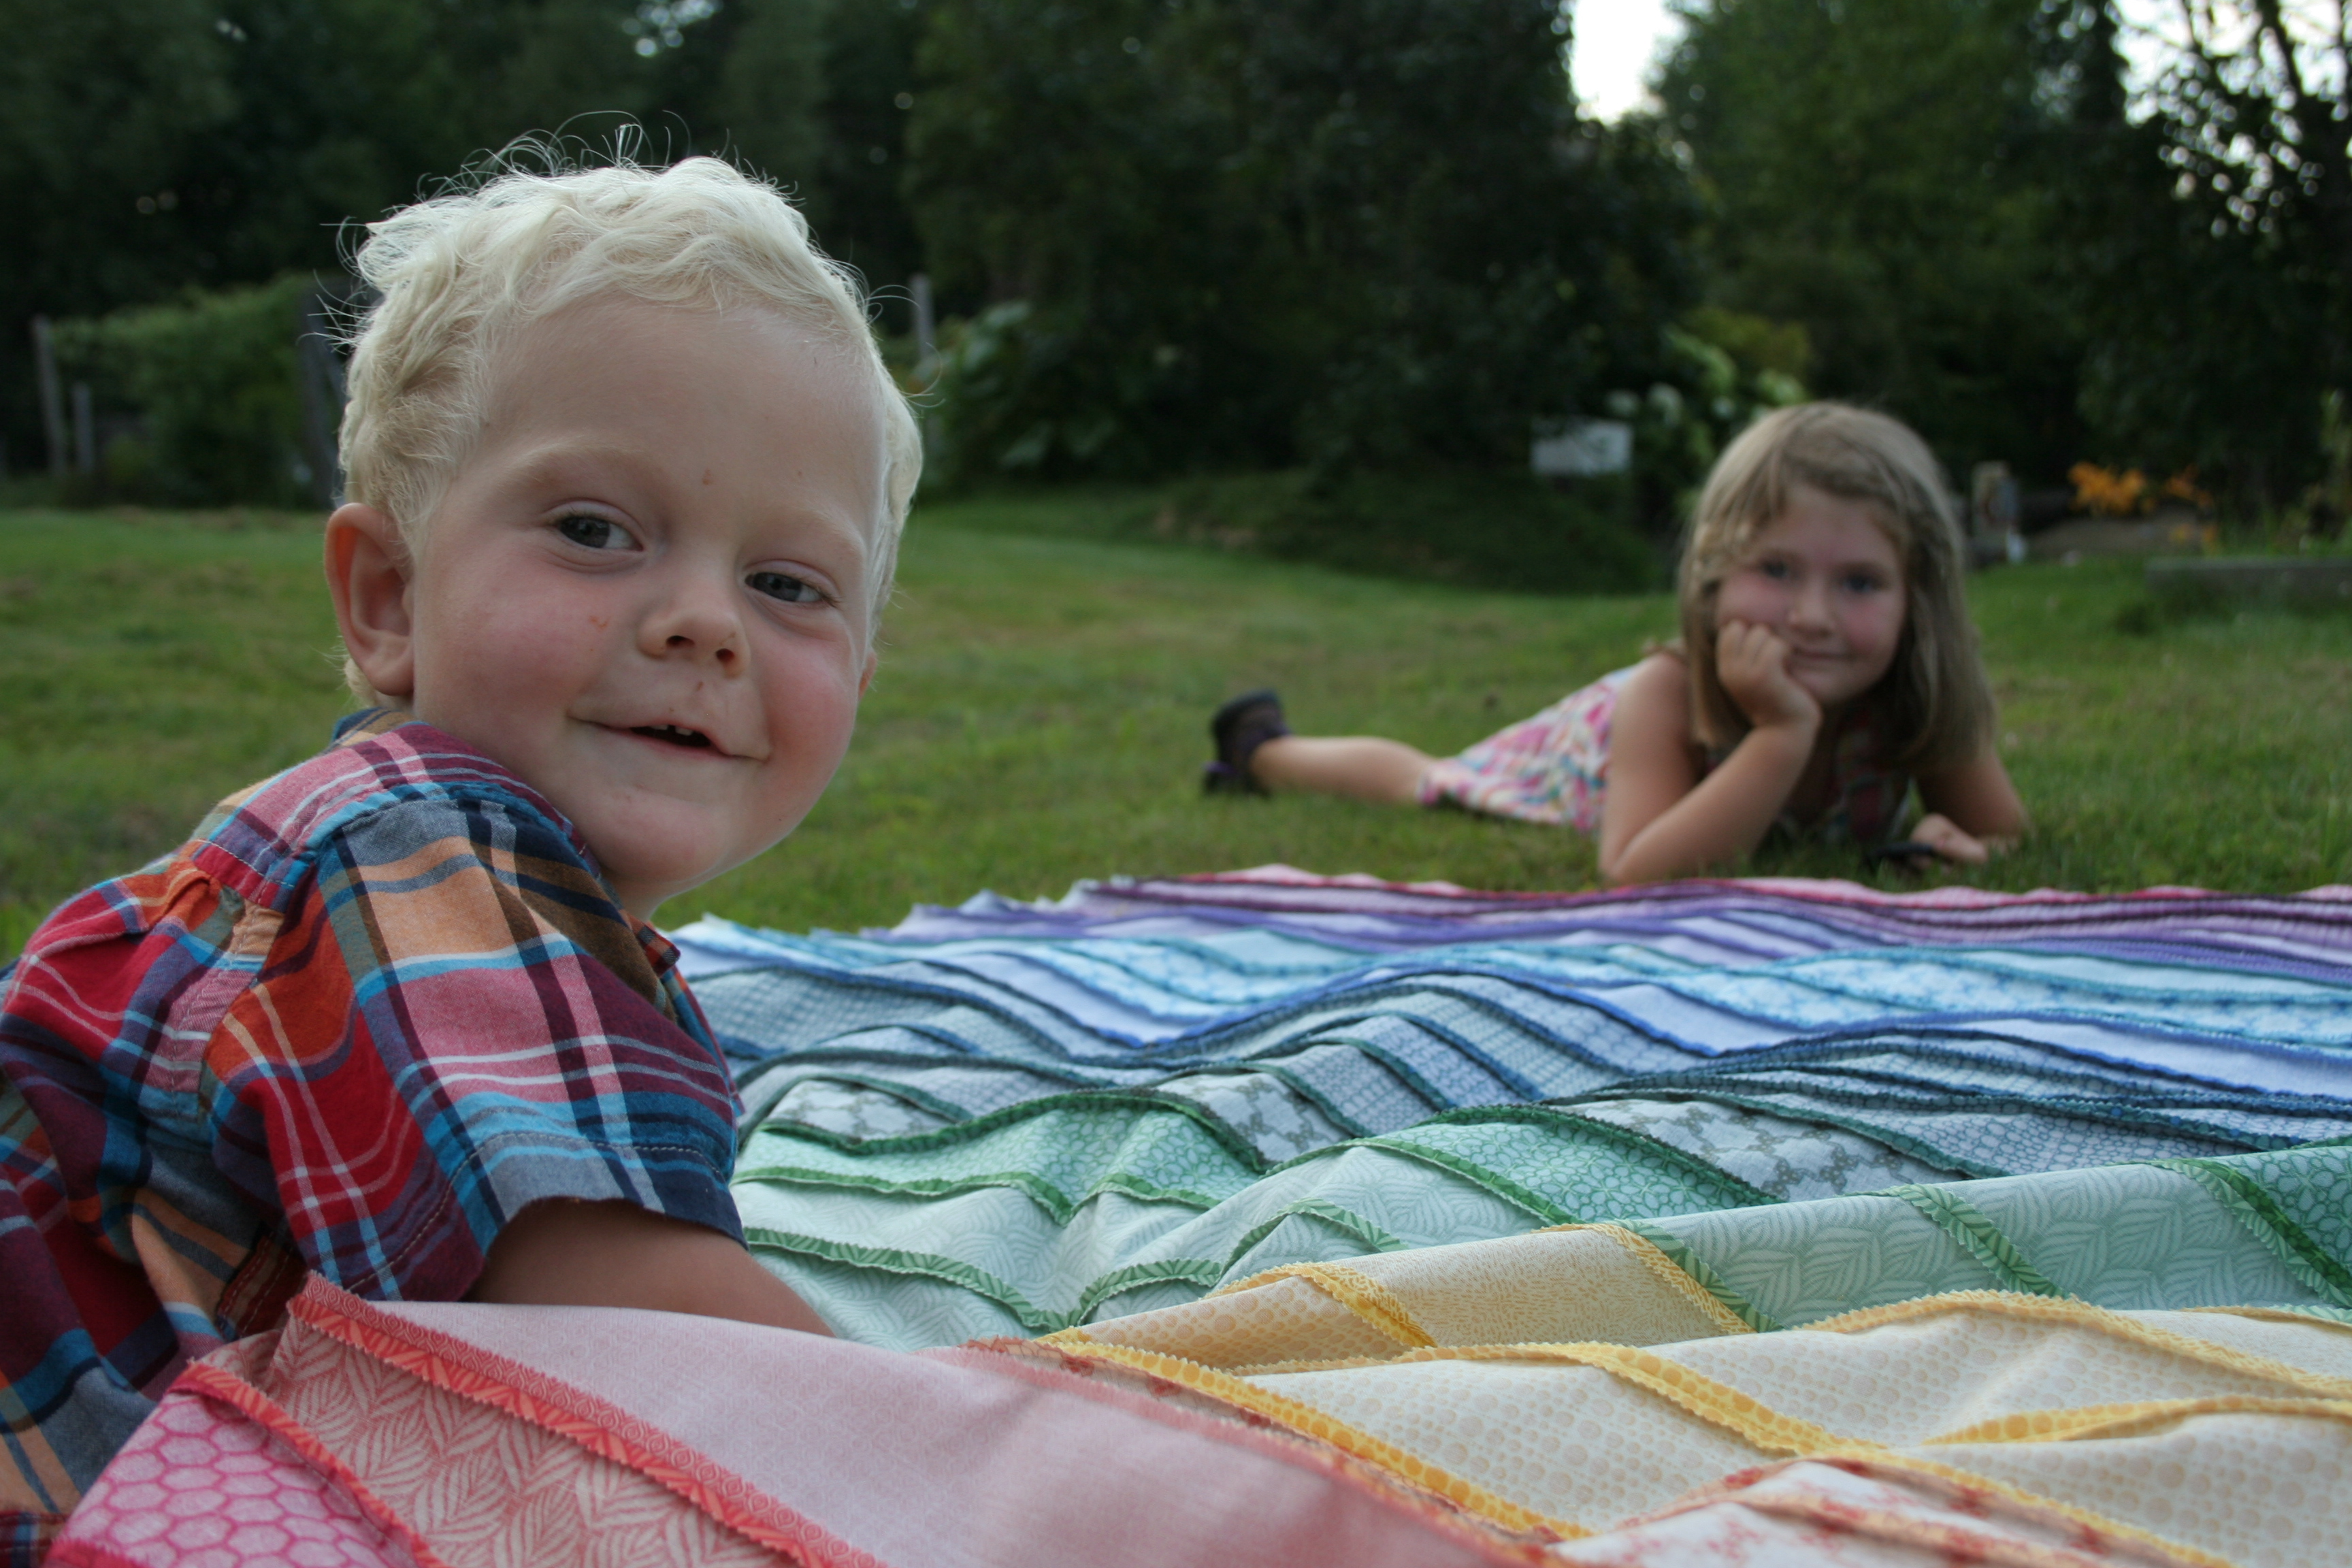
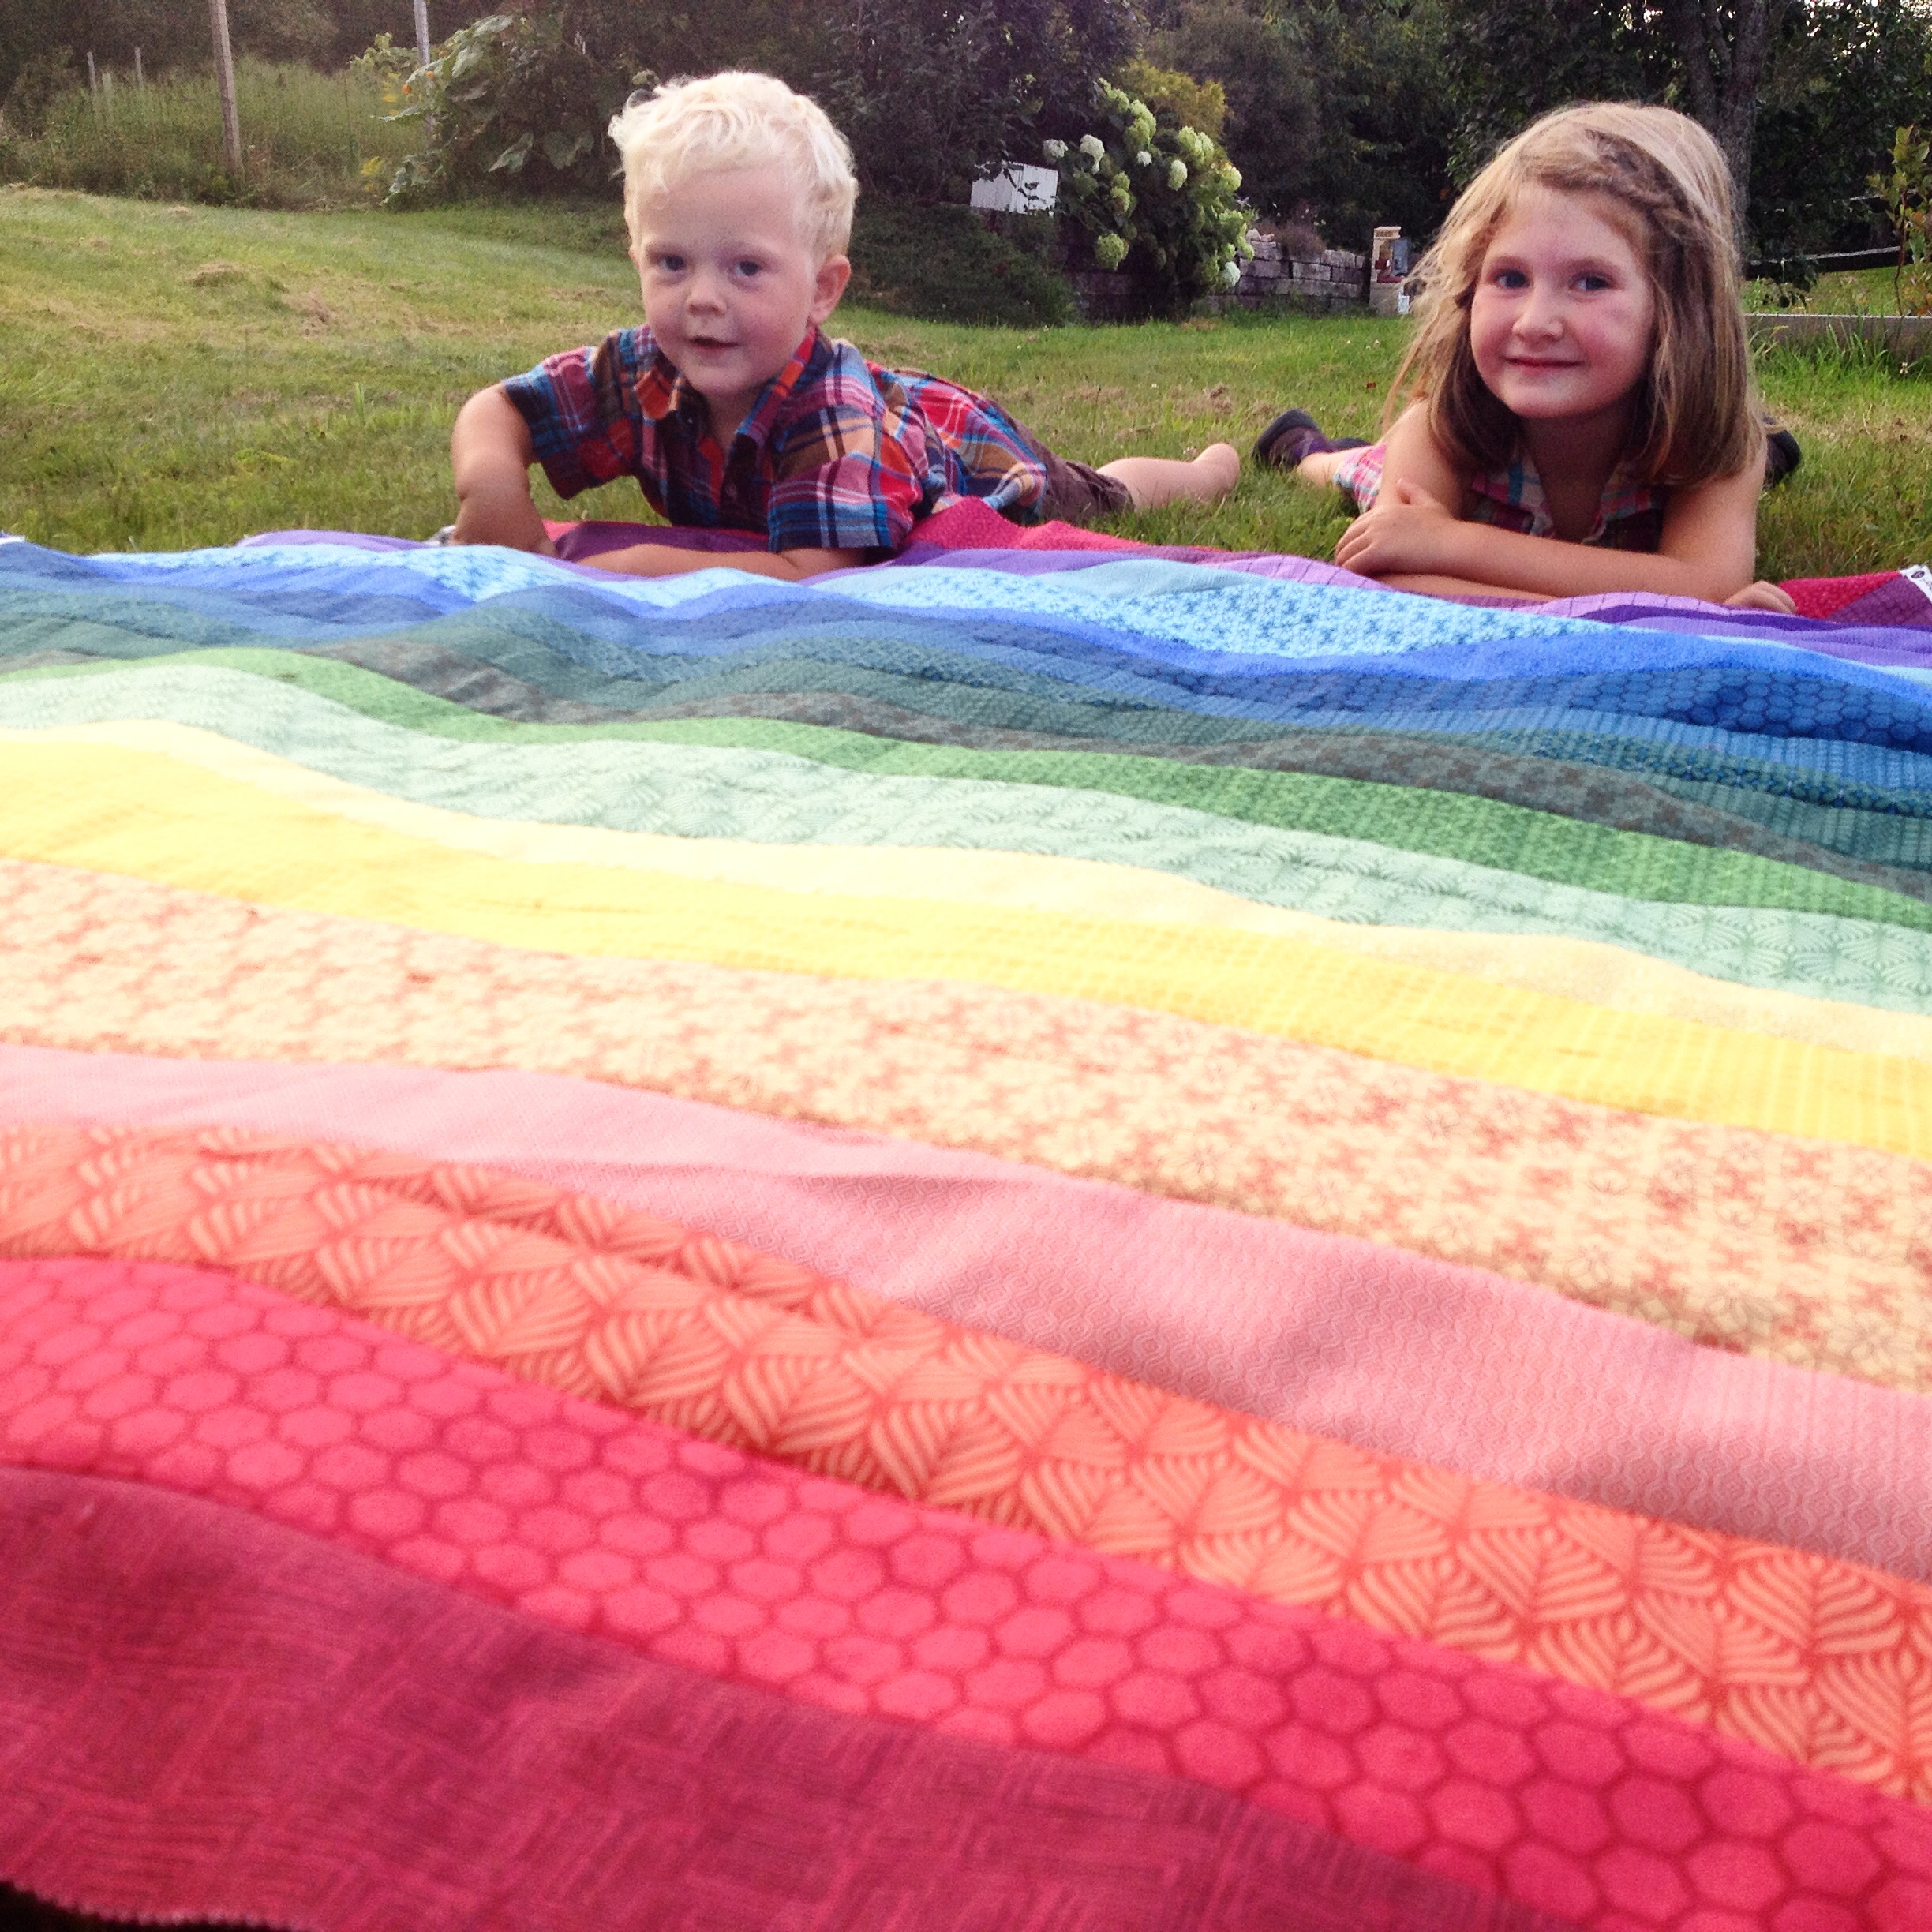
As evening began to set, I decided to go out and try a shady photo shoot, since in the past I’ve captured better color richness in shaded photos. With my kiddos back at home after an adventurous day with Grammy & Great Aunt Ellen, they of course wanted to help:
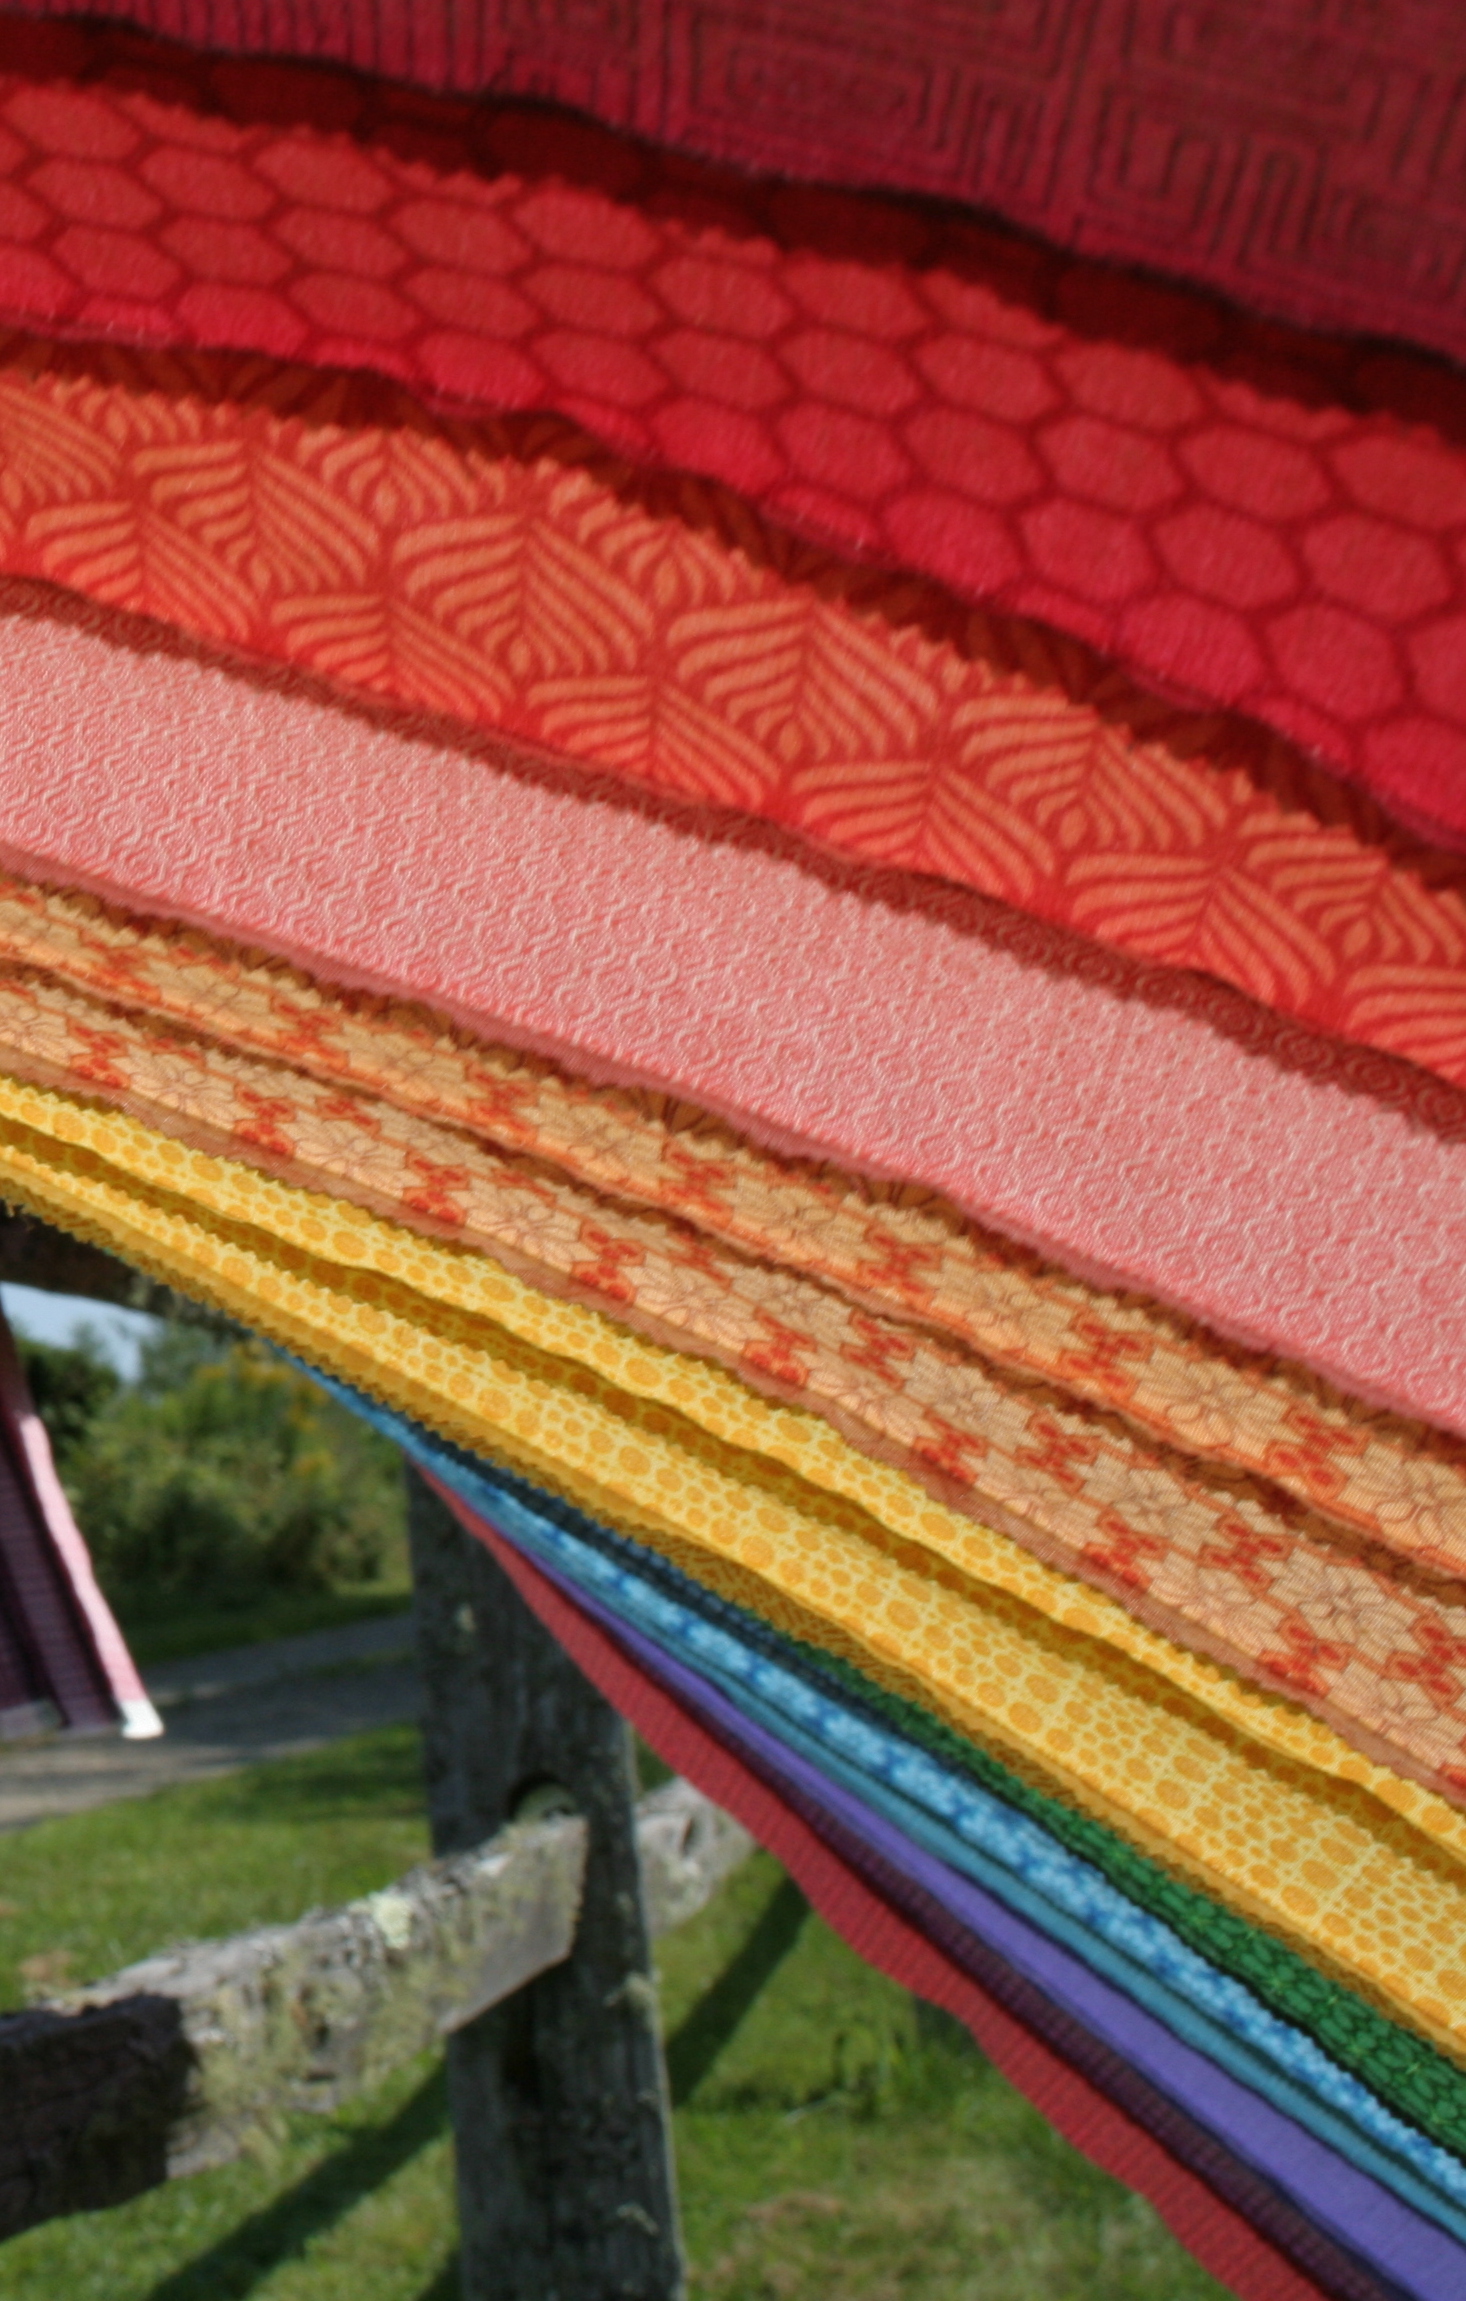
The colors definitely are richer in the shady photos, although I miss the crispness of the sunny photos. With this photo shoot, I think I prefer the sun for the full-quilt photos, and the shade for the close-ups. What do you think?
I love the look of the back of a freshly pieced quilt, even with kids flopped on it.Rainbow jellyroll quilt top front.Rainbow jellyroll quilt top back.
So pretty! I am quite pleased with how this came out, even if it’s a bit off-kilter on the edges. I plan to quilt it and then square it up after it’s all quilted. For those of you who have quilted rainbow quilts before, do you have any tips? I think I am going to try to match general colors of thread, and do simple straight line quilting along each strip. I guess that means I will need to buy some more Aurifil since I don’t have a full rainbow spectrum of thread (darn. wink wink).
I need your help!
My biggest question is with the bobbin: I only have two bobbins for my machine, and thus far I have quilted only in grey. When switching colors often in your quilting, do you just wind a bobbin a small amount, and hope to get lucky with how much you will need? I don’t want to waste a bunch of thread, but once I am finished quilting in a certain color, I will need to unwind the rest of the thread from the bobbin to make room for the next color. Any tips are greatly appreciated!
I’ll leave you with one last cute picture of my helpful kids, posted on Instagram last weekend (follow me @nightquilter).
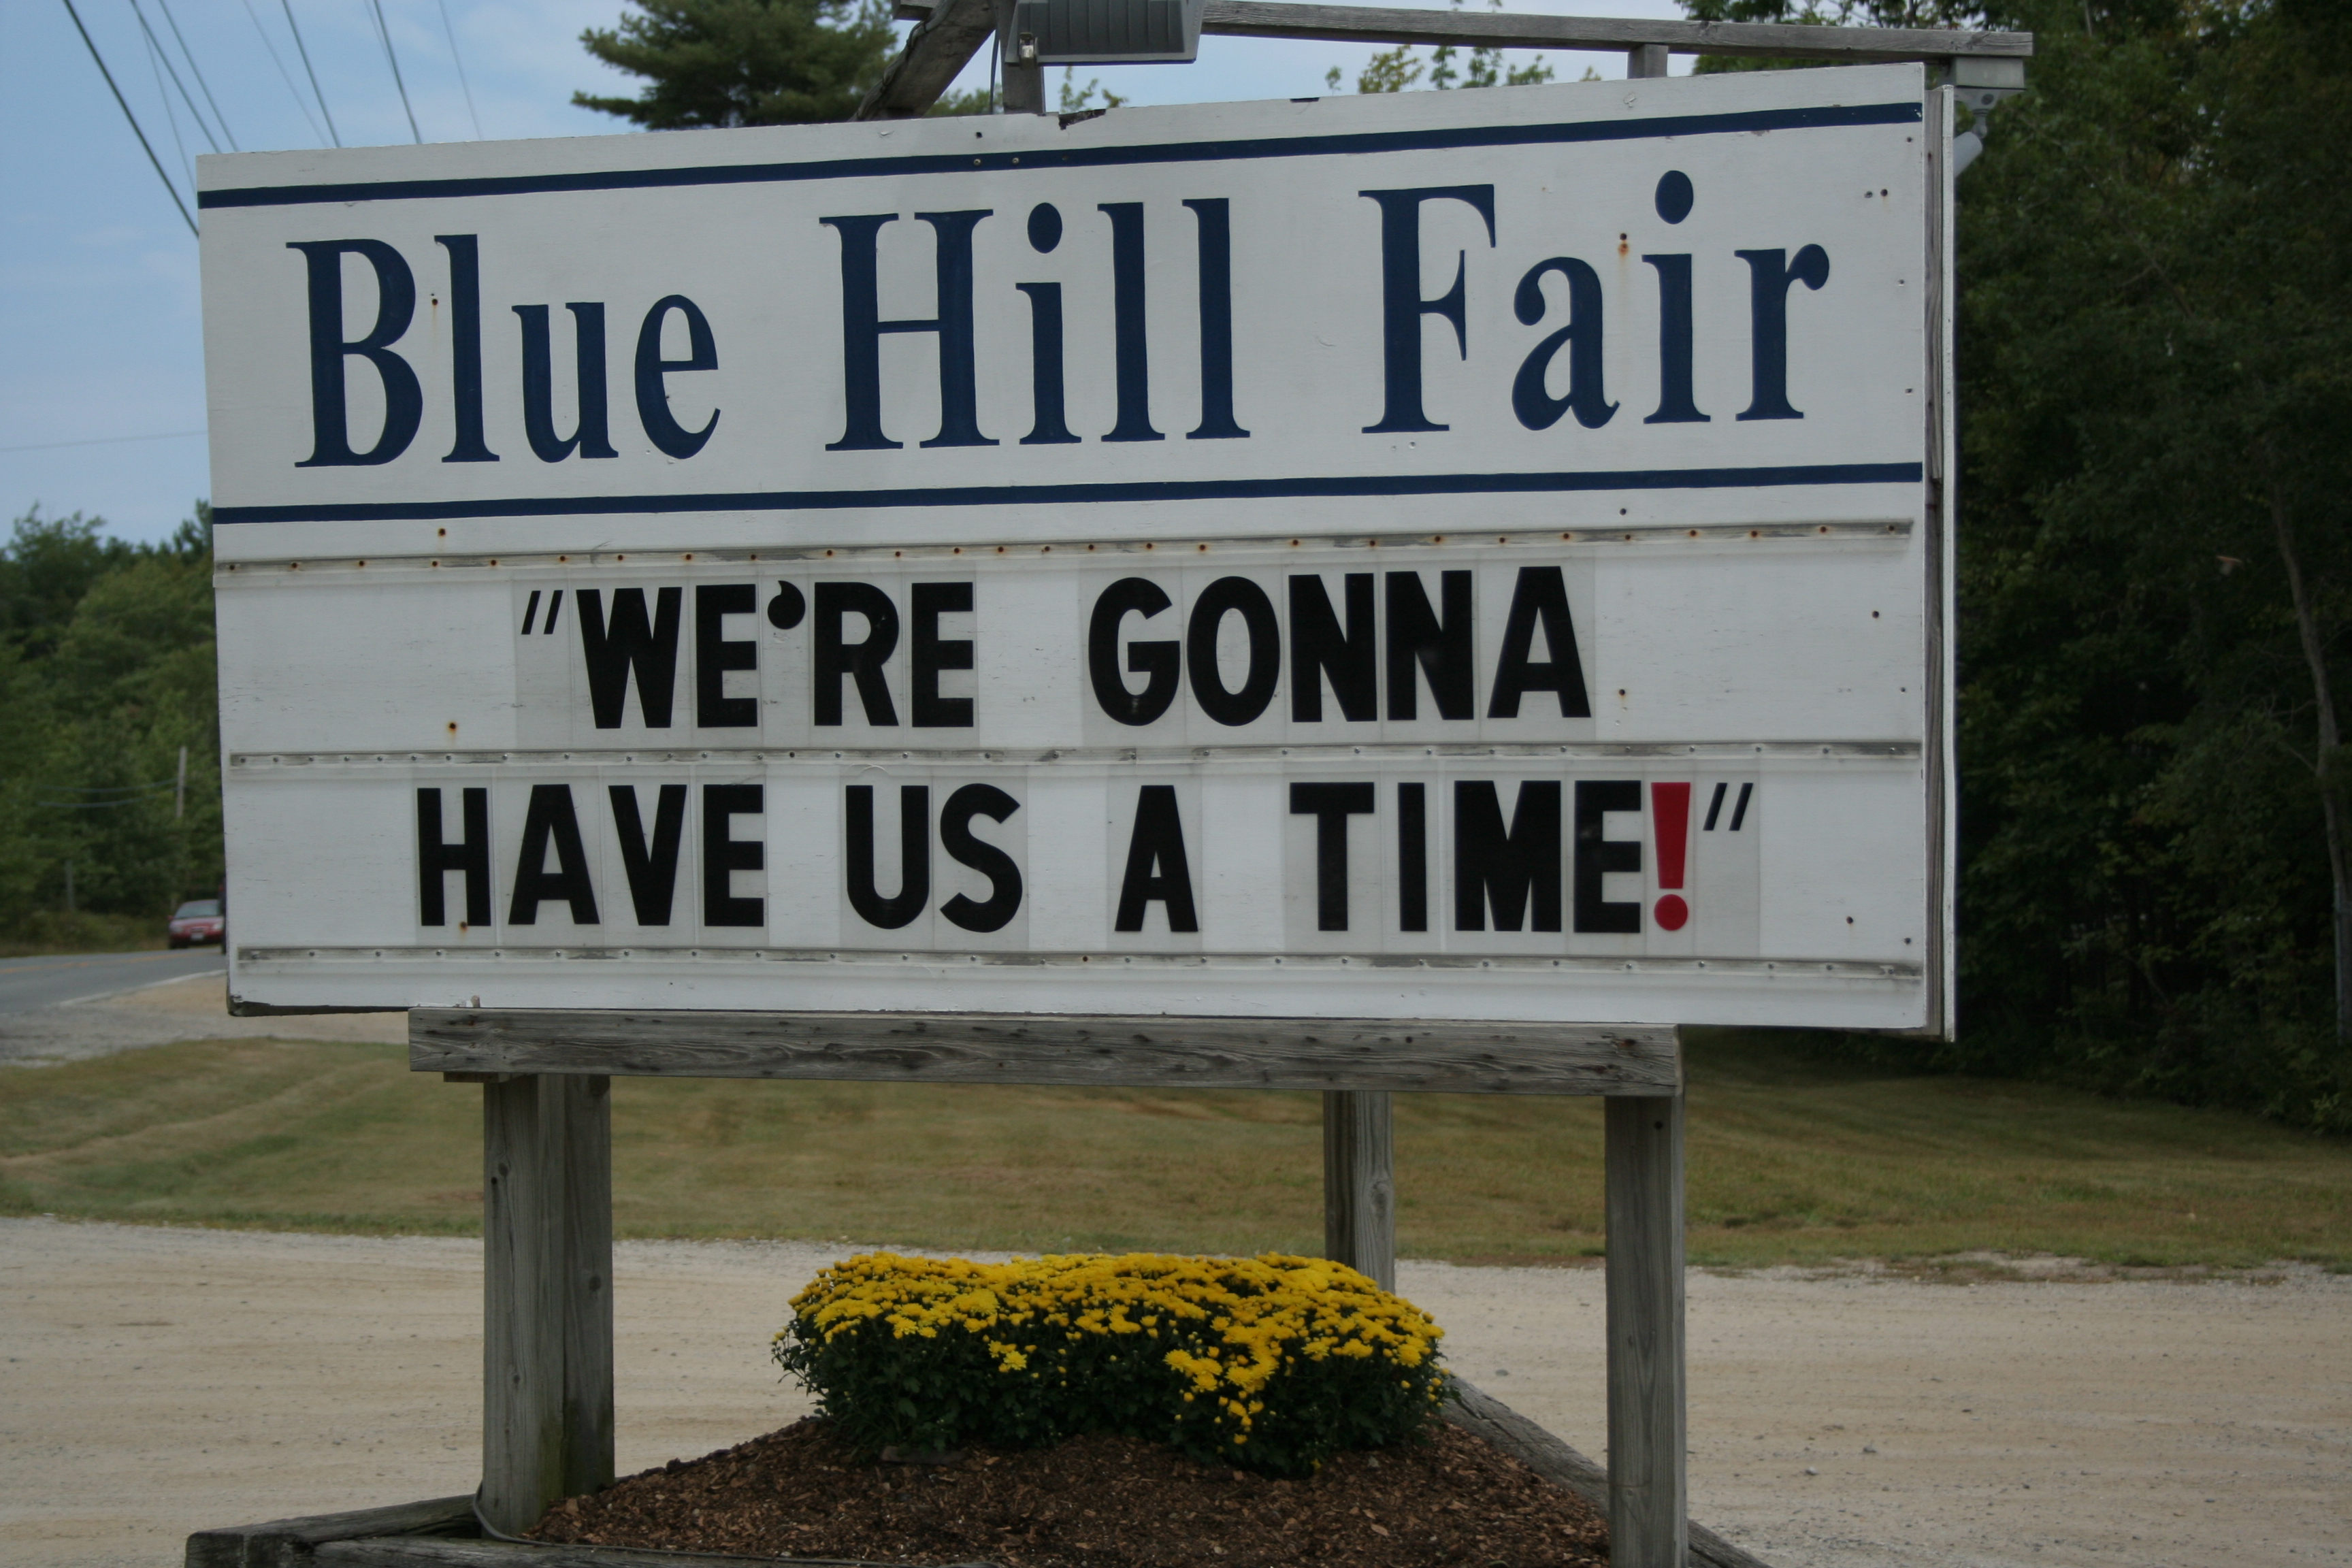
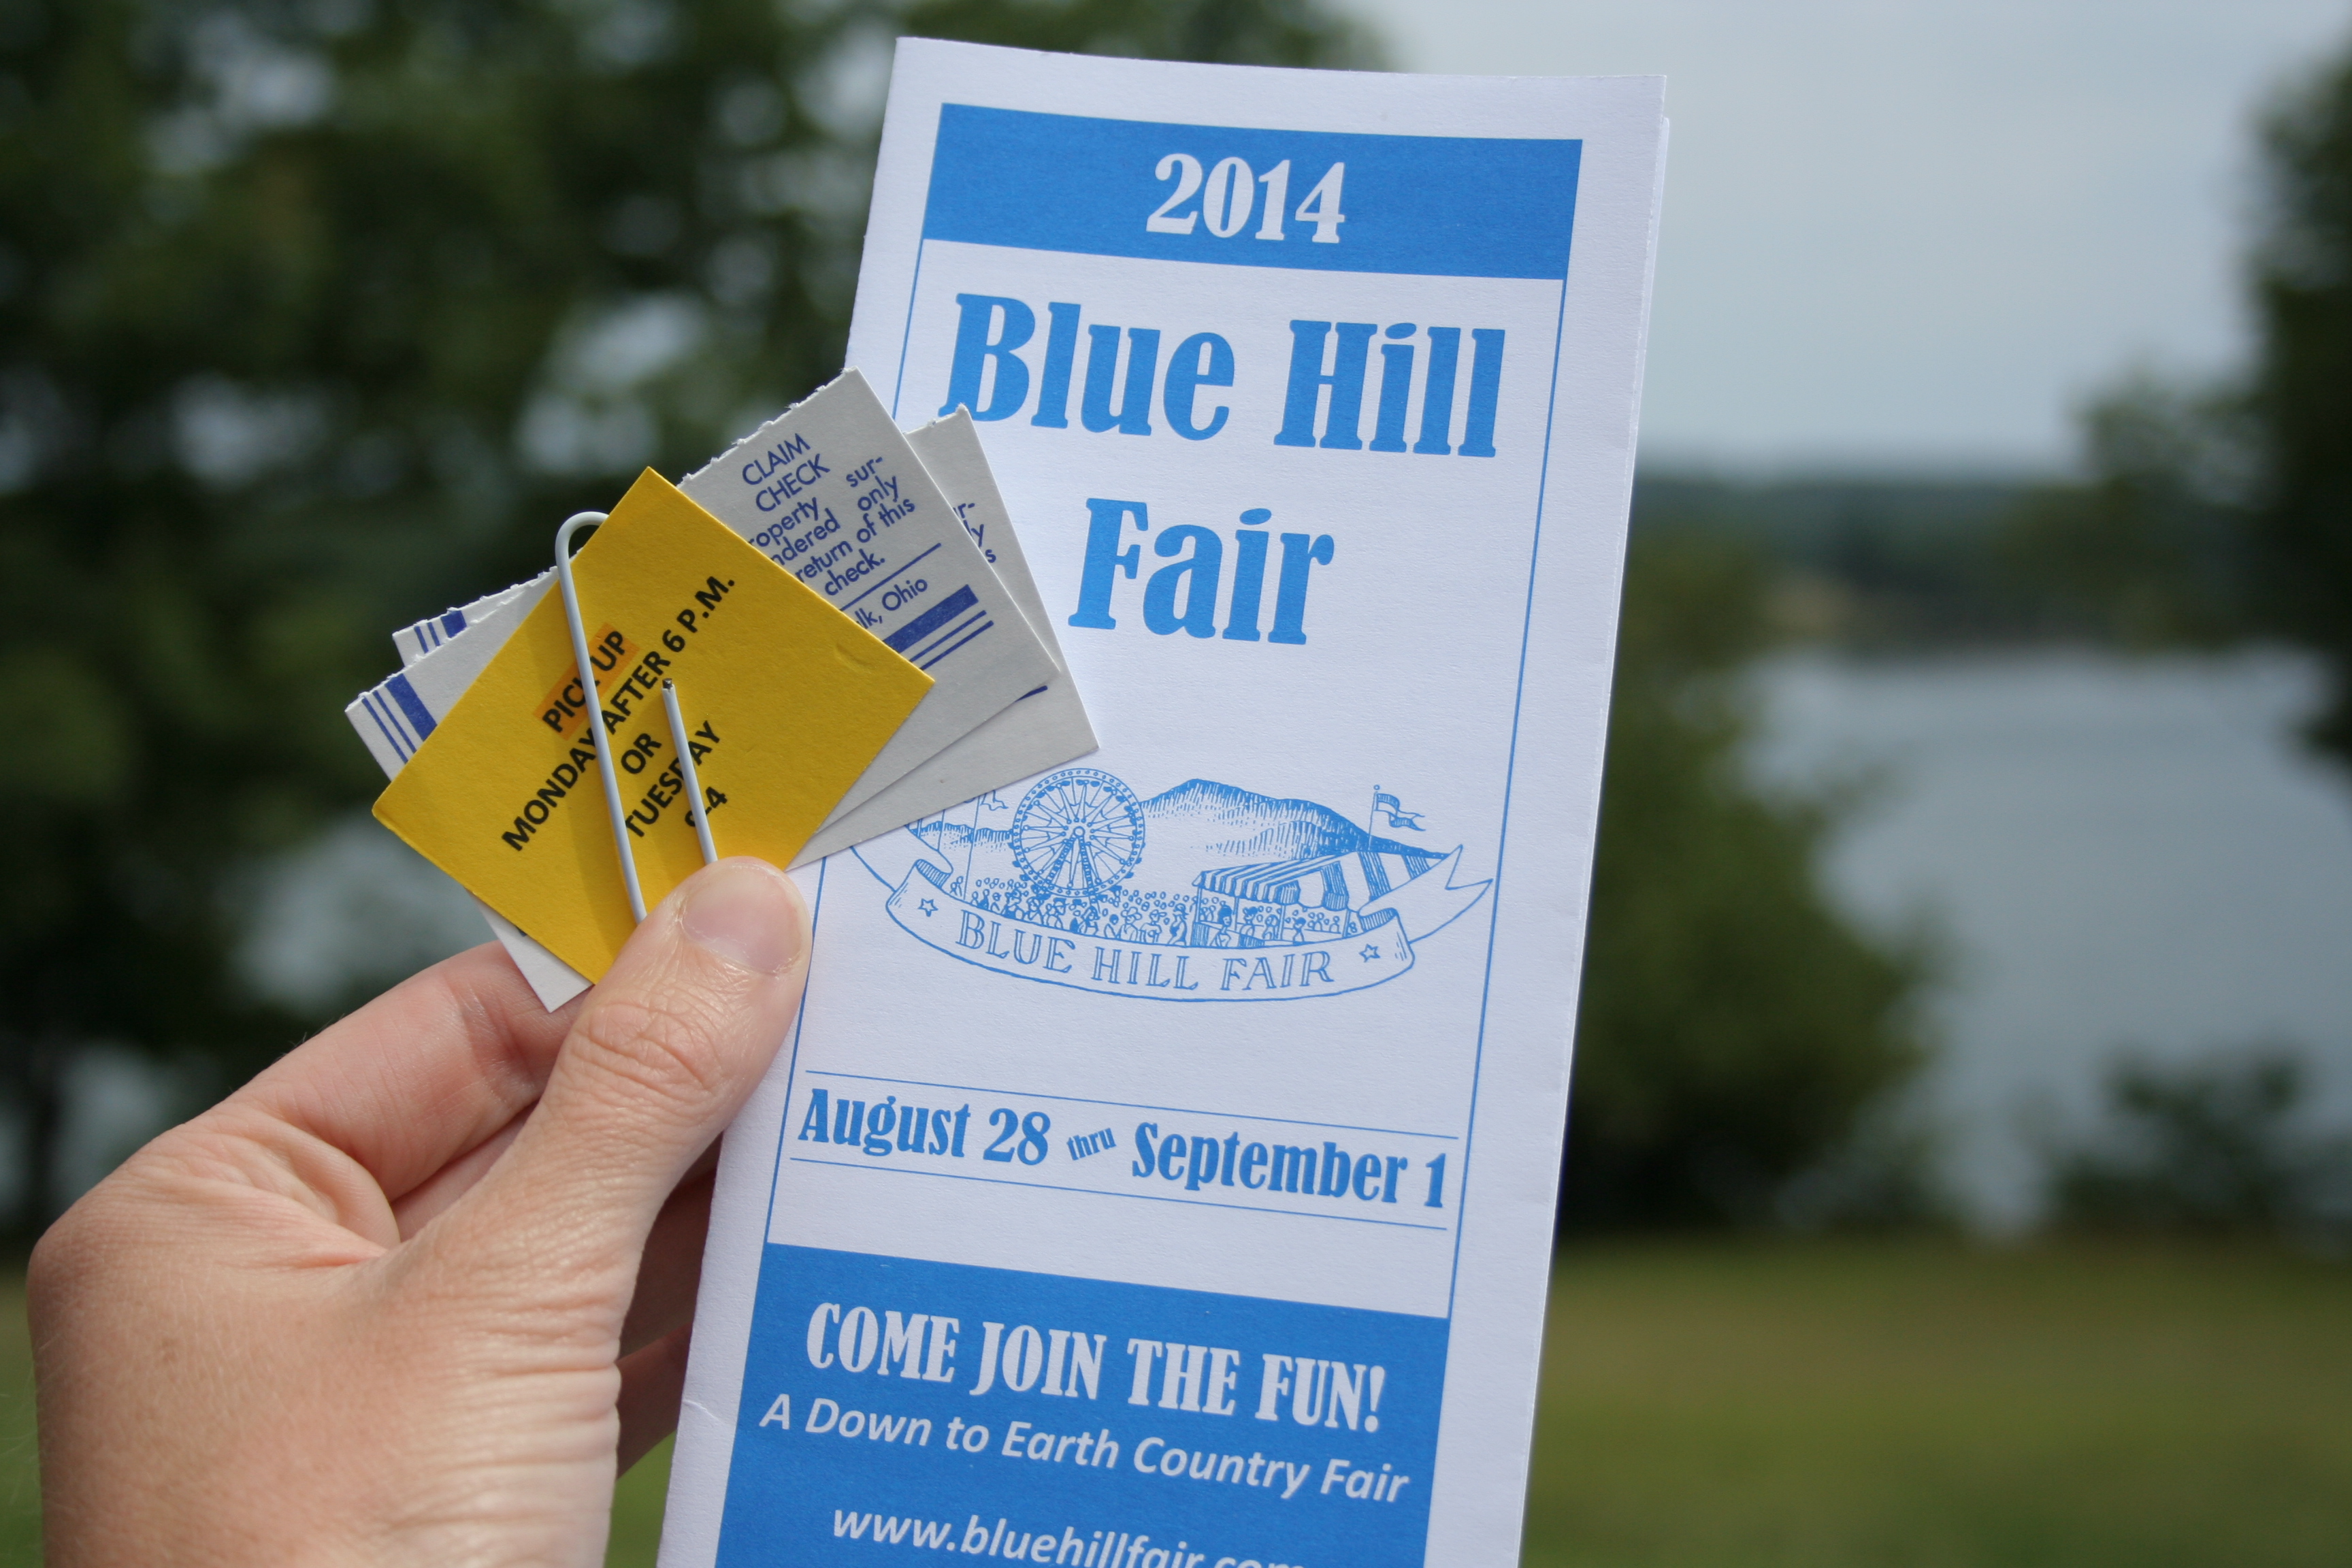
Yesterday I dropped two small, machine quilted wall-hangings at the Blue Hill Fair in Blue Hill, Maine. This is my first time ever showing anything at a fair, and will be the first public display of my quilts. I’m excited and nervous all at once!
Entering my quilts in the fair was surprisingly simple. The website simply said to bring the quilts to the fairgrounds on the Tuesday or Wednesday prior to the fair. I sought out a woman from my church who is very well versed in the local quilt scene and active in the local quilt guild last Sunday, and confirmed the simplicity in entering quilts in the fair. I was worried about getting the quilts ready to hang or display and she gave me a priceless tip: they don’t need to have a hanging sleeve or dowel since they will typically display quilts with clips. That saved me a good hour of hand-stitching!
It took only about five minutes to hand my quilts over and give them the necessary information. It almost seemed too easy, but I suppose when they have hundreds of people entering all sorts of handcrafted everything, efficiency is key.
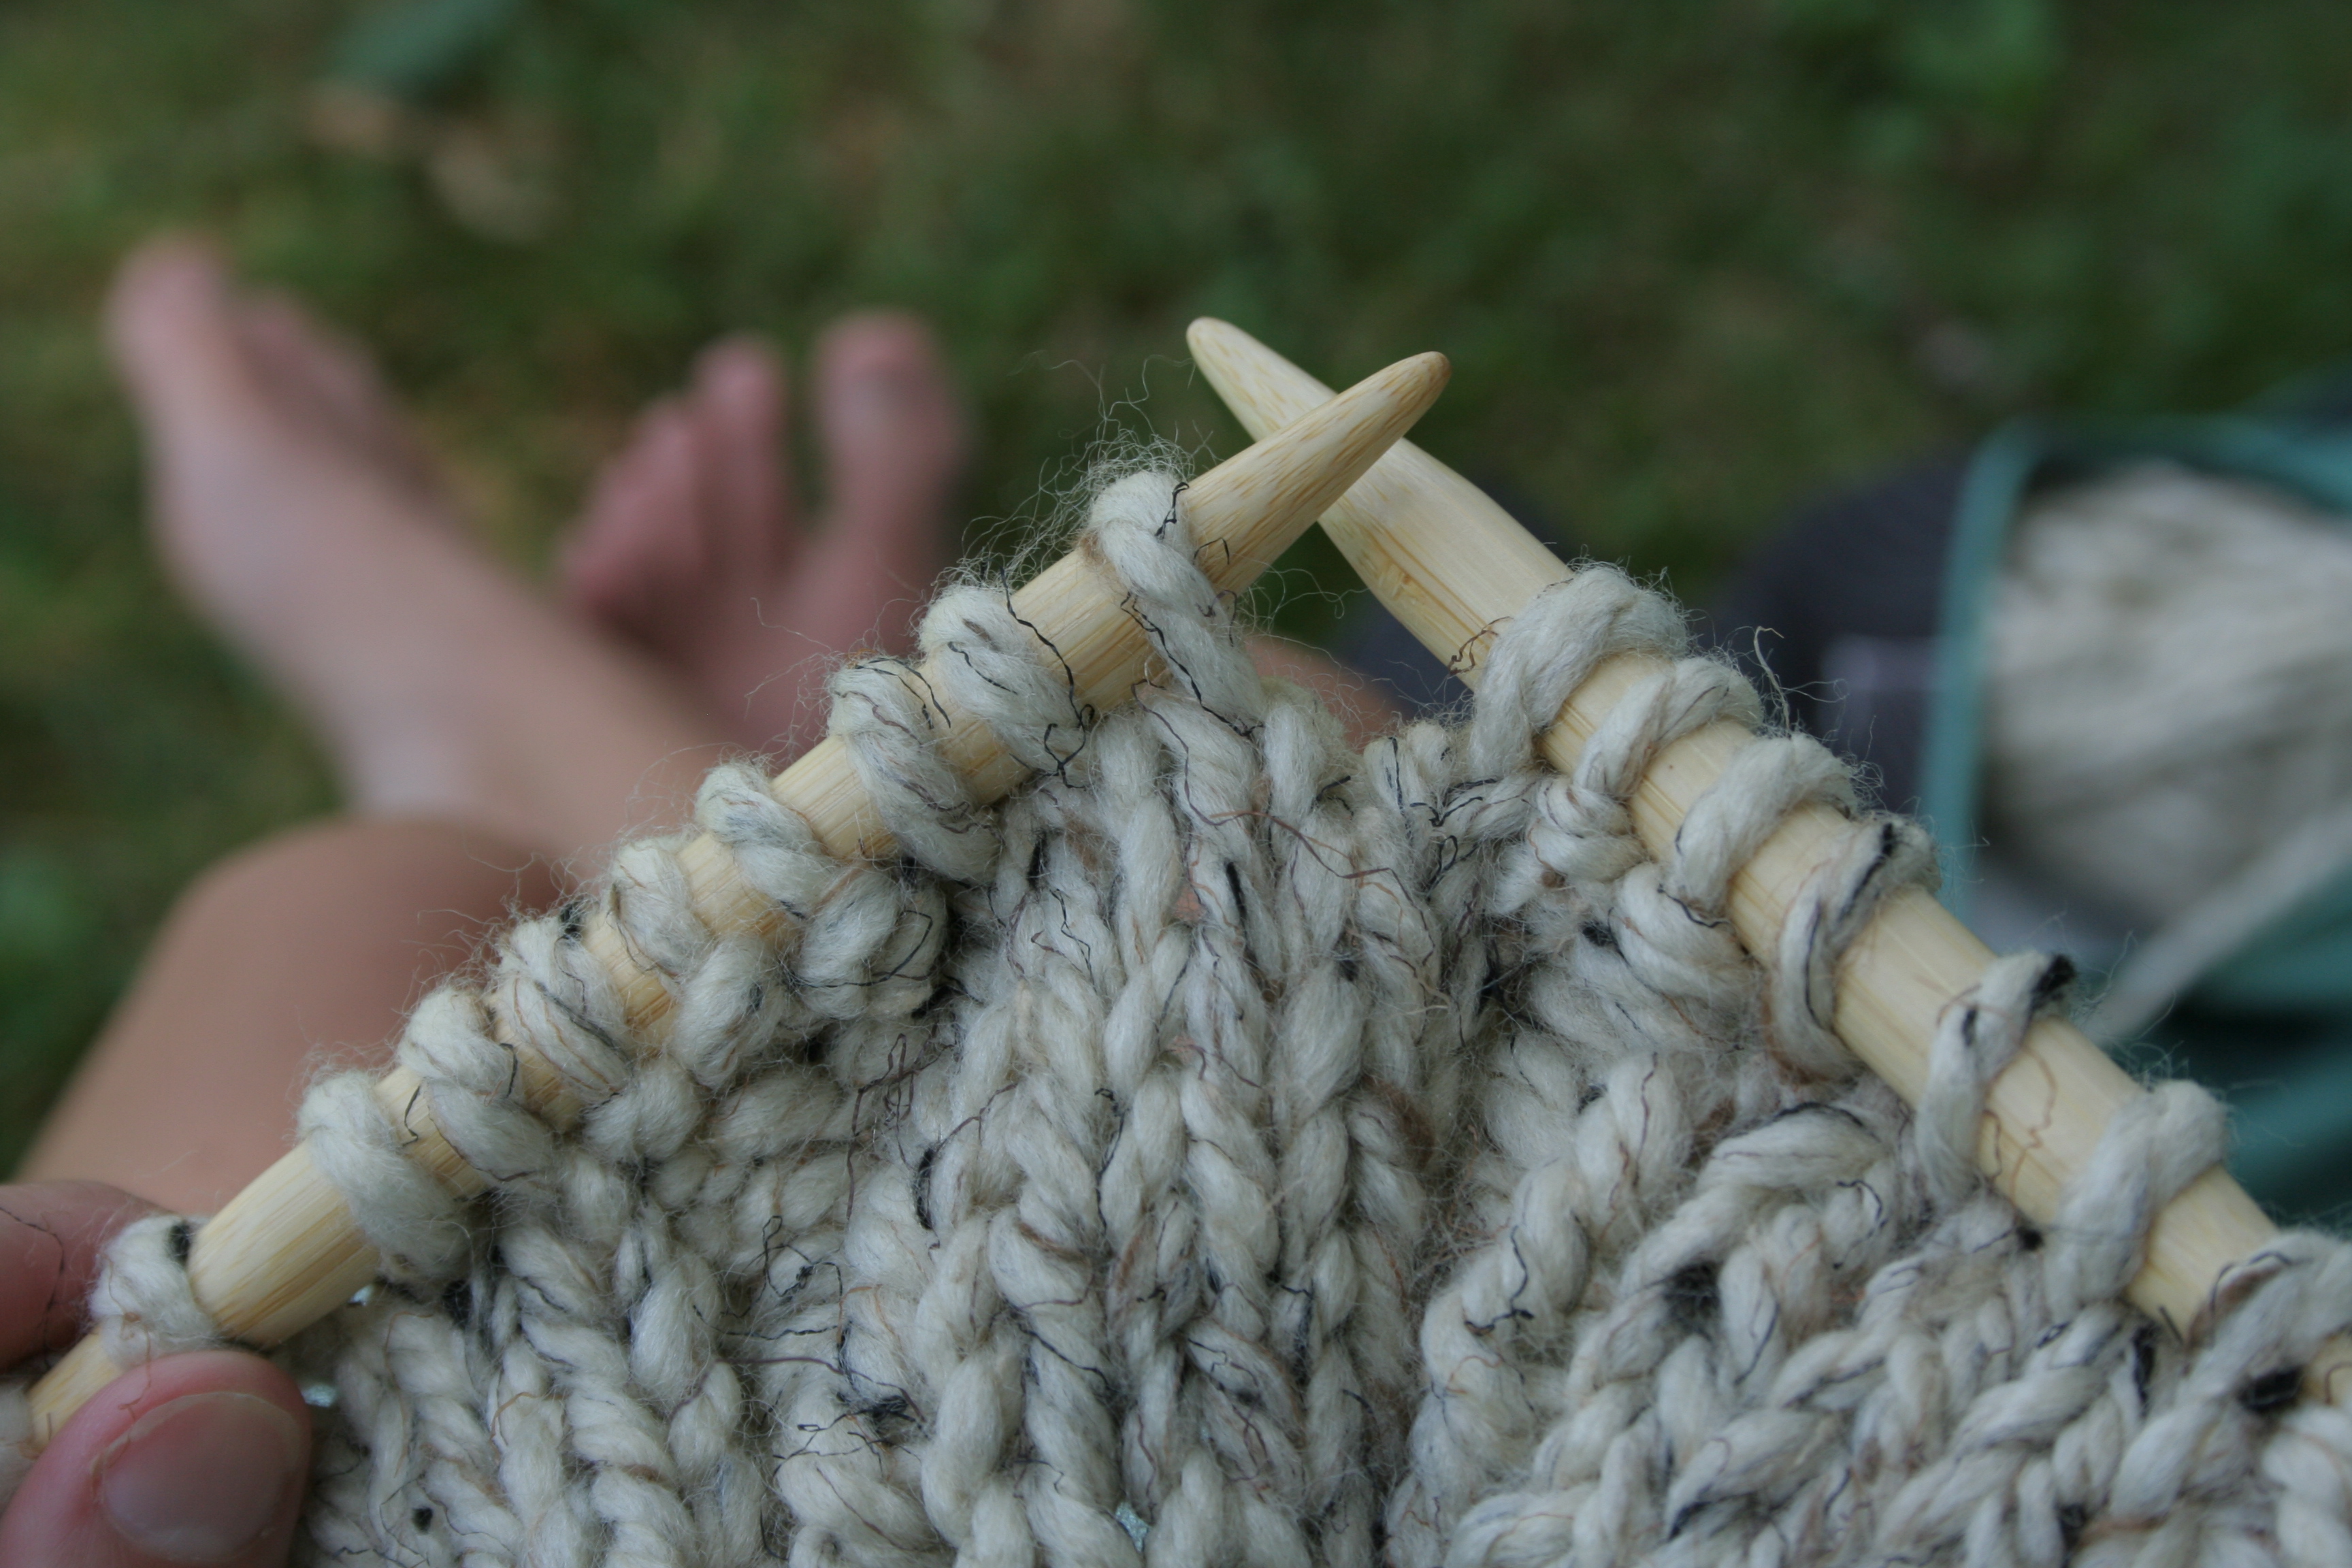
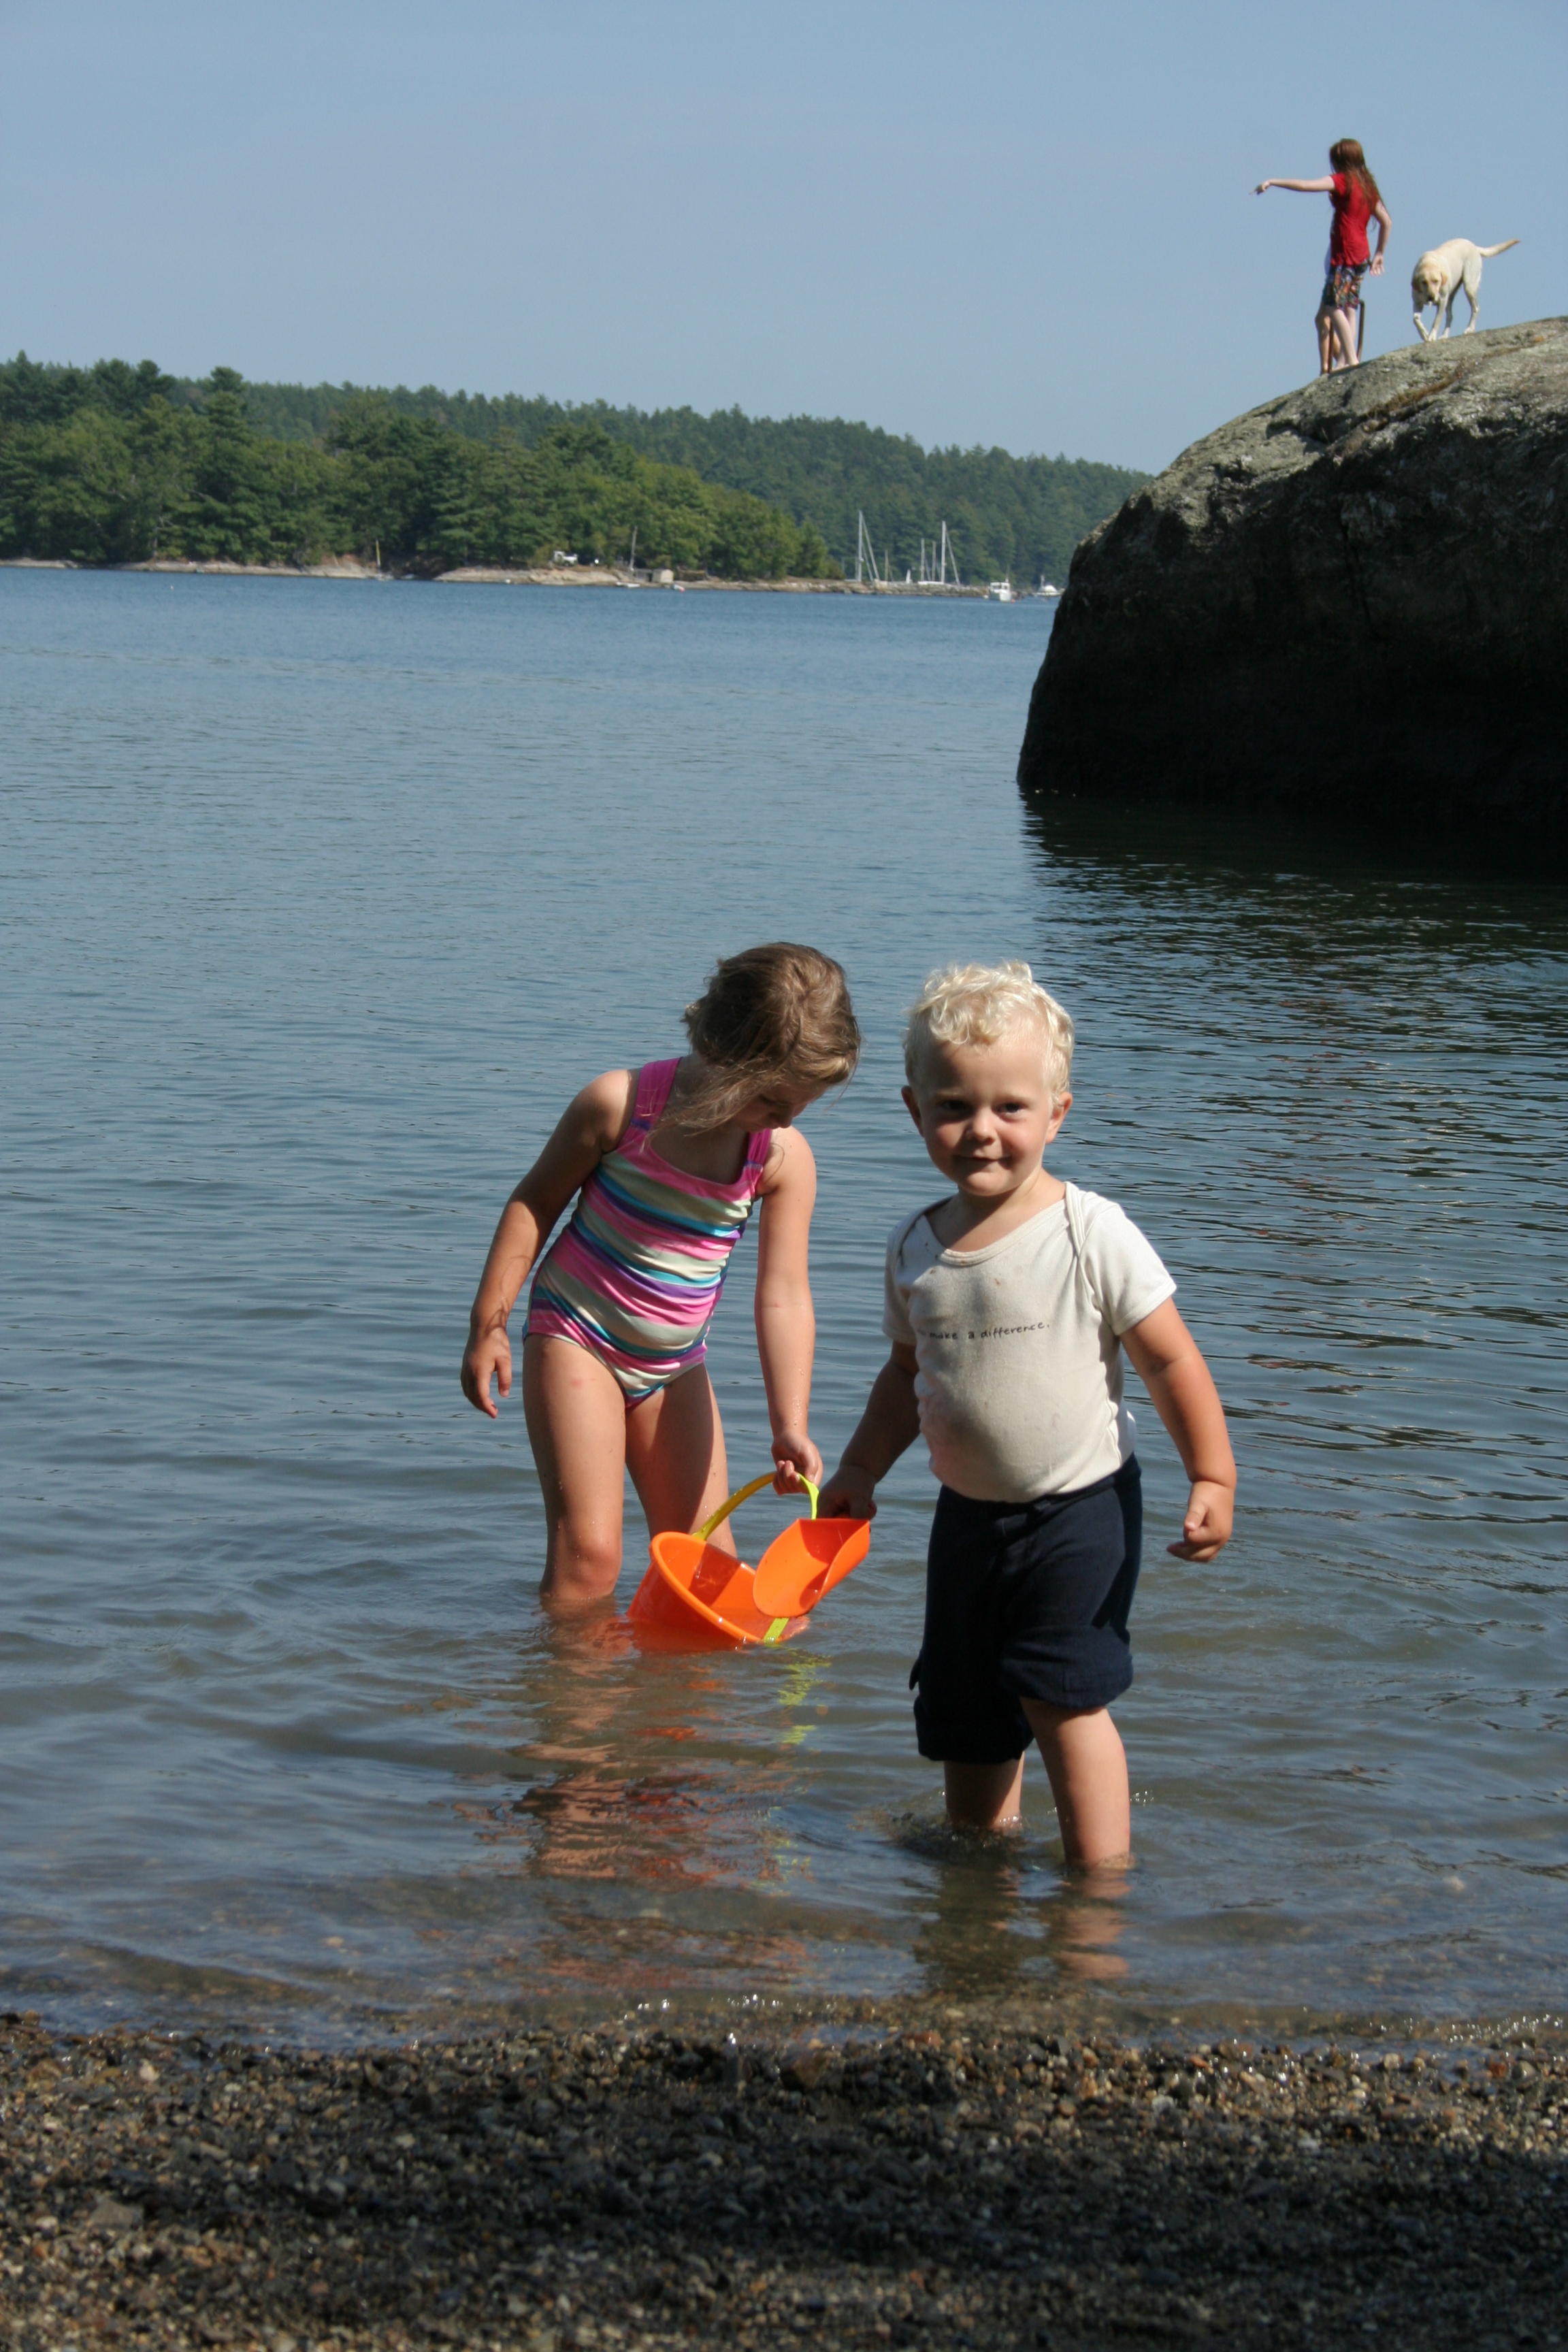
I went with my mother-in-law and aunt, since 1) they had been to the fair before and knew generally where the quilt display building was, and 2) it was about 45 minutes away so we decided to make a day of it with the kids at the local park and beach. After submitting my quilts, we headed to Blue Hill Park for a picnic, and then the kids played on the playground while I got some rare mommy time. I sat in the shade and worked on the knitted Katniss cowl I’m making in exchange for a logo design, enjoying the cool breeze and the gorgeous view of the harbor.
My gorgeous view of Blue Hill Harbor.Swimming in the harbor at Blue Hill Park.
This morning I read a post by Yvonne from Quilting Jetgirl about her experience entering quilts in her local fair, and now I’m even more excited. I didn’t realize that judges actually filled out a score card and left comments about your entered quilts. The Blue Hill Fair begins this evening and runs through Monday, September 1st, and I think my family will be going this evening. I will be sure to take photos of my quilts on display, and I’m eager to see the other quilts, too!
As for what quilts I entered, you will just have to wait and see, since I didn’t get good photographs before drop-off.
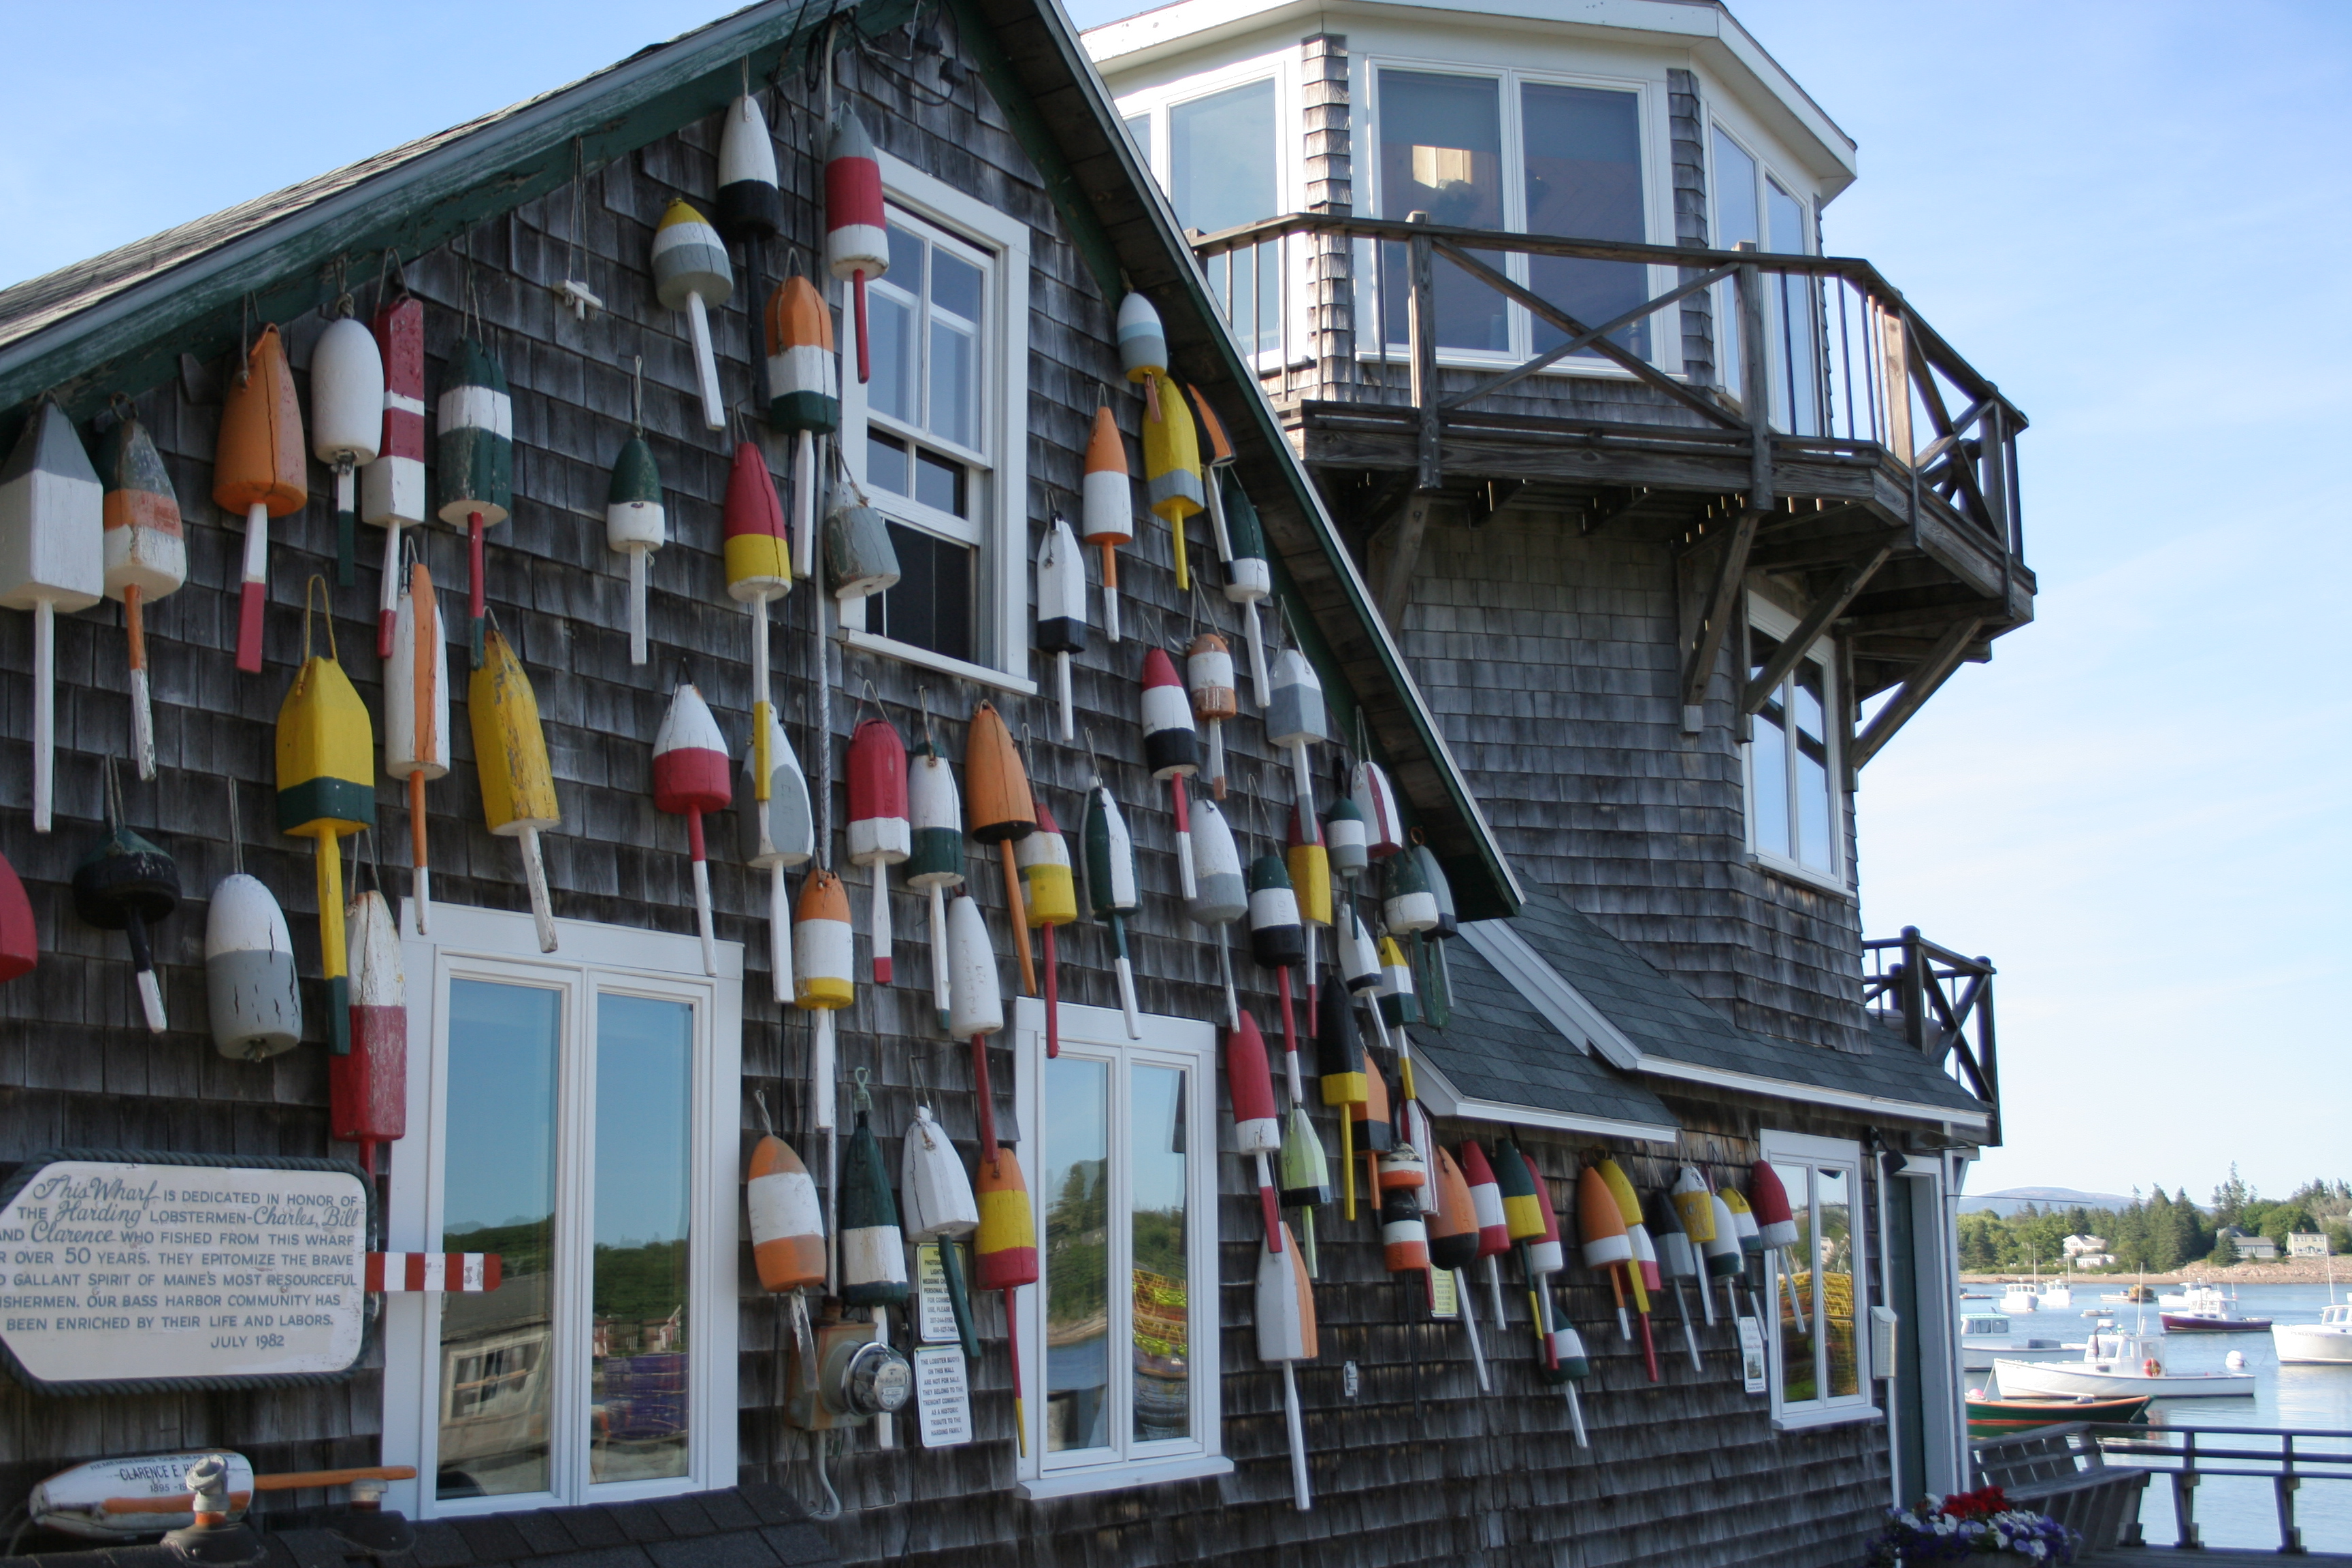
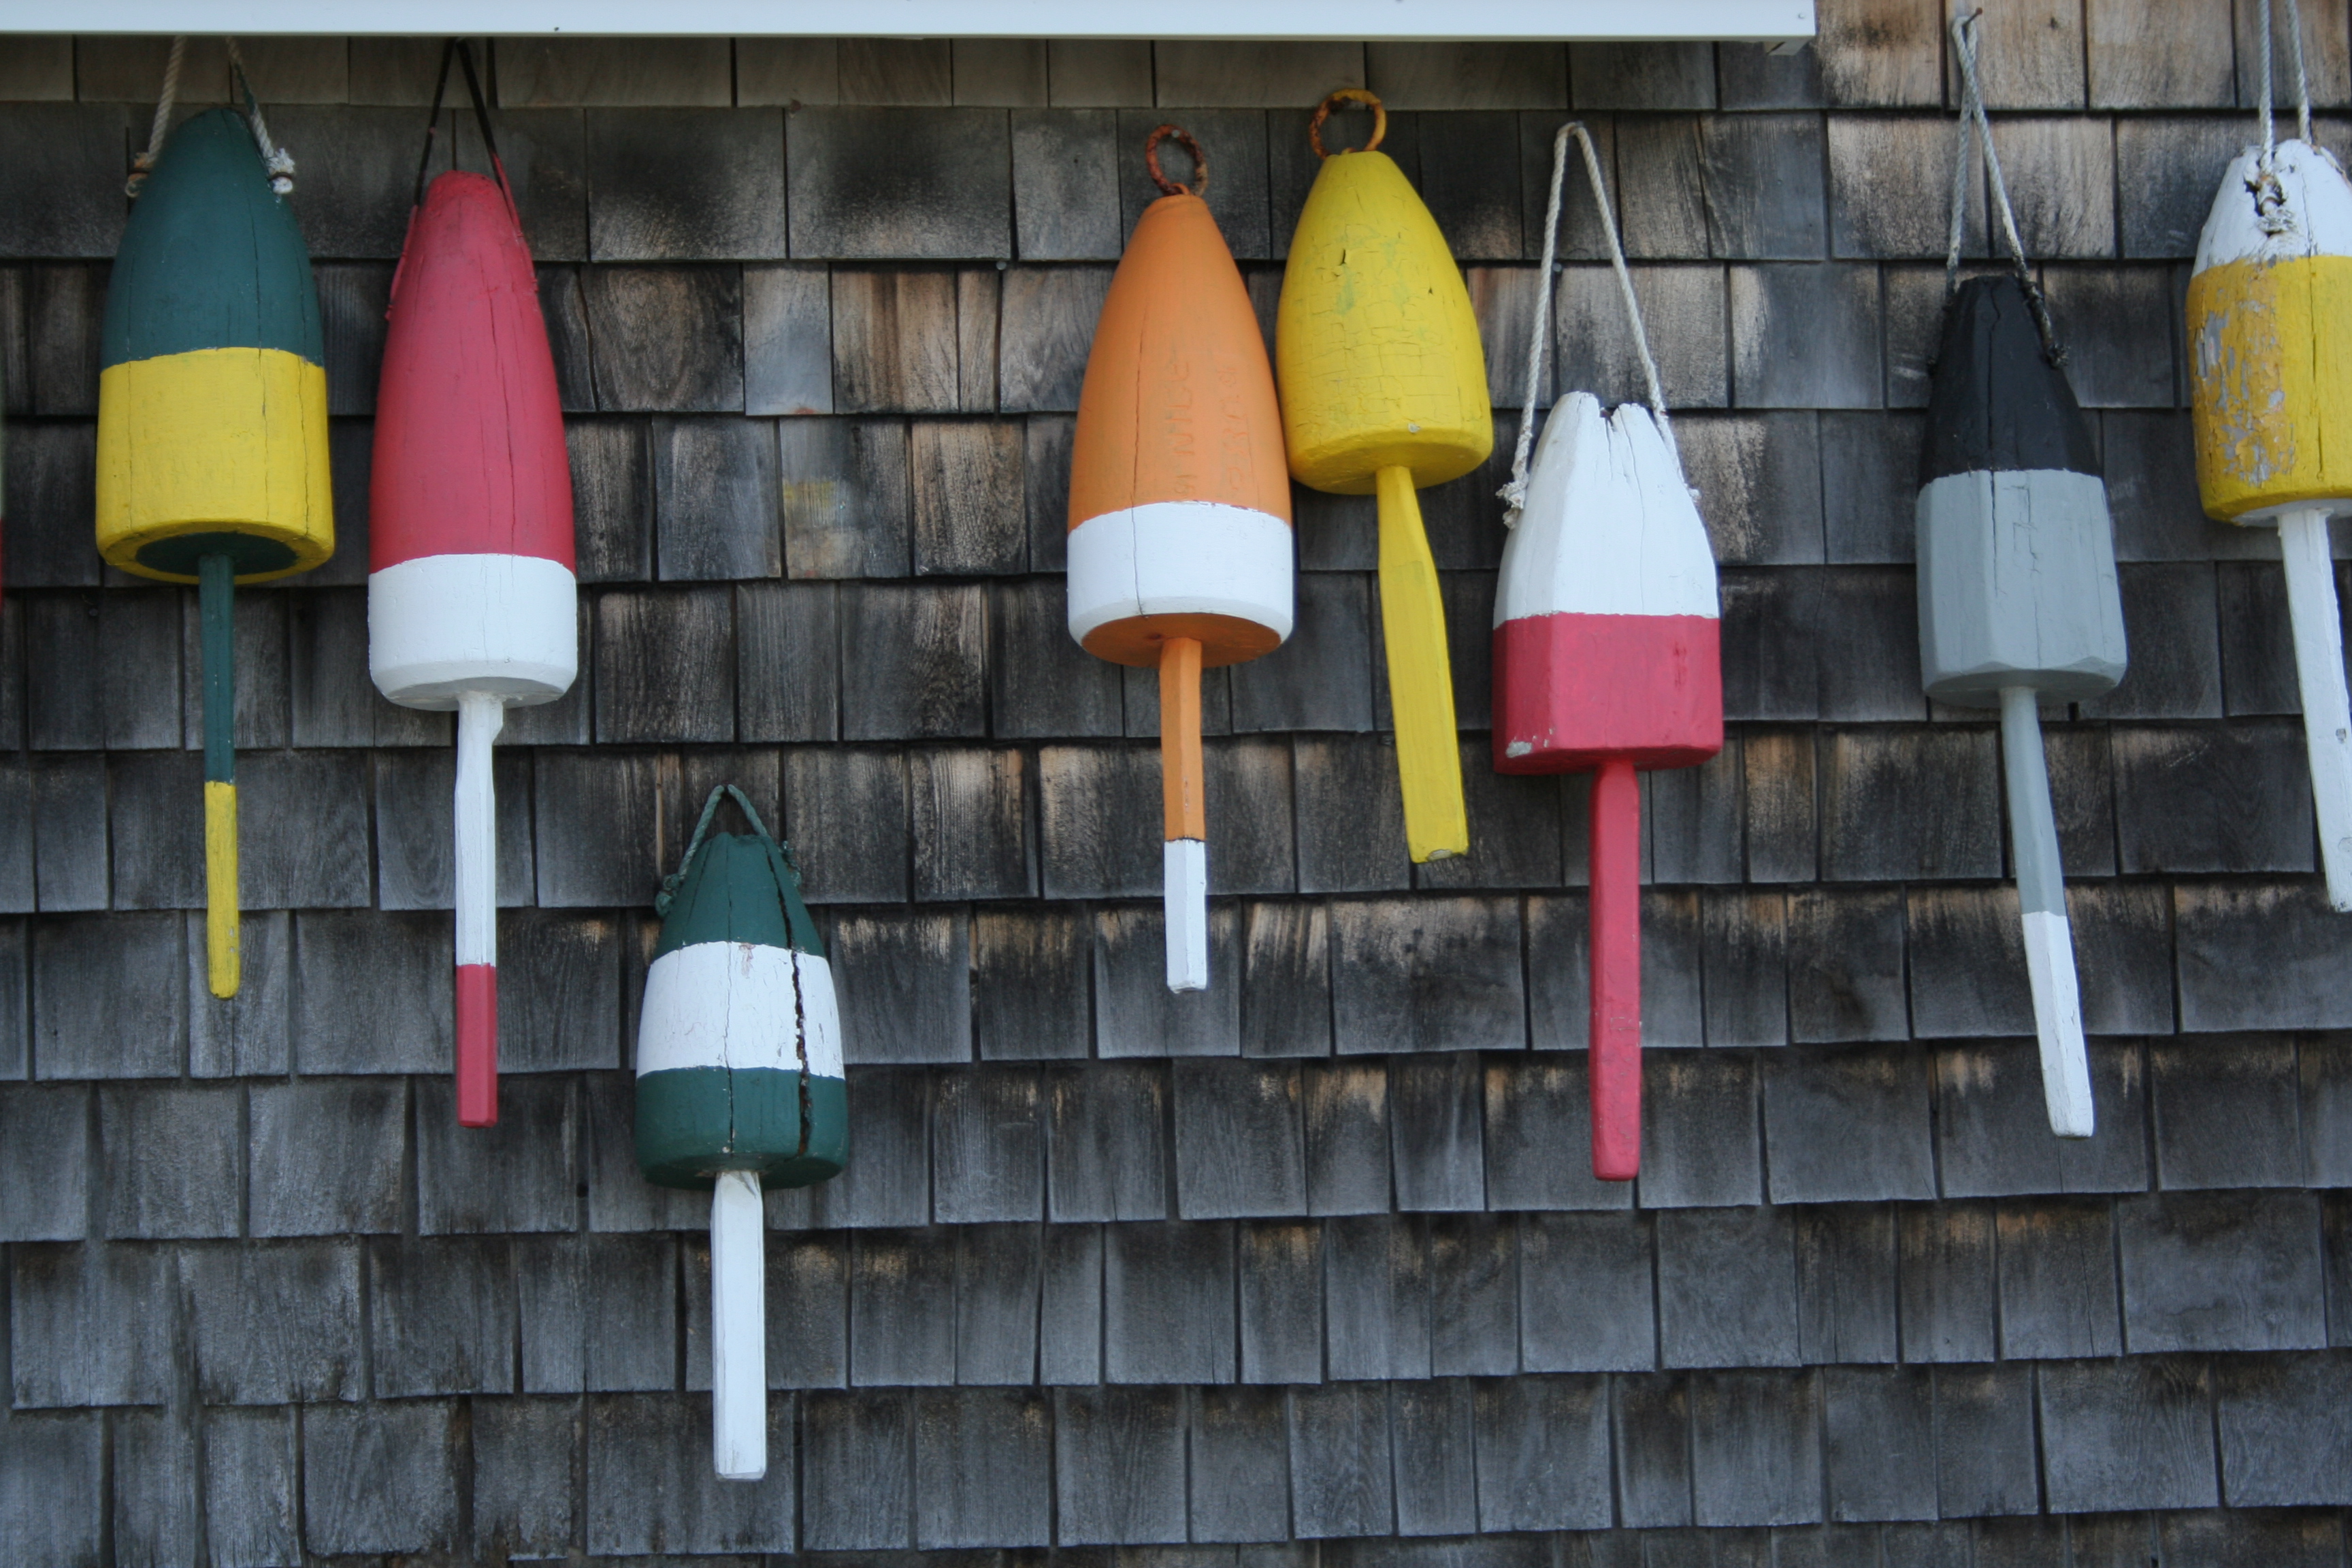
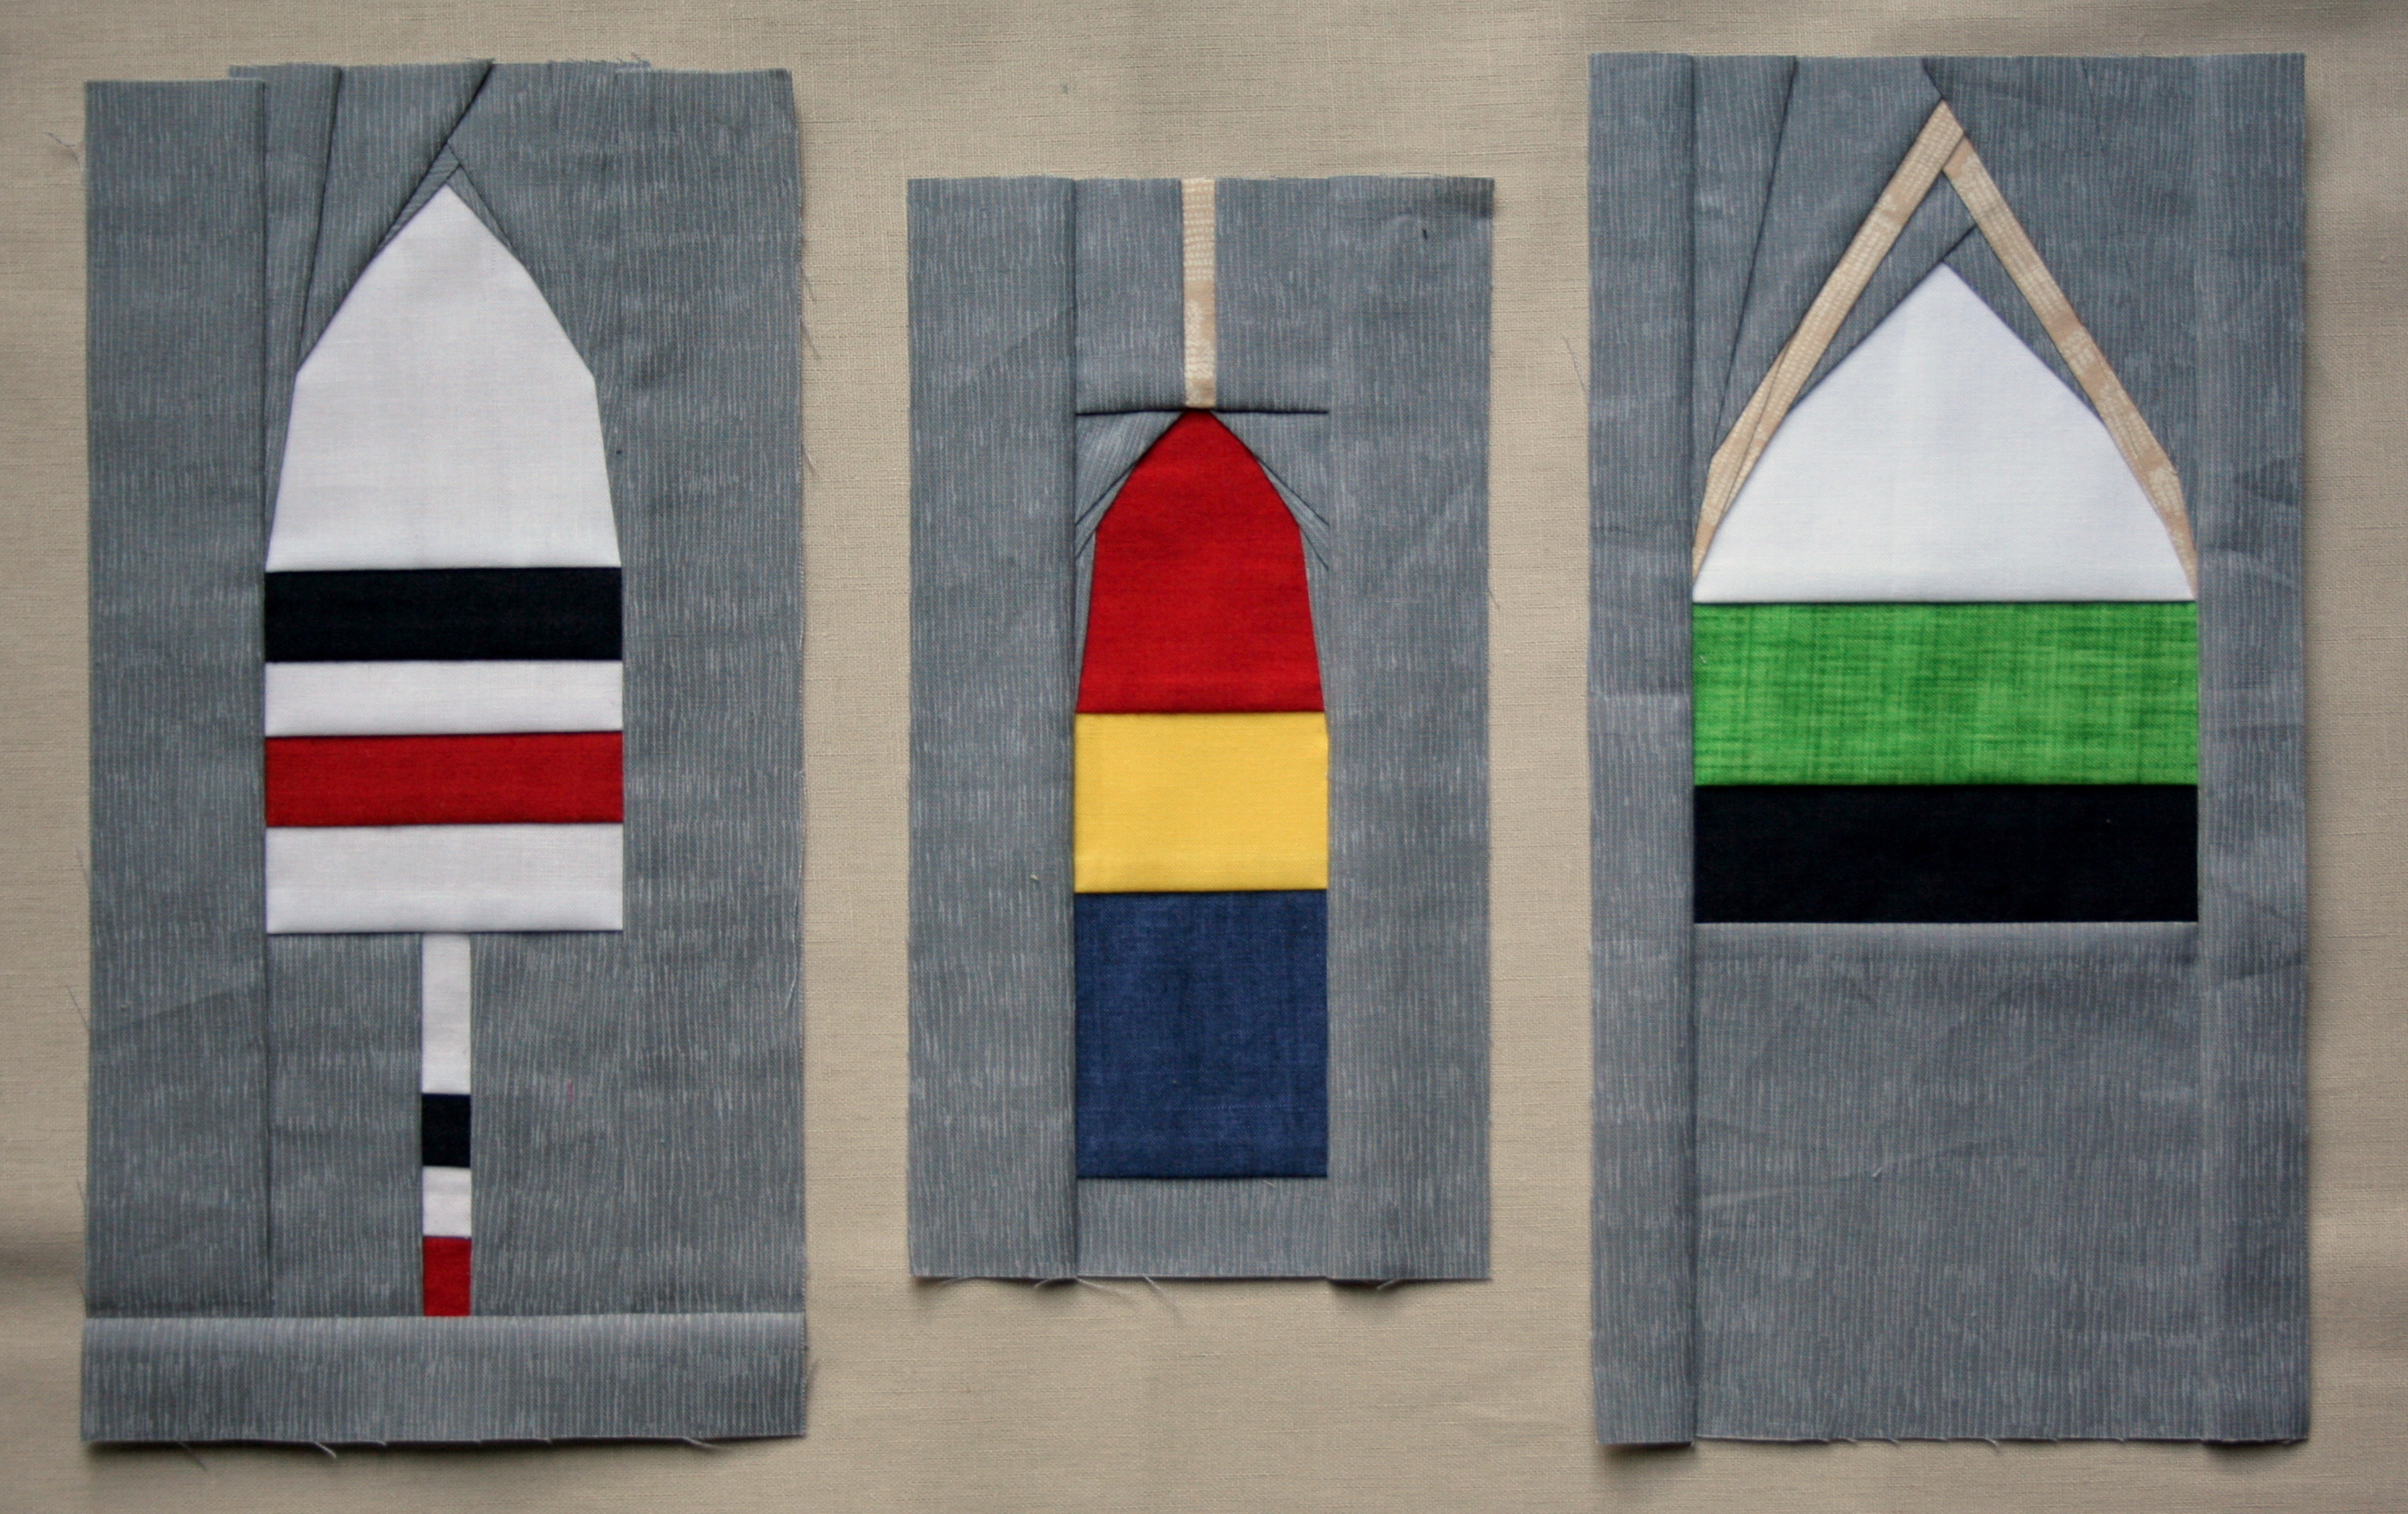
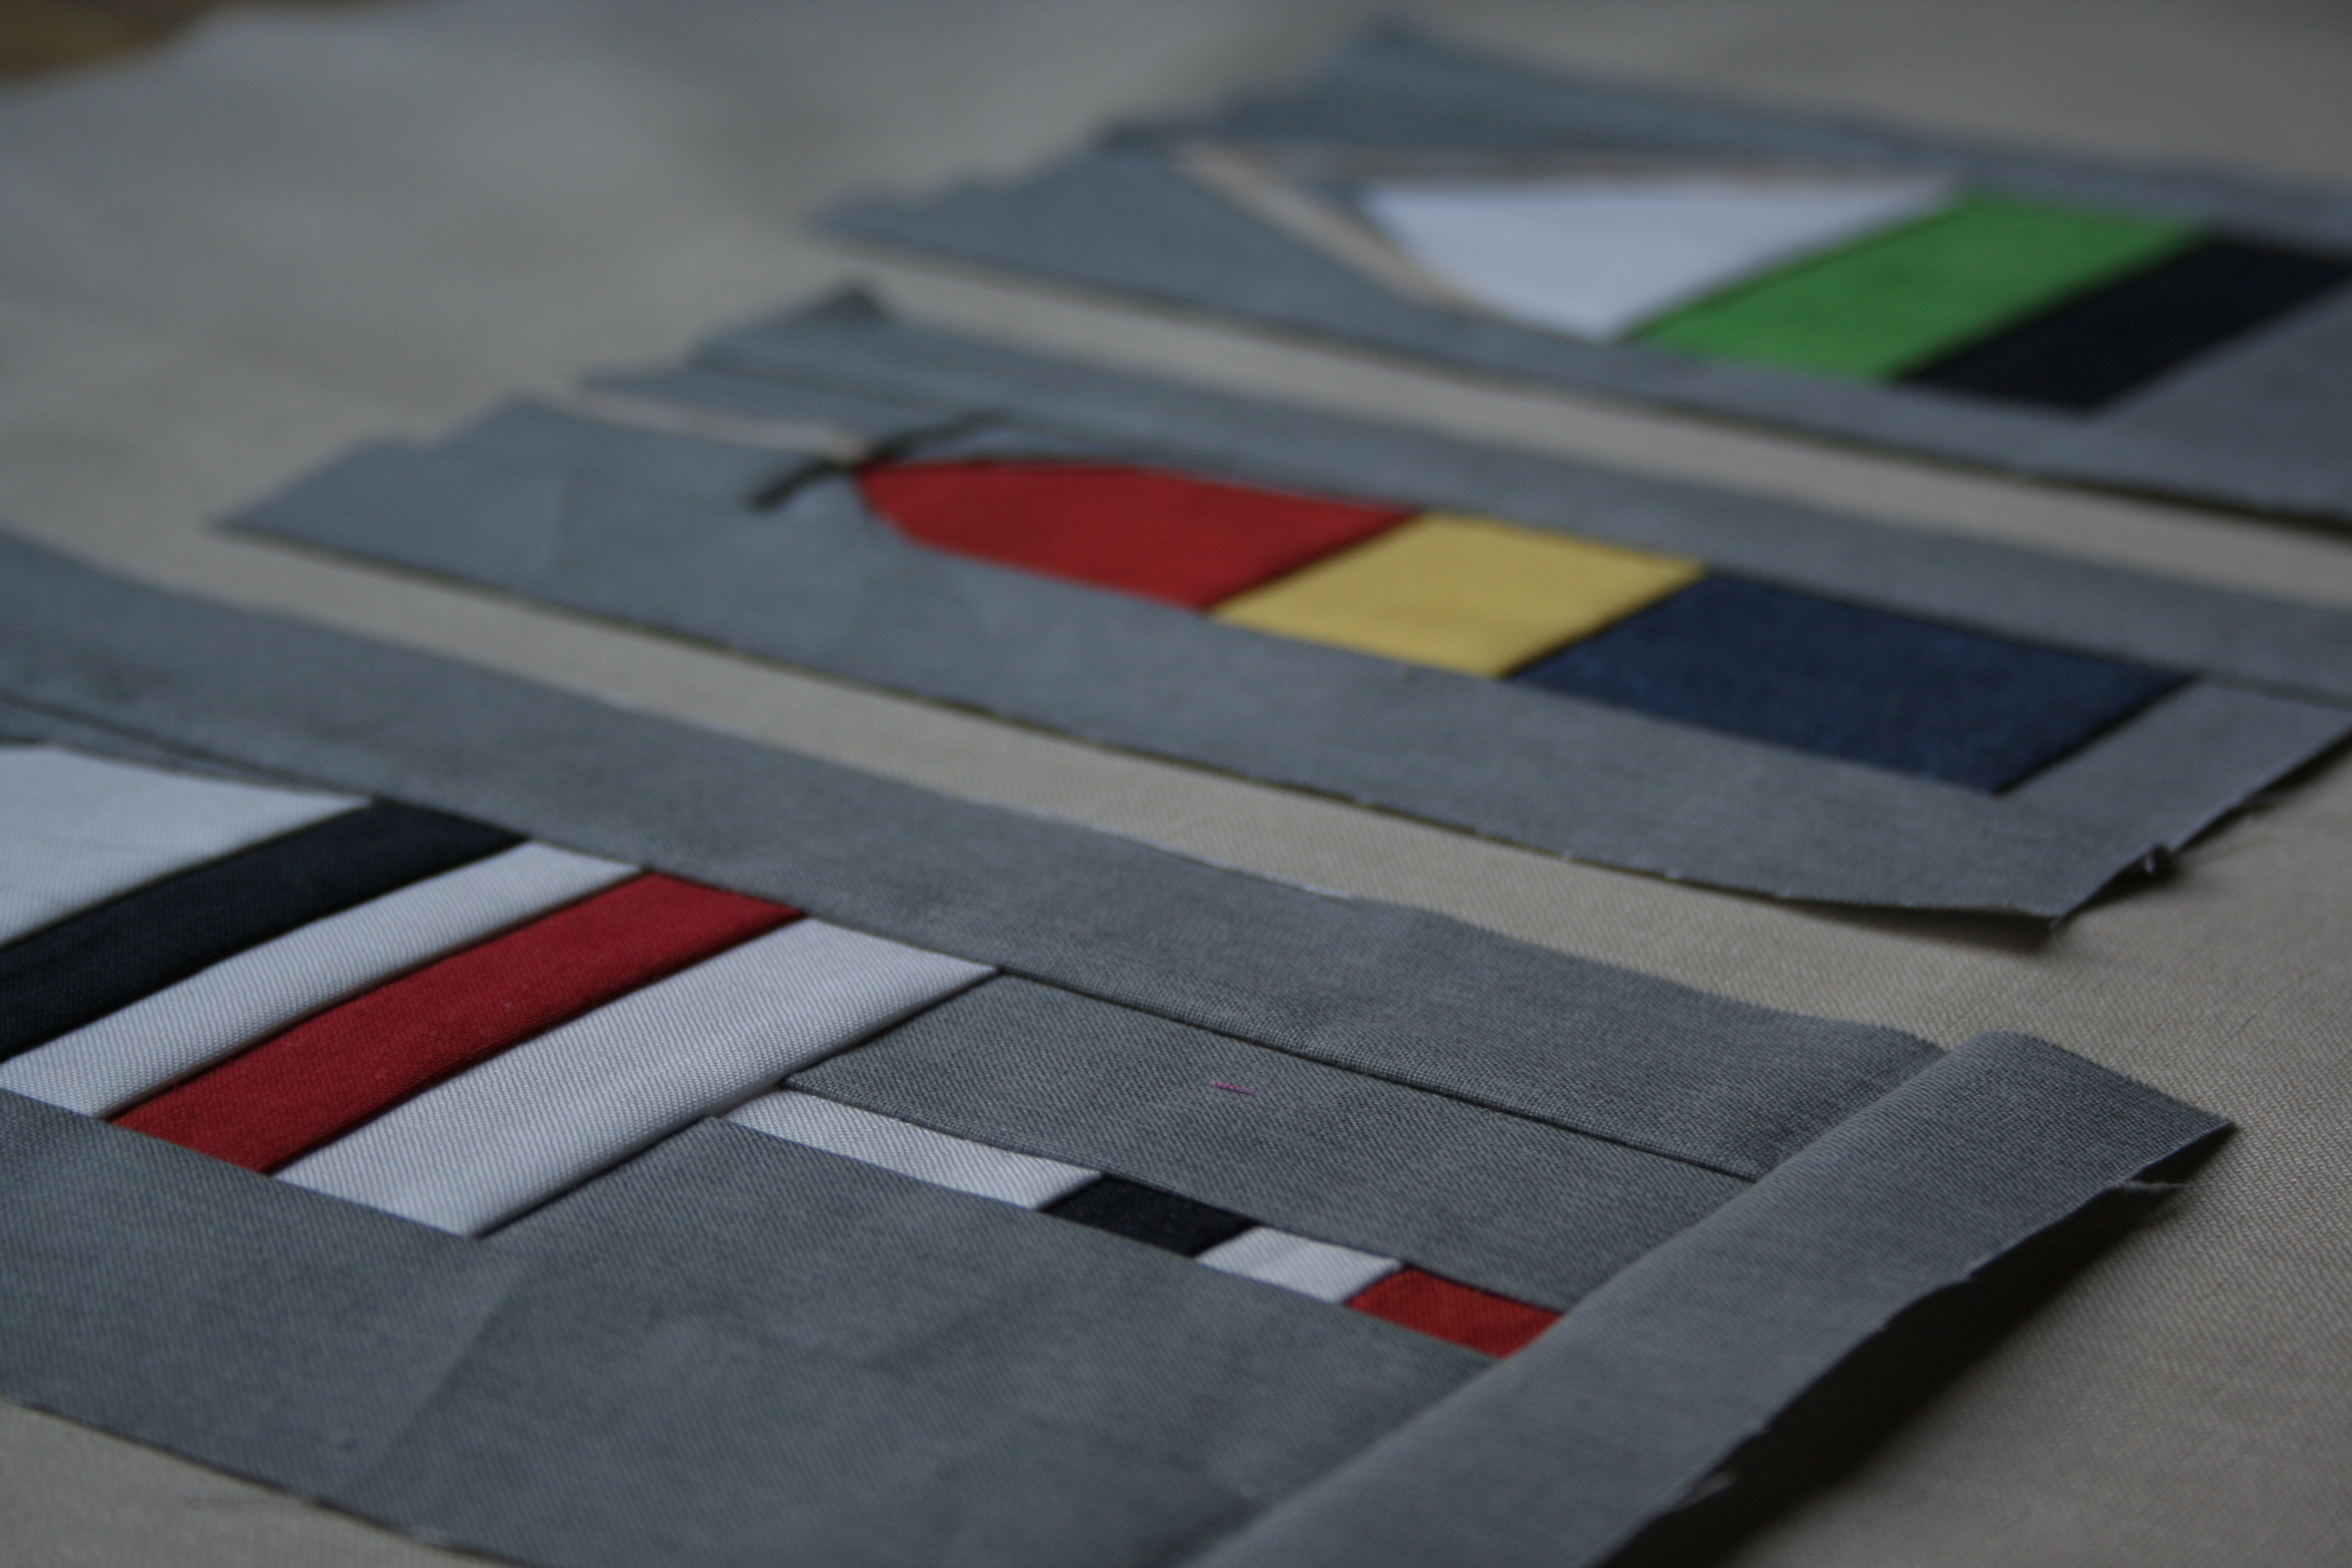
On the coast of Maine, lobster buoys freckle the harbors and are often seen hanging on the sides of buildings, sheds, boat houses, and even near mailboxes further inland. Many of my patterns are inspired by the Maine coast, and my latest works in progress are certainly not exceptions. I’ve finally completed and posted all three of my buoy foundation paper piecing patterns in my Craftsy store.
Lobster buoys come in all shapes and sizes, and definitely many different colors. I tried to create patterns for at least the three most commonly seen shapes, and I am happy with how they turned out.
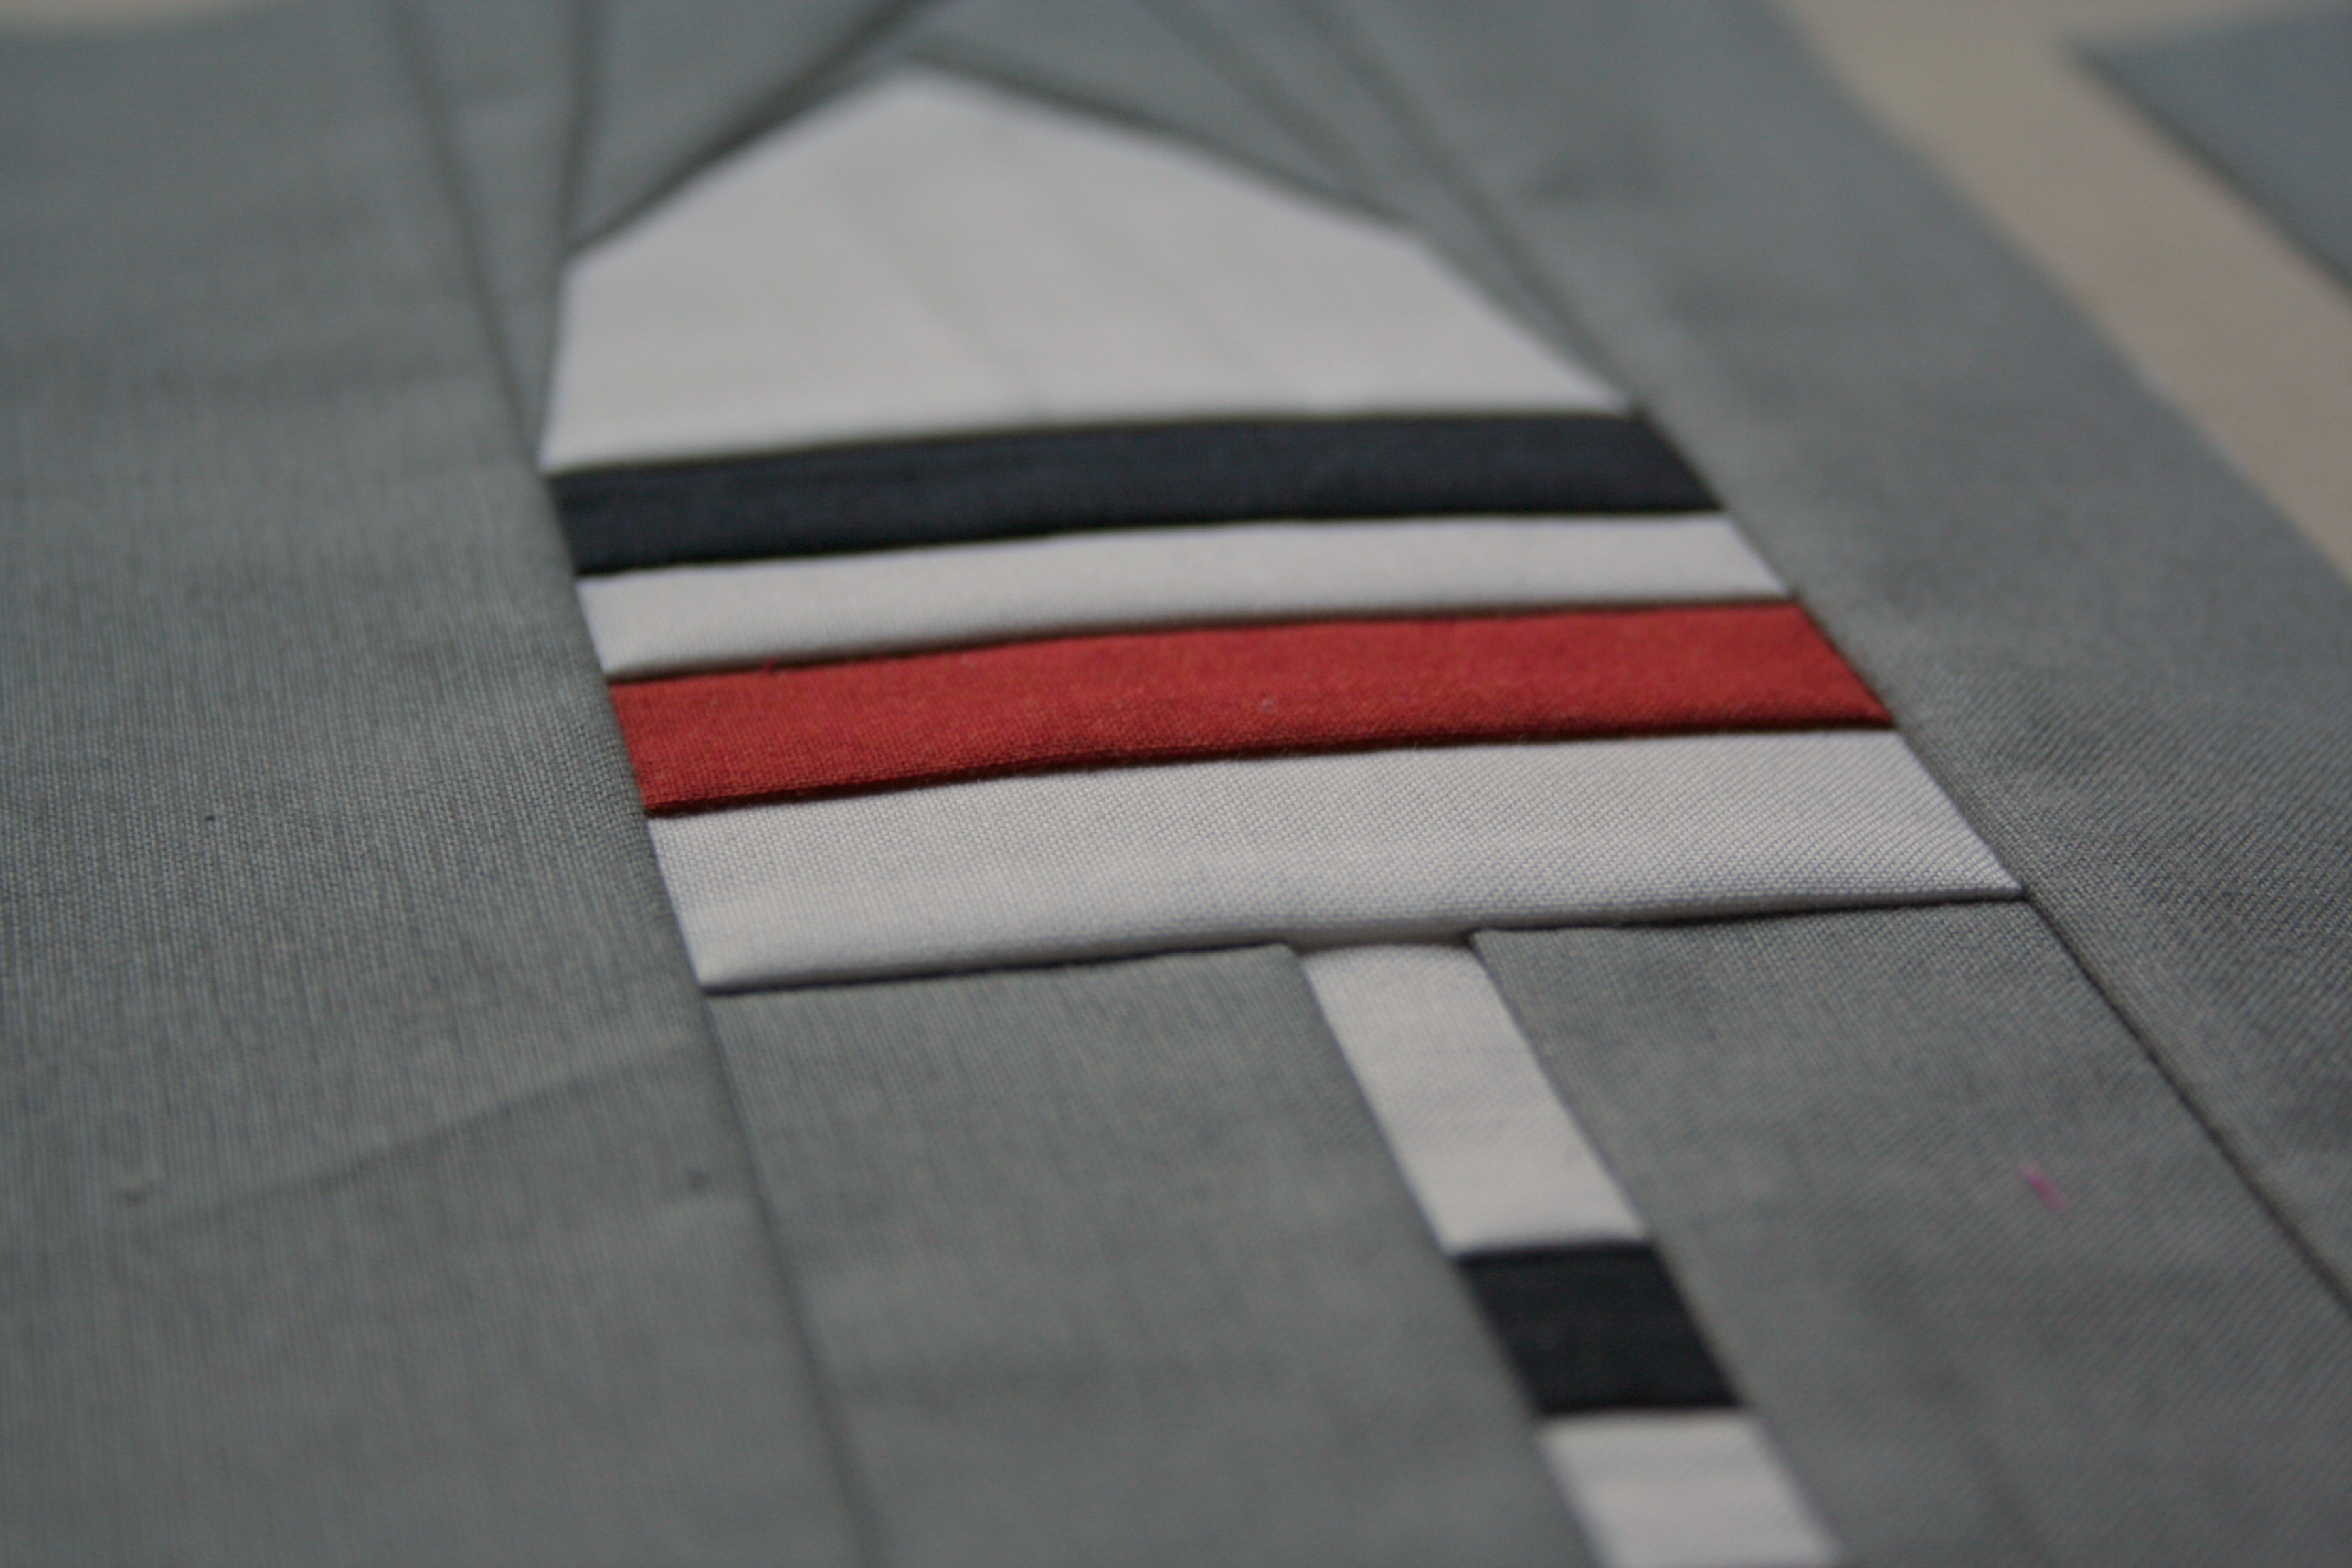
The patterns are super simple and extremely versatile. While testing these patterns, I accidentally sewed the 4″x8″ of the middle buoy, instead of the intended 5″x10″ version. I’m not quite sure what I will do with the little buoy yet, but the larger ones will be made into a pillow once I make a 5″x10″ of that pesky middle one.
I love the detail and precision of foundation paper piecing. There’s something about the exactness of seams and the ability to create anything with fabric that makes me happy.
Buoy 1 foundation paper piecing pattern detail.
Since I still need to remake a larger version of the Buoy 2 pattern and stitch these all together, I’m linking up with Freshly Pieced’s Work in Progress Wednesday. Stay tuned to see the completed pillow, and stop by my shop if you have an inkling of making some nautical lobster buoy creations!
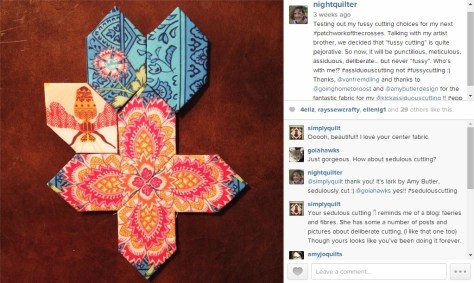
Sometimes there’s a saying that is so commonly used that you don’t even think twice about it. Last month, while on vacation with my family, my brother Steven commented on how cool my specifically planned cutting looked in my English paper piecing project. I told him how in the quilting world it’s called “fussy cutting”, and how much fun I was having with this, my first foray into it. He looked at me with an almost offended air, repeating with disdain, “fussy cutting”?!
Fussy cutting in practice for my Lucy Boston Patchwork of the Crosses center.
Steven is an artist who lives in San Francisco among many other artists of various trades. Perhaps this is why he was so taken aback by the terminology paired with quilters’ practice of selectively cutting a fabric based upon a particular element or design. He reasoned, “You wouldn’t call Michelangelo a “fussy” painter. You might call him meticulous, or careful, but never fussy.” He has a point.
It’s true; the definition of the word fussy holds a decidedly negative air. “Petty details”? “…a fussy, cluttered look.” Losing the thread of the story because of the fussy writing. None of these definitions or examples are very flattering. Personally, I think that fussy cutting in quilting is a skill and style that deserves a more complimentary, positive name. Then again, it’s just a word, right?
This conversation got me thinking: who coined the term “fussy cutting” and when did it start getting popular? I wonder if it was a saying created by the quilters, or by those seeing the completed work. A bit of googling uncovered the fact that the first evidence of selectively cutting motifs from fabric was the development of Broderie Perse in England in the 1700’s (from answers.com, so take it for what it is). The article goes on to explain that “…this technique was used by women of wealth, who had the leisure time to devote to this style of applique. Their goal was to make a “best” quilt that would be shown off to friends or used on special occasions.” In other words, it was women of wealth who could afford the time and fabric to select only very specific features to make a “best” quilt, leaving the fussy cut refuse to waste or other small, non-functional projects. Was the term “fussing cutting” created by those of lesser social status out of semi-contempt of those who could afford such fabric waste and leisure?
In searching more, in an interview with Eleanor Burns conducted in 1999, she casually mentions that she and her sister may have coined the term “fussy cutting”. Here’s an excerpt of the interview:
Brenda Horton (BH): Now you called your sister the fussy one but you “fussy cut” sometimes on your patterns, is that where you got the term?
Eleanor Burns (EB): Yes, she told me “fussy cut.” What’s really interesting, we may have coined the word “fussy-cut” but now it’s a standard in the industry. And that’s really fun to see something you started as just common terminology.
MF: Explain to us what “fussy-cut” is.
EB: Fussy-cut means you would have a large floral design with a lot of flowers. You might just specially cut out one flower and use that one flower repeat throughout your quilt, so it’s just specially cut out of the fabric to use in a certain piece. It puts together a really pretty design– fussy.
It doesn’t sound very disparaging, although between sisters, perhaps there is a bit of a teasing tone? What do you think?
Assiduous cutting with Amy Butler’s Lark fabric.
For me, I can no longer say “fussy cutting” without thinking of my conversation with my brother. Here’s my IG post from the night of the conversation:
I wrote: Testing out my fussy cutting choices for my next #patchworkofthecrosses. Talking with my artist brother, we decided that “fussy cutting” is quite pejorative. So now, it will be punctilious, meticulous, assiduous, deliberate… but never “fussy”. Who’s with me!? #assiduouscutting not #fussycutting 🙂 Thanks, @vanfremdling and thanks to@goinghometoroost and @amybutlerdesign for the fantastic fabric for my @kickassiduouscutting !! #epp
I’m sure that “fussy cutting” will still be part of my quilting lingo, since when in Rome! However, I will also be using “assiduous cutting”, “meticulous cutting”, and “punctilious cutting” interchangeably. Personally, I lean toward “assiduous cutting” since then I can say I’m doing some “kick-ass-iduous cutting” tonight!
What do you think? Do you think “fussy cutting” has a derogatory inclination? If you are a quilt historian and have any more information regarding the origination of the term “fussy cutting”, I’d love to know!
Until then, have fun with your punctilious, meticulous, assiduous, deliberate, and okay… sometimes fussy… cutting. I know I will!
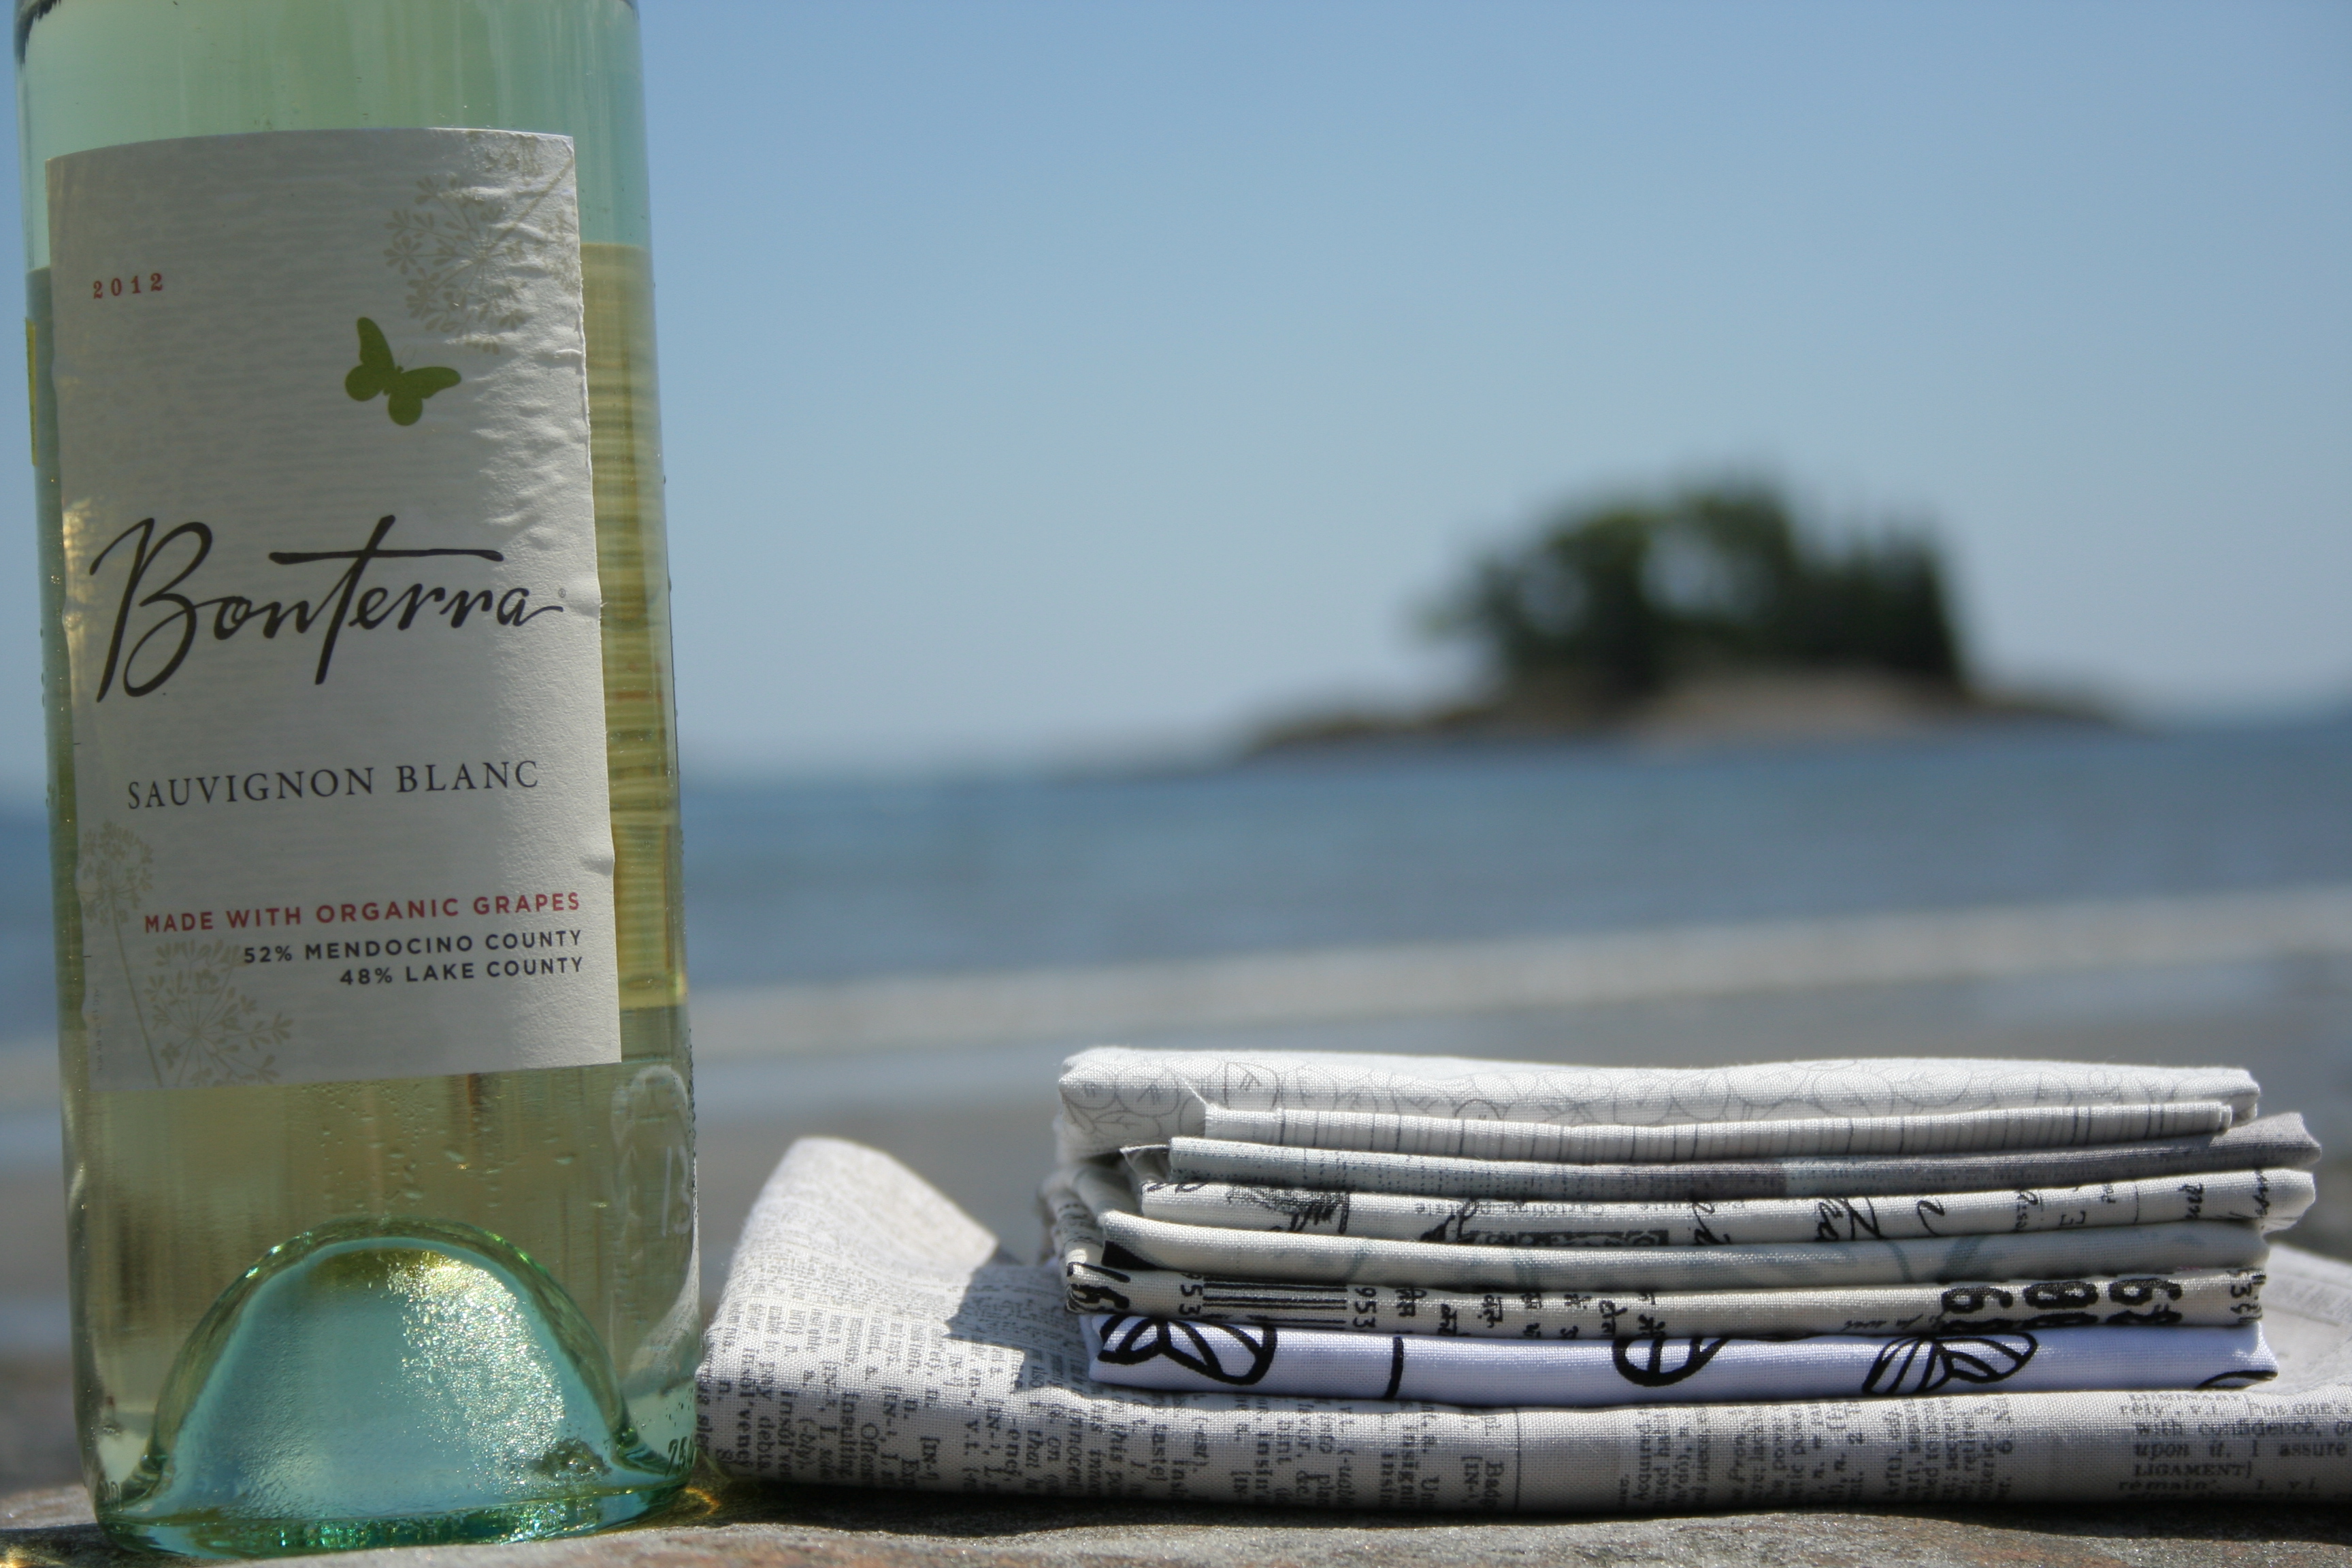
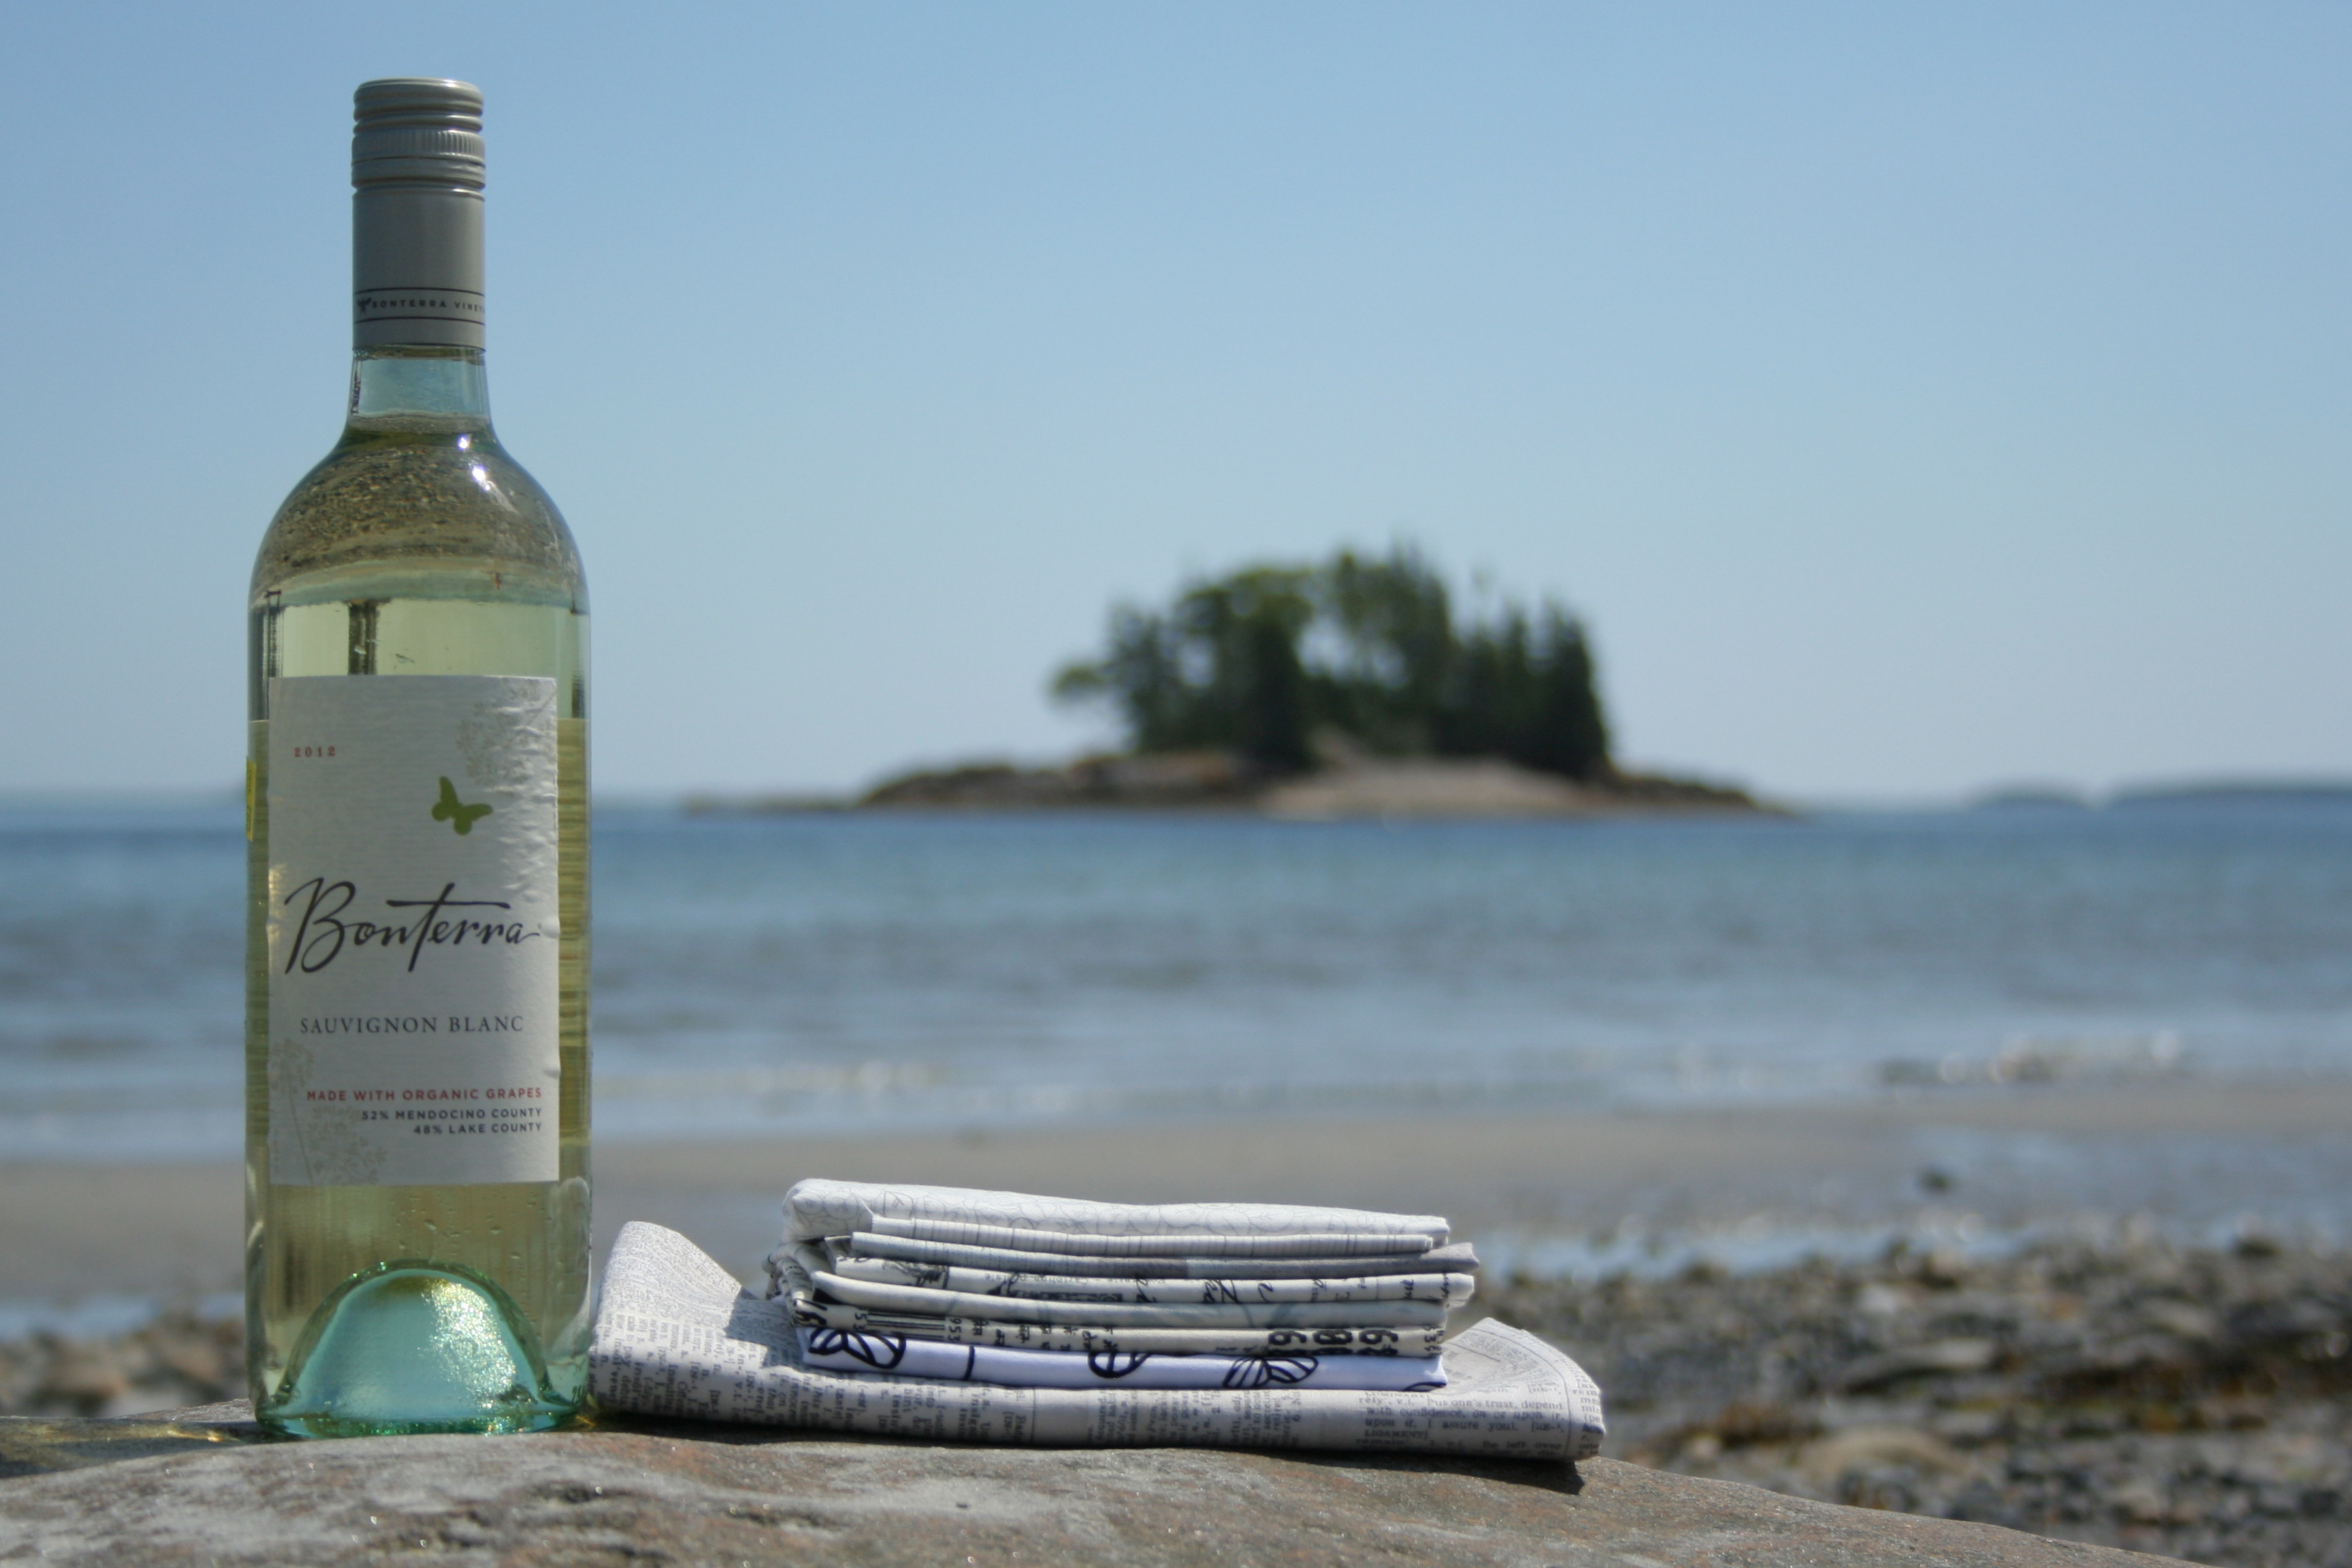
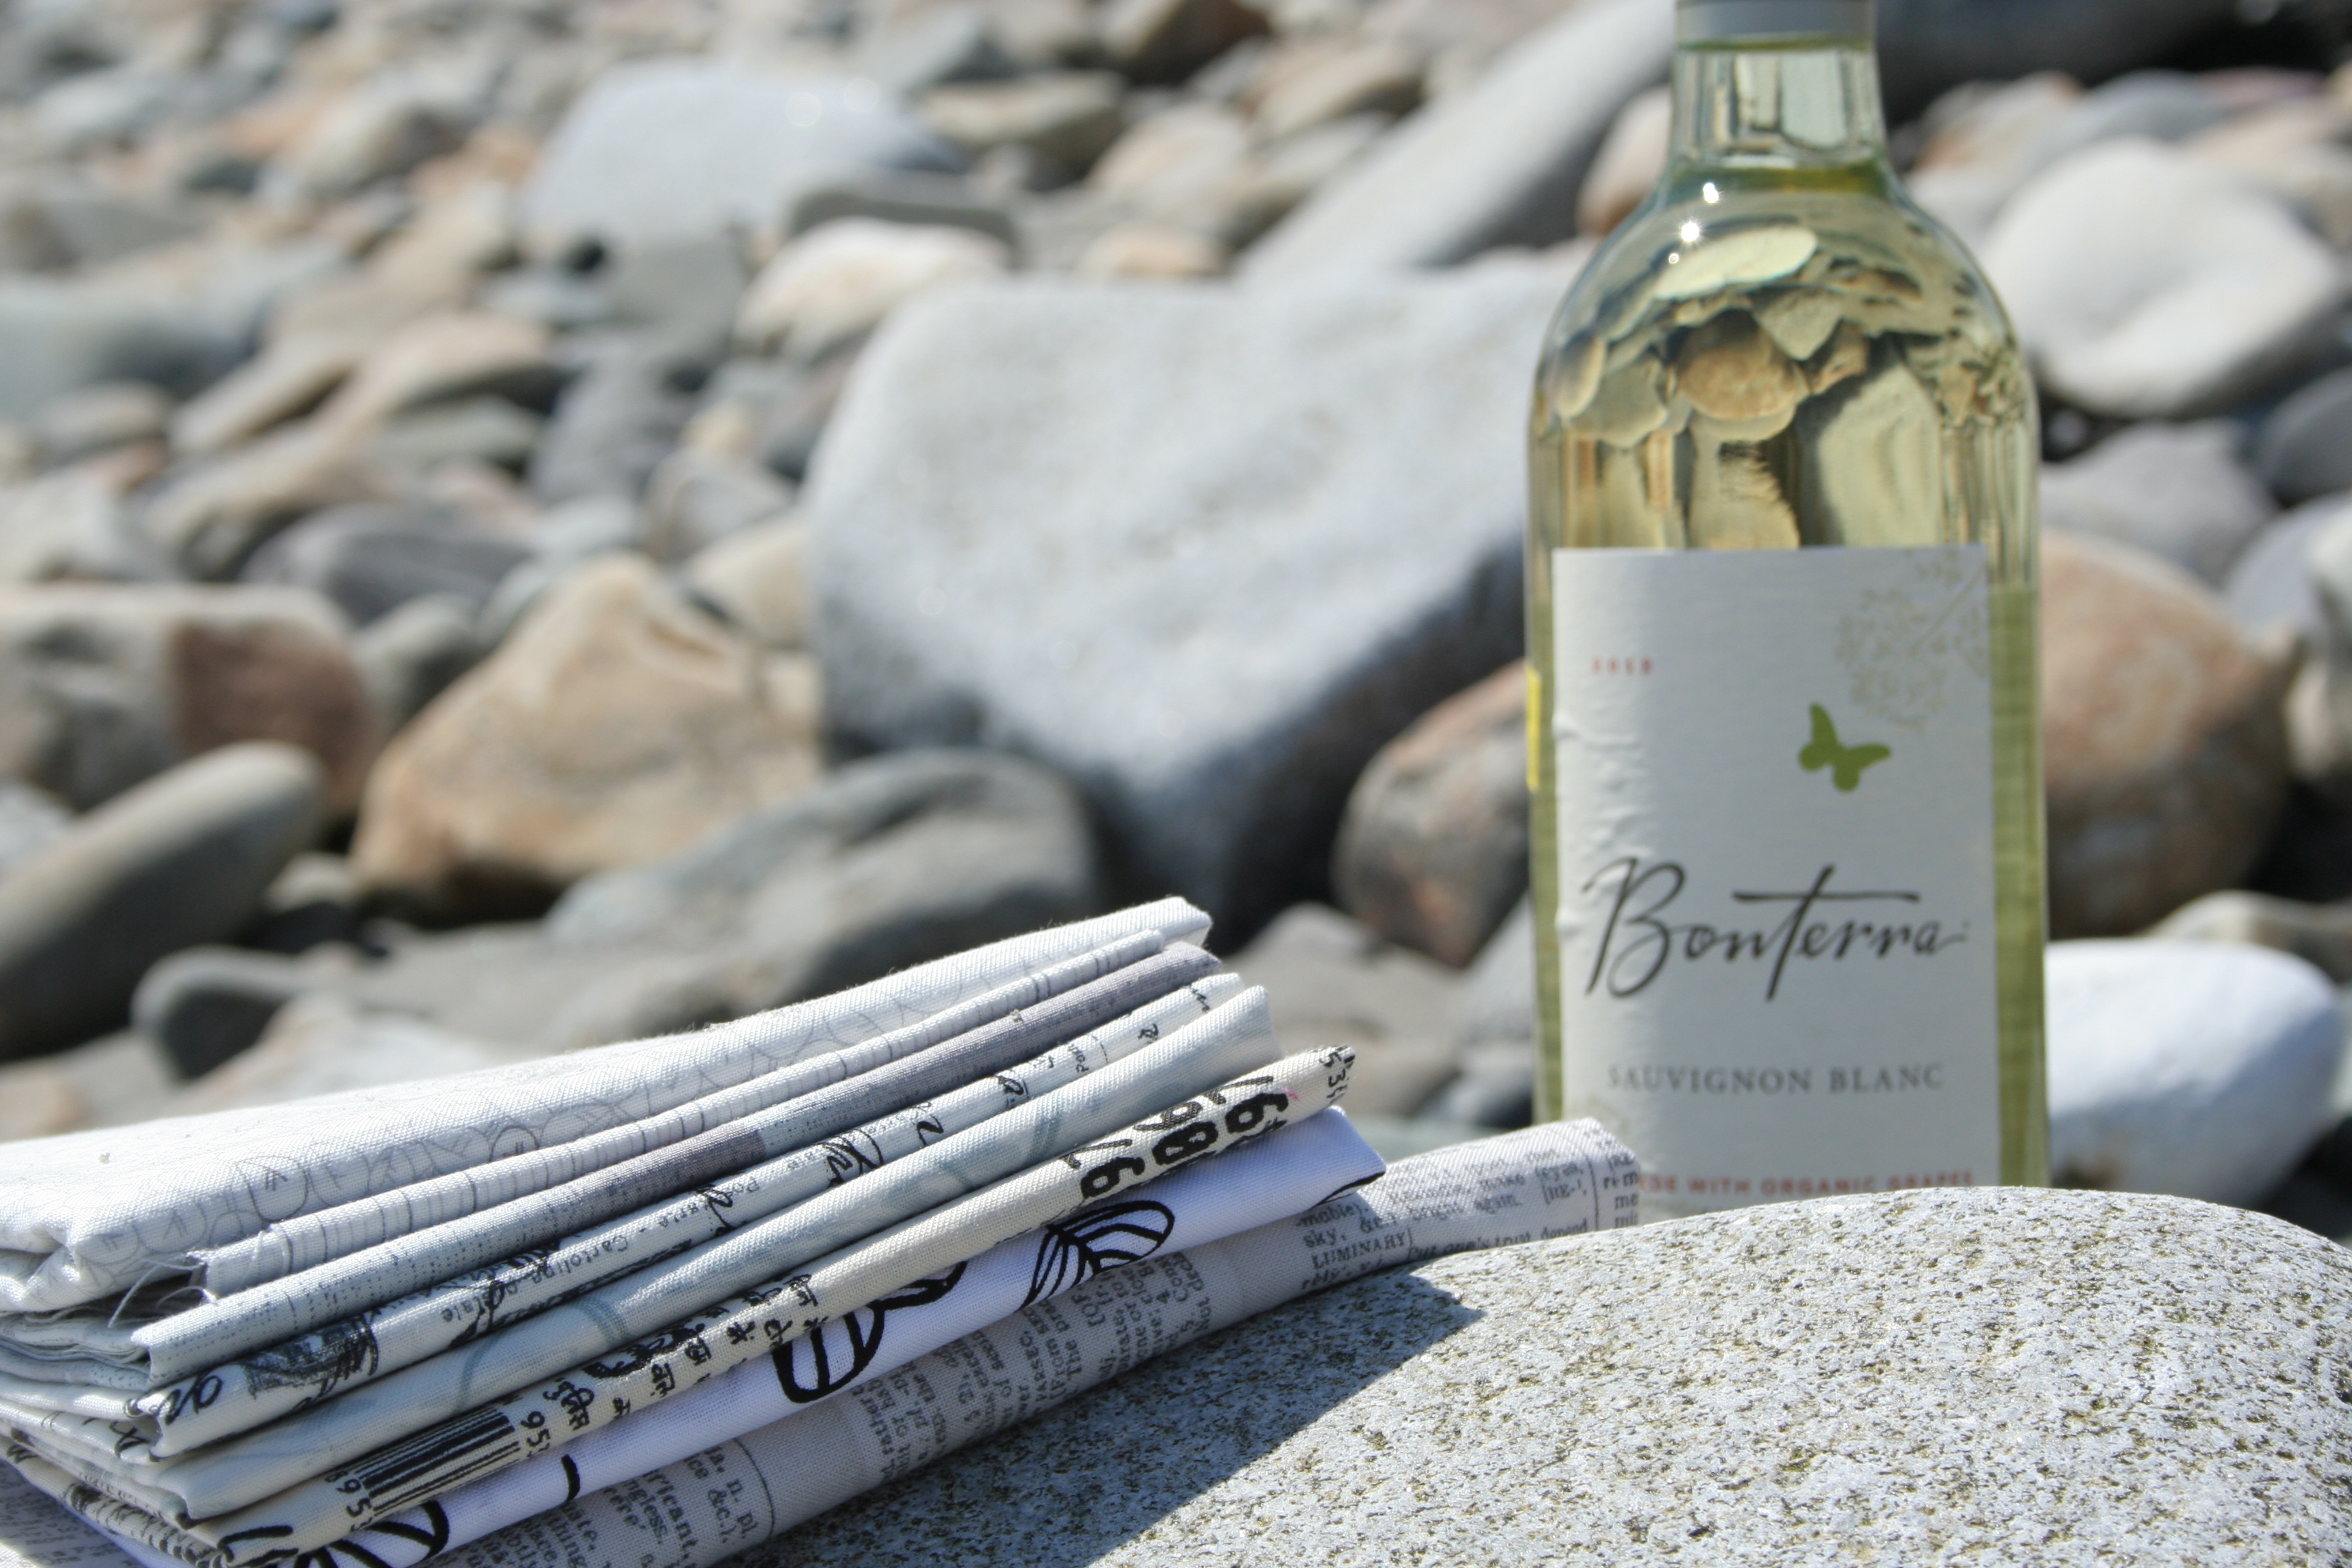
Last month I had a revelation during some early evening vacation hand-stitching: wine and fabric go splendidly together. My first serendipitous pairing of wine and fabric has resulted in a habit of maybe choosing wine based upon its fabric-pair-ability, and in seeing various types of wine and fabric mates all over the place.
While my first wine and fabric duo were quite specific, pairing the specific wine with a single fabric line, this match is a bit more general: Sauvignon Blanc pairs wonderfully with low volume & mostly-white fabrics. This is good news for all of us! The next time you’re working on a project involving low volume prints, you know a Sauvignon Blanc will be just the varietal for you (especially on these hot summer nights)!
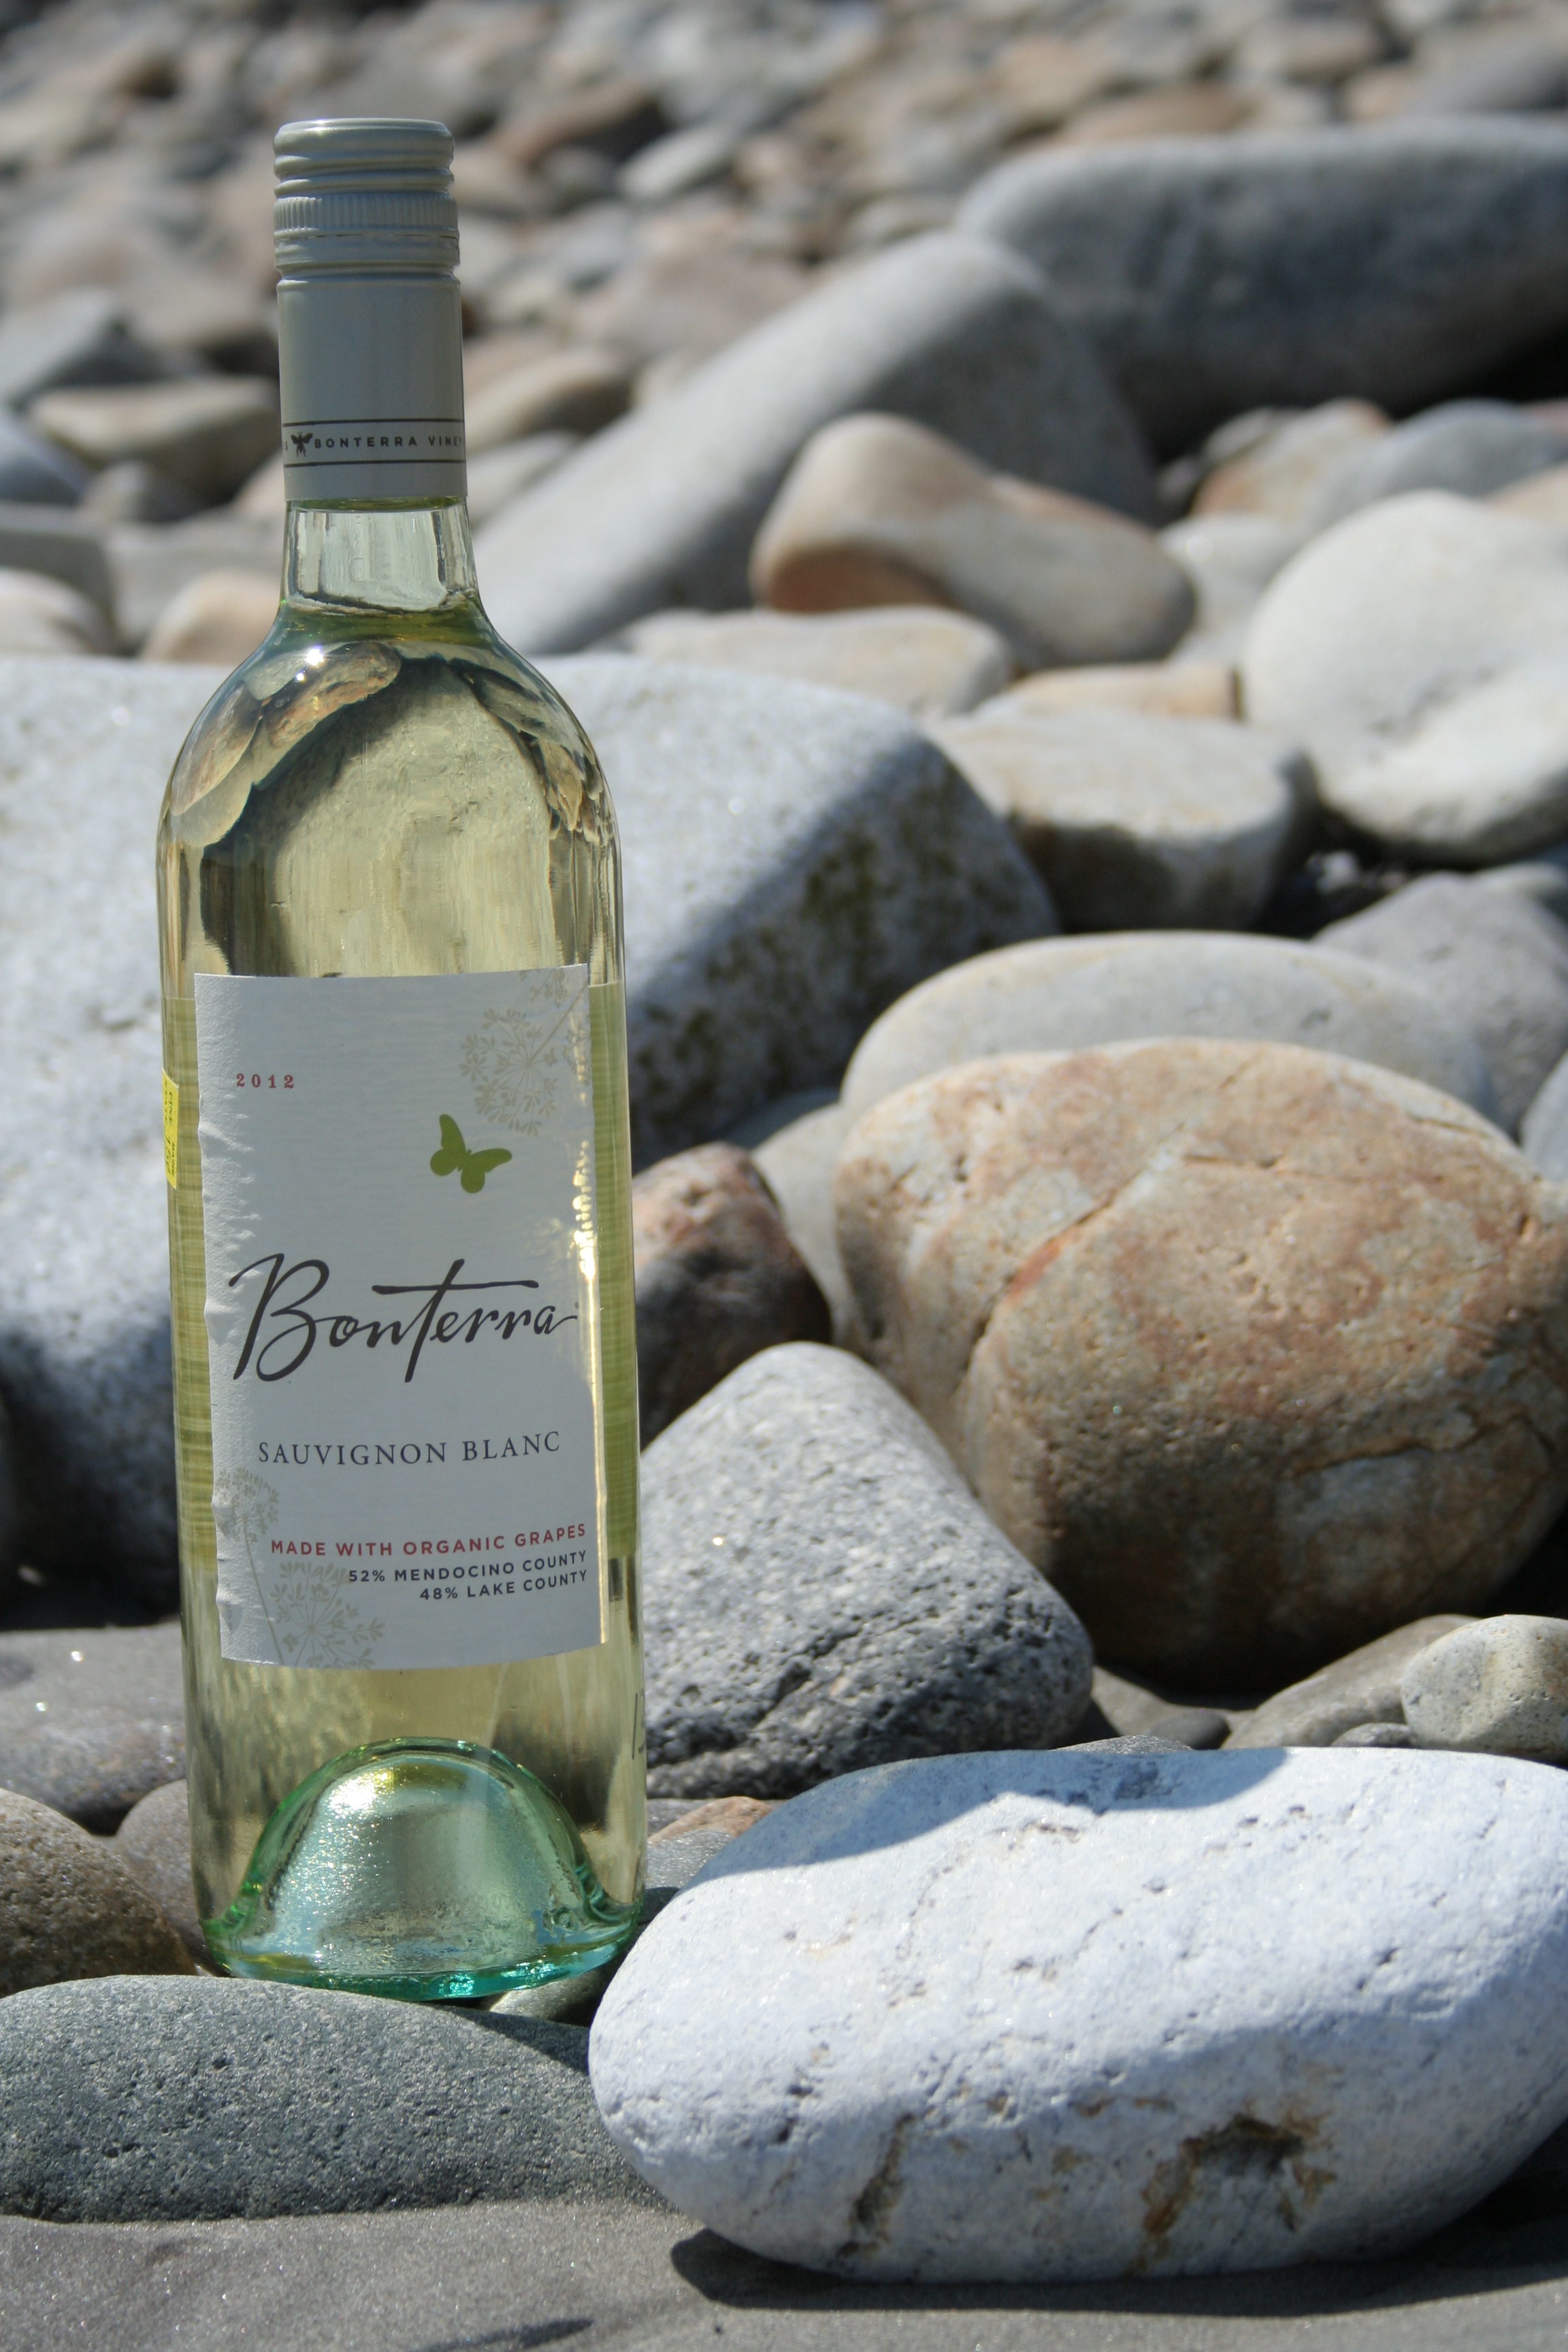
Bonterra has been producing wine from 100% organic grapes since 1993, and they passionately believe that organic grapes make better wine. Since I already opt for as much organic food as I can, and after trying their Sauvignon Blanc, I can’t disagree.
Yes! I would add that wine should also be paired with a fabric that is a perfect expression of the varietal or flavor. I have decided to step up to that task. I grabbed a stack of some of my favorite low volume, mostly white fabrics, and a bottle of Bonterra Sauvignon Blanc and headed to Crescent Beach in Owls Head, Maine for a photo shoot. Crescent Beach has gorgeous fine white sand that sparkles in the sunlight, a rarity in Maine where rocky coasts are the norm. The stones that meet high tide are smooth, round, and often white, so I knew this was the perfect location for the blanc-low volume shoot.
The perfect pair:
Fabric
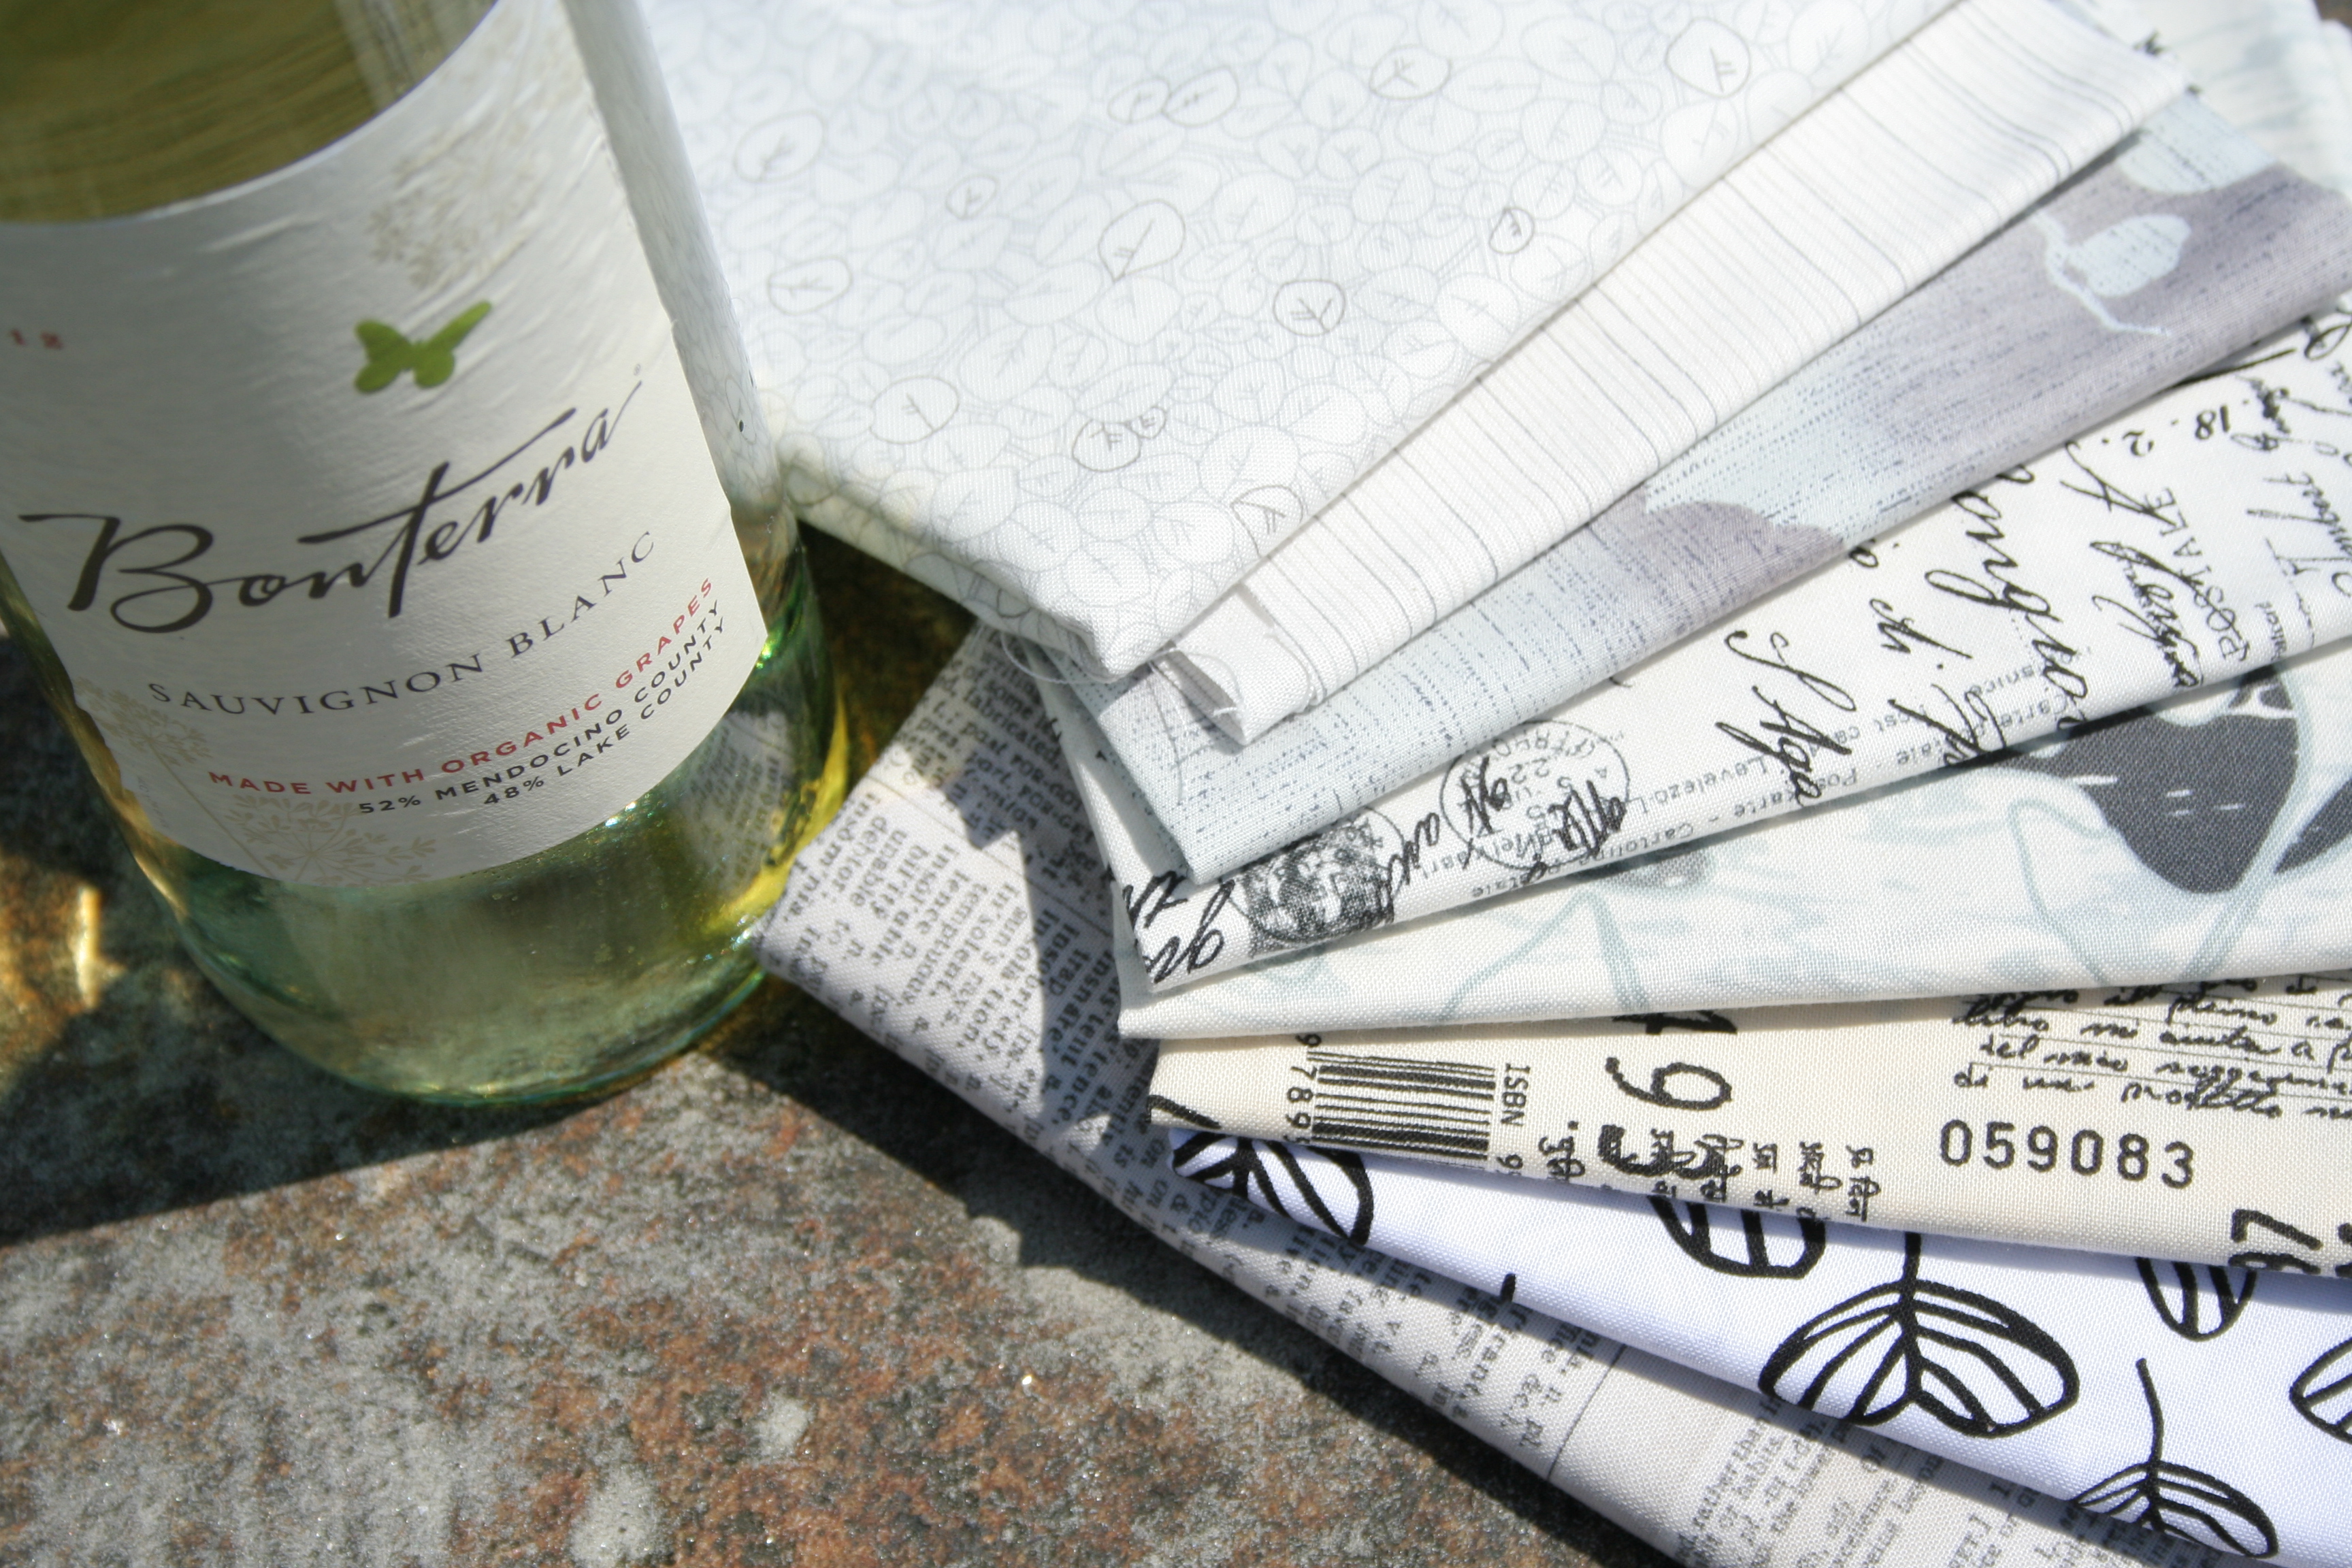
Any low volume or primarily white fabrics.
My stash grab includes:
Description of wine from the label: Intense aromas of grapefruit, citrus, kiwi and fresh cut grass greet the nose. As you drink, the crisp acidity gives the wine a fresh vibrant feel with flavors of grapefruit, lime zest and grass that closes with favors of melon and a nice tart finish.
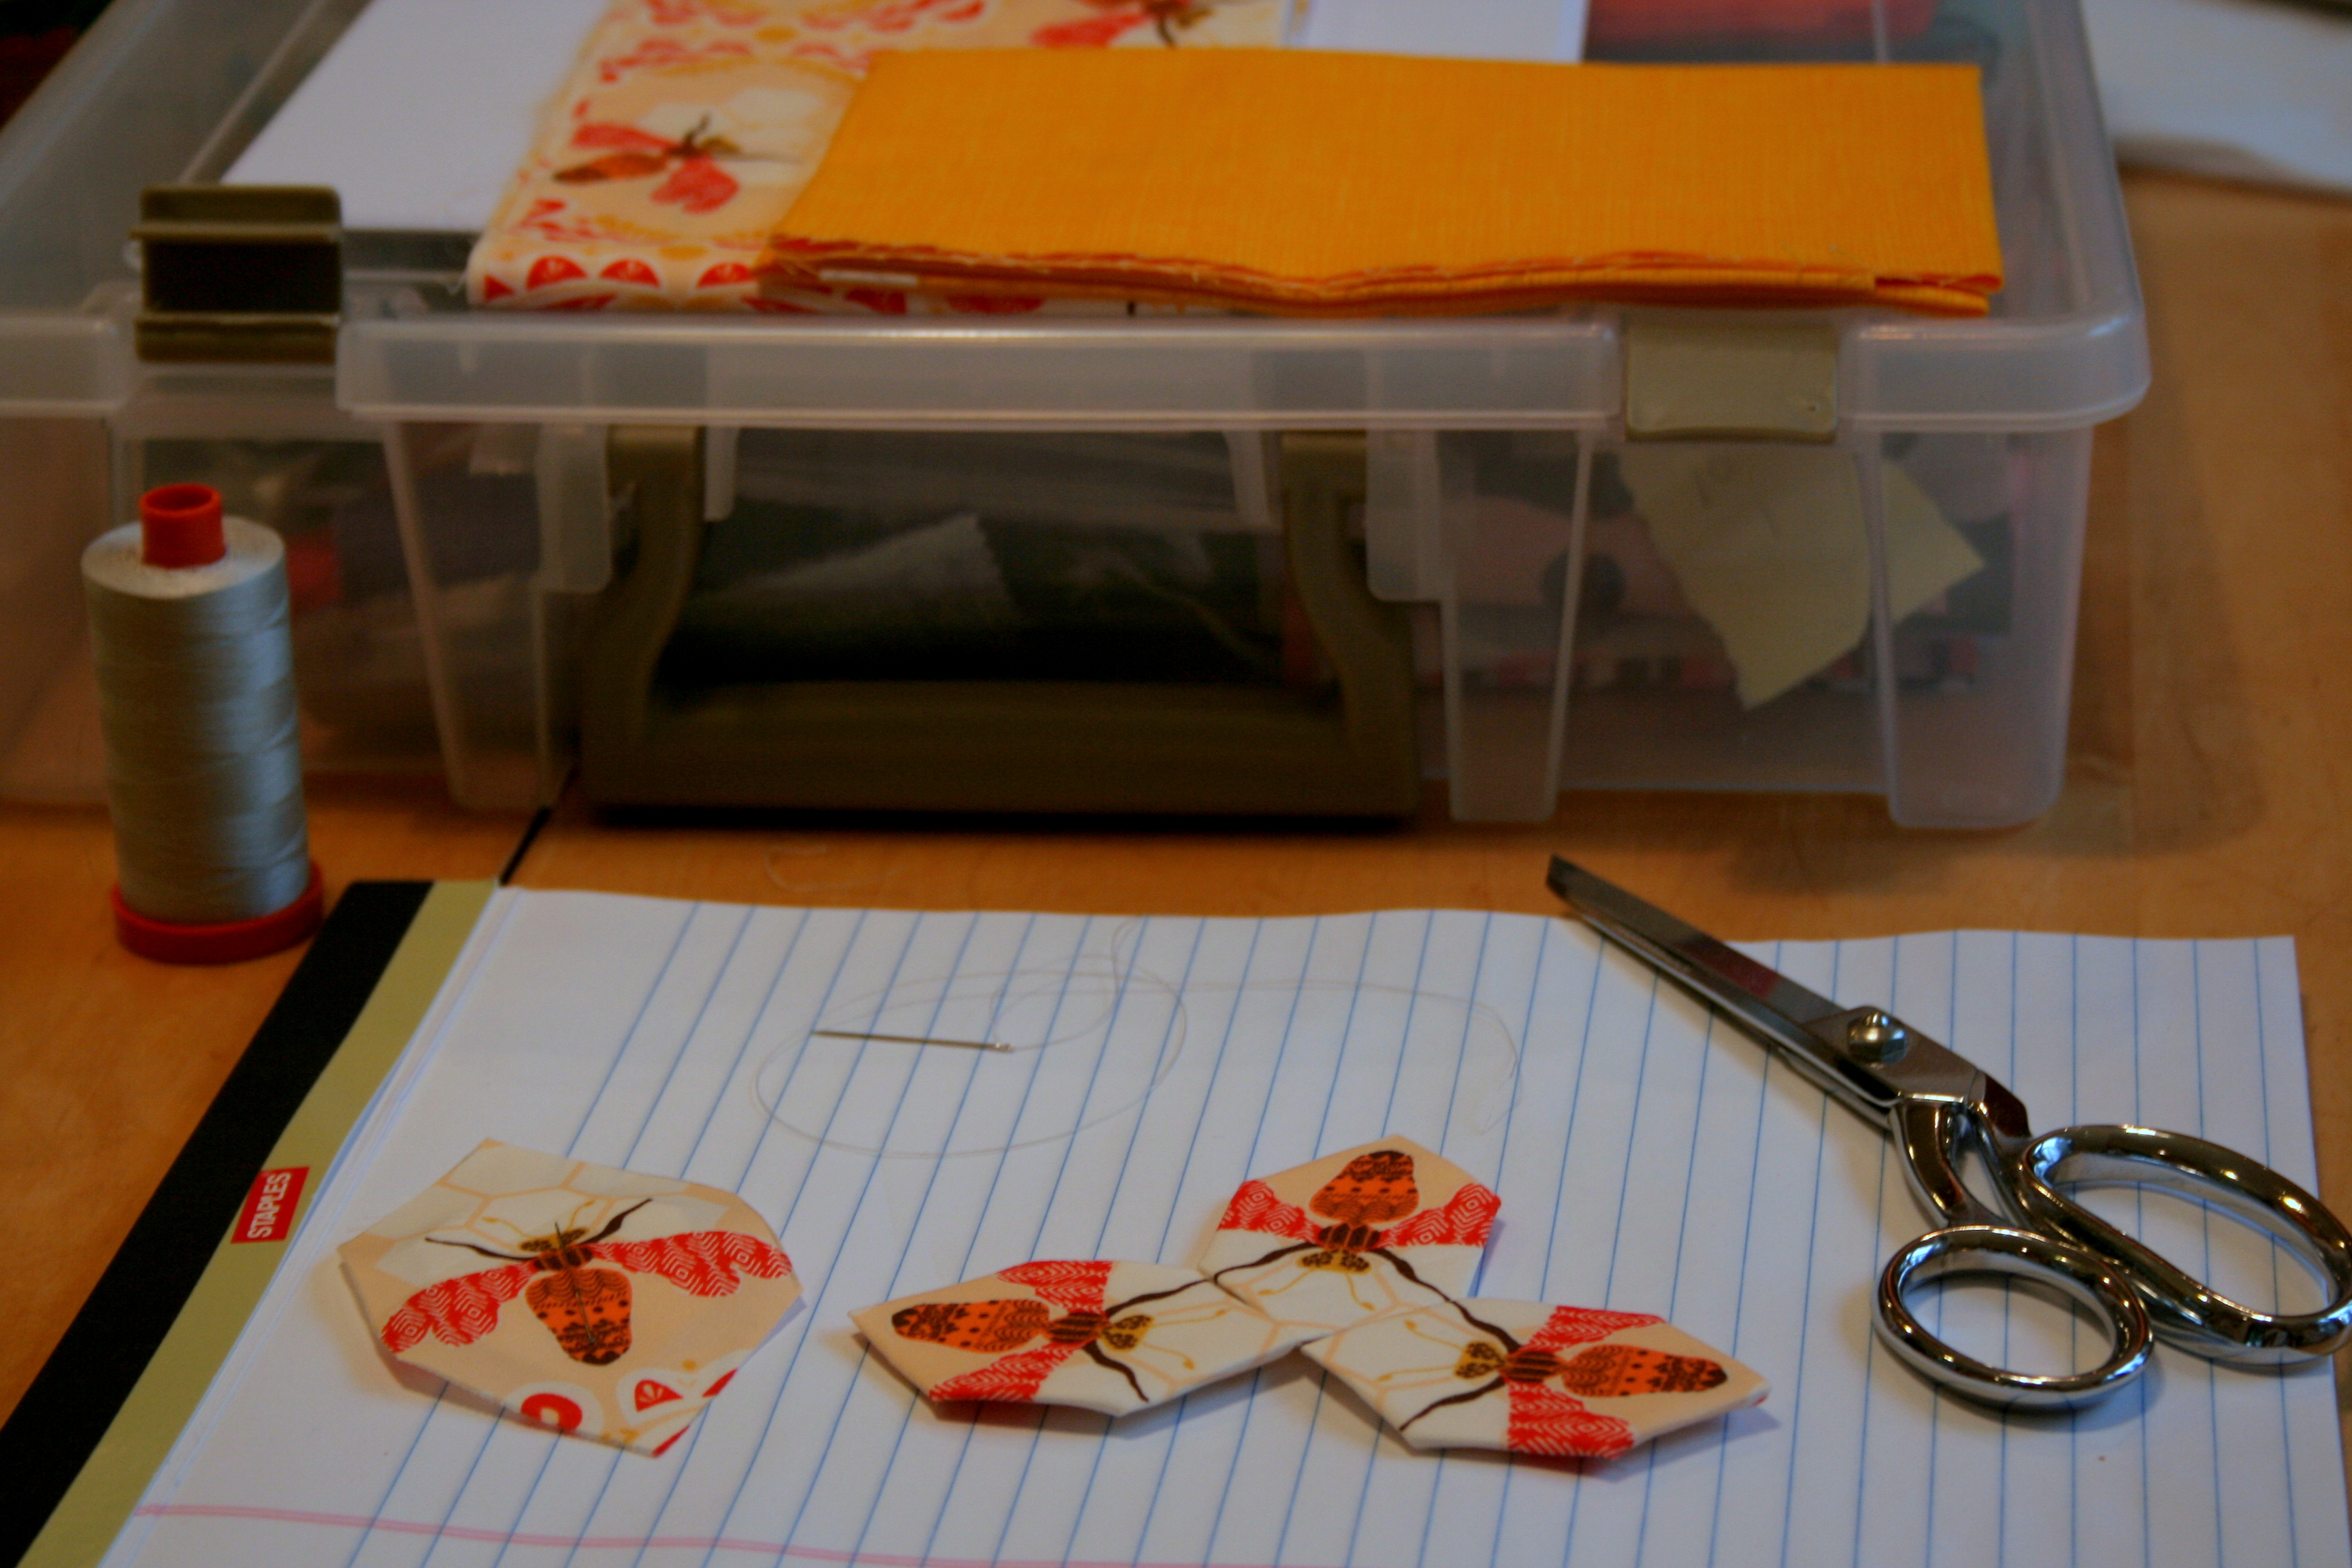
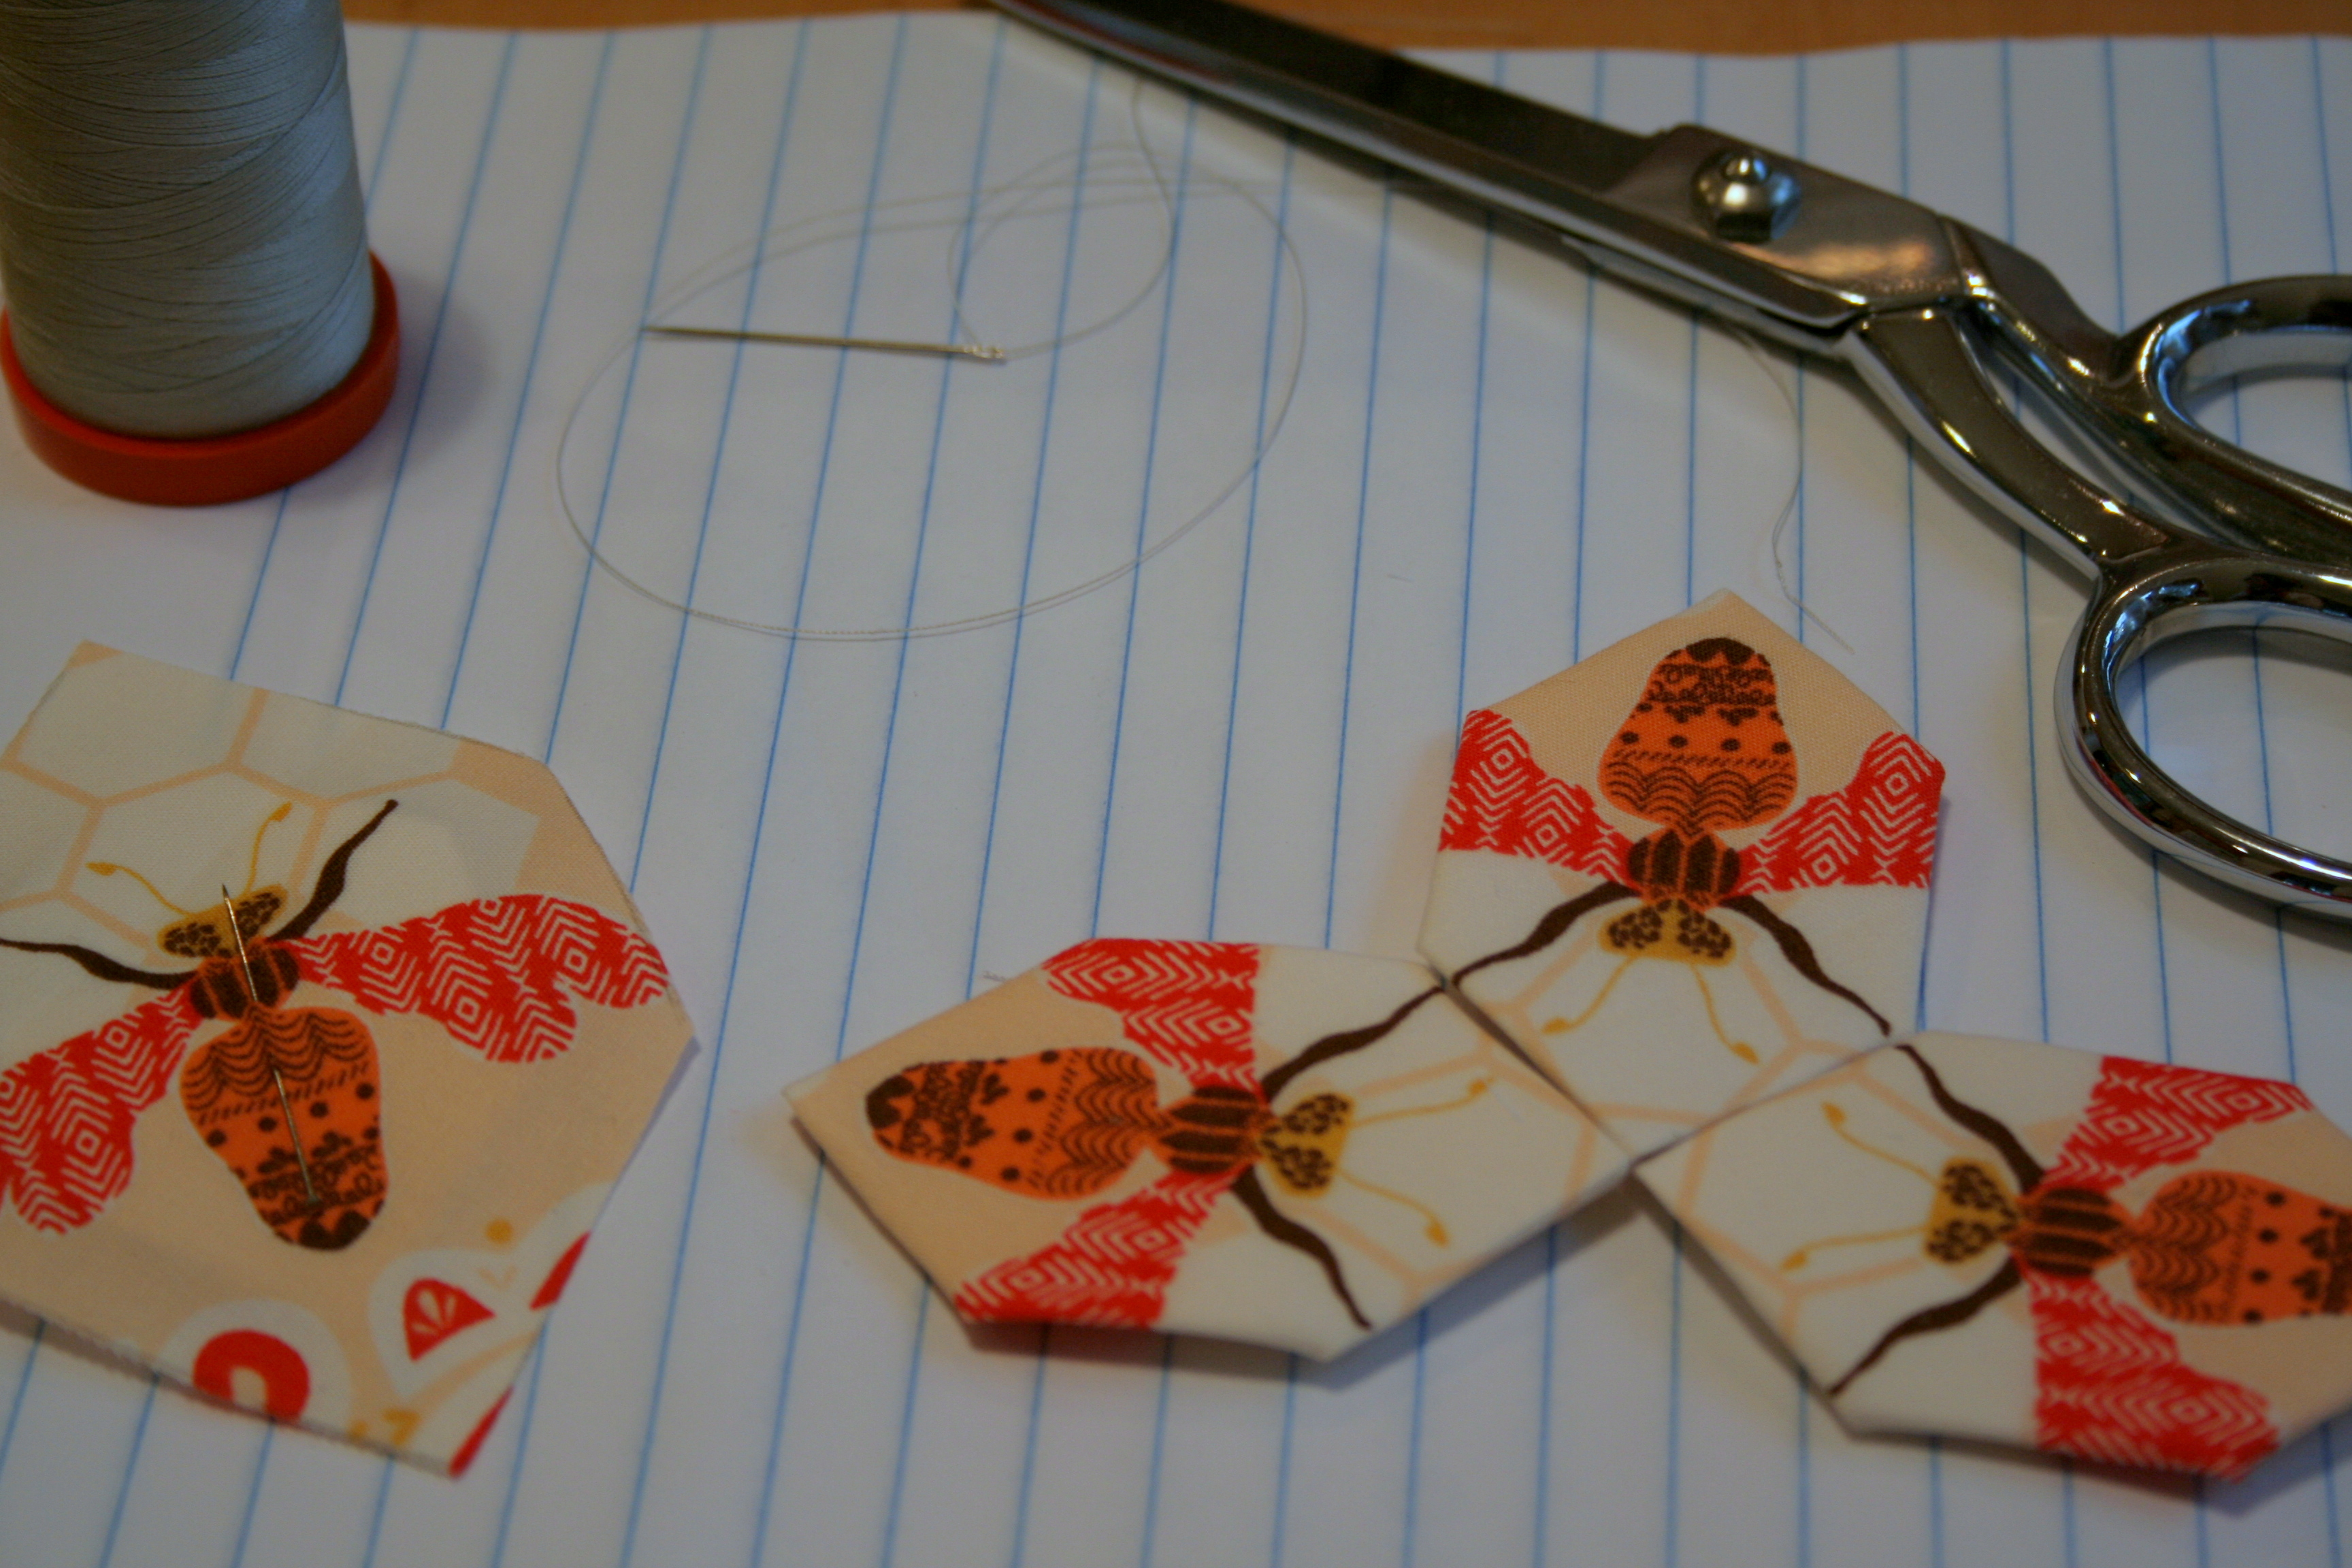
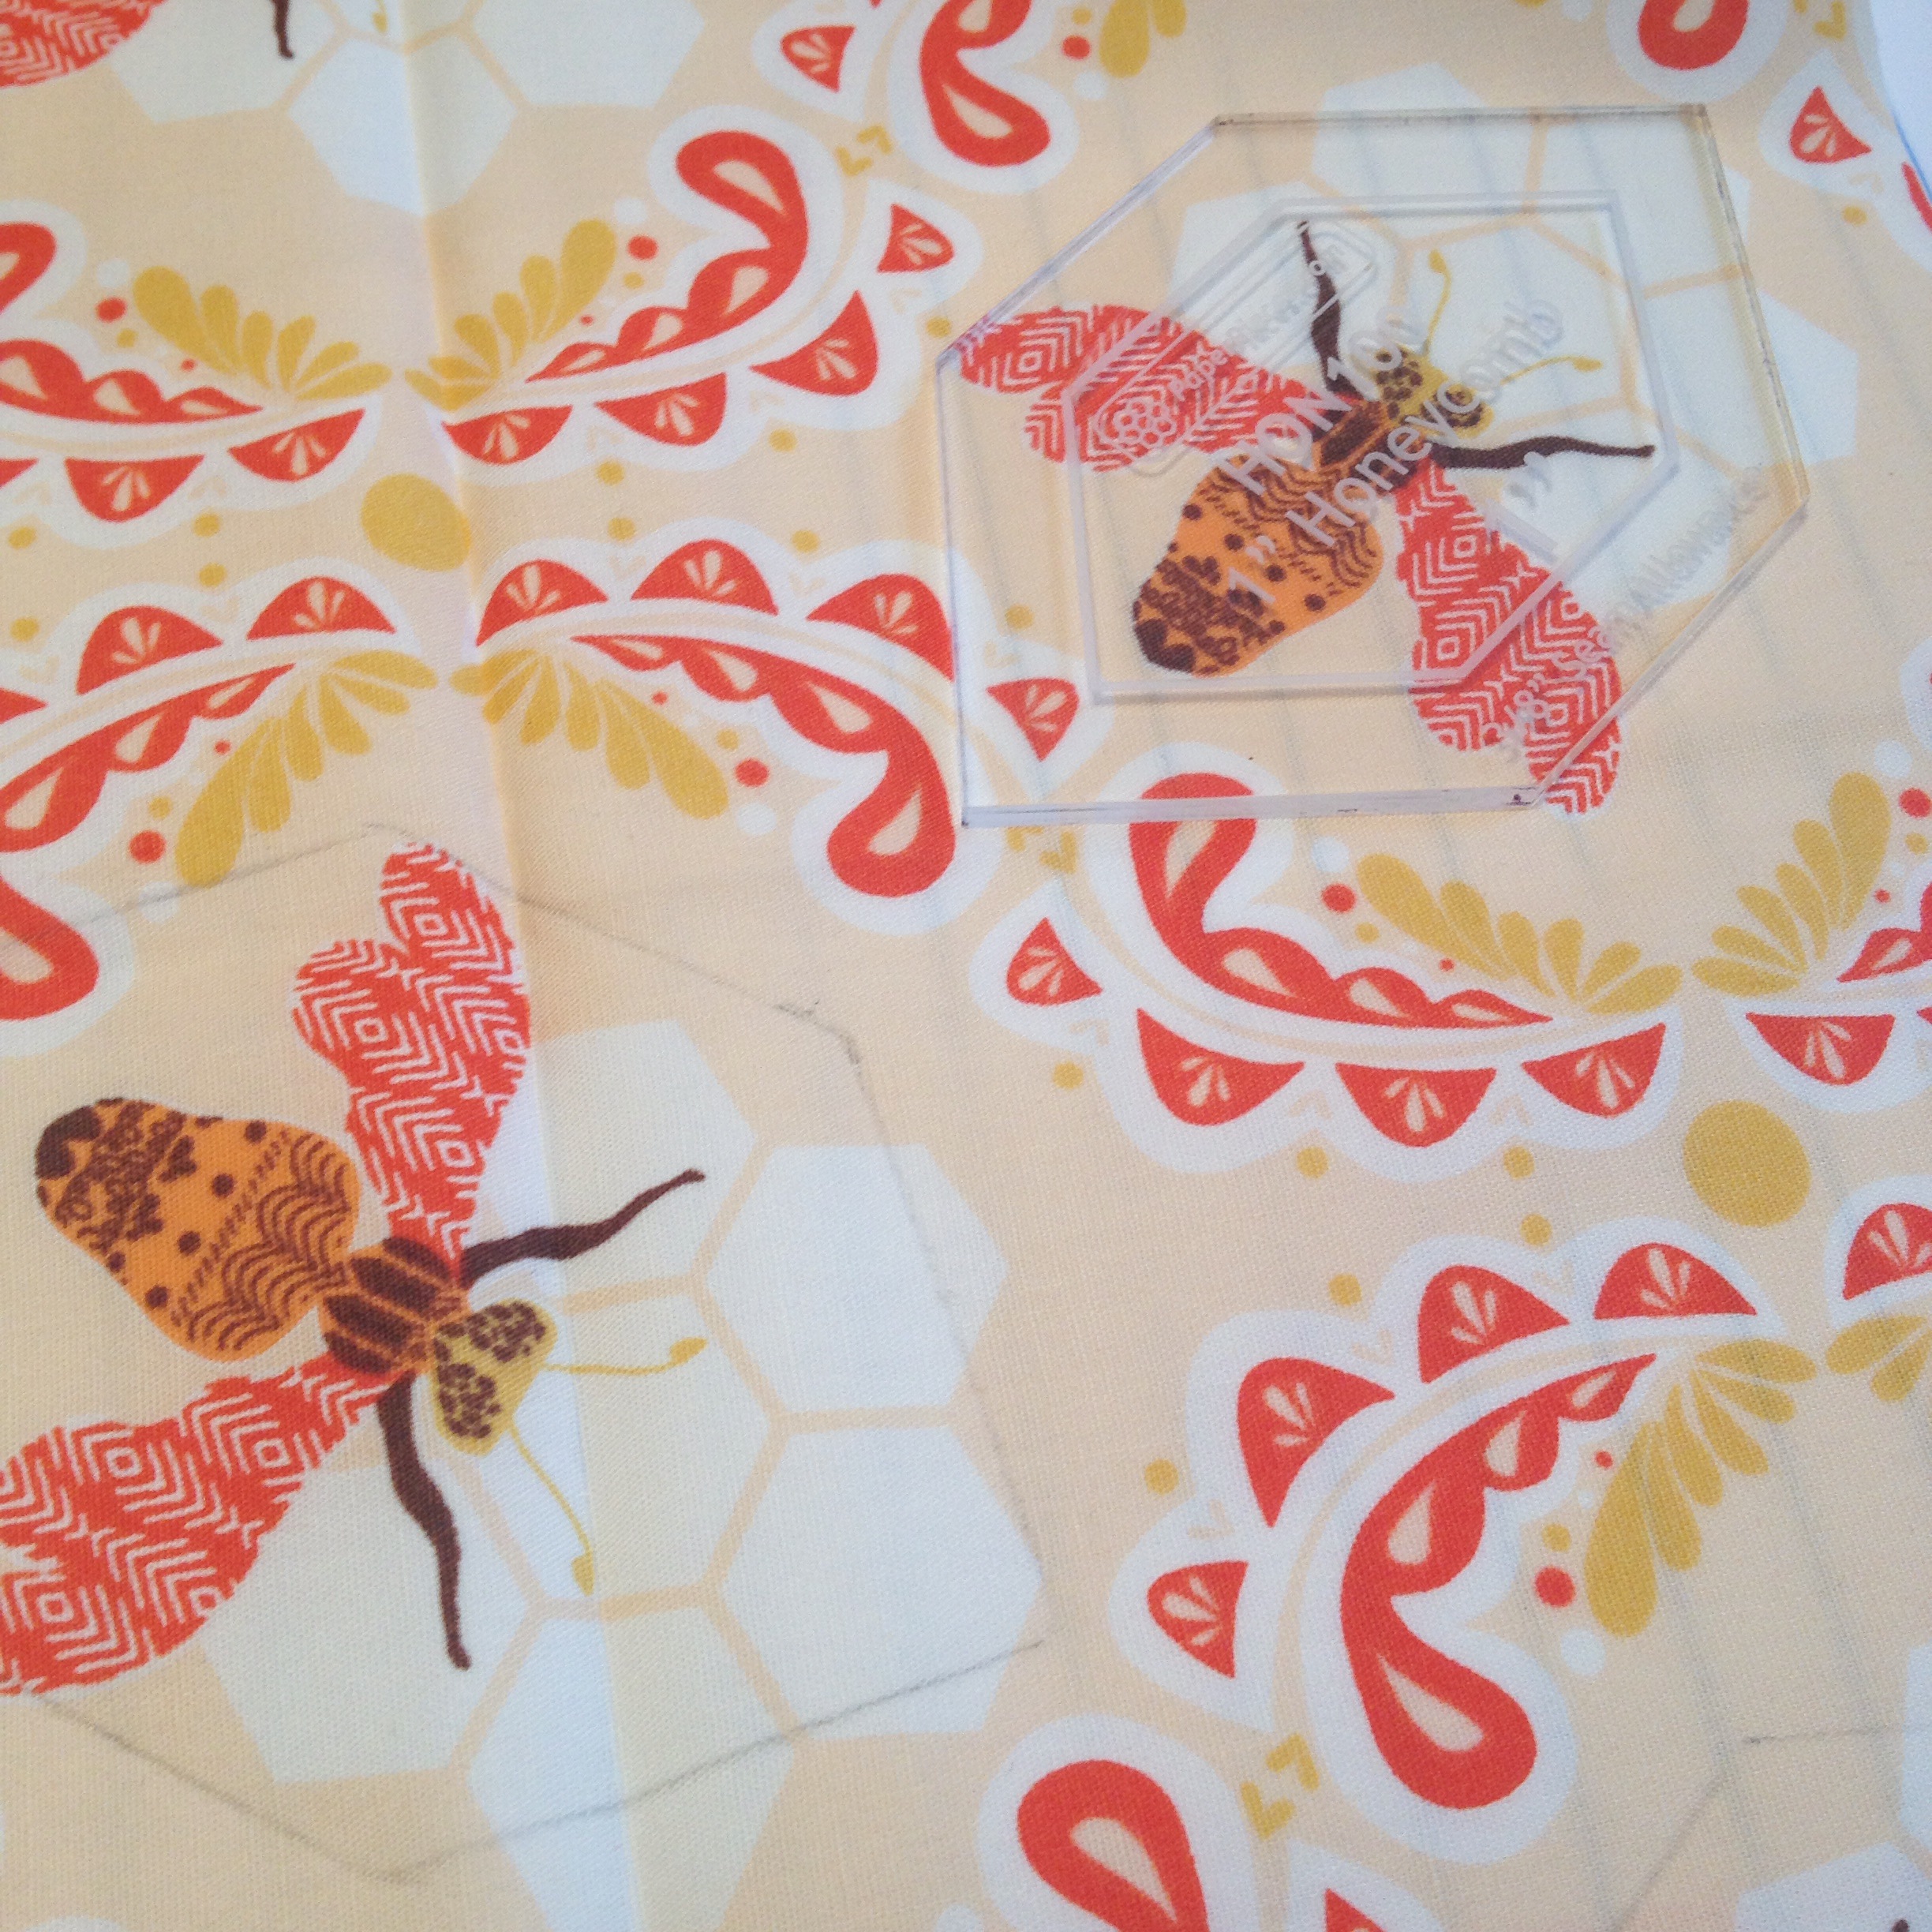
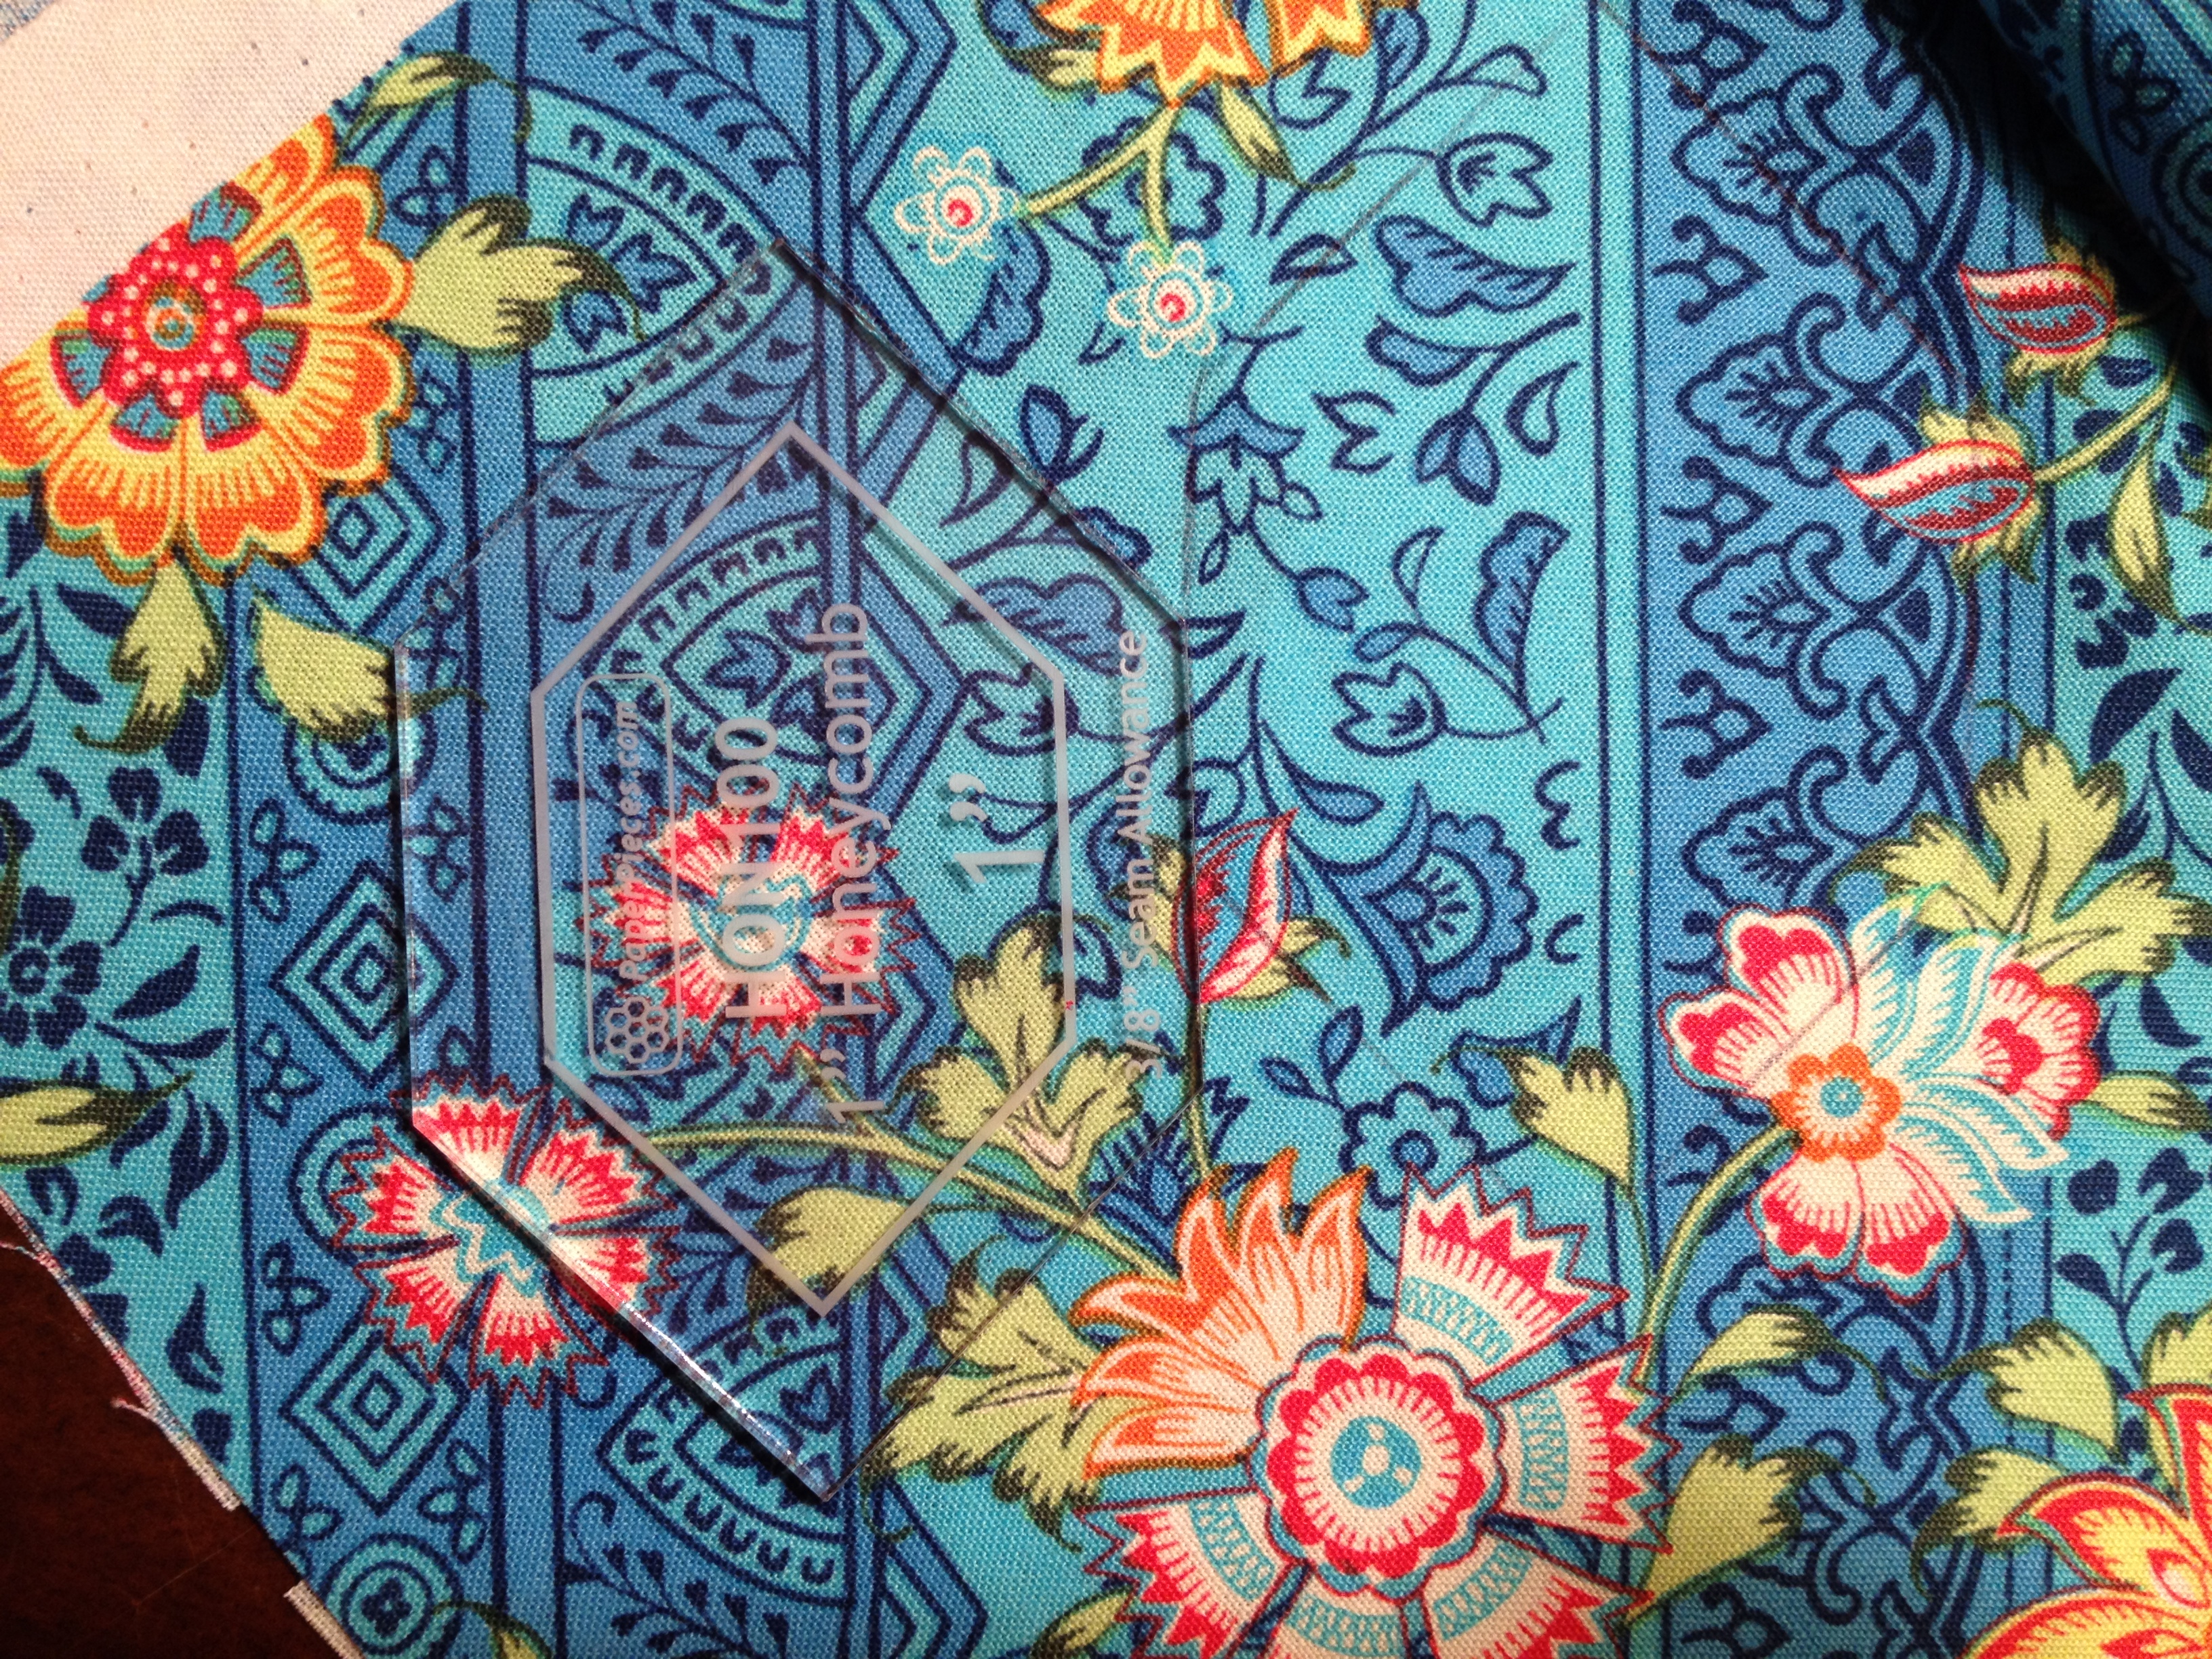
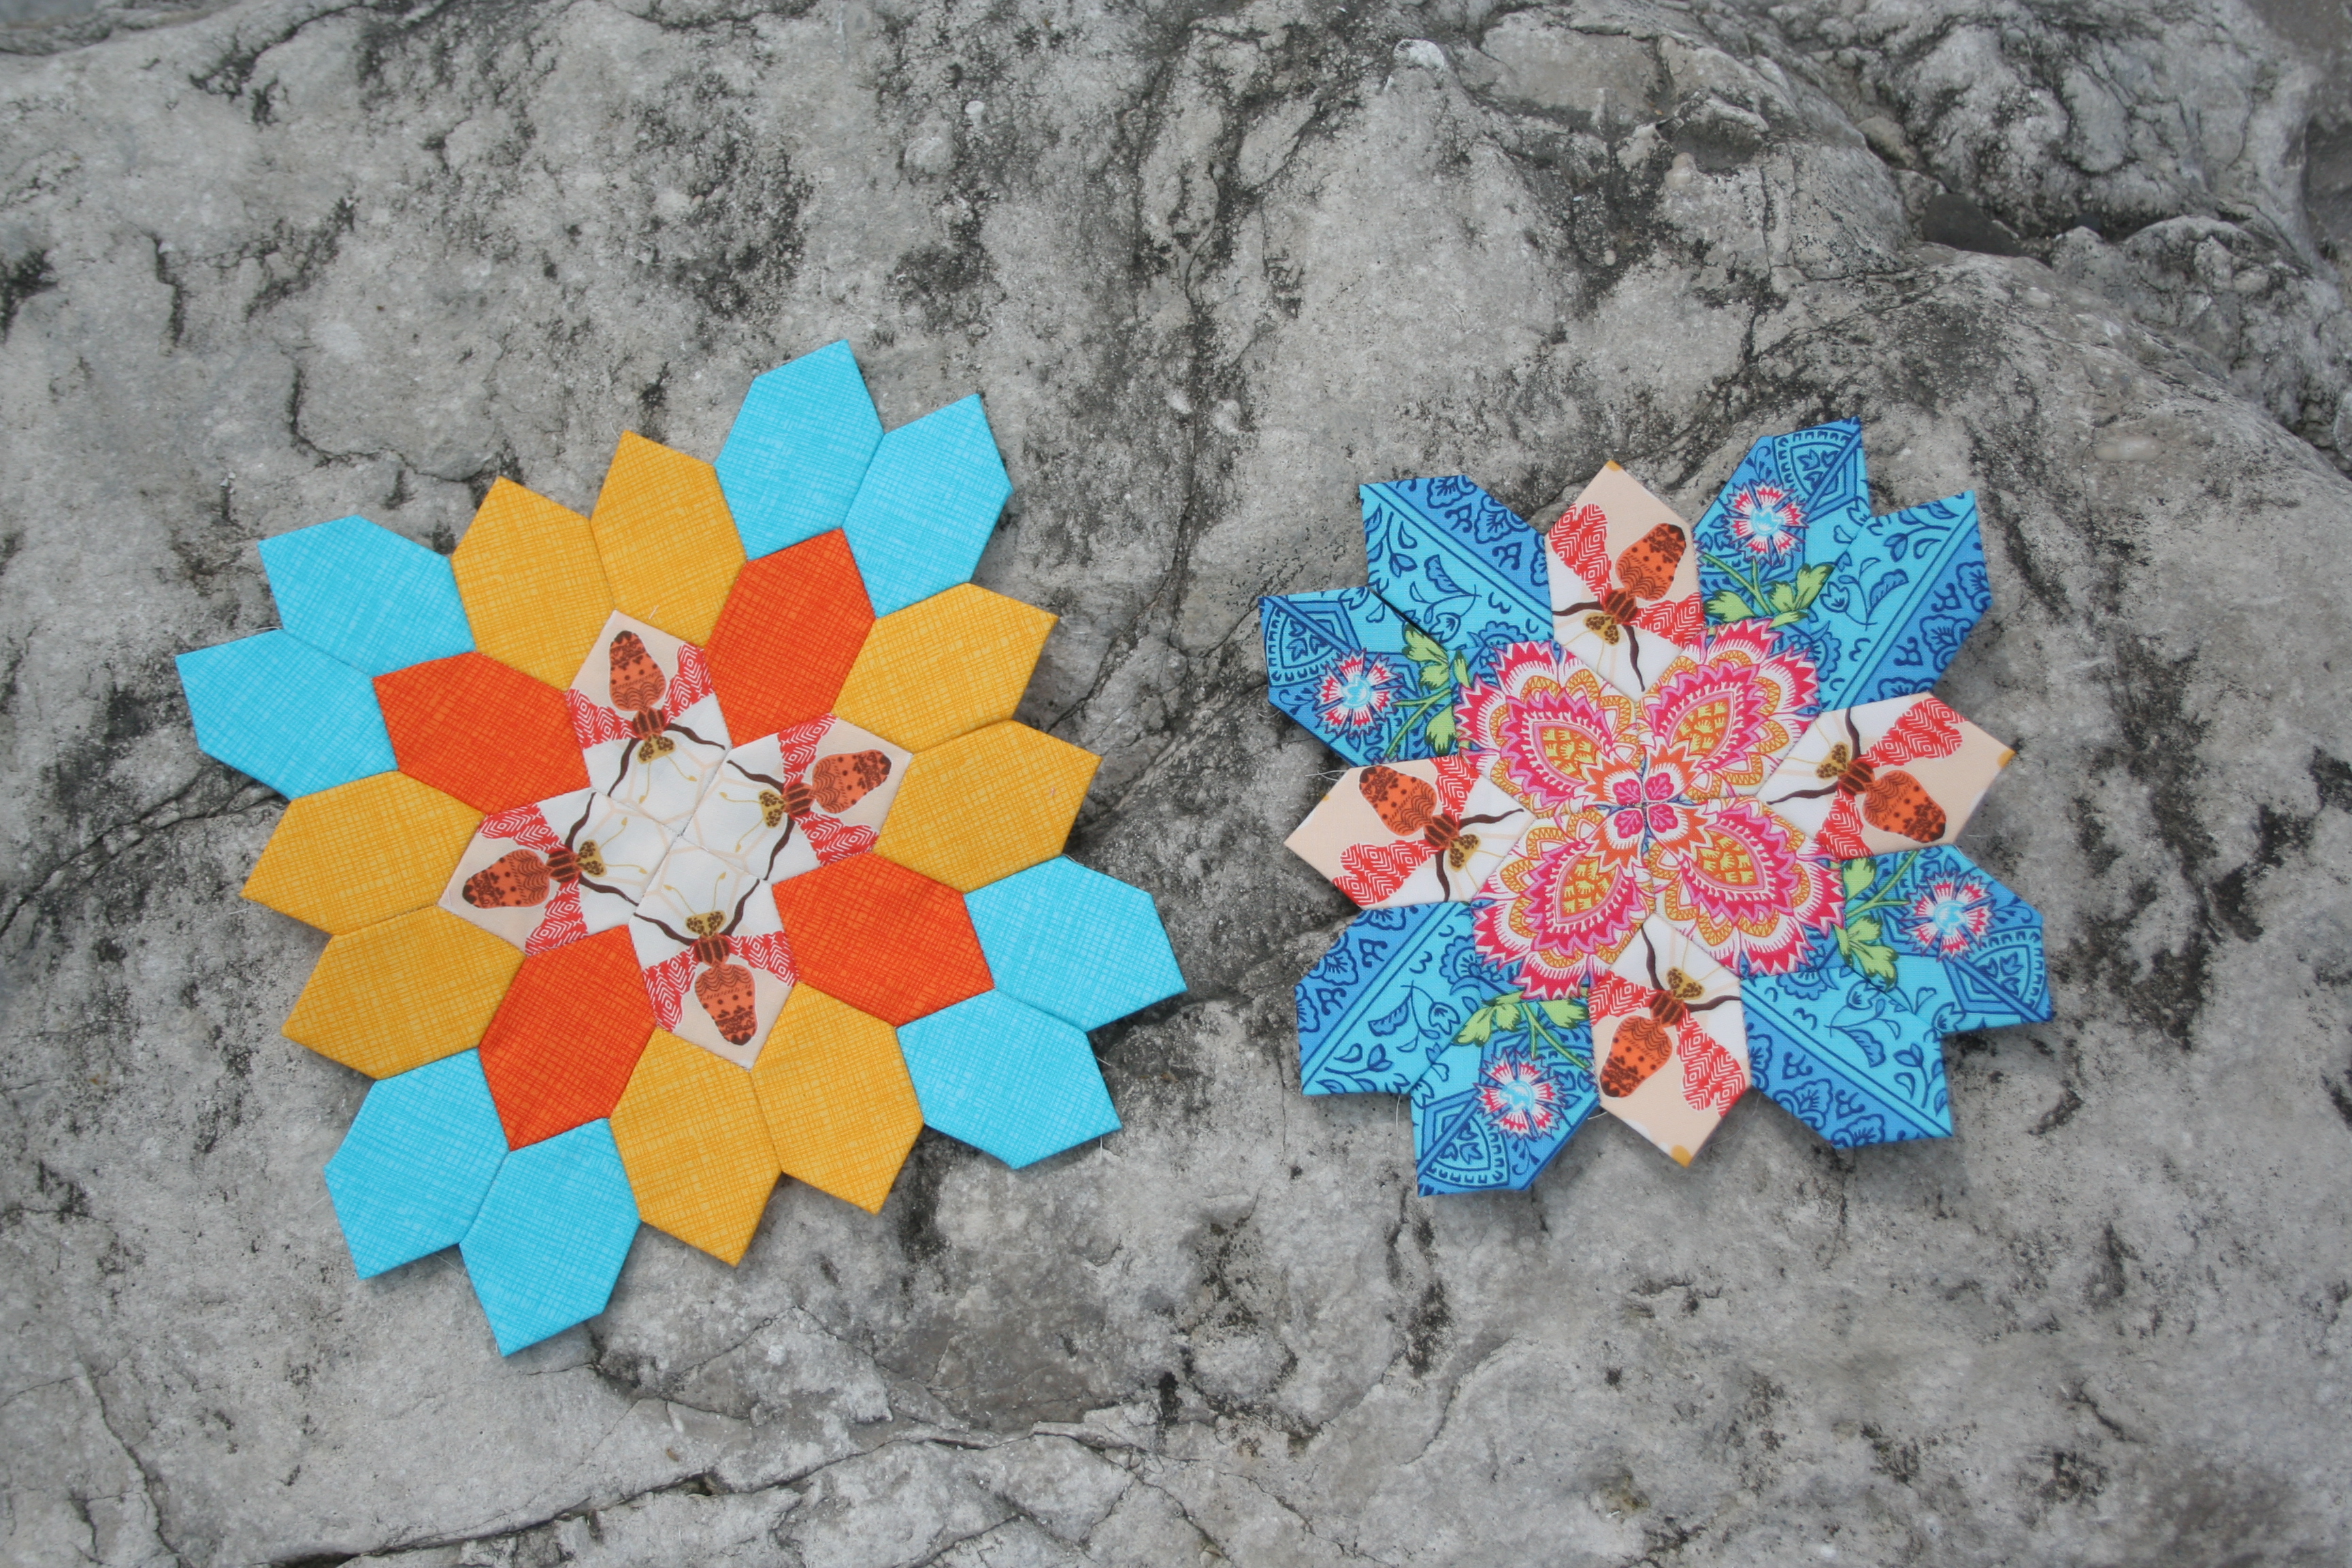
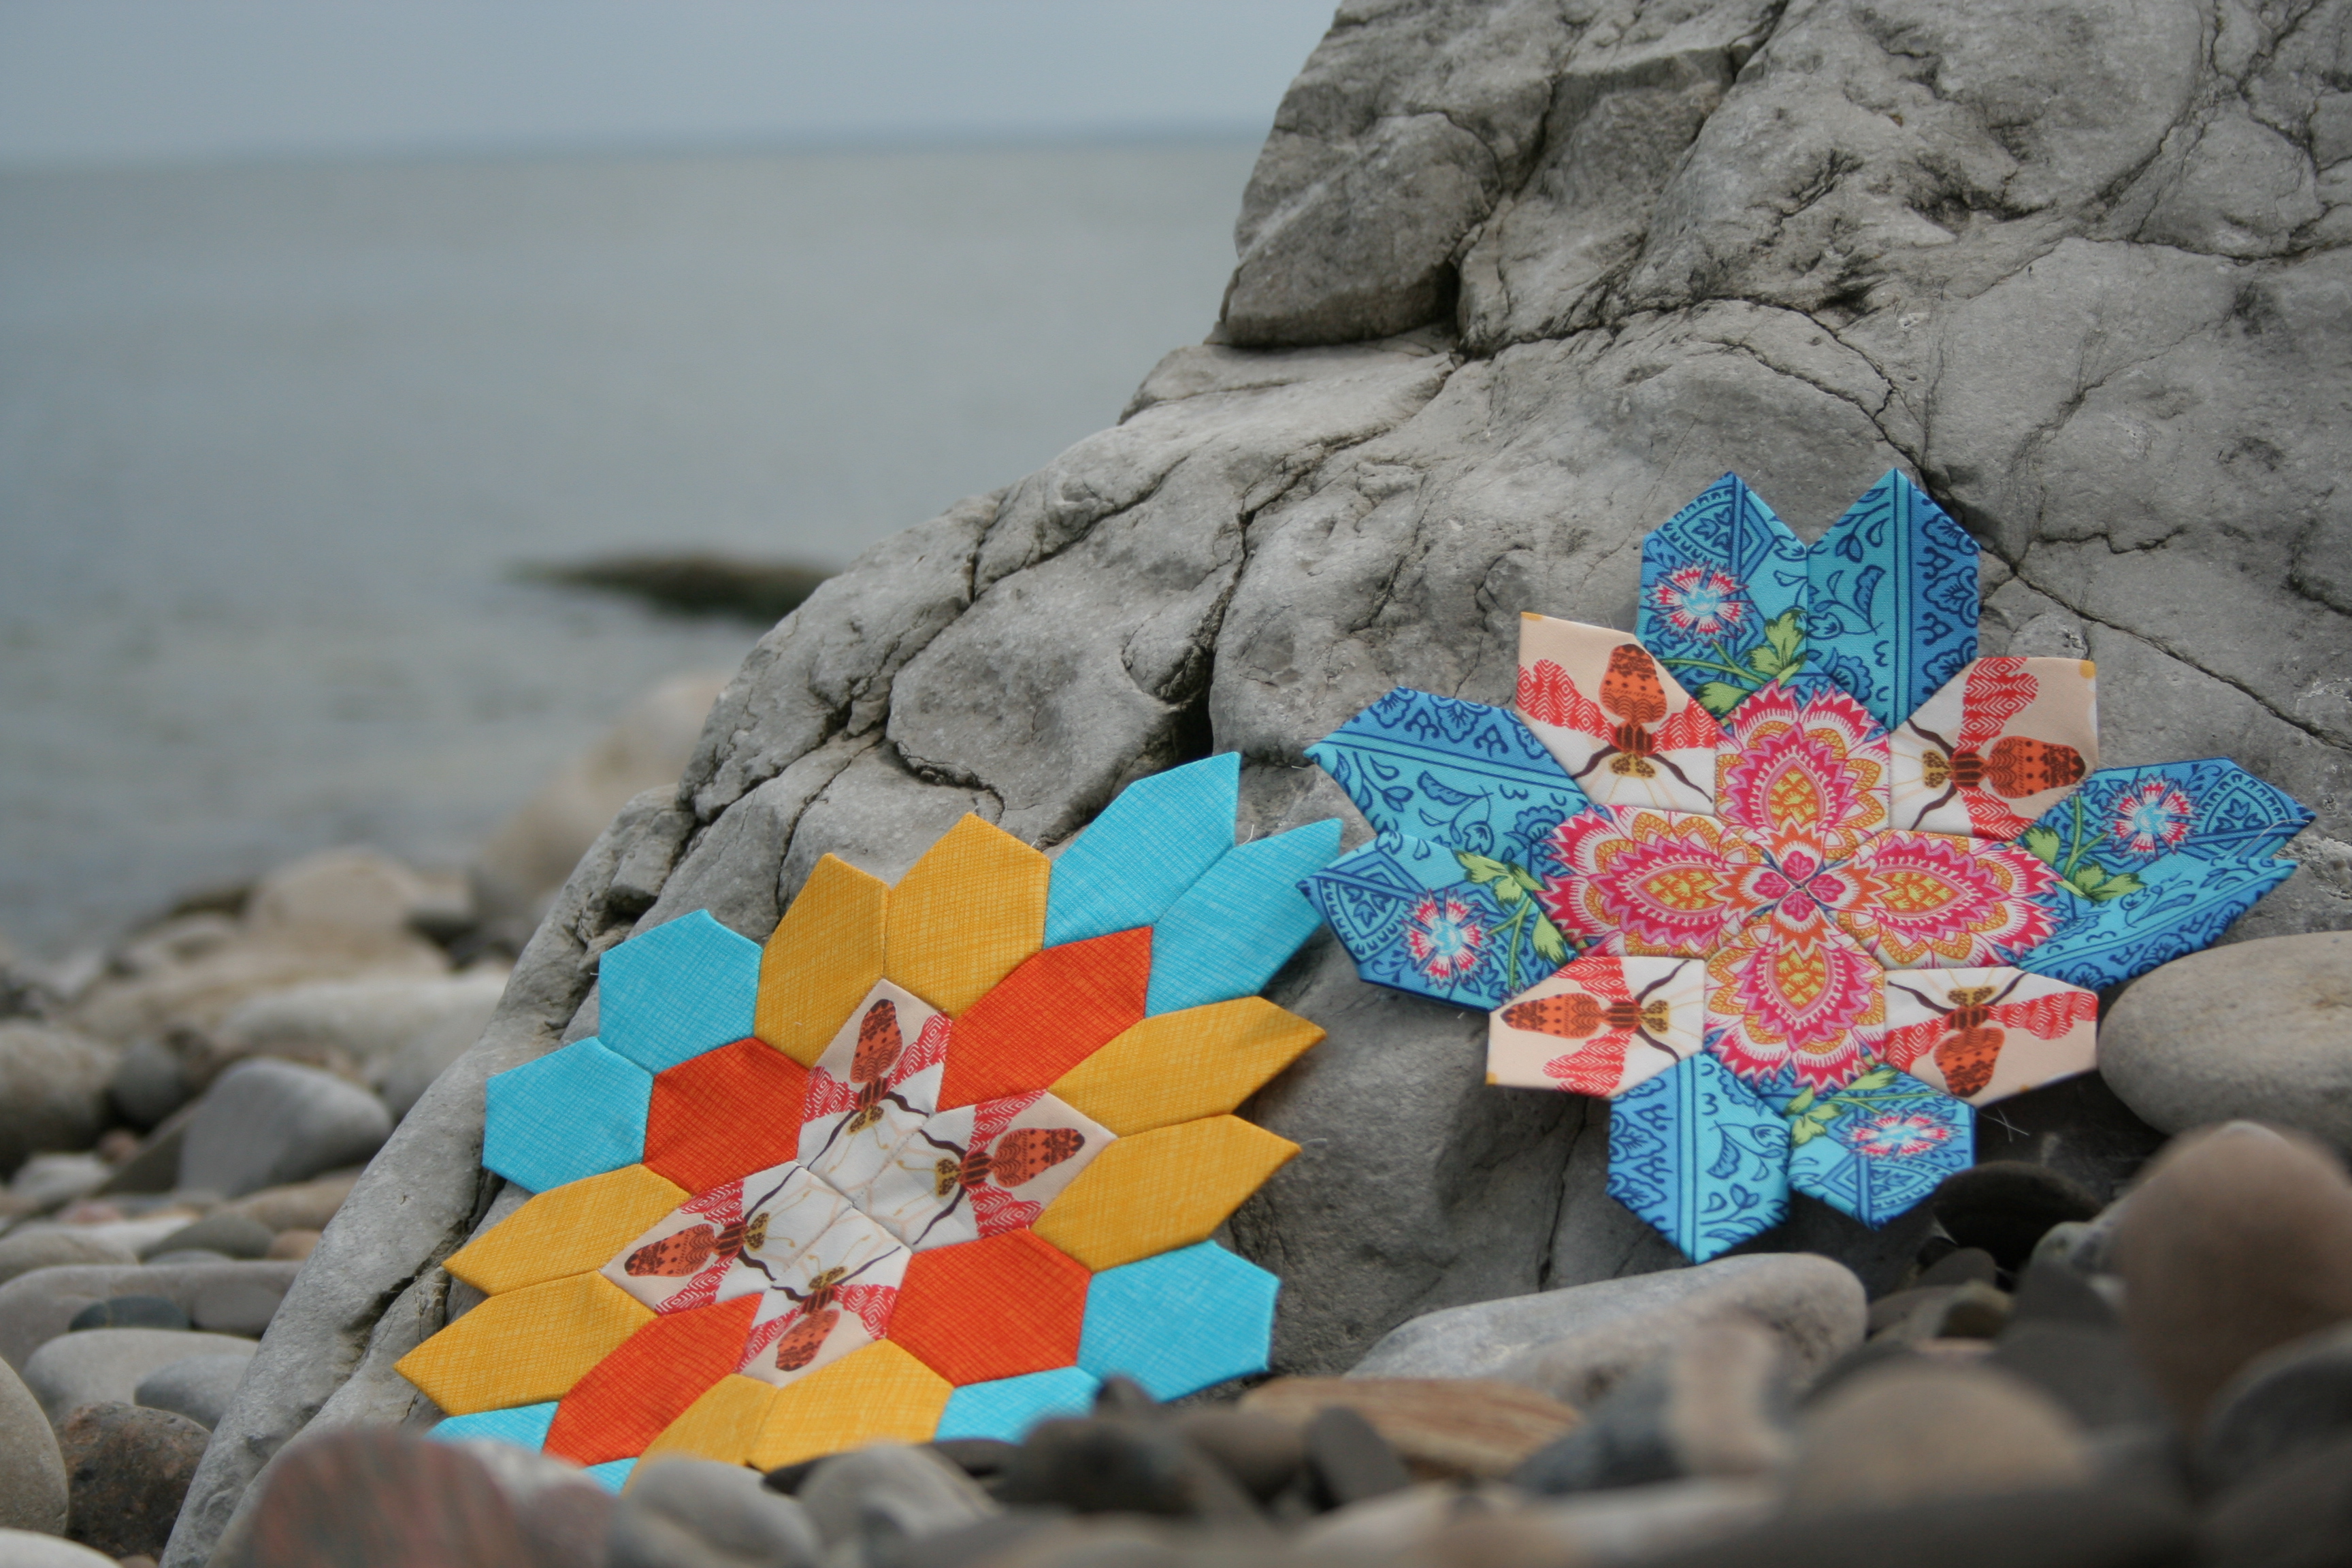
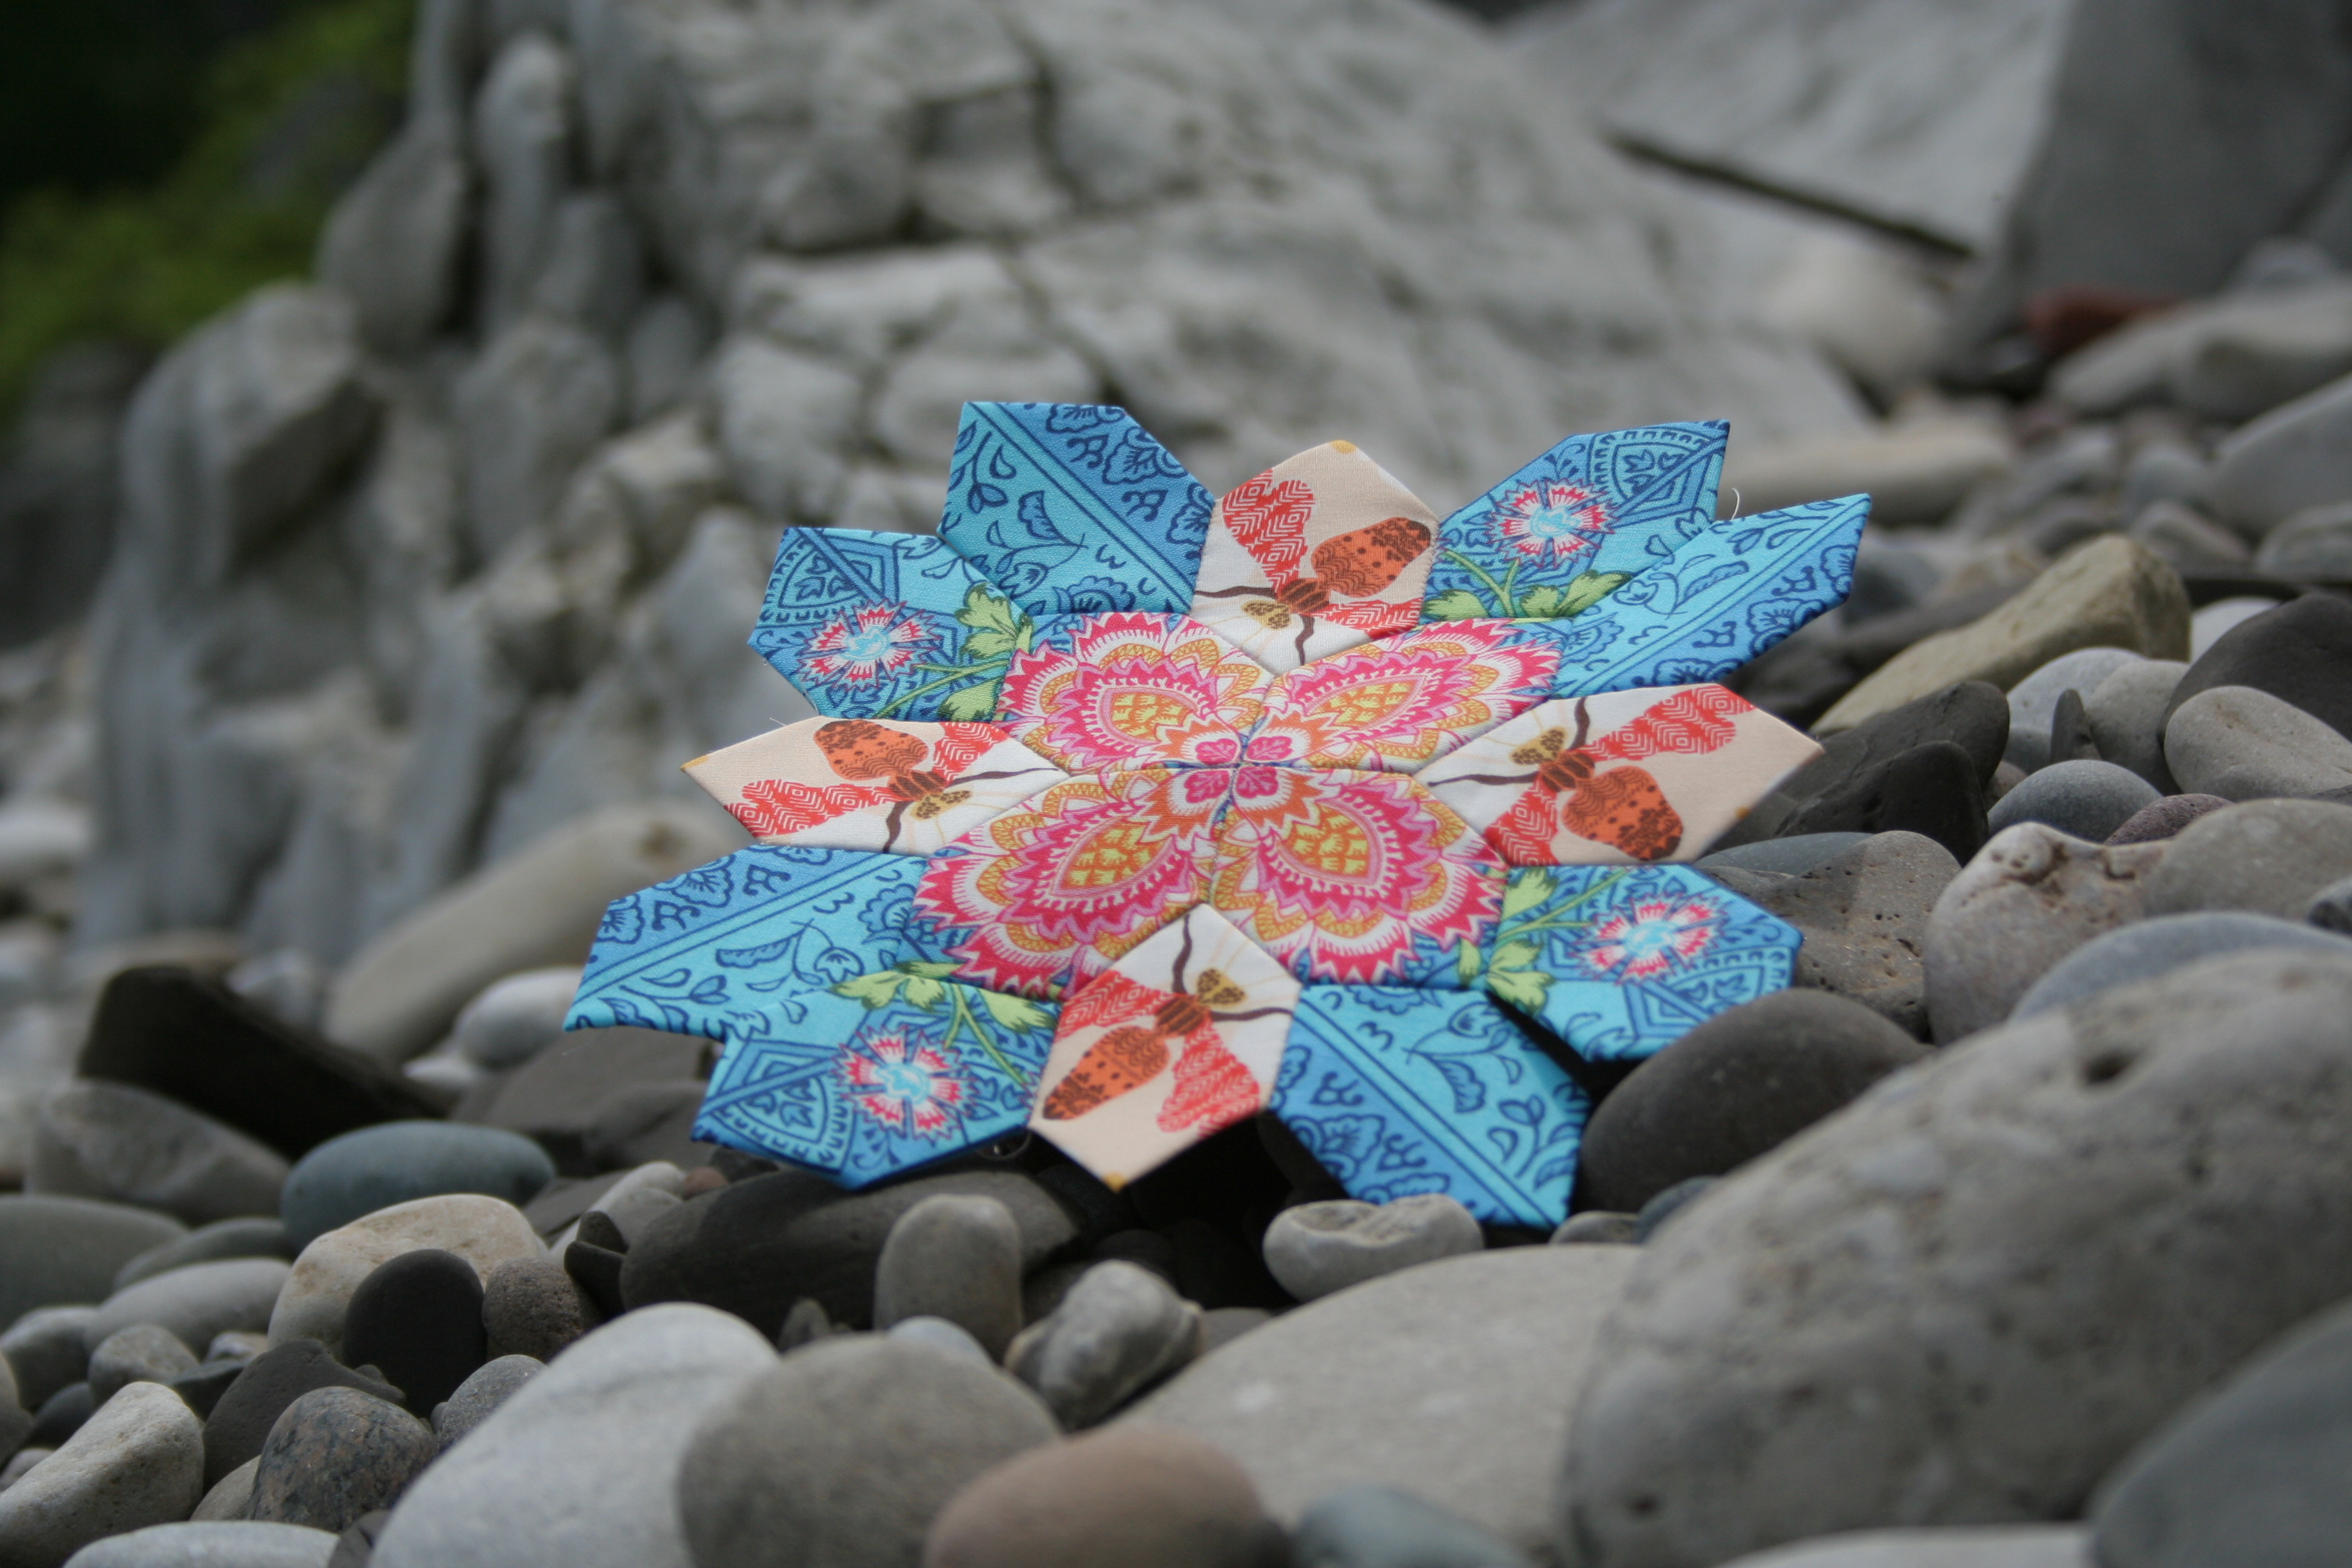
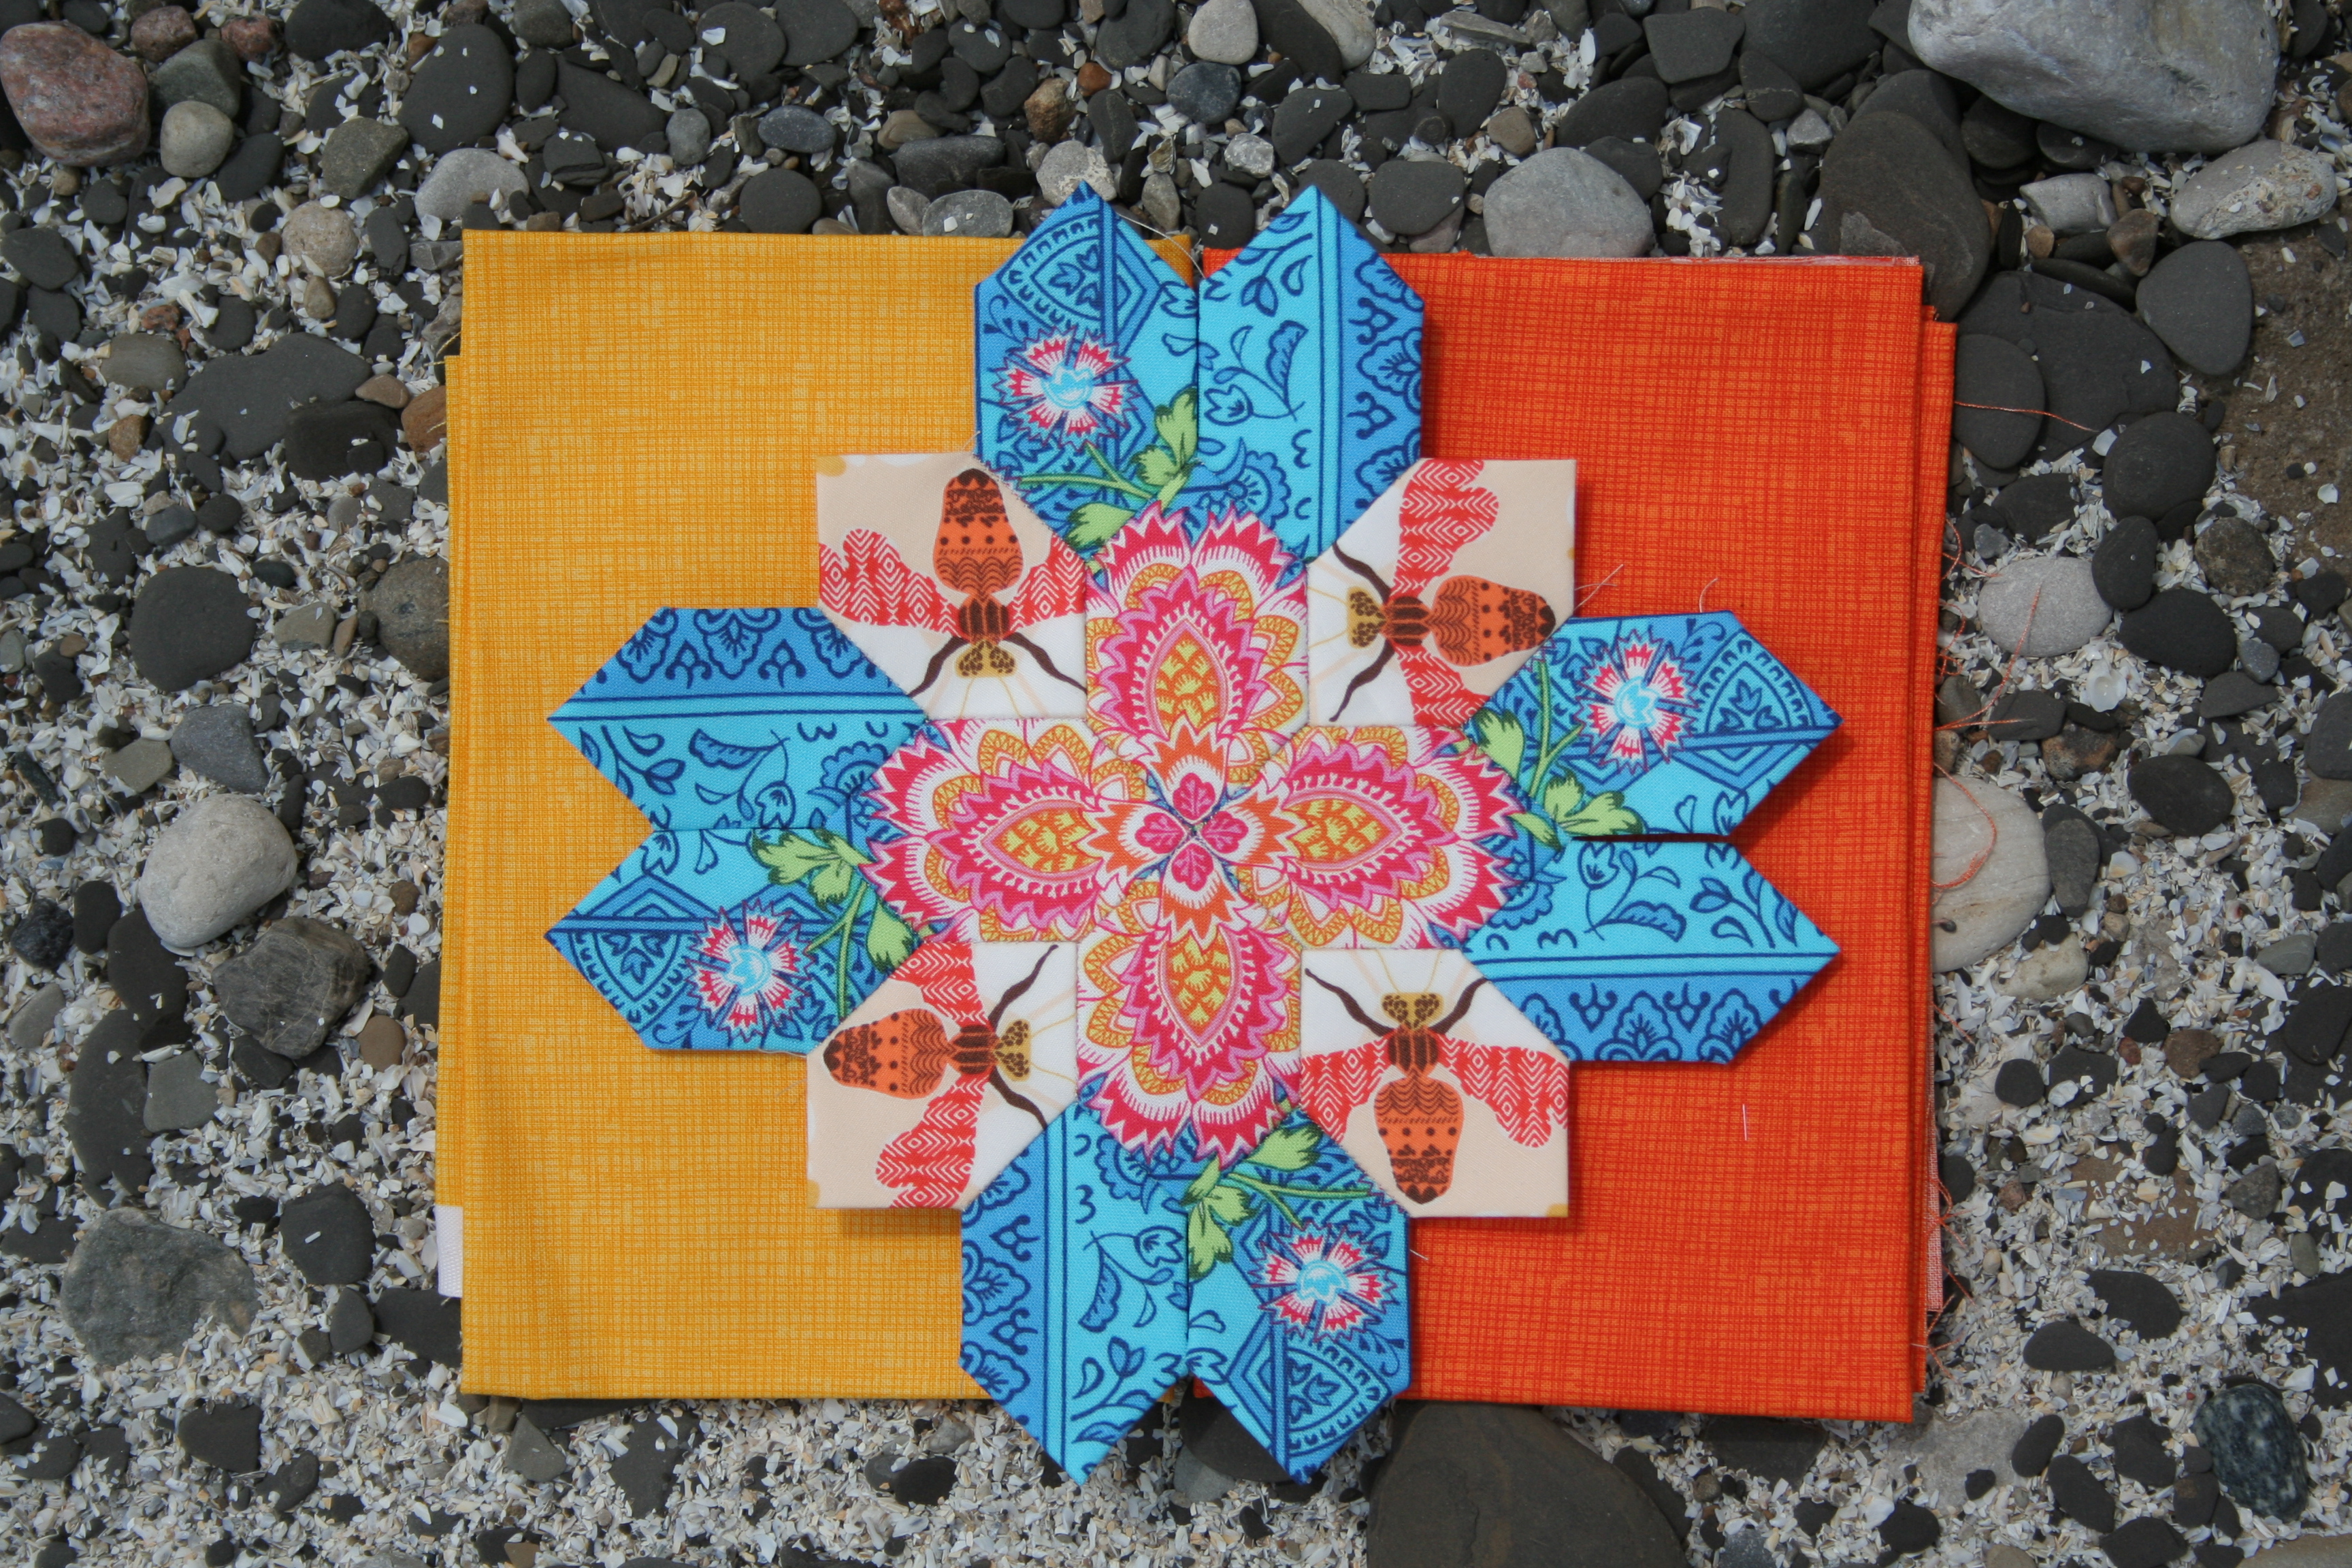
It feels like I’ve been on vacation for most of July, which is not a bad thing! While traveling and away from my sewing machine, I have taken the opportunity to try my hand at English Paper Piecing (EPP) for the first time, delving into stitching my first and second Lucy Boston Patchwork of the Crosses blocks. I was inspired by Jan at Sew and Sow Farm blog to try the Patchwork of the Crosses as my first EPP.I completed my first block (left) during the car ride from Maine to Ohio, and have almost completed my second block (right) since I’ve been here at our rental house on Lake Erie. I have had a lot of fun finding the perfect little peeks of fabric for each of the pieces, called “fussy cutting” by the quilting community, and decidedly meticulous but perhaps not so fussy, per a discussion I recently had with my artist brother (more on that in a later post).
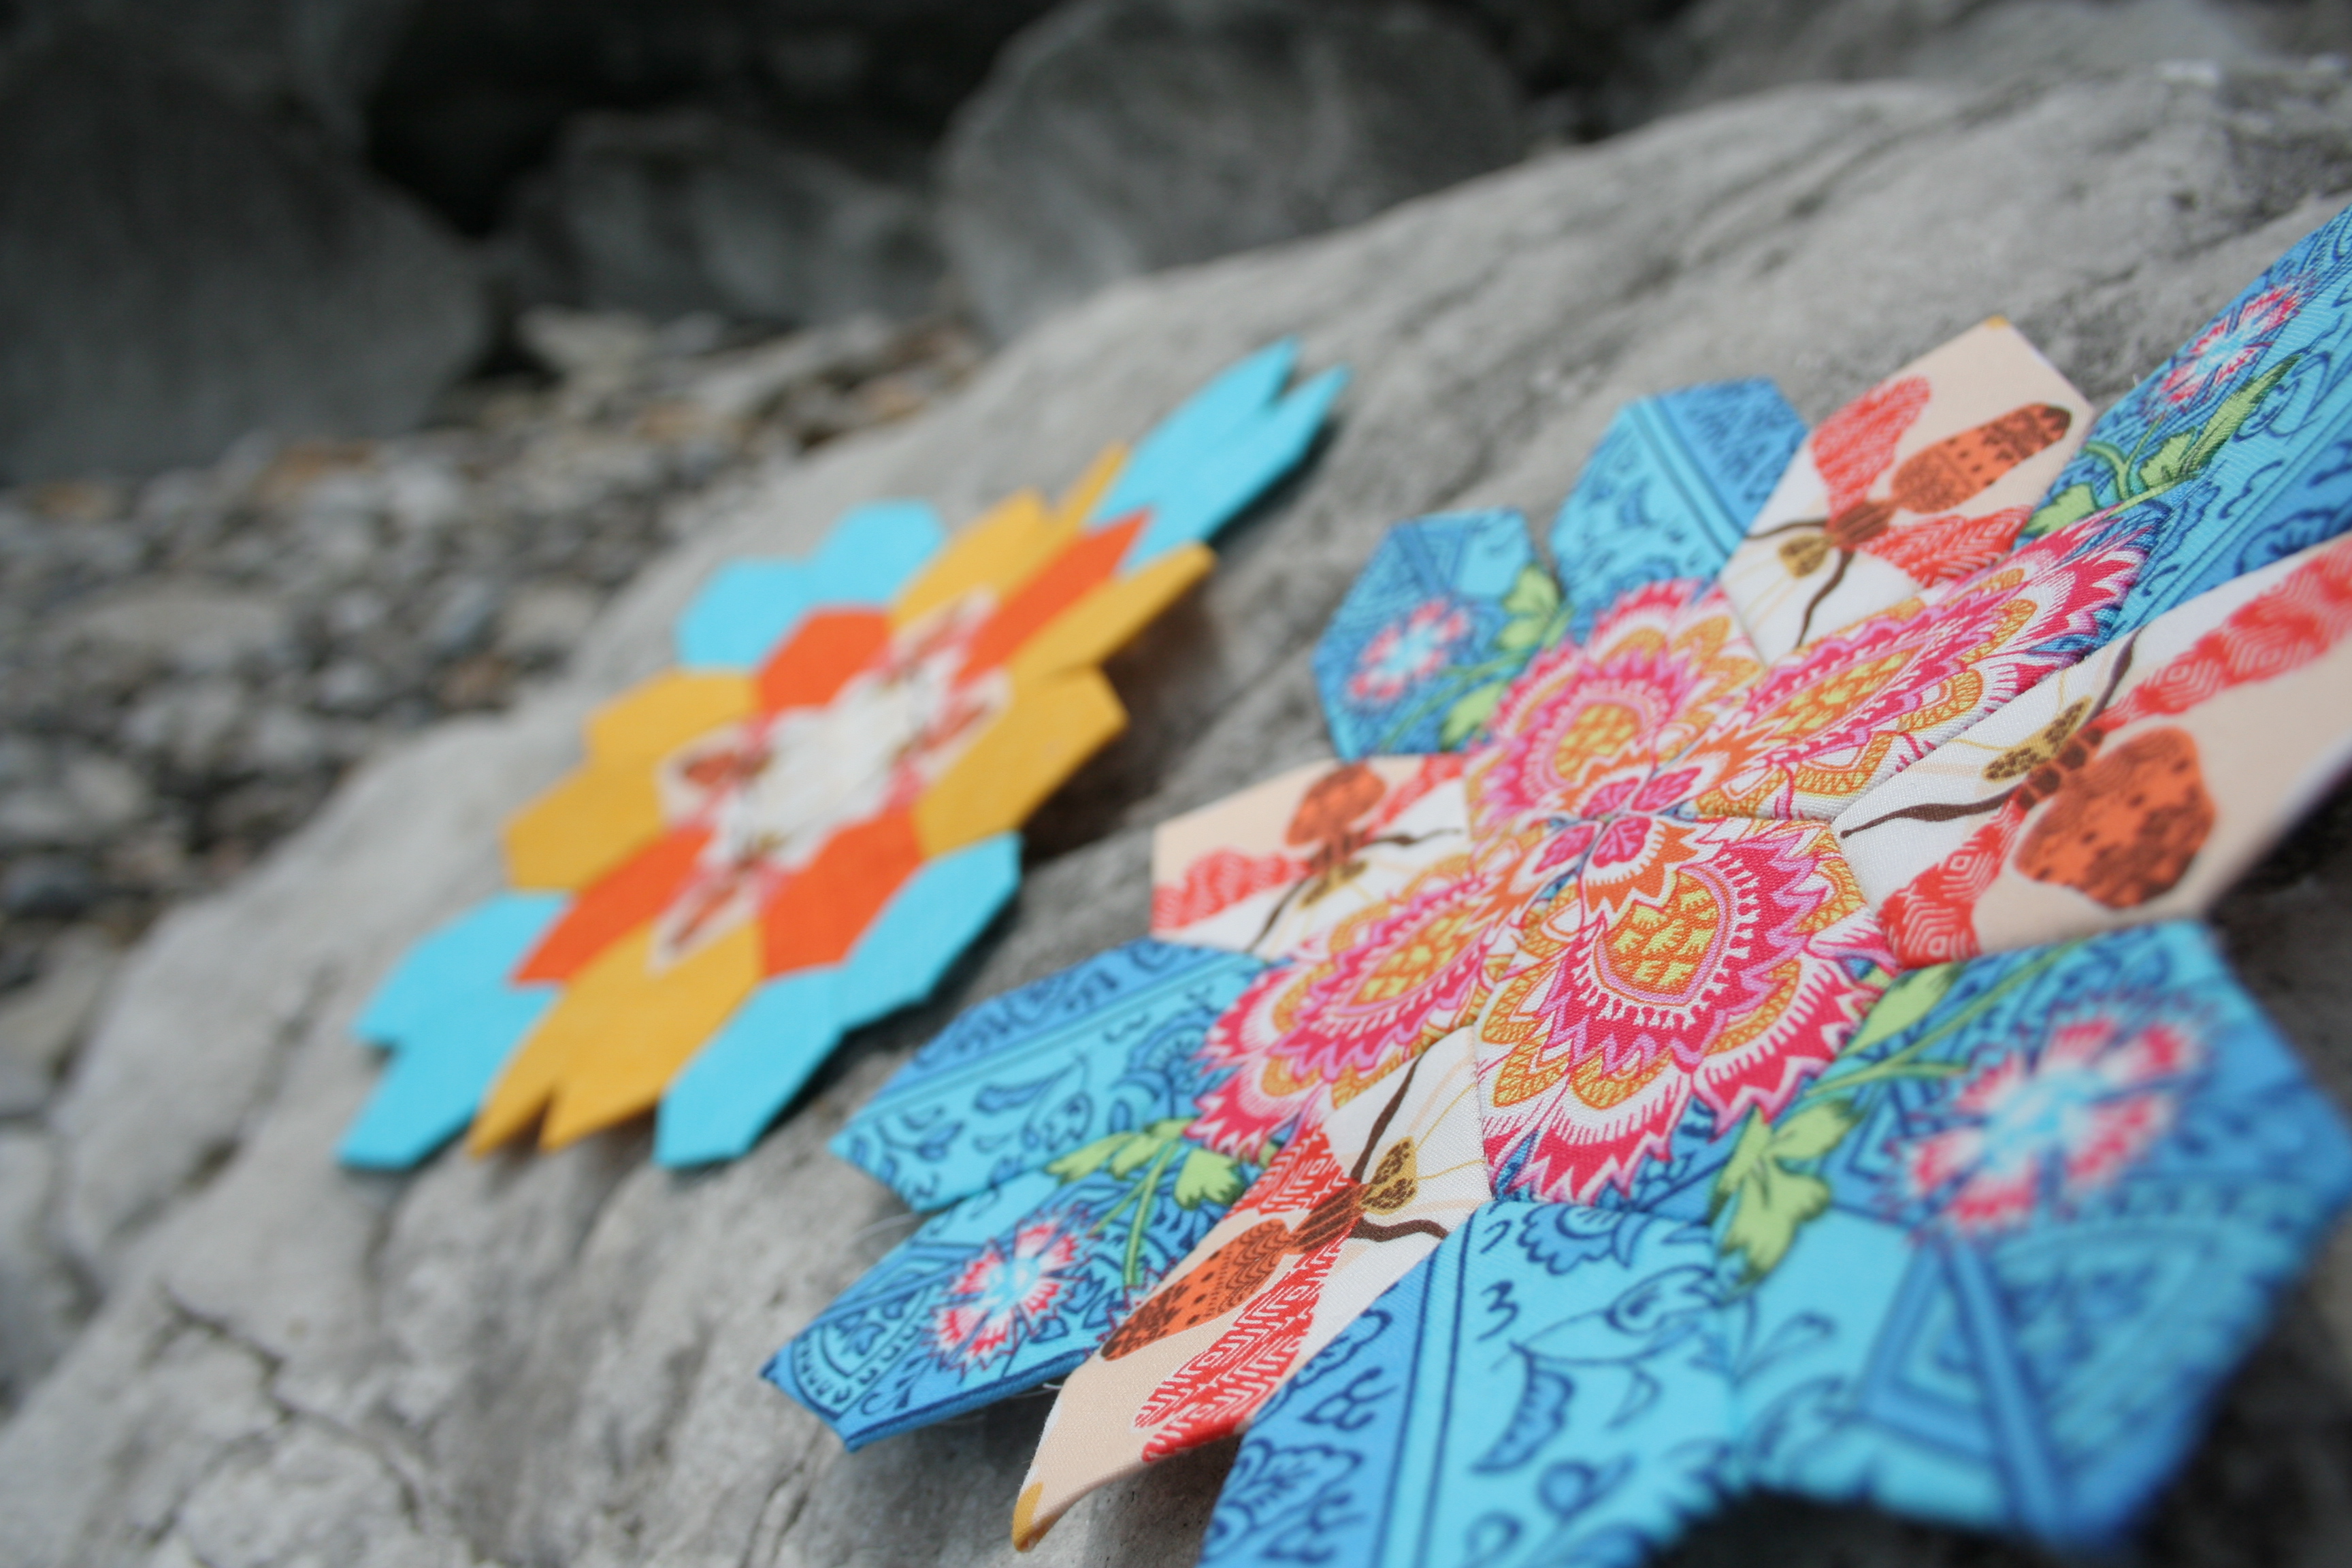
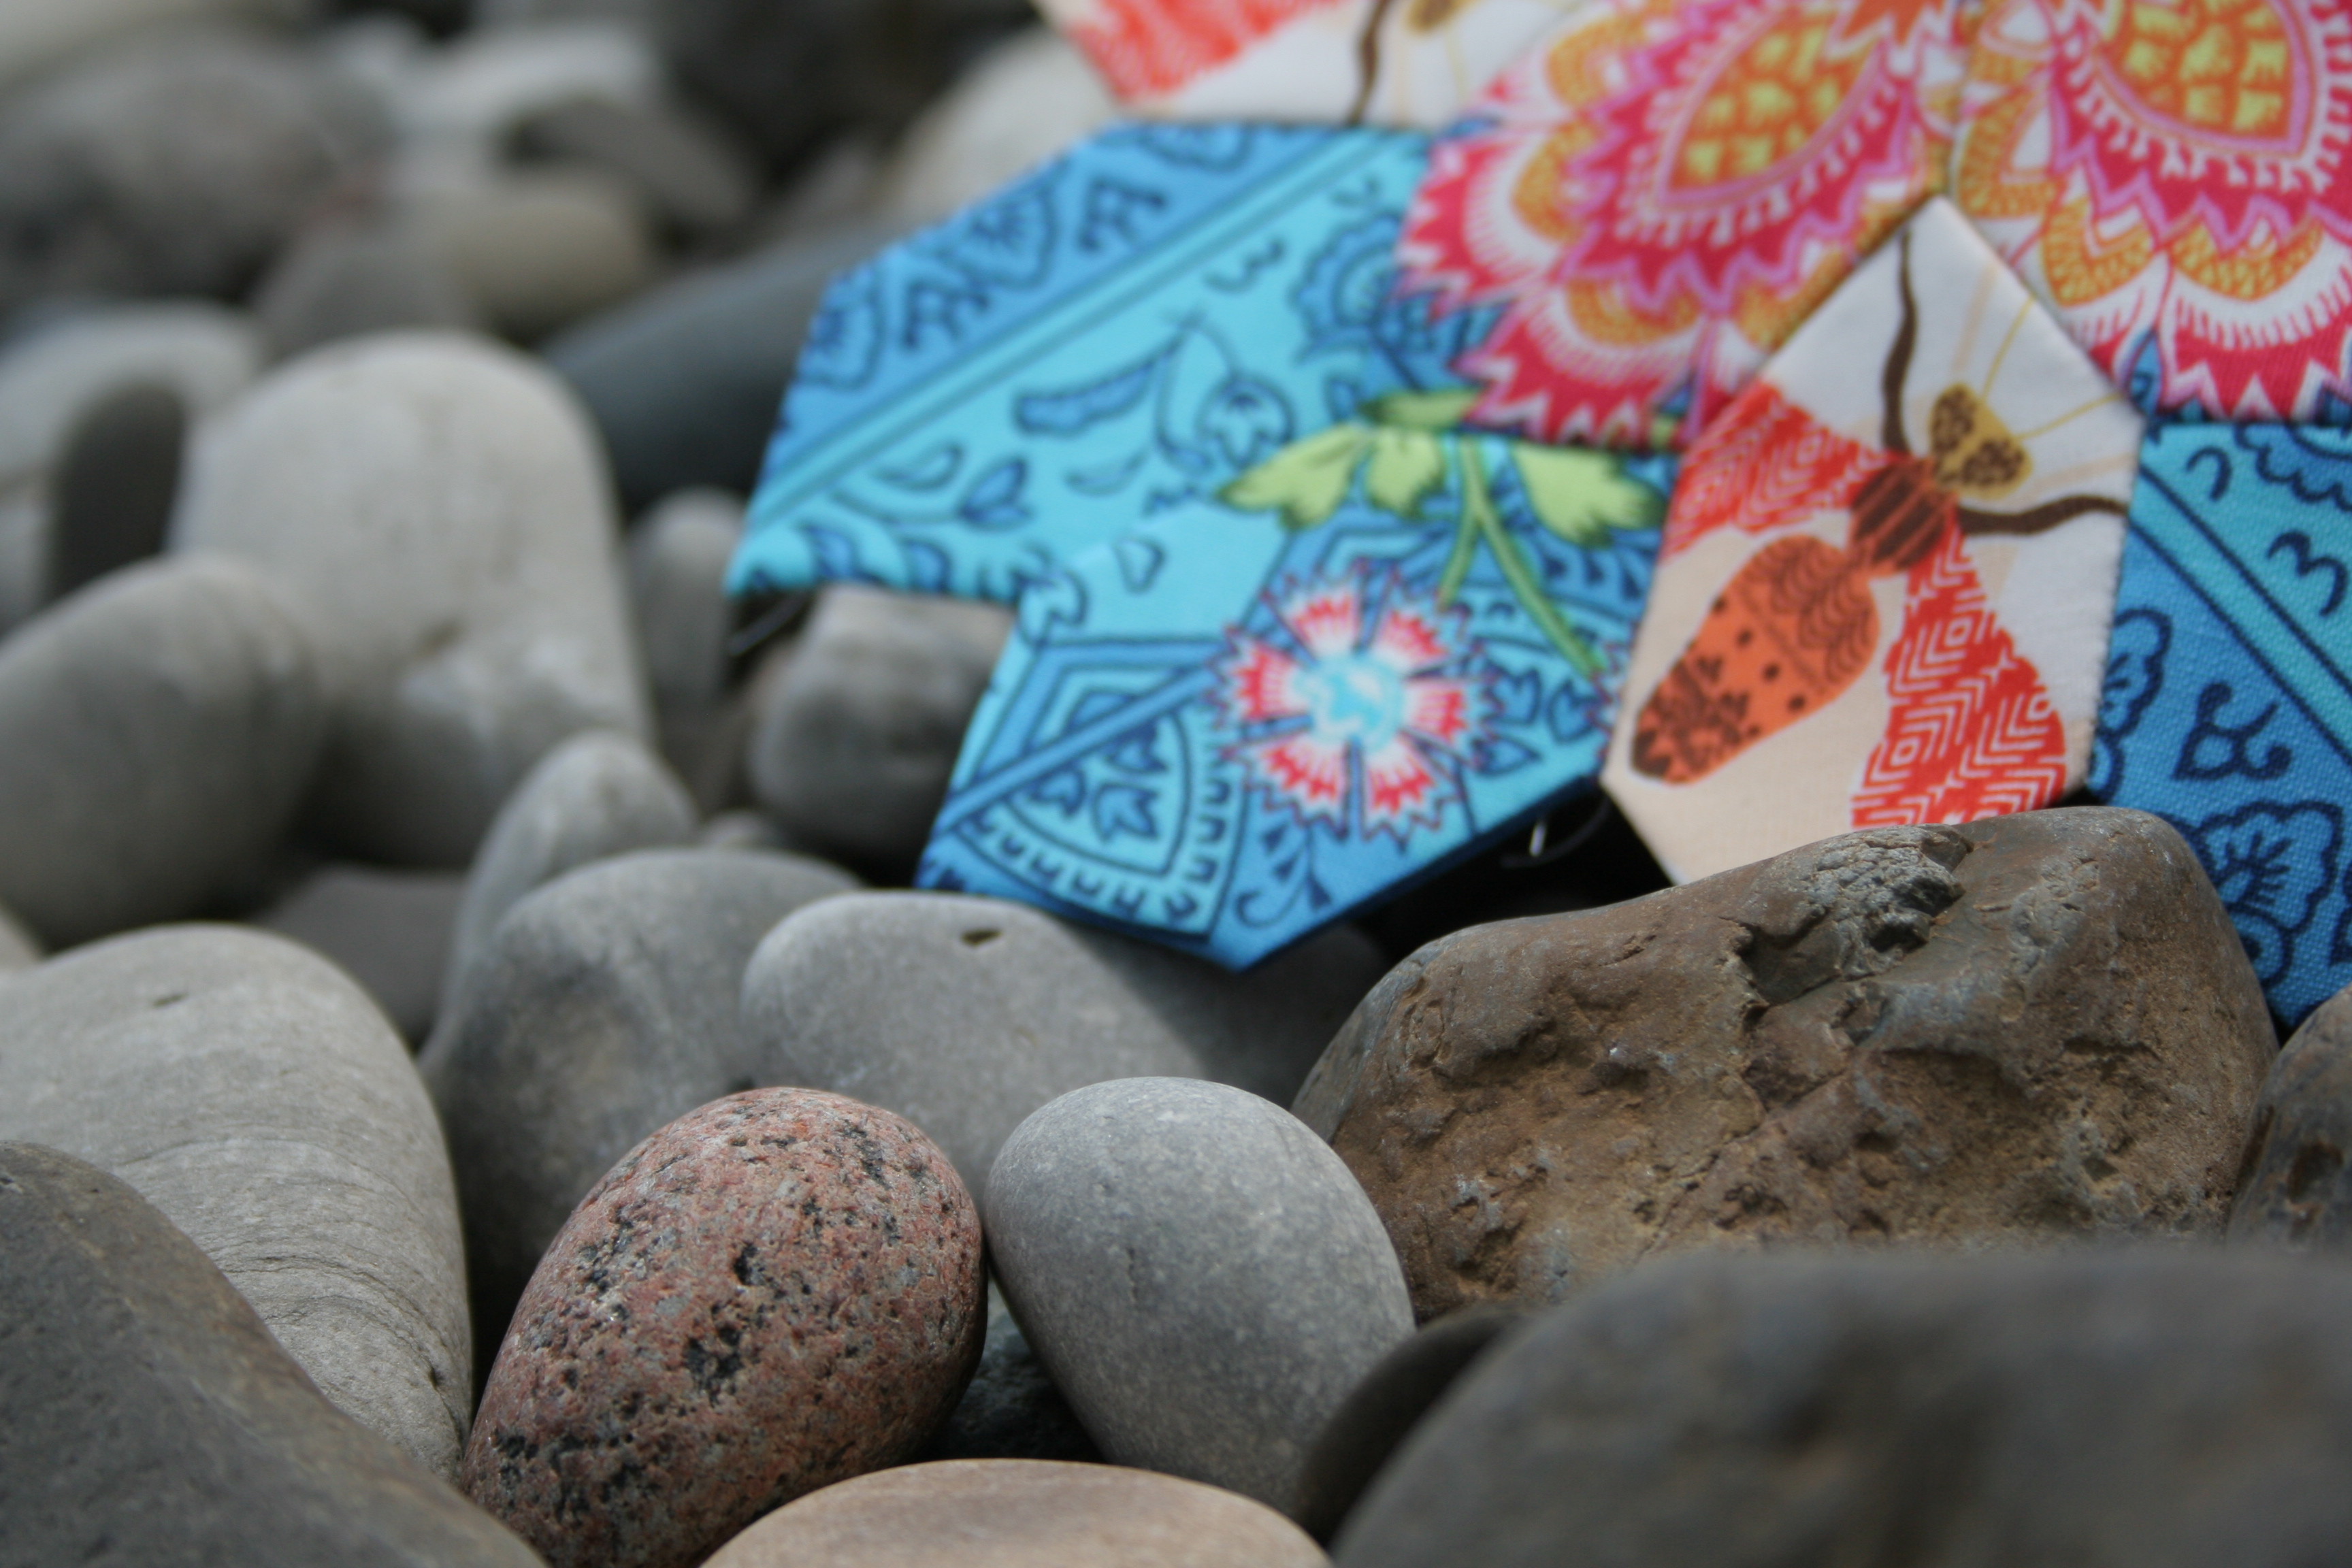
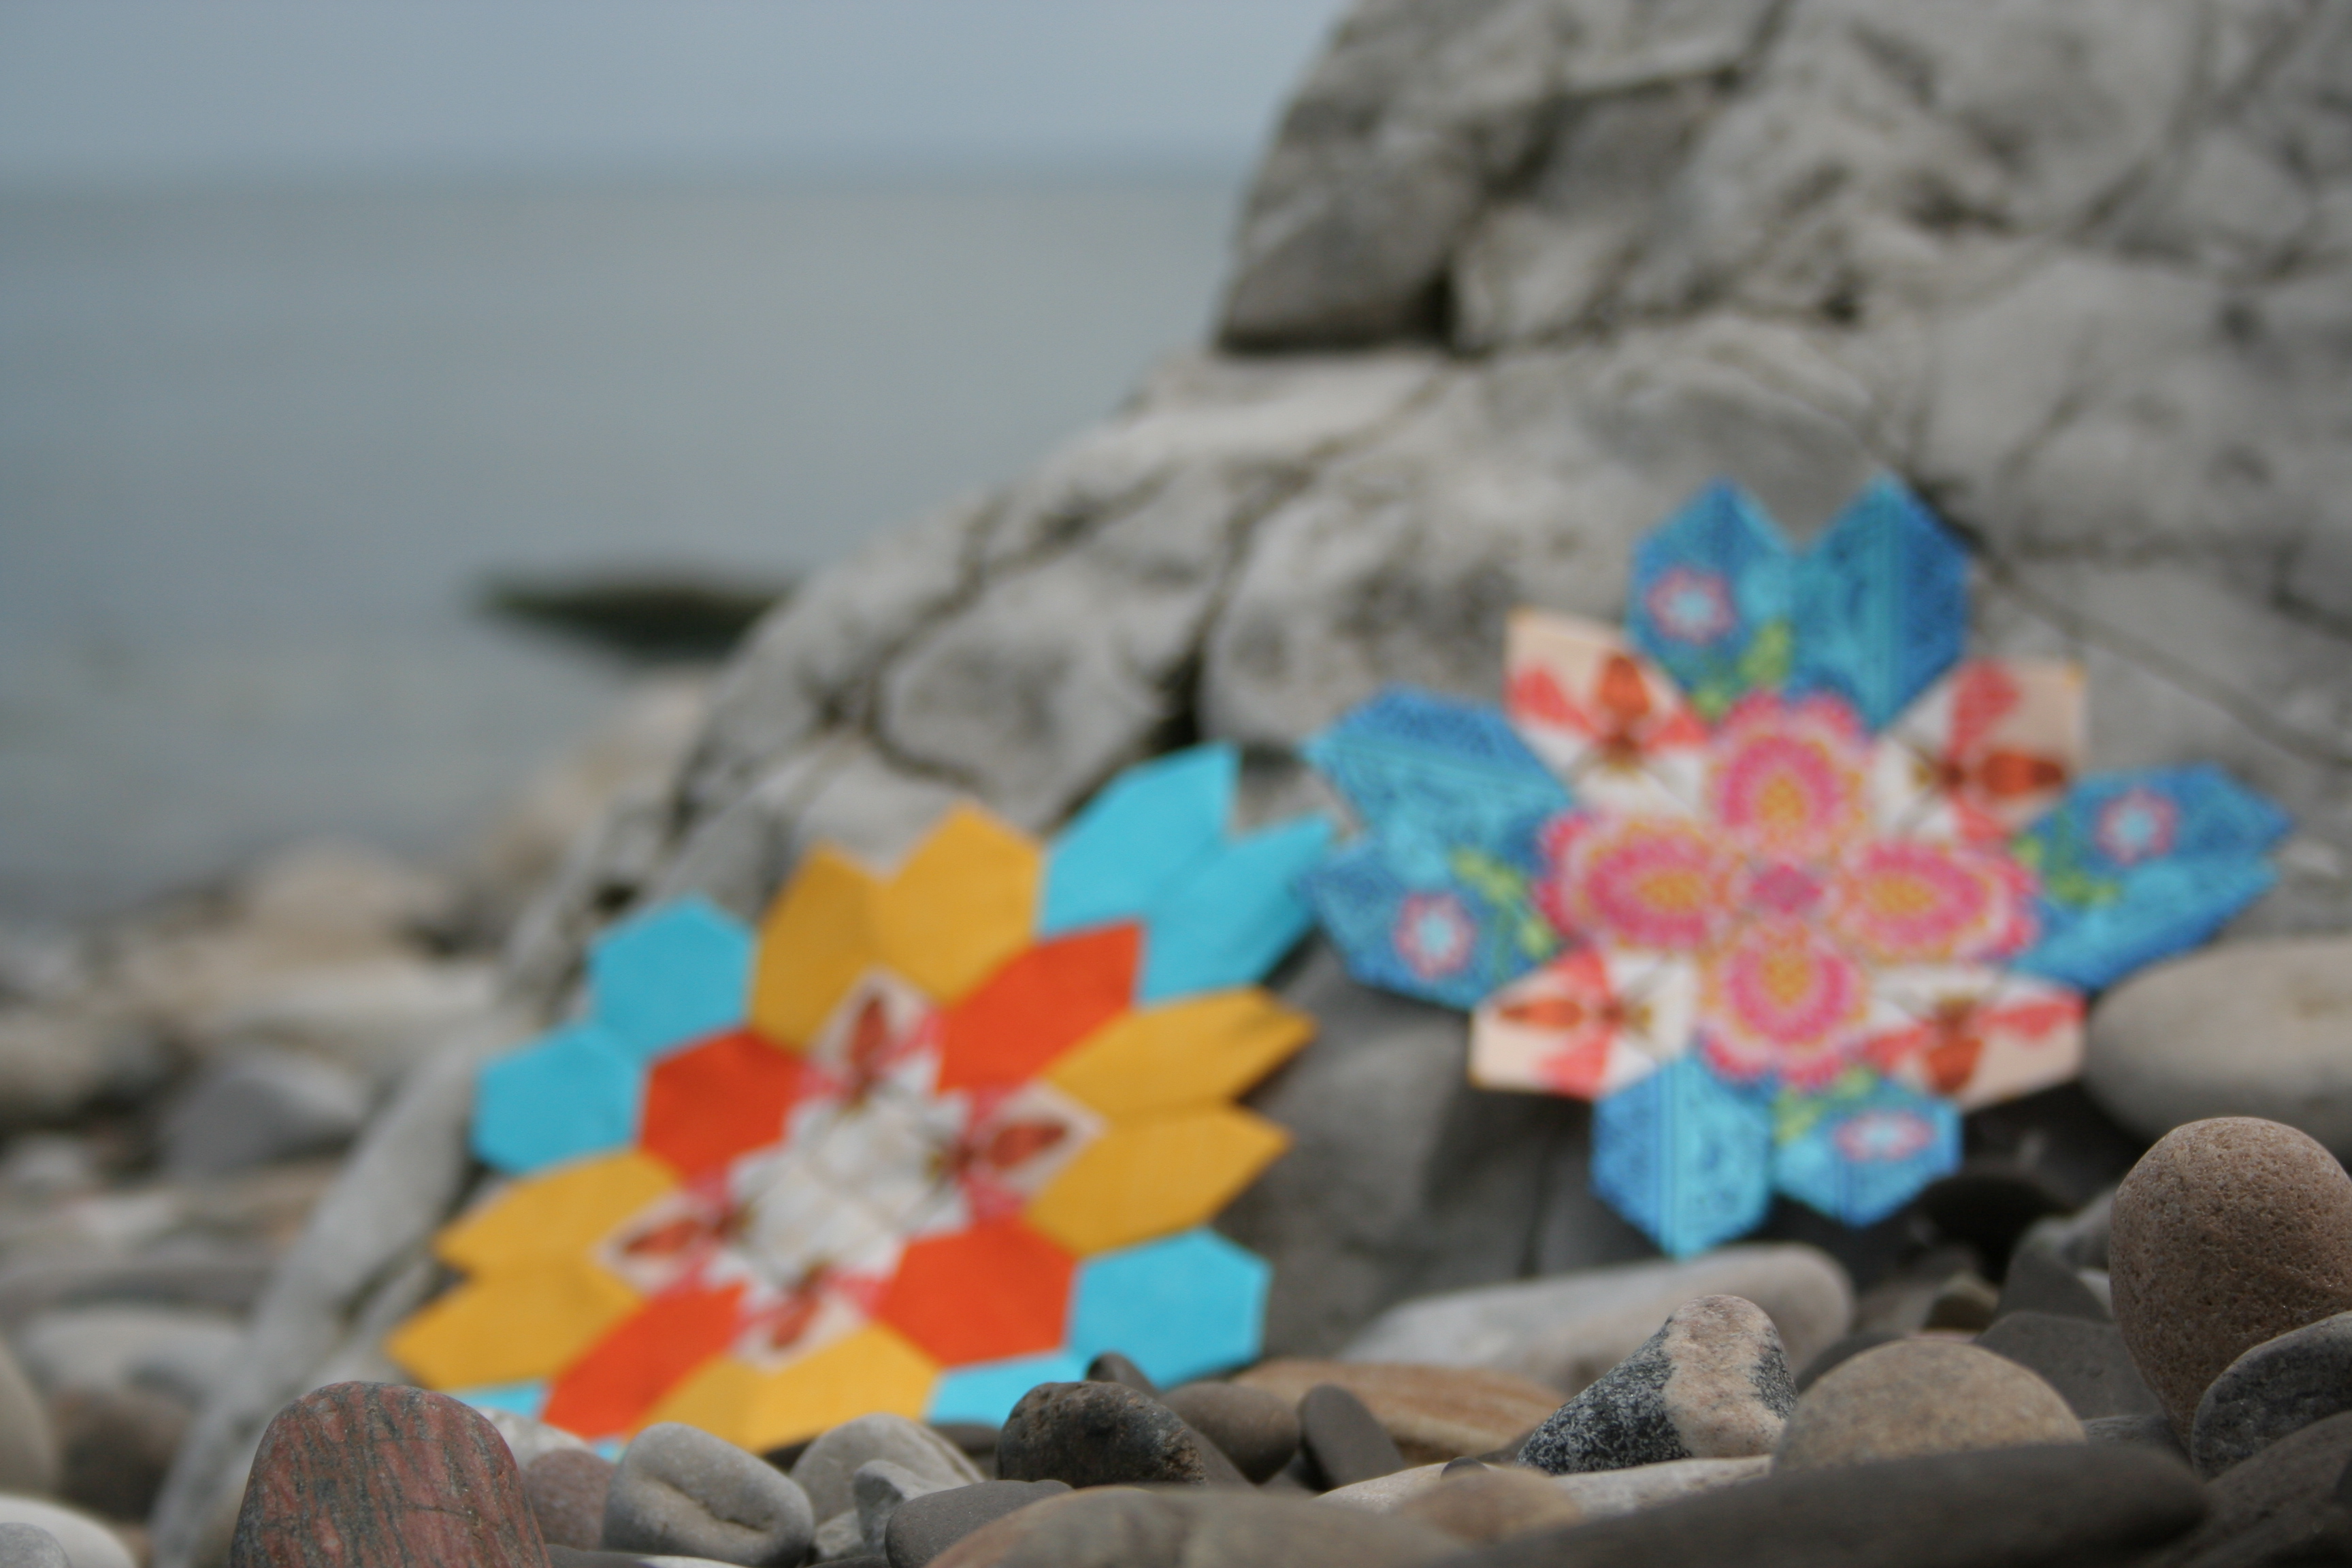
The coast of Lake Erie is gorgeous and very different than the coast of Maine. I had a good shot of my EPP wips on the rocks earlier today, and here are the results:
Playing with depth of field in photographs is so much fun. I love the difference a little change of focus can make with the photo outcome.Beautiful rocks with a gorgeous backdrop.Lark by Amy Butler lends itself well to “fussy cutting”.
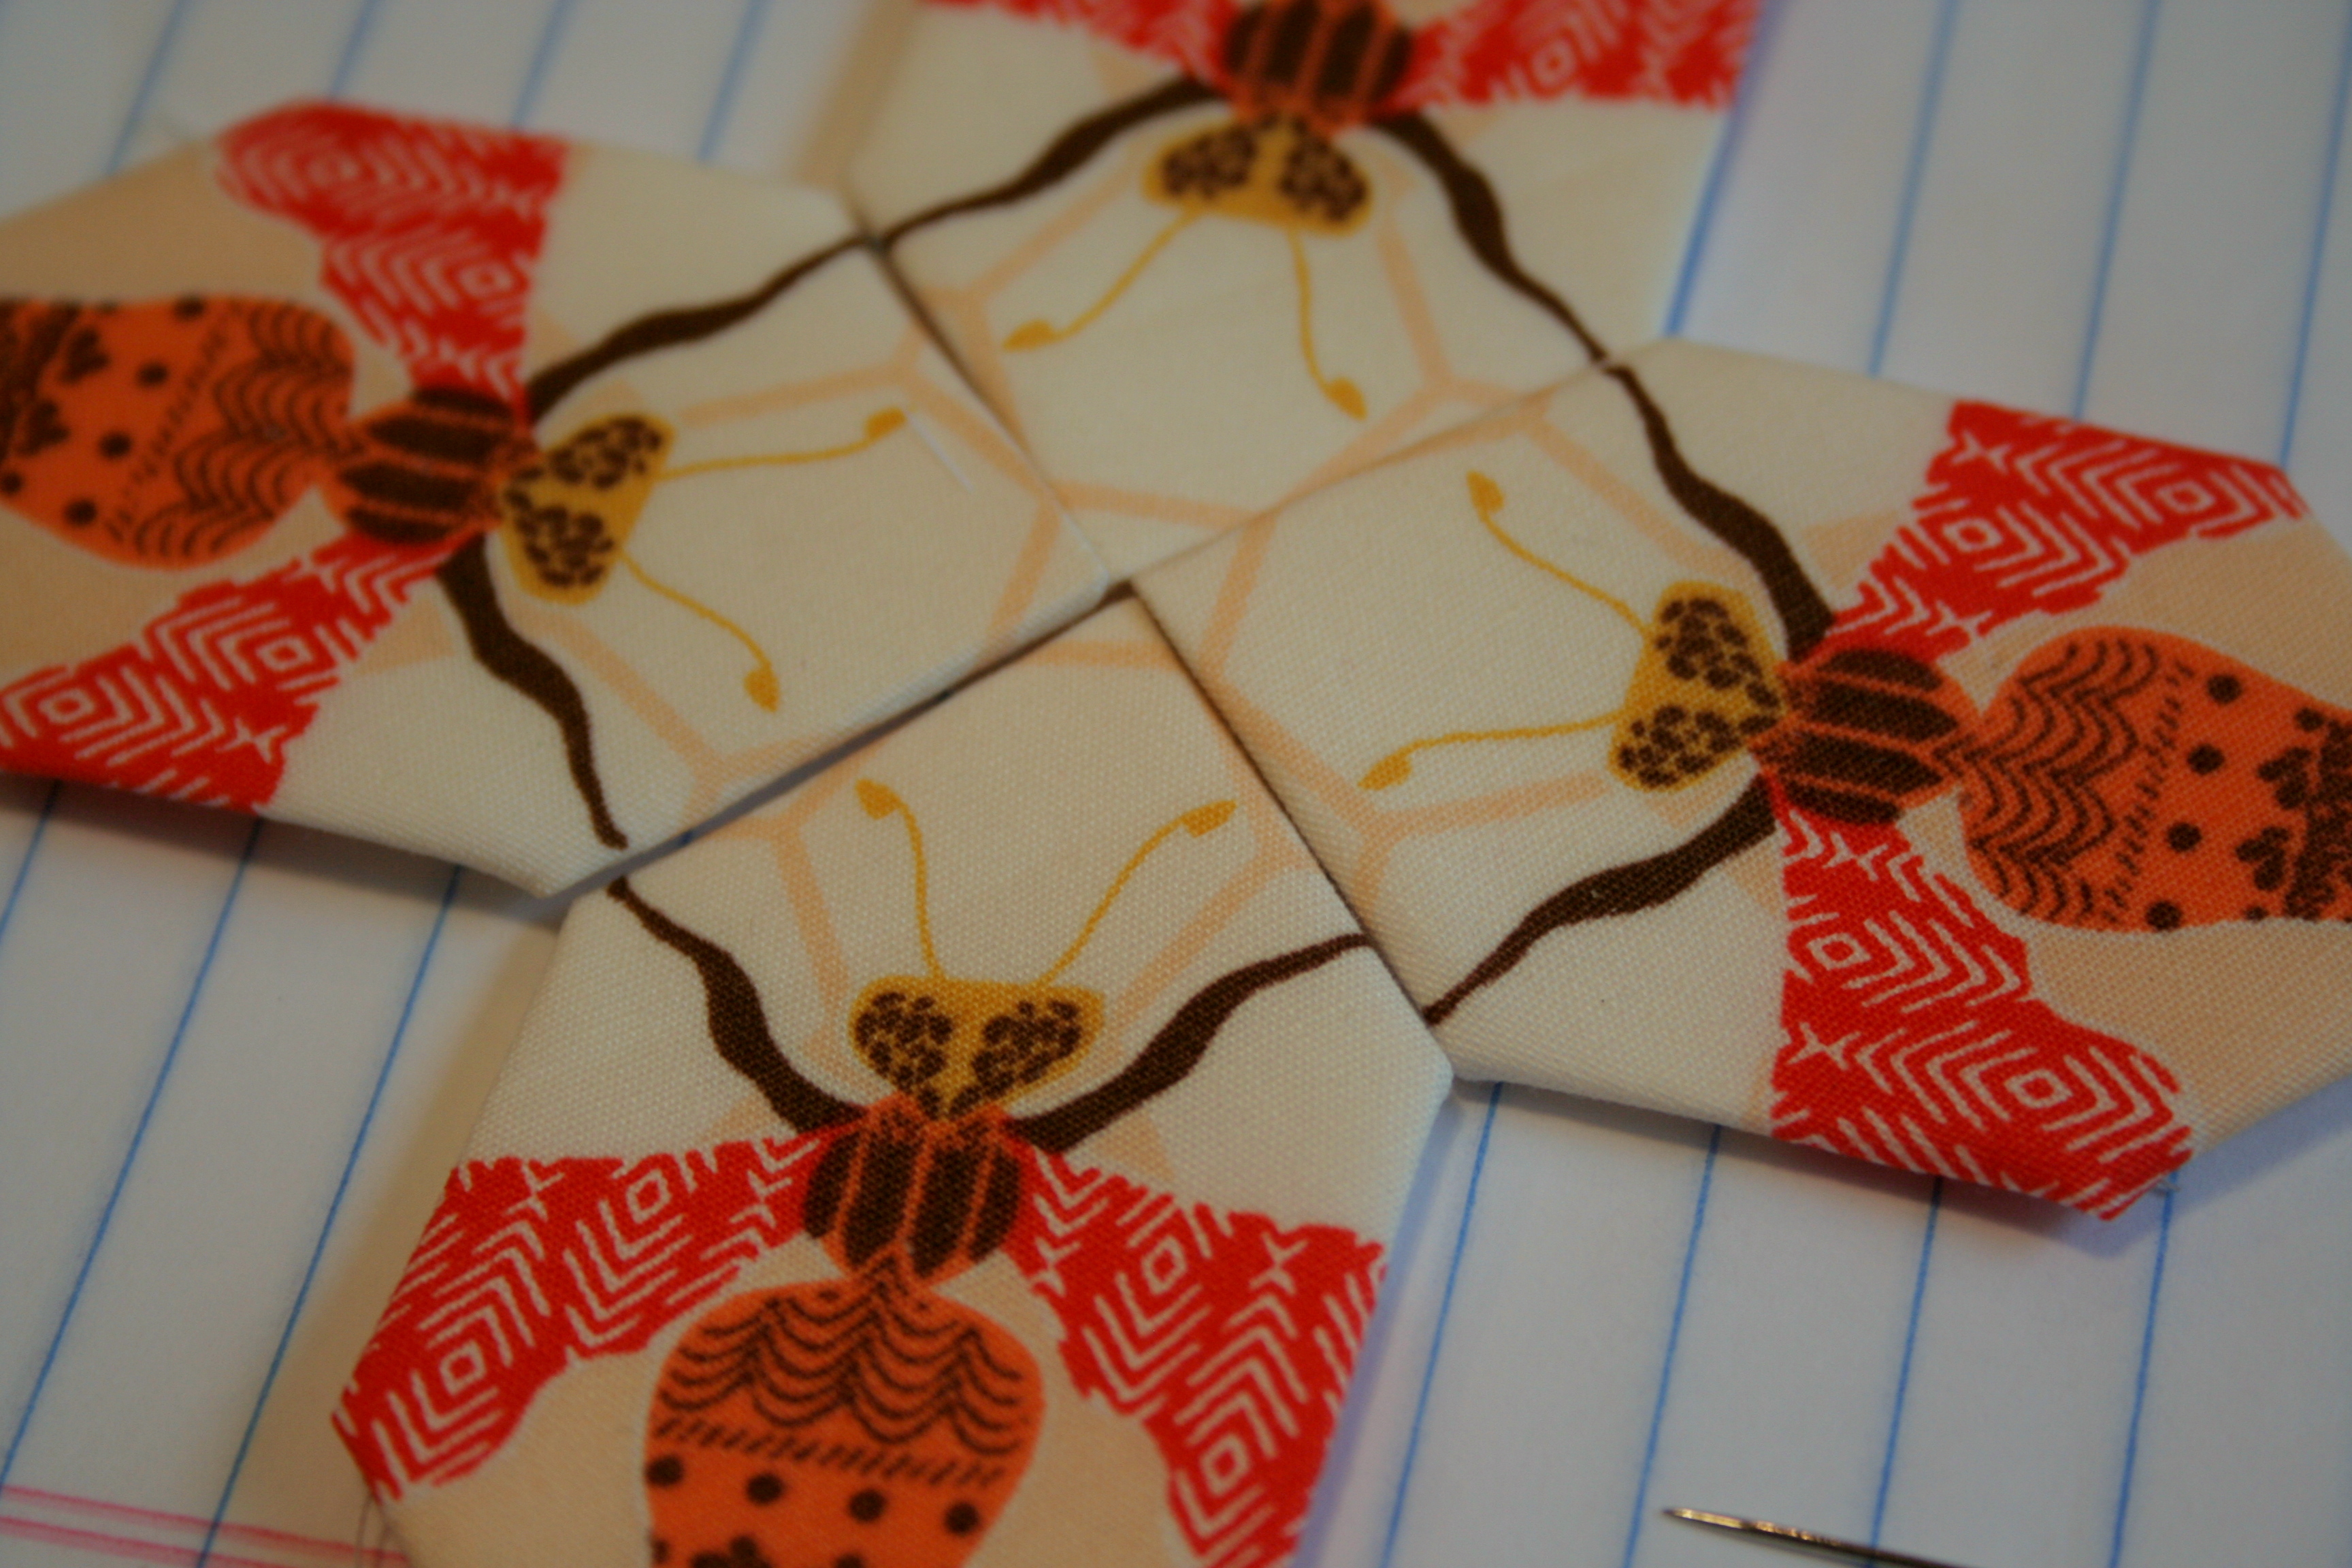
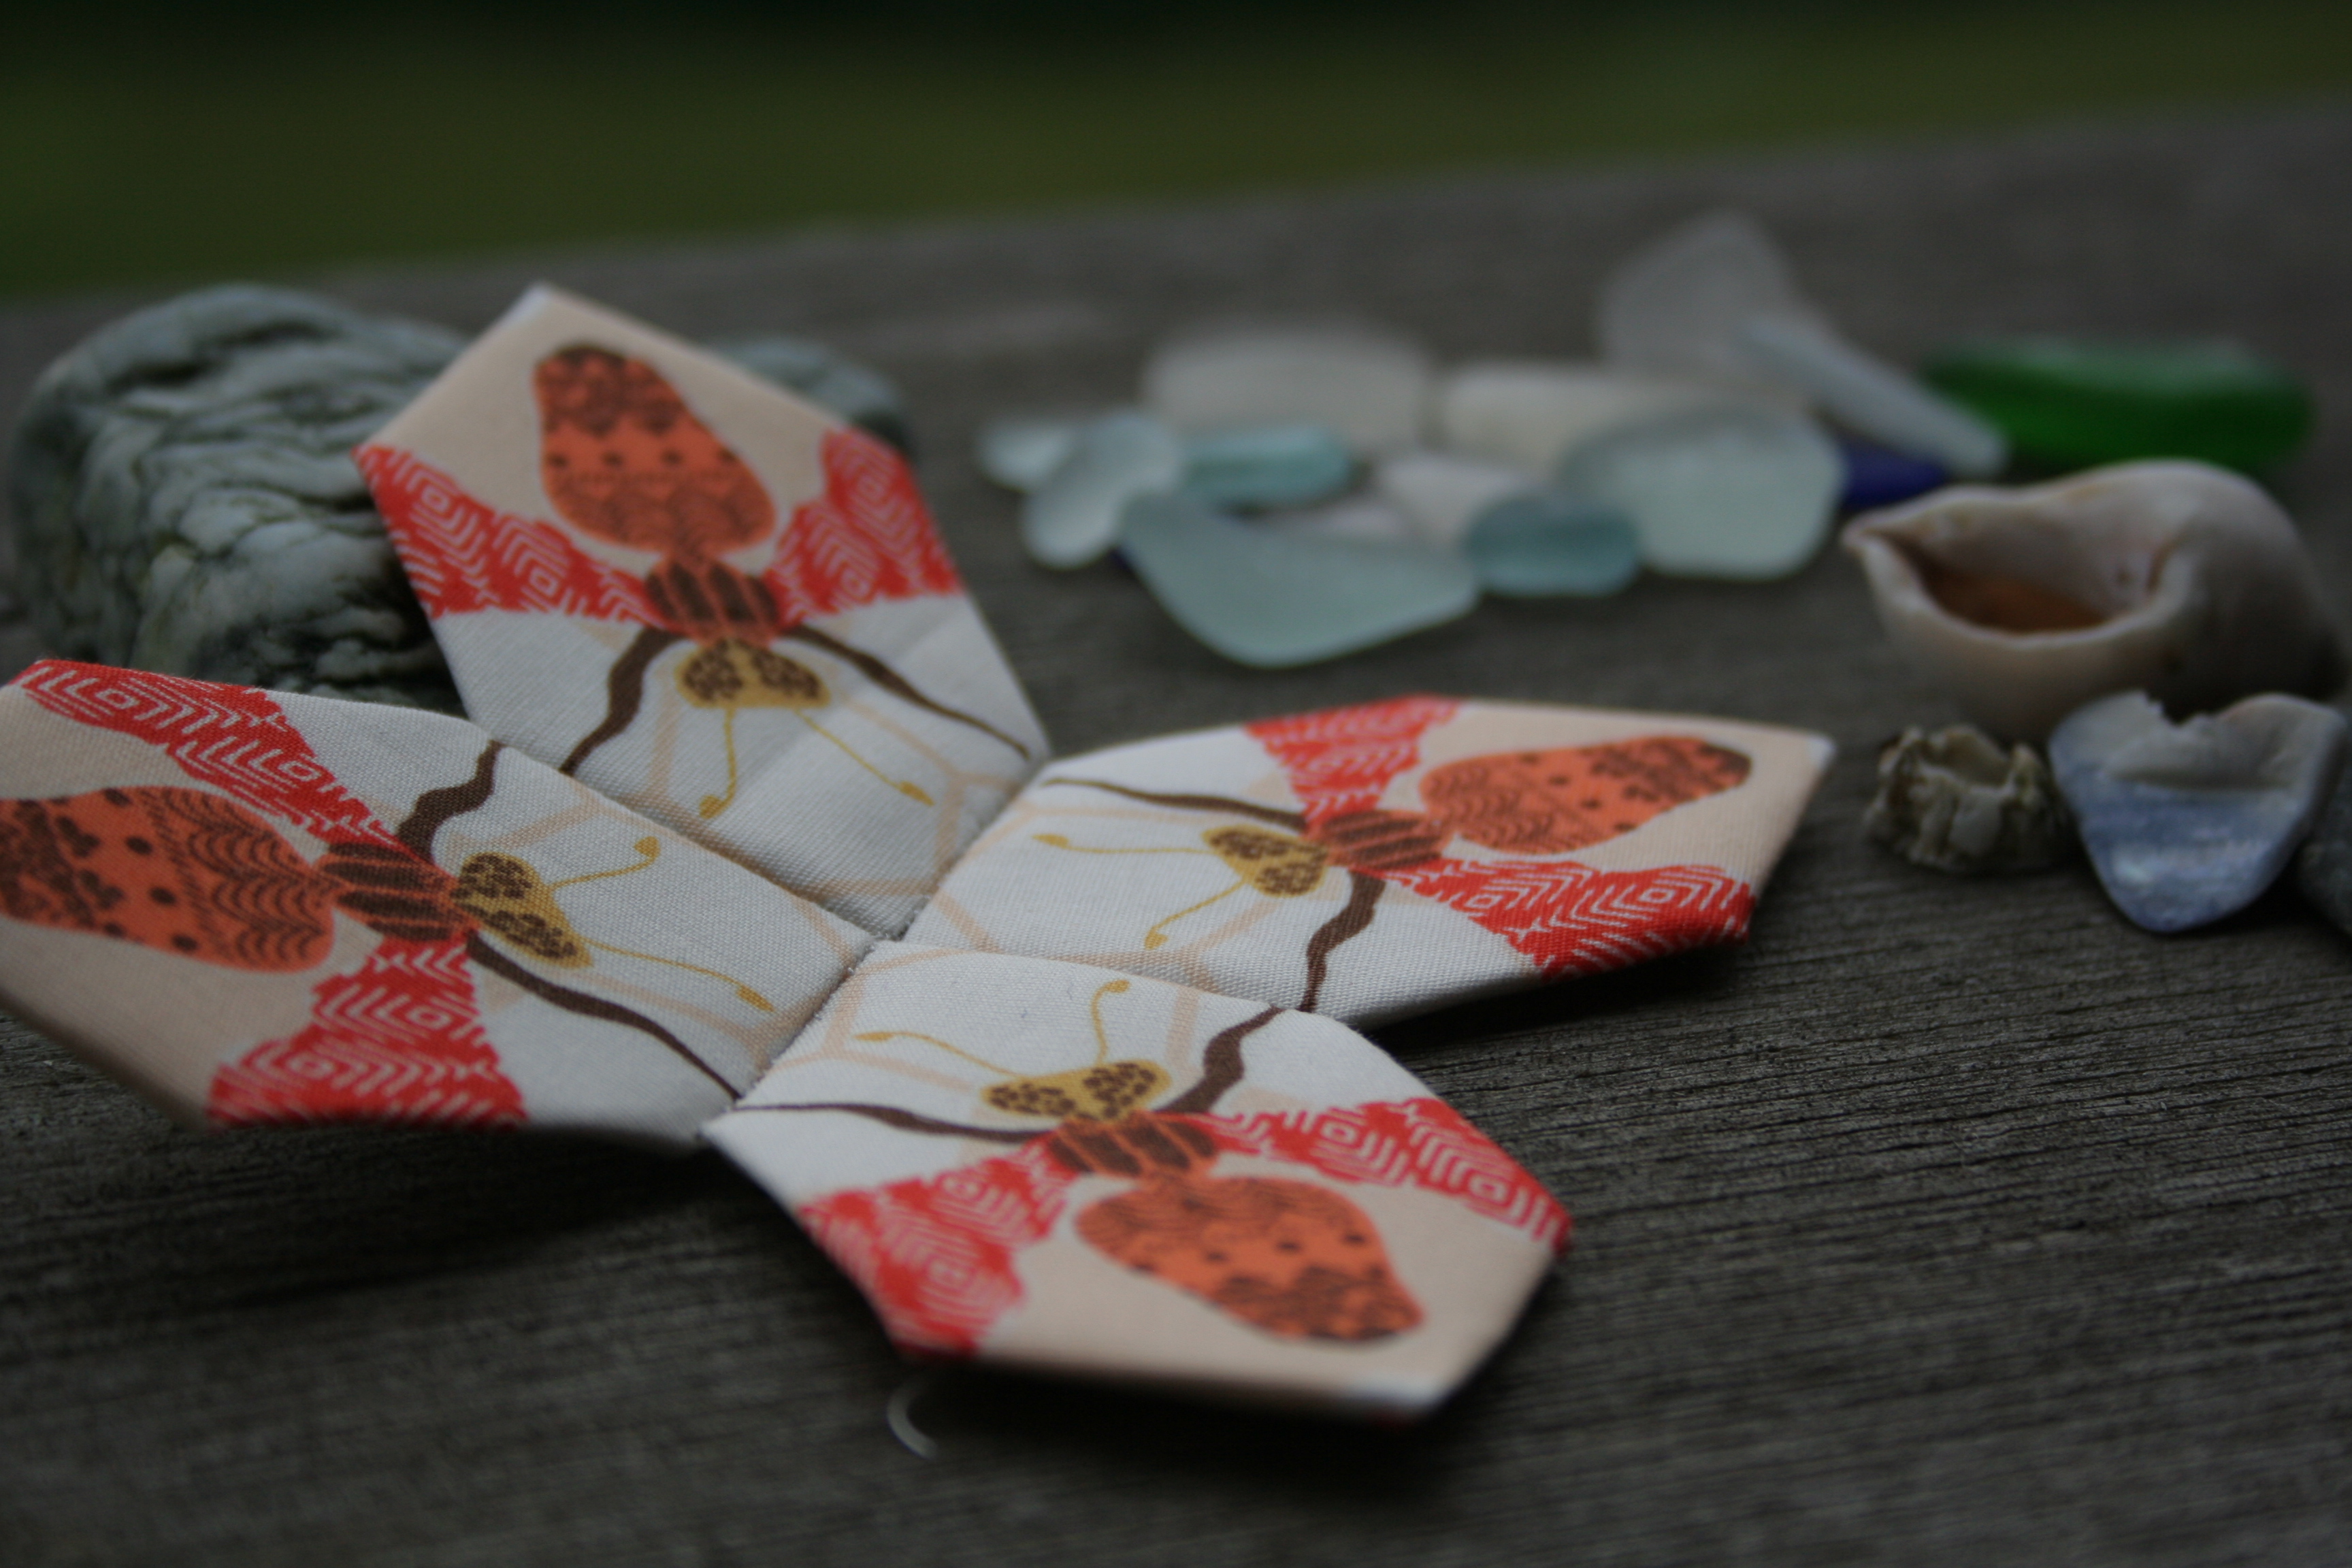
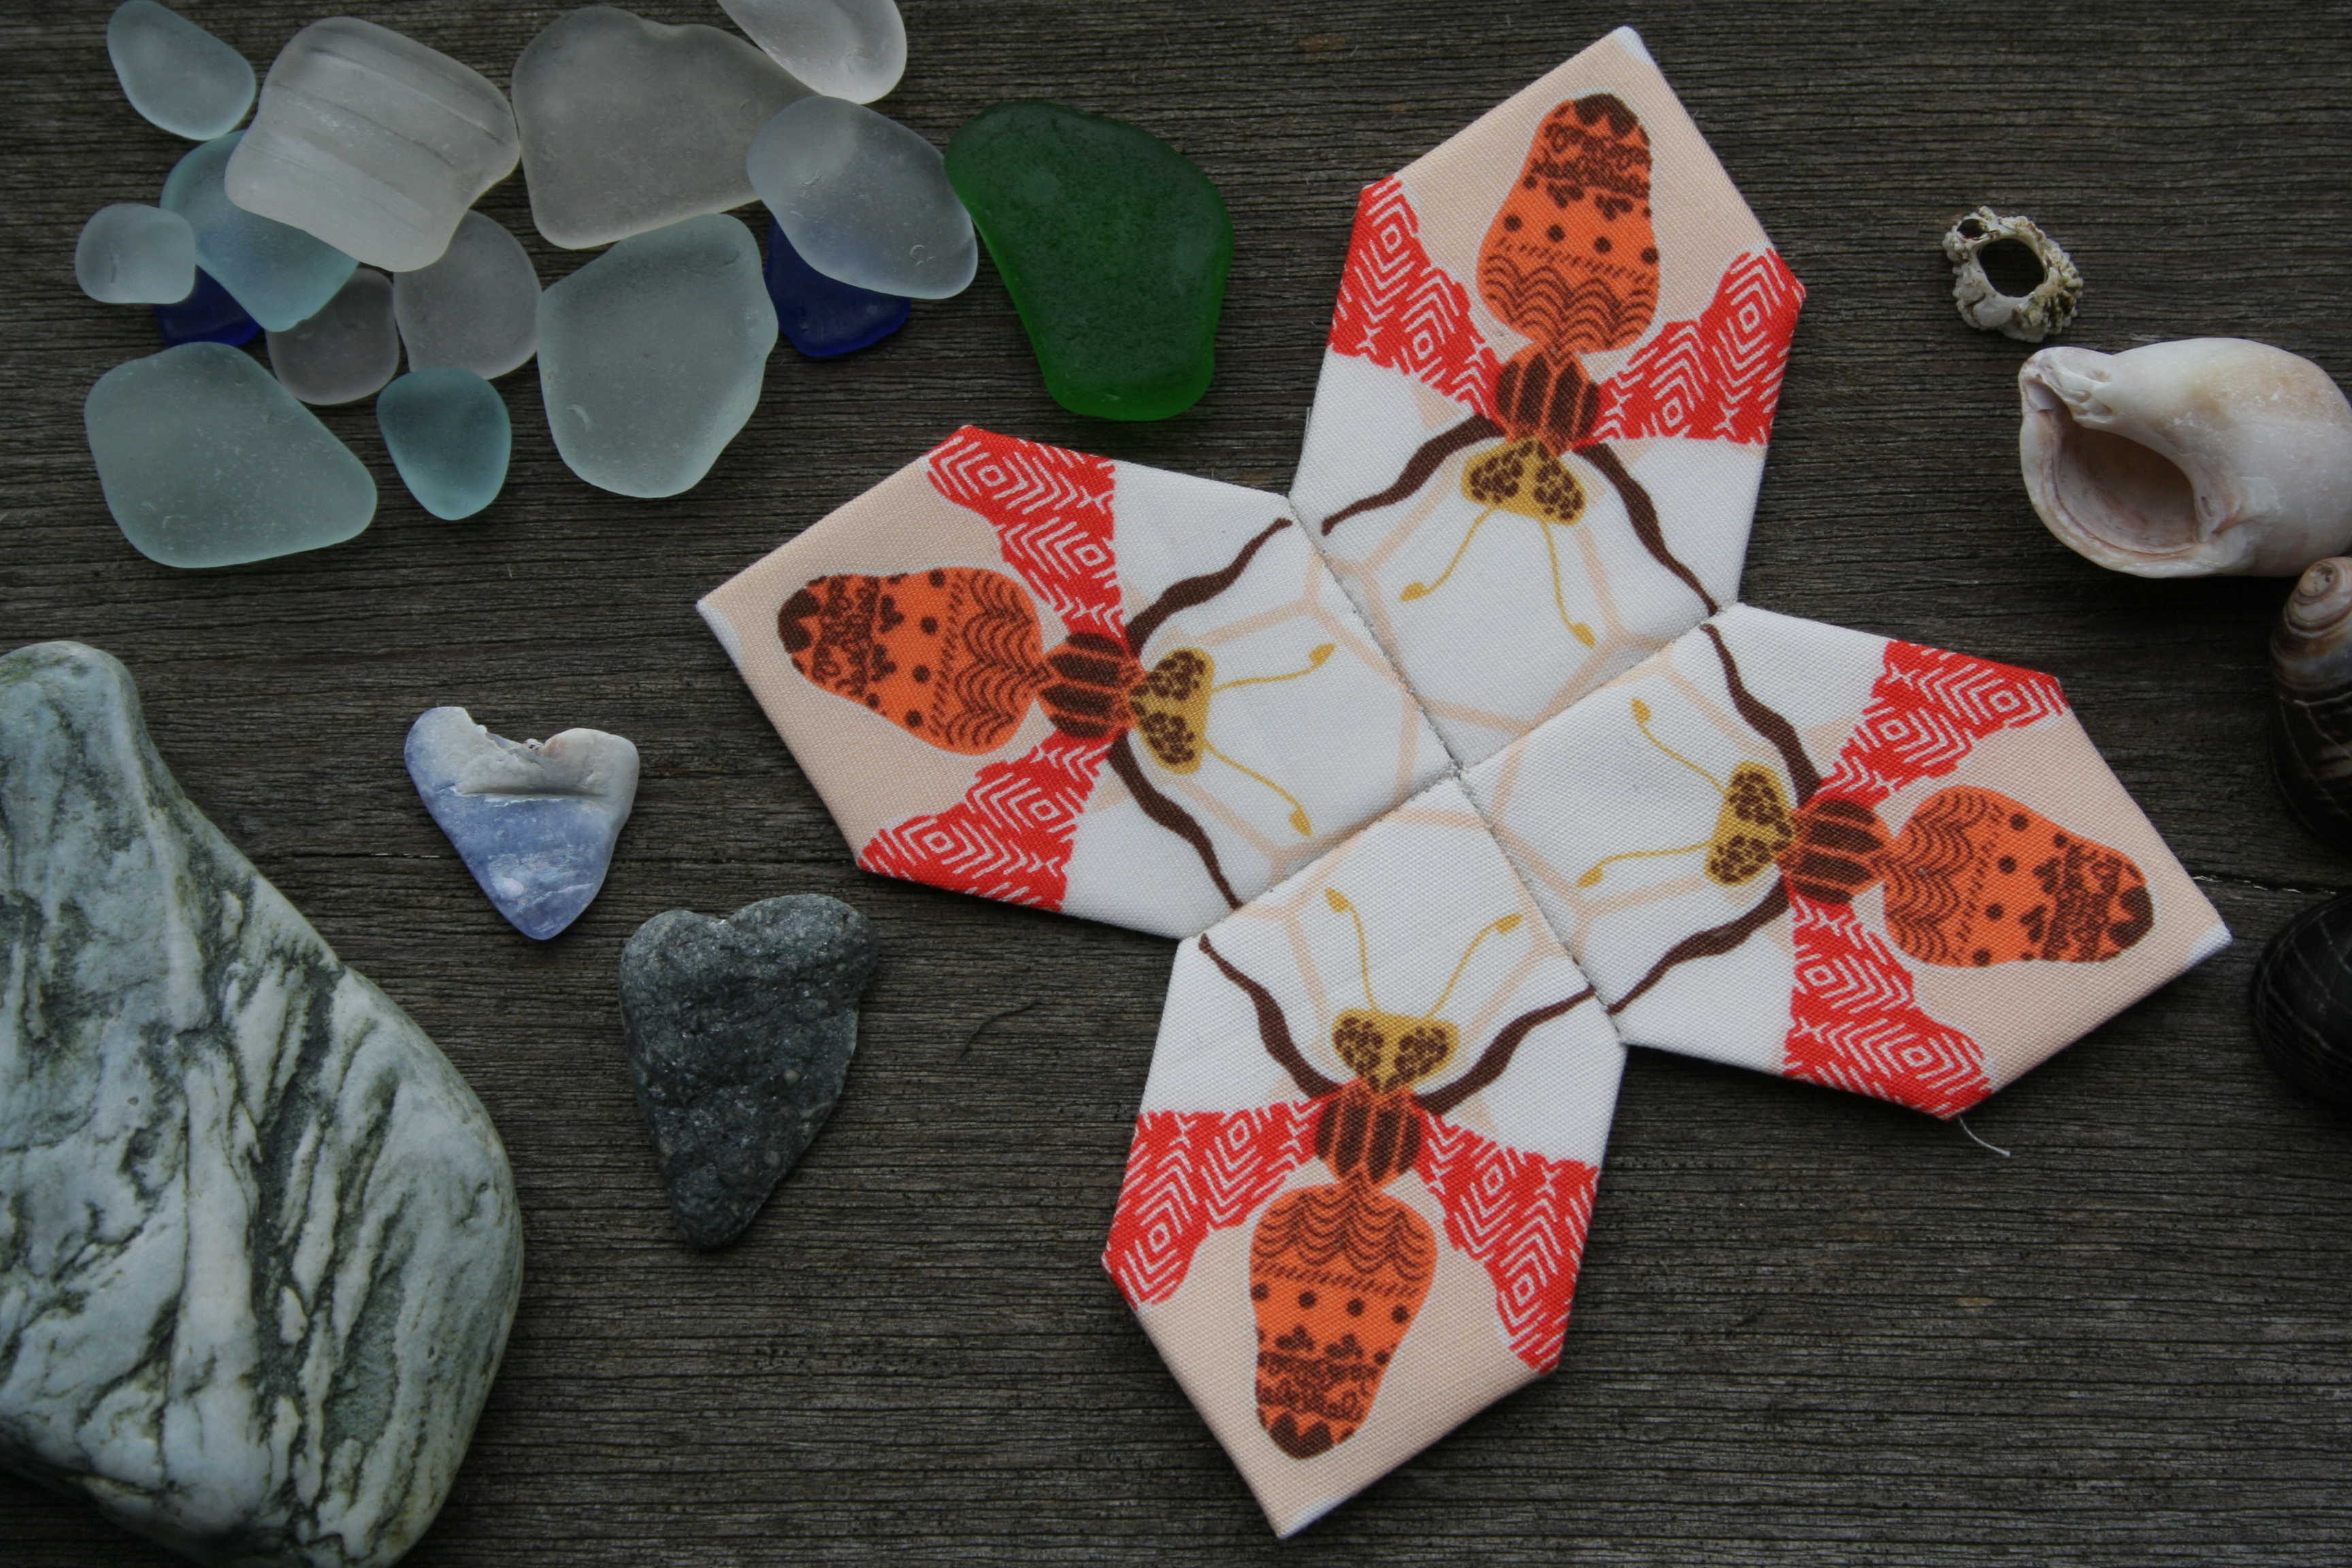
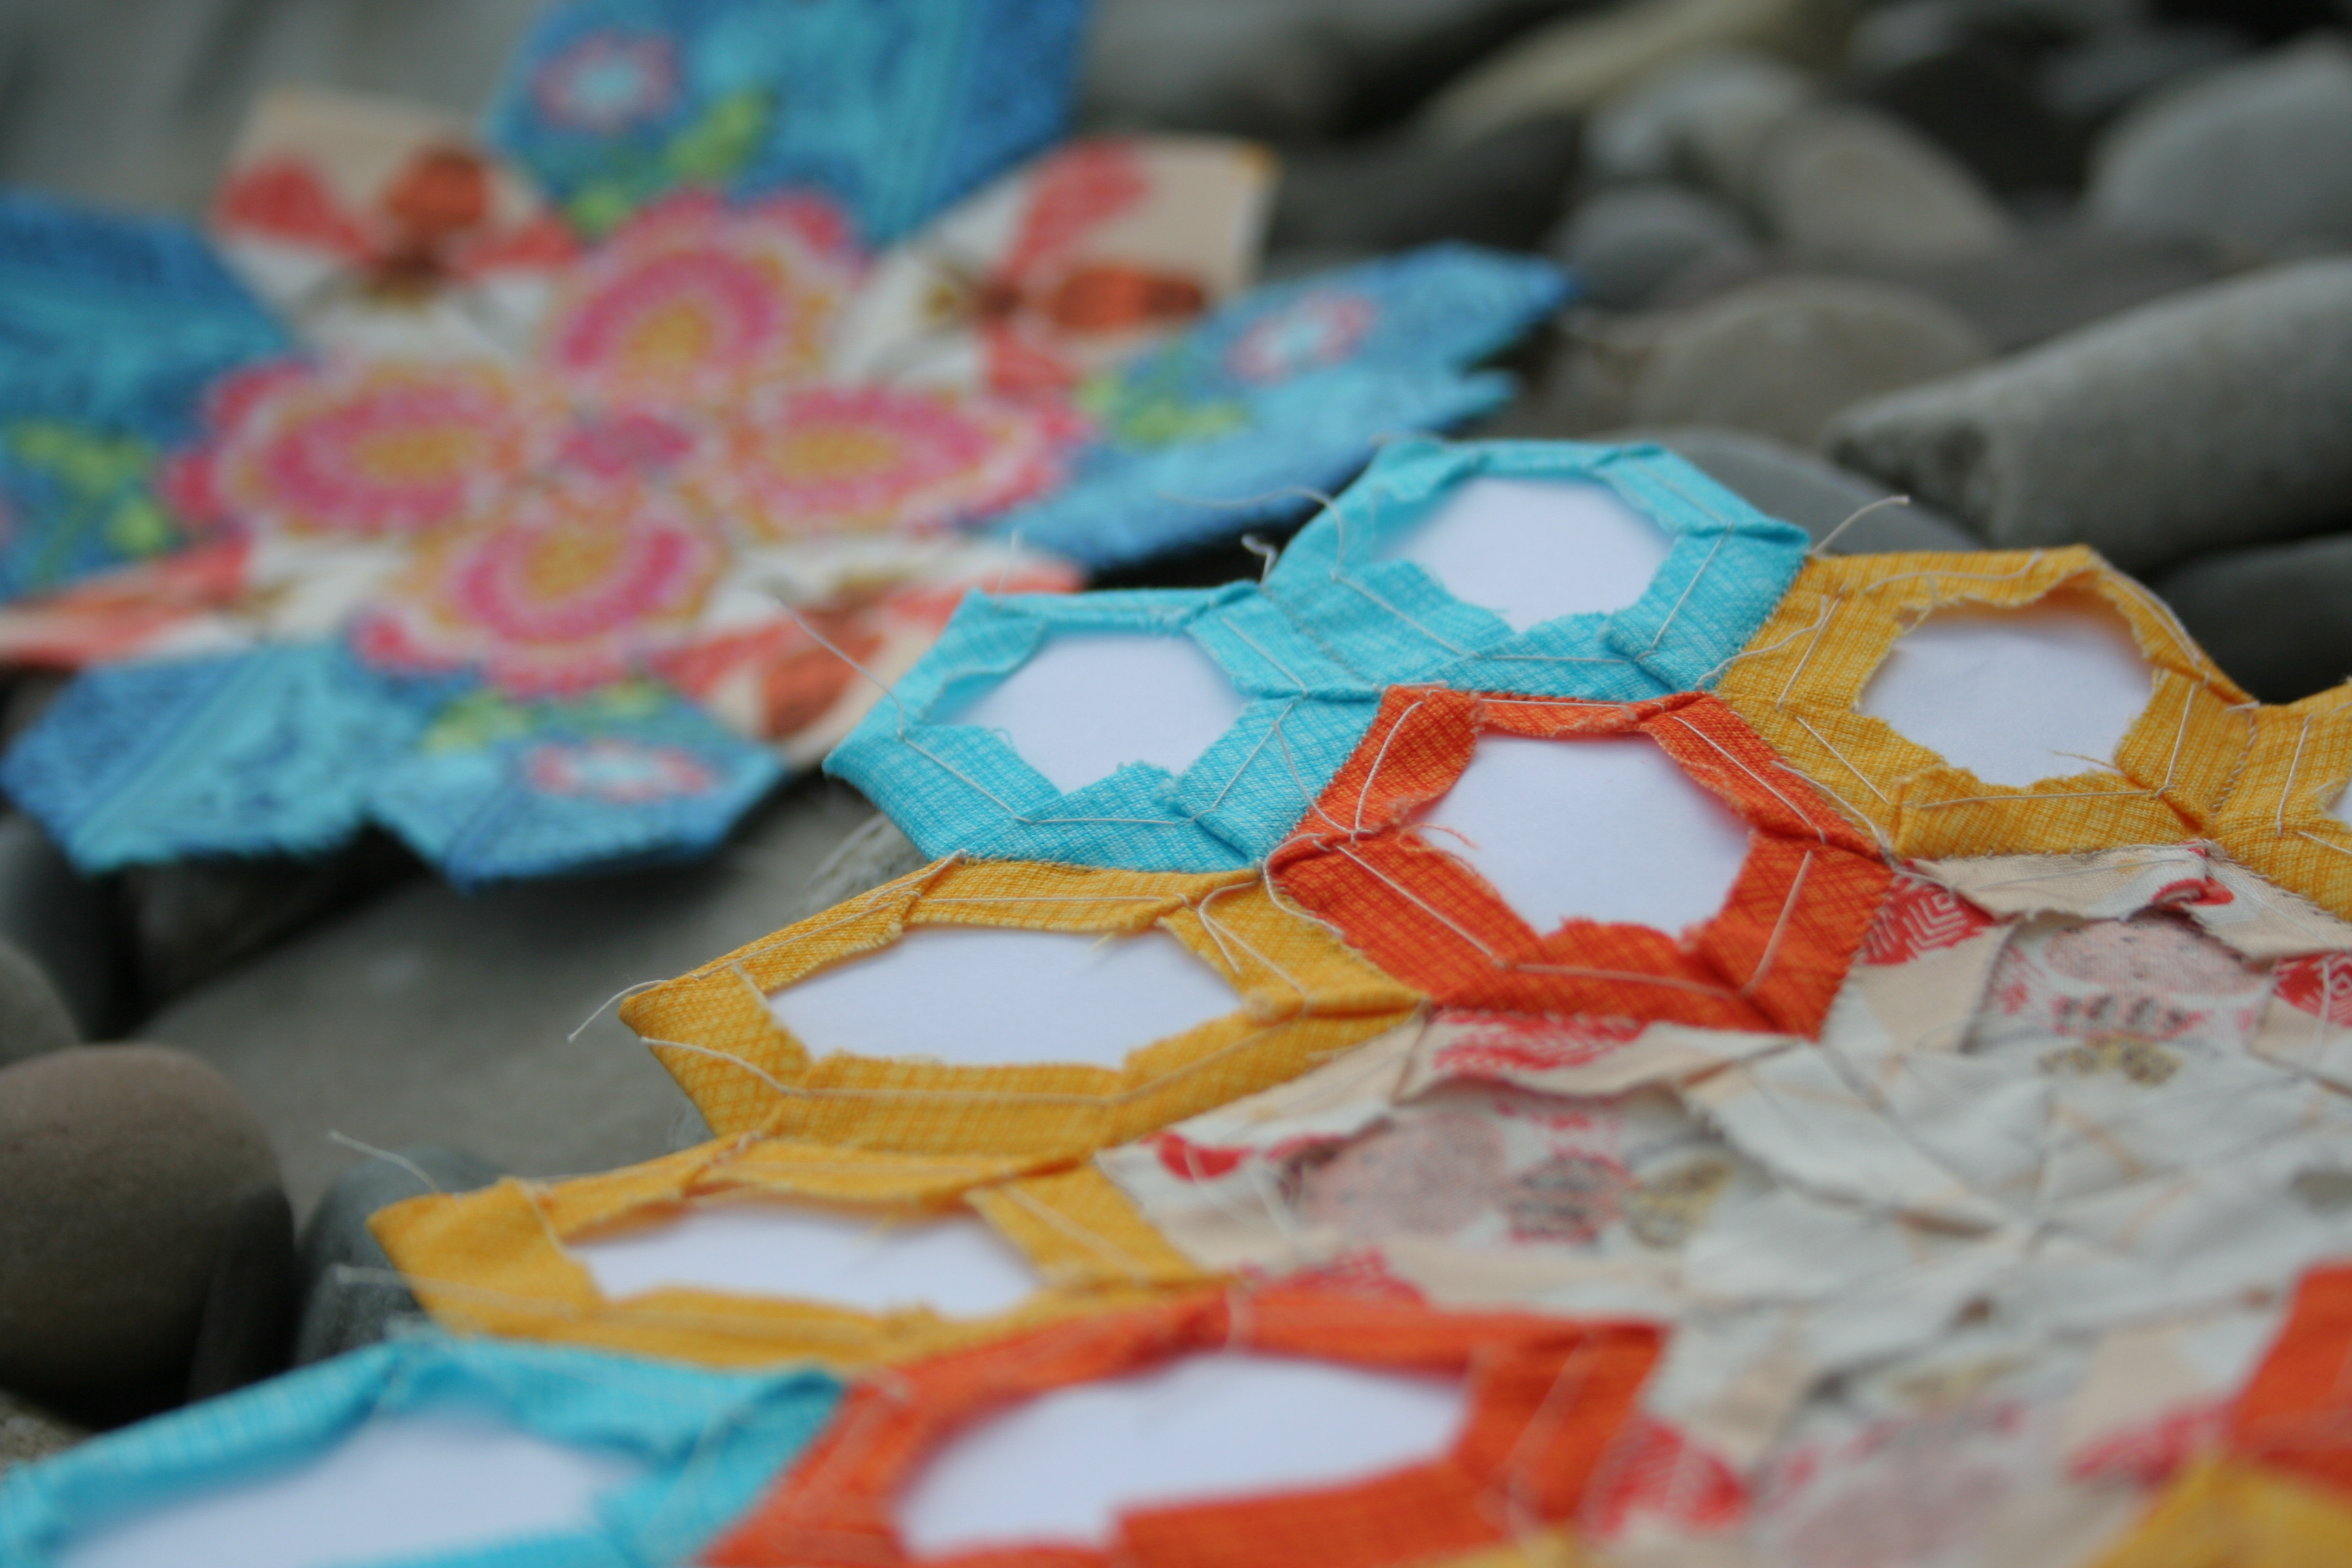
I have not yet removed the papers from either of the blocks, except the four center bee pieces more as a test to make sure I could get the paper out than anything else, and I love the way the backs look. Every little basting stitch, the crisp folds, the tiny hand stitches holding them all together: beauty.
I think I have decided that these blocks will be turned into a table runner or centerpiece. My plan is to make another block the same as my first with the four bees in the center, and use the new Lark-heavy block as the center with the two bee blocks on either end, joined and bordered by some other background fabric. I still have to decide what color to use in the outermost border for the center block, but I’m leaning toward yellow.
I then might add one more outer edge of some other color, to make the center block larger than the outer ones. I am really enjoying the process of English Paper Piecing, specifically how portable it is and how it is so easy to pick up and put down for even just a five minute sewing stint. I’m looking forward to exploring other EPP template shapes. So far I’ve found hexagon, diamond, and triangle templates, but it looks like there are no rules; any shape or combination of shapes can be made into templates. Let the pattern creation begin! Well, after I finish these blocks of course.
This year I was honored to be a part of the New Quilt Blogger Blog Hop organized by Beth at Plum & June. Through this blog hop, I got to know so many awesome quilters, helped jump start a couple of awesome friendships, and learned a ton about quilting and blogging in general. If you missed it, my introductory post is here: Let’s Get Acquainted! It includes everything you ever wanted to know about me, and then some.
As of last week, the final round of new quilt bloggers have posted their introductory posts, so the hop is officially complete! For those of you who haven’t had a chance to hop around to all of the awesome new quilt bloggers in the group, here’s your chance. Compiled by Yvonne at Quilting Jetgirl, here is a complete list of all of the new quilt bloggers and their introductory blog posts in no particular order. Yes, there were a TON of us… pace yourself! There is no better way to get to know some new, follow-worthy bloggers. Enjoy, and tell them Kitty @ Night Quilter sent you!
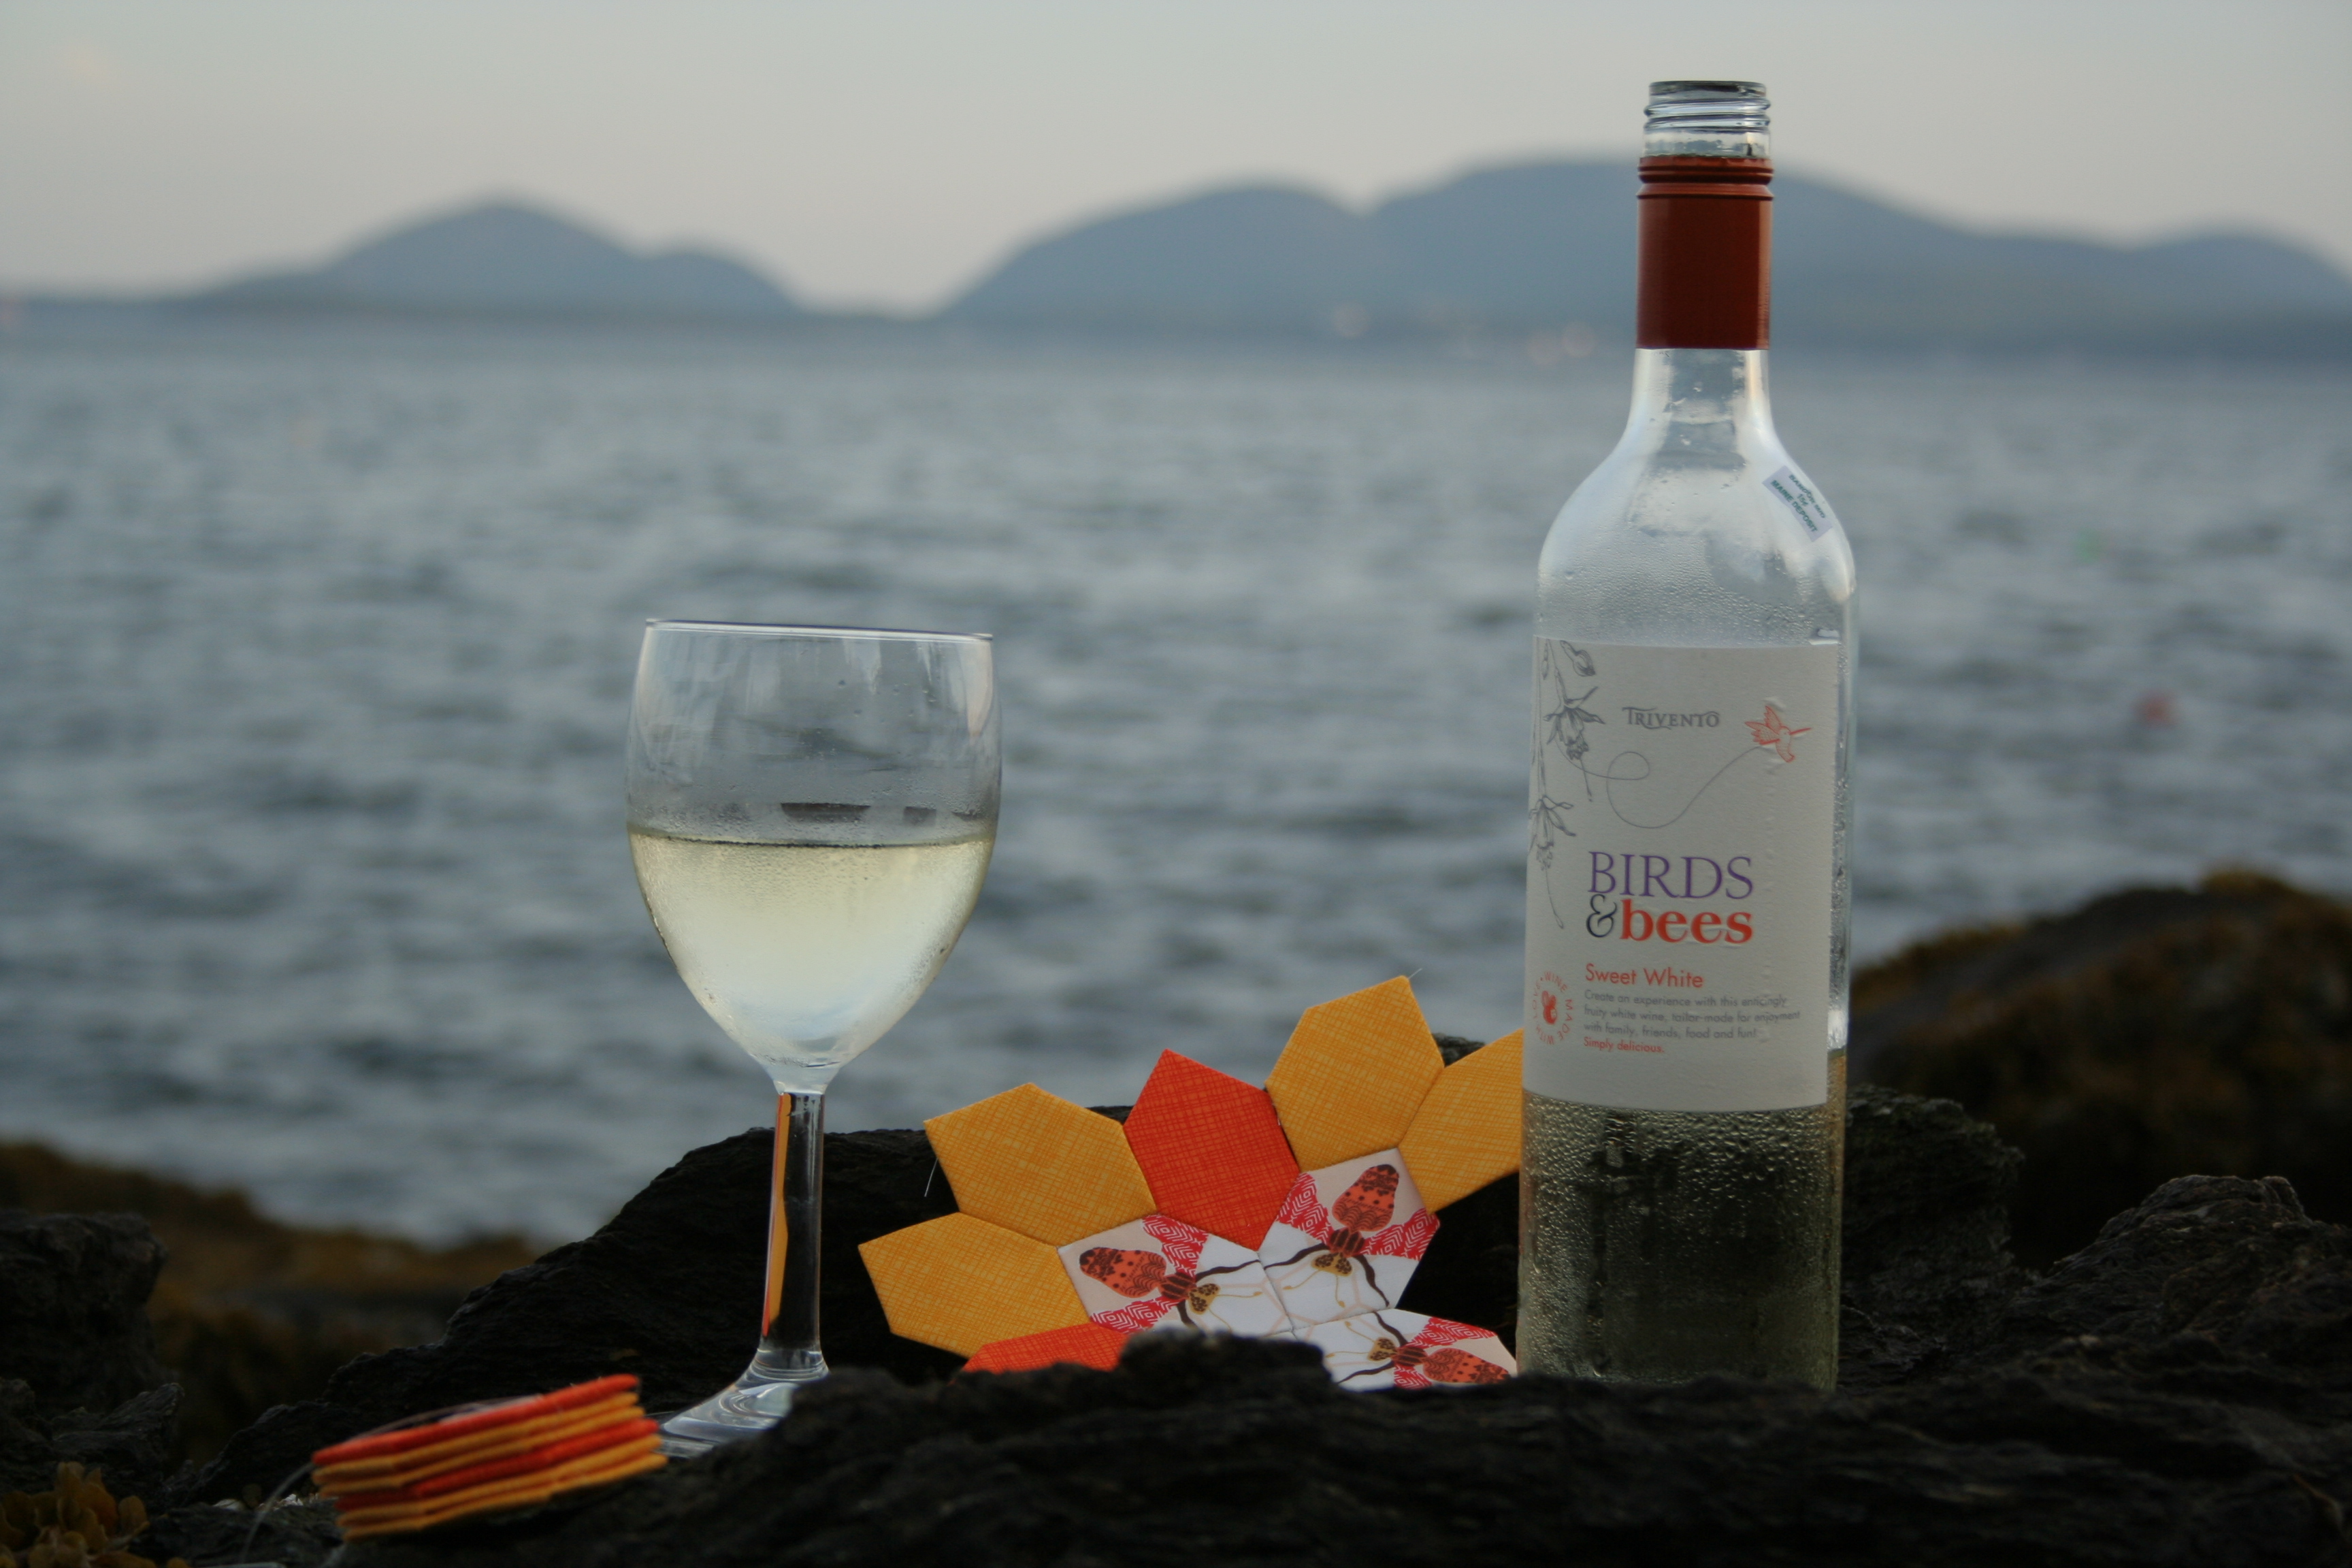
Sometimes, after a long, hot day on vacation, you open up the perfect bottle of wine to help refresh the evening. And sometimes, when you open up that perfect bottle of wine, something serendipitous happens: you realize that it’s also the perfect bottle of wine to pair with your current handwork project.
Who knew that wine and fabric could pair so well? There’s no debate that this is the perfect pair, though. Birds & Bees Sweet White wine is a refreshing and crisply sweet wine perfect for cooling off on a hot summer’s evening. Properly chilled, this wine is smooth and has the perfect balance of sweetness to make it pleasant and refreshing. I love that the back label says “Birds and Bees Sweet White evokes sunshine and laughter, passion and romance.” What’s not to love?
As I enjoyed this lovely wine, I worked on my Lucy Boston Patchwork of the Crosses, my first ever foray into English Paper Piecing. The feature fabric fussy cut for the center cross is none other than the Bee Sweet Fabric from Bonnie Christine‘s Sweet as Honey line. Talk about the perfect fabric to pair with Birds & Bees Sweet White!
This serendipitous encounter on the coast of Maine got me thinking about pairing wine and fabric more often. For those of us who love stitching, and love a glass of wine at the end of a long day, why can’t there be a perfect pairing of the two? You would pair the “right” wine with your dinner, so why not pair the “right” wine with your stitching? I admit, this idea of pairing wine and fabric had me giggling and laughing into the next day (or was it the wine?), so it is decidedly something I must try to do again.
The perfect pair:
Fabric Fabric: Bee Sweet in Sunset Collection: Sweet as Honey Designer: Bonnie Christine Manufacturer: Art Gallery Fabrics
Wine Wine: Birds & Bees Sweet White Producer: Trivento
What is your favorite wine? Favorite fabric? Maybe I’ll try to find its perfect pair!
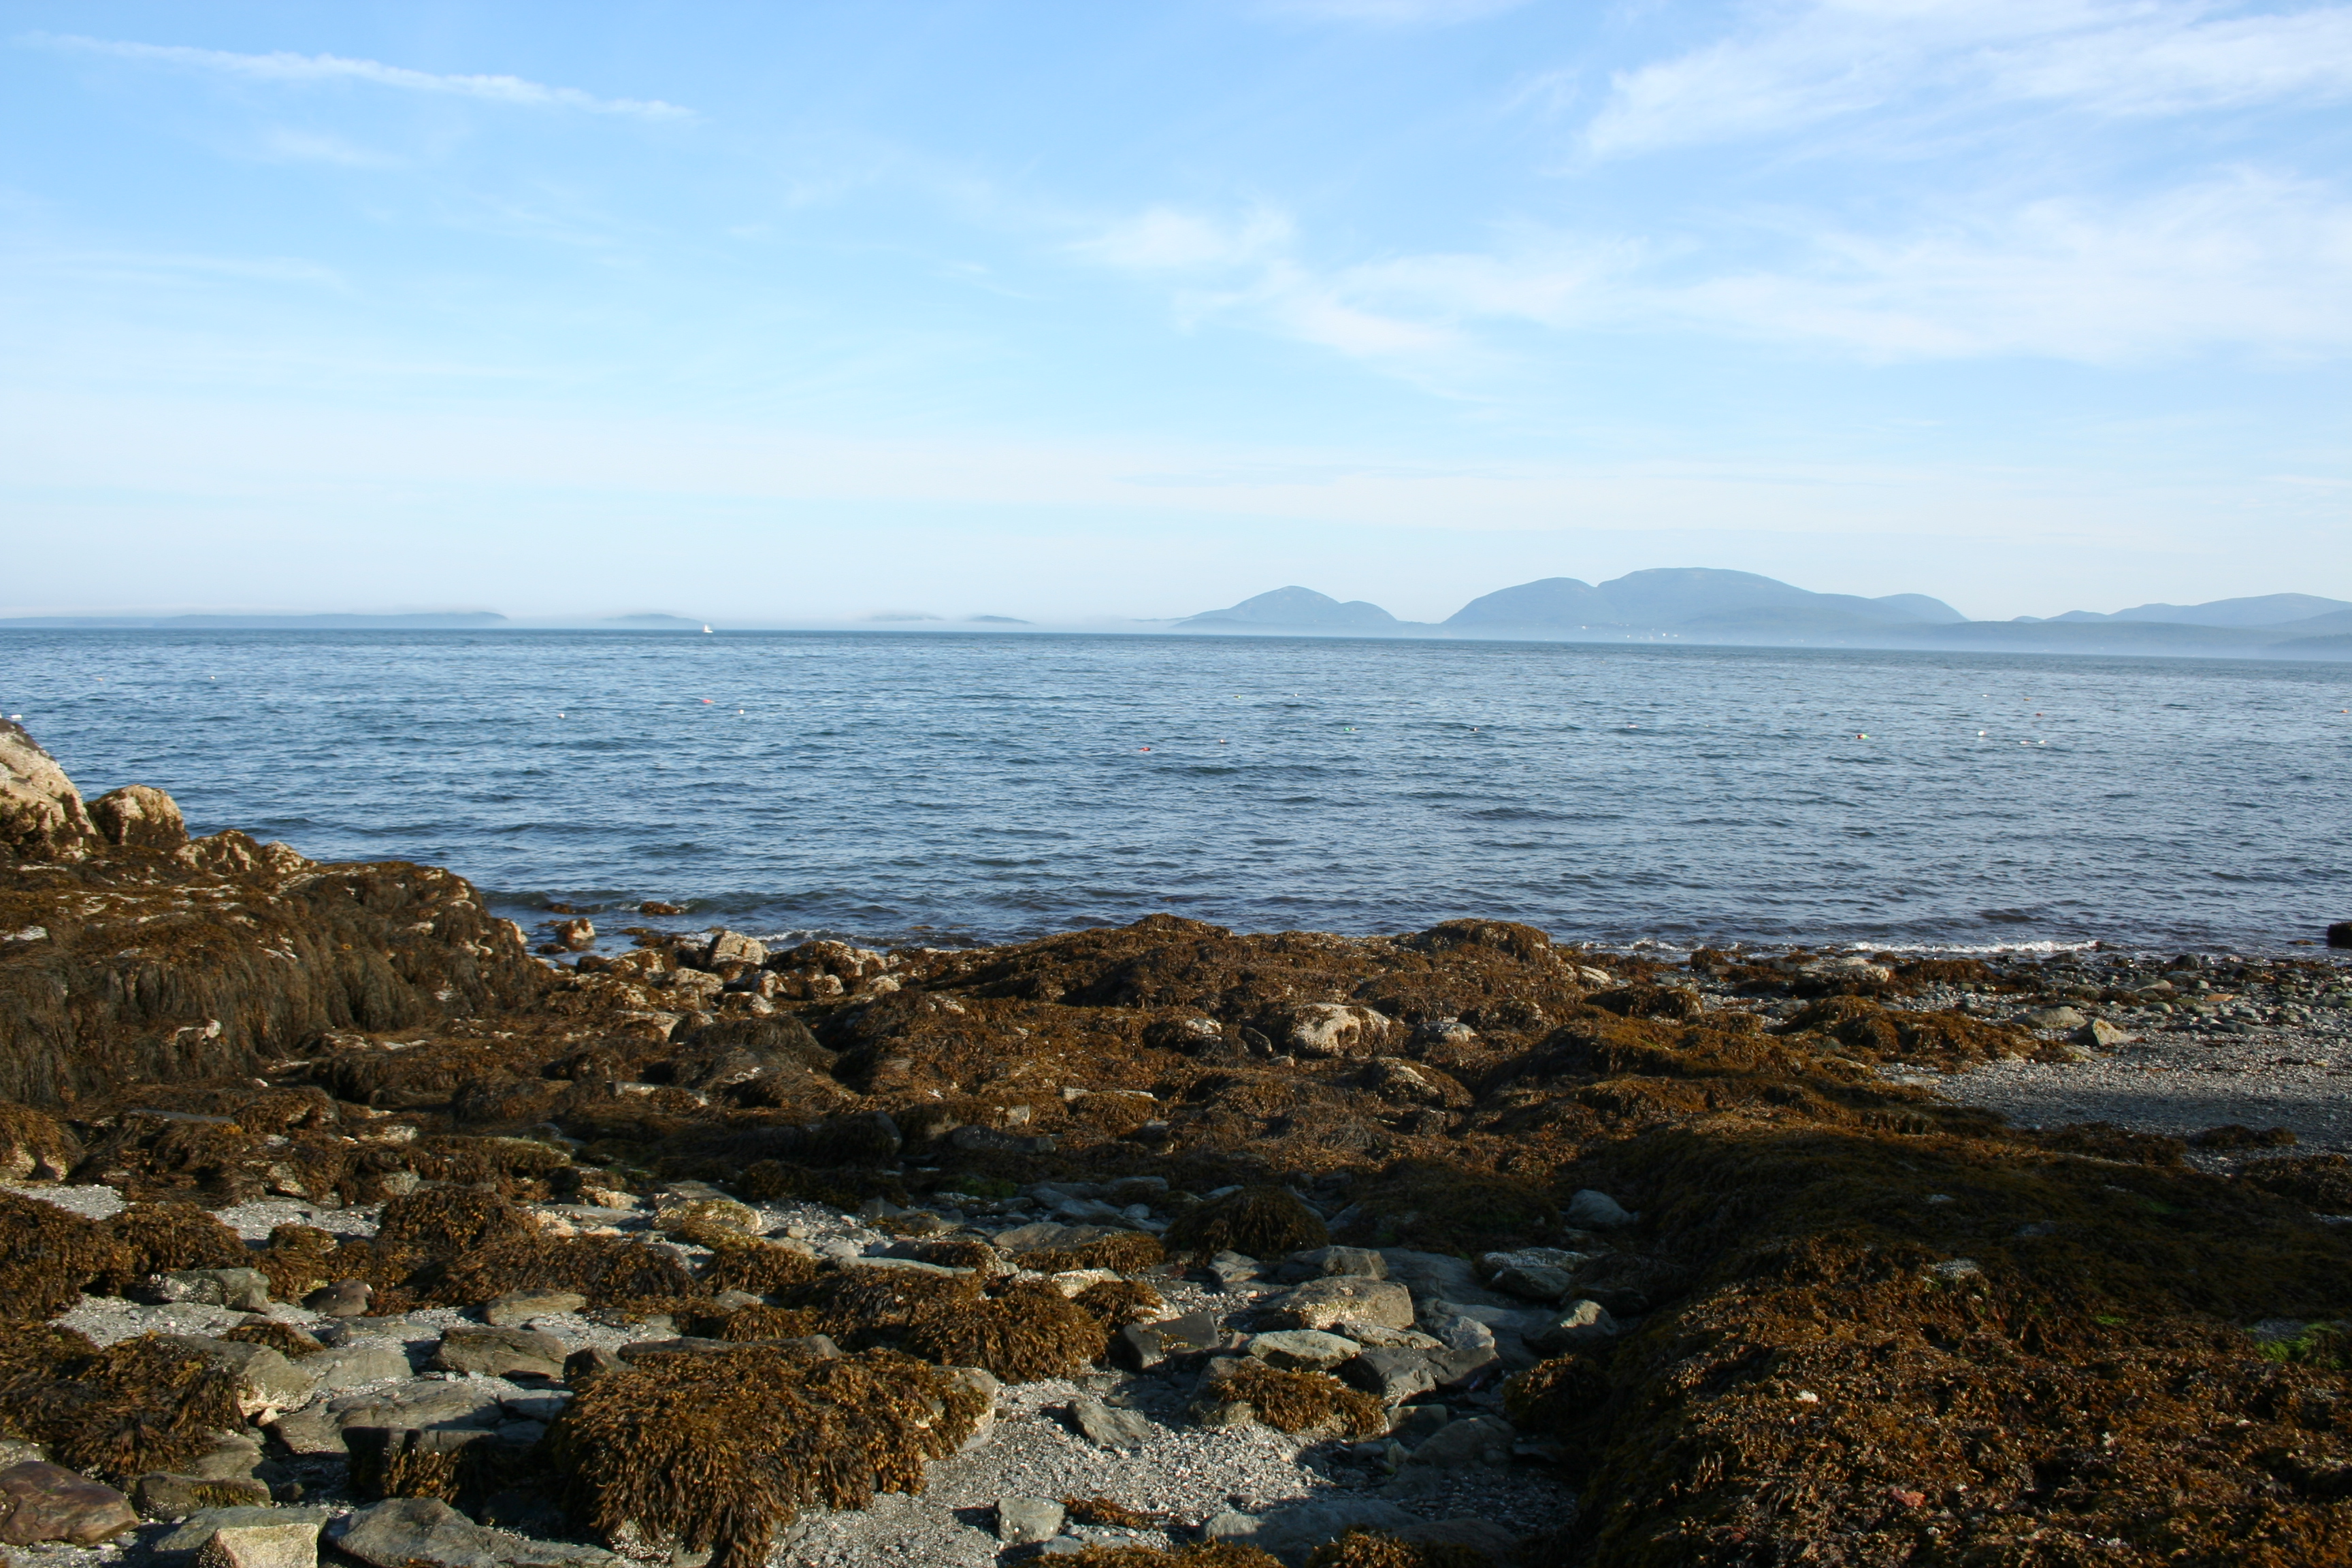
I never wish for rain while I’m on vacation, and this trip isn’t any different. Sometimes, though, you get rain even if you don’t want it. We are on vacation on Hancock Point, Maine, for the week with my husband’s family. The rental house is right on the ocean and has an amazing view of Bar Harbor and Acadia, located directly across the bay.
Acadia and Bar Harbor as seen from our rental house on Hancock Point, Maine.
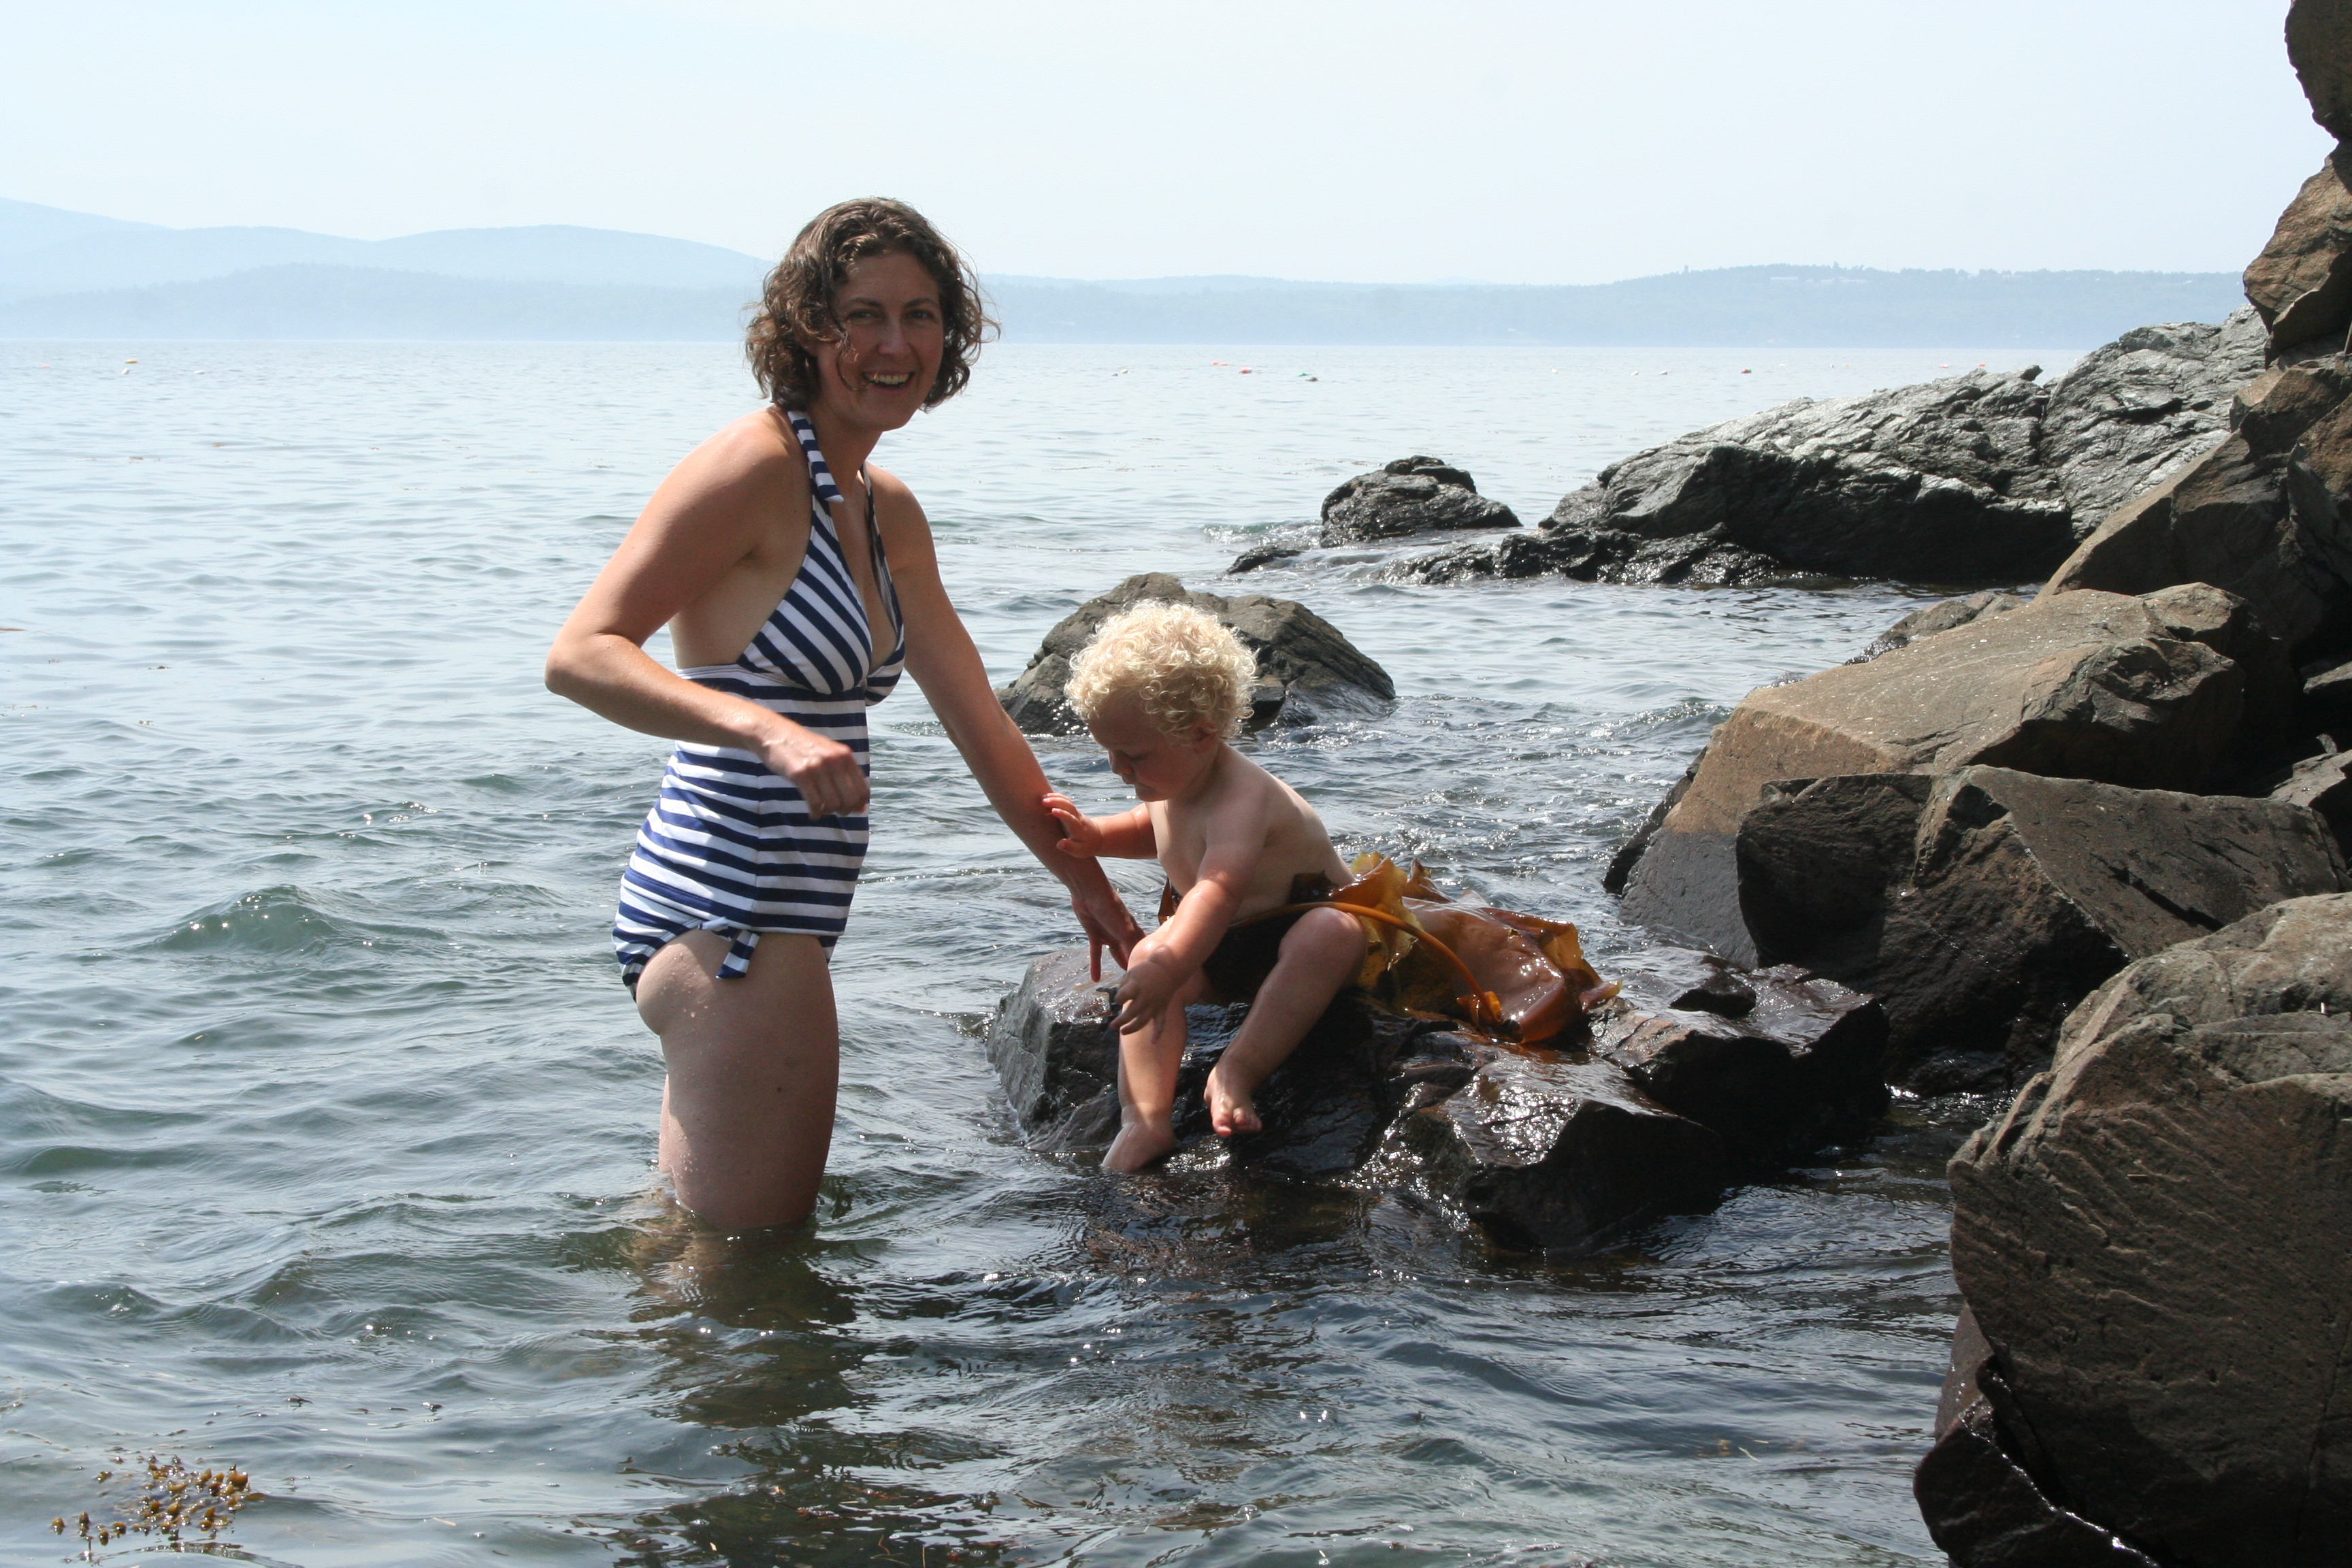
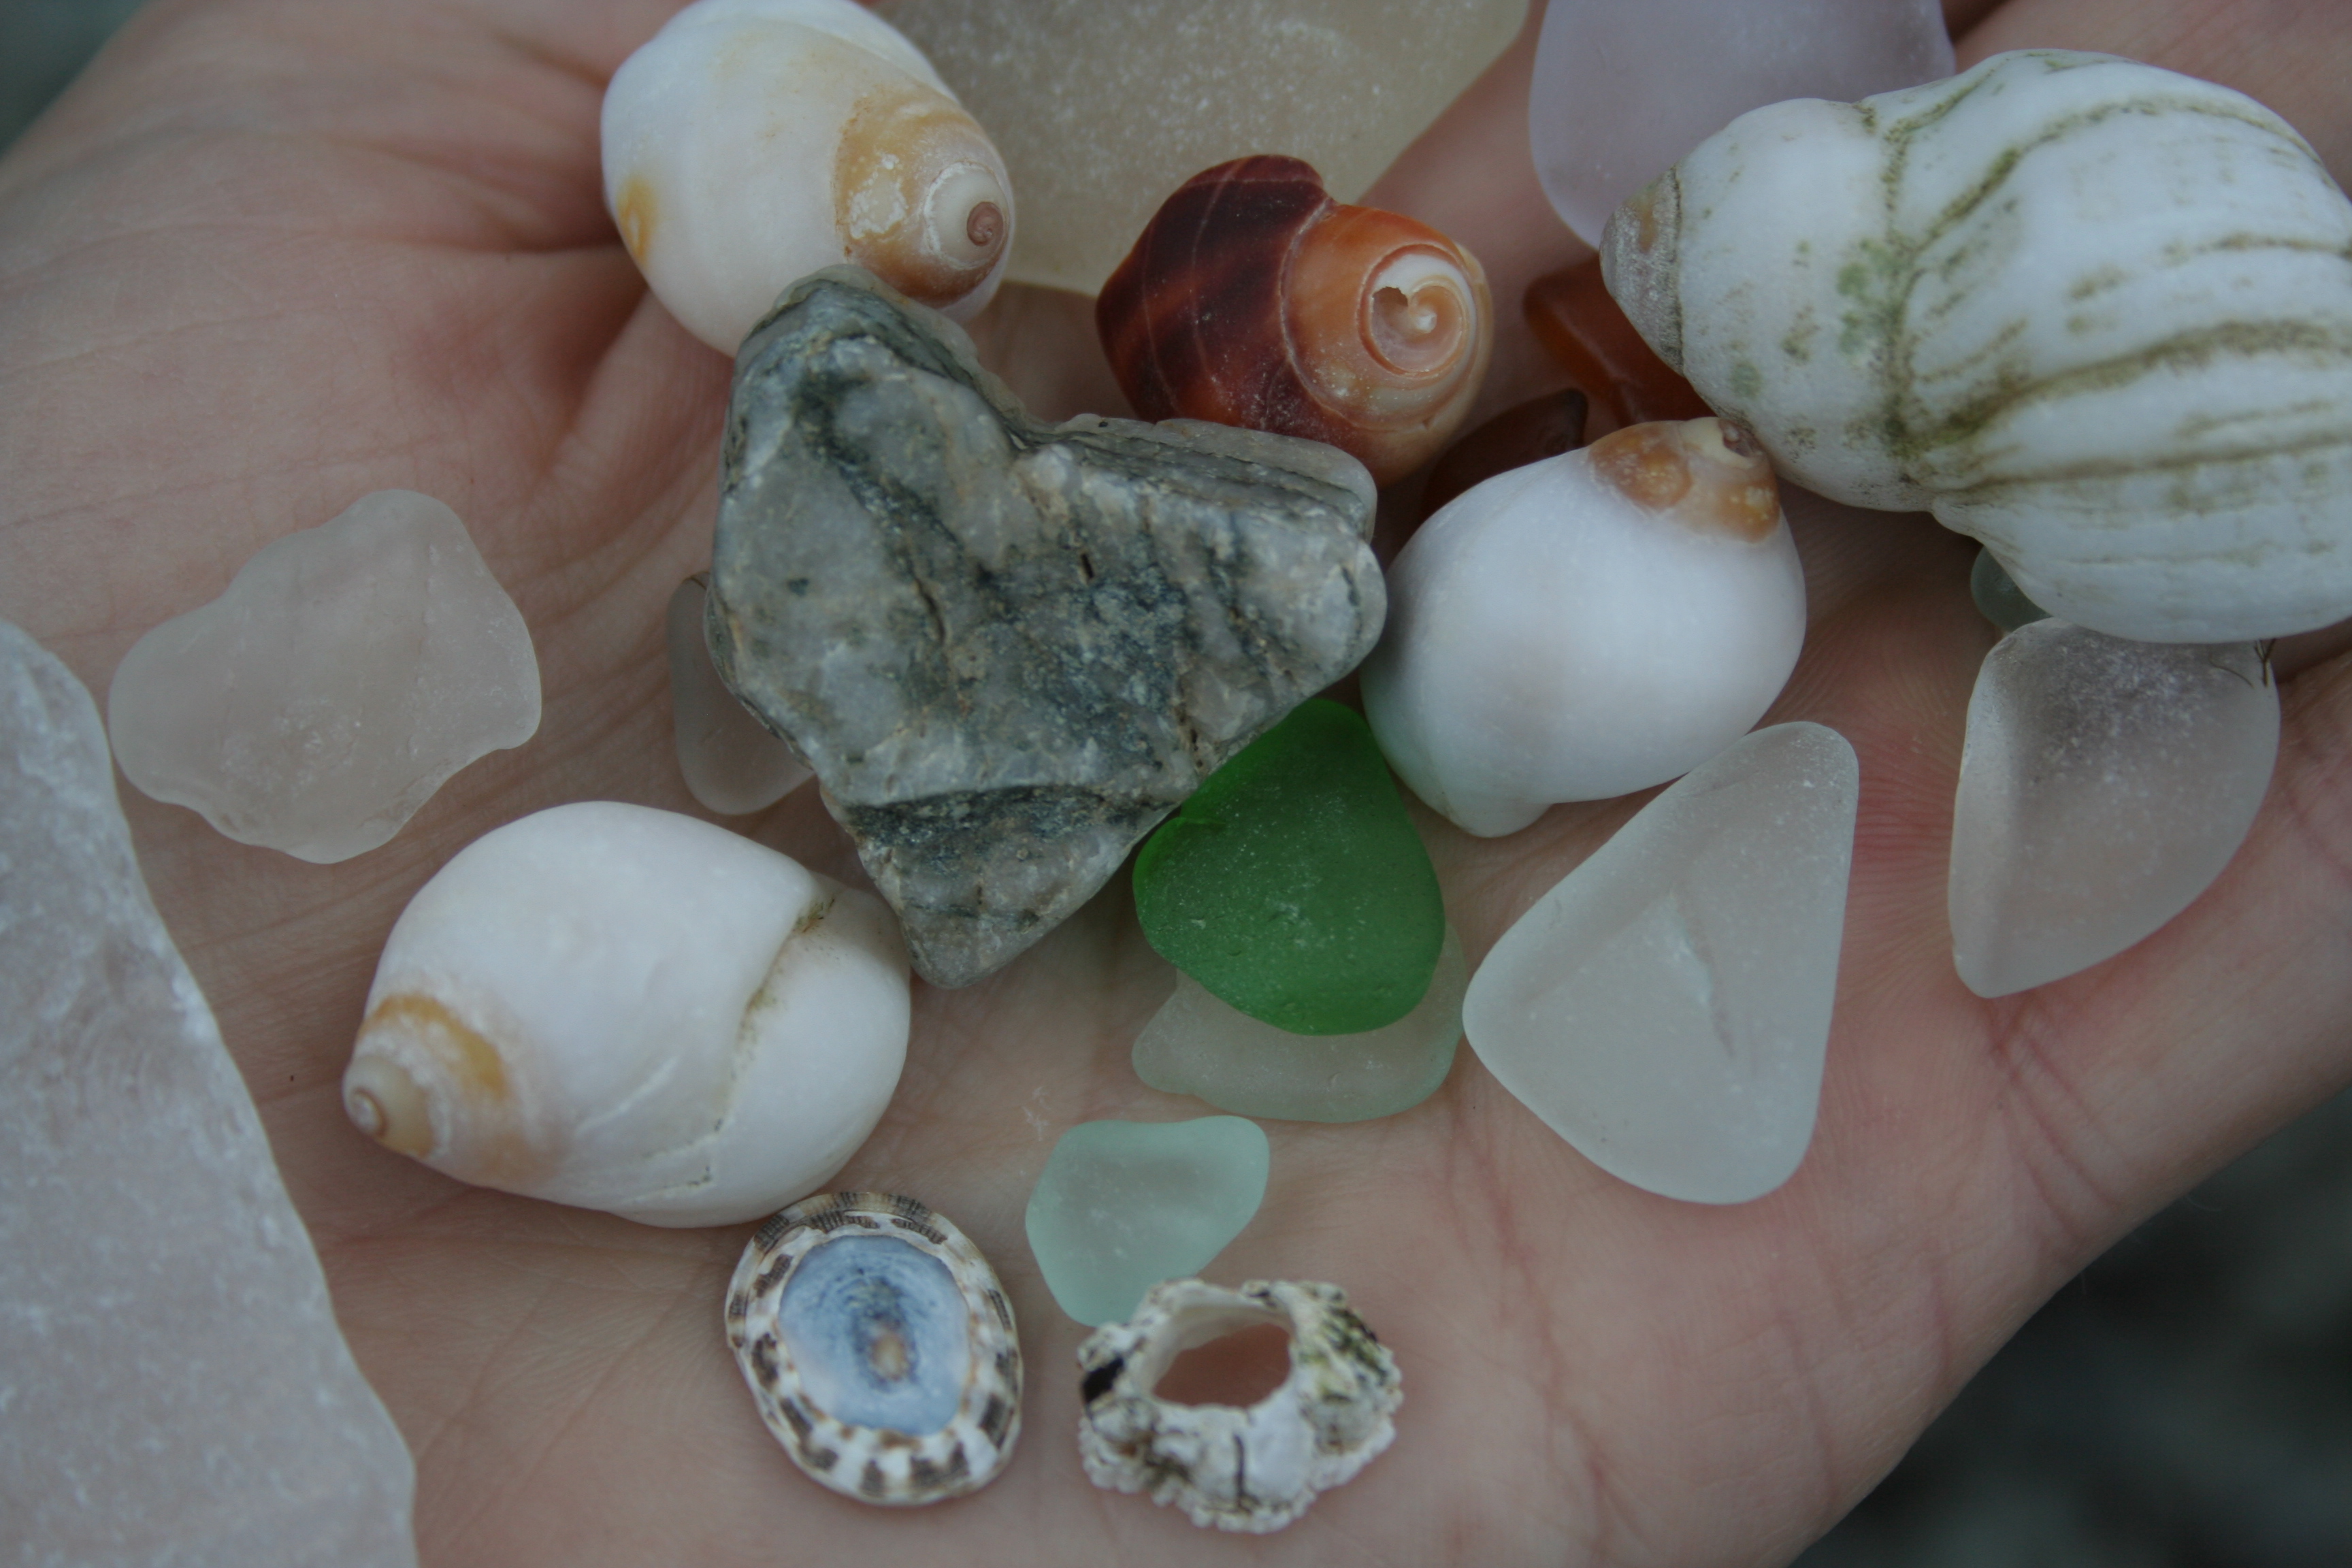
Until today, we have had gorgeous weather and have spent much of our time swimming (or quickly dipping, in my case) in the ocean or walking along the beach looking for treasures. I don’t think I could ever tire of gazing at the beauty left by the tides.
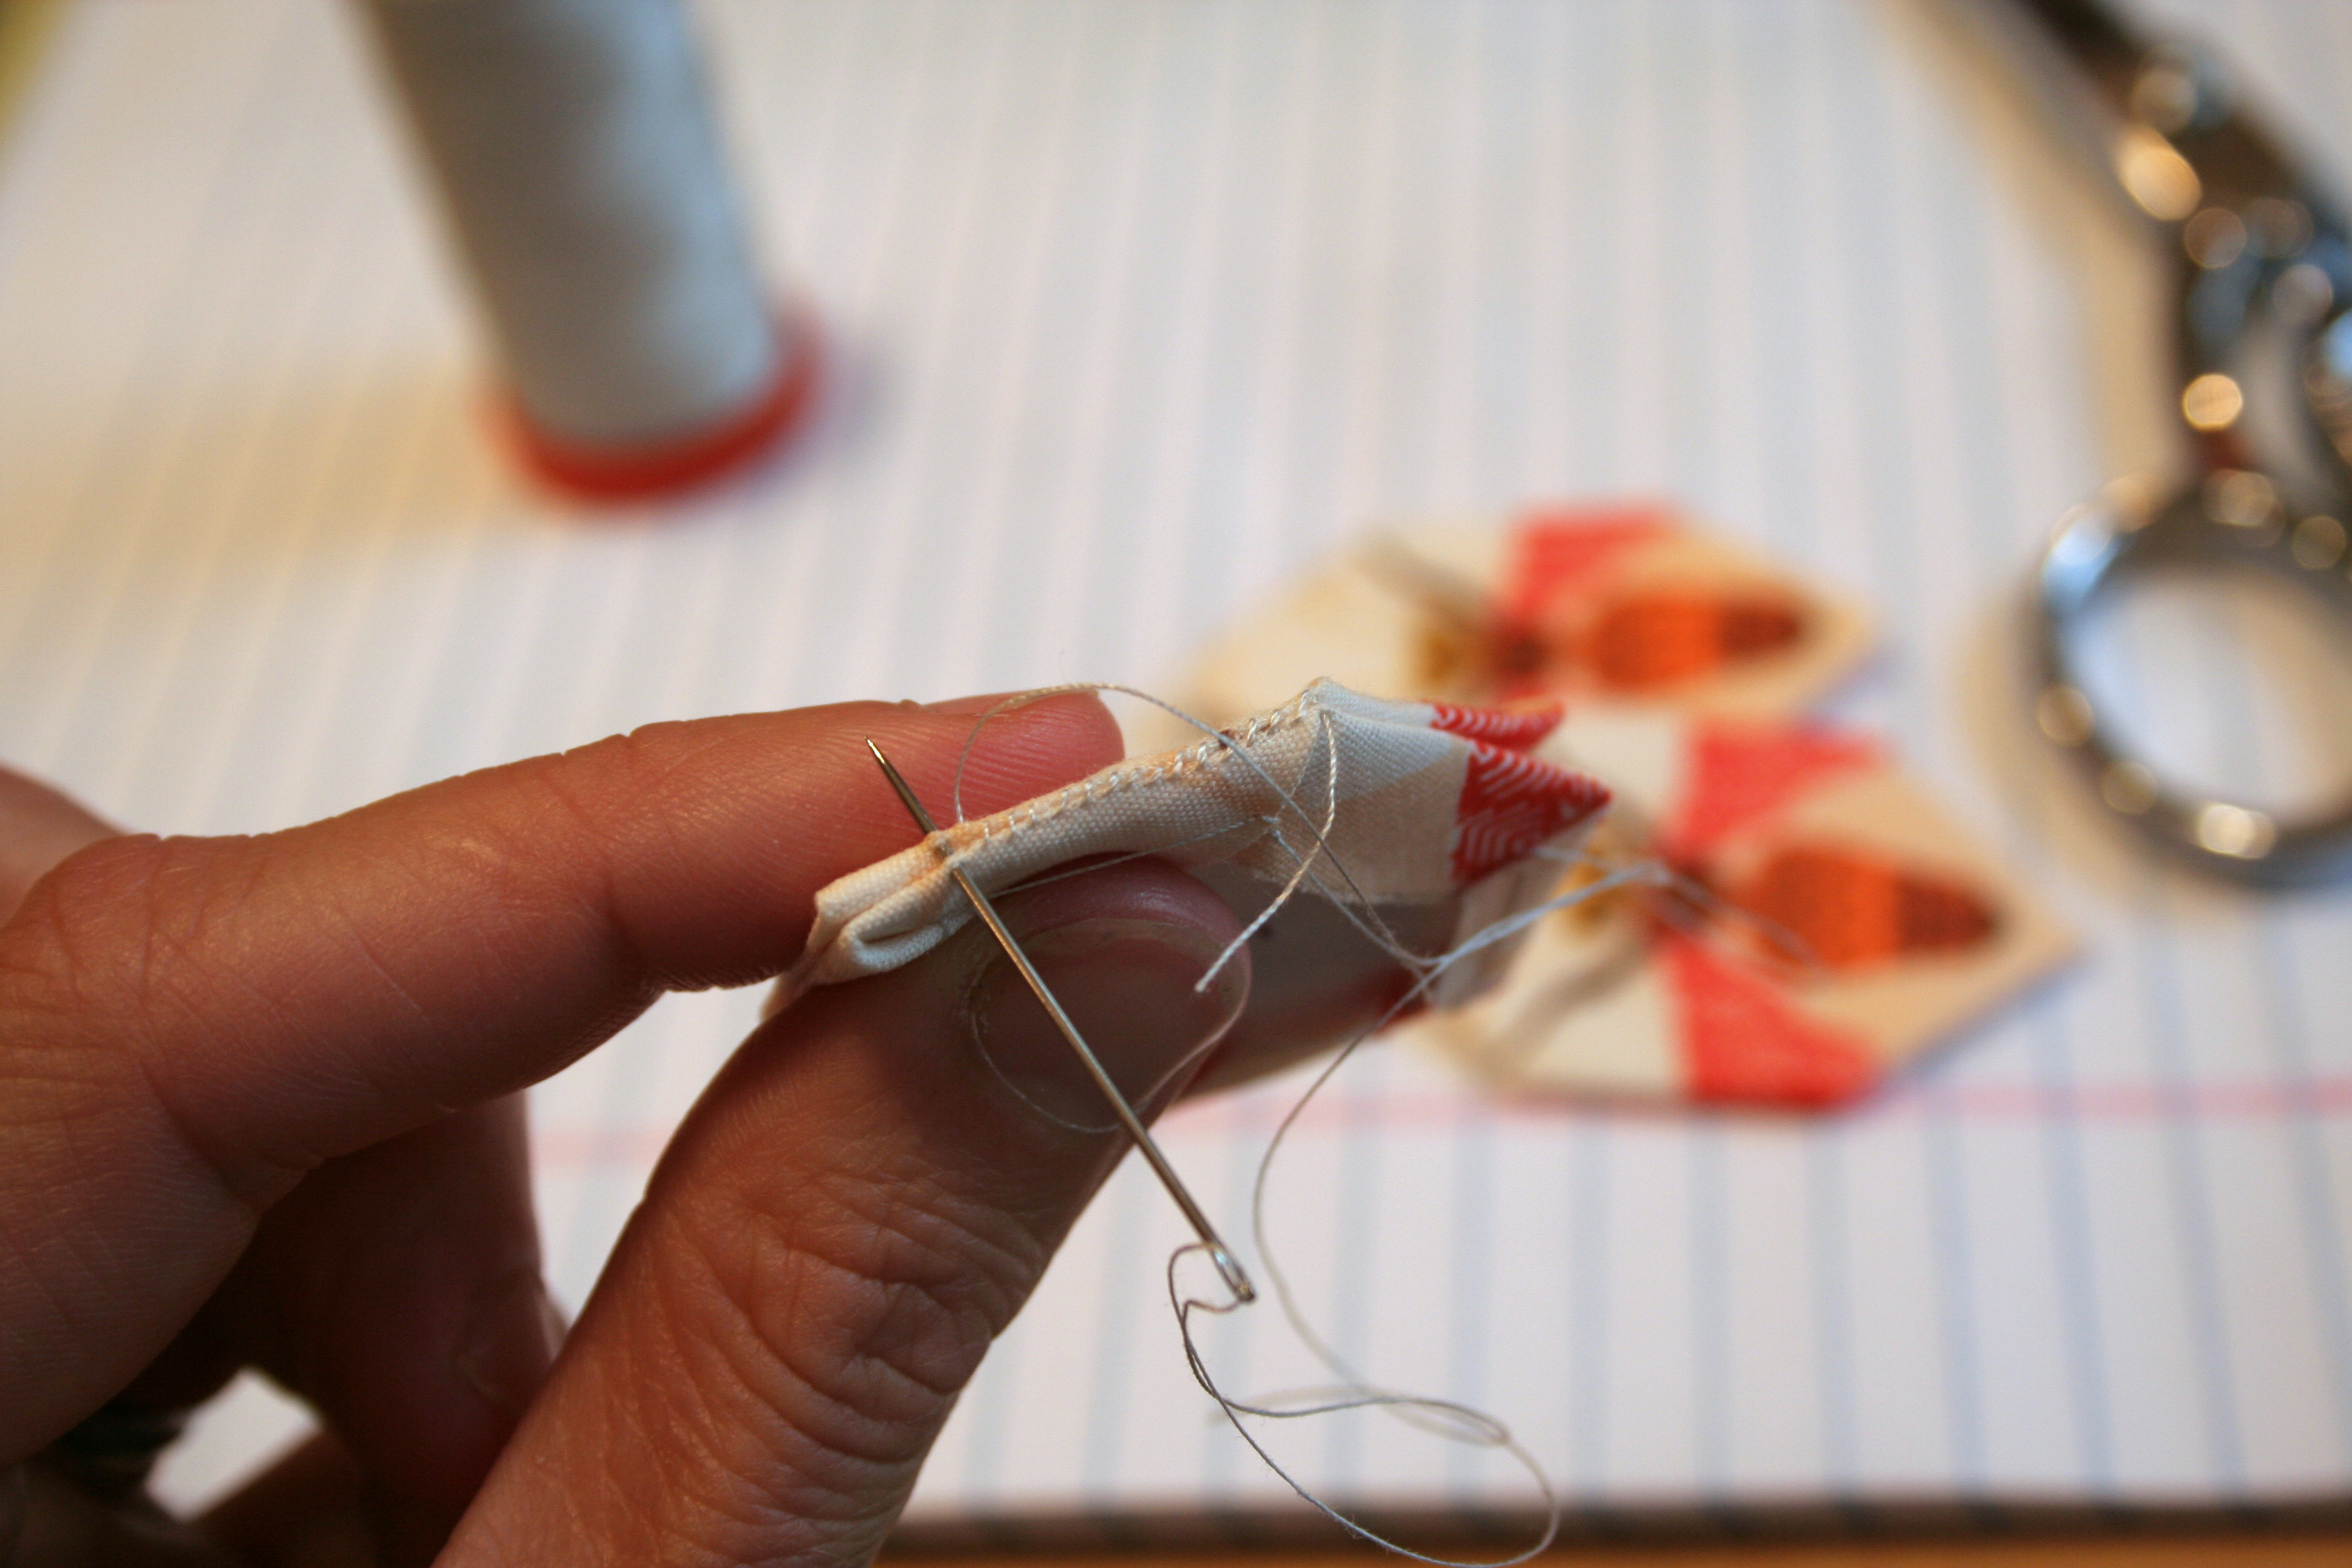
Today, it is cold, dreary, and pouring. In trying to beat the rainy vacation day humdrums, I decided to pull out my sewing stuff. This morning I tried my hand at English Paper Piecing, starting with the fussy cut center for a Lucy Boston Patchwork of the Crosses. I must say, handwork is quite fun!
I had to unstitch and retry one of the honeycomb pieces since the pattern didn’t even come close to lining up on one side. Admittedly, it wasn’t a whole lot closer after I redid it, but I decided to go with it.
Having never done any handwork before, I felt like I was flying by the seat of my pants. How far apart should the stitches go when joining pieces? How exactly does one “whip stitch” the corners? I think I did two whip stitches, but it seems to have worked for the moment. I can see the stitches a bit, but my mother-in-law said that the slight peek of stitches is part of the charm of hand sewn creations. I’ll take her word for it.
I can certainly see why so many people travel with their English Paper Piecing projects. Progress is made in small bits, so it is easy to pick up and put down as needed. I finished sewing the center four honeycombs together at the breakfast table this morning, and once I figure out what color scheme to go with for the rest of it, I am looking forward to passing the rainy days with stitching.
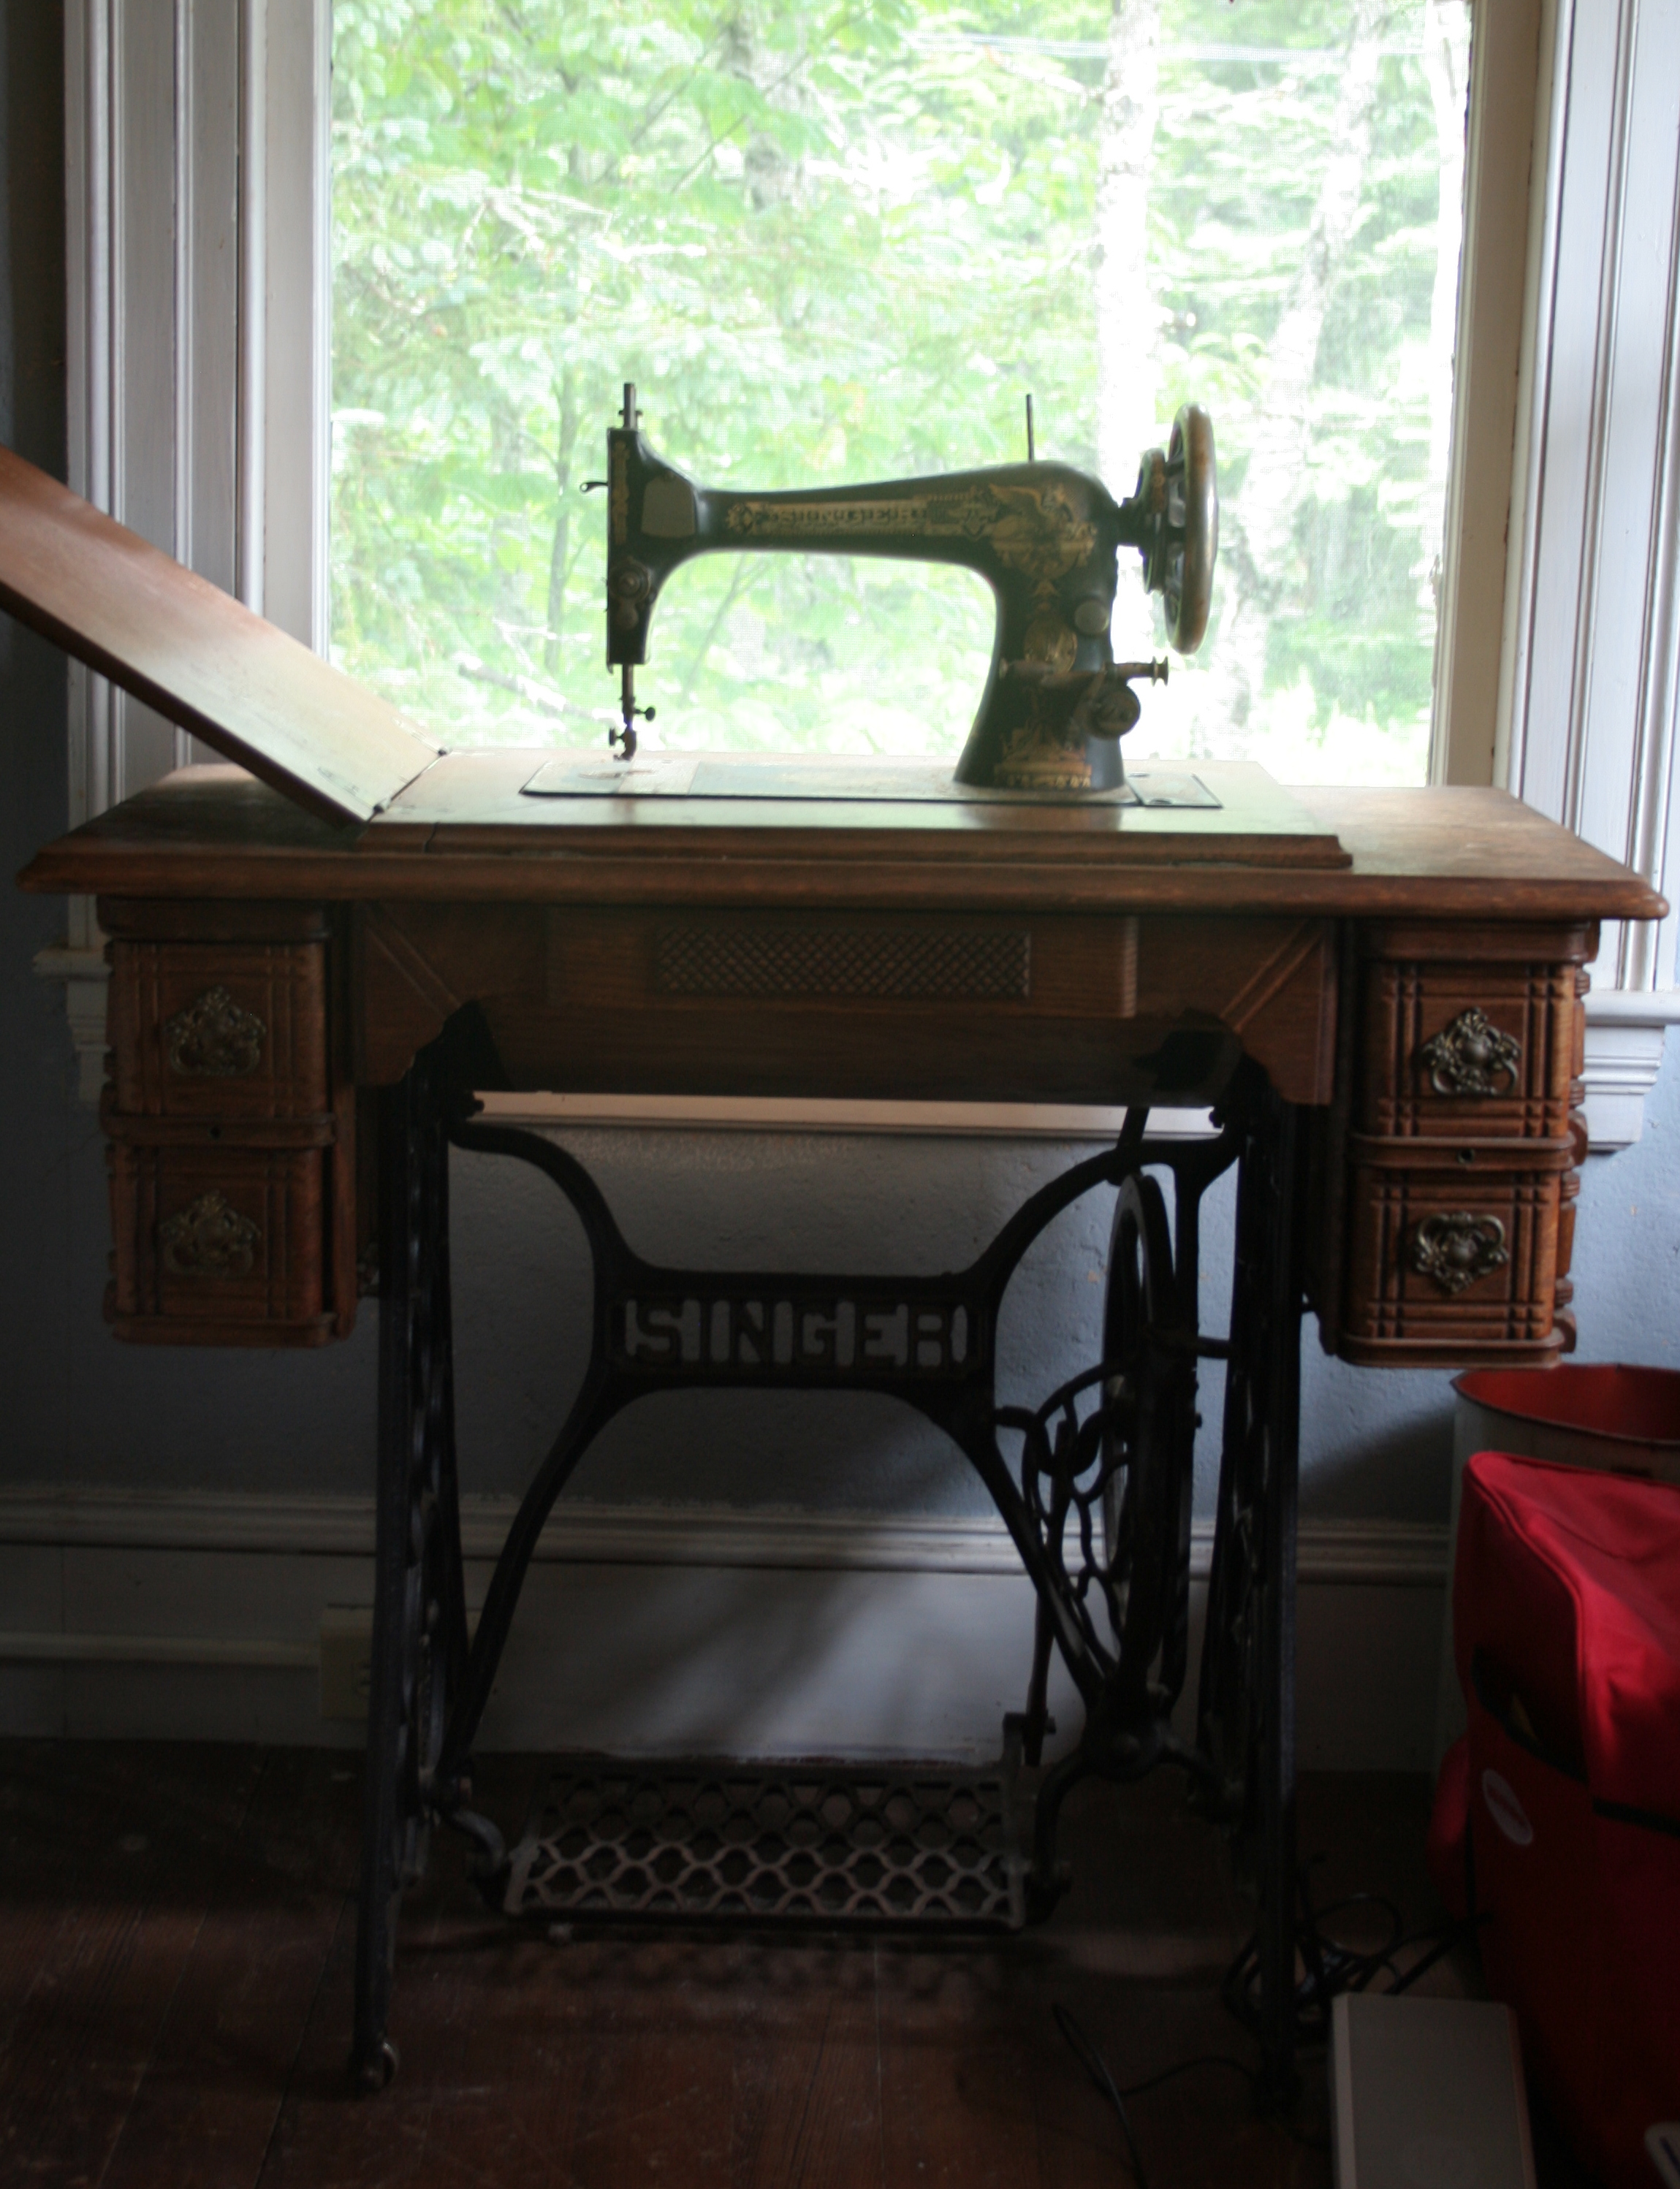
I also brought my sewing machine with me on this trip. It’s the first time I’ve ever brought a sewing machine on vacation, and I debated for quite a while whether I should take it with me or not. Now, with the next two days forecasted as torrential rain and chilly cold, I’m so glad I did. Not to mention the fact that there is a singer treadle and table right next to my bed in our bedroom.
While this treadle is missing its belt and therefore doesn’t work, I am taking it as a clear sign that I was meant to bring my sewing machine on vacation with me. Perhaps this afternoon I’ll do a bit of machine sewing as well!
My loaner Bernina, ready to go on her Singer table.
Do you take your sewing on vacation with you?
I grab a needle and thread once the kids are in bed


 Thus, my fabric stash grew a little bit last week when the lovely bundle arrived in the mail. Thank you so much to Jody from the Fabric Shoppe for this awesome giveaway, and for adding the very first feather fabric to my stash–I know, hard to believe I haven’t bought any feather fabric yet!
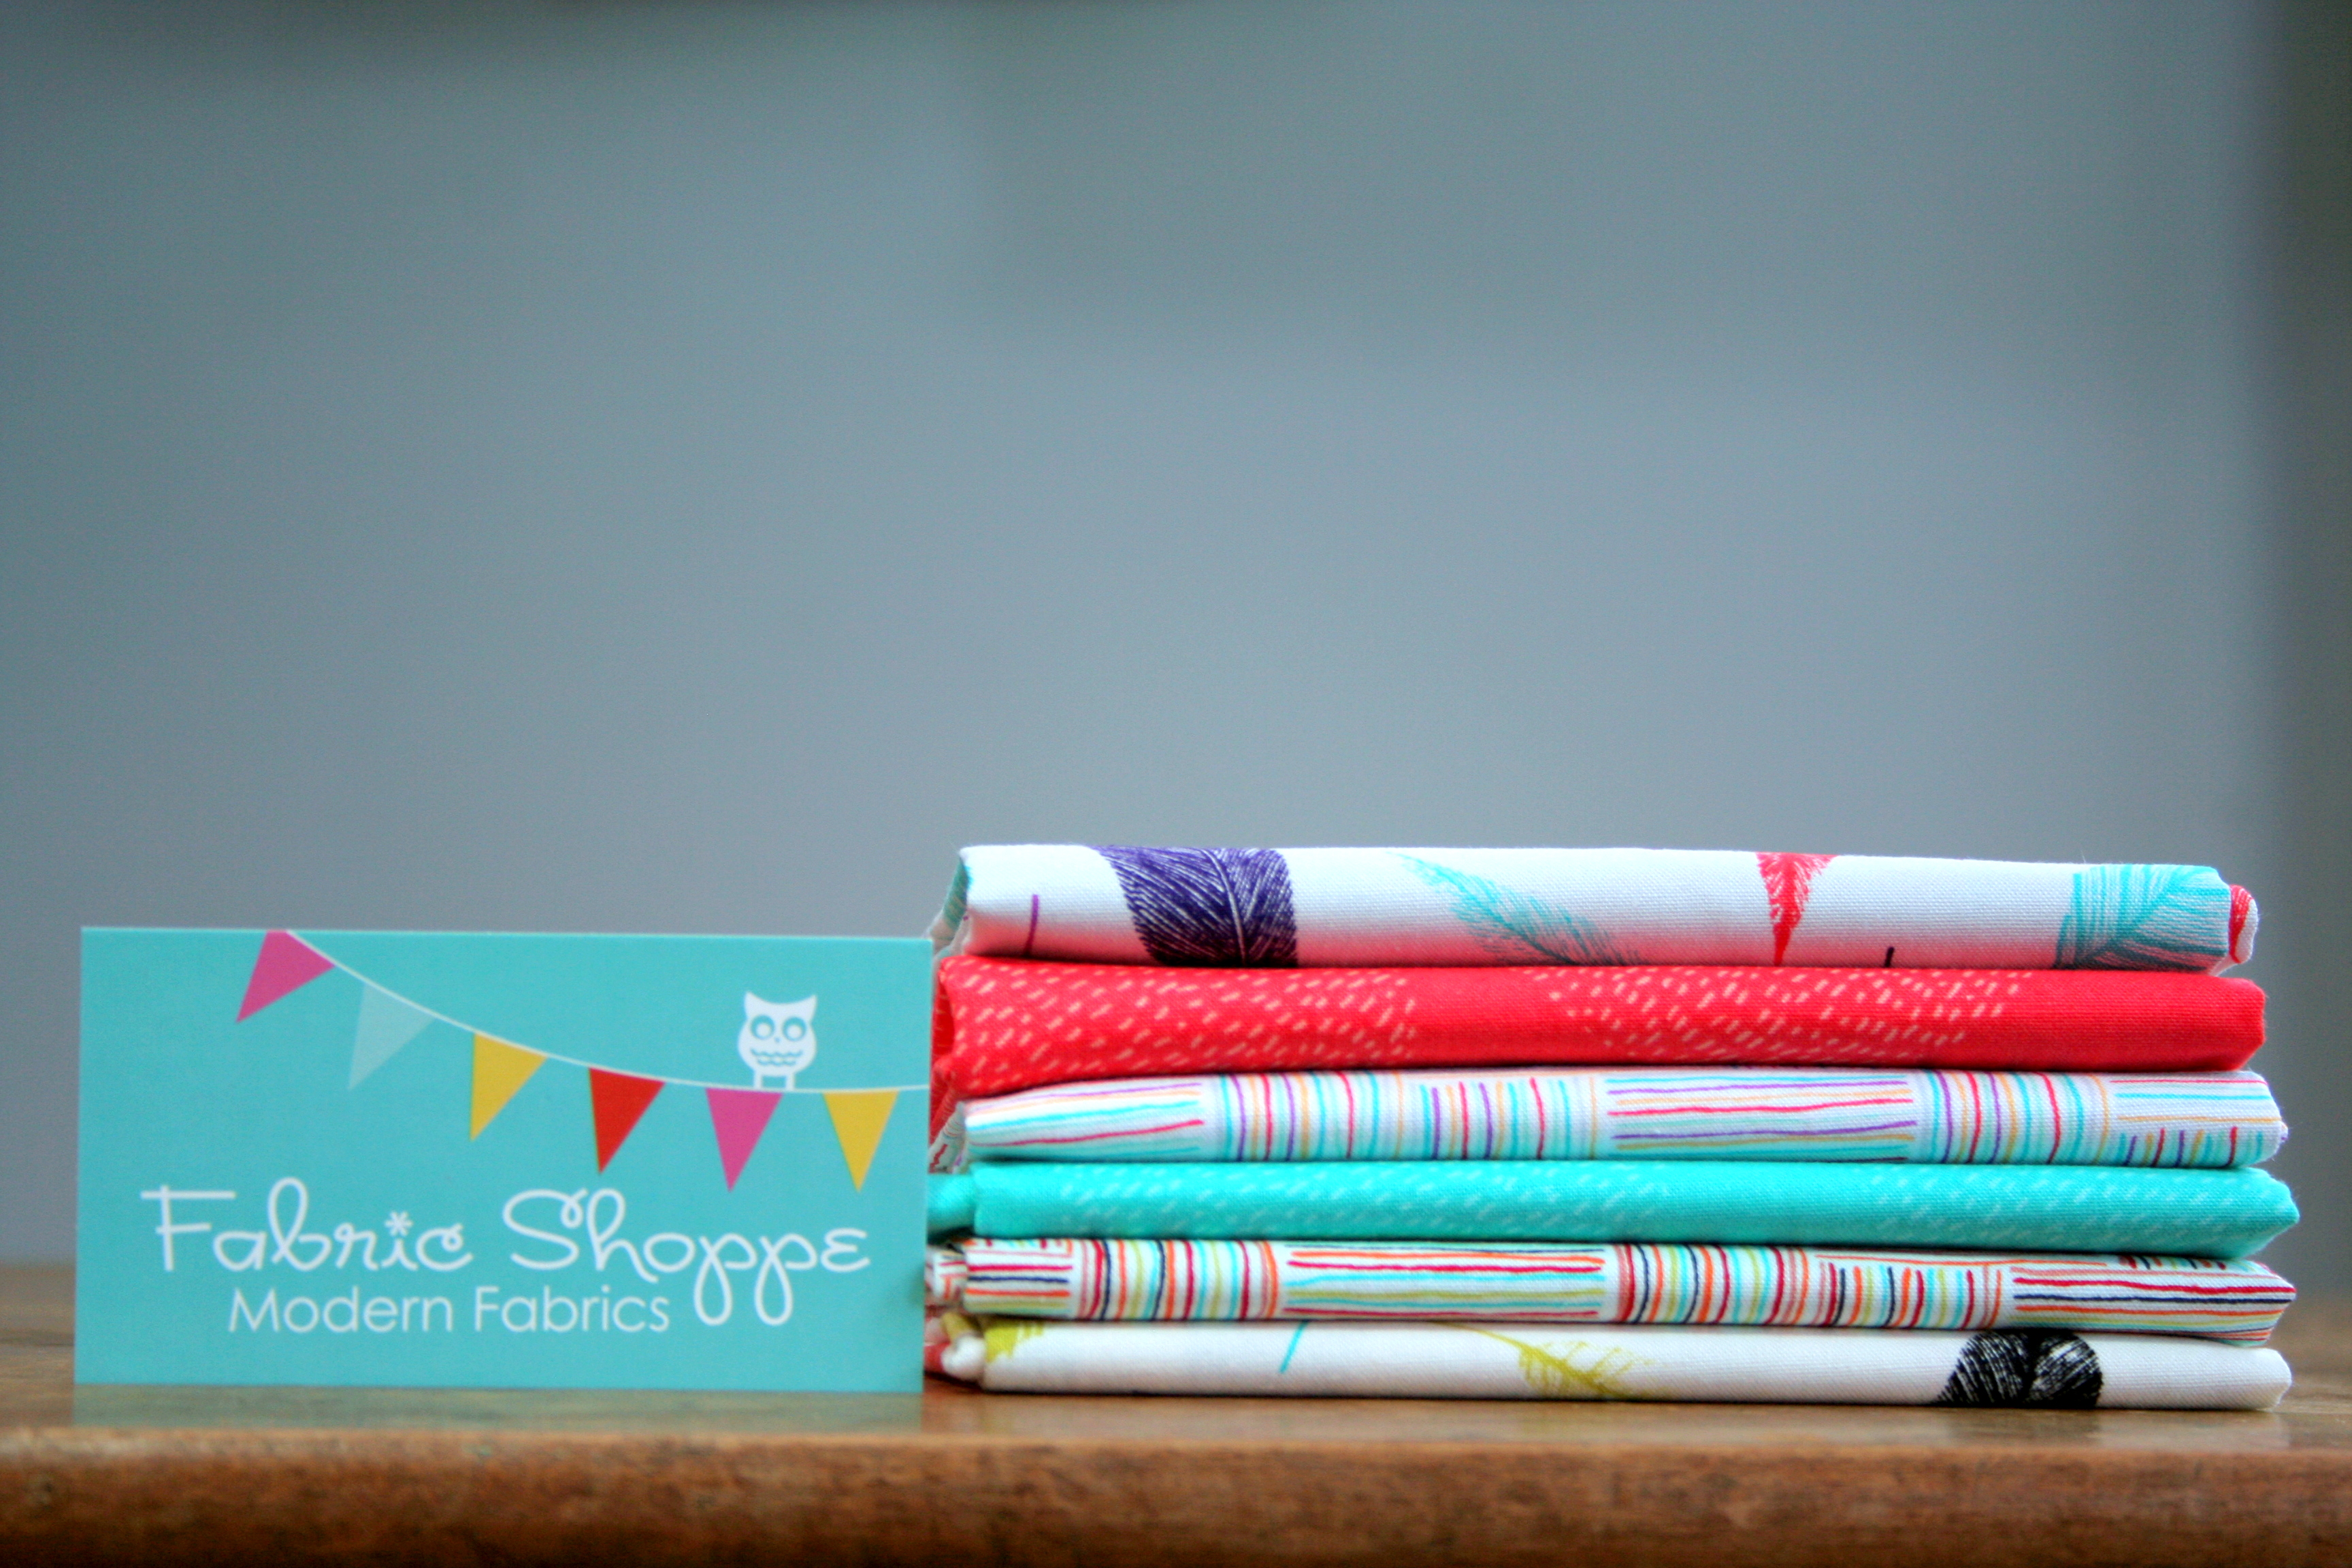


 This year I was honored to be a part of the New Quilt Blogger Blog Hop organized by